Installation
↑ Back to top- Download the .zip file from your WooCommerce account.
- Go to: WordPress Admin > Plugins > Add New and Upload Plugin the file you have downloaded.
- Install Now and Activate.
Setup and Configuration
↑ Back to topAfter activation of the Store Locator with Google Maps extension, you can find the “Store Locator” in WordPress admin panel. Click to view settings and get started.
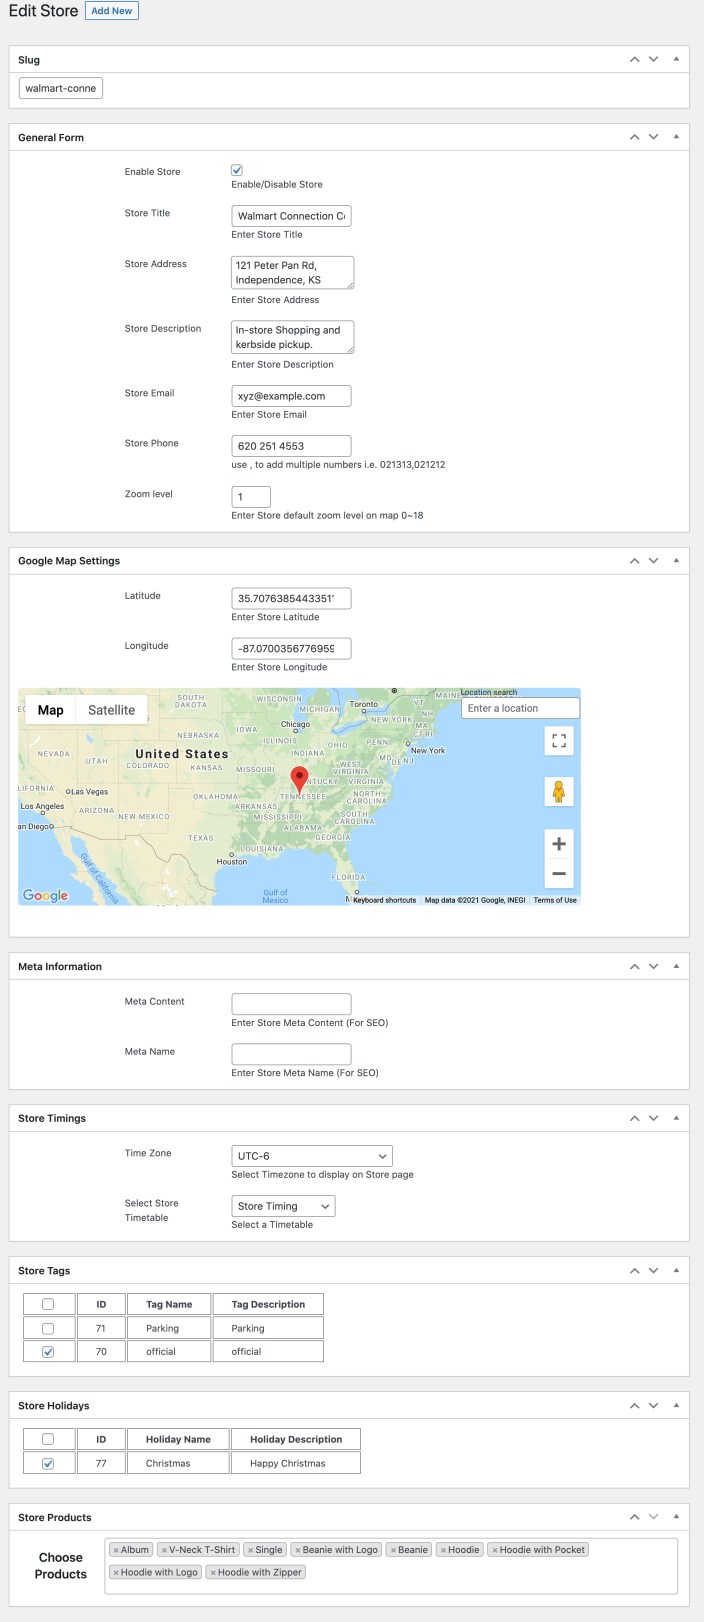
Adding new store location:
↑ Back to top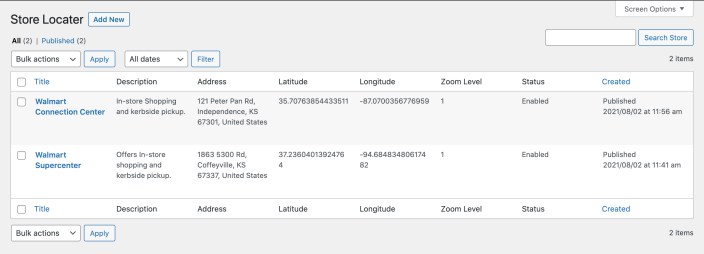 Note: Before adding your first store location, it is recommended to add timetables, tags and holidays.
While adding a new store location you can:
Note: Before adding your first store location, it is recommended to add timetables, tags and holidays.
While adding a new store location you can:
- Customize store slug (URL)
- Enable store and add its title
- Add store address and description
- Add store email, phone number
- Add Zoom level (1-18), higher zoom level shows the location closer on map
- Add store latitude and longitude to show location pin
- Add store meta title and description
- Select store time zone and timetable
- Select store tags and holidays
- Search and add products available in store
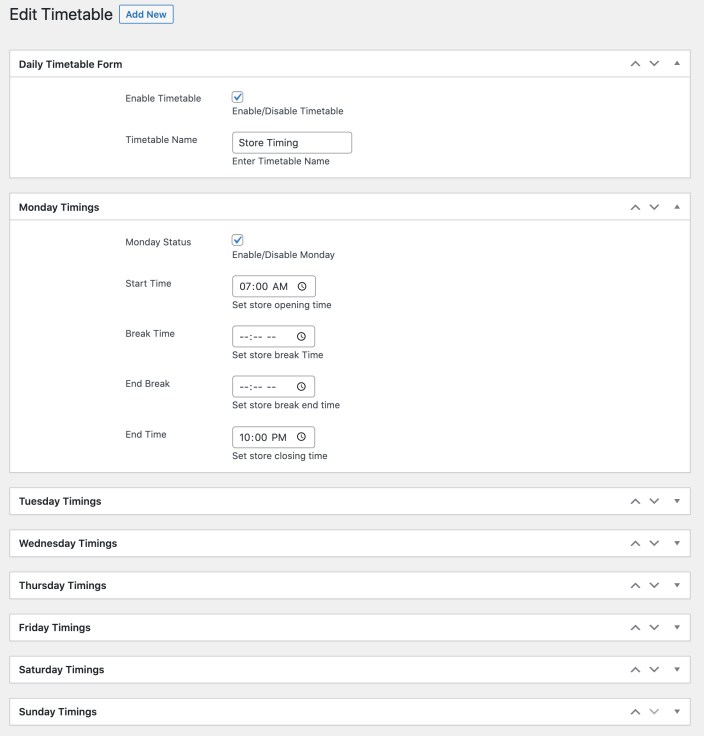
Adding timetables:
↑ Back to top While creating a new timetable you can:
- Enable time table
- Add a title for future reference
- Enable days and specify the start, break and end time for each day
Adding Tags:
↑ Back to top

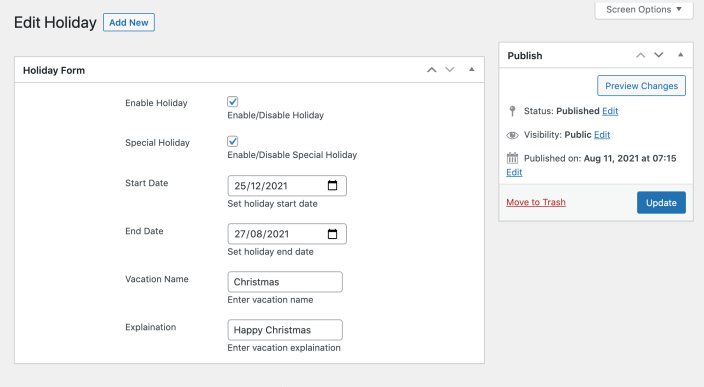
Adding holidays:
↑ Back to top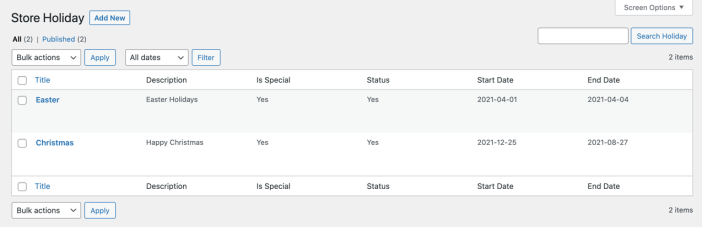
Configuration Options:
↑ Back to topGeneral Settings:
↑ Back to top- Enable meta title and description of store locator page
- Add default map latitude and longitude
- Add API key
- Set map zoom (1-18) – the map will be zoomed to its maximum
- Add icon for stores and change marker with custom image
- Enable holidays, tag, timetable and available in stores section on the product page and also customize its position
- Shortcode to display store finder section on any page
Search Settings:
↑ Back to top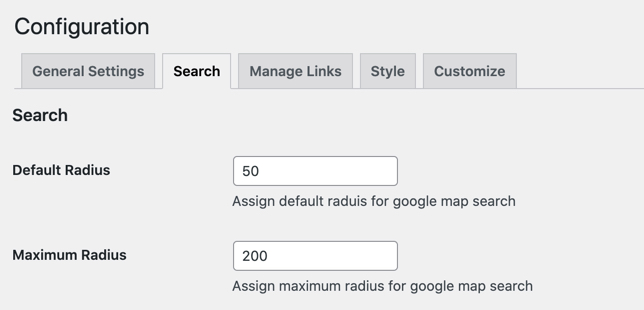
Manage Links:
↑ Back to top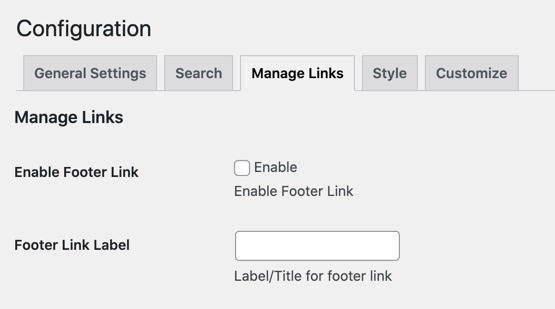
Style:
↑ Back to top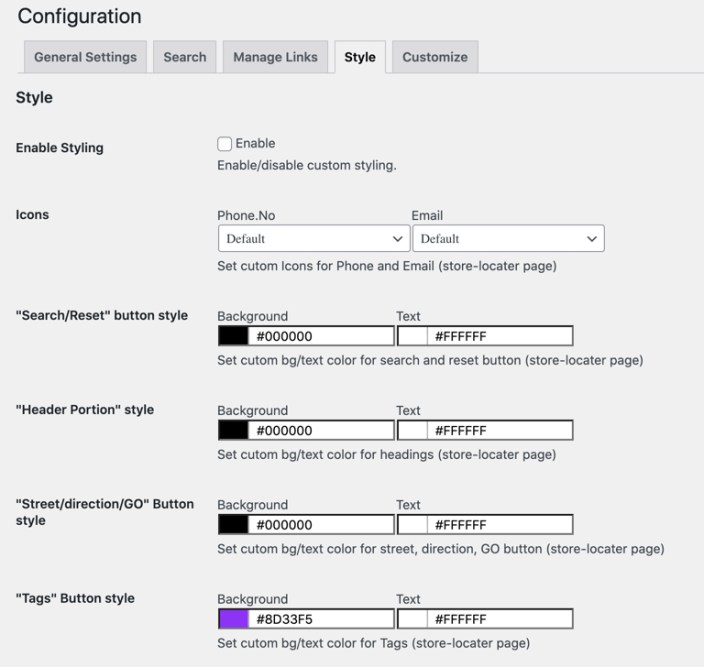
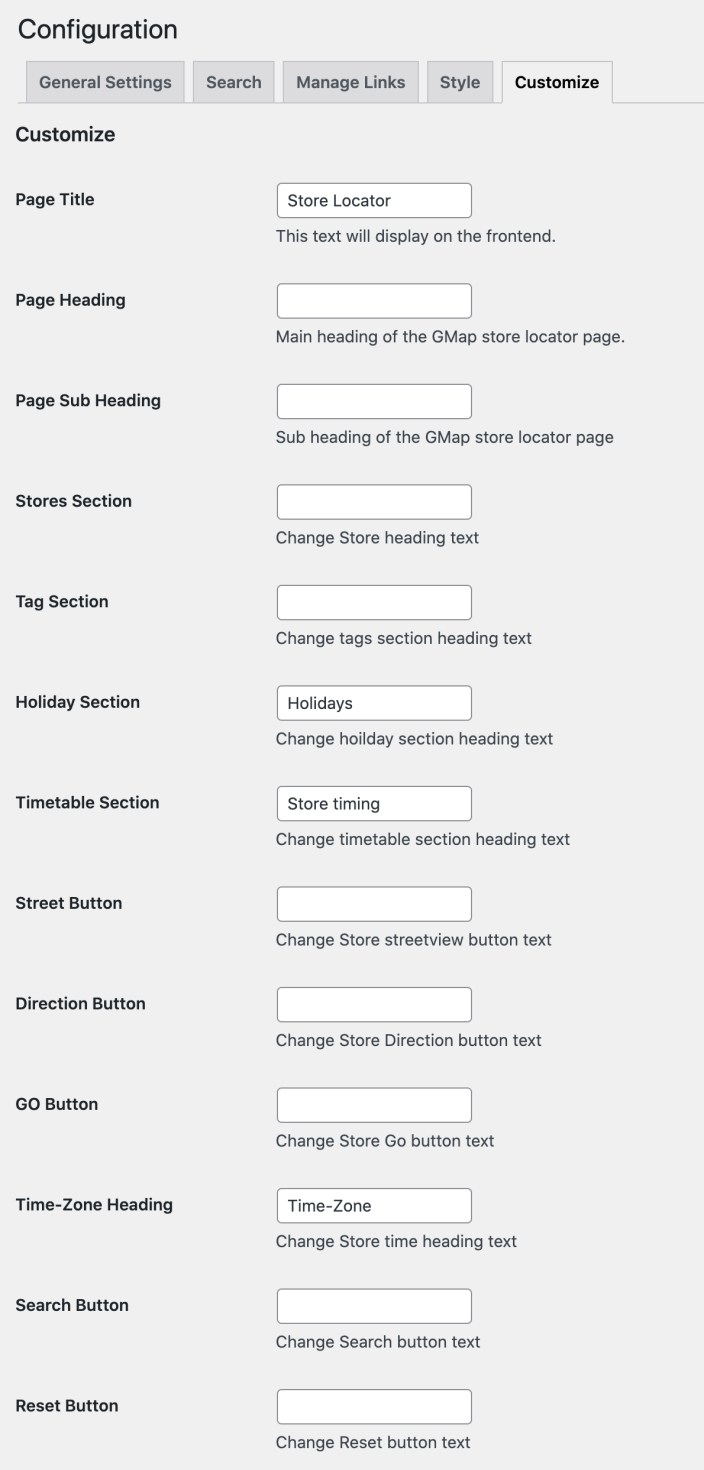
Customize:
↑ Back to top