Introducing Tishaa Theme
↑ Back to topBuild a beautiful online store with ease! The Tishaa theme is a WooCommerce block theme designed specifically for jewelry stores. However, it’s flexible enough to create any e-commerce website.
Before diving in, preview the demo site created using the Tishaa theme to see the full potential and what you can achieve:
This documentation will guide you through everything you need to understand about using the Tishaa theme. We’ll cover getting started, exploring the various customization options, and making your online store shine bright.
If you haven’t already purchased the Tishaa theme, that’s the first step to getting started! You can find more information about buying the theme below:
Purchase Tishaa Theme
↑ Back to topReady to create your stunning online store? Click the Buy Now button at the top of this page to get started!
Need Help Before You Buy? Get Pre-Sales Support
Our friendly support team is happy to answer any inquiries you wish to discuss before purchasing the Tishaa theme. Here’s how to reach them:
- Visit the WooCommerce Contact Support Page
- If you’re not logged in, follow the on-screen instructions to create a new WooCommerce account or log in to your existing account.
- On the support page, scroll down until you find the section labeled “Submit a request“.
- From the “What do you need help with?” dropdown, choose Presales
- Type “tishaa” in the field labeled Product to specify the theme.
- Submit the form after filling out the remaining fields.
Getting Started (Video Tutorial)
↑ Back to topFor a smooth onboarding experience, we highly recommend watching our video tutorial alongside this documentation. This step-by-step screencast guides you through setting up your Tishaa theme, making it easy to visualize the process and get your online store launched quickly.
Installation
↑ Back to topThe Tishaa theme and WooCommerce plugin are prerequisites for your e-commerce website. Once you purchase the Tishaa theme, follow the steps below to install the required theme and plugin on your WordPress website.
Download and Install Tishaa Theme
↑ Back to topDownload Theme File
- Begin by logging in to your WooCommerce.com account
- Once logged in, navigate to the Downloads section
- Locate the Tishaa theme from the products list and click the Download link. This will download a compressed file named tishaa.zip to your computer
Upload the Theme to WordPress
- Log in to your WordPress dashboard
- From the left menu bar, hover over the Appearance
- Within Appearance, click on the Themes
- On the themes page, click the Add New button.
- You’ll see a theme upload option. Click on the Upload Theme button.
- In the upload window, select the tishaa.zip file you downloaded earlier from your computer.
- Once selected, click the Install Now button.

Activate the Tishaa Theme
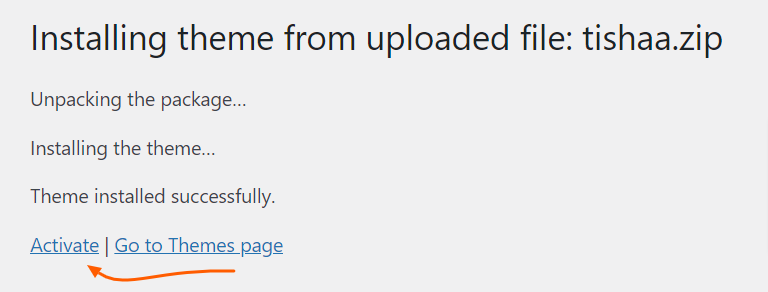
- After installation, WordPress will redirect you to a theme activation page.
- On this page, click the Activate link.
Congratulations! You have successfully installed and activated the Tishaa theme on your WordPress website. Since Tishaa is an e-commerce theme, the next step is to install the WooCommerce plugin.
Install and Activate WooCommerce Plugin
↑ Back to topWooCommerce offers comprehensive documentation for installing and activating their plugin. Follow the official guide for the instructions:
Official WooCommerce Installation Documentation
Homepage & Blog Setup
↑ Back to topBy default, the Tishaa theme displays the latest blog posts on the homepage. However, it’s common practice to show the landing page with product collection and CTA banners for e-commerce websites.
So, you might want to replicate the homepage from our demo website.
Follow the steps below:
Create Page for Homepage
↑ Back to topYou need to set a separate home page
- Create a page for Homepage as instructed in this article: https://wordpress.org/documentation/article/create-pages/#creating-a-new-page
- For this example, let’s insert “Home” for Homepage Add title field of the page editor

Add Pattern to Home Page
↑ Back to topThe next step is to add content to the home page you created. Tishaa offers pattern for the homepage so that you do not need to design it yourself.
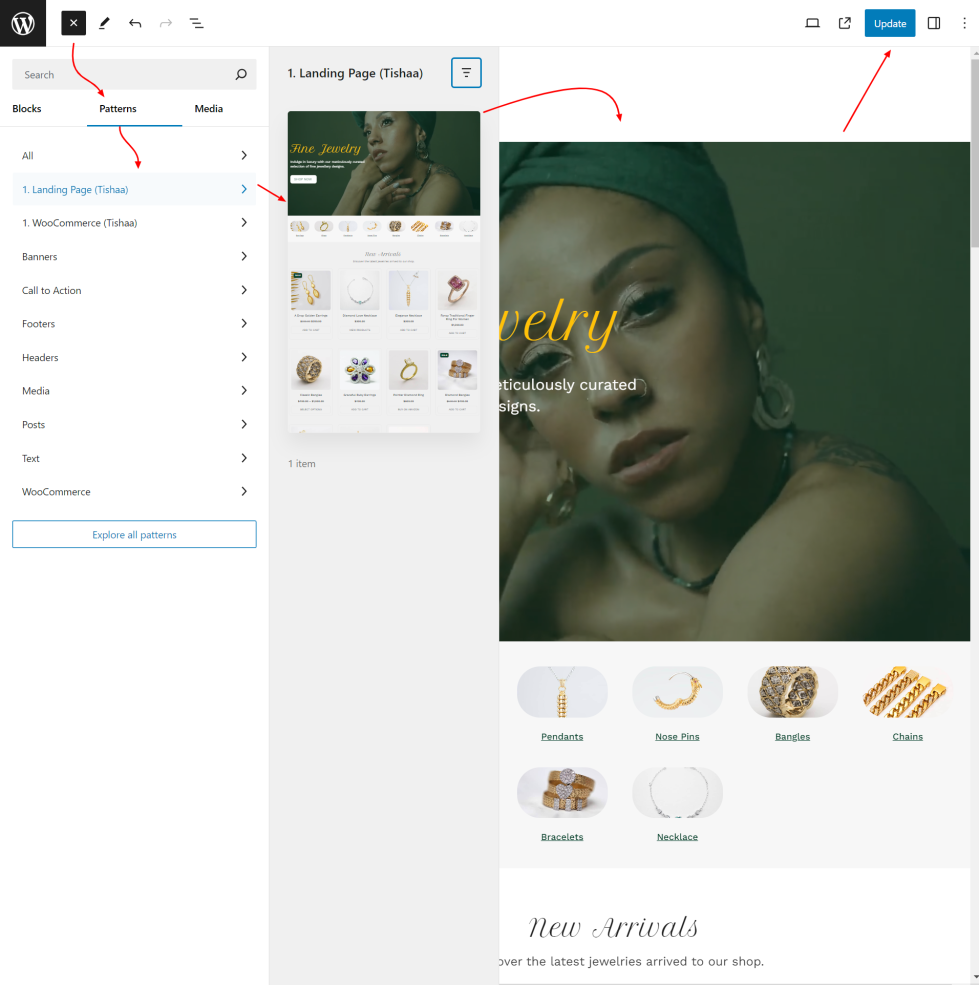
- To add a pattern, click the plus (+) button at the top right on the page editor.
- Navigate to Patterns tab > 1. Landing Page (Tishaa) category
- Click on the Home 1 pattern as shown in the screenshot below
- It’ll add the landing page pattern to the page editor, which you can customize later as per your requirements
Change Page Template
↑ Back to topThe default template displays the page header and vertical space around the content. So, it might not be ideal for the landing page content.
That is why Tishaa provides a different template for such purposes.
Follow the steps below to switch the page template:
- From the page editor, click the Settings icon at the top right beside the Update/Publish button
- Navigate to Page tab > Template
- Click Pages link
- Then, click the Swap template option. It’ll open a panel to choose from templates.
- Click over Canvas with Header and Footer box to apply the template to the page
- Finally, click the Update button to save changes.
- If you preview the page, you’ll see the page just like the home page demo site.
- However, it is just another normal separate page. So, we need to set it as the front page of the website which is explained in below.

Create Page for Blog
↑ Back to topIf you want to have a separate blog page to post your articles, you can create a page for it just like you created the home page and name it Blog.
Set Up Static Page as Homepage
↑ Back to topNow, you need to tell WordPress to assign these pages to the Homepage and Blog Page so that they appear separately.
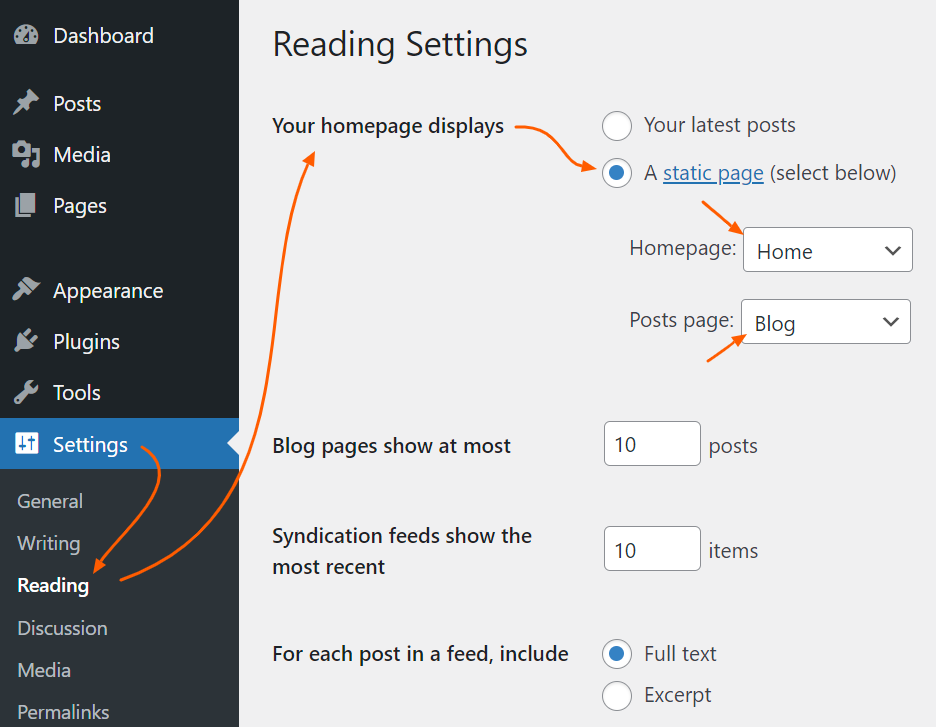
- Navigate to Settings > Reading from the WordPress dashboard.
- In Your homepage displays option, select A static page (select below). This will activate the options to set home and blog page.
- From the dropdowns, choose the respective page you created before:
- Homepage: Home
- Posts page: Blog
- Note: the Posts page here means the Blog page.
- Finally, click the Save Changes button.
Now, if you browse the homepage of your site, it should display the landing page you created. Also, you can view the blog page by navigating to the Pages menu item. Next, you can fill your website with products to sell and blog posts.
Display Products on Homepage and Shop Page
↑ Back to topThis guide will show you how to showcase your products on the homepage and shop page using the Tishaa theme.
By default, sections using WooCommerce product blocks: “Newest Products” & “On Sale Products” on the homepage and shop page might appear blank as shown in the screenshot below. This is perfectly normal! These sections are designed to display your products, but if you haven’t added any products yet, they will naturally remain empty.

Here’s how to make them work:
Add Products to Your Store
↑ Back to topThe key to seeing products populate these sections is to have products added to your WooCommerce store.
Note: If you want to get the sample products from the demo site, skip to the Import Demo Products section below and get back here.
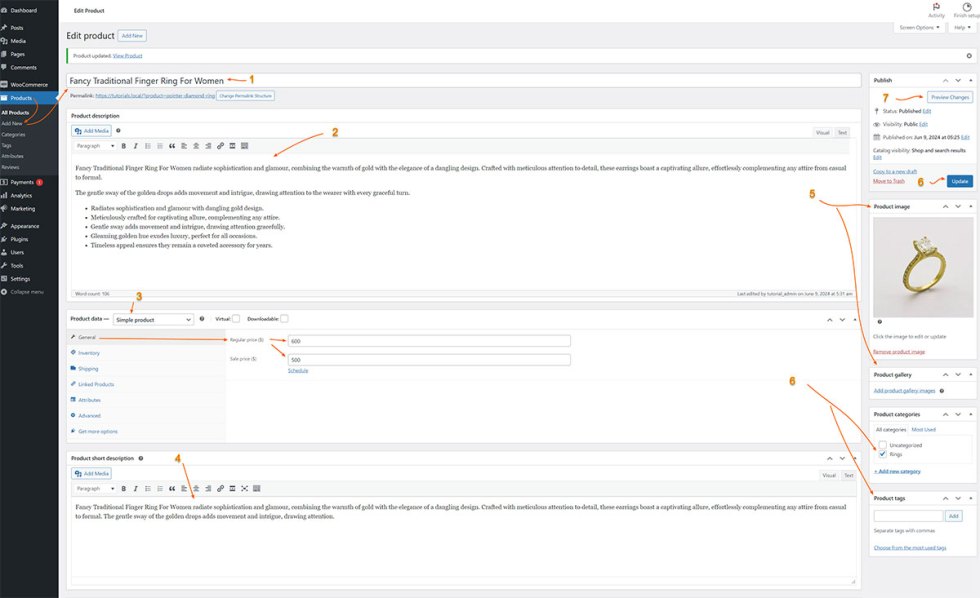
- In your WordPress dashboard, navigate to Products > All Products.
- Click the Add New button.
- Start Adding Product Details: Here are the key fields to fill in for a basic product:
- Product name
- Product description
- Product data > General > Regular price
- For Products on sale, enter the Sale price as well
- Note: products with sale prices will appear under the On Sale section of the homepage
- Product short description
- On the right side of the editor, Set product image or product gallery images, and Add a new category for it and Product tags.
- Click the Publish button to make your product live on your store.
- You can view it in the front end by clicking the Preview button.
Keep adding new products you have and they’ll appear on the homepage and shop page. To access the shop page, navigate to Shop from the header menu.
Import Demo Products
↑ Back to topAlternatively, If you want to see how it looks before adding your product just like in our demo site. We’ve exported CSV file from our demo site for you to import in your site. You can import it and update it with your products.
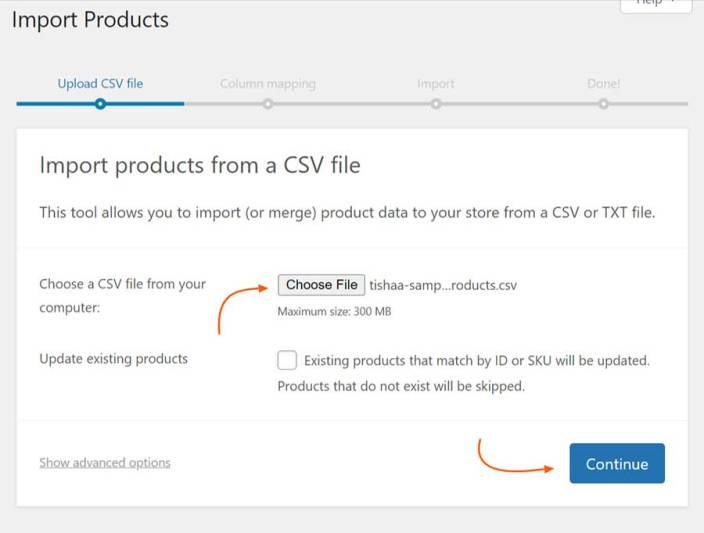
- In your WordPress dashboard, navigate to Products > All Products.
- Click the Import button.
- Download the Tishaa Sample Products CSV file below and upload it to the file uploader.
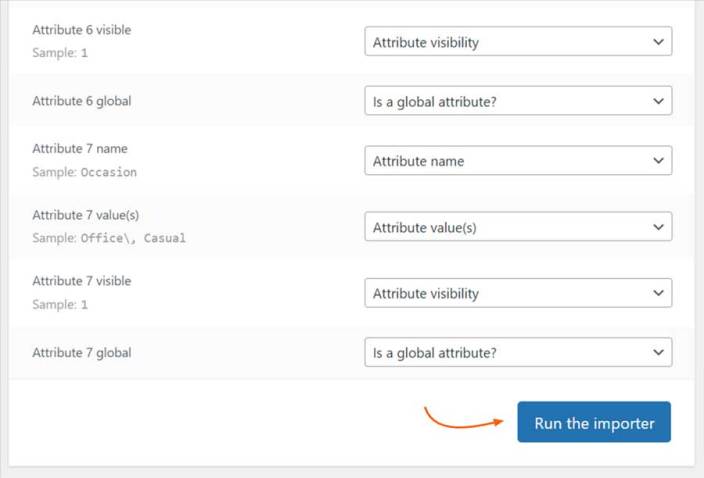
- Follow the steps as shown in the screenshots below.
In the final step, click the View products button to view the imported products in the dashboard.
Now, if you preview the homepage and shop page, you’ll see the products you have added.

