This extension integrates WooCommerce with Dynamics BC, allowing users to automatically send form entries to Dynamics BC as new Contacts and Orders records.
This document provides a comprehensive guide for setting up and using the extension, including how to configure Dynamics BC API authentication.
Prerequisites
↑ Back to top- A WordPress website with WooCommerce installed and activated.
- Access to the Dynamics BC platform.
- Administrator access to your WordPress site.
- API credentials from Azure (Tenant , Client ID , Client Secret and Authorization Code).
Installation
↑ Back to topTo start using a product from WooCommerce.com, you can use the “Add to store” functionality on the order confirmation page or the My subscriptions section in your account.
- Navigate to My subscriptions.
- Find the Add to store button next to the product you’re planning to install.
- Follow the instructions on the screen, and the product will be automatically added to your store.
Alternative options and more information at:
Managing WooCommerce.com subscriptions.

Step 2: Dynamics BC Authentication Process
↑ Back to topTo use the Dynamics BC API, you need to create a Azure Developer App and obtain the Tenant , Client ID , Client Secret and Authorization Code.
Creating a Dynamics BC Developer App
↑ Back to top- Log in to your Azure account.
- Navigate to Developer Apps.
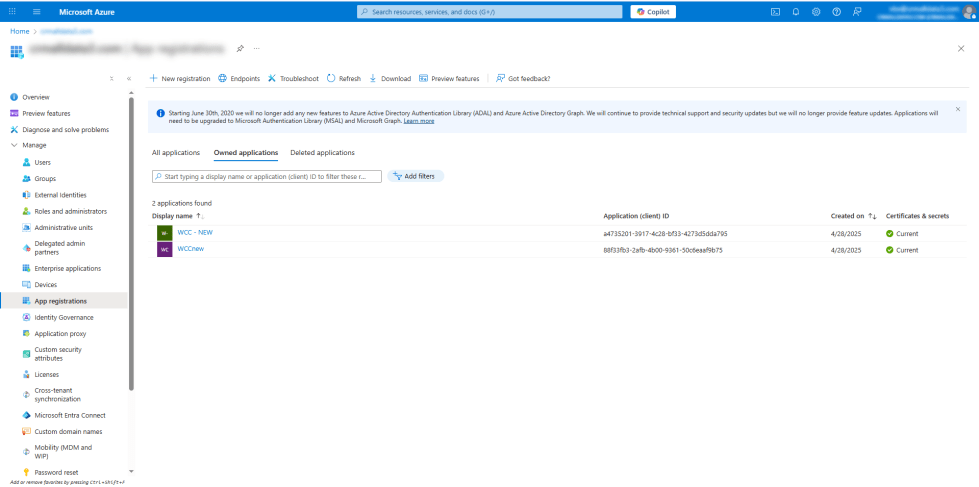
- Click Create New App.
- Fill out the following fields:
- App Name: Enter a name for your application (e.g., “WooCommerce Integration”).
- App Description: Provide a brief description (e.g., “Integrates WooCommerce with Dynamics BC”).
- Redirect URL: Enter the redirect URL provided by the plugin (found in the plugin settings page in WordPress).
- Scope: Select Scope Read And Write Both ( Contacts , General , Custom actions , Grants ).
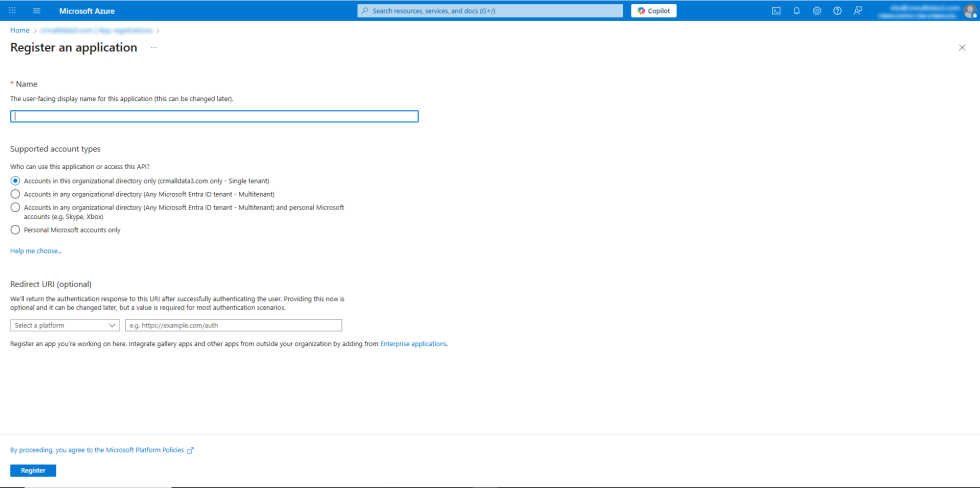
- Click Save.
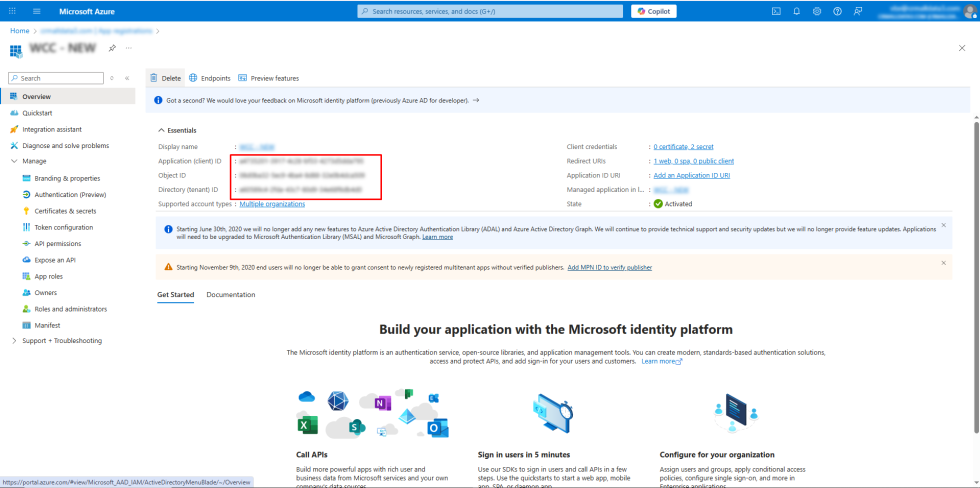
- Copy the Tenant , Client ID and Client Secret displayed after saving the app.
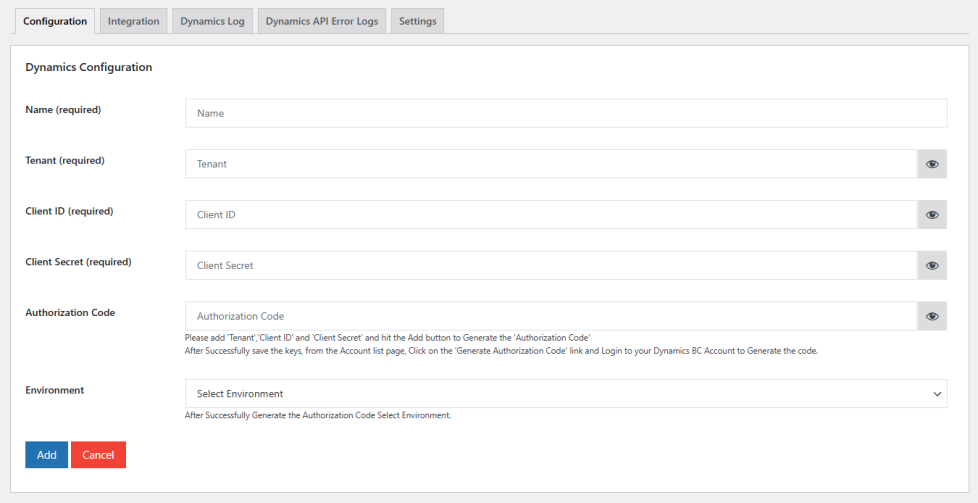
Step 3: Configure the extension settings
↑ Back to top- From your store’s WP Admin dashboard, navigate to Configuration > Add New Account.

Enter the Tenant , Client ID and Client Secret obtained from Dynamics BC And Press Add Button.
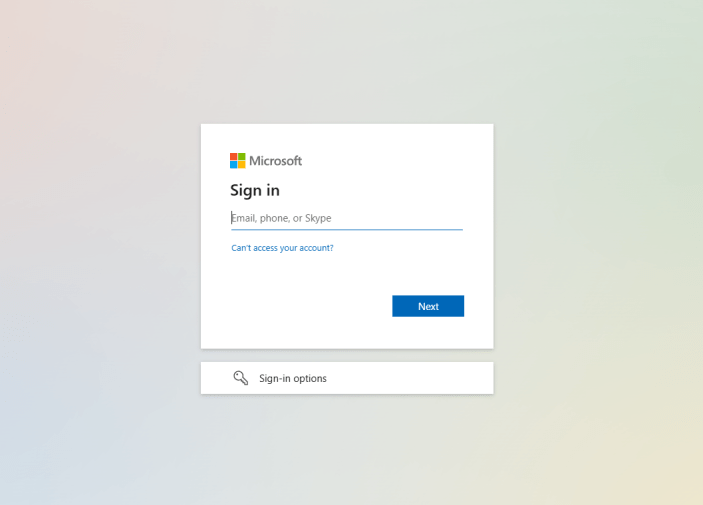
Click Genarate Authorization Code. This will redirect you to Dynamics BC’s login page.
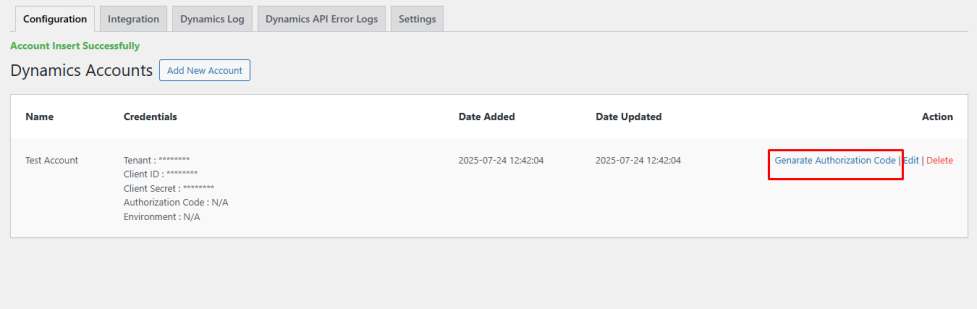
Log in and grant access to the application.
Once authorized, you will be redirected back to your site, and the extension will display a success message.
Step 4: Map WooCommerce Fields to Dynamics BC
↑ Back to top- Navigate to Integration.
- Click on Add New Integration.
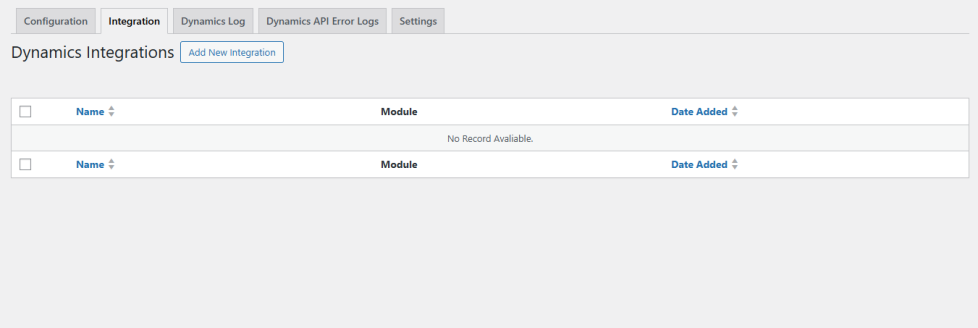
Map the WooCommerce fields to the corresponding Dynamics BC fields (e.g. First Name, Last Name, Email, etc.).
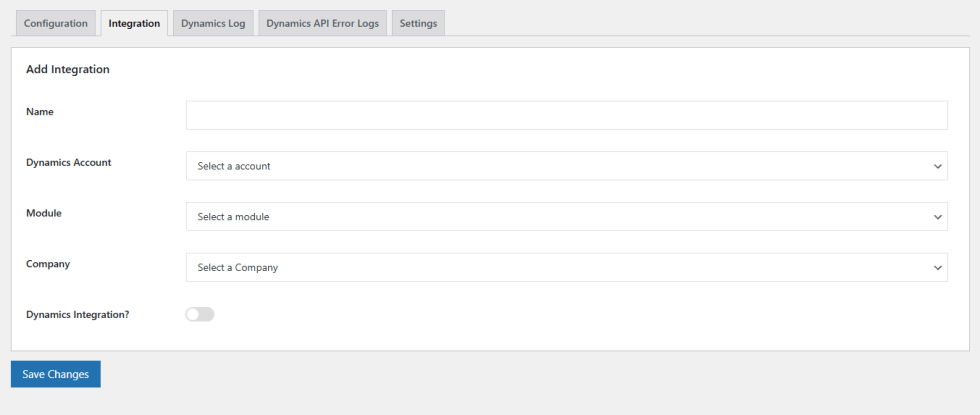
Save the mapping.
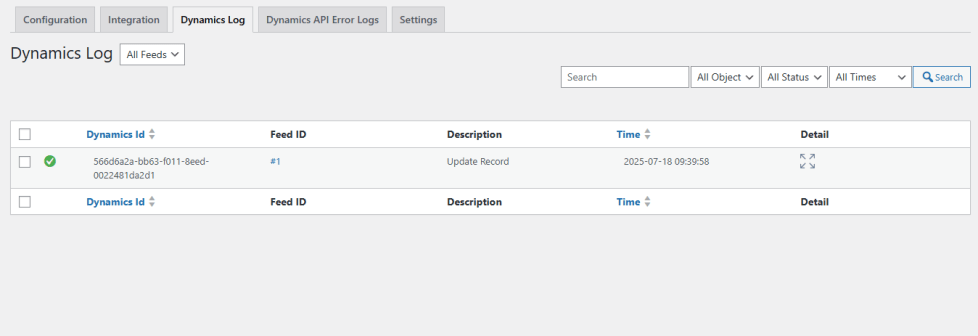
Step 5: Test the Integration
↑ Back to top- Submit a test entry via WooCommerce.
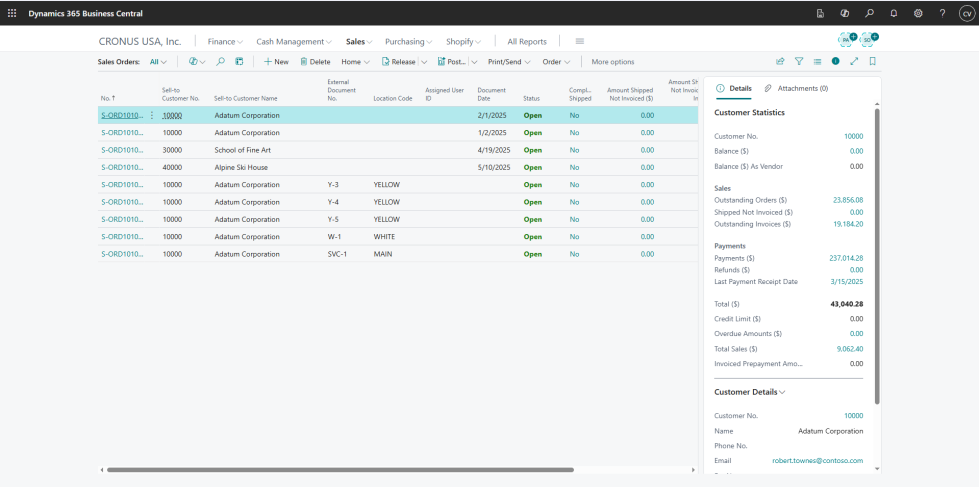
- Log in to Dynamics BC and verify that the entry has been added correctly.
Troubleshooting
↑ Back to top- Authorization Error: Ensure the Tenant , Client ID , Client Secret, Authorization Code, and Redirect URL are correct.
- Data Not Syncing: Verify that field mappings are correctly set up.
- Debug Logs: Check the extension’s logs for error messages.