Roles and Permissions for WooCommerce is a powerful role management and account management plugin for B2B online stores.
It enables B2B store owners to add company accounts in addition to individual customer accounts and also enables company owners to add their own team members or users in their account and assign different roles and permissions to them.
This instructional guide is for store owners to help them properly set-up and configure this plugin as per their store requirements and also explains how the plugin works on the customer’s front end.
Note: It is required that the WooCommerce plugin must be installed and activated on your store to use the features of the Roles and Permissions plugin.
Table of Contents
- Installation & configuration for the store owners.
- How to Add a Company Account
- How to Add a User to the Company Account
- How Company Owners can manage their own accounts and add their users and assign permissions to them
Installation
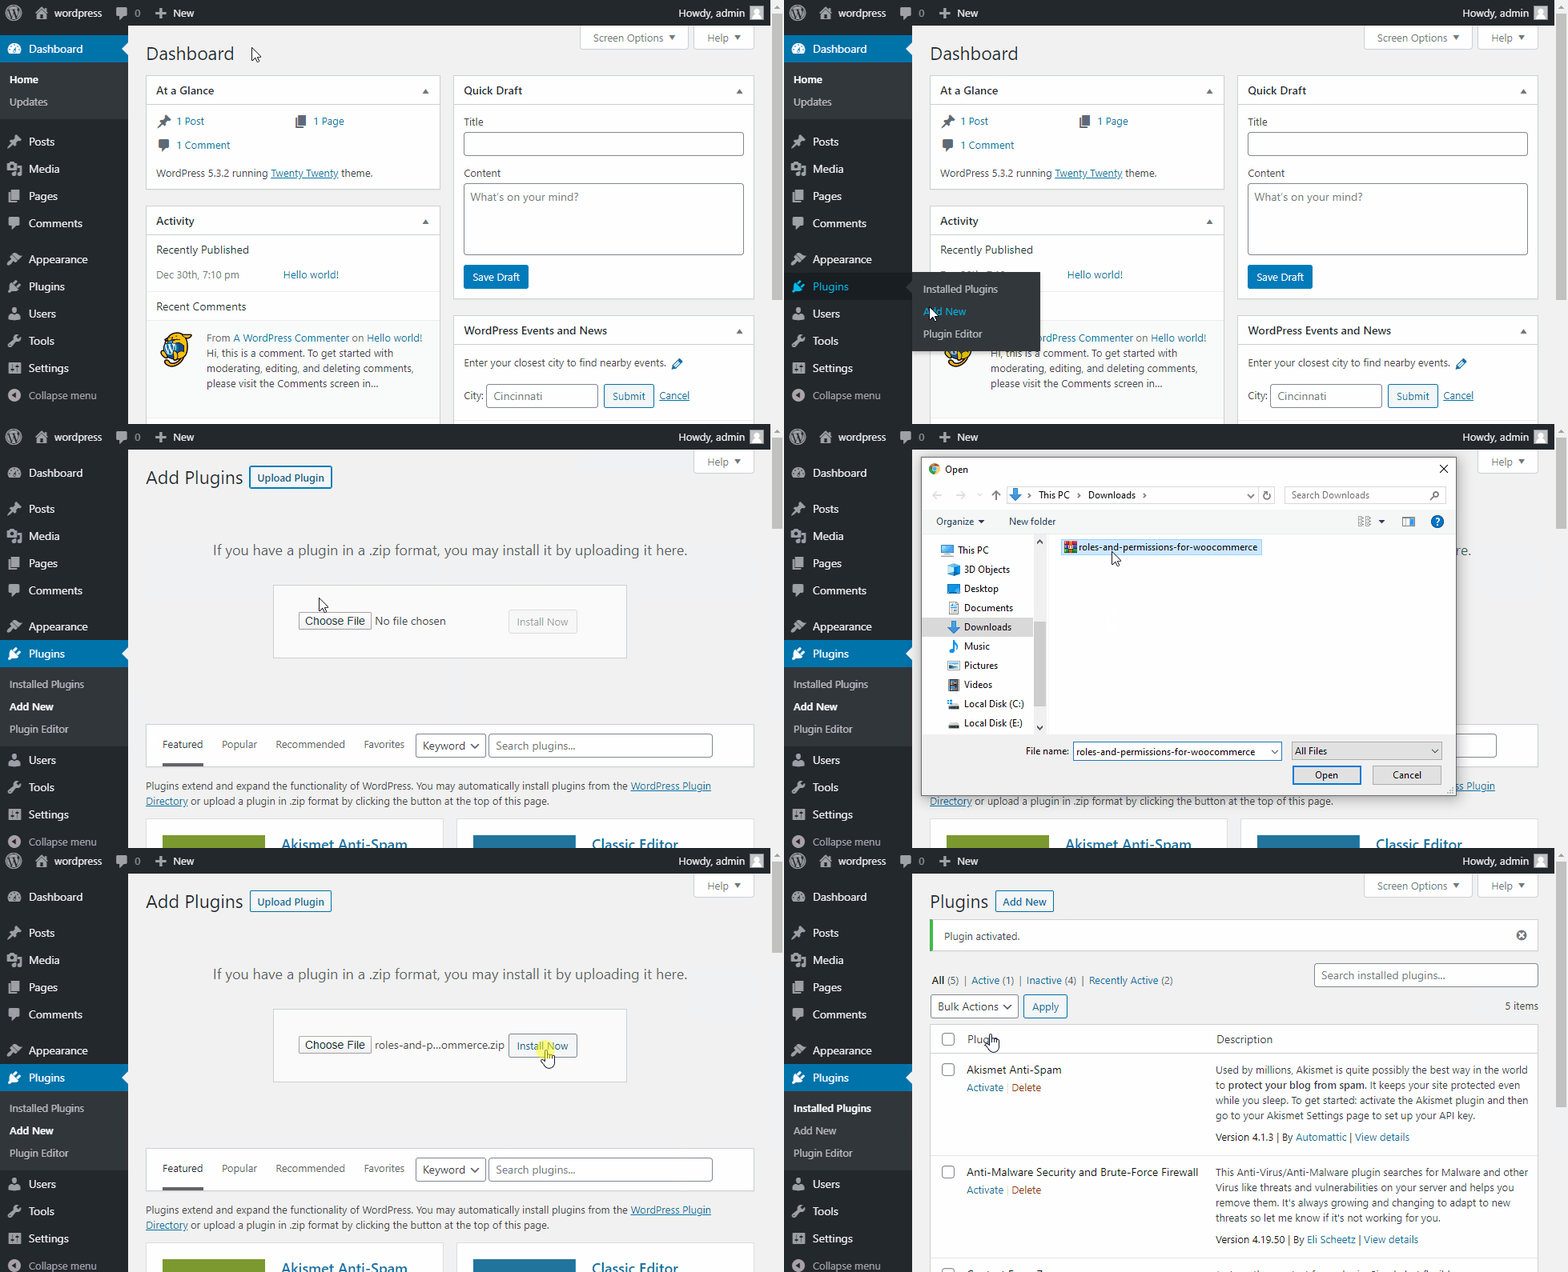
To install the plugin, navigate to Plugins > Add New. Click on Upload Plugin button on the top left of the page. From the modular screen, search for the plugin file that you saved on your computer and upload it. Click on Install to install the plugin.
Once the plugin is installed, you’ll see the Activate option. Activate the plugin so that it works its magic on your store.
Roles and Permissions plugin for WooCommerce allows store owners to add company accounts and add individual customers or users to that company account.
This allows B2B store owners to treat each of their buyers as separate business entities and allows those buyers to self-serve their own accounts by adding their own team members in their account and assign them the correct rights and permissions.
Now, to add a new customer (company) as a company account, follow the steps below.
- Find the Companies menu on the left sidebar of the admin dashboard and click Add New Company
- Simply provide the company name, any details of the company and click publish to add the company.
- If you want to give purchase credit to that company, you can see the option on the right sidebar. Check the option and enter the amount of credit you want to provide.
- You also have the option to display user roles you have already created in your WordPress site on the company owner’s dashboard and allow company owners to assign WordPress roles as well to new users.
Hit Publish or Update to make your company account go live.
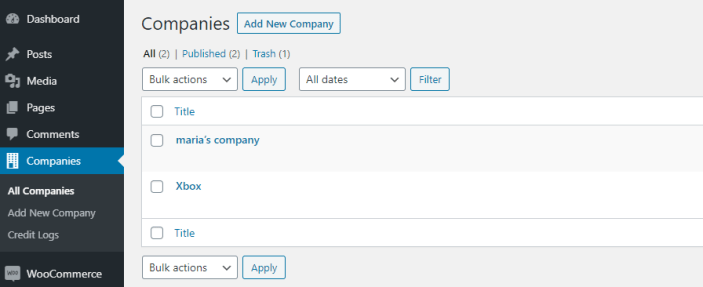
Once you’ve created a company account, the next step is to add the customer to that company account, so that they have all the capabilities to add new user roles, assign permissions, and create workflows for them.
Go to Users on the left menu of WordPress dashboard and click on All Users or Add New. If you want to edit an existing user and add them to the company account you’ve created, select that user from the list of All Users and click on Edit. Make sure you’ve assigned them the role of Customer. Under Company, you’ll see a dropdown menu that would display the companies you have added. Select the Company you want to add the user to.
To add a new user to the company account, go to Add New in Users. Fill in all the details of the user including their username, password, and email address. In the Role field, select the role of Customer. When you do that, you’ll see another field named Company. Select the company account from the dropdown menu in which you want to add the user to.
When you’ve done that, the user or company owner will be given role management capabilities on their own dashboard or account page.

Once you add a customer to a company account, that particular customer is given the role of Company Owner and is given admin capabilities, which allows them to add their own team members in their account and assign them roles and permissions.
Adding New Users To Their Account
Company owners can add new users to their accounts. On logging into their account, they are given an option of Company Dashboard on the left menu.
From there, they can see all the team members in their accounts and the different roles and permissions assigned to them.
The Company Owner can add new users in the company account by clicking on Add User in the top menu.
On the screen that follows, they can enter the user details and also
select the Company Role they want to assign that user.
Note that there are two default roles:
Admin and User.
The Admin Role has the capability to add new users in the company account and assign roles and permissions to them.
The User Role only has the capability to look at Company Orders and Shared Carts.
There is also an option to add custom user roles. Click on the ‘plus’ sign to add a custom role by calling it whatever you wish. Once you create a custom role, that role can be selected from the dropdown menu.
The custom user role will have User capabilities and not Admin capabilities (this means all custom roles you create will have the capabilities to view company orders and shared carts and will not be able to add new user roles and assign permissions).
If WordPress Roles were enabled when creating the company account on the backend, the Company Owner can assign WordPress Roles to the user as well.
Once the user is created, the Company Owner can assign roles and permissions by clicking on the Manage Permissions icon.
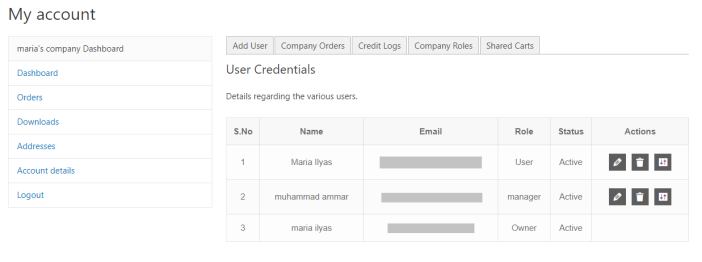
To assign and manage permissions for the user, click on the Manage Permissions icon on the right side of the user.
Select Limit Renewal
This option allows you to select how frequently you want the purchasing limits to be renewed for the user: monthly or yearly.
Manage Categories

Here, you can set purchase limits for the user by setting a price and quantity limit. If the category option is disabled, you can set global limits. When Category is enabled, you can set limits for particular categories of products and even enable or disable certain categories.
Manage Cart
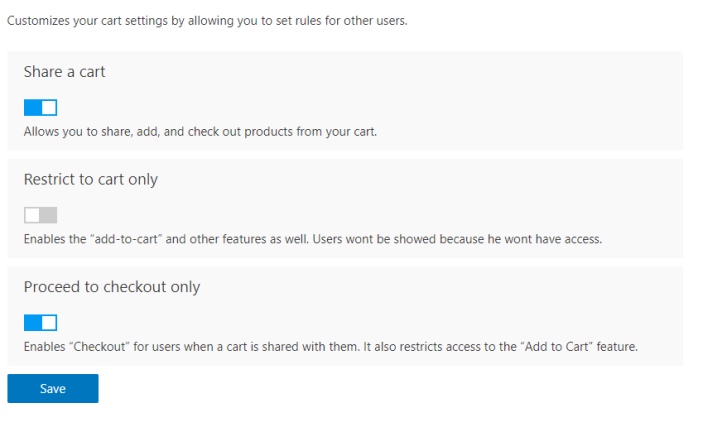
You can give users certain permissions related to cart sharing and checkout.
- Share a Cart
When this option is enabled, the user can share, add, and check out products. This means the user has all permissions enabled.
- Restrict to Cart Only
When this option is enabled, the user can Add to Cart but will have checkout and cart sharing features restricted. However, when Share a Cart option above is also enabled, the user can share the cart having only a restriction to checkout.
- Proceed to Checkout Only
When this option is enabled, the user can only proceed to checkout having Add to Cart and Cart Sharing features disabled. However, the user can view carts shared with him on his account page from where he can proceed to checkout.
The user can view carts shared with him by going to his account page and navigating to Shared Carts. From there, the user can go to the cart page and check out from there if he is given the permission to do that.

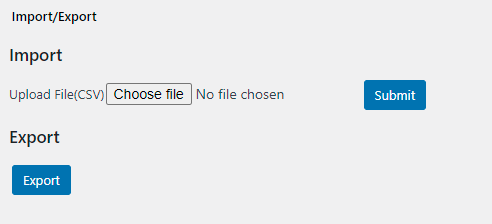
Roles and Permissions for WooCommerce plugin allows you to easily export all your data related to your buyers and companies and import it on another WooCommerce site running Roles and Permissions plugin.
Email notifications are triggered automatically on the following events:
- On Creating a New Company: Whenever a new company is created, an email is sent to the email address used when creating the account. The email notification includes details like Credit Limit and Permissions to create custom roles.
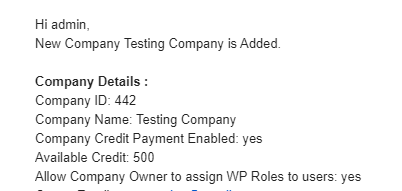
- On Editing any Company Settings: Whenever the admin makes changes to company settings, for example when the credit limit is updated, an email is triggered.
- On Adding a New Role in Company Account: Whenever the Company owner/admin adds a new user in his/her company account, an email is sent to that user notifying that he/she is being added to the company account.
- On Sharing Carts Between Users: Whenever a cart is shared between users, an email is sent to both the users alerting them about the cart shared.
You can extend the functionality of Roles and Permissions for WooCommerce using its webhooks and API requests. We’ve built compatibility for Template Overriding that allows users to customize the frontend interface of the plugin as well as Email templates. Refer to its
API documentation for more details.
Plugin Support
Should you need any further assistance regarding this plugin, feel free to contact us at woosupport@codup.co and have our support team look into the issue for you. Thank you!


 Here, you can set purchase limits for the user by setting a price and quantity limit. If the category option is disabled, you can set global limits. When Category is enabled, you can set limits for particular categories of products and even enable or disable certain categories.
Manage Cart
 You can give users certain permissions related to cart sharing and checkout.


