The WooCommerce cart checkout and upsell plugin improves the shopping flow, lets you place helpful product suggestions at the right moments, and supports simple upsell prompts that push customers to add more to their order without complicating their experience.
Installation
↑ Back to topTo start using a product from WooCommerce.com, you can use the “Add to store” functionality on the order confirmation page or the My subscriptions section in your account.
- Navigate to My subscriptions.
- Find the Add to store button next to the product you’re planning to install.
- Follow the instructions on the screen, and the product will be automatically added to your store.
Alternative options and more information at:
Managing WooCommerce.com subscriptions.

Configuration
↑ Back to topOnce the WooCommerce cart checkout and Upsell plugin is installed, you will find two main sections to work with: the “General Settings” and the “Add New Rule” panel for creating your upsell offers.
Each section allows you to adjust elements such as the text, buttons, and colors, or build custom rules that trigger specific suggestions based on products or categories. It gives you enough control to shape the upsell experience without overcomplicating the setup.
General Settings
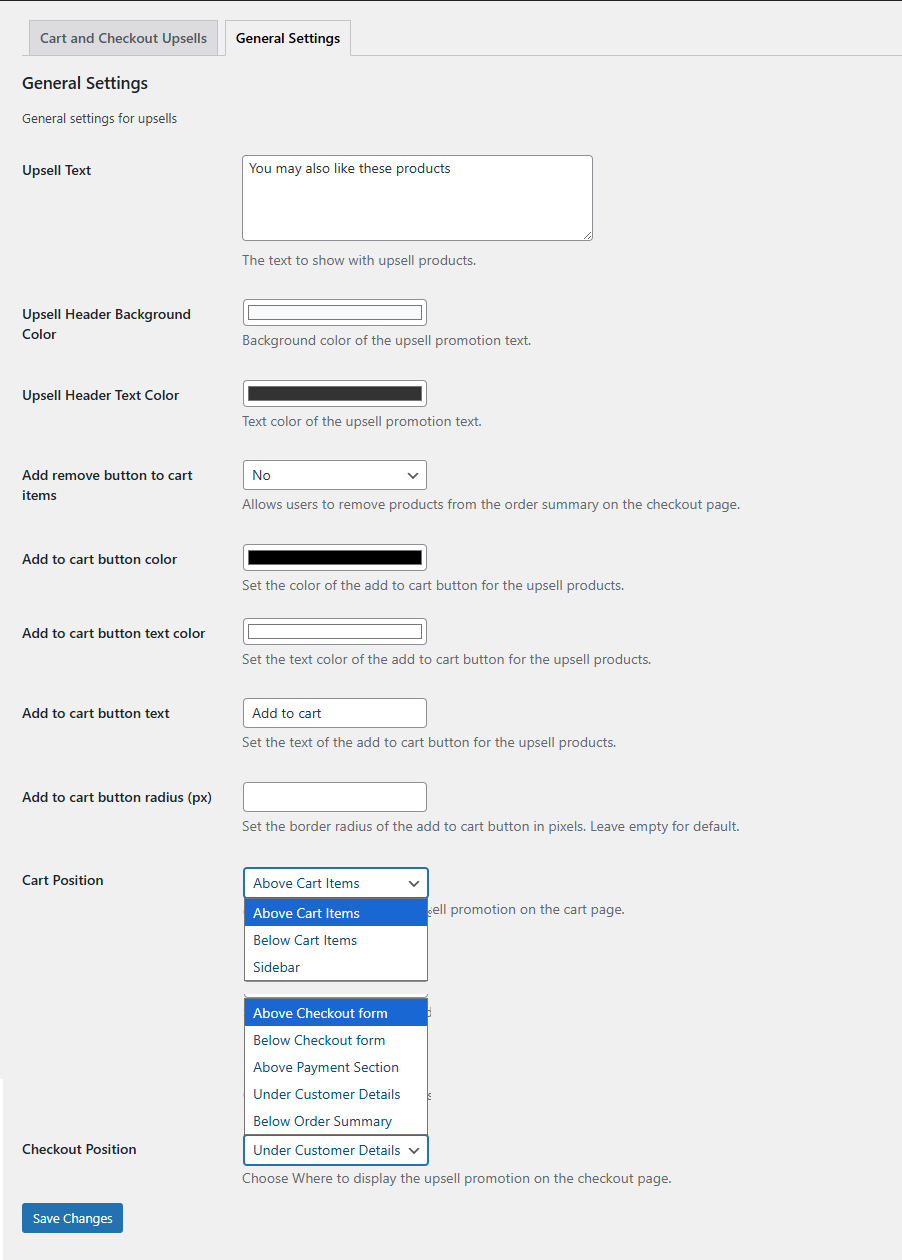
↑ Back to topYou can configure the general settings for the WooCommerce cart checkout and upsell plugin by going to WooCommerce > Upsell Settings > General Settings. There you will be able to see multiple options as listed below:
- Upsell text: Enter the message that will appear above your upsell products to catch the customer’s attention.
- Upsell Header Background Color: Choose the background color for the upsell text.
- Upsell Header Text Color: Set the color of the upsell text itself.
- Add or Remove Button to Cart Items: Enable or disable buttons for adding or removing upsell products directly from the checkout.
- Add to Cart Button Color: Pick a color for the upsell product’s add-to-cart button.
- Add to Cart Button Text: Customize the text shown on the add-to-cart button for upsell products.
- Cart Position: Decide where the upsell section appears on the cart page.
- Above Cart Items
- Below Cart Items
- Sidebar.
- Checkout Position: Choose where to display the upsell section on the checkout page, like:
- Above Checkout Form
- Below Checkout Form
- Above Payment Section
- Under Customer Details
- Below Order Summary.
Finally, click on the “Save Changes” button to save the settings that you configured.
Add New Rule
↑ Back to topGo to WooCommerce > Upsell Settings > Cart & Checkout Upsell and click on the “Add New Rule” to add your own custom rules.
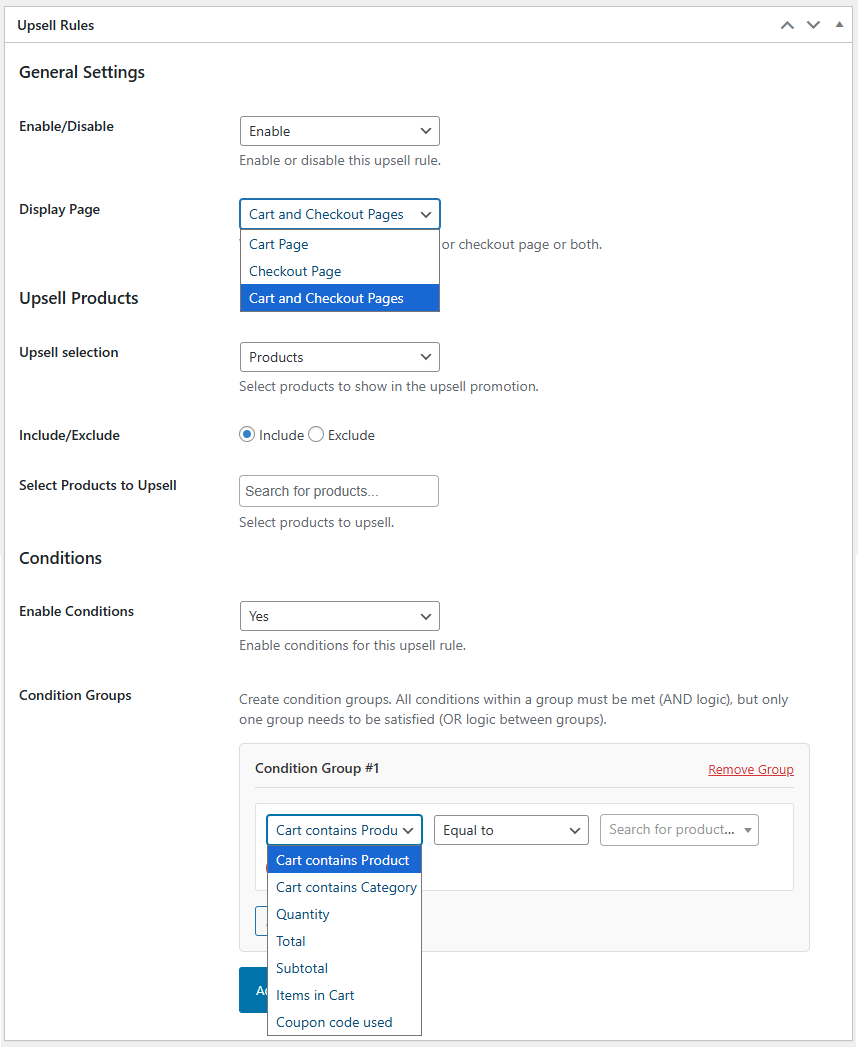
General Settings:
Enable/Disable: Turn this upsell rule on or off.
Display Page: Choose where this rule should appear from the options below:
- Cart page
- Checkout page
- Cart and Checkout page
Priority: Set the rule’s priority; the lower the number, the higher the priority.
Upsell Products:
Upsell Selection: Choose which products to display in the upsell. Options include:
- All Products
- Products
- Categories
Conditions:
Enable Conditions: Choose “Yes” to apply conditions to this upsell rule, or “No” to ignore them.
Condition Groups: Set up one or more groups of conditions. All conditions within a group must be true, but only one group needs to match for the rule to apply. You can add as many conditions to each group as needed.
Conditions Applicable If: Choose the type of condition to trigger the upsell, such as:
- Cart contains Product
- Cart contains Category
- Quantity
- Total
- Subtotal
- Items in cart
- Coupon code used
Select Options Based on Applicable Conditions: Define how the condition is evaluated:
- Equal to
- Not equal to
- Greater than or equal to
- Greater than
- Less than or equal to
- Less than
Enter the Desired Value: Specify the products, categories, or value to which the conditions apply.