How to install
↑ Back to topDownload the file from the WooCommerce dashboard.
Go to WordPress admin > Plugins > Add New > Choose File to upload the downloaded zip file.
Click on Install Now. After installation, click on the Activate button to activate the plugin.
The email customizer and designer has several elements and an easy drag-and-drop feature to create custom WooCommerce emails.
After installing, navigate to the WordPress admin menu bar, where you will find the installed plugin, the ‘Email customizer’.
Global styles
↑ Back to topYou can set and edit the email template to global style by clicking on the ‘global style’ button from the top.
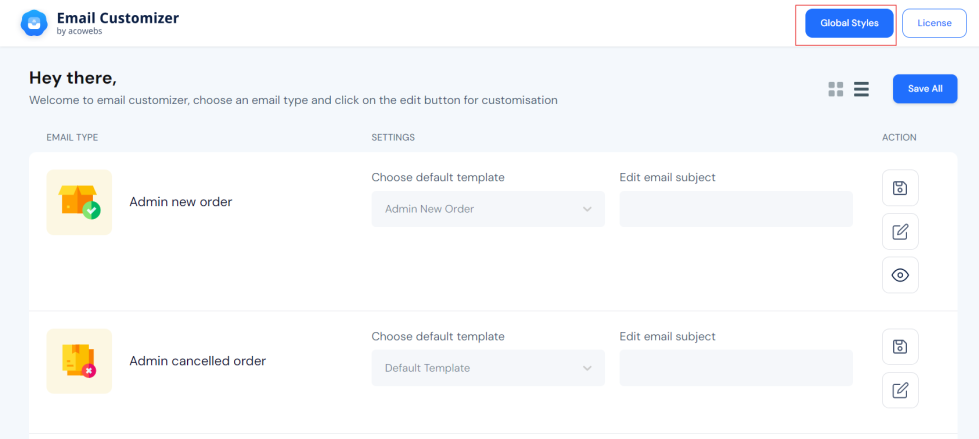
In the Global styles for email templates, you can find these common edit options.
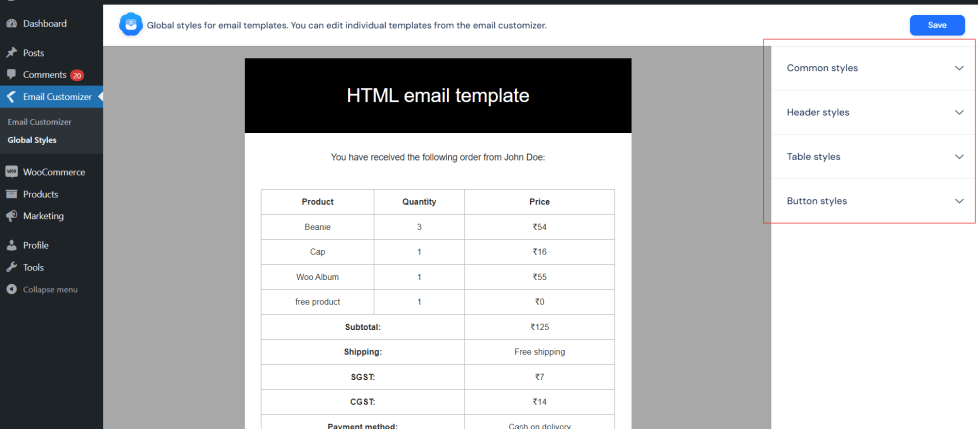
Common styles
↑ Back to top
Below is an image of the options appearing under Common Styles on the sidebar.

- Change the template’s background color.
- Change the background color of the container
- Change the template’s heading color.
- Change the template’s body-text color.
- Change the color of the links in the template.
Header styles
↑ Back to topUnder the header styles, you get two options: the header background color and the header text color.
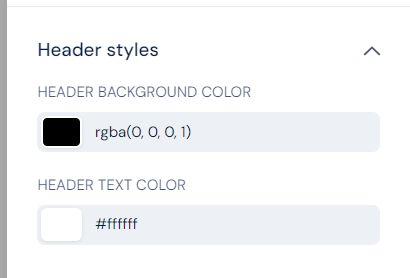
- Change the template’s header background color.
- Changes the text color of the header.
Table styles
↑ Back to top
Here are the four options under the Table styles.
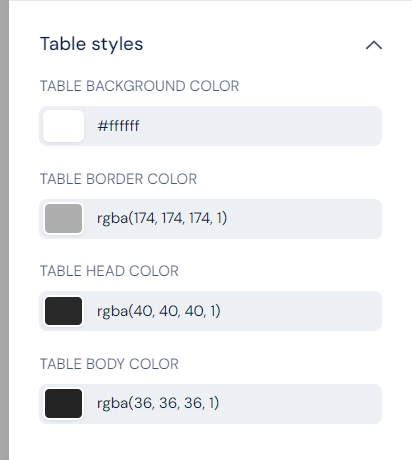
- Change the background color of the table.
- Table border color changes the color of the table border.
- Change the color of the table head.
- Change the color of the table body.
Button styles
↑ Back to topHere are the options under Button styles.
- The button background color changes the background color of the buttons in the template.
- Button border color changes the border color of the buttons in the template.
- Button text color to change the text color of the buttons in the template.
Template
↑ Back to topYou can select from 20+ default template styles and easily edit, add, and customize them even with zero coding knowledge.
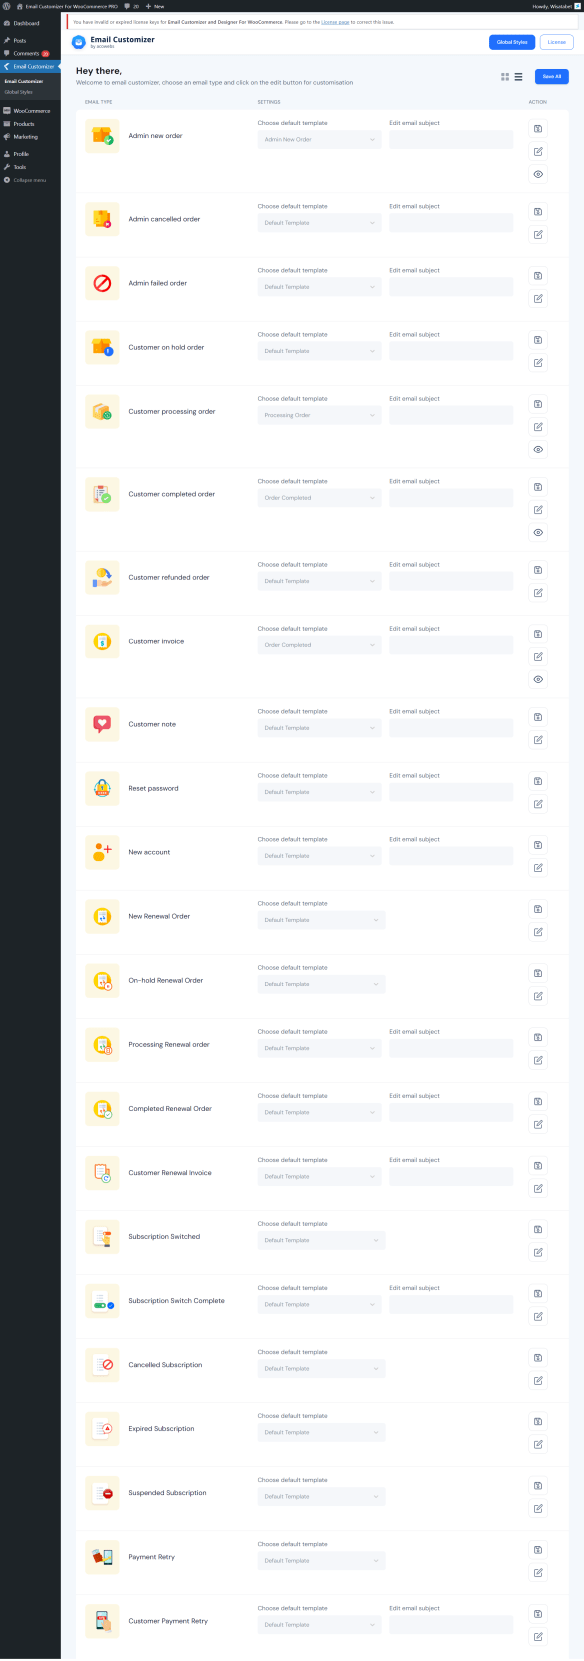
You can edit these email templates with a single click on the edit action button.
New template
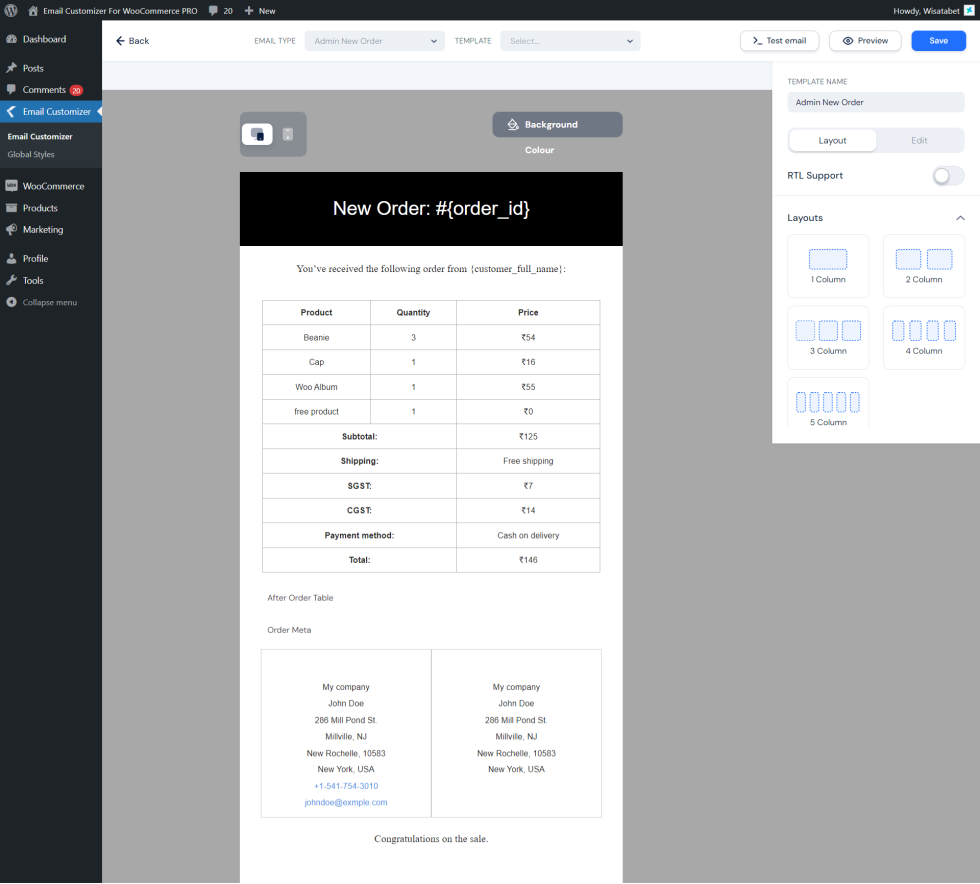
↑ Back to topUpon clicking on the ‘new template’ option on the top right side, a new tab opens. Now you can start customizing your email template with the drag-and-drop feature.

Template name
↑ Back to topYou can change the template name in the box provided on the right side of the page.
RTL support
↑ Back to topEnable this toggle button to view the page from right to left.
Layouts
↑ Back to topThe email template layout can be changed by selecting these options on the right sidebar. You can add upto five columns in the layout.

Edit option for the sub-template
↑ Back to topYou get options to edit, delete, and move on each sub-template.

Click on the edit button to get the following options.
- Title font family
- Title Font weight
- Title font style
- Title Font size(px)
- Title line height
- Title color
- Title Align
- Title Margin Bottom(px)
- Table Background Color
- Cell Padding(px)
- Table Font Family
- Table Font weight
- Table Font style
- Table Font Size(px)
- Table Text Line Height
- Table Text Color
- TABLE TEXT ALIGN
- TABLE HEAD COLOR
- TABLE BORDER WIDTH(PX)
- TABLE BORDER STYLE
- TABLE BORDER COLOR
- PADDING(PX)
Basic elements
↑ Back to topDrag and drop these basic elements from the right sidebar into the template to start editing. Click the edit button to further edit the text color, font size, alignment, etc.
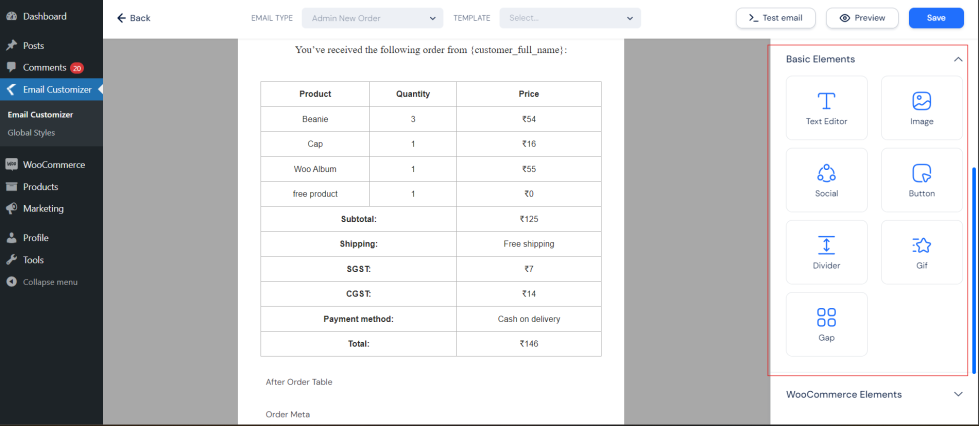
Text editor – Use this option to add text to the email template and edit using the element text color, font size, alignment, etc.
Image – Add and edit images into the template.
Social – Add social media buttons to the email template. You can add links to the respective social media accounts.
Button – To add interactive buttons on the email template.
Divider – Customize the layout style of the template by using a single line divider.
GIF – To add gifs to your email template.Gap – Add gap between elements.
WooCommerce elements
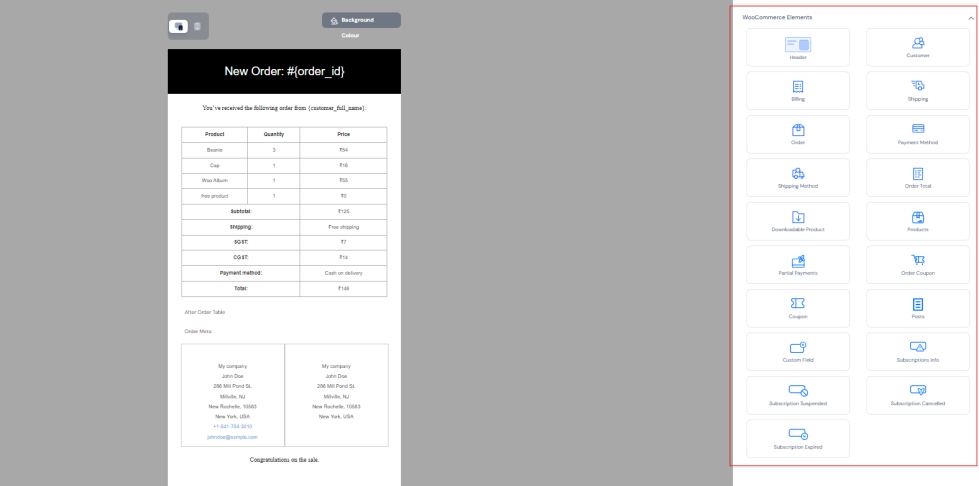
Header – To add a header section to your template.
Customer – To add customer details to the template
Billing – To add the billing details of purchase in the email template
Shipping – Include the shipping details into the template.
Order – Order details can be added into the email template
Payment method – Display the payment method.
Shipping method – To display the shipping method.
Order total – Display the order total in the email template.
Downloadable products – Display the product data in the table format, that can be downloaded.
WooCommerce Hooks
↑ Back to top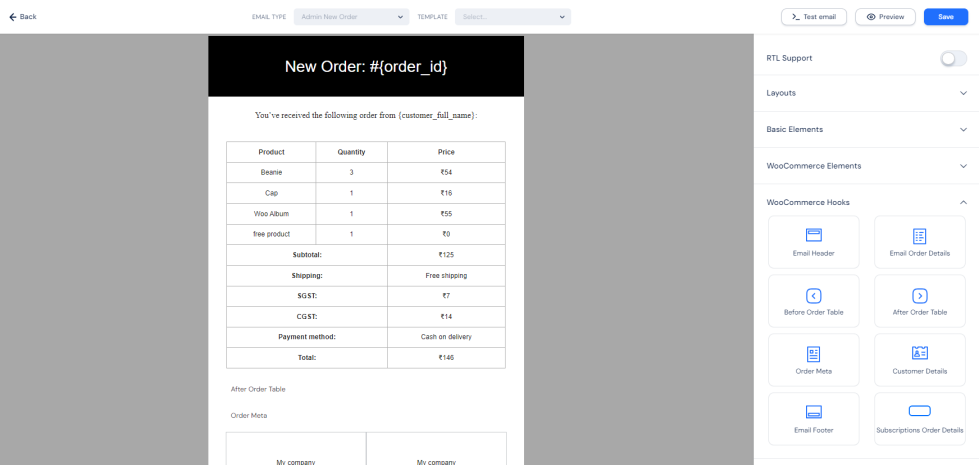
These are elements used to customize email templates. The WooCommerce hooks in the email customizer are:
1. Email Header
2. Email Order Details
3. Before Order Table
4. After Order Table
5. Order Meta
6. Customer Details
7. Email Footer
Other options
↑ Back to topApart from the customization buttons, here are the other three important options: Test email, Preview, and Save buttons.

Test email
↑ Back to topThe test email feature helps you understand how a customized email appears and to detect any issues before sending it to the customer.
Preview
↑ Back to topAfter every update, you can view the changes made in real-time.
Save
↑ Back to topTo save the customized template.
You can edit the other 20+ email templates in the same manner.
If you need any further clarification, feel free to contact us.
