Quantity Increment Buttons for WooCommerce allows you to add user-friendly plus/minus buttons and sliders to quantity fields in your WooCommerce store. Control limits, steps, tooltips, and design to make shopping quick and easy.
Installation
↑ Back to topTo start using a product from WooCommerce.com, you can use the “Add to store” functionality on the order confirmation page or the My subscriptions section in your account.
- Navigate to My subscriptions.
- Find the Add to store button next to the product you’re planning to install.
- Follow the instructions on the screen, and the product will be automatically added to your store.
Alternative options and more information at:
Managing WooCommerce.com subscriptions.

Configuration
↑ Back to topGo to WooCommerce > Quantity Buttons. Here, you will find all the configuration settings for the Quantity Buttons plugin.
General Settings
↑ Back to topGo to WooCommerce > Quantity Buttons and Click the General Settings Tab
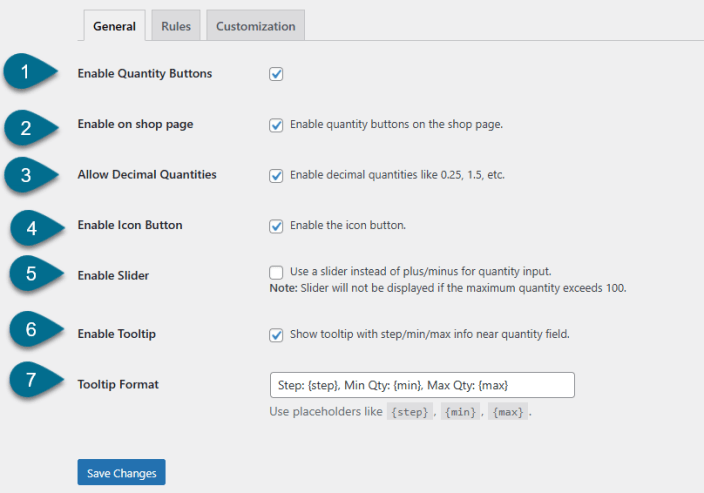
The General Settings section allows you to control the visibility, behavior, and appearance of quantity buttons across your store, including options for sliders, tooltips, and decimal quantities.
- Enable Quantity Buttons – Toggles quantity buttons on product pages site-wide.
- Enable on Shop Page – Enables quantity buttons on the shop pages.
- Allow Decimal Quantities – Allows customers to enter fractional quantities (e.g., 0.5, 1.25).
- Enable Icon Button – Displays plus/minus as icons instead of standard buttons.
- Enable Slider – Replaces buttons with a slider UI for selecting quantity (max 100).
- Enable Tooltip – Shows a tooltip displaying step, min, and max values near the quantity input.
- Tooltip Format – Customize tooltip text using placeholders like {step}, {min}, and {max}
Rules Settings
↑ Back to topHead to WooCommerce > Quantity Buttons > Click Rules Tab
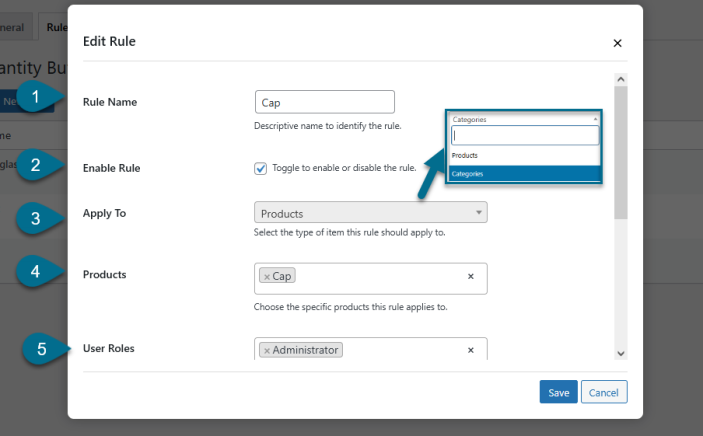
The Rules tab lets you create targeted quantity restrictions for specific products and user roles, including control over minimum, maximum, and step values.
- Rule Name – Enter a descriptive name to identify this rule
- Enable Rule – Toggle to activate or deactivate the rule
- Apply To – Choose where the rule should apply::
- Products – Select one or more specific products
- Categories – Select one or more specific categories
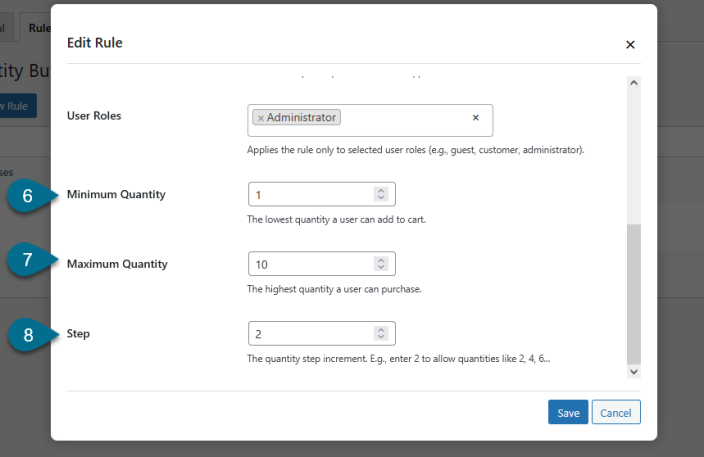
- User Roles – Restrict the rule to selected user roles (e.g., customer, guest)
- Minimum Quantity – Set the minimum quantity allowed in the cart for selected items
- Maximum Quantity – Set the maximum quantity a customer can purchase
- Step – Define the quantity increment (e.g., enter 2 to allow 2, 4, 6…)
Rules Grid
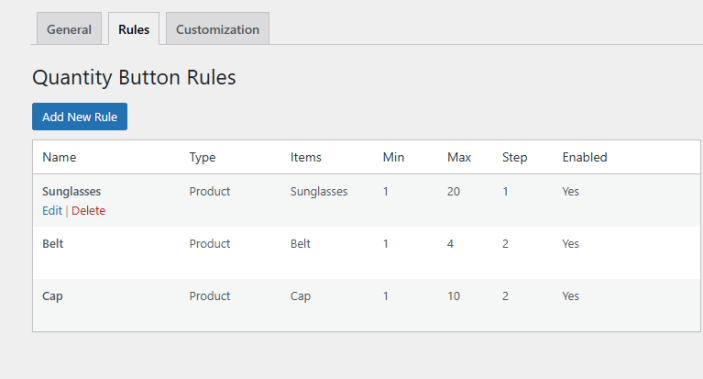
↑ Back to topThe Quantity Button Rules grid displays all configured rules, allowing store admins to quickly view, edit, or delete quantity restrictions based on product type, minimum and maximum quantities, step values, and activation status.
- Name – The descriptive name given to the rule for easy identification
- Type – Specifies the target type for the rule (e.g., Product, Category)
- Items – Lists the specific products or categories the rule applies to
- Min – Displays the minimum quantity allowed for the listed item(s)
- Max – Displays the maximum quantity allowed for the listed item(s)
- Step – Indicates the quantity increment for the rule (e.g., 1, 2, 5)
- Enabled – Shows whether the rule is currently active (Yes) or inactive (No)
- Actions – Provides Edit and Delete links to modify or remove the rule (shown below rule name)
Customization
↑ Back to topGo to WooCommerce > Quantity Buttons > Click the Customization Tab.
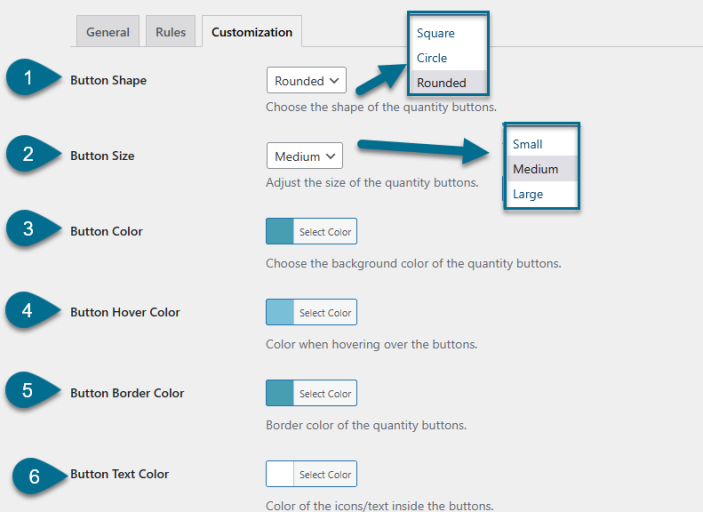
The Customization tab allows you to personalize the appearance, position, and icon style of the quantity buttons to match your store’s design and branding.
- Button Shape – Select the shape of the quantity buttons:
- Square
- Rounded
- Circle
- Button Size – Adjust the button size by choosing from
- Small
- Medium
- Large
- Button Color – Set the background color of the quantity buttons.
- Button Hover Color – Choose the button color when a user hovers over it.
- Button Border Color – Define the border color for quantity buttons.
- Button Text Color – Set the color of the icon or text inside the buttons.
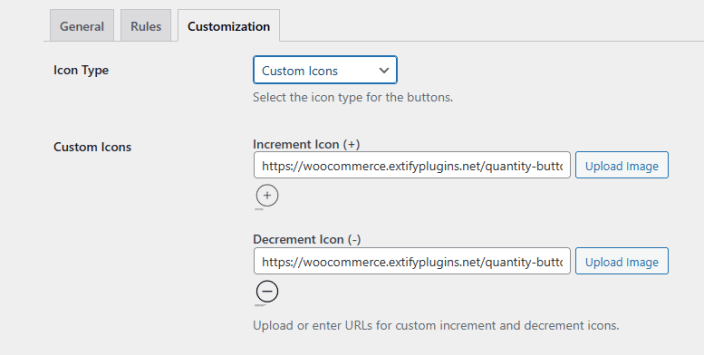
7. Icon Type – Choose the icon style:
- Plus/Minus
- Arrows
- Chevrons
- Custom icons
8. Custom Icons – Upload or link to custom increment and decrement icons.
9. Button Position – Determine where buttons appear:
- Before the quantity input
- After the quantity input
- Around the quantity input
10. Enable Responsive Support – Toggle responsive styling for better mobile and tablet compatibility.
