Installation
↑ Back to top- Download the zip file from your WooCommerce account;
- Go to your WordPress Dashboard to Install;
- Click “Upload Plugin” at the top;
- Click on the “Choose File” button and select Restaurant-For-WooCommerce-Plugin.zip;
- Click “Install Now” and Activate the extension;
Menu User Guide
↑ Back to topDashboard
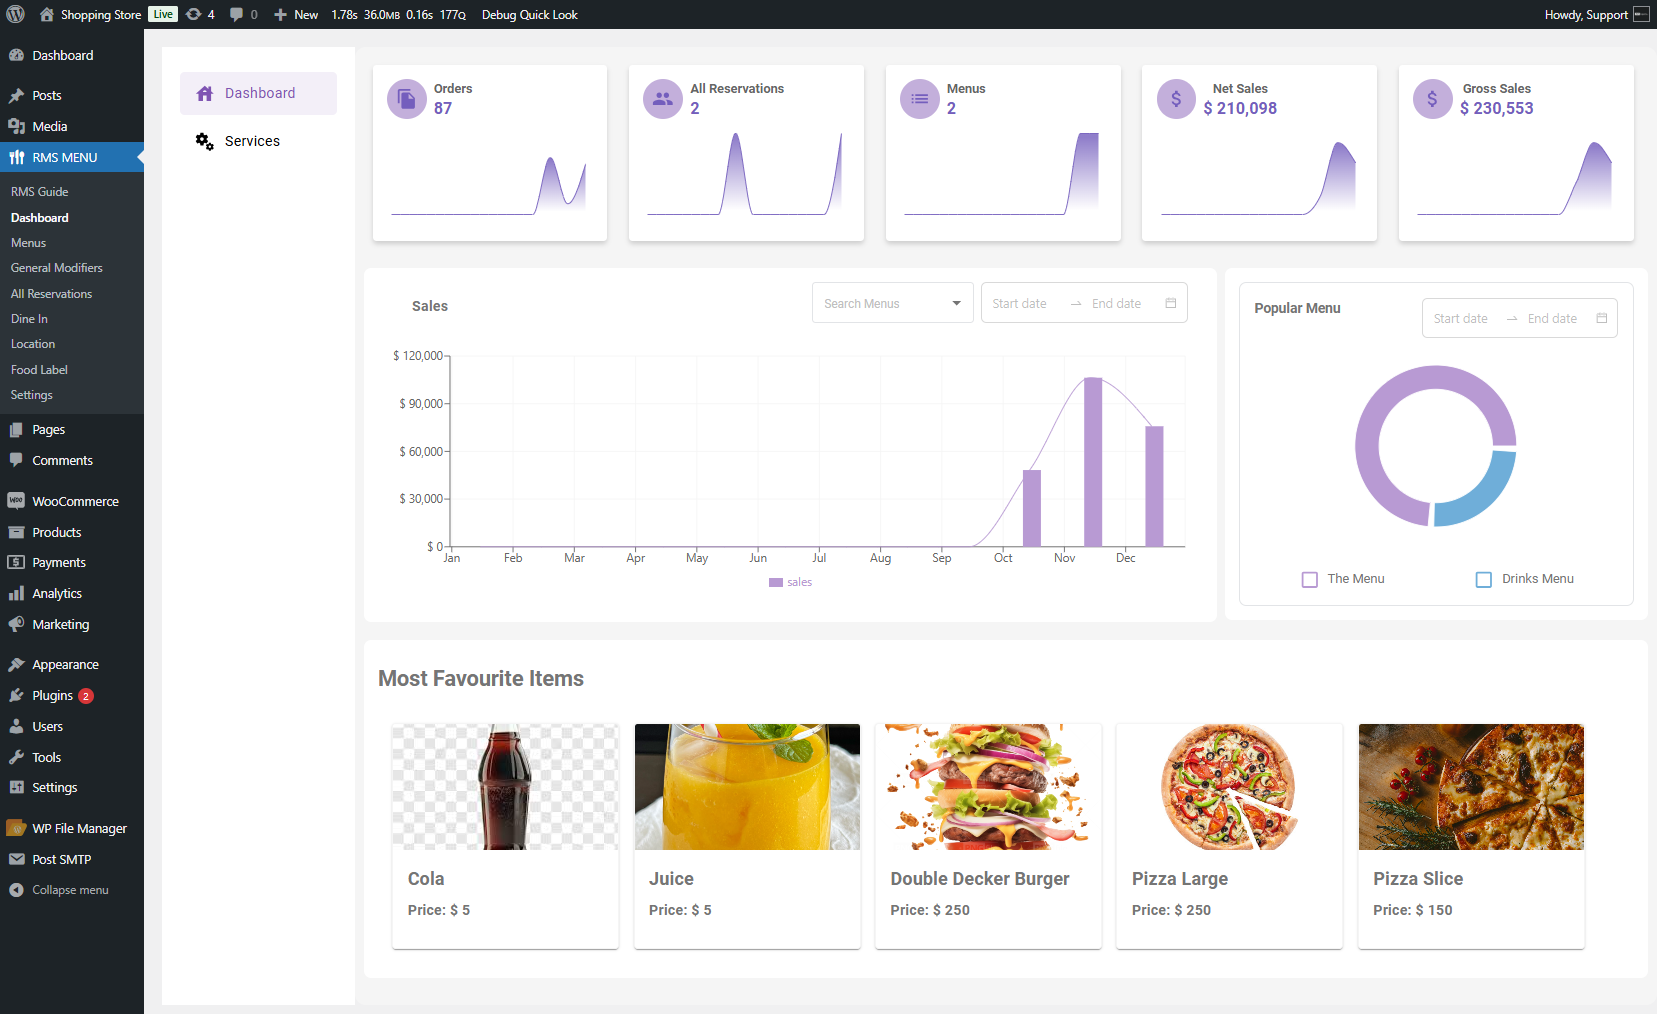
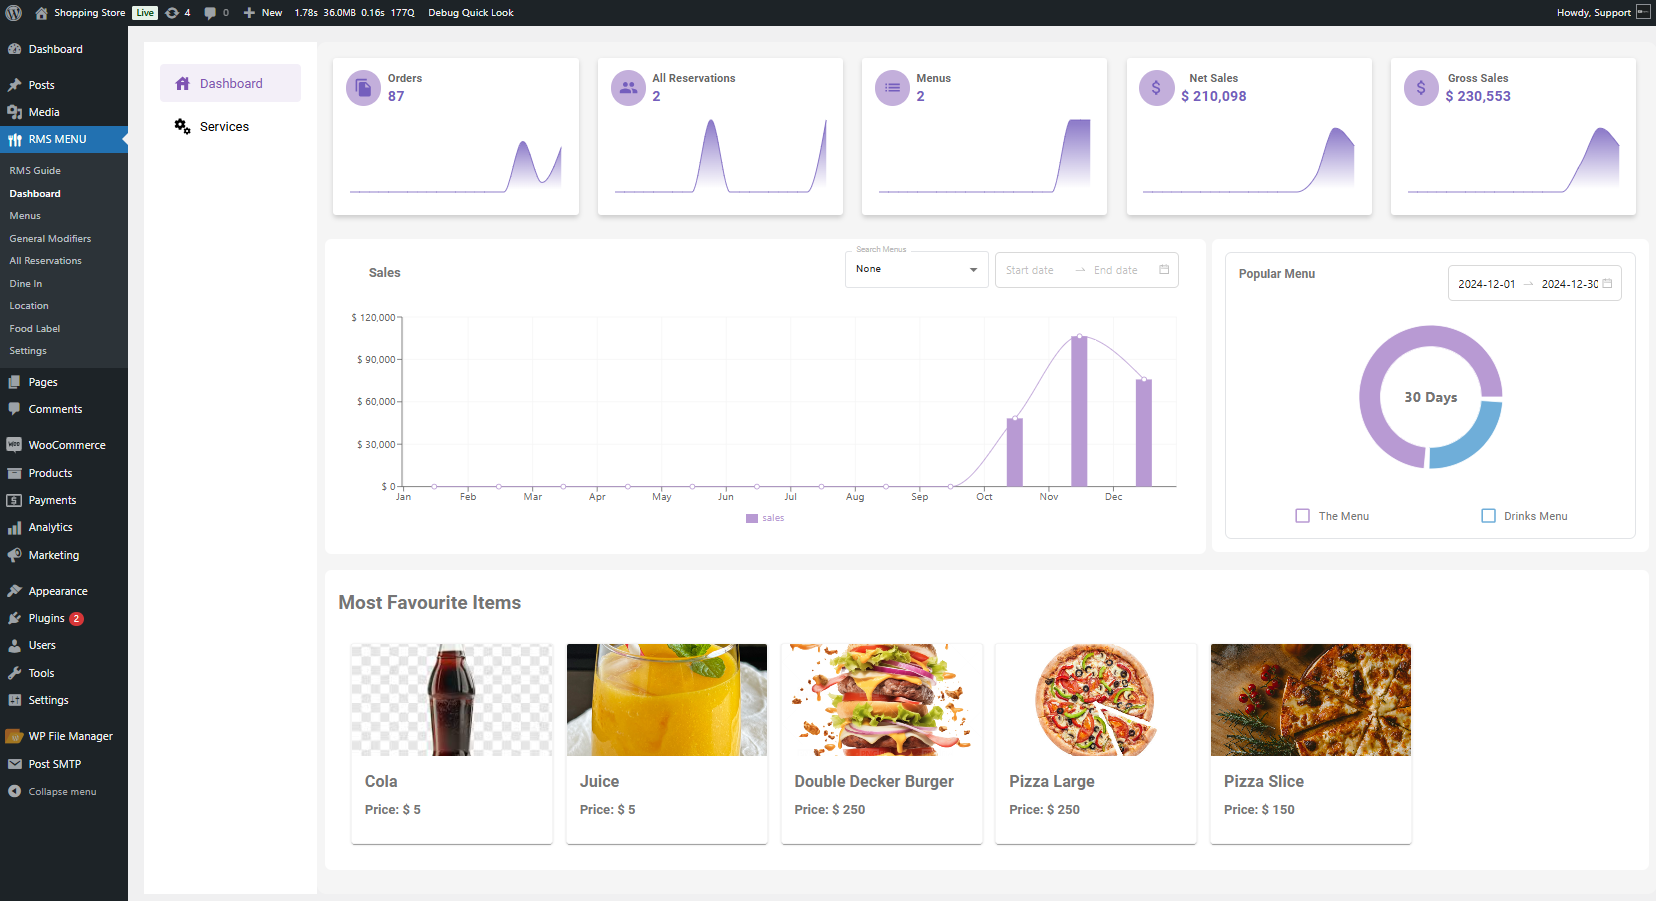
↑ Back to top- Go to WordPress Admin Dashboard > RMS MENU > Dashboard.

- The Dashboard will load for the admin, giving admin insights into key metrics and performance.
- The Dashboard is organized into four major sections.
- Top Summary Boxes
- Sales Graph
- Popular Menus (Pie Chart)
- Most Favorite Items
Top Summary Boxes
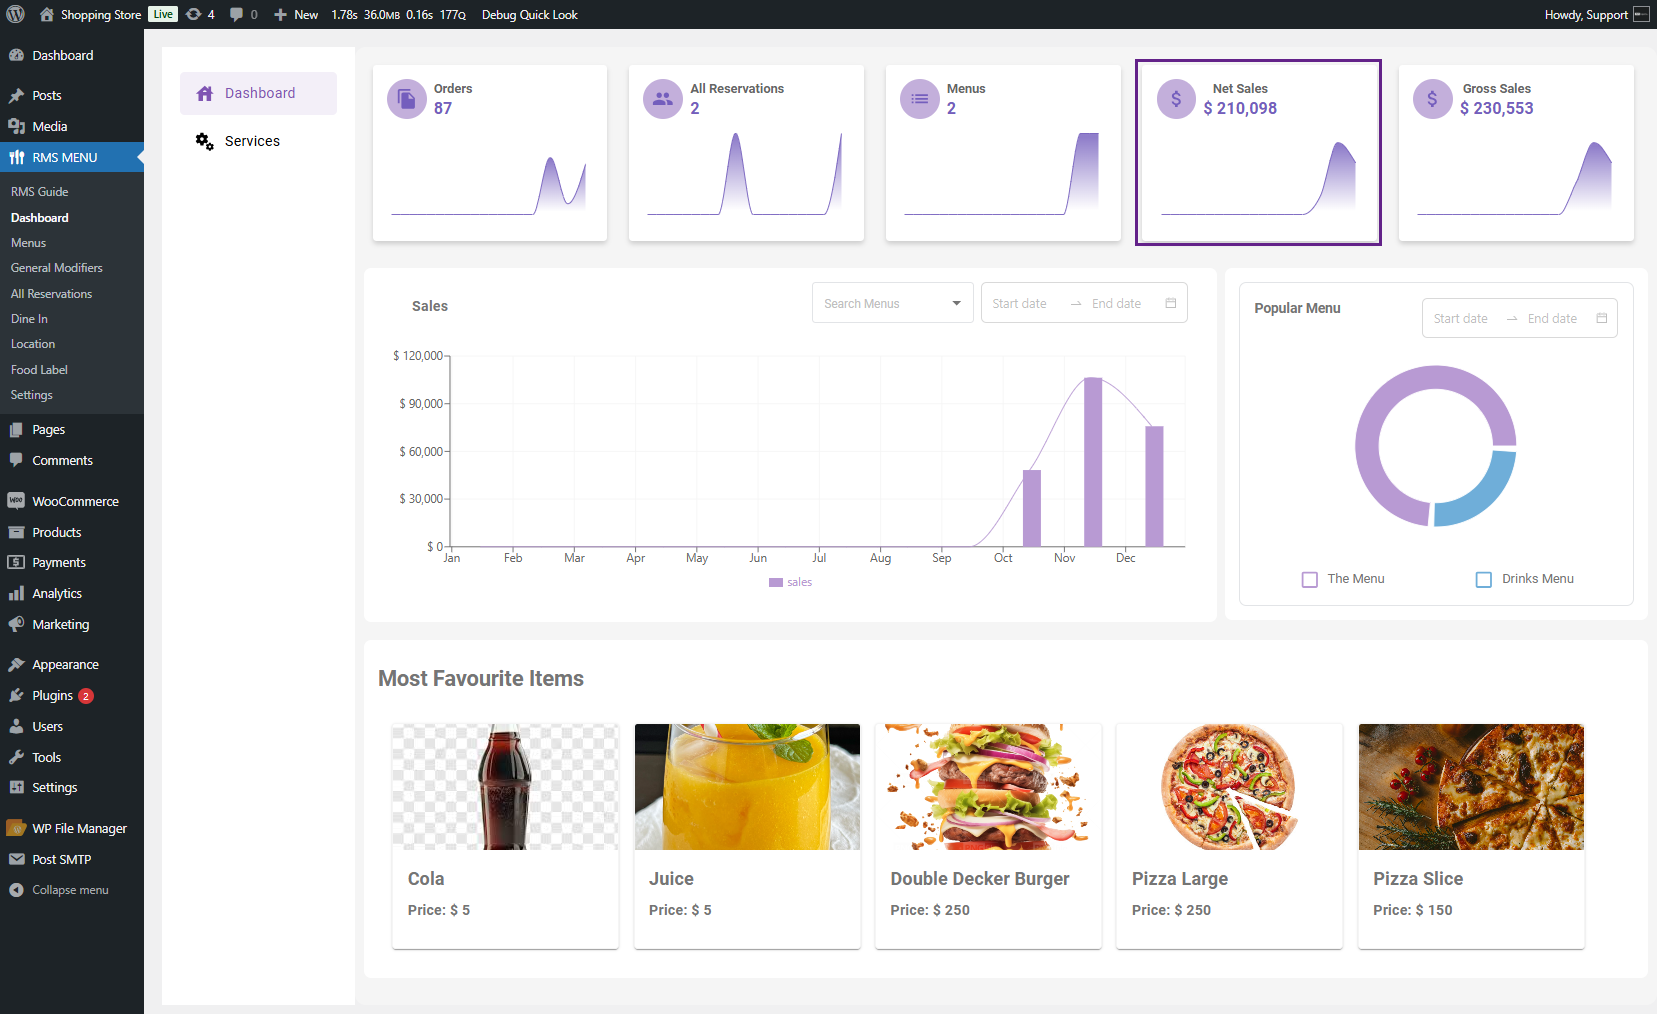
↑ Back to top- These are the five boxes at the top of the dashboard. Each box provides key performance metrics at a glance.
- Orders
- Shows the total number of orders placed.
- For example, the number 87 here means 87 orders have been processed.

- All Reservations
- Displays the total number of reservations made.
- For example, the number 2 means there have been 2 reservations.

- Menus
- Indicates how many menus are available.
- For example, 2 shows show that you currently have two menus uploaded to the system.

- Net Sales
- Displays total sales after deductions like taxes, discounts, or returns.
- For example, $210,098 is the net revenue after these adjustments.
- Gross Sales
- Shows the total sales amount before deductions (like taxes or discounts).
- For example, $230,553 is the gross revenue from sales.

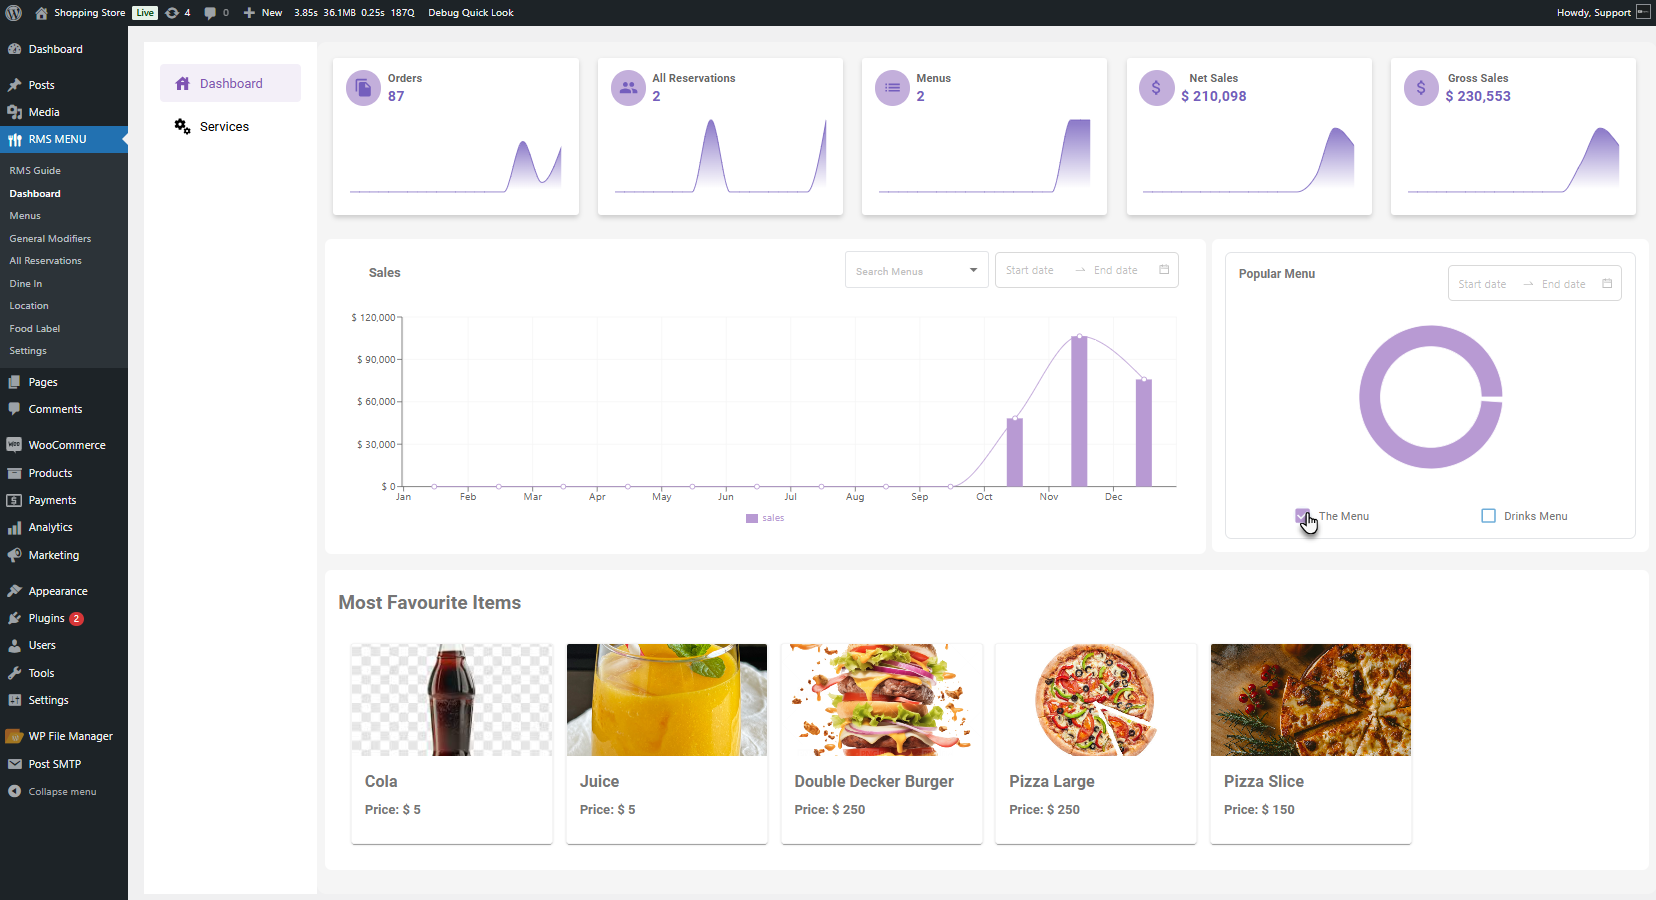
Sales Graph
↑ Back to top- The graph in the middle of the screen shows sales trends over time. The admin can view the monthly sales data from January to December in a bar chart. For example, the chart shows a sales spike in November and December.

- The admin can hover over any month to view the month’s sales data.

- There are two filters available for the admin.
- Menu Filter: Choose a specific menu to view its sales trends.

- The graph will display data for the selected menu.
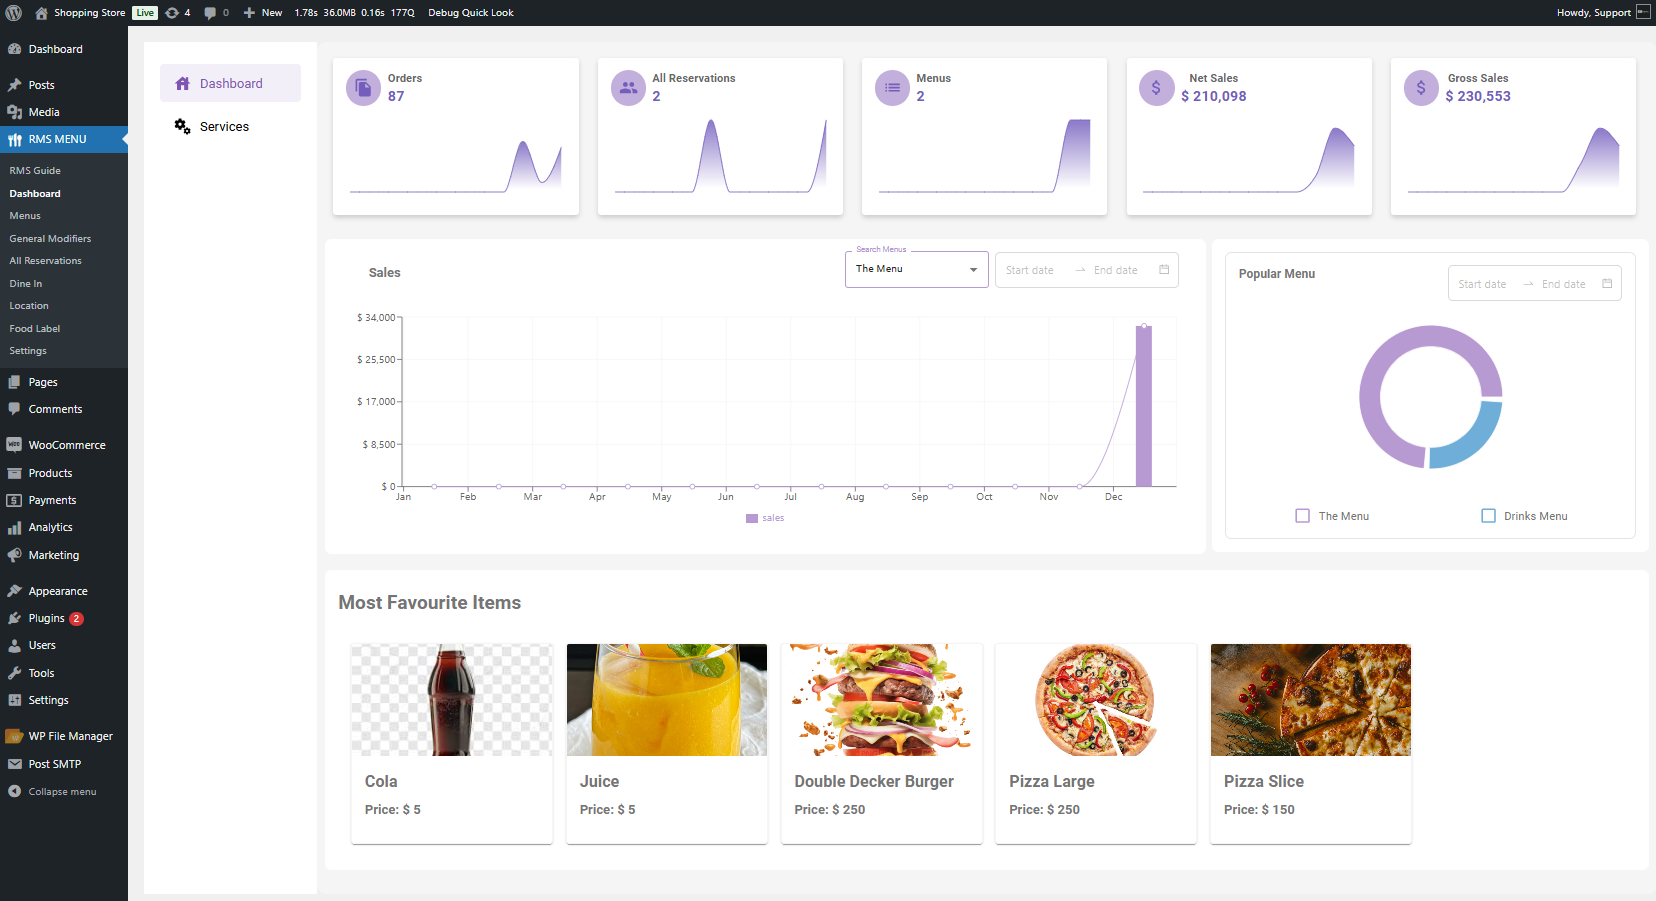
- Date Range Calendar: Select custom dates to analyze sales for a specific period. The admin can set a start and end date to display the corresponding data on the graph.

NOTE: The admin can use both filters simultaneously.
- The graph will showcase data corresponding to the selected time period.

Popular Menus (Pie Chart)
↑ Back to top- This is the circular chart on the right side of the screen. It breaks down the popularity of different menu categories (e.g., The Menu vs. Drinks Menu).

Note: The chart is color-coded for easy understanding (e.g., purple for The Menu and blue for the Drinks Menu).
- The admin can use the Date Range Filter to analyze which menus were most popular during specific periods.
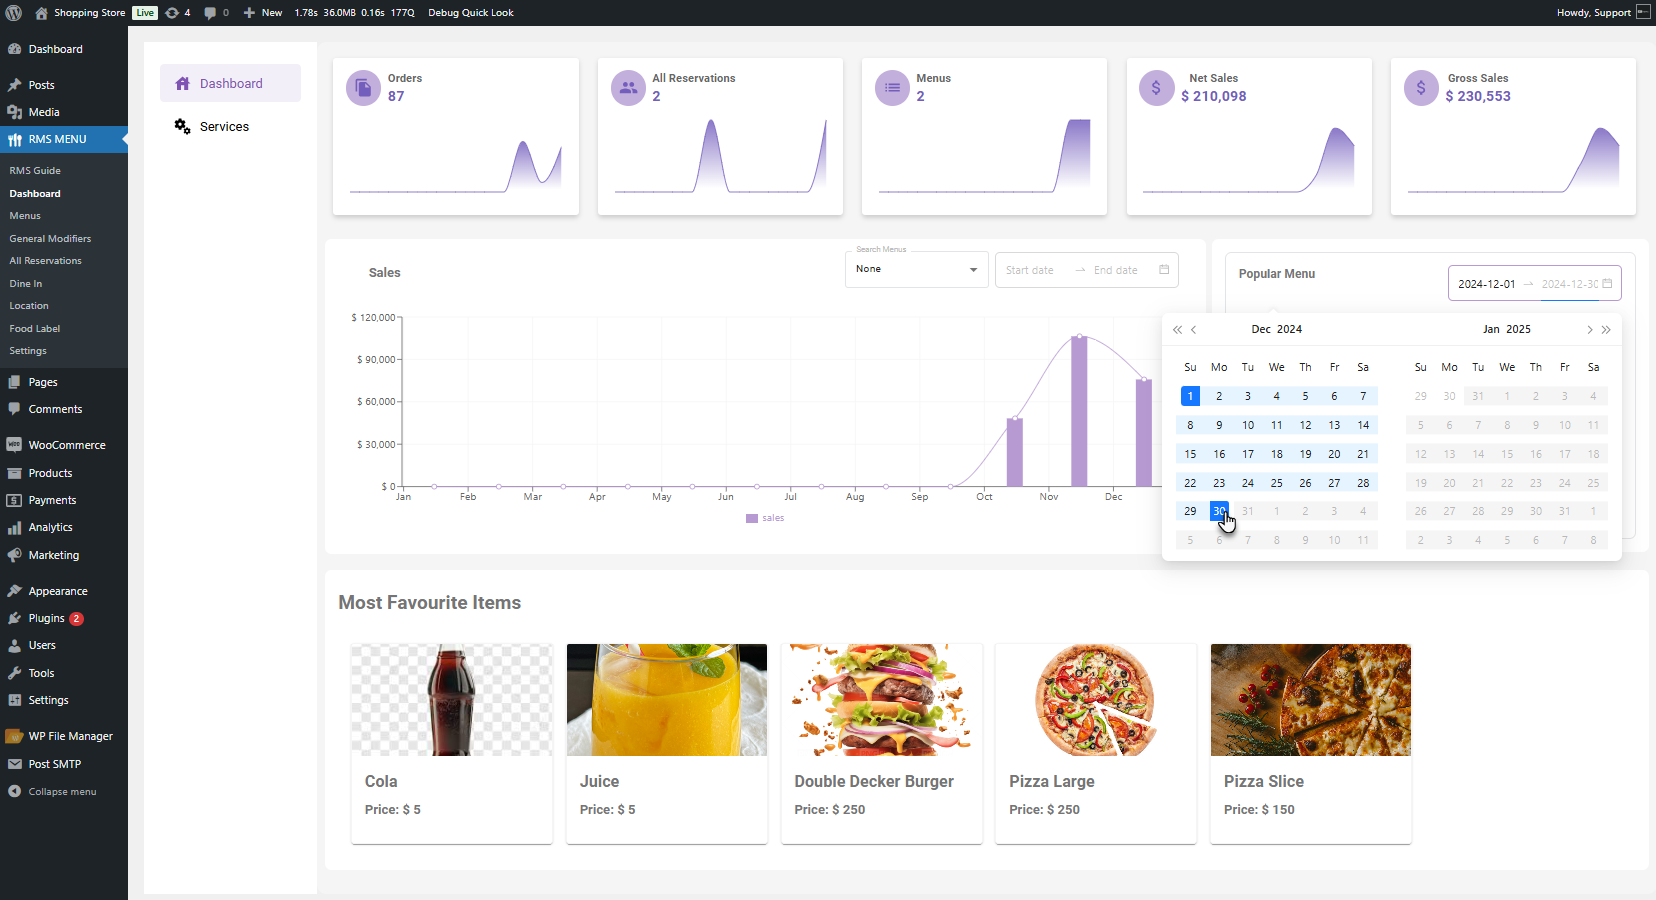
- The graph will showcase data corresponding to the selected time period.
Note: The number 30 represents the days between the start and end dates selected.
- Hover on any chart to view the details of the particular menu.
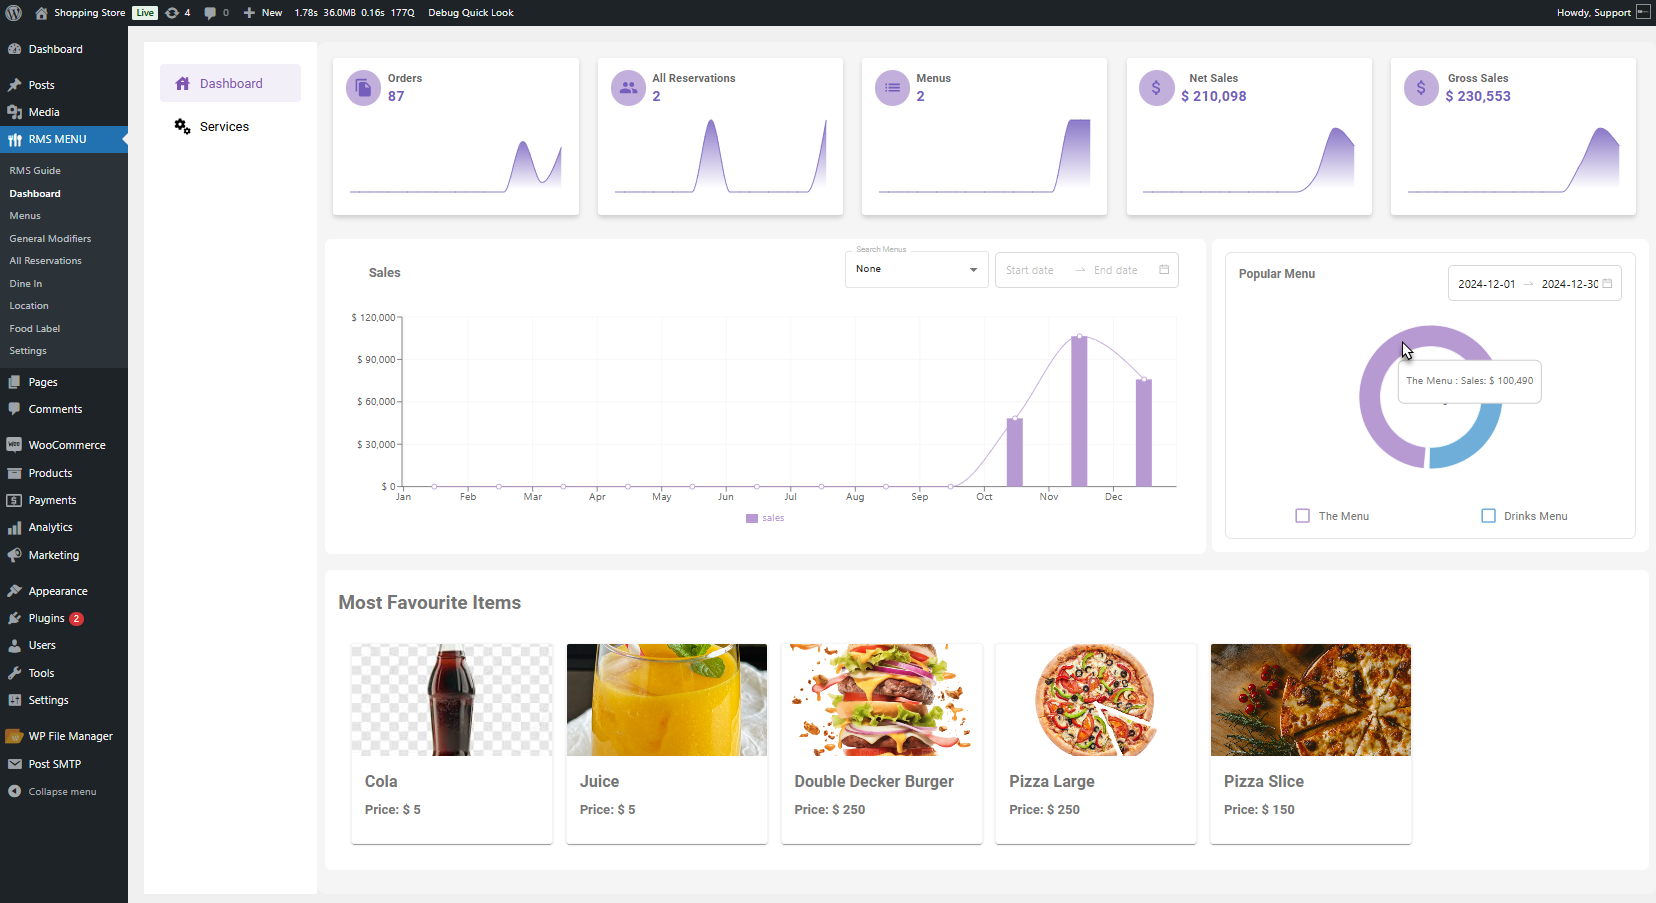
- The admin can view specific menu data on the graph by selecting the desired menu option.
Most Favorite Items
↑ Back to top- This section showcases the most popular items based on sales. It shows the products by their names and prices.

Note: The top five selling products will be listed here.
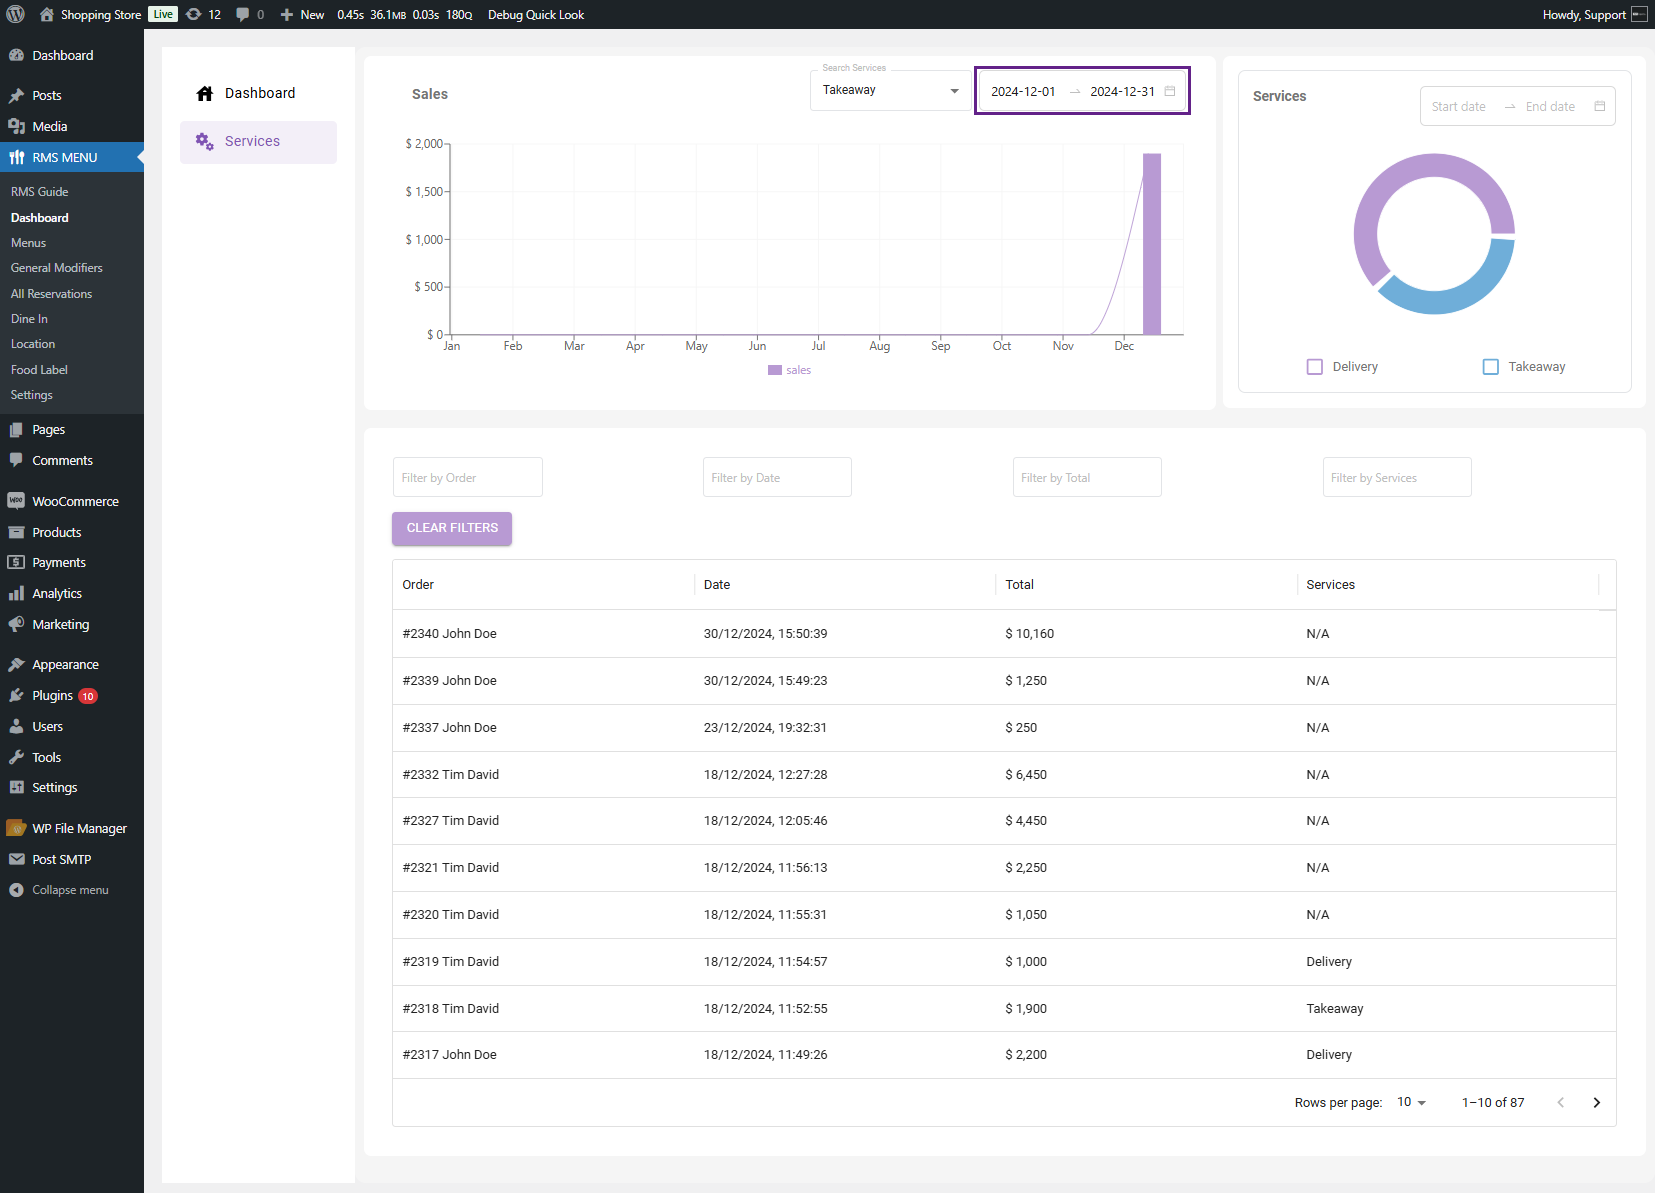
Services
↑ Back to top- Go to WordPress Admin Dashboard > RMS MENU > Dashboard > Services. The Services Dashboard provides detailed insights into your service operations, including sales trends, order details, and service types (e.g., delivery or takeaway).

- The Services dashboard is organized into three major sections.
- Sales Graph
- Services Breakdown (Pie Chart)
- Order Details Table

Sales Graph
↑ Back to top- A bar graph displaying sales performance over time (monthly from January to December).
Example: The graph highlights sales peaks in November and December, indicating higher revenue.

- There are two filters available for the admin.
- Services Filter: Choose a specific Service to view its sales trends.

- The graph will display data for the selected Service.
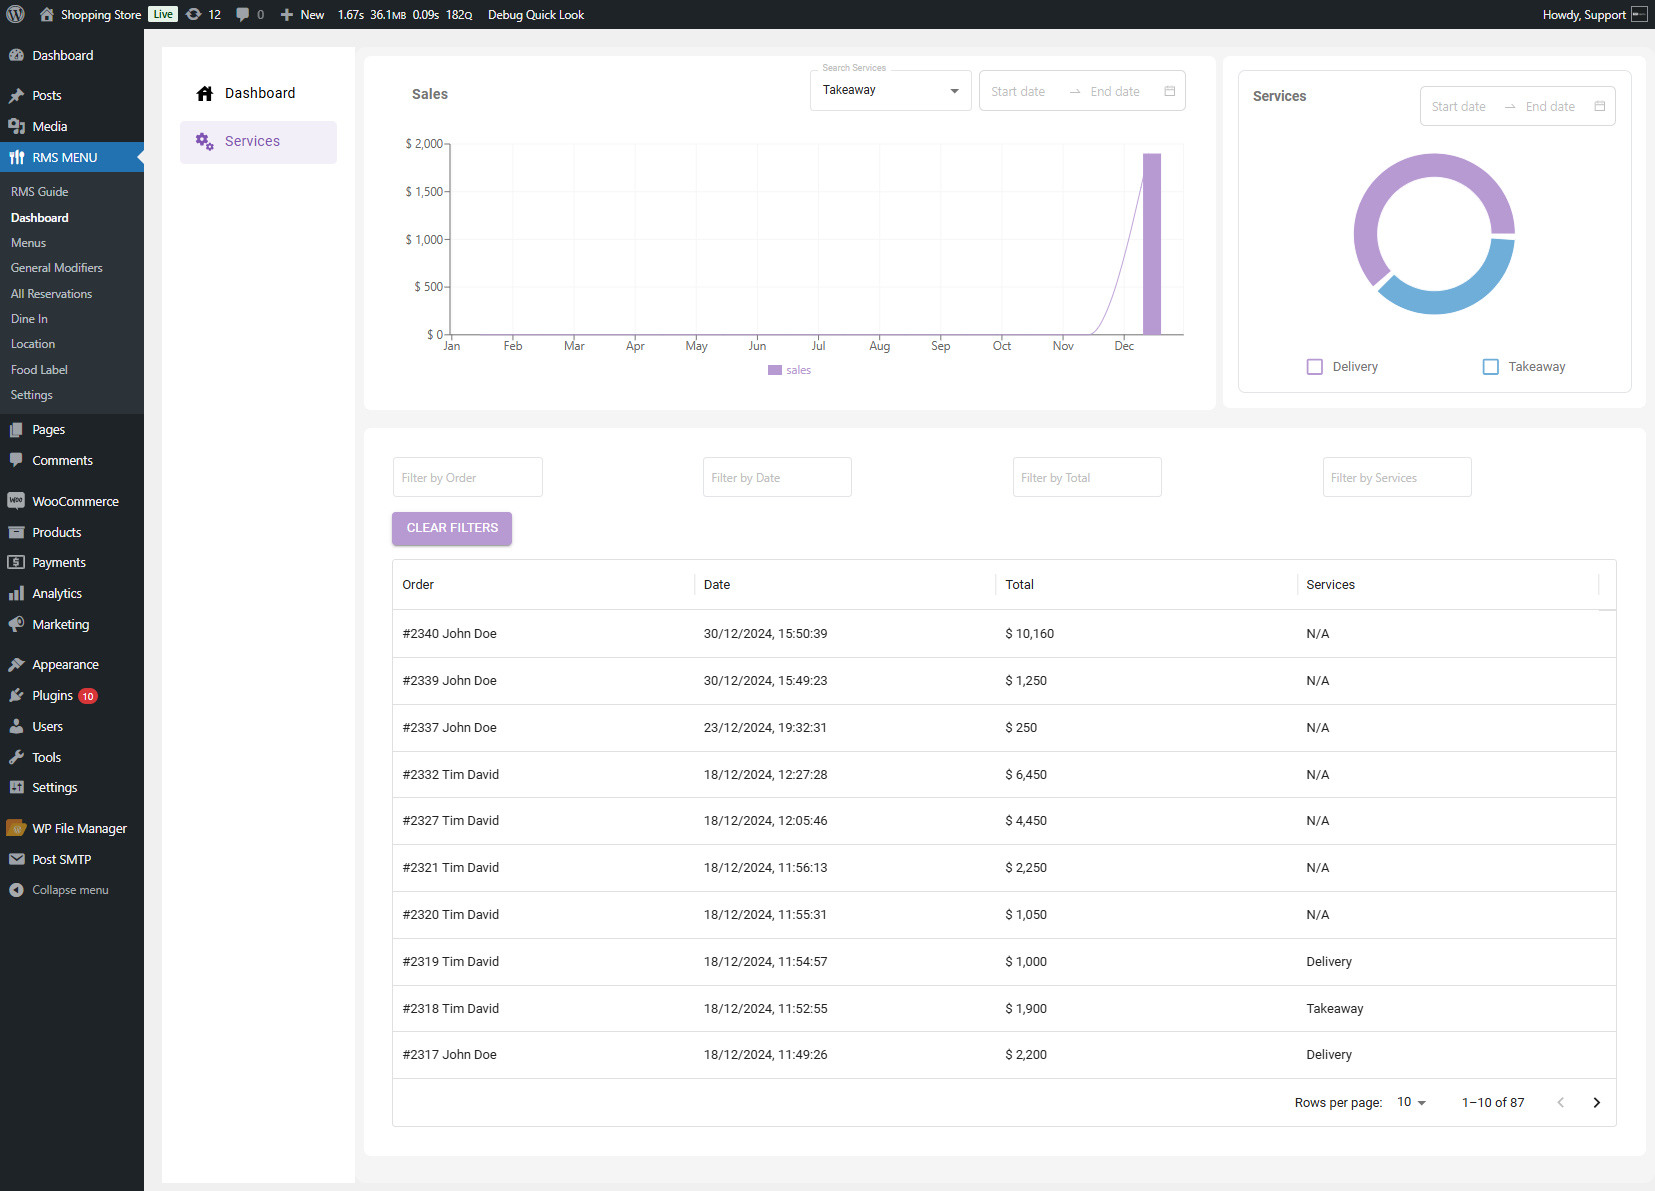
- Date Range Calendar: Select custom dates to analyze sales for a specific period. The admin can set a start and end date to display the corresponding data on the graph.
- The graph will showcase data corresponding to the selected time period.

Note: The admin can use both filters simultaneously.
Services Breakdown (Pie Chart)
↑ Back to top- A pie chart shows the service types’ percentage distribution (e.g., Delivery vs. Takeaway).

Note: The chart is color-coded for easy understanding (e.g., purple for Delivery and blue for the Takeaway).
- The admin can use the Date Range Filter to analyze which menus were most popular during specific periods.

- The graph will showcase data corresponding to the selected time period.

Note: The number 31 represents the days between the start and end dates selected.
- Hover on any chart to view the details of the particular service.
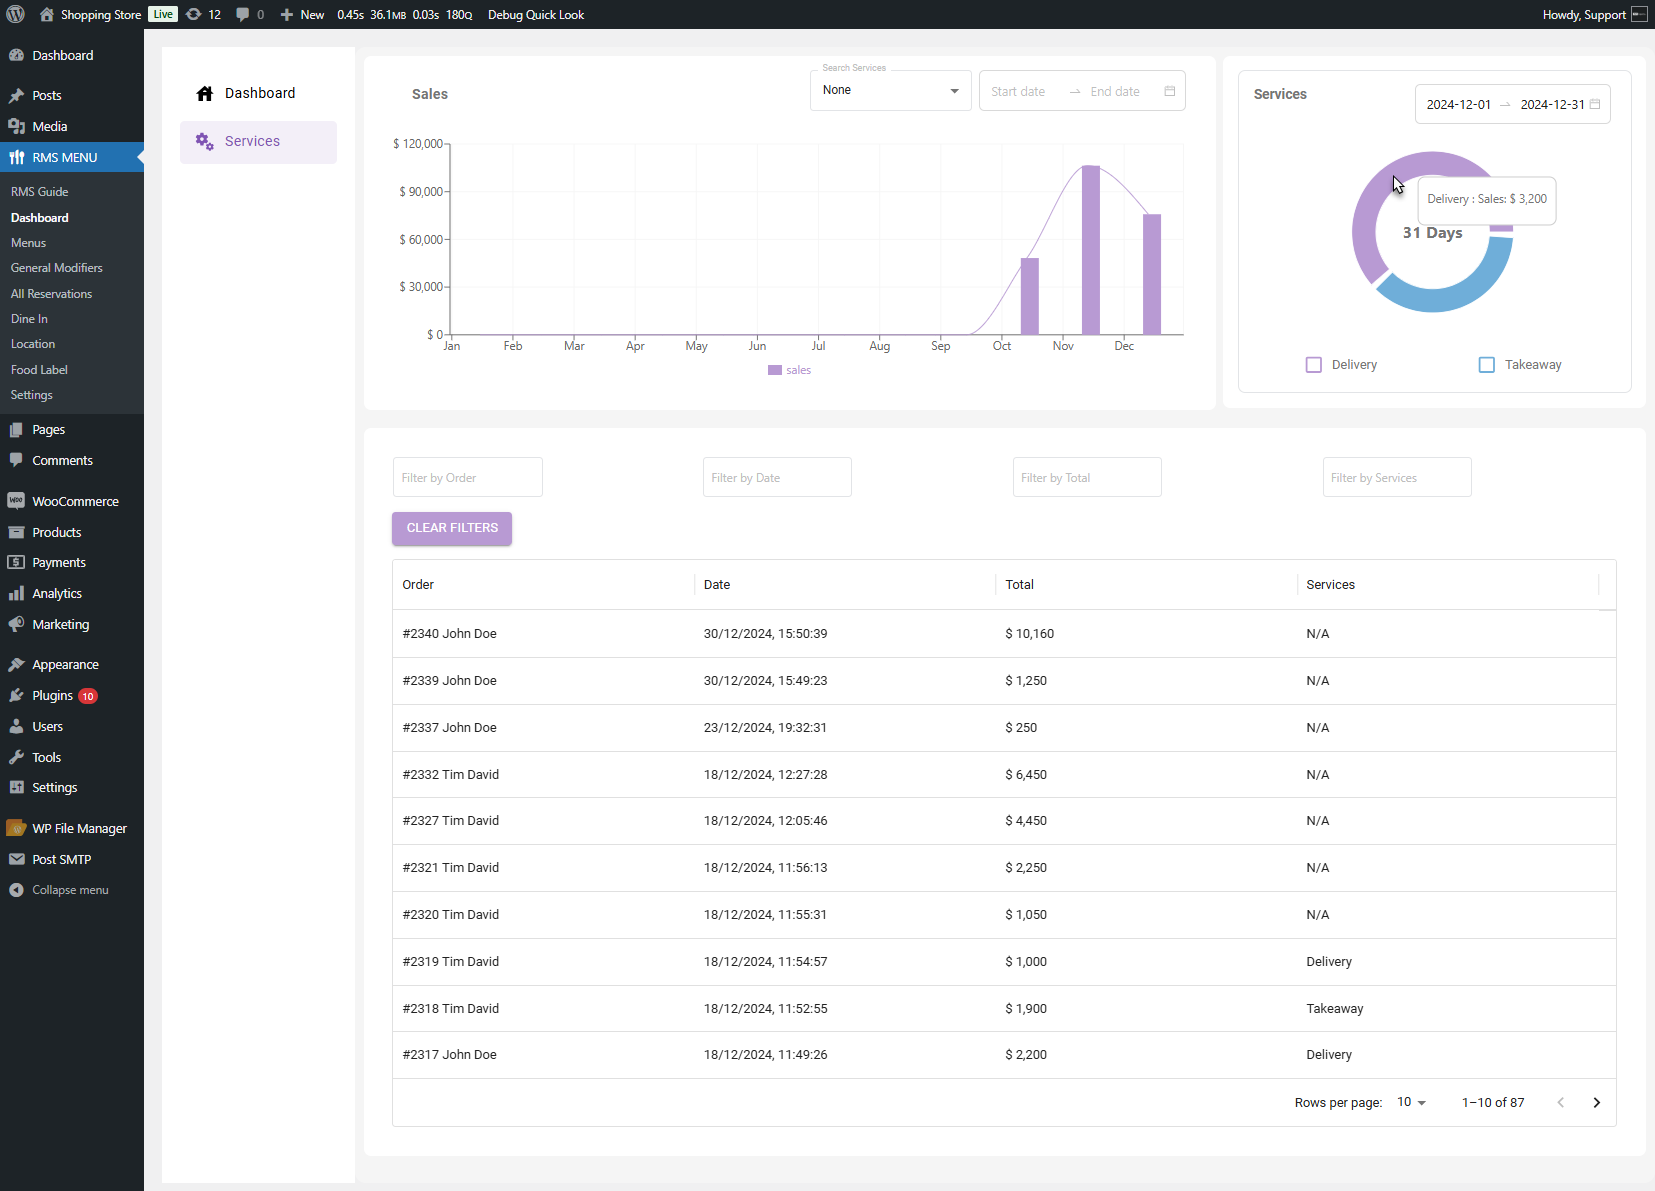
- The admin can view specific service data on the graph by selecting the desired service option.

Order Details Table
↑ Back to top- A detailed table listing all orders placed, with the following columns:
- Order Number: Unique identifier for each order.
- Date: Timestamp of when the order was placed.
- Total: The total amount for the order.
- Service Type: The type of service (e.g., Delivery, Takeaway, or N/A for undefined services).
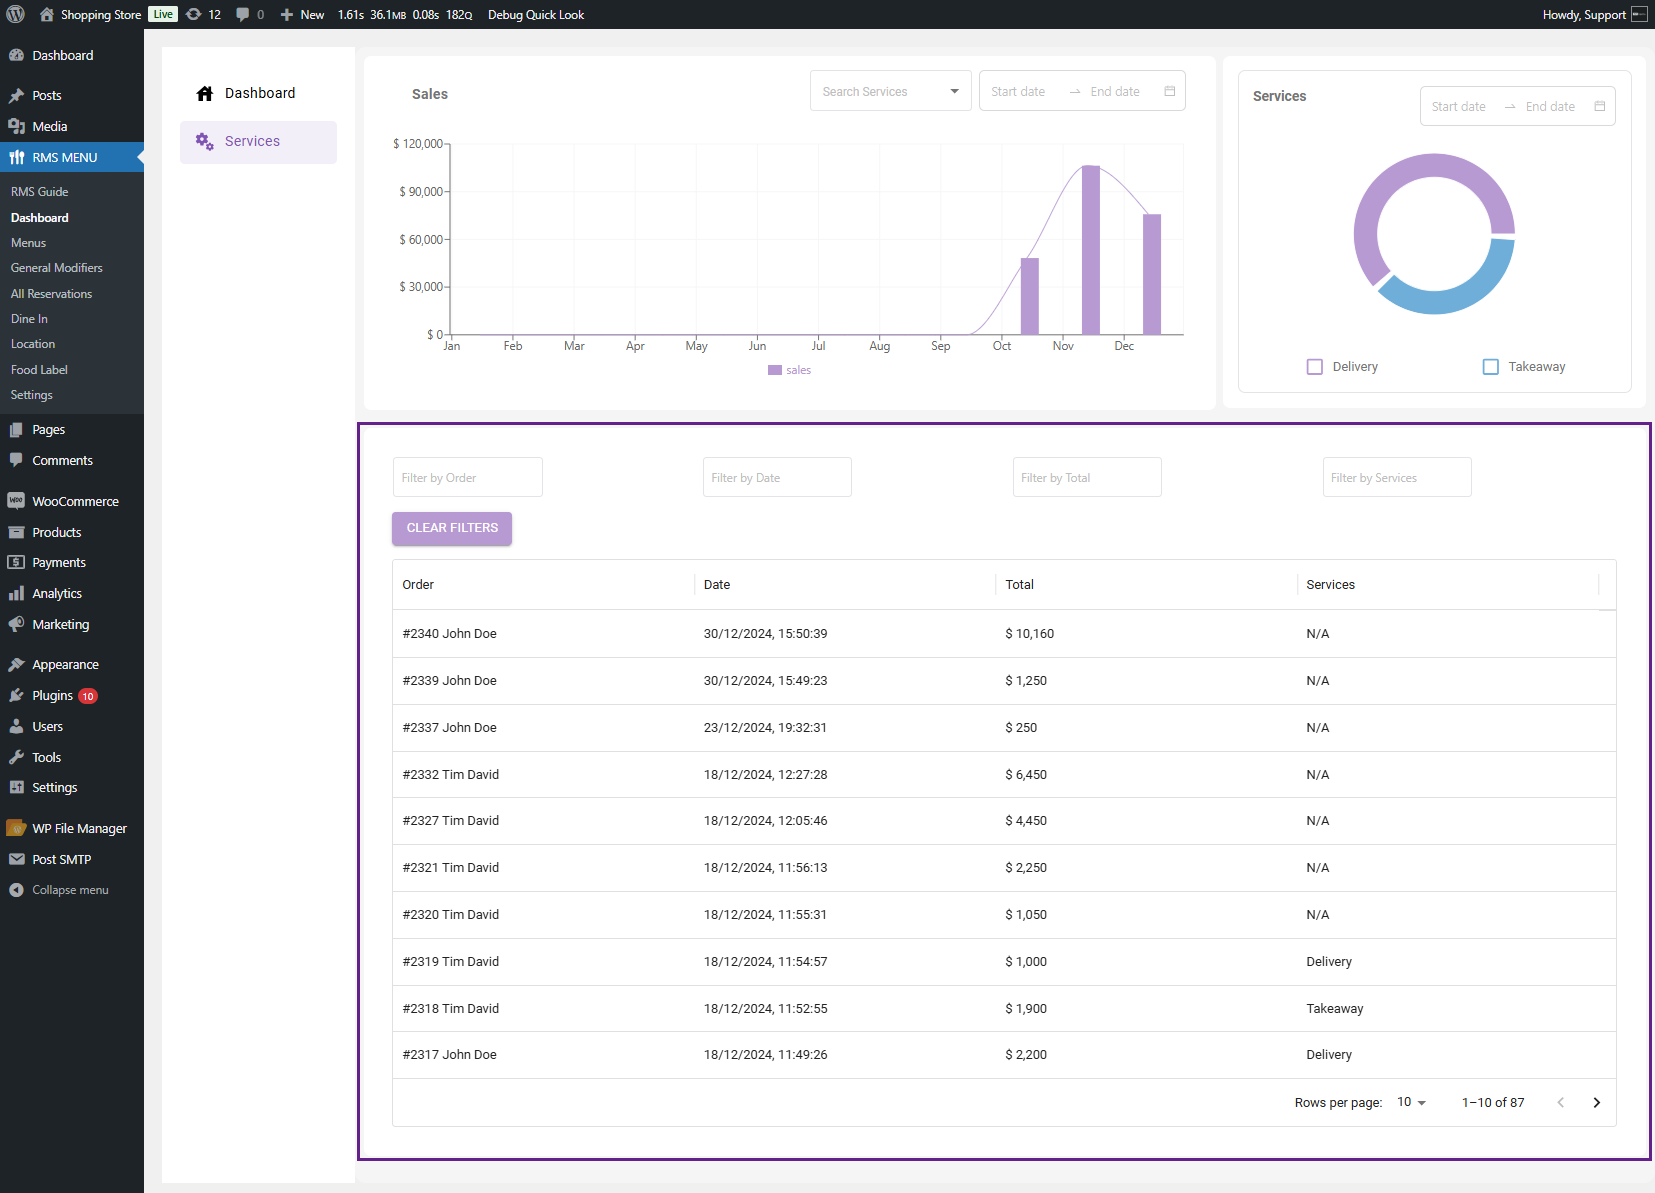
- The admin can use four types of filters to search for a specific order.
- Order Filter: Search by order number.
- Date Filter: Filter by a specific date.
- Total Filter: View orders with a specific total amount.
- Service Filter: Search by service type (e.g., Delivery, Takeaway).

- The admin can sort the table columns in ascending or descending order.
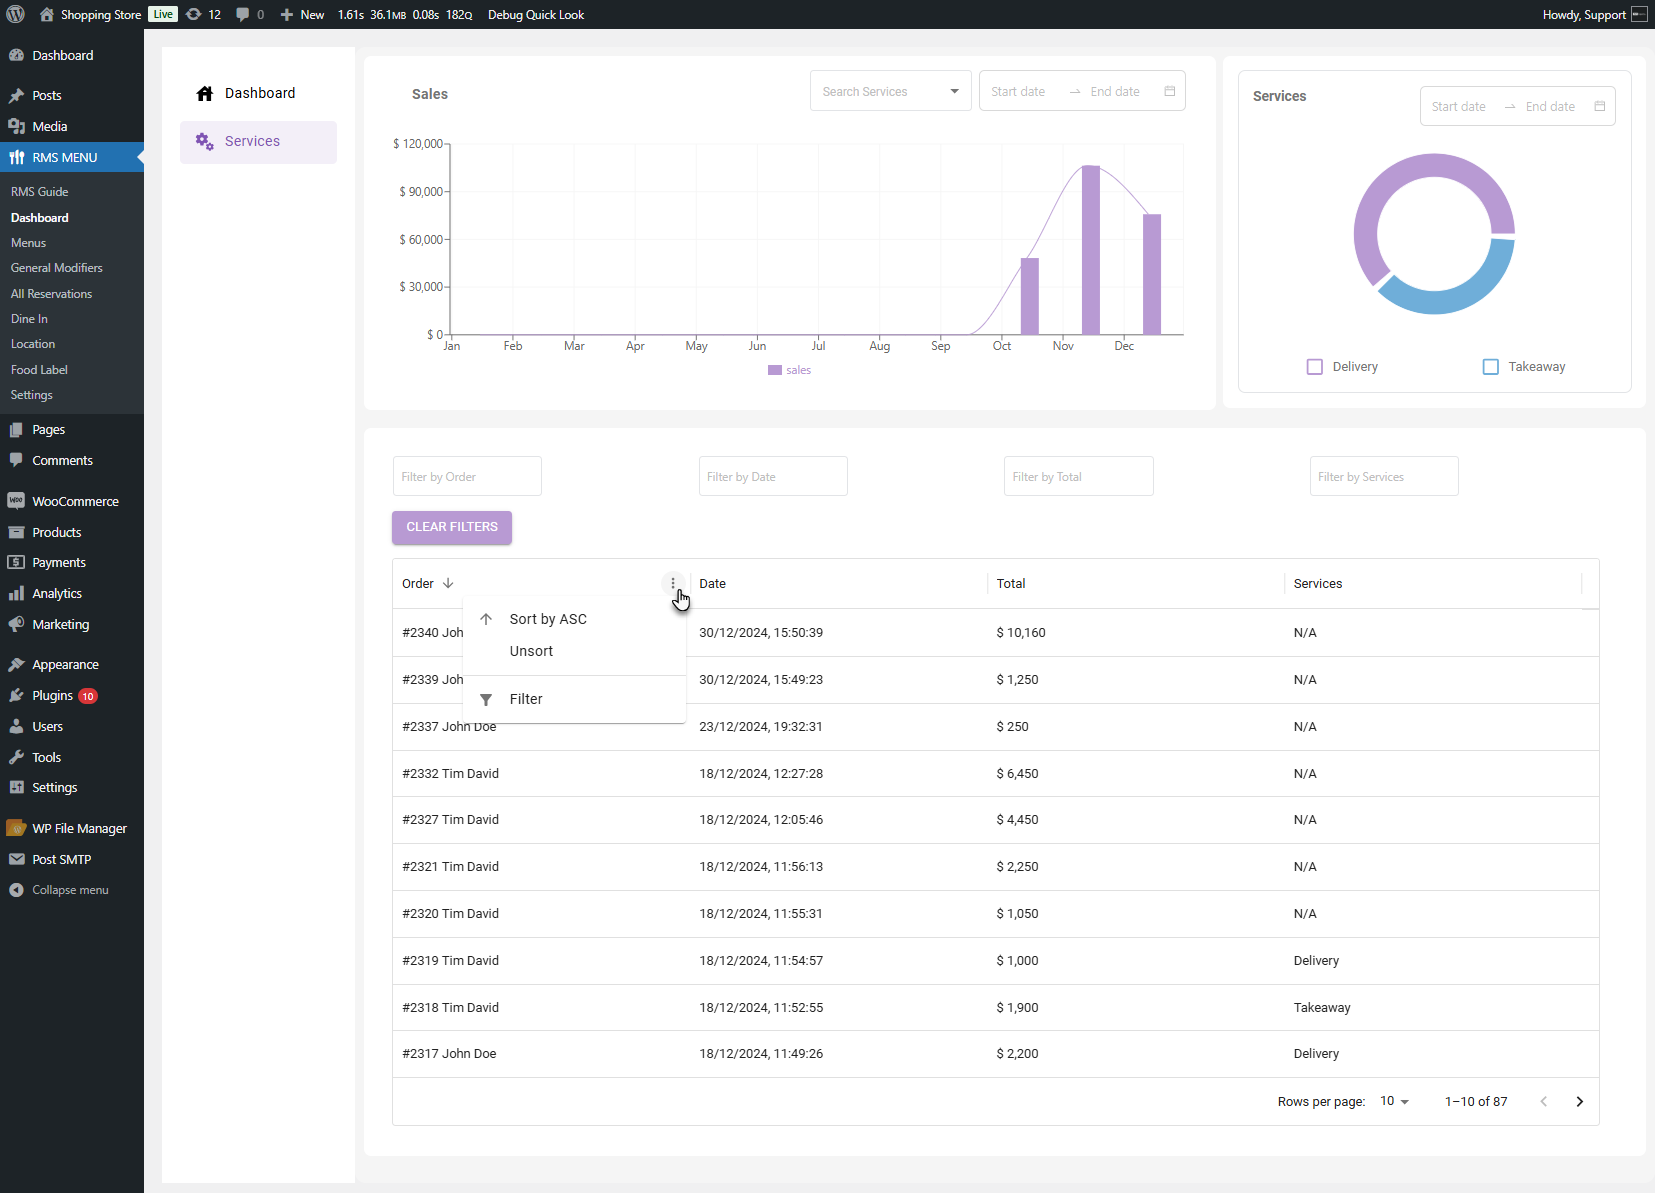
- The admin can also use the pagination feature to navigate between multiple pages of orders by adjusting the number of rows displayed per page (e.g., 10, 30, or 60 rows).

Add a New Menu
↑ Back to topNote: Always configure the Menu before configuring RMS Menu Settings.
- Once the plugin is activated, you’ll see the RMS Menu on the WP Admin Dashboard.
- RMS Menu → click on the “All Menus” tab.
- Click on the “Add Menu” button.
- You can also add the menu to the Admin Dashboard → RMS Menu → Add Menu.
- Once a menu is created, the Admin will be redirected to the Menu configuration page.
Menu Title
Add Title
- You will see an input field for the menu title on the menu configuration page.
- Add the title of your Menu.

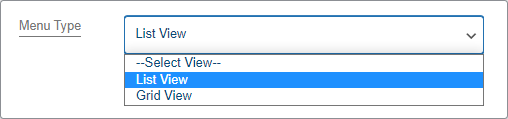
Menu Type
- On the Menu Type dropdown list, you will see two menu types:
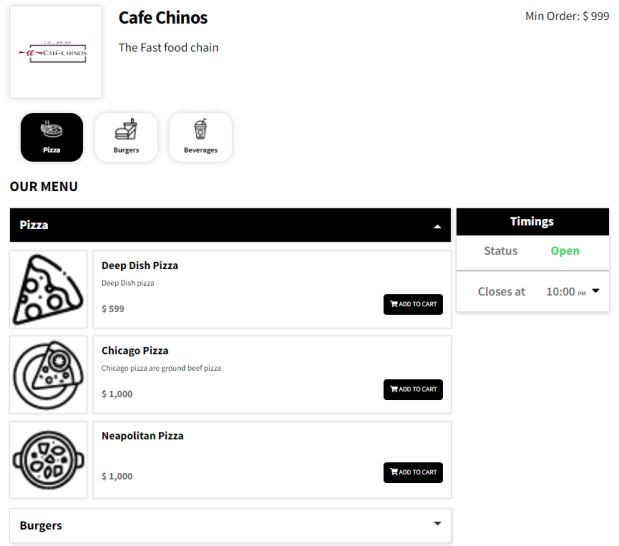
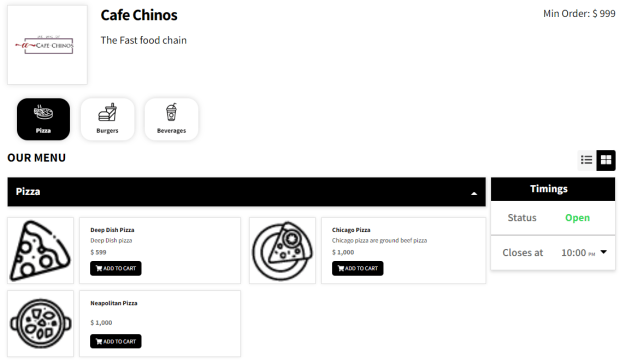
List View: Products are displayed in a list layout.
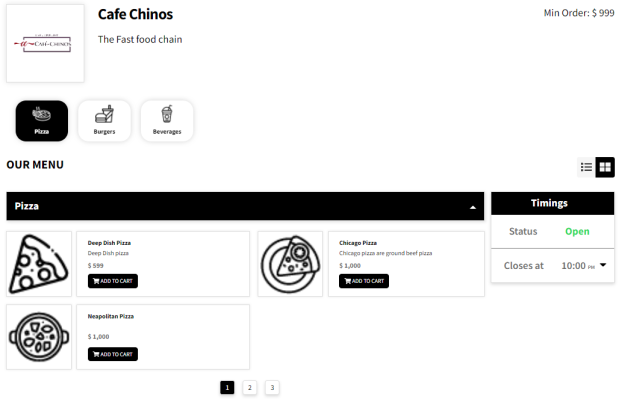
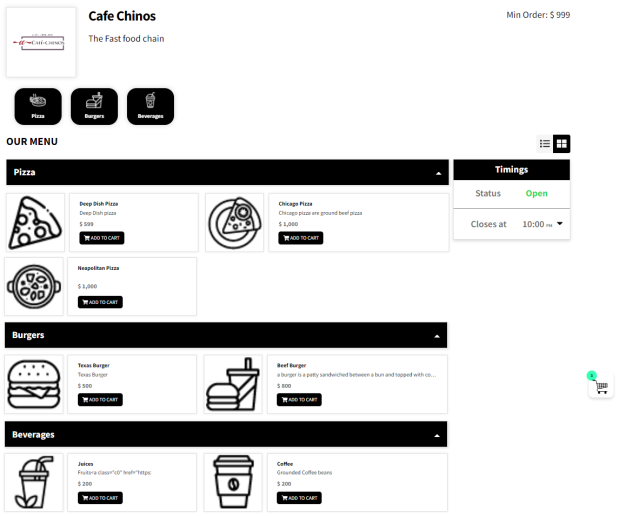
Grid View: Products are displayed in a grid layout.
Front-end Screenshot
Menu Type – List View
Menu Type – Grid View
Toggle Display
- Enabling the Toggle Display allows users to interchange the list and grid views on the front end. This option is disabled by default.
- Disabling this option will restrict users from toggling between grid and list view. The Menu type displayed on the front end would be configured in the Menu Type option.

Front-end Screenshots
Toggle Display – Enabled
Toggle Display – Disabled
Pagination (Items per page)
- You will see an input field where you can enter a number for items you want to display on a single page.

Front-end Screenshot
Display Categories
- Search the categories in the input field
- A dropdown will allow you to select the categories you want to display in the menu.
- The admin can also drag and drop selected categories to manage the sequence.
- All categories will be displayed on the menu if the input field is empty.

Front-end Screenshot
Exclude Products
Exclude products from the menu
- Enter the Product ID in the input field to exclude products from the menu.
- Enter Product ID separated by commas to exclude multiple products from the menu.
- All products will be displayed on the menu if the input field is empty.

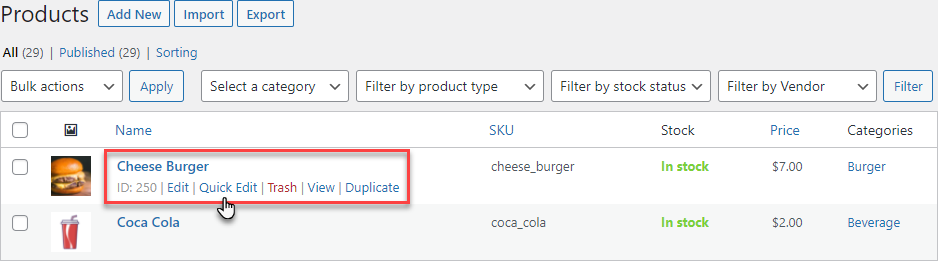
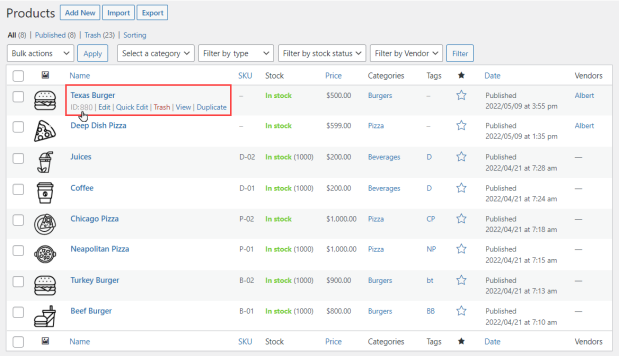
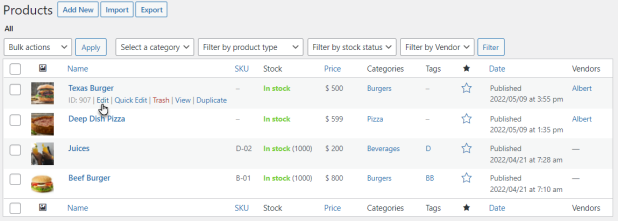
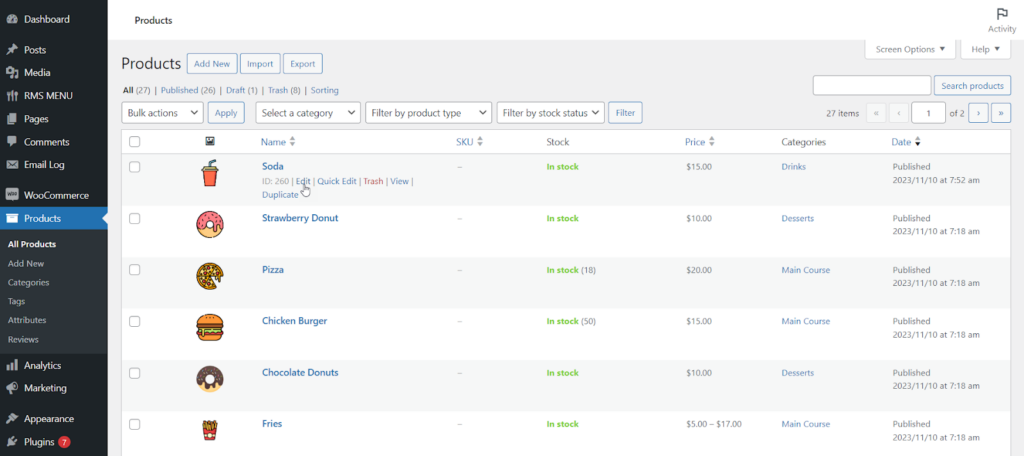
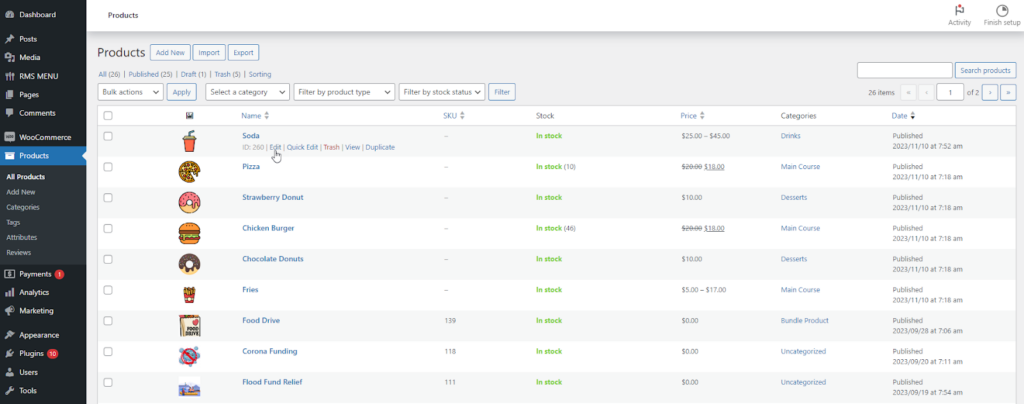
Finding the product ID
- Product ID can be found by navigating to the Admin Dashboard
- Go to Products → All Products.
- Hover on the respective item to view its Product ID.
Excluding products by ID
- As we can see, we have added the Pizza, Burgers, and Beverages categories to the Display Categories option and entered the Product IDs of both items in the Burger category.

Front-end Screenshots
Before
After
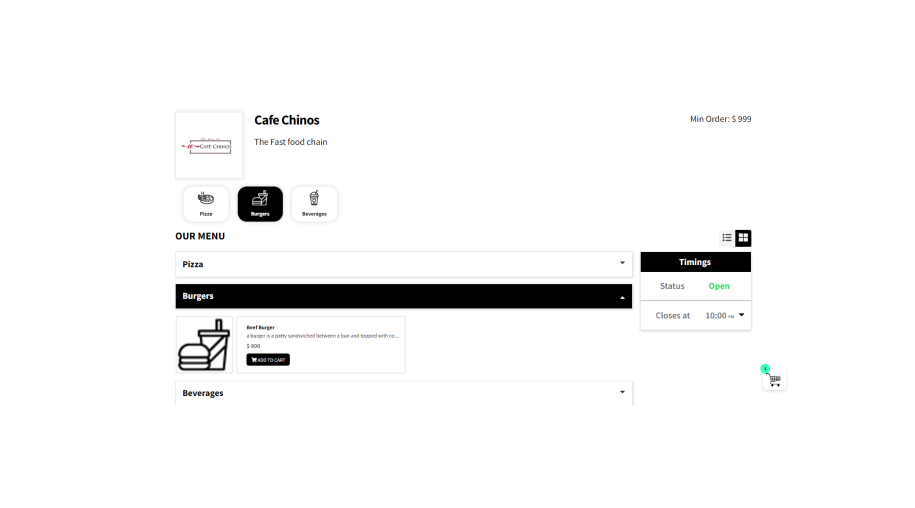
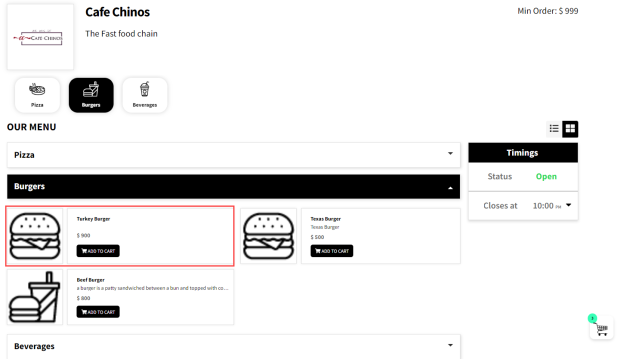
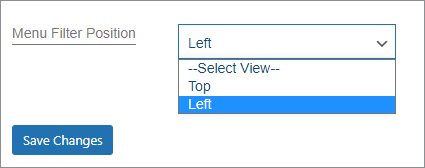
Menu Filter Position
Configuring Menu Filter and Menu Filter Position
- Enable the Menu Filter option, which will display a menu category filter on your menu. This option would be disabled by default.
- Once the Menu Filter option is enabled, you can choose the position of the Menu Filter.
- There are two options on the Menu Filter Position dropdown menu: Top view & Left View.
Front-end Screenshots
Top View
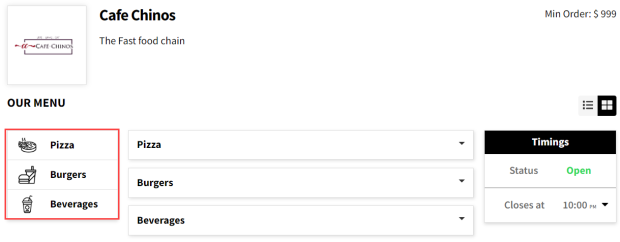
Left View
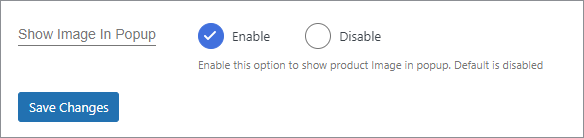
Show Image in Pop-up
- Enable this option to show the product’s image in a pop-up. By default, this option is disabled.
Front-end Screenshots
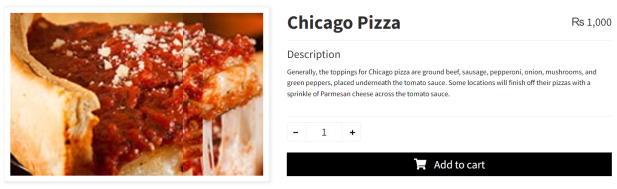
Option Enabled
- When the user visits the website, click the + sign to add the item to the cart.
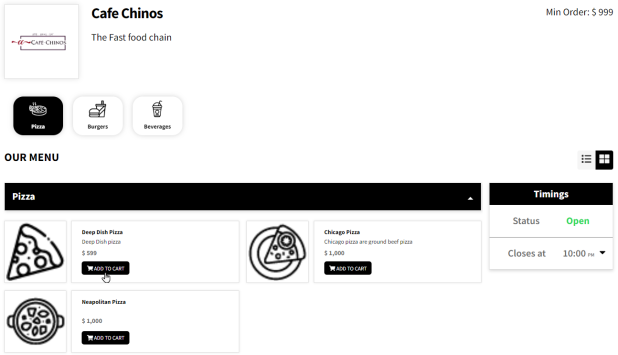
- The Image of that item would appear in a pop-up.
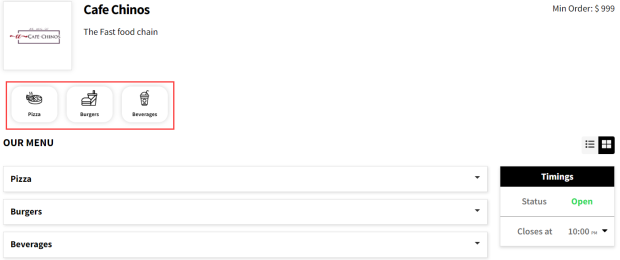
Option Disabled
- When the user visits the website, click the + sign to add the item.
- The Image of that item would not appear in the pop-up.

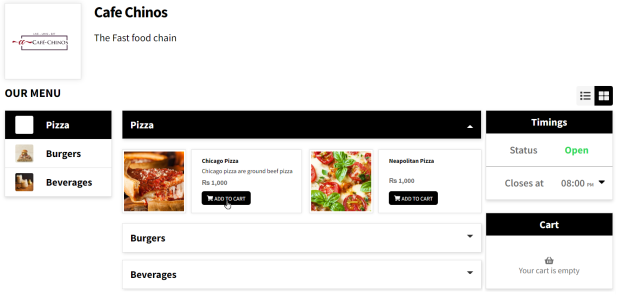
Cart Suggestions
Enable suggestions in the cart
The admin has the option to display the cross-sell products in the cart. Whichever products are selected in the cross-sells box, those products will be displayed in the cart suggested area when a user adds the main product to the cart.
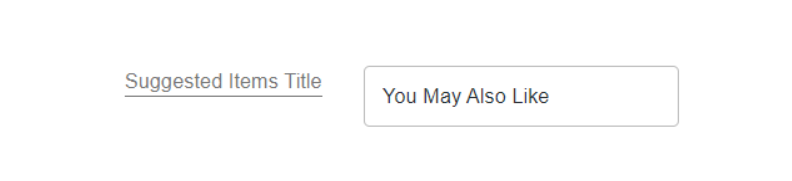
- To set up Cart Suggestion, Navigate to RMS Menu → Settings → Labels.
- Add the desired suggestion Title.
- After that user needs to add the cross-sell product to link it with the Sliding cart.
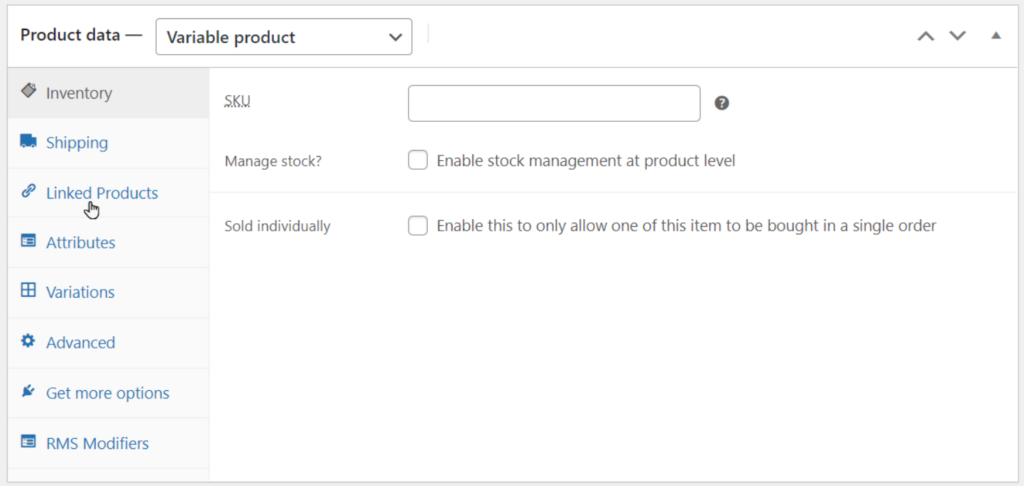
- To add cross-sell products, navigate to Woocommerce → Products→ All Product.
- Now, Select the desired product you need to edit by clicking the edit button.

- Now under Product data, click Linked Product.
- Afterward, search and select the product in the Cross-Sells textbox.
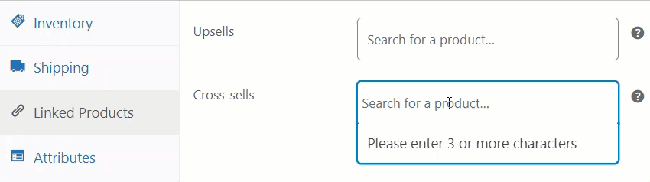
- Now click the Save Button.
Note: The linked product settings will apply to simple and variable products. If multiple products are selected in the cross-sells section, the products in the suggested items section in the cart will appear as a carousel for users to swipe.
Front-end Screenshot
Menu Shortcode
- Every menu has a unique shortcode, which is visible in the Menu Shortcode section on the right side of the menu configuration page.
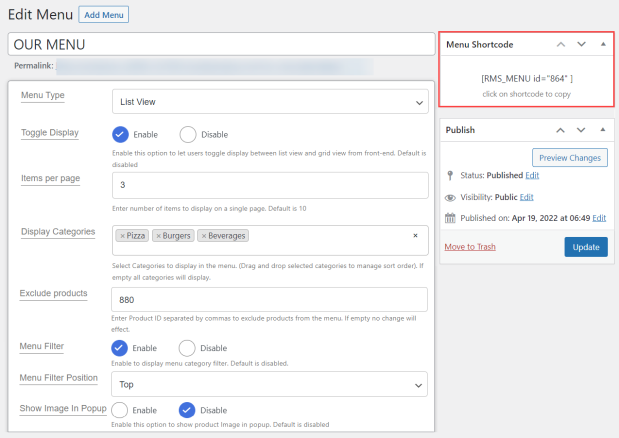
- It is also present on the All Menu page beside each menu.

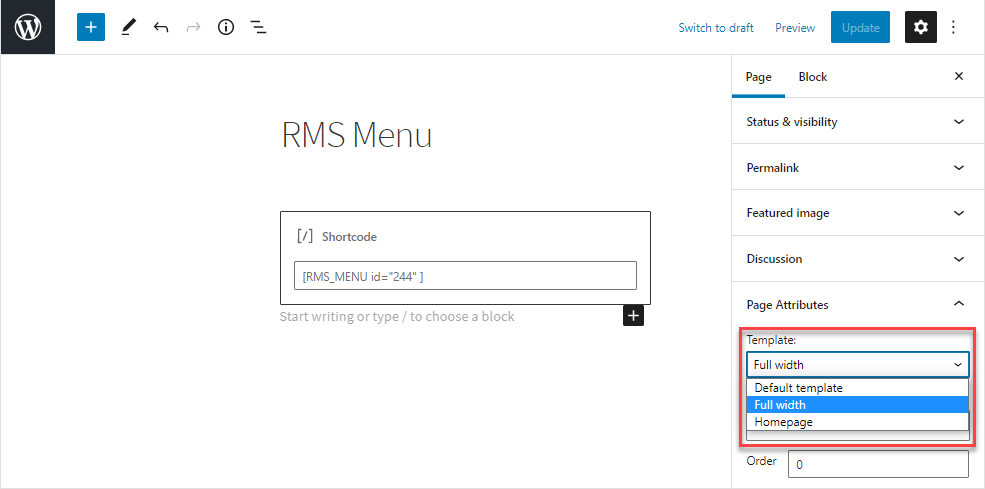
Display your menu using a shortcode
- Go to Admin Dashboard → Page → Add New.
- A new page would open.
- Add the Title of the page.
- Click on the sign + to add blocks.
- Select the Shortcode element.
- Now paste the shortcode of your menu.
- Click on the Publish button.
Note: Always set the Page template to Full Width in the Page Attributes section when using a Menu Shortcode.
Front-end Screenshot

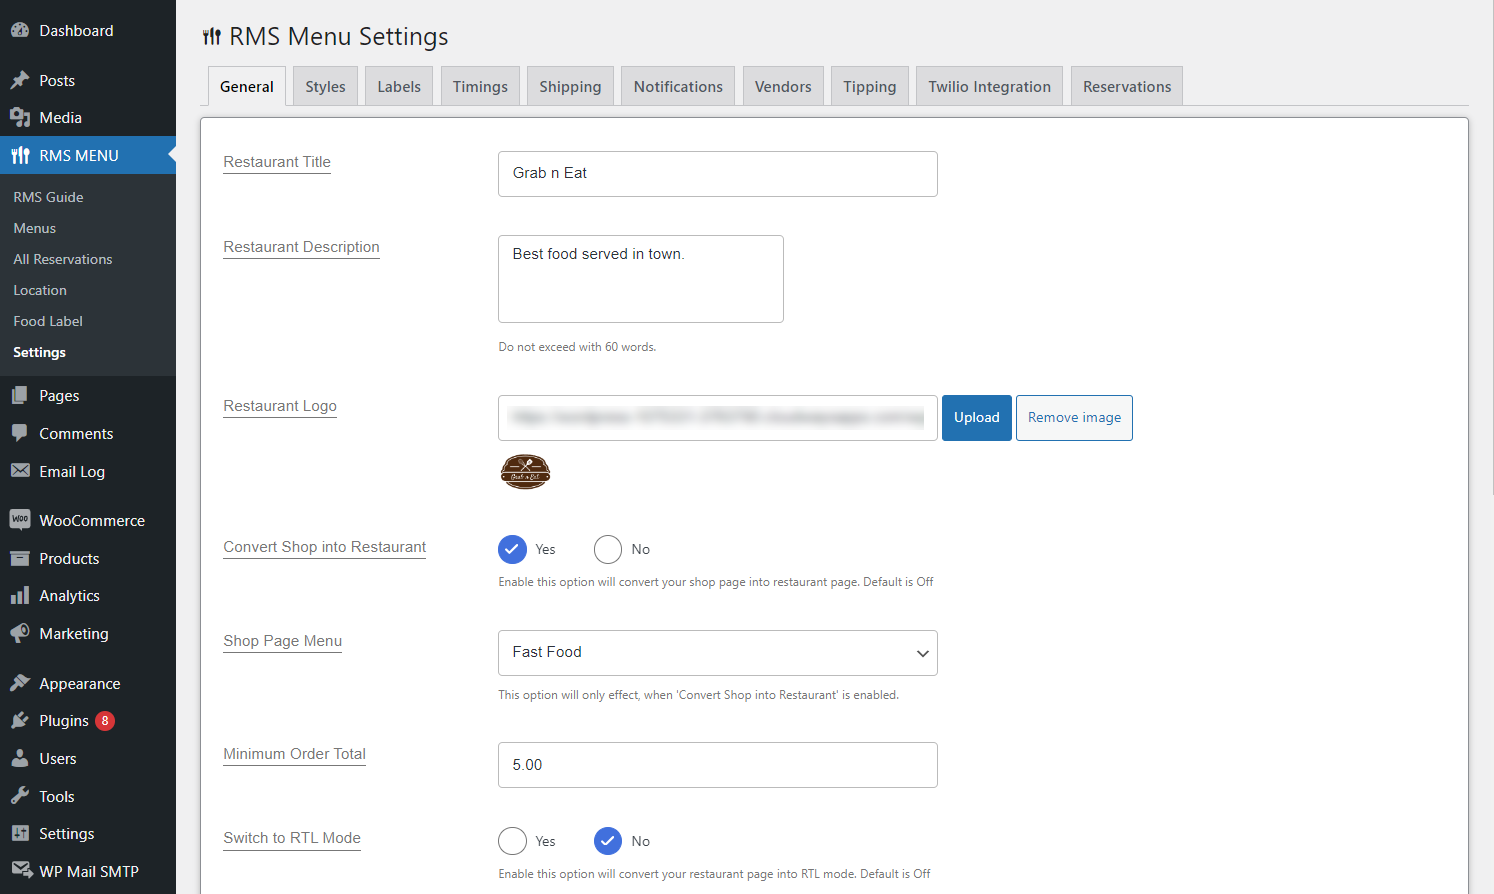
General Menu Settings
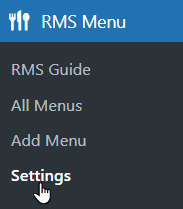
↑ Back to top- Go to Admin Dashboard → RMS Menu → Settings.
- Tabs would appear on the RMS Menu Settings page.

Restaurant Title
↑ Back to top- Add the title of your restaurant in the Restaurant Title input field.

Restaurant Description
↑ Back to top- Add the description of your restaurant in the Restaurant Description input field.

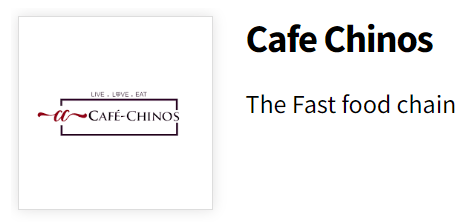
Restaurant Logo
↑ Back to top- Add the logo of your restaurant by uploading an image.
- Click on the “Upload” button.
- Select the image from your media or browse to upload the image from your device.
- Click on the “Select” button.

Front-end Screenshot
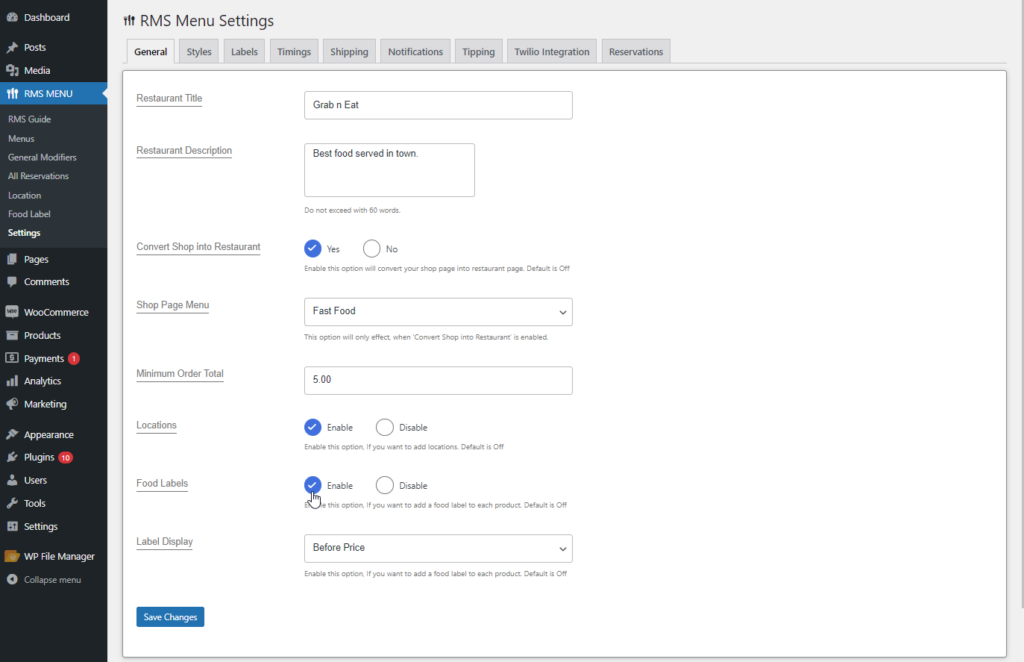
Shop Page Menu
↑ Back to topConverting the shop page into a food menu
- Enabling this option will convert your shop into a restaurant. It will be disabled by default.
- This option will allow the Admin to choose the Shop Page’s Menu from a dropdown list.

Front-end Screenshot
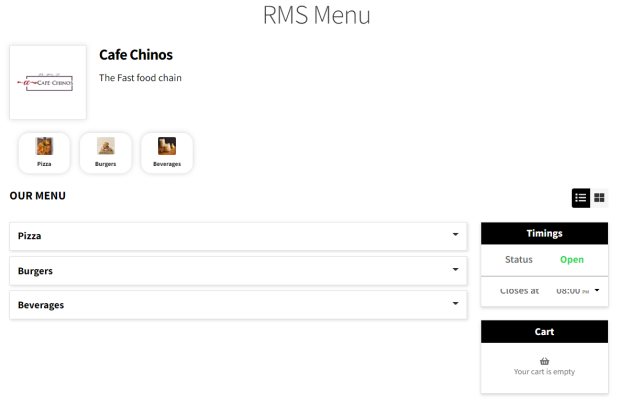
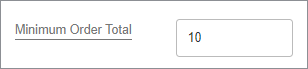
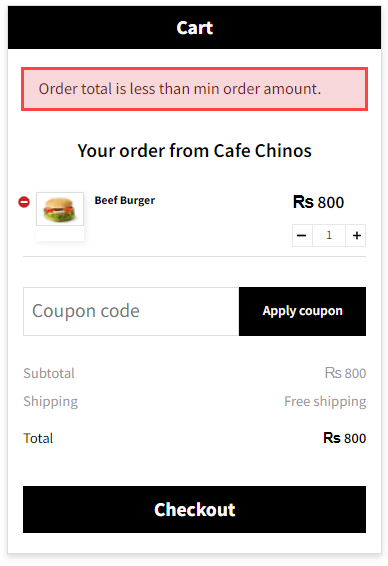
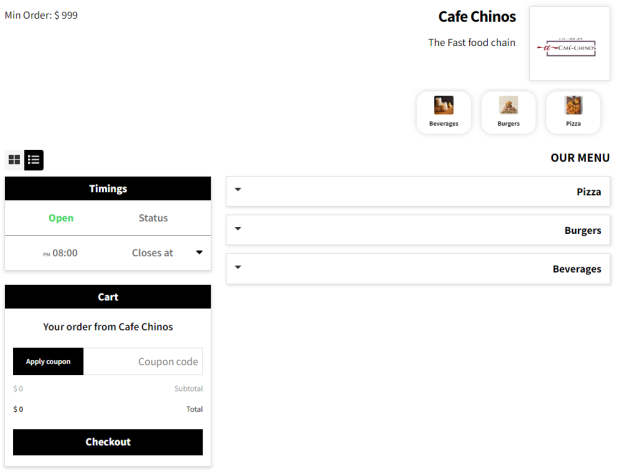
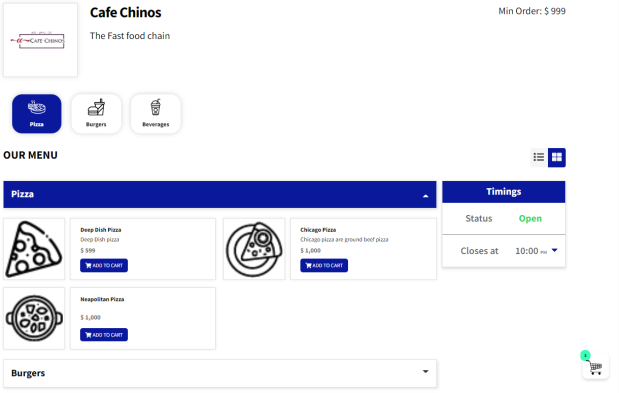
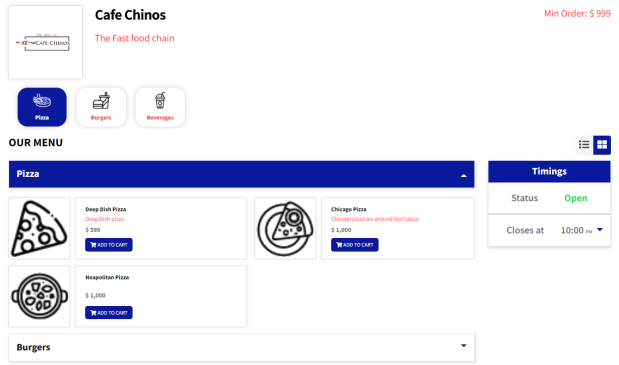
Minimum Order Total
↑ Back to topSetting up a minimum order total restrictions
This option allows you to set a Minimum Order Total, any order less than this total will be rejected at the cart.
- Enter a number in the minimum order total input field.
- It will be visible on the top right corner of the menu page.
Front-end Screenshot
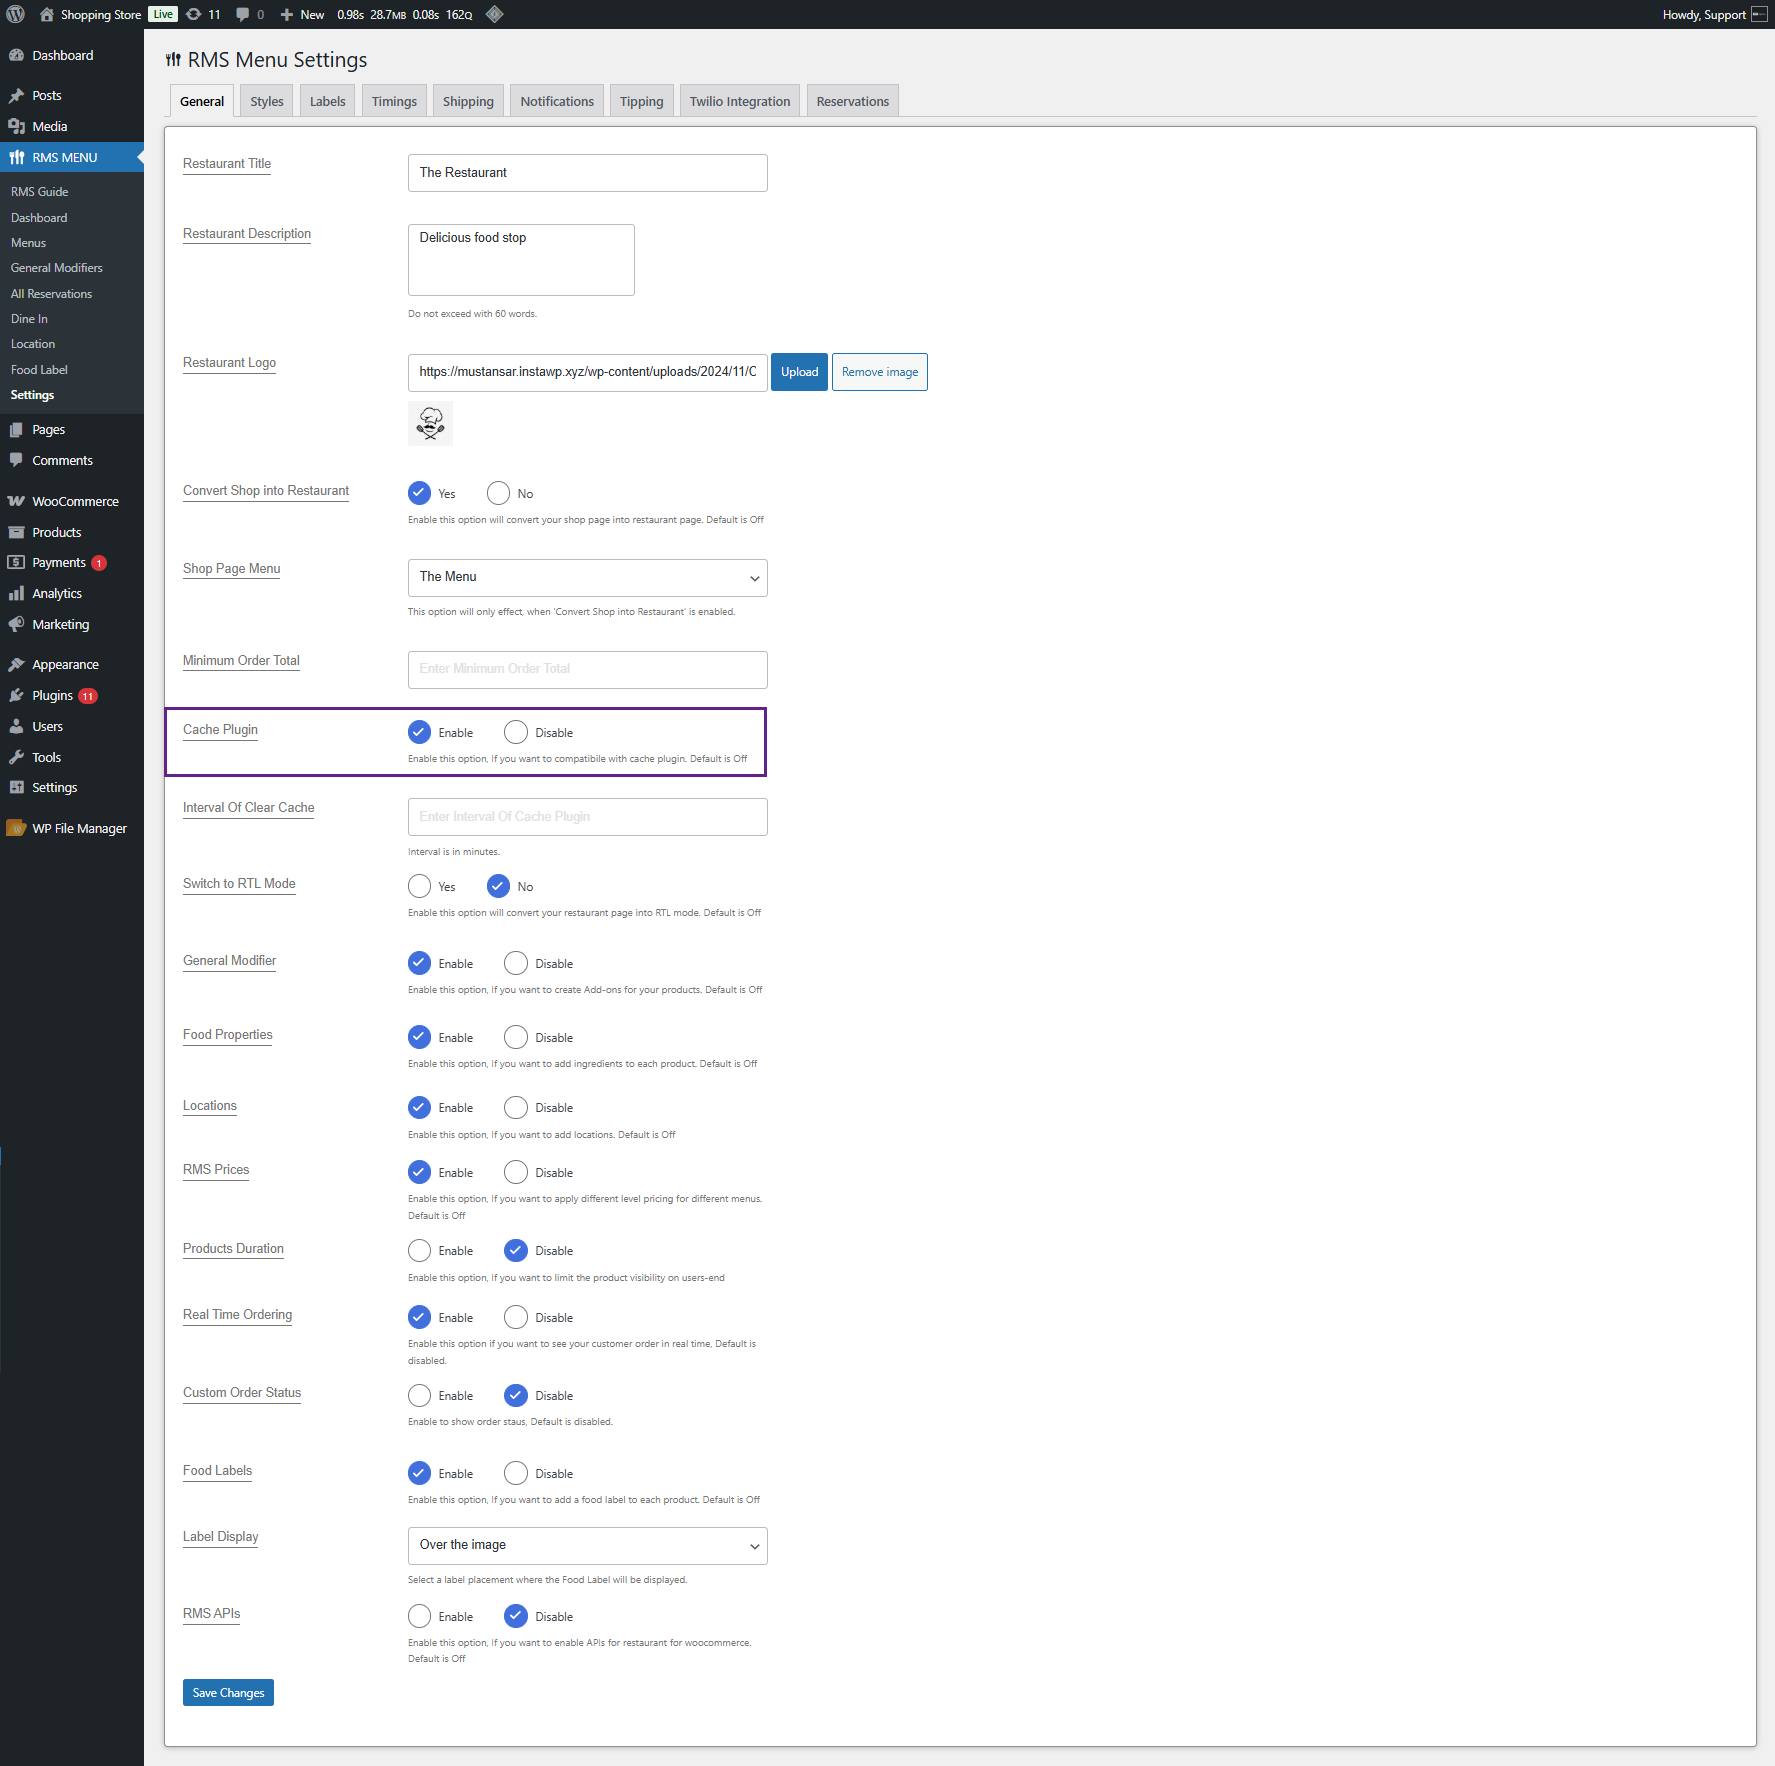
Cache Plugin
↑ Back to top- Navigate to the WordPress Admin Dashboard > RMS MENU > Settings > General.
- Locate and enable the Cache Plugin option. Enabling the Cache Plugin option allows compatibility with Cache Plugins( LiteSpeed Cache and WP Rocket ). This ensures the RMS plugin functions appropriately without any cache-related issues.
Switch to RTL (Right-to-Left) Mode
↑ Back to topRTL (Right-to-Left) mode changes the direction of the language used in the food menu. This is usually used in languages written from right to left (Arabic, Hebrew, etc.). It will be disabled by default.
- Select the radio button labeled “Yes“.

Front-end Screenshot
General Modifiers
↑ Back to topEnable General Modifiers
- You will find the option to enable or disable General Modifiers in the General Settings tab.
- Once the General Modifier option is enabled, click the Save Changes button.

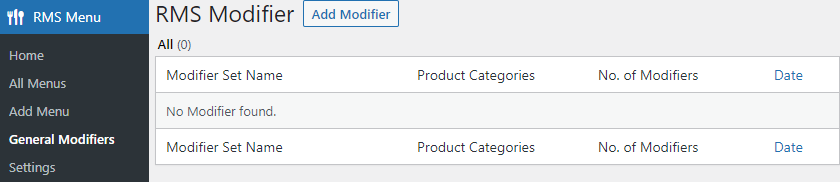
- A new option titled General Modifier will appear in the Dashboard.
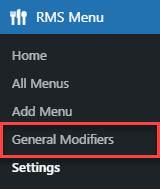
- Click on the General Modifier option on the Dashboard.
- Click on the Add Modifier button to create a new modifier.
Modifier Name
- Create the name of your Modifier by entering text in the input field.

Modifier Description
- Set the description of your Modifier by entering text in the input field.

Product Categories
- Select Product Categories from the dropdown list.
- You can choose multiple Product Categories for every modifier.

Display Type
- Choose the display type of the Modifier.
- You can choose between the Select box, Checkbox, and Radio Button types.

Is Required?
- If you choose “YES” as your option, then the user will not be able to complete his order until he/she has selected this modifier.
- If you choose “NO” as your option, then the modifier will become an optional field.

Modifier Options
- Add the name and price of your Modifier option.
- You can add more modifier options by clicking the Add Option button.
- You can also delete any modifier by clicking on the Trash icon next to each one.
- Click on the Publish button to save your modifiers and apply changes.

Front-end Screenshot
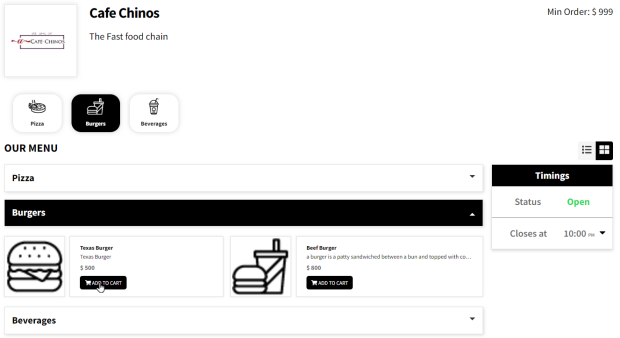
- Select the Product category.
- The category will expand, and the products will appear.
- Click on the sign beside the image of the item.
Assigning Modifiers to Products
- Admin can also assign modifiers to a product by navigating to Admin Dashboard → Products → All Products.

- Hover on the respective item and click on the Edit option.
- Go to the Product Data section and navigate to the RMS Modifiers tab.
- Select the Enable radio button and select the modifier from the dropdown list.
- Once done, click on the Update button.

Food Properties
↑ Back to topEnable food properties
- The admin will have the option to set food properties for any product. To set up, navigate to RMS → Settings → General.

- Enable the Food Properties

- Click Save Changes.
- Now, navigate to Products → All Products
- Click Edit.
- Under product setting, navigate to Product data and select Food Properties
- Now click the Add More Button.
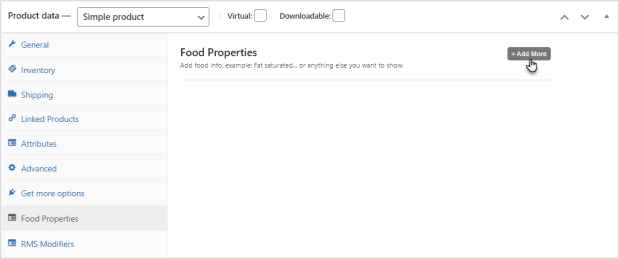
- Once done, set the desired food properties and their values.

Note: Select the red delete icon beside the text box to delete the food properties.
- Now, Click the Update button.
Front-end Screenshot
Location
↑ Back to topAdmin can now set the Location. When a customer on the front end visits the restaurant page, a popup will appear with the location dropdown displaying all the locations. Users can select the location, and a menu related to that location will be displayed on the customer end.
- Navigate to the Dashboard => RMS MENU => Settings => General.
- Navigate to the Locations in General tab.
- Enable the Locations option.
- Click on the Save Changes.

- After the Locations option is Enabled, the Location option will appear on the left-sidebar in RMS MENU.
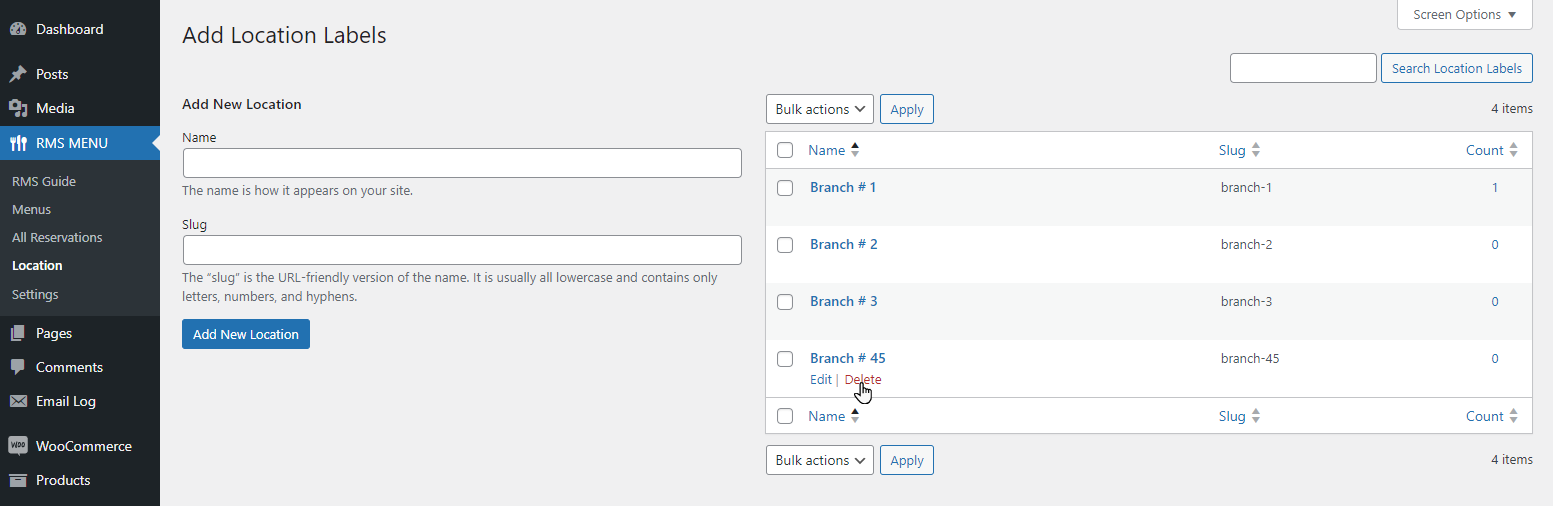
- Navigate to the Dashboard => RMS MENU => Location.
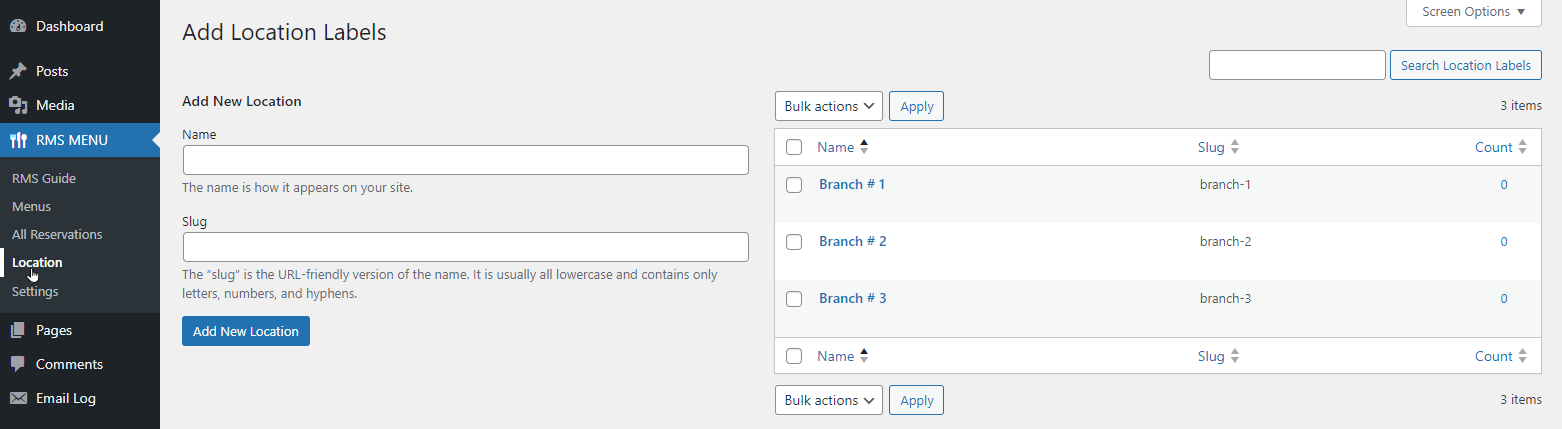
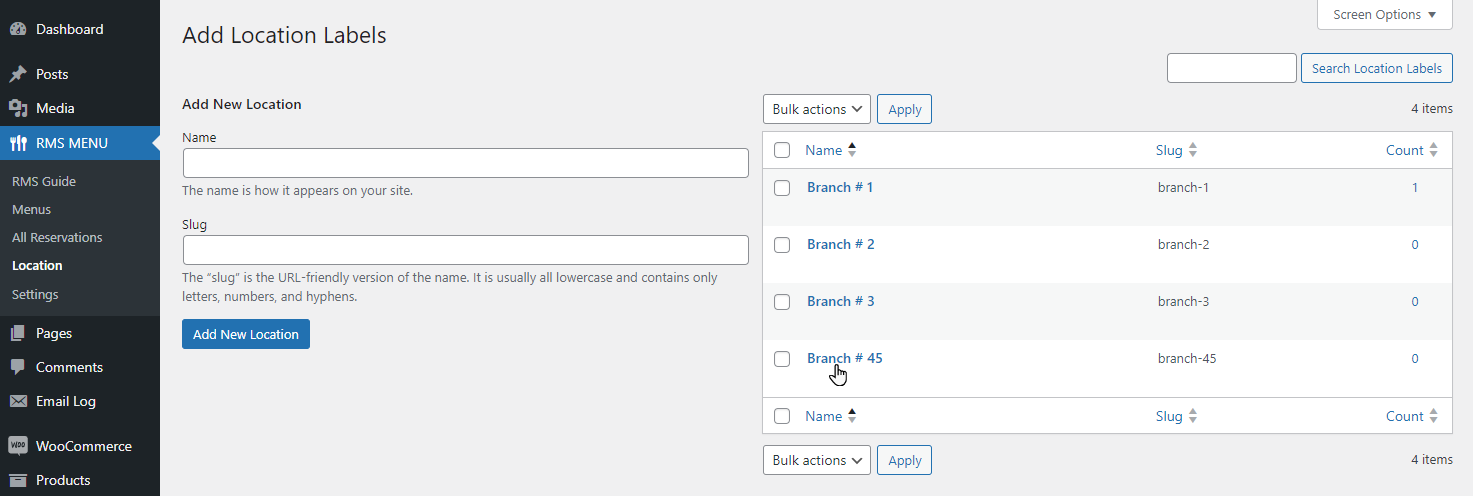
- Admin can Add New Location from the left side; after clicking on Add New Location, it will appear on the right side of the window in the table.
- Navigate to the Add New Location => Name.
- Enter the location name in the Name text box.
- Enter the Slug in the text box below slug.
- Click on the Add New Location button.
- Admin can Edit any location in the table.
- Hover the location in the location table.

- Click on the Edit button.
- Admin can edit the Name and Slug of location.
- Click on the Update button.
- Whatever the changes made by the admin will appear in the Location table.
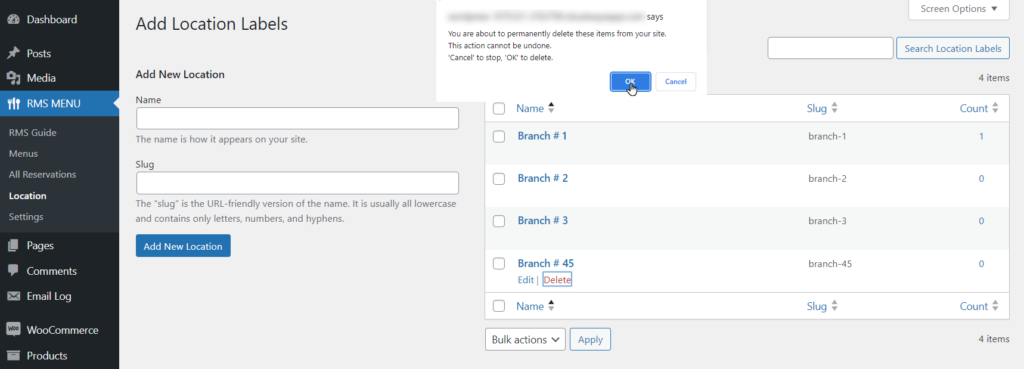
- Admin can delete the individual location from the location table.
- Hover on the location in the location table.
- Click on the Delete button.
- An alert box will appear, click on Okay button to delete it completely.
- To link a menu with a location, navigate to the Dashboard => RMS MENU => Menus.
- Click on the Add Menu or Edit any Menu.
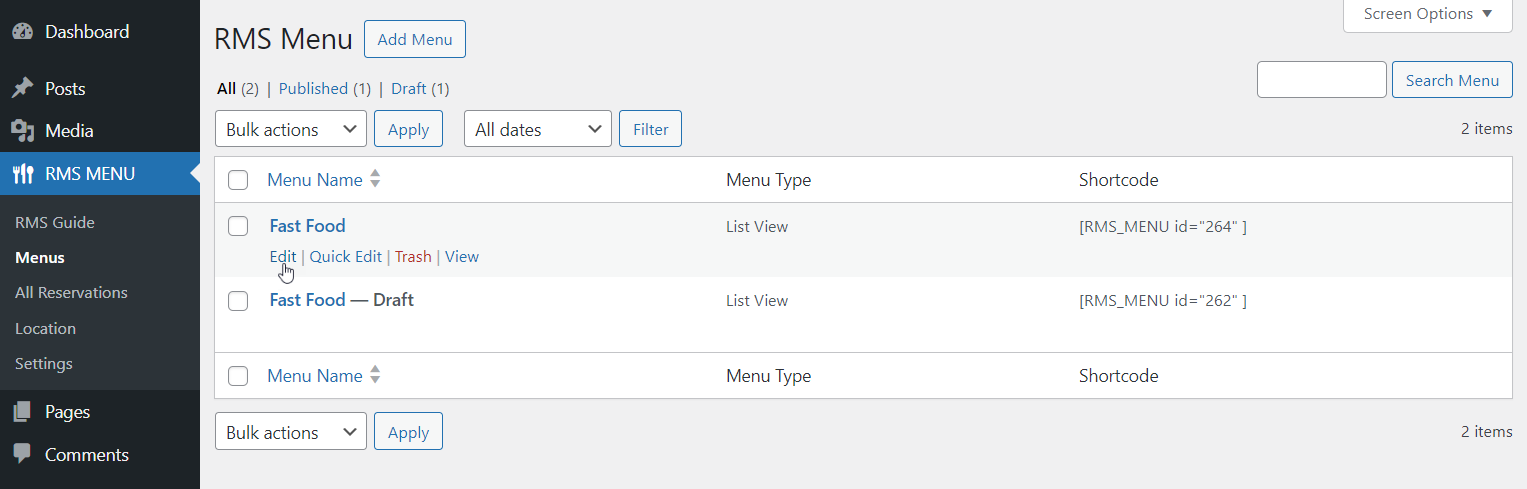
- Navigate to the Locations section on the right-hand side.
- Select the location the Admin wants to link the menu with for customers.
- Click on the Update button.

Front-end Screenshots
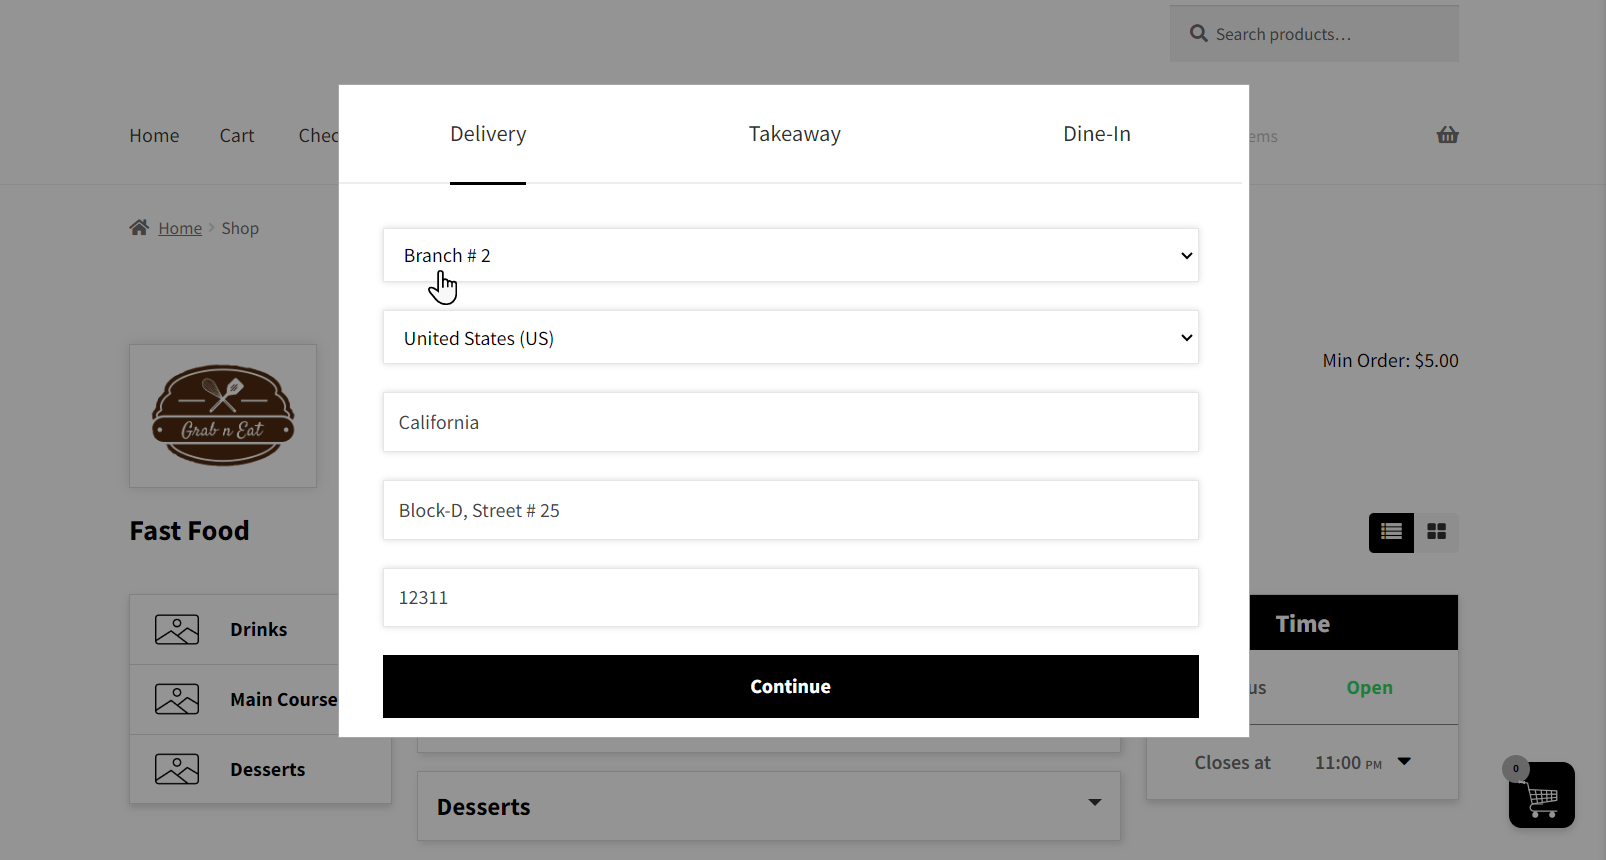
- The menu will open when the user selects the Branch after clicking on the Continue button.
RMS Prices
↑ Back to top- The admin can now set different prices for the same product in different menus.
- Navigate to the Dashboard => RMS MENU => Settings => General.

- Navigate to the RMS Prices in General tab.
- Enable the RMS Prices option.
- Click on the Save Changes.
- Navigate to the Products.
- Either create a new product by selecting Add New or hovering and click on Edit option in the product table.
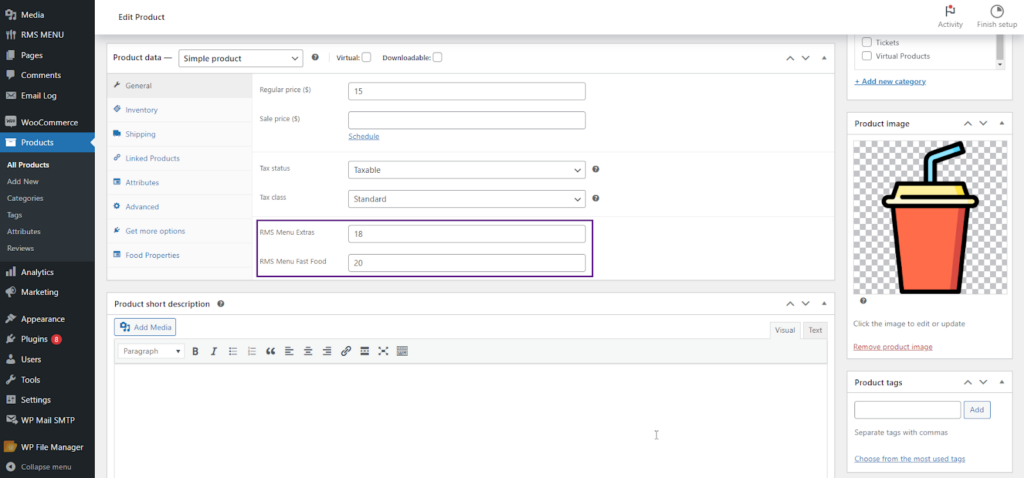
- Navigate to the General tab in the Product data.
- Navigate to the RMS Menu.
- The admin can add different product pricing options to the menu.
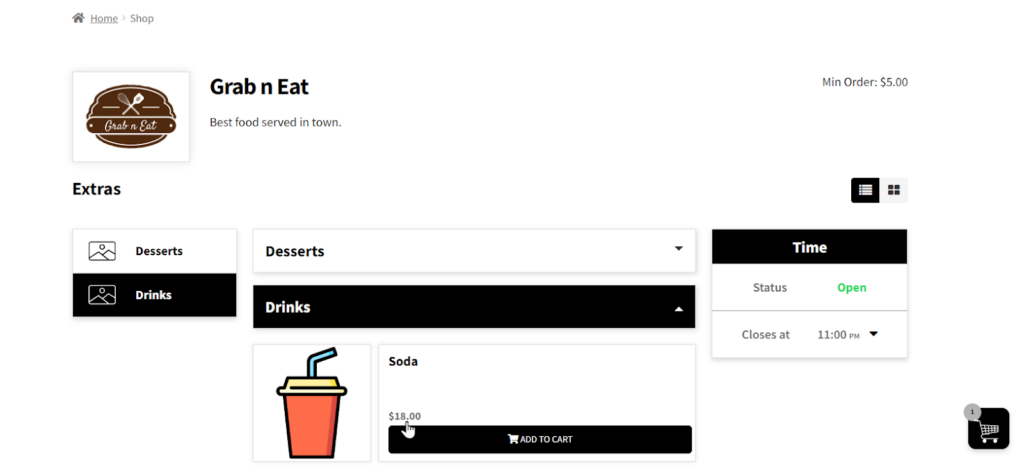
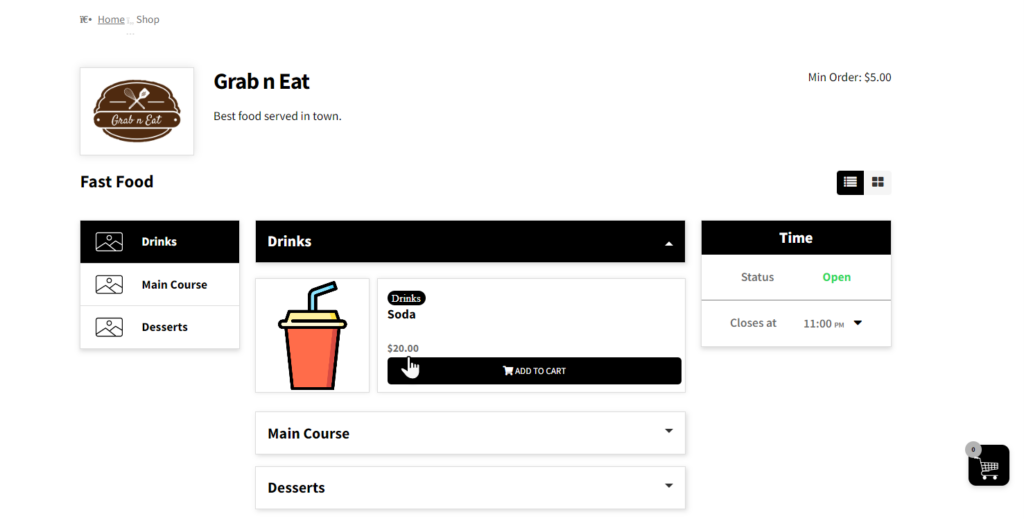
- Example: The regular price of product drinks is $15; in RMS Menu Extras, it is $18, and in RMS Menu FastFood, it is $20.
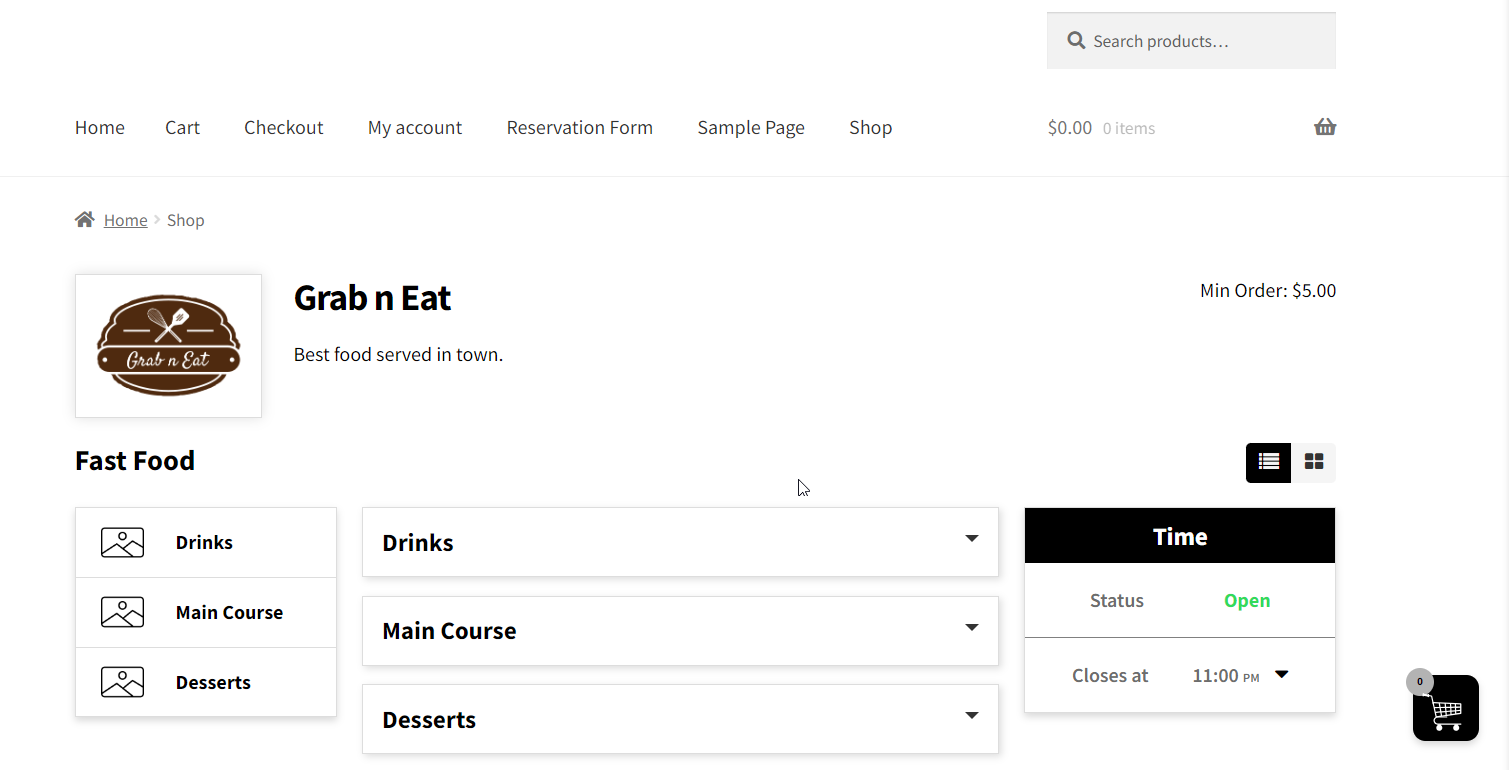
Front-end Screenshots
On Extras Menu
On Fast Food Menu
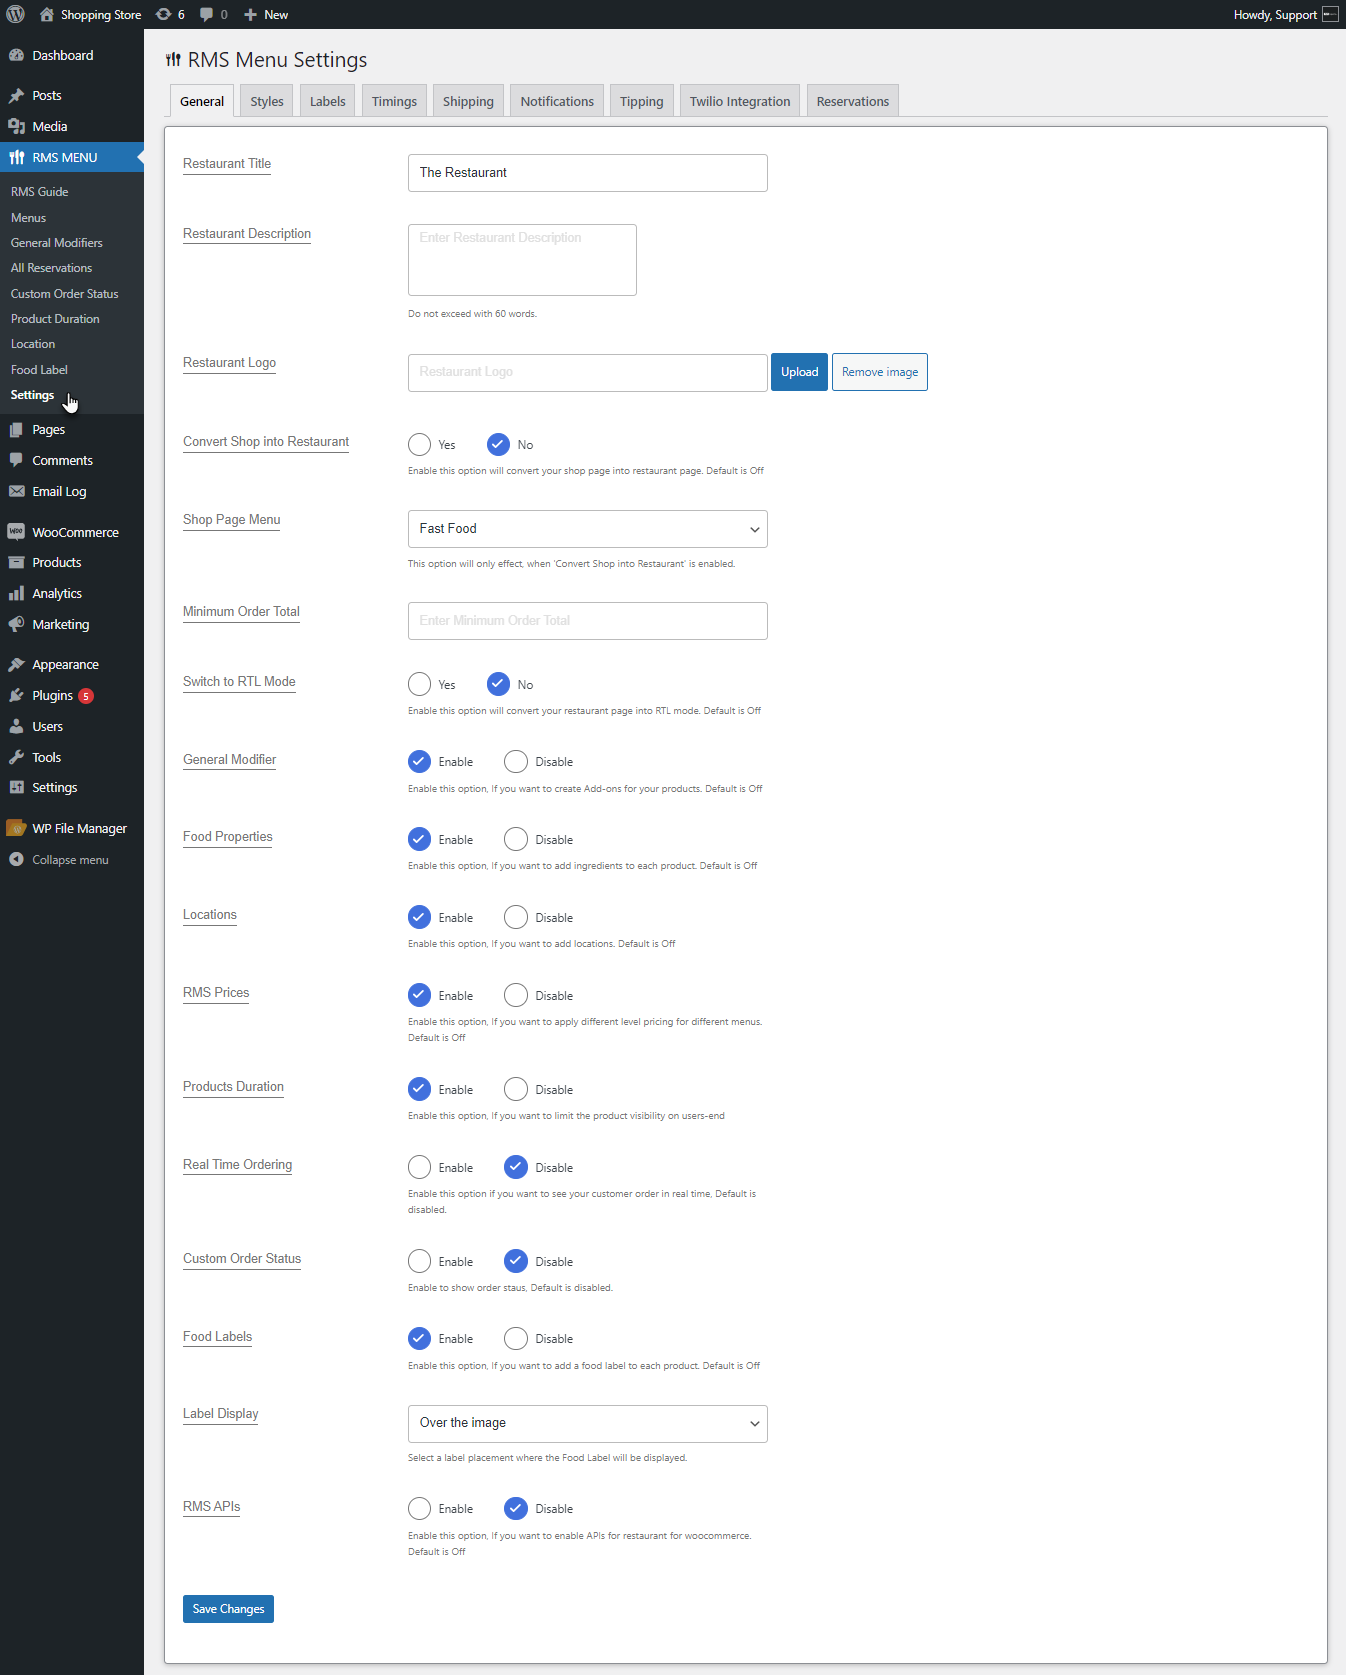
Product Duration
↑ Back to top- This feature allows the admin to set the duration the product will be visible/hidden to users.
- Go to WordPress Admin Dashboard > RMS MENU > Settings > General.
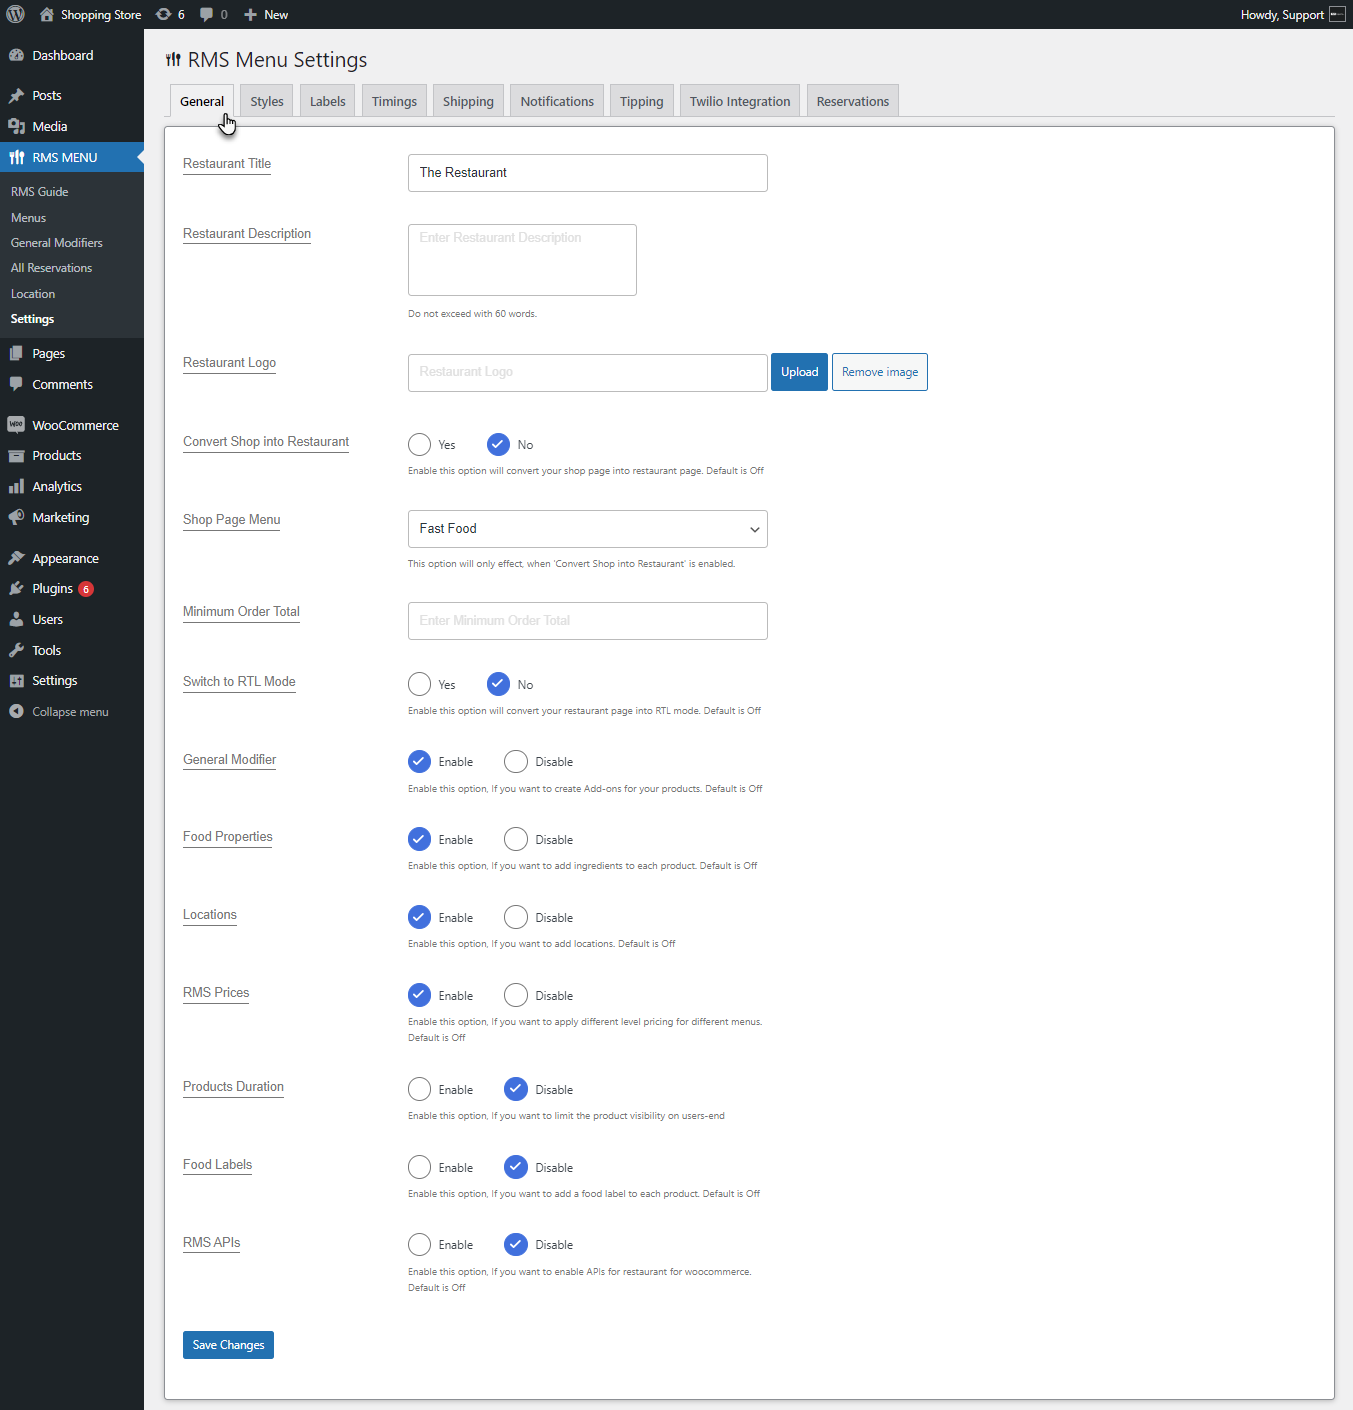
- Scroll down to the Product Duration option. To enable Product Duration, click on the Enable option.
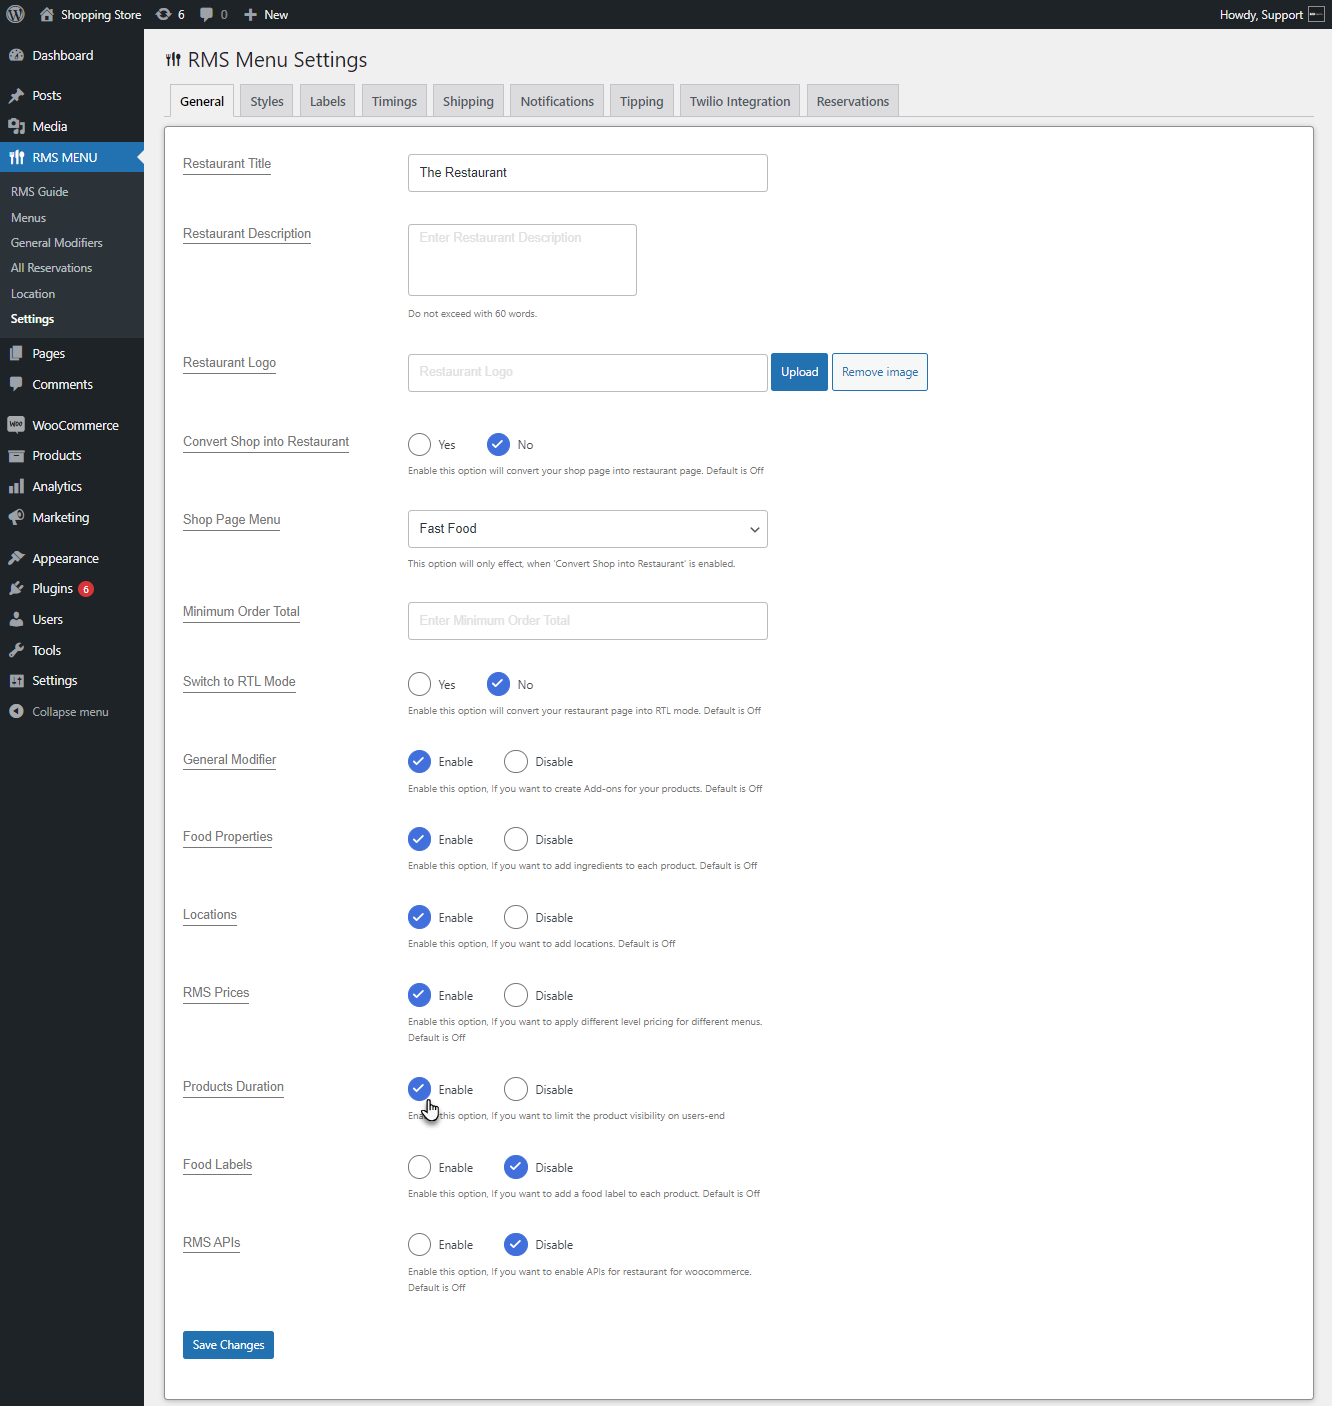
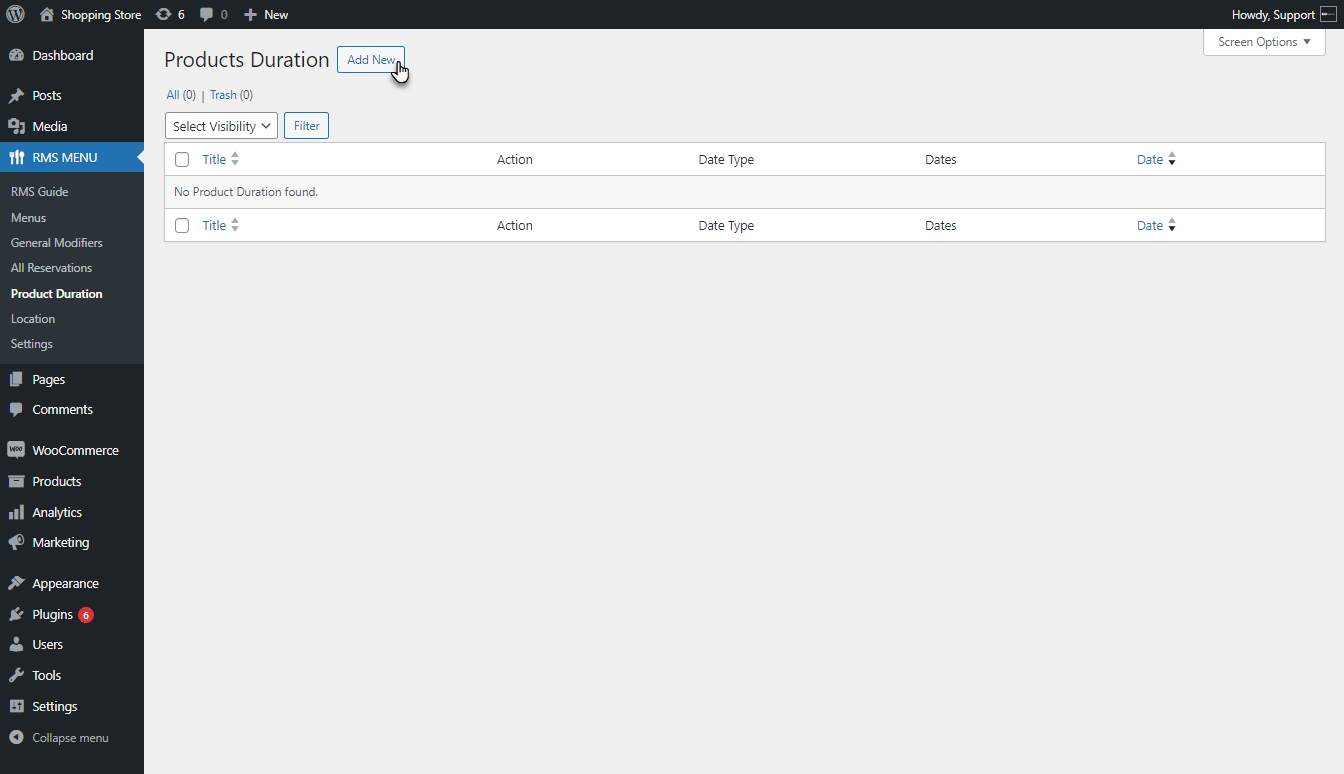
- The Product Duration option will appear in the side tab. Click on it.

Add New Product Duration
Add New
- A Product Duration list page will appear. Click on the Add New button.
Add Title
- An Add New screen will appear.
- Add a title in the Add Title field.
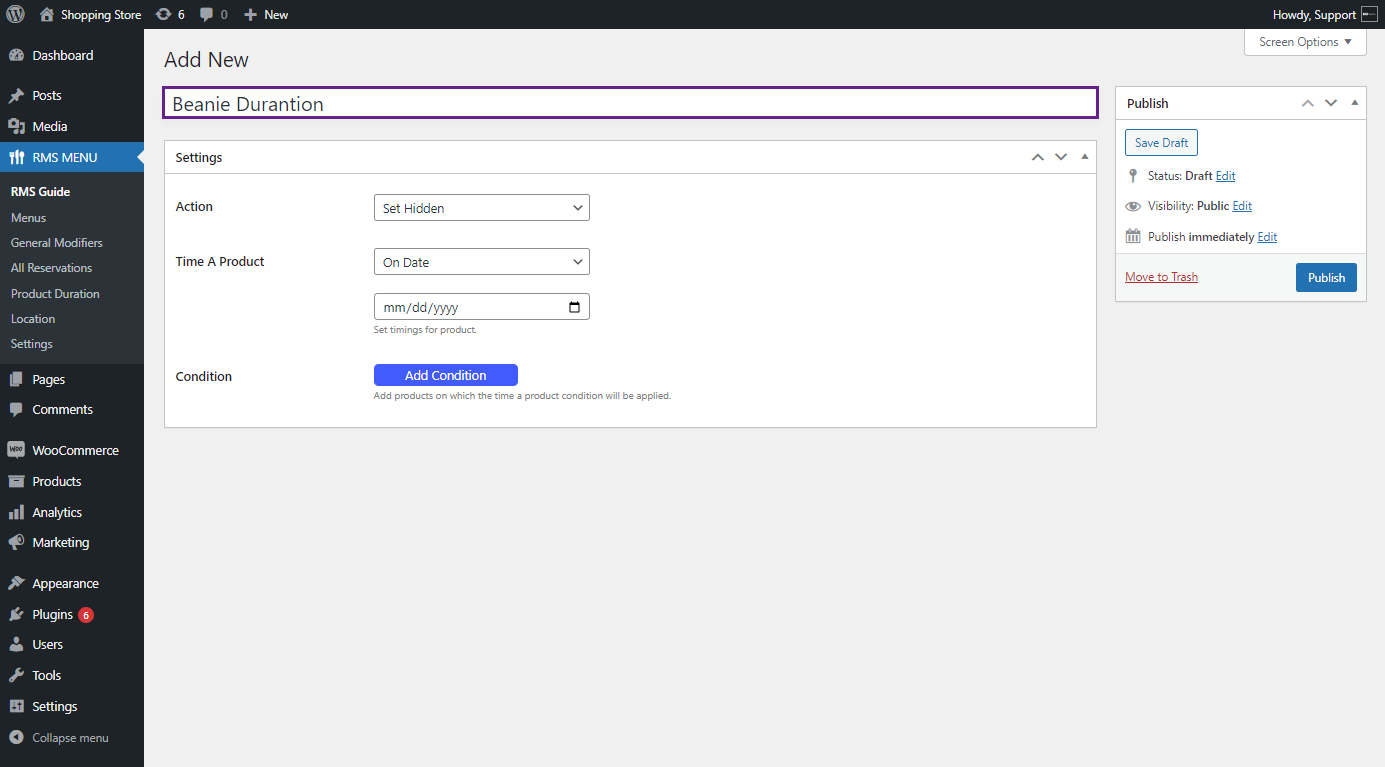
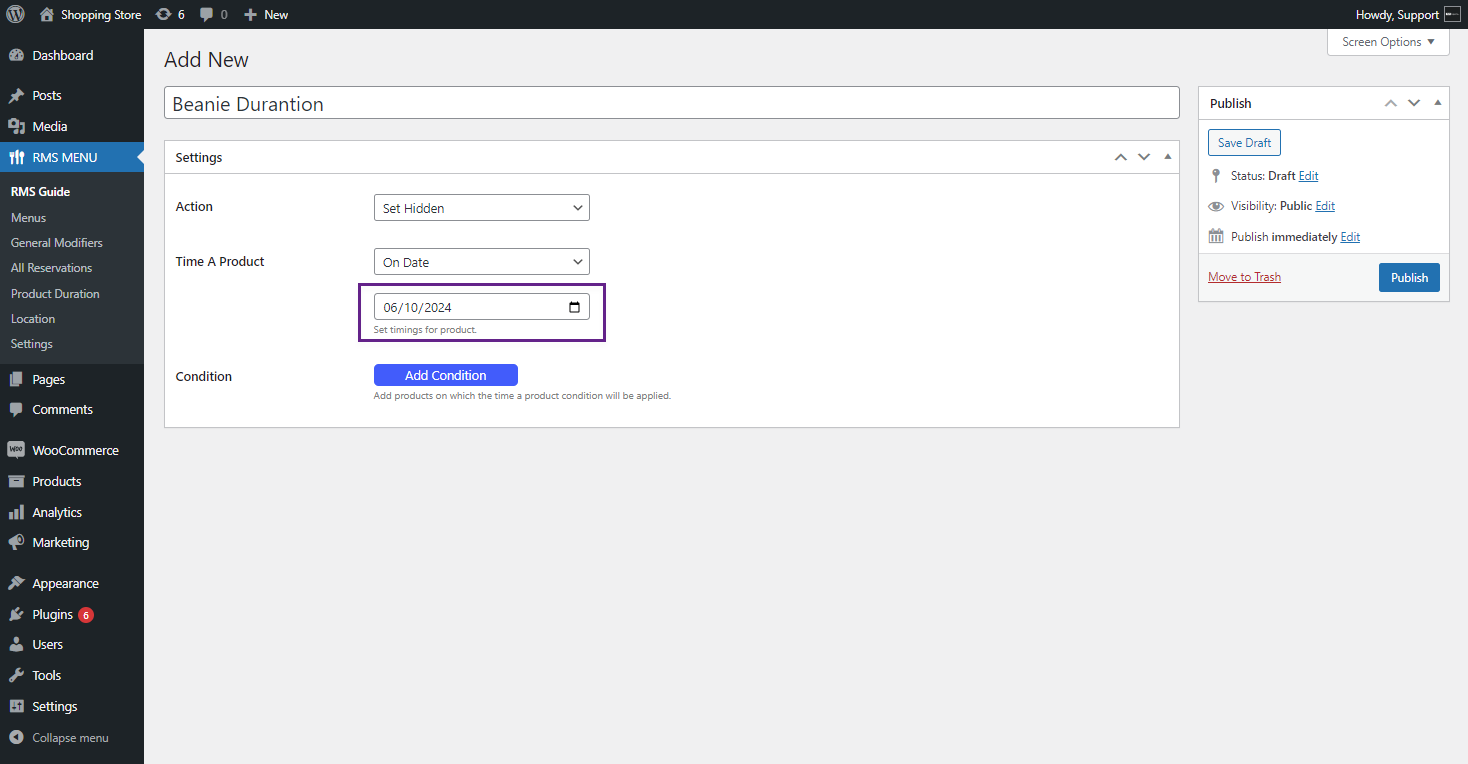
Settings
- Now move to the Settings tab. In this tab, the admin can configure the settings for the Product/Category to be Visible or hidden for users.
- The admin can choose the action to be applied to the Product/Category from the Action dropdown list. Two actions are provided in the Action dropdown.
- Set Visible: This option will make the product/category visible to the user.
- Set Hidden: This option will hide the product/category from the user.

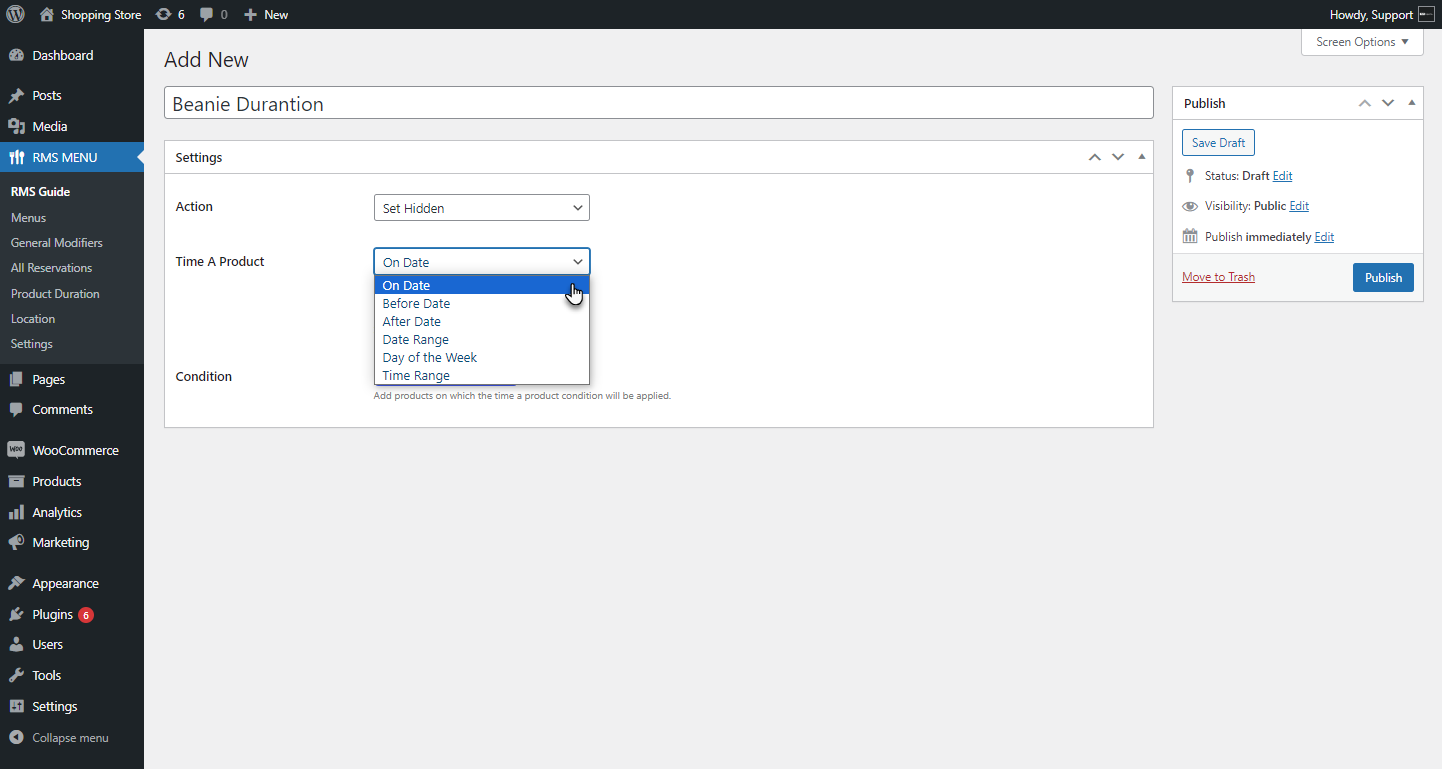
- The admin can select the time for the product in the Time a Product option. The drop-down list provides six options.
- On Date: The product/category will be visible or hidden on the selected date.
- Before Date: The product/category will be visible or hidden before the selected date.
- After Date: The product/category will be visible or hidden after the selected date.
- Date Range: The product/category will be visible or hidden within the selected date range.
- Day of the Week: The product/category will be visible or hidden on the selected day of the week.
- Time Range: The product/category will be visible or hidden during the selected time range.
On Date
- Select On Date from the Time a Product drop-down list. This option will make the product/category visible or hidden on the selected date.
- You can set the date using the option below the drop-down list. The format is Month, Date, and Year.
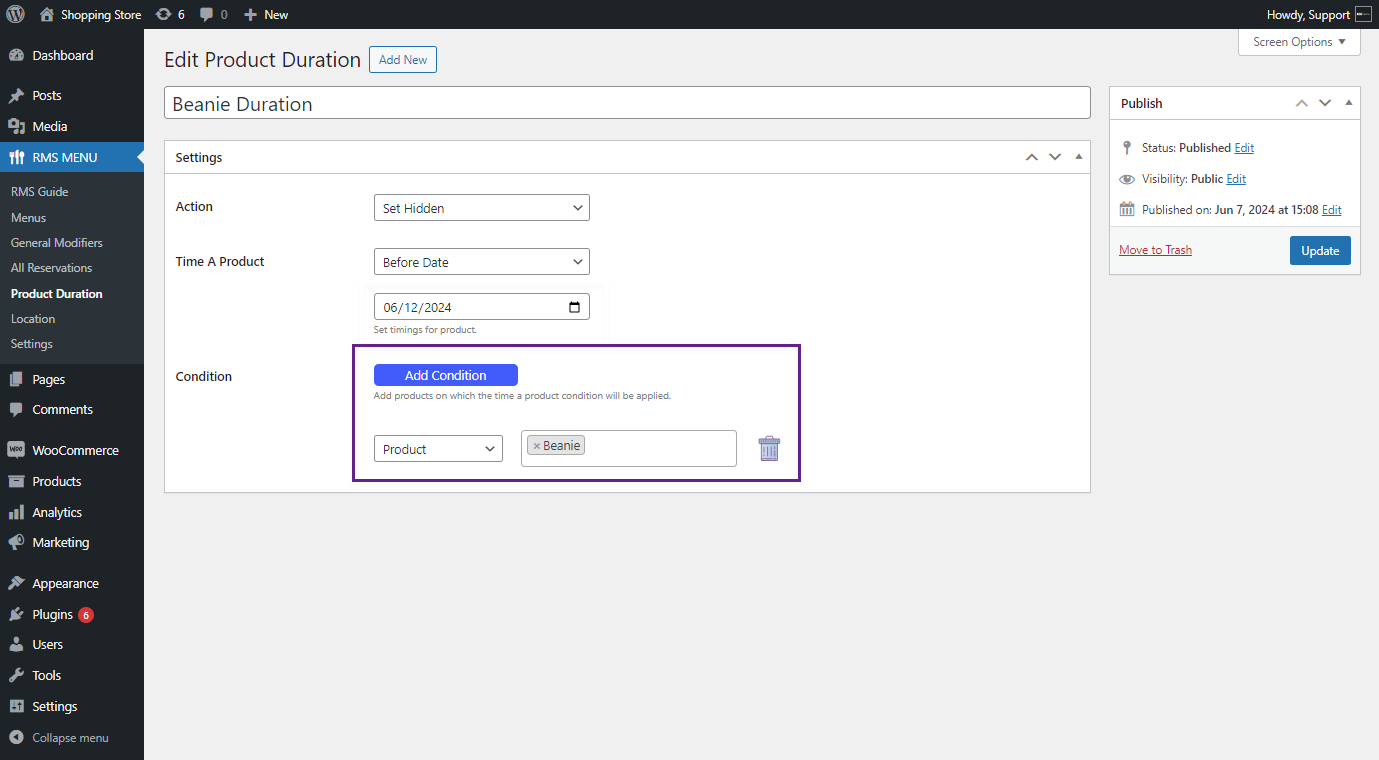
- The admin can add a product or category to which the condition will be applied in the condition option. Click on the Add Condition button.
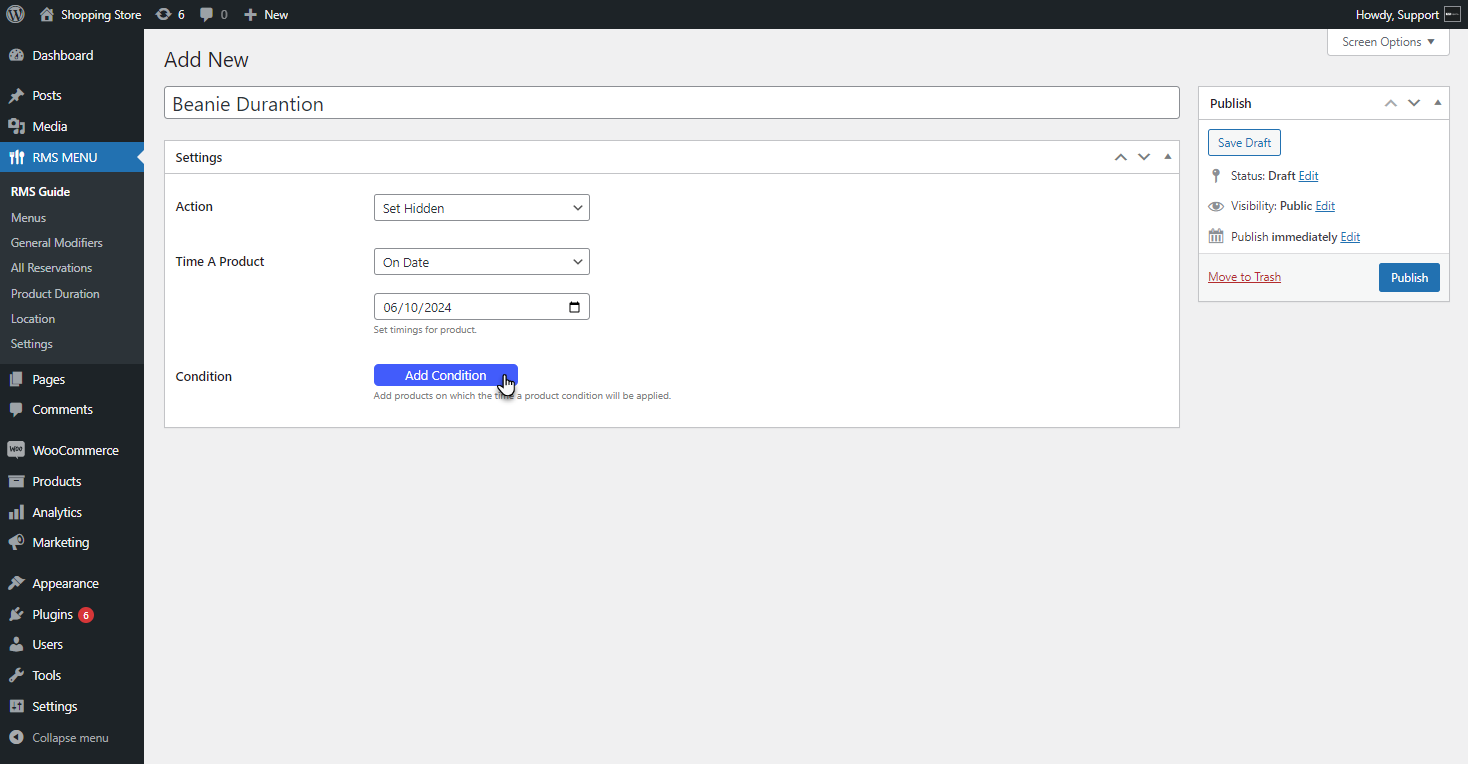
- The admin can select a Product or Category from the drop-down list and then search for specific product or category respectively.
- The admin can add multiple conditions using the Add Condition button.
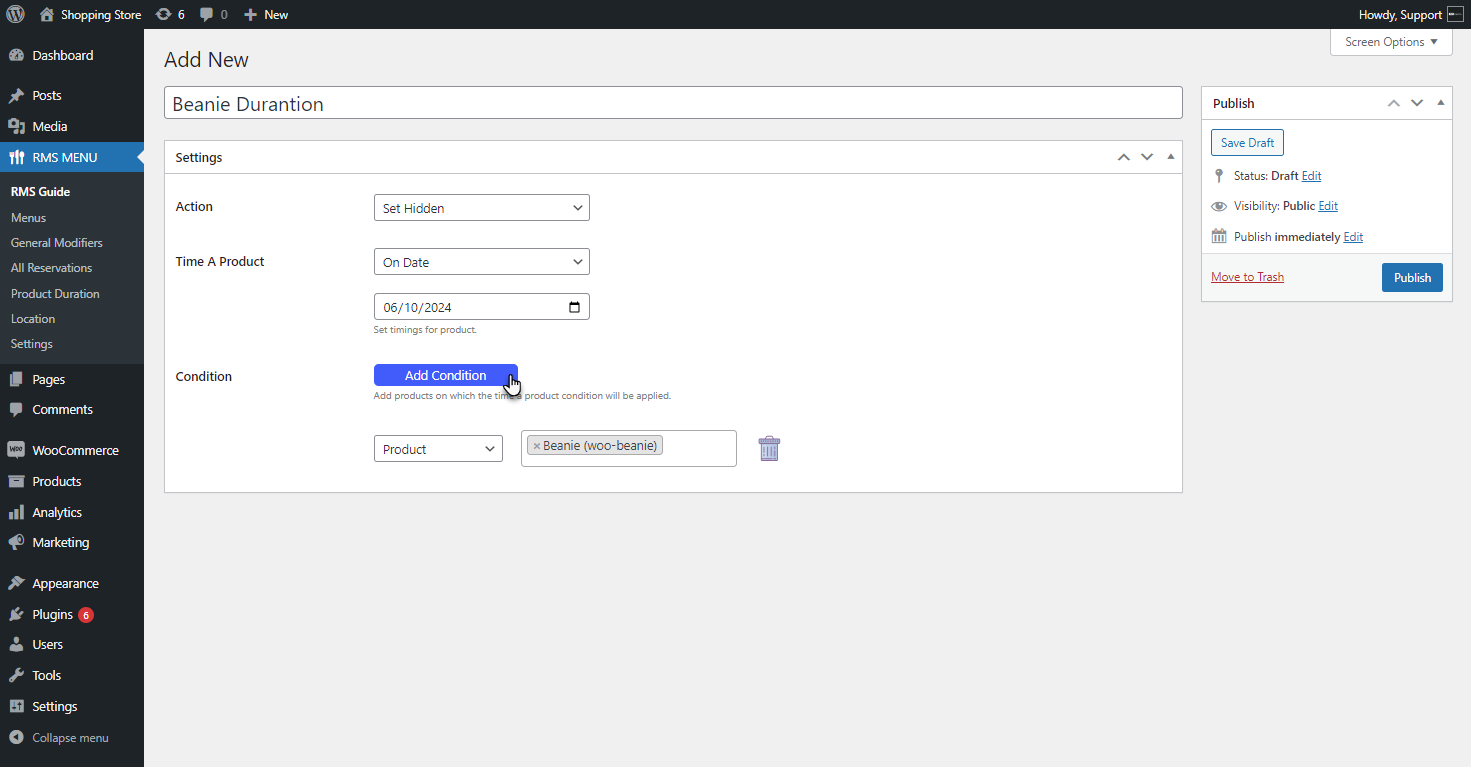
- The admin can Delete the condition by using the bin icon.
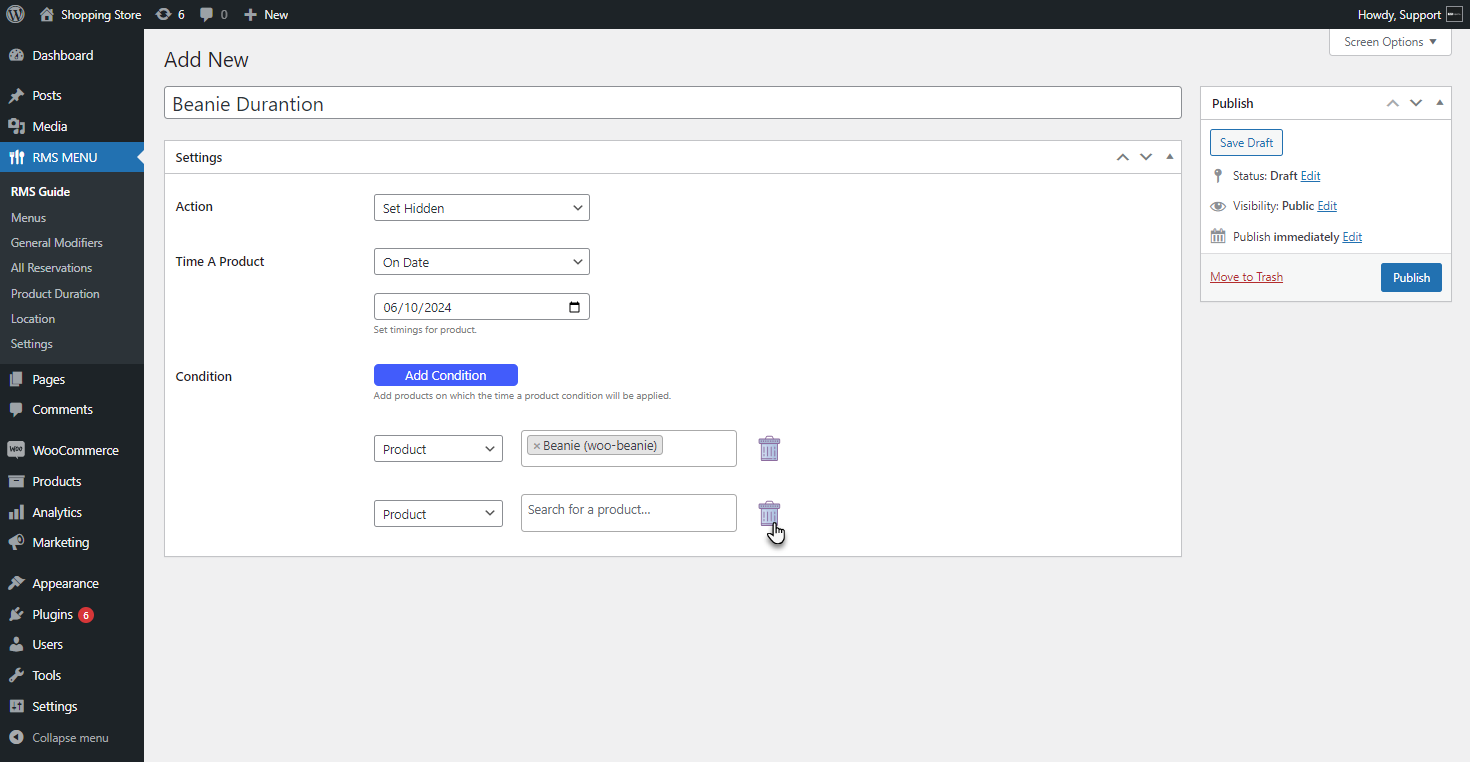
- Click on the Publish button to save your settings.

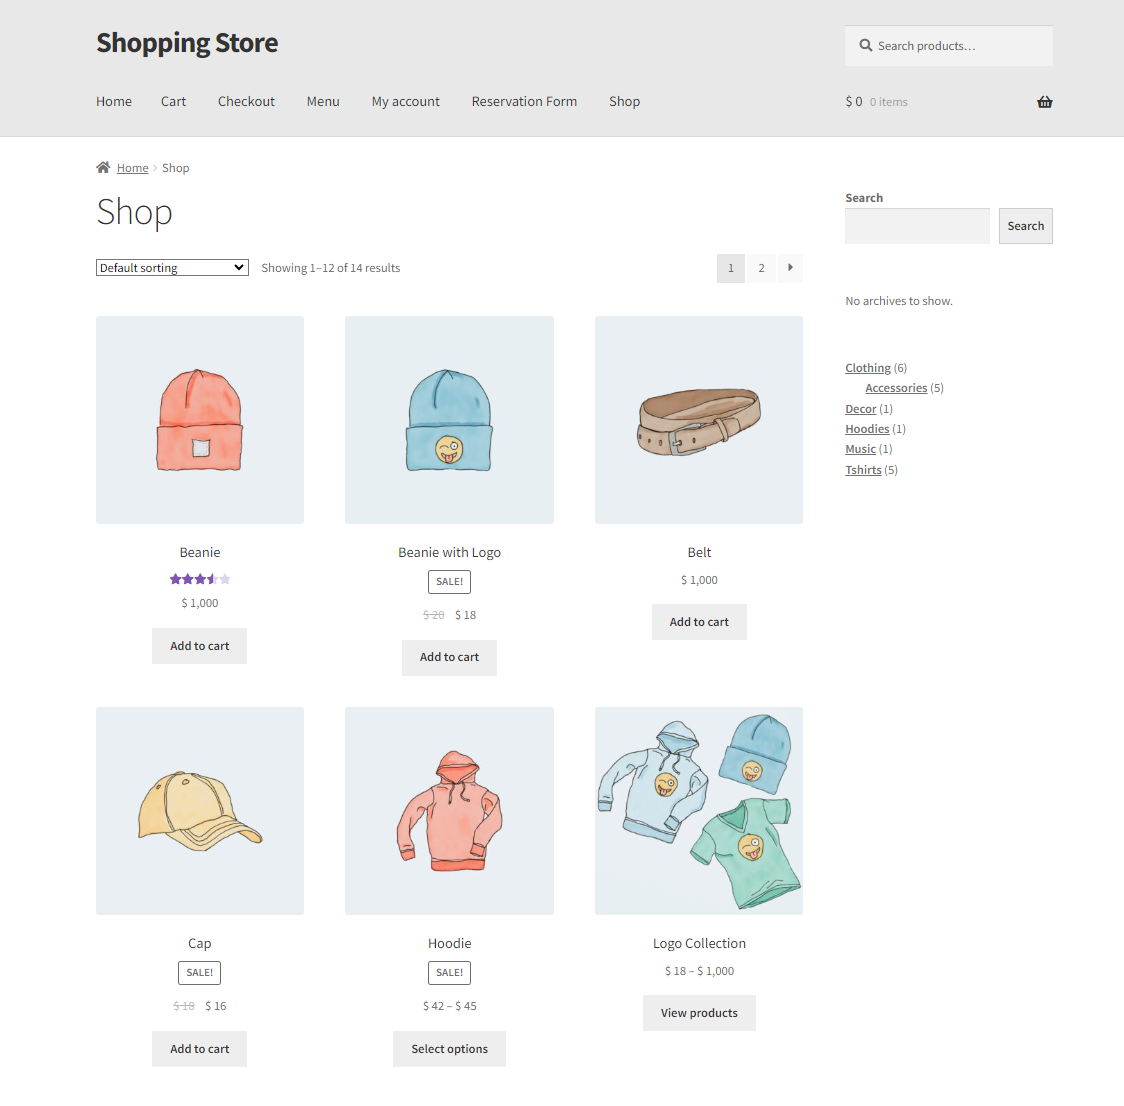
Front-end Screenshots
- Login to your WordPress account.
- Go to the shop page.
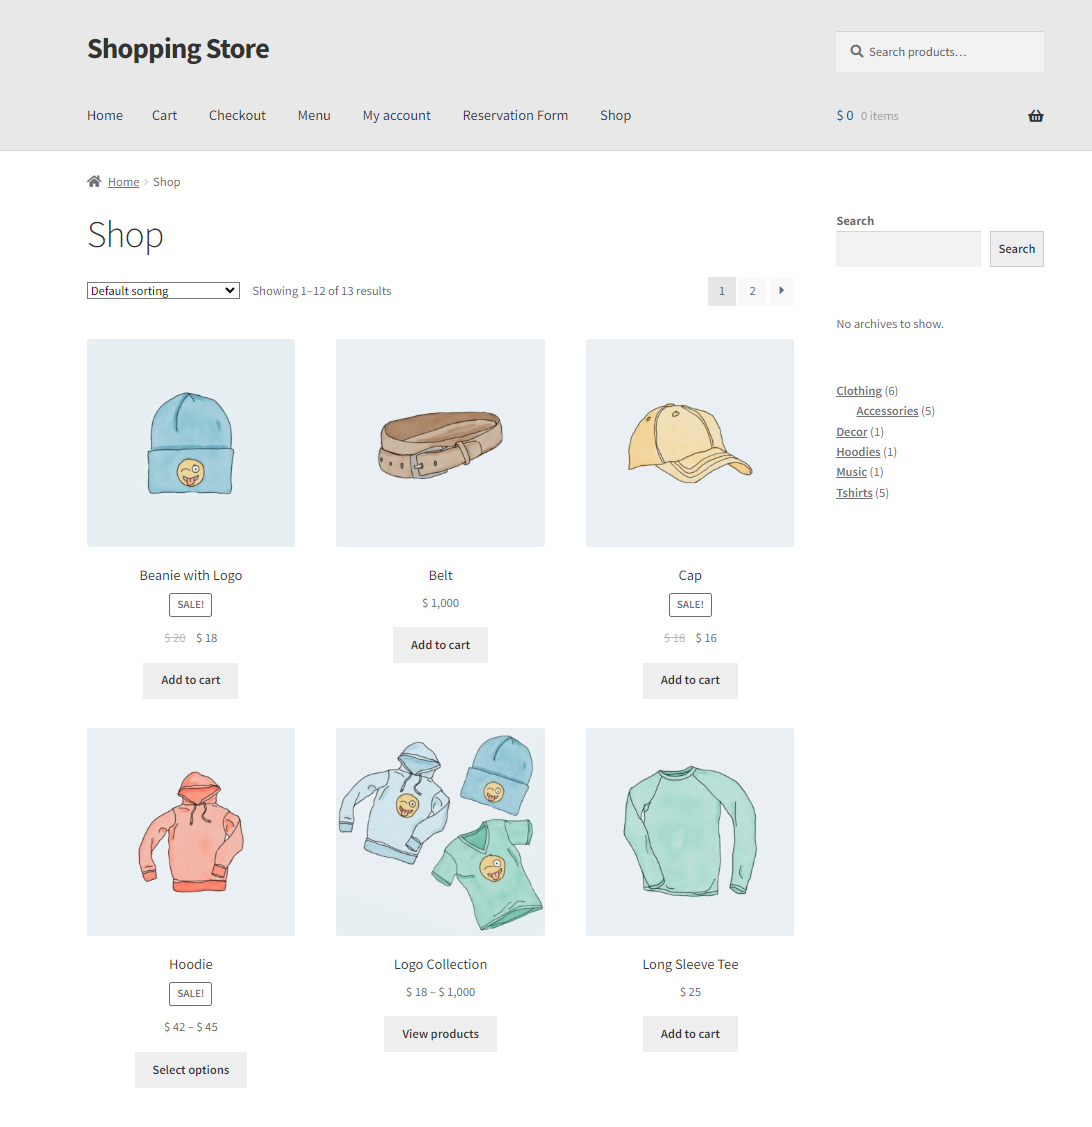
- The selected product will be hidden from the front end.
Before
After
Before Date
- Select Before Date from the Time a Product drop-down list. This option will make the product/category visible or hidden before the selected date.
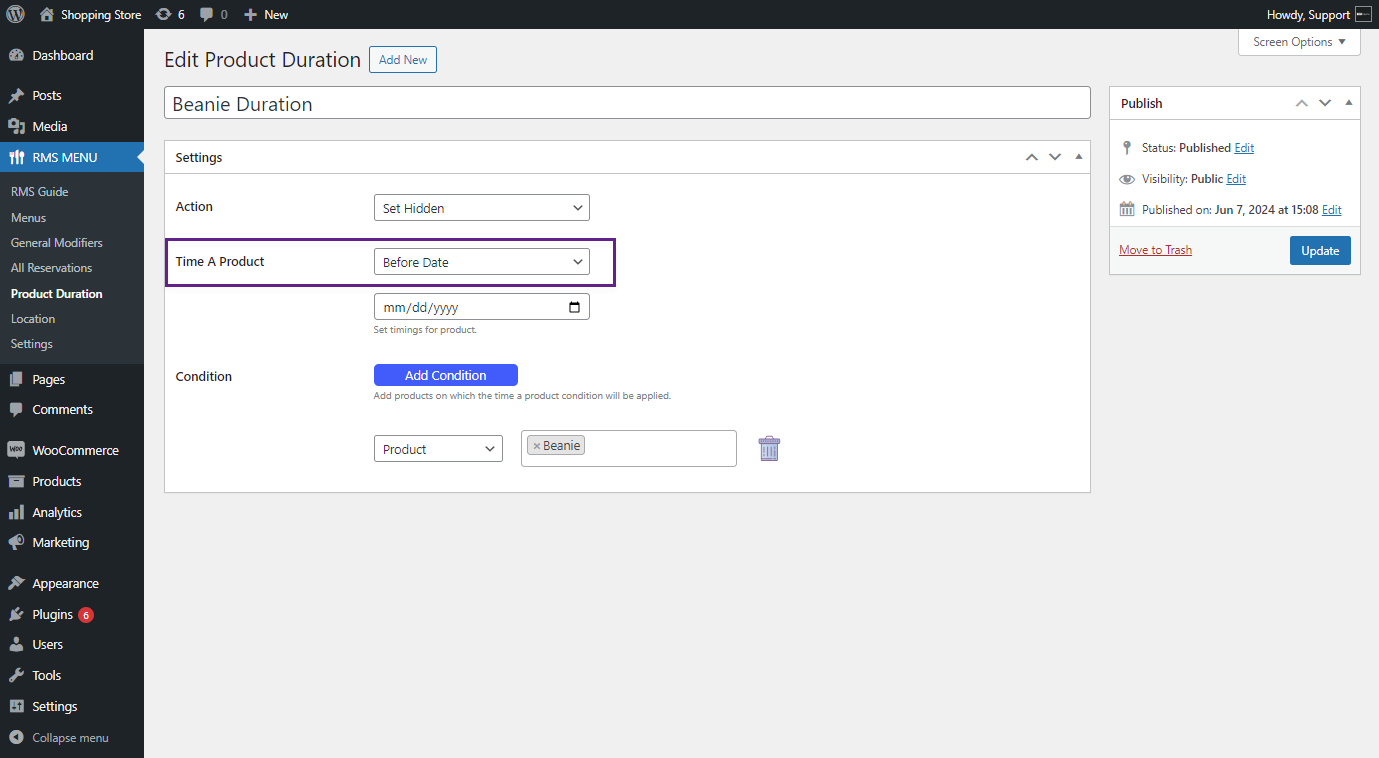
- Select the date from the option given below the drop-down list. The date format will be Month, Date, and Year.
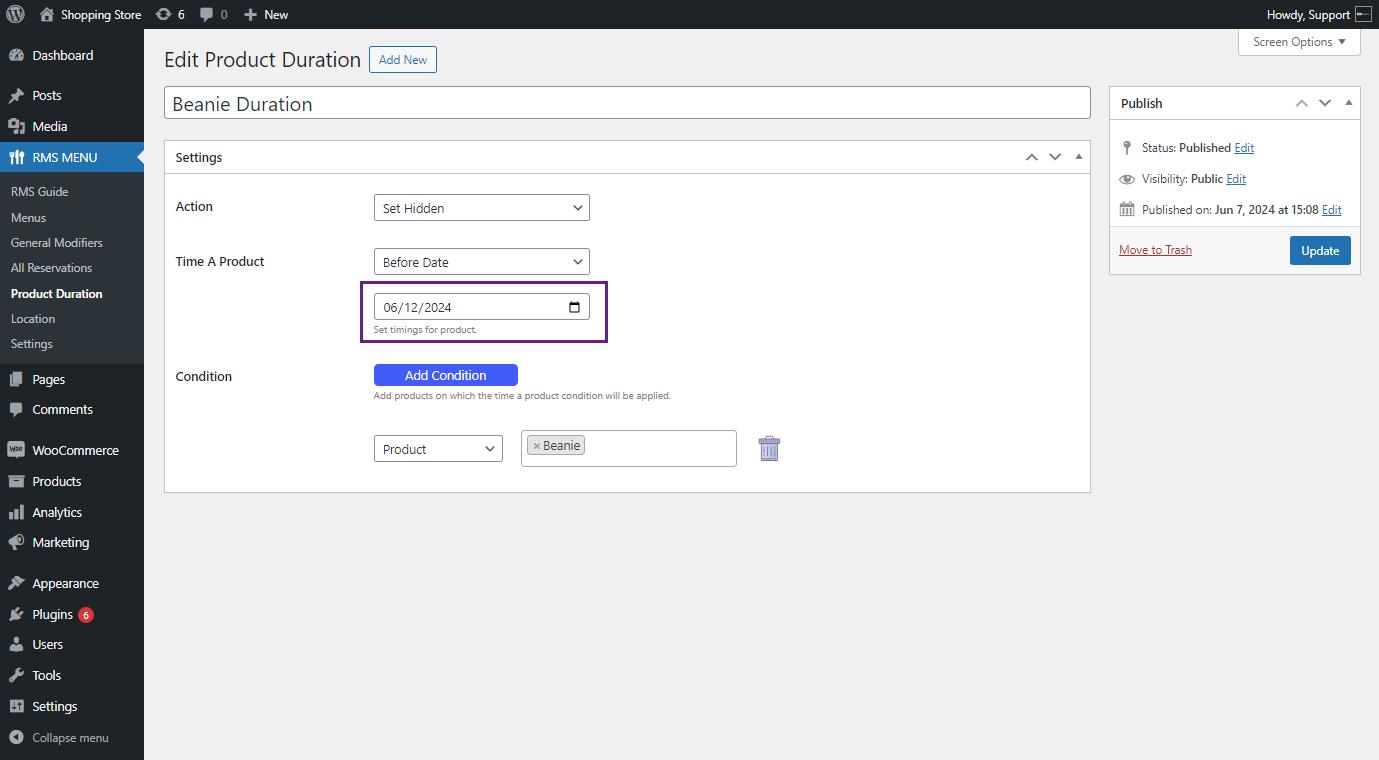
- Add a product/category in the condition option as needed.
- Click on the Update button to save the changes.

After Date
- Select After Date from the Time a Product drop-down list. This option will make the product/category visible or hidden before the after date.

- Select the date from the option given below the drop-down list. The date format will be Month, Date, and Year.

- Add a product/category in the Add Condition option as needed.

- Click on the Update button to save the changes.

Date Range
- Select Date Range from the Time a Product drop-down list. This option will make the product/category visible or hidden between the selected dates.
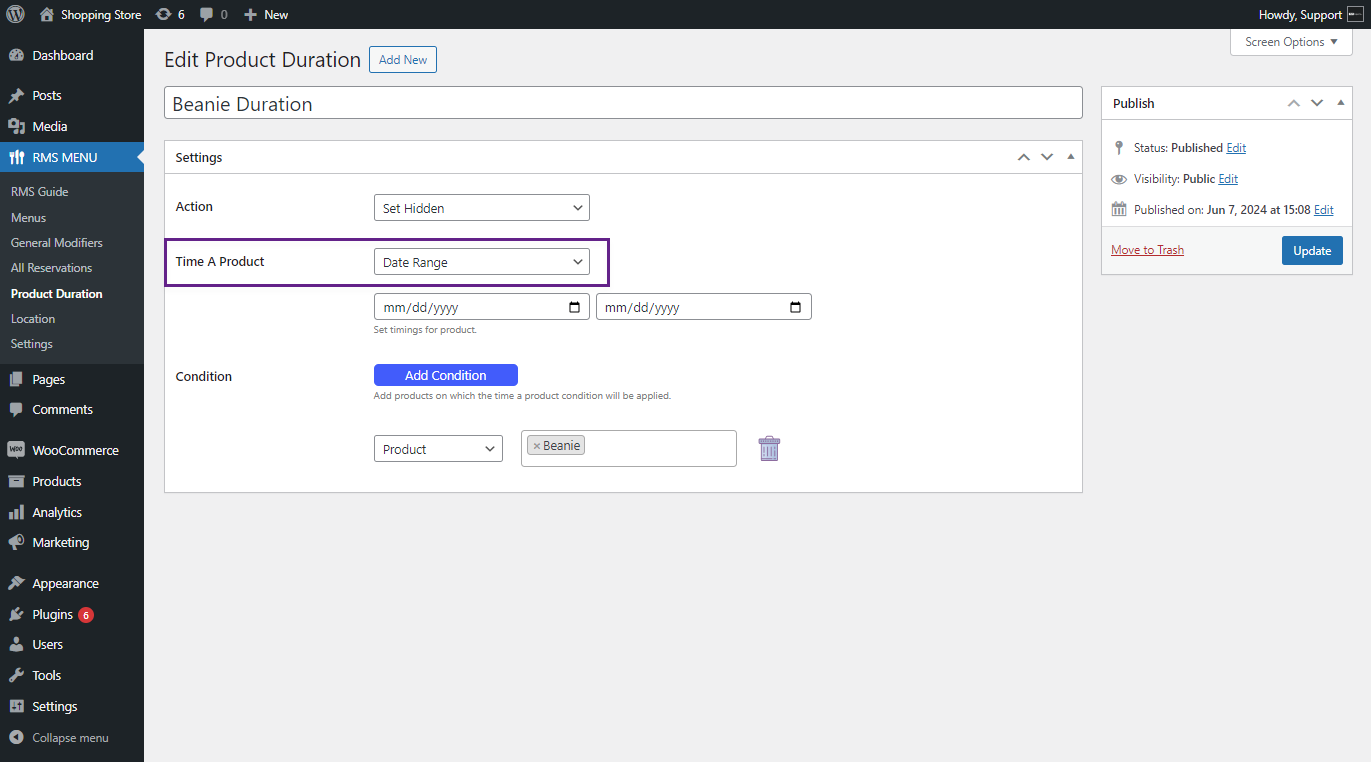
- Set the Date Range from the option given below the drop-down list. The date format will be Month, Date, and Year.
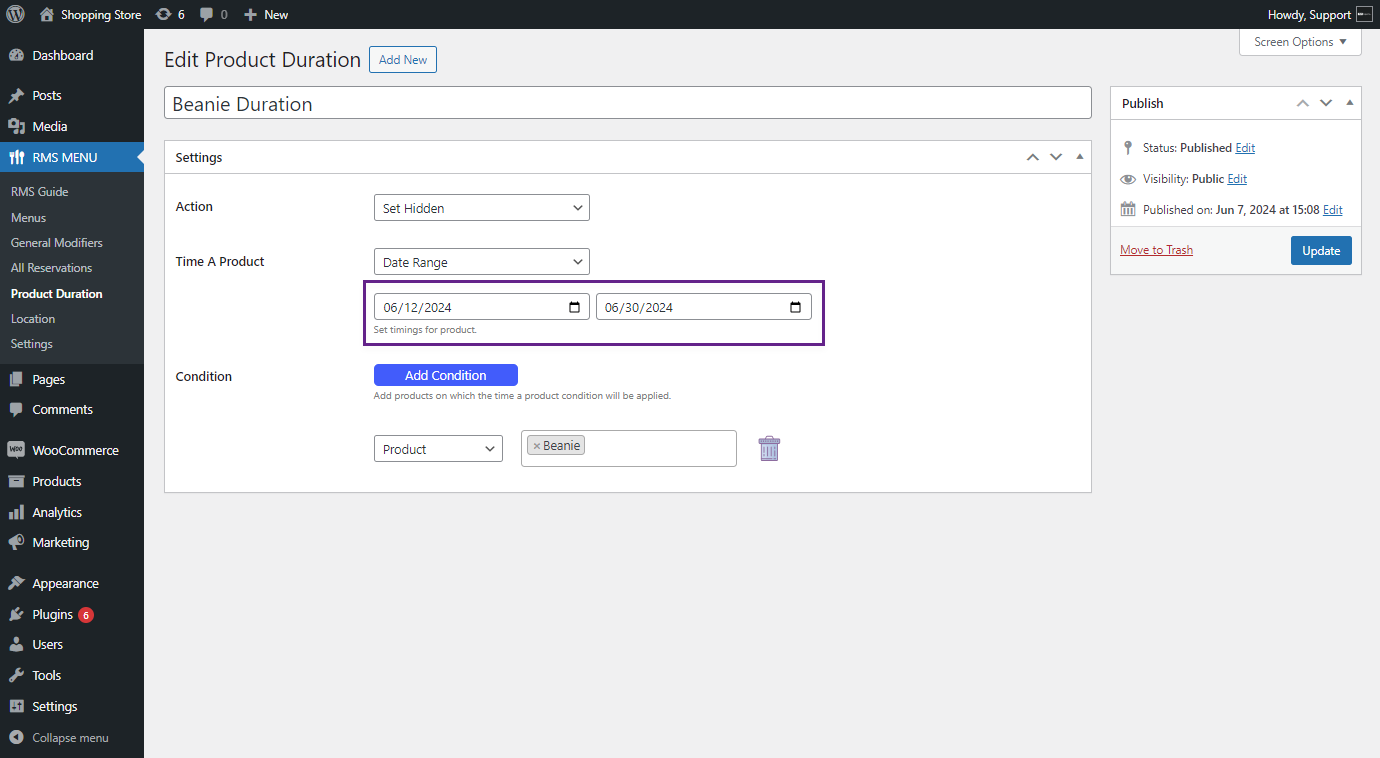
- Add a product/category in the Add Condition option as needed.

- Click on the Update button to save the changes.

Day of the Week
- Select the Day of the Week from the Time a Product drop-down list. This option will make the product/category visible or hidden on a specific day of the week.
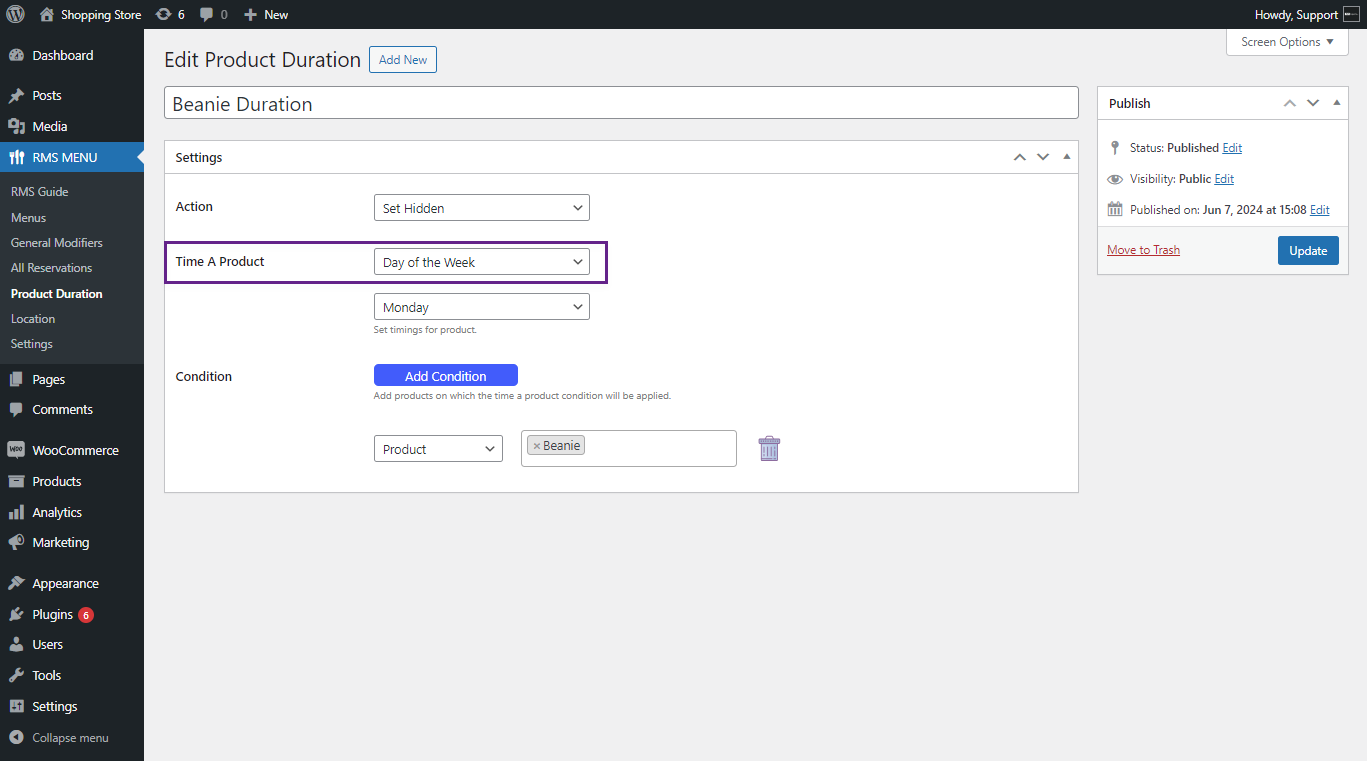
- Select the Day from the drop-down below the Time a Product list.
- Add a product/category in the Add Condition option as needed.

- Click on the Update button to save the changes.

Time Range
- Select Time Range from the Time a Product drop-down list. This option will make the product/category visible or hidden during the selected time range.

- Set the time range from the option given below.

- Add a product/category in the Add Condition option as needed.

- Click on the Update button to save the changes.

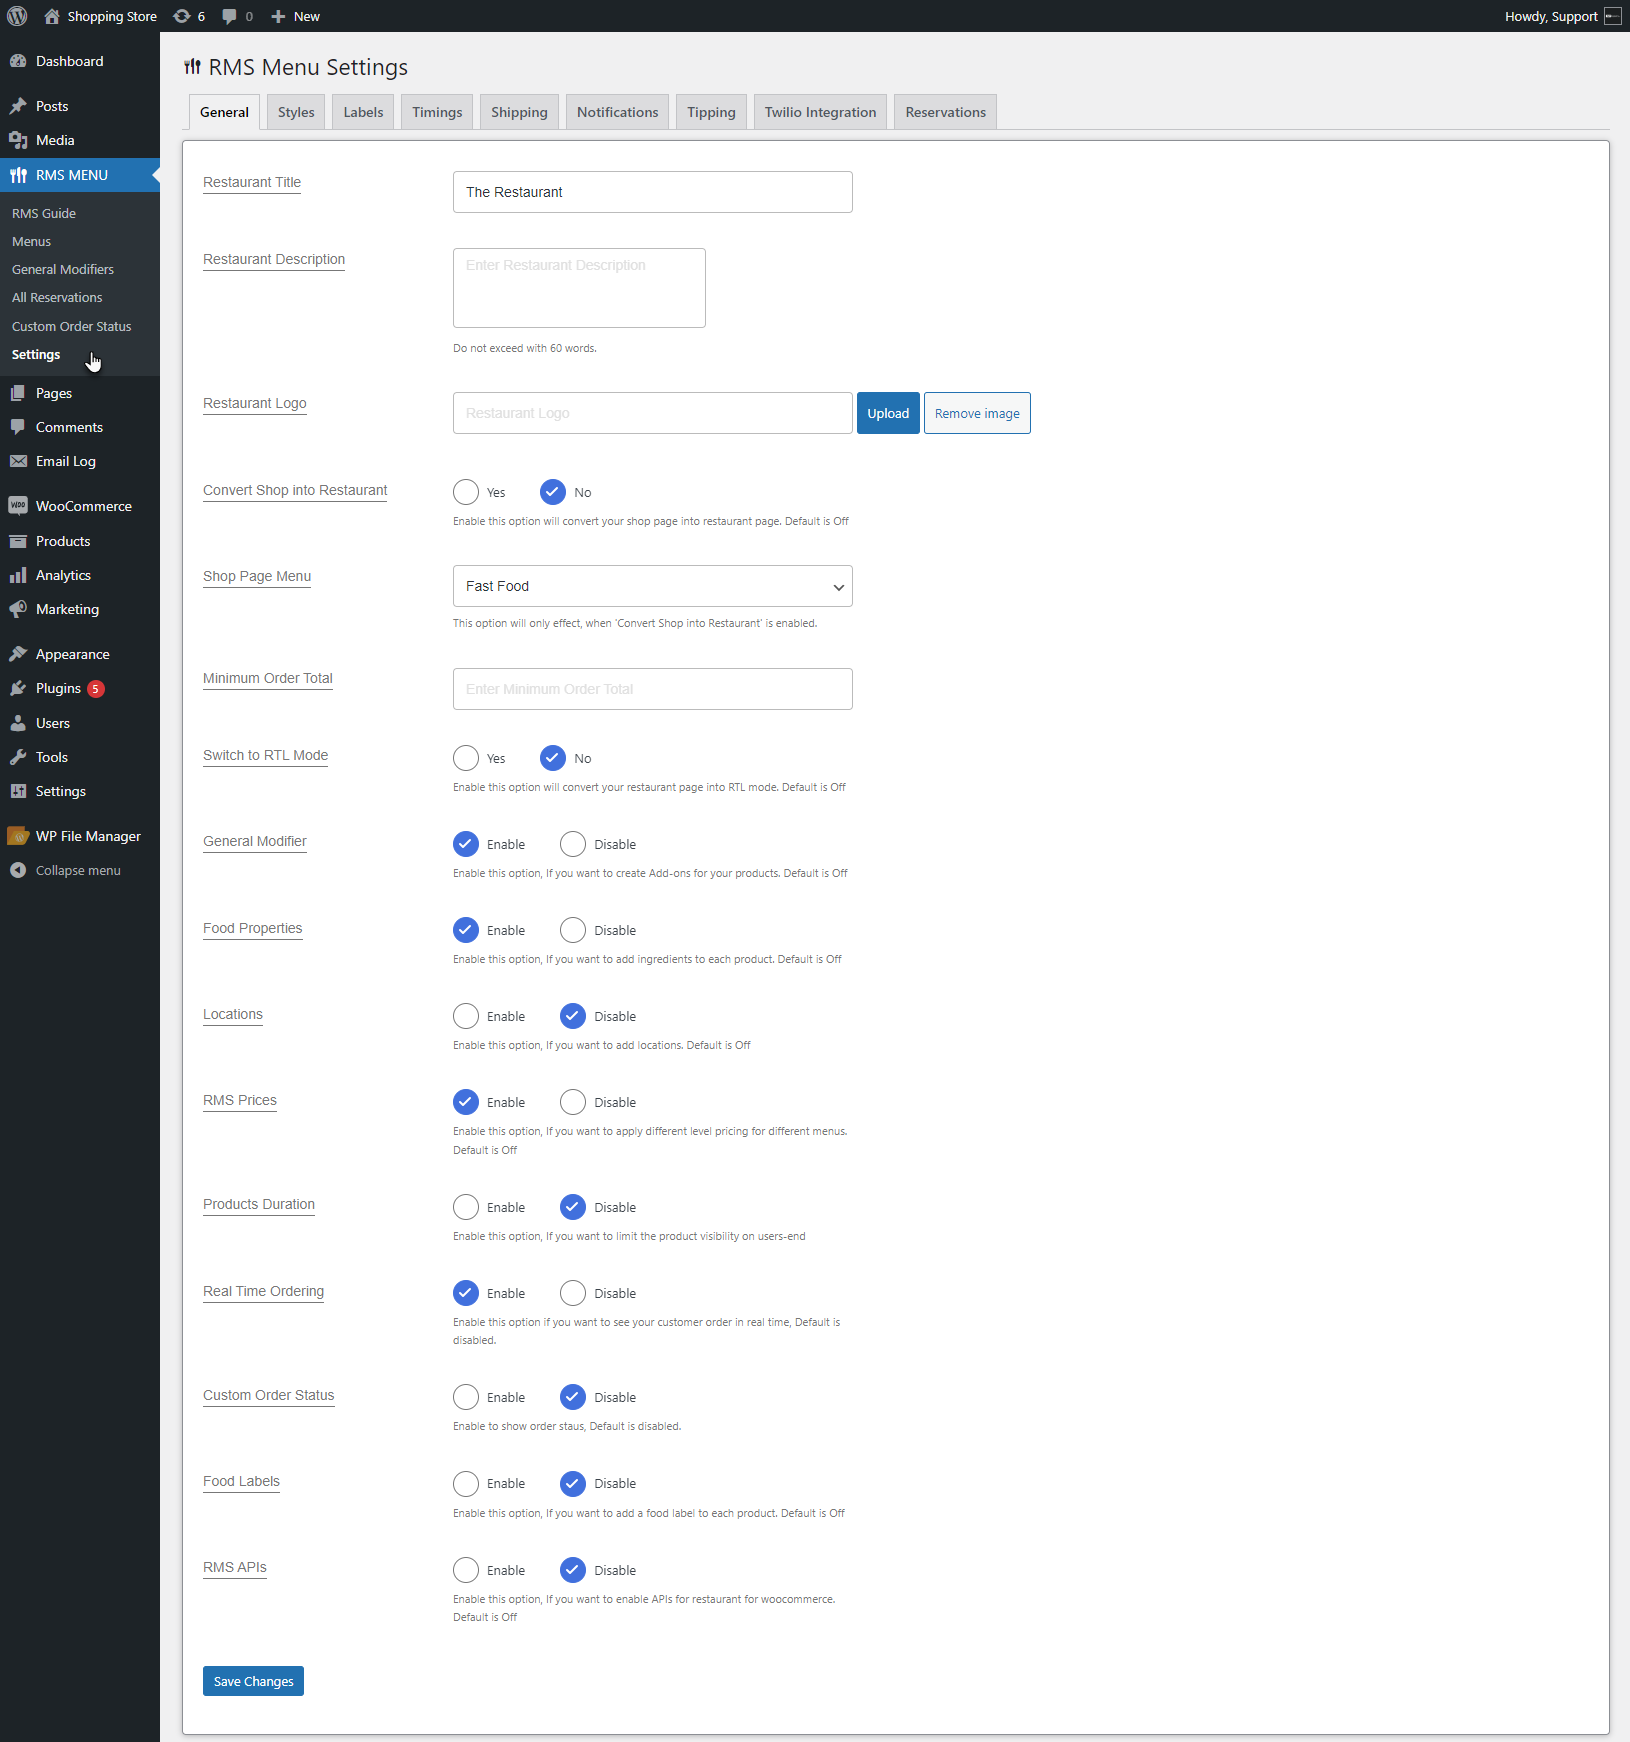
Real-Time Ordering
- This feature enables the admin to see user orders in real time.
- Go to the WordPress Admin Dashboard > RMS MENU > Settings > General.
- Navigate and enable the Real Time Ordering option.
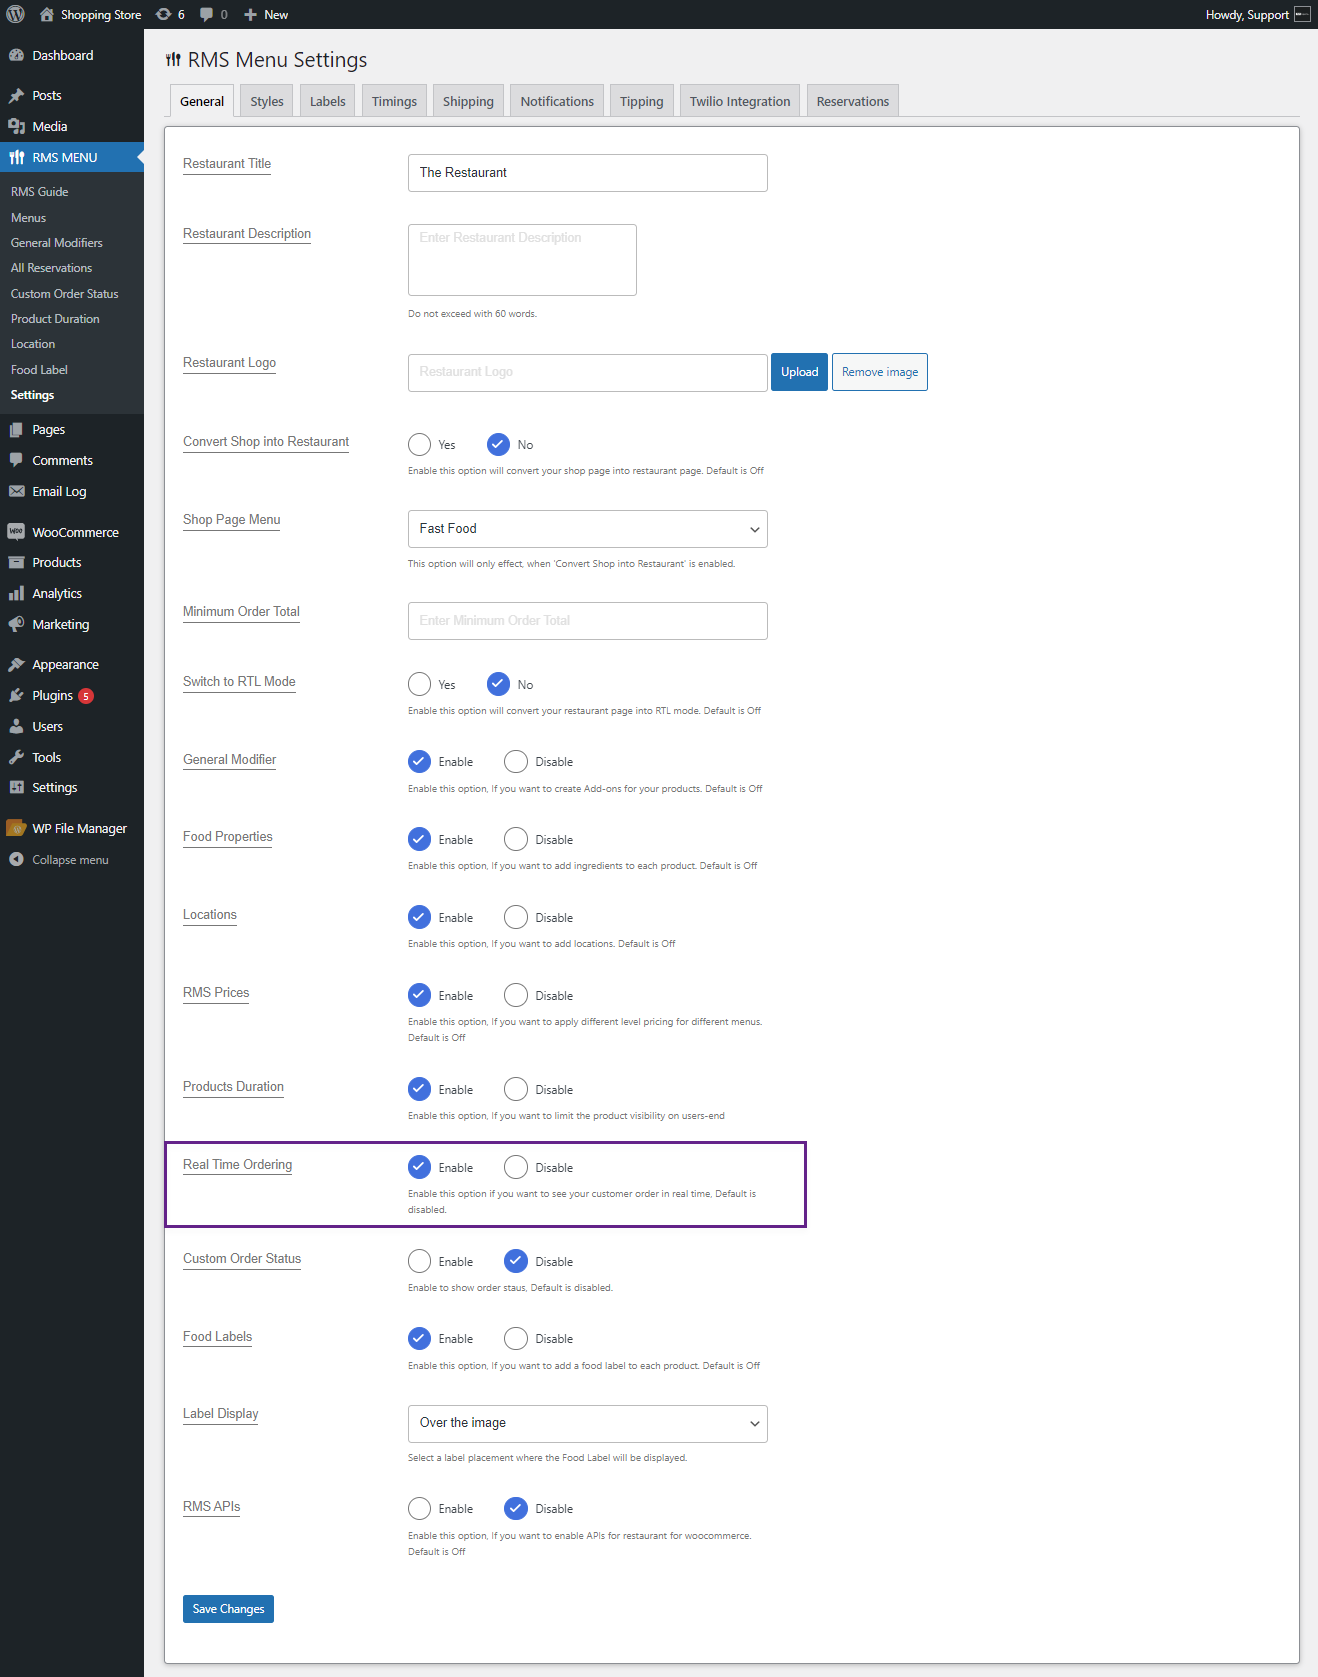
- Click on the Save Changes button to update the settings.

- Now Go to the WordPress Admin Dashboard > WooCommerce > Orders.
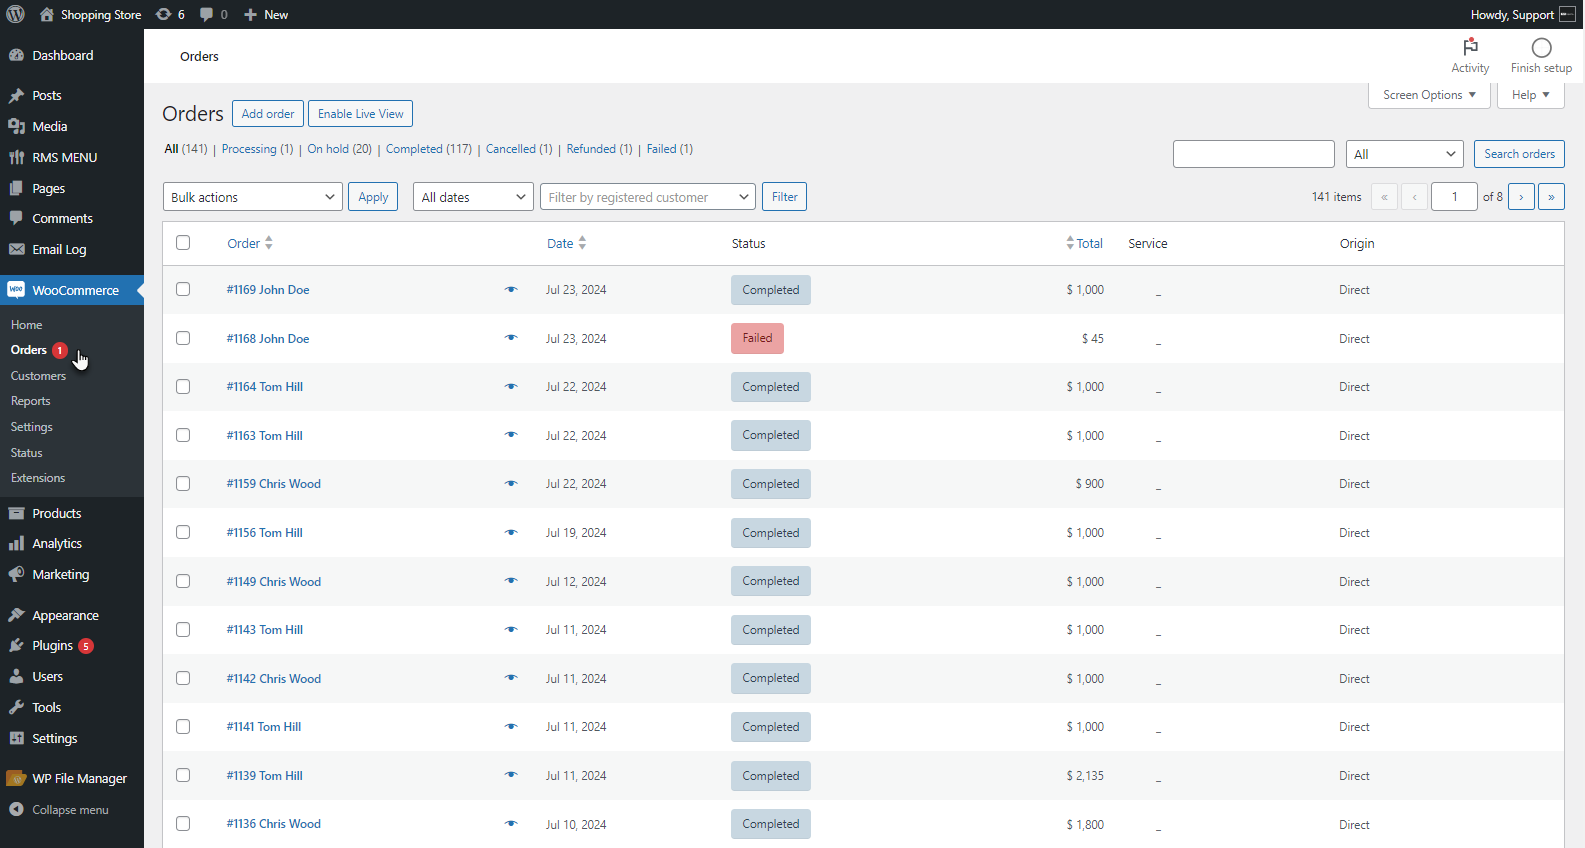
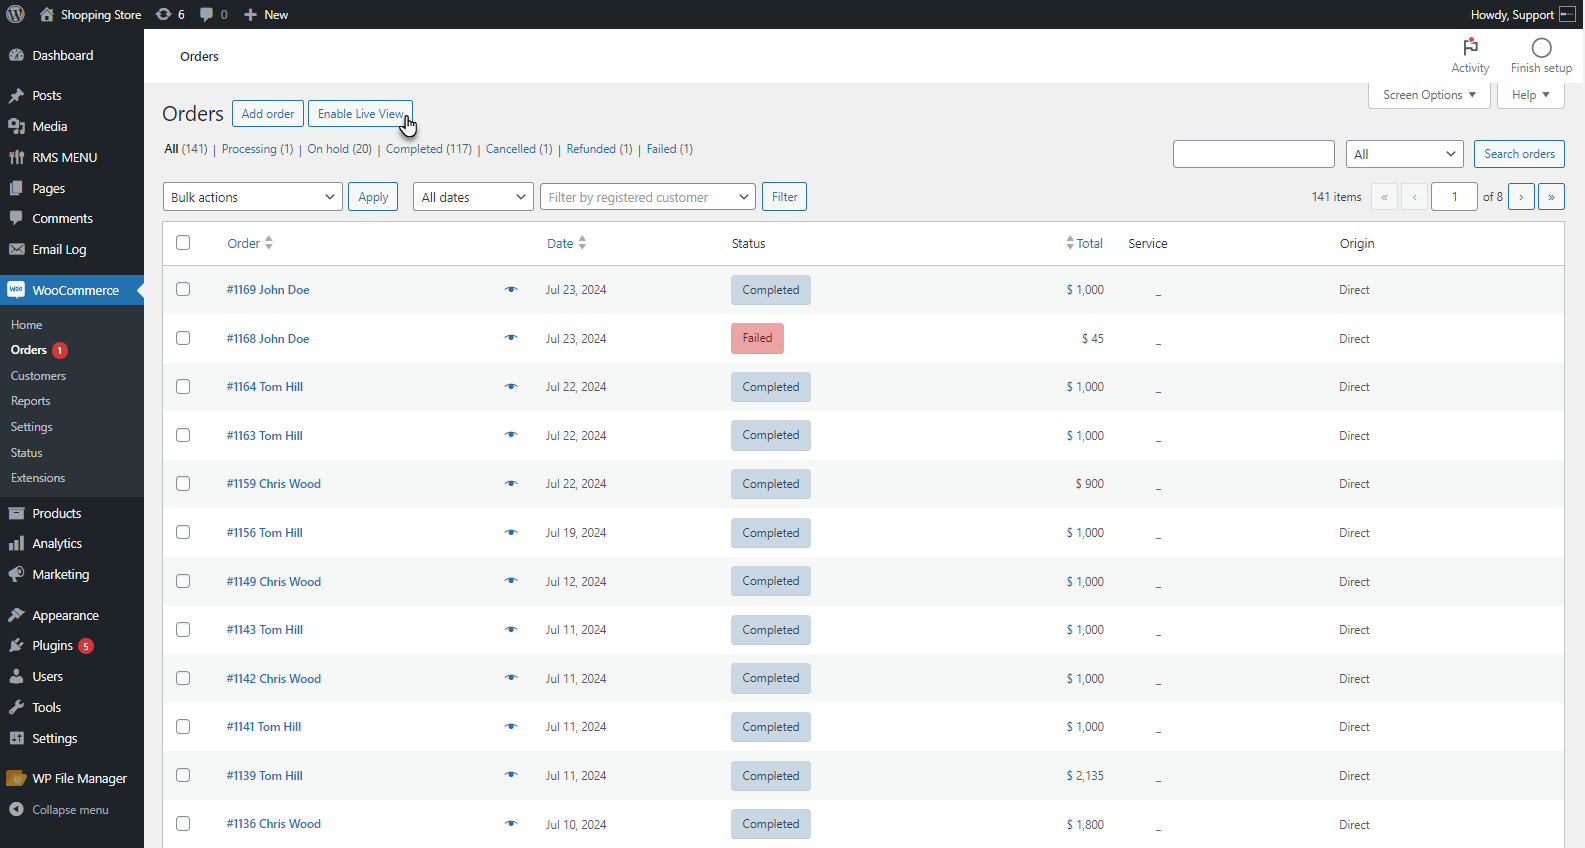
- The Orders List page will appear. Click on the Enable Live View button.
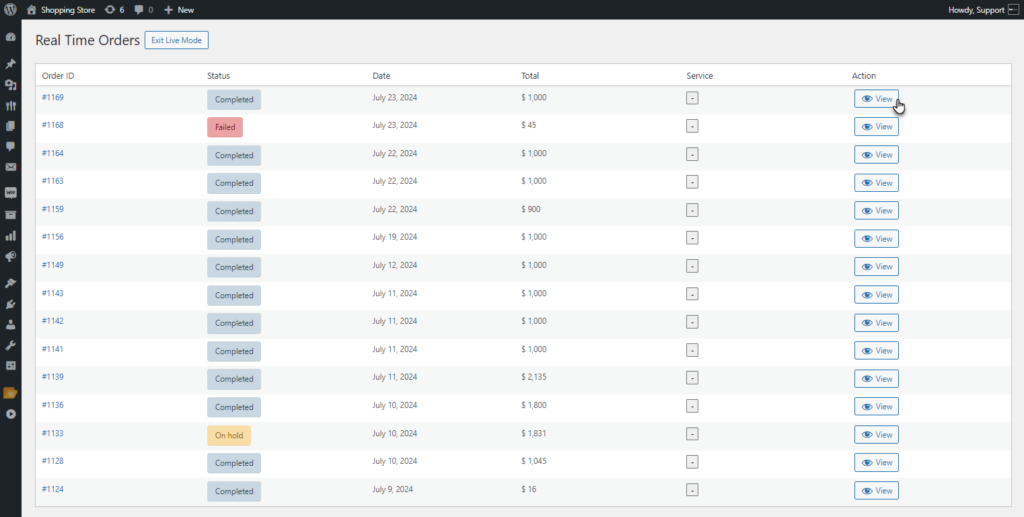
- The Real Time Orders screen will appear. The admin can see the live status of the orders without reloading the page.
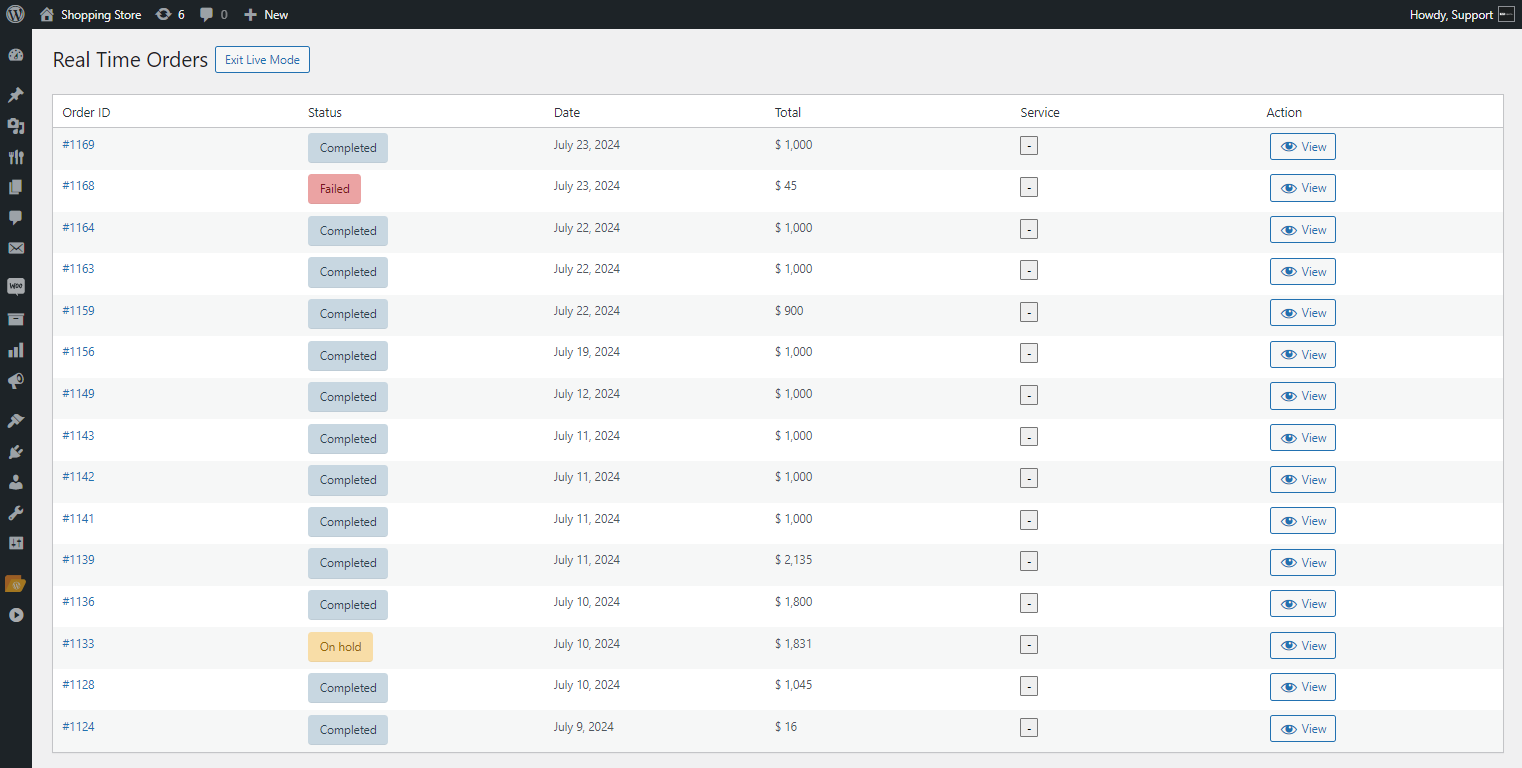
- The admin can see the details of the orders by clicking on the View button in the Action column.
- The order details will appear.
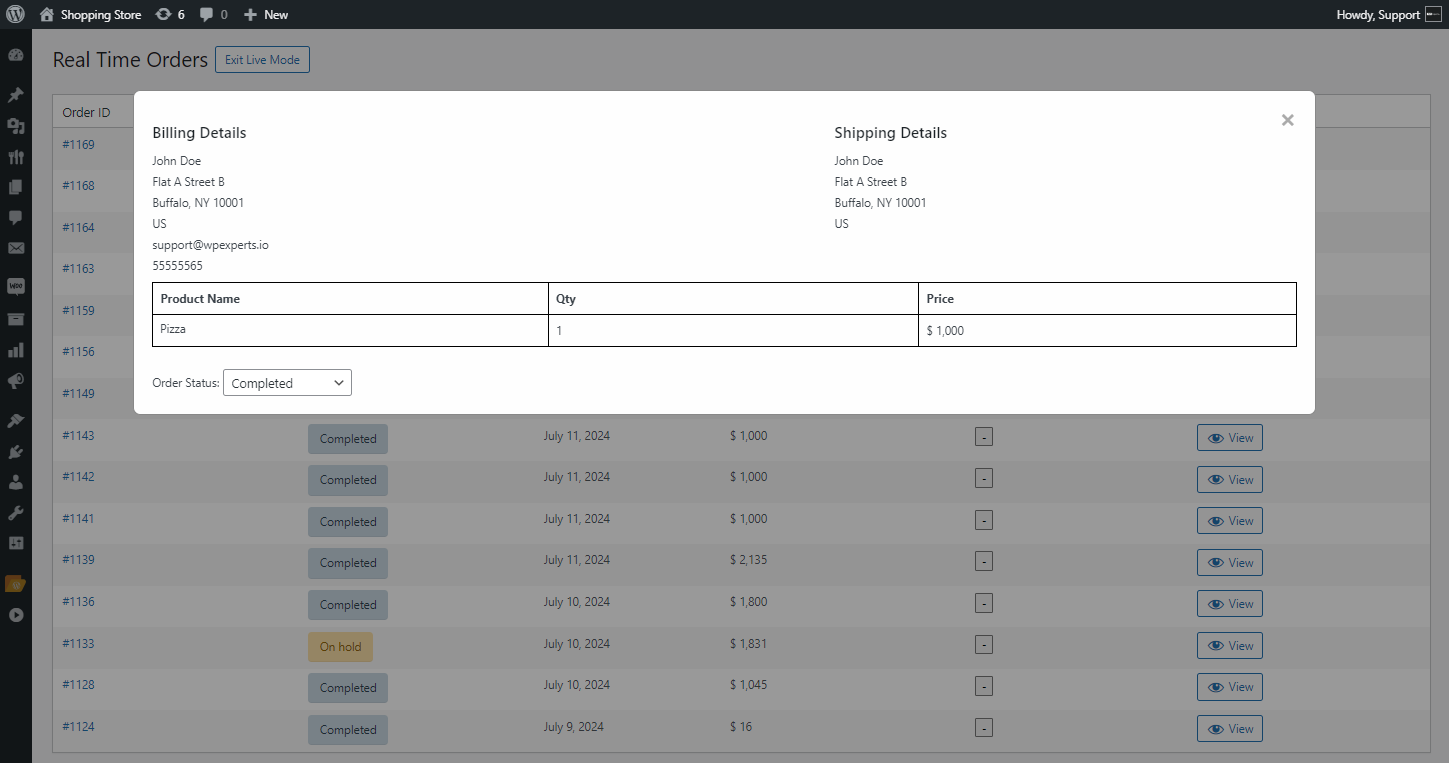
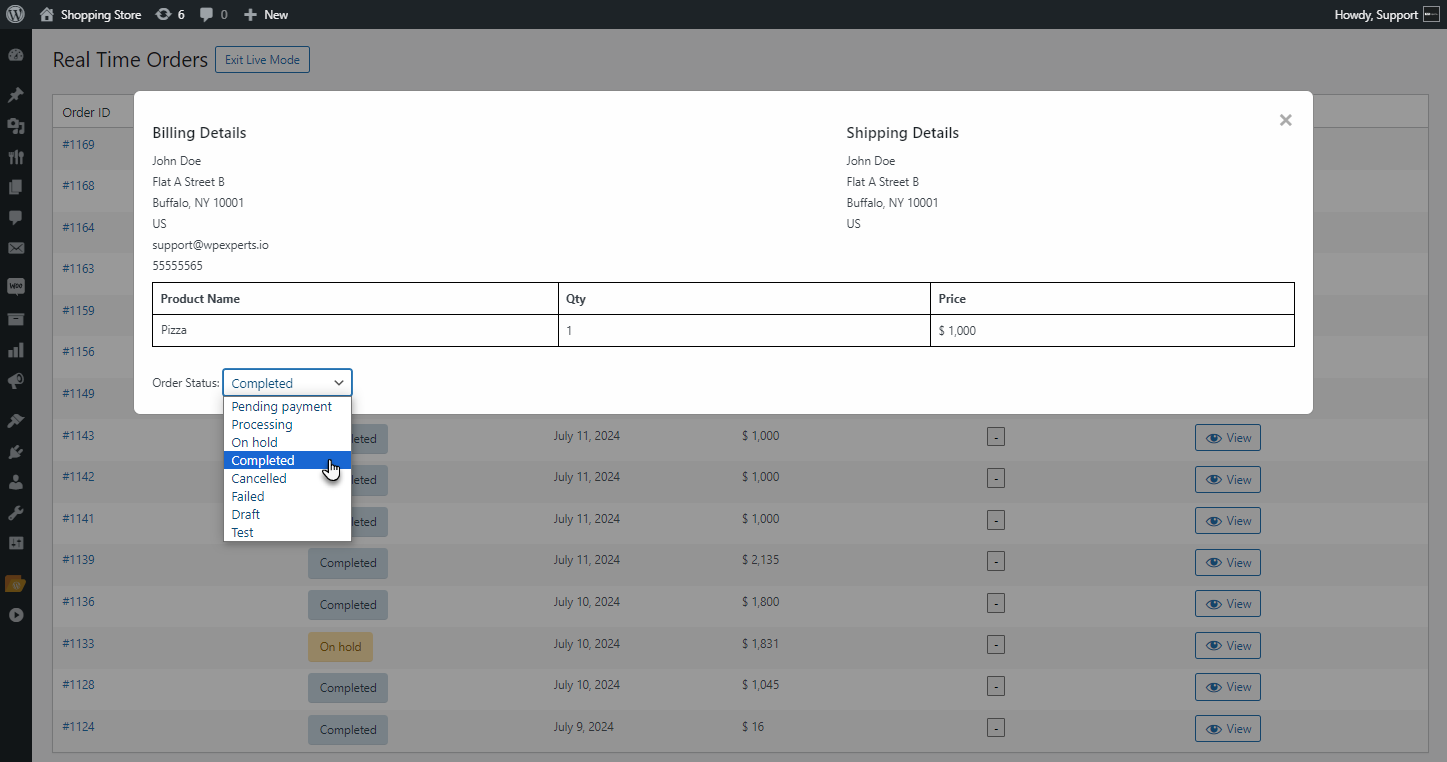
- The admin can check and change the status of the order by using the Order Status drop-down list.
- The admin can click the Exit Live Mode button to leave the real-time order status view.

Custom Order Status
↑ Back to top- This feature enables the admin to set the Custom Order Status.
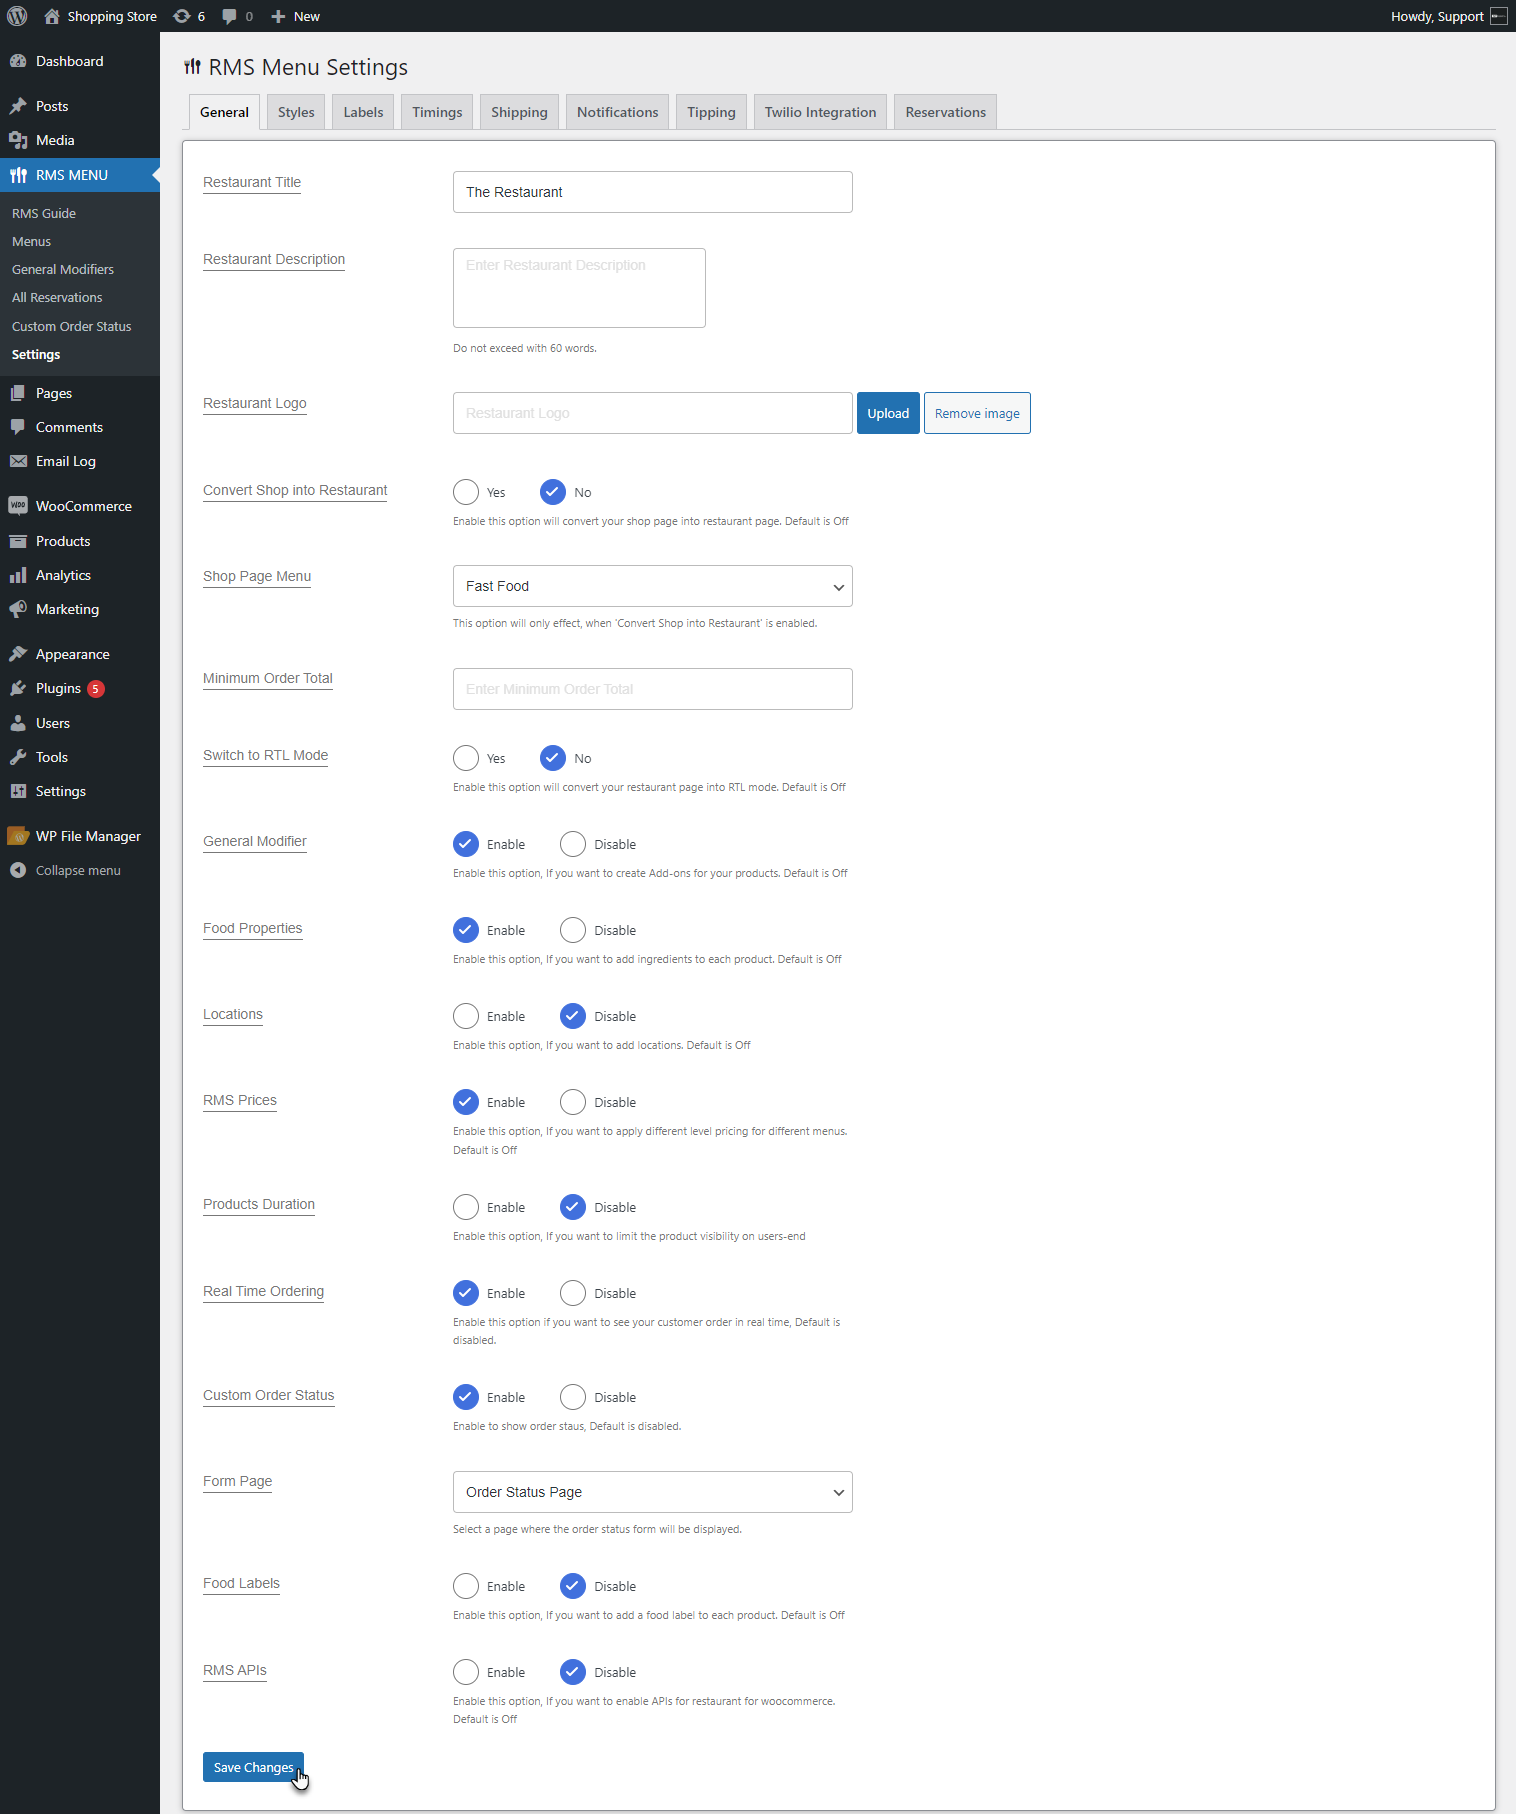
- Go to the WordPress Admin Dashboard > RMS MENU > Settings > General.
- Navigate and enable the Custom Order Status option.
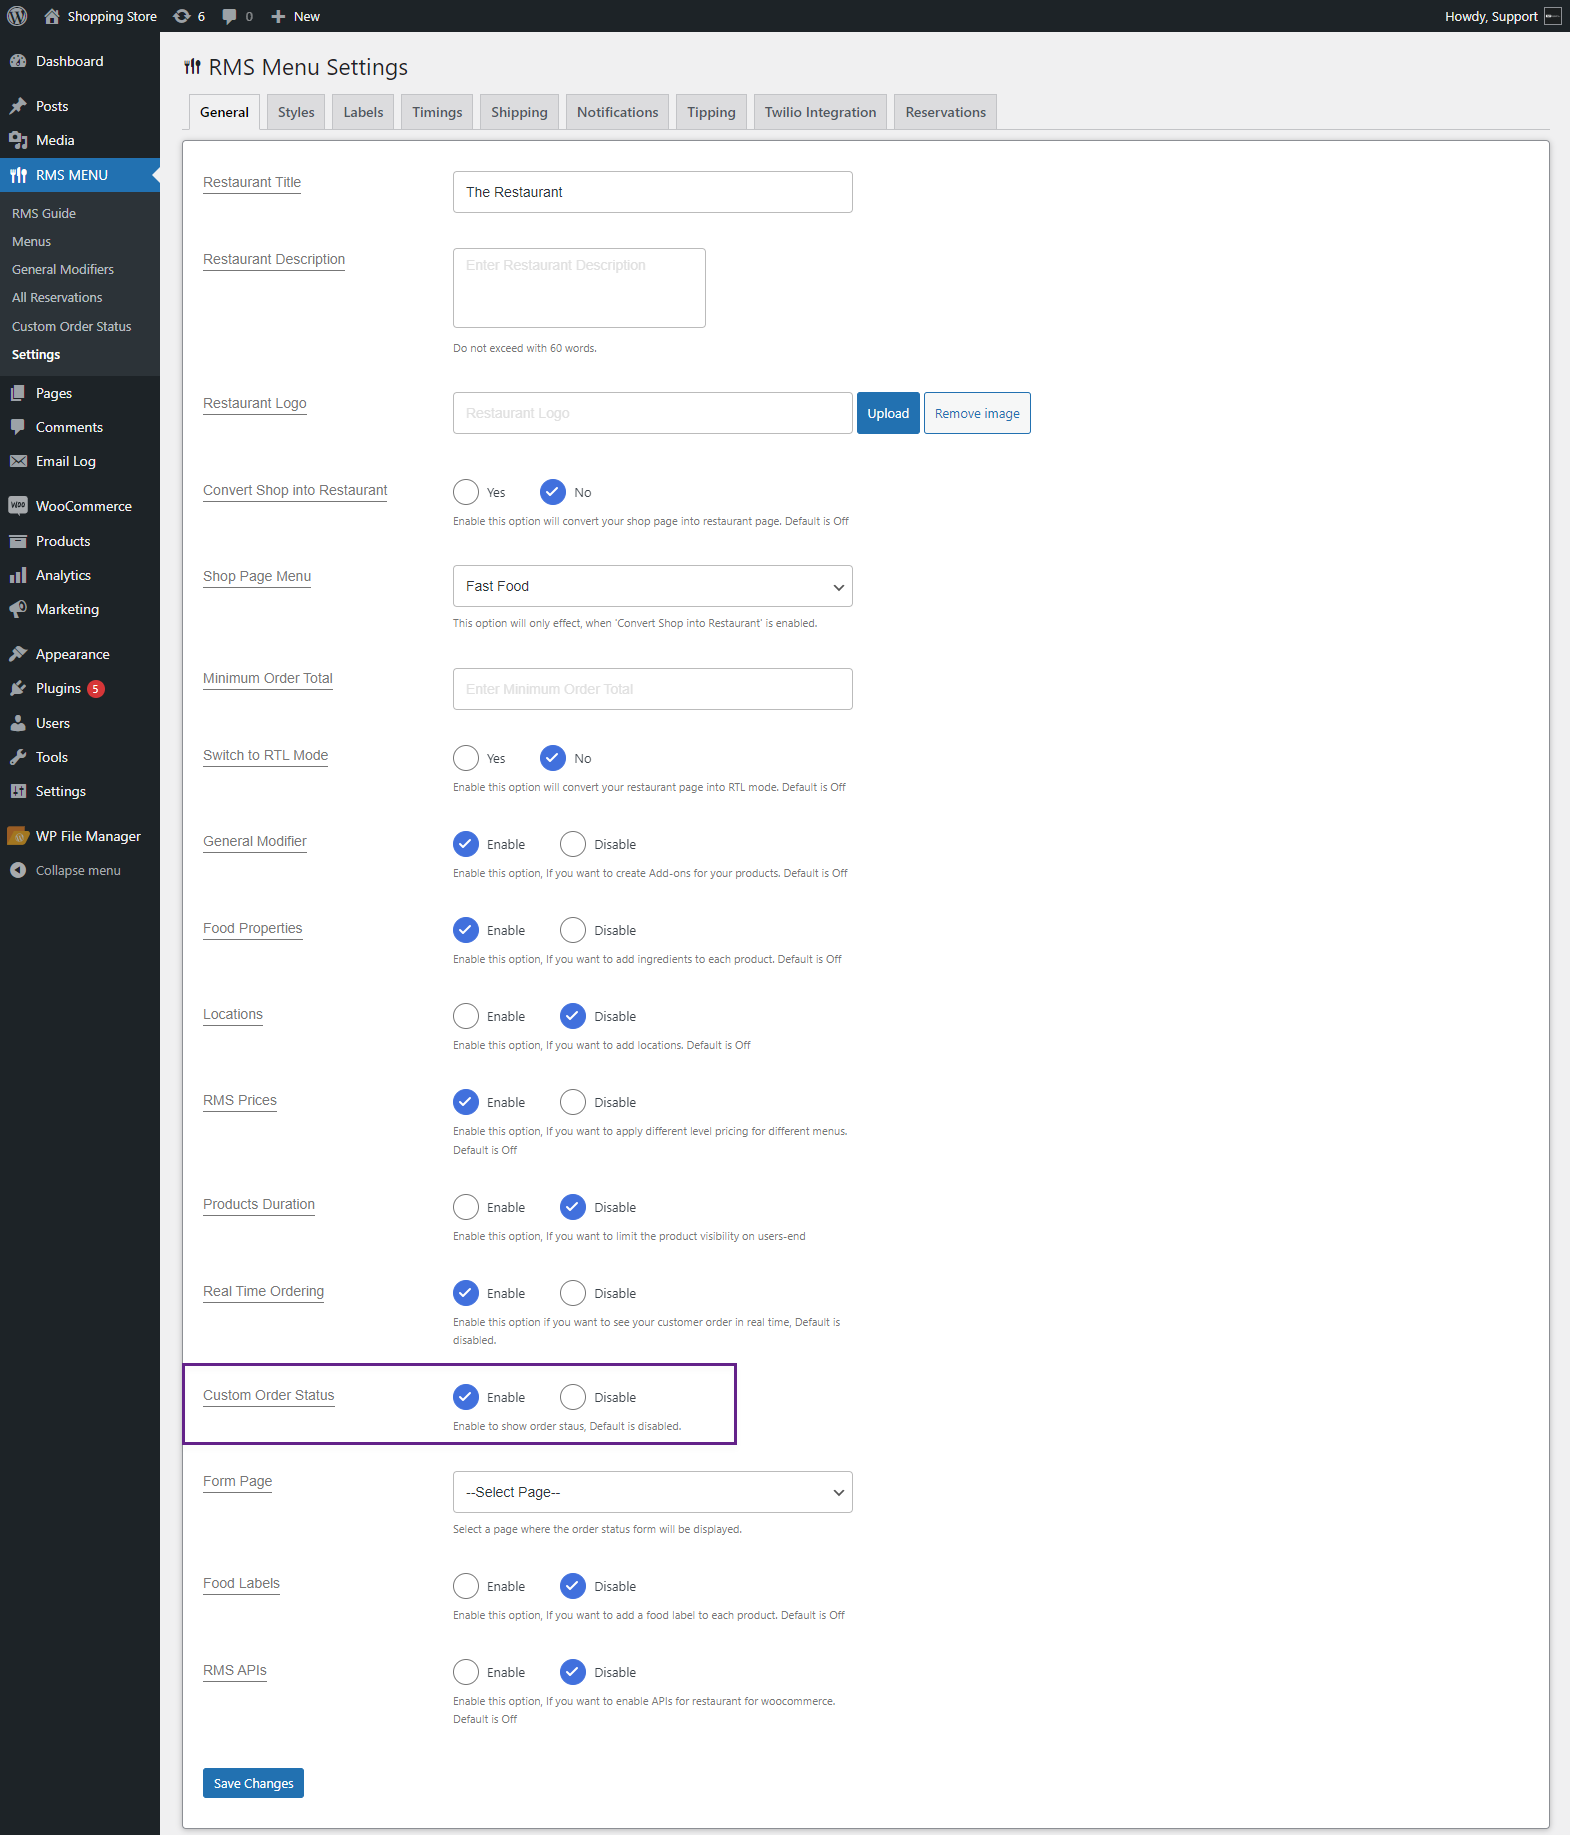
- The admin can select the page where the order status form will be displayed from the Form Page drop-down list.
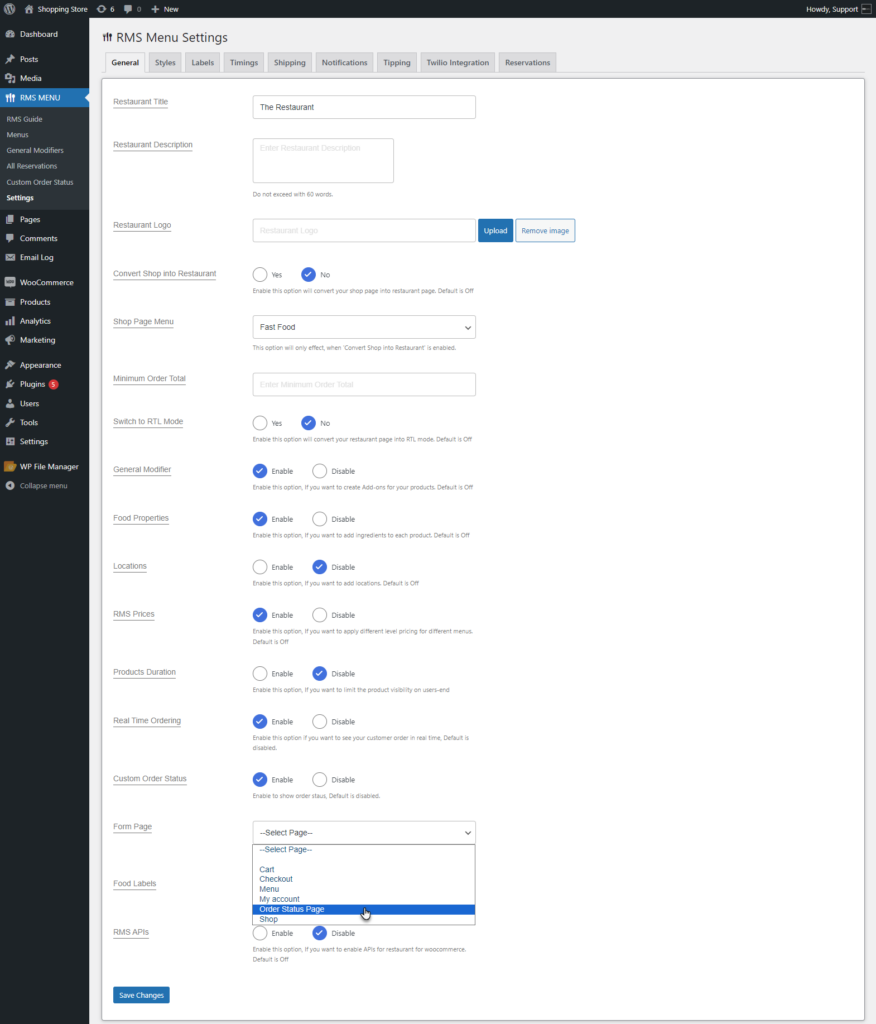
NOTE: When the Custom Order Status option is enabled, the admin can also display the order status on any page by adding the RMS Order Status shortcode block.
- Click on Save Changes to update the settings.
Creating New Custom Order Status
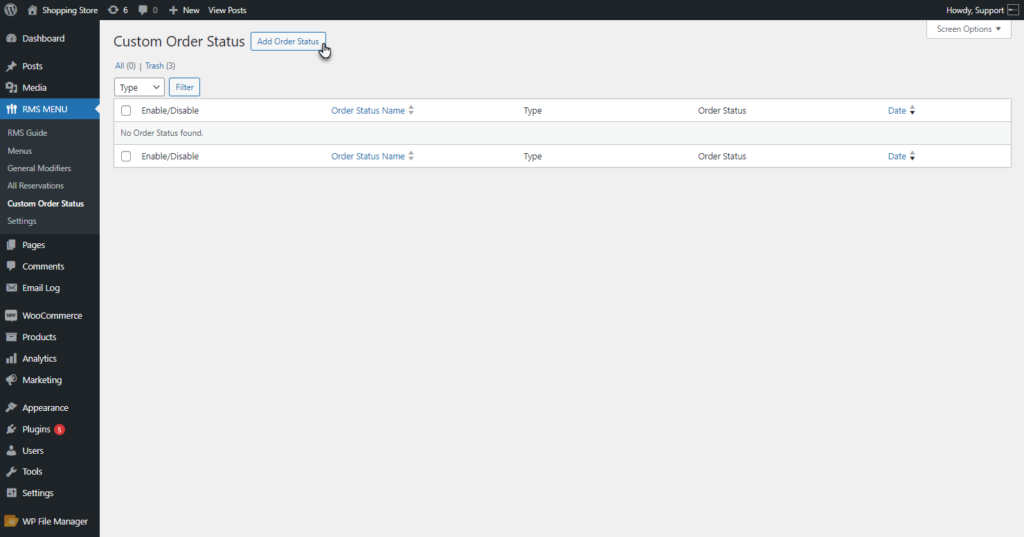
- Once this feature is enabled, Go to the WordPress Admin Dashboard > RMS MENU > Custom Order Status.
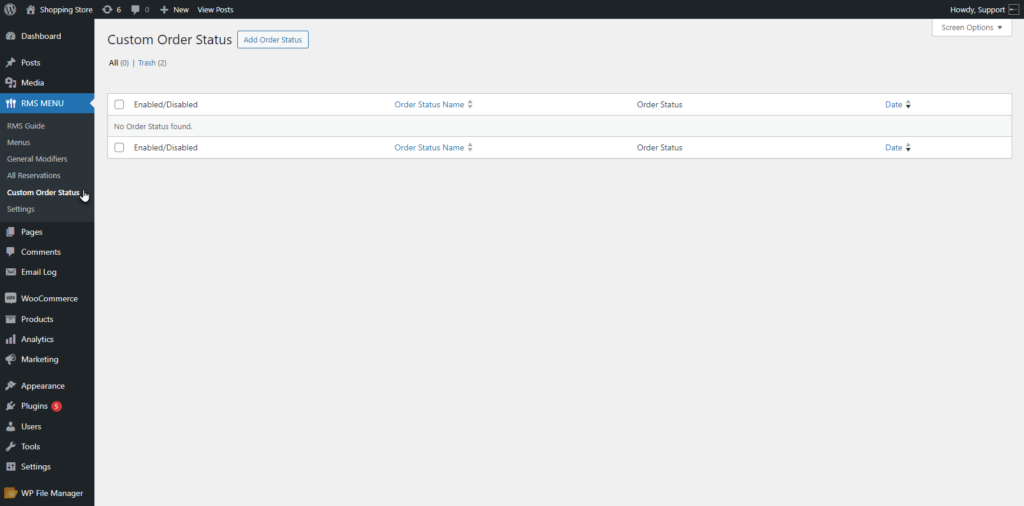
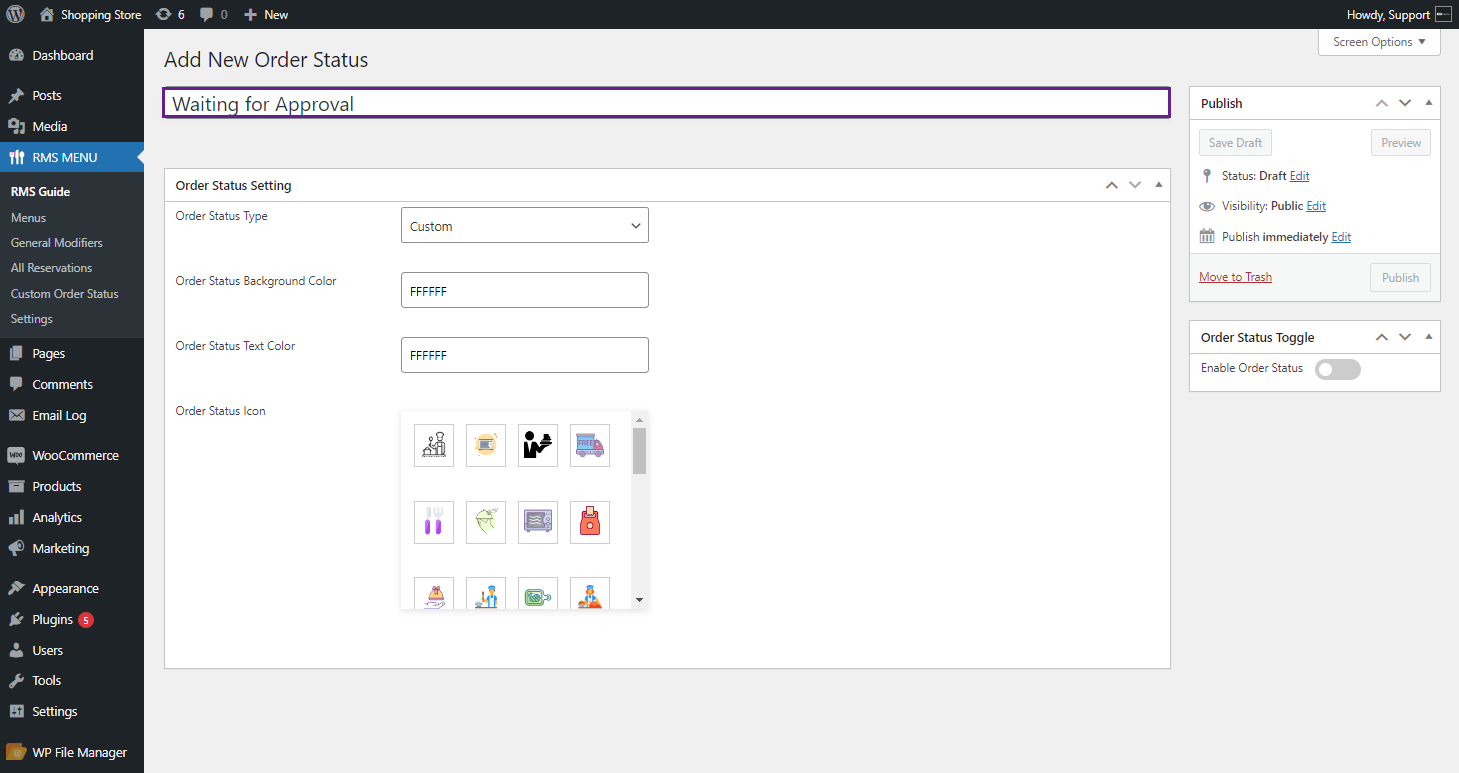
- The Custom Order Status list page will appear. Click on Add Order Status.
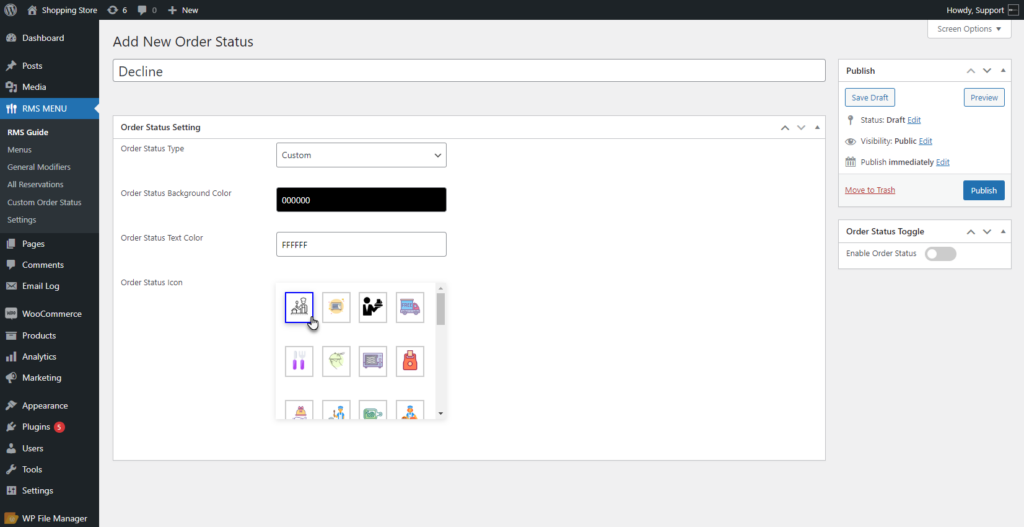
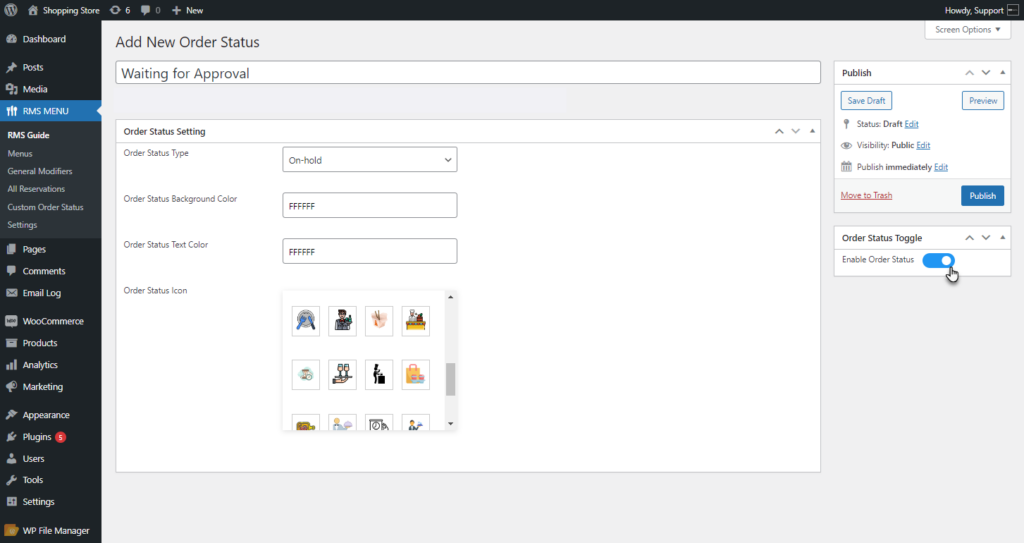
- The admin can set the Title of the Order Status in the Add Title field.
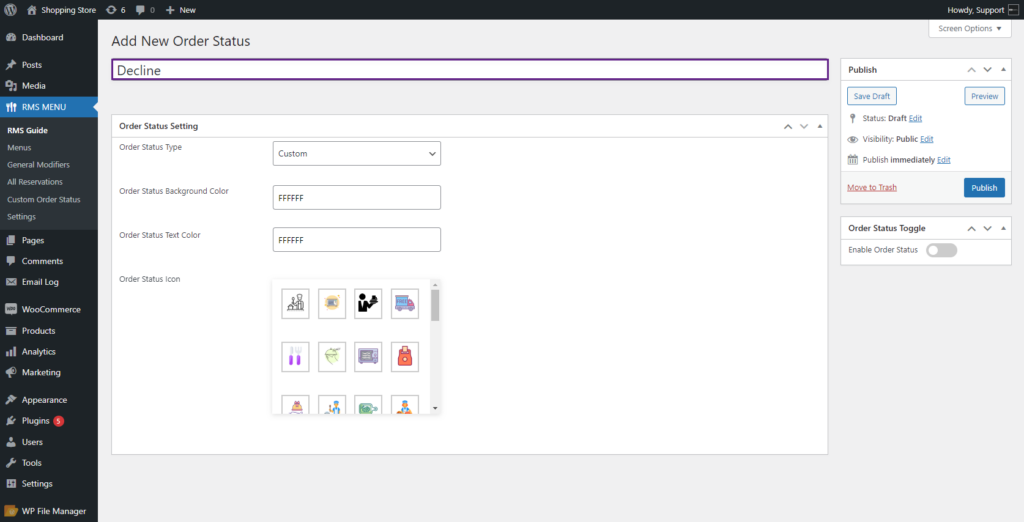
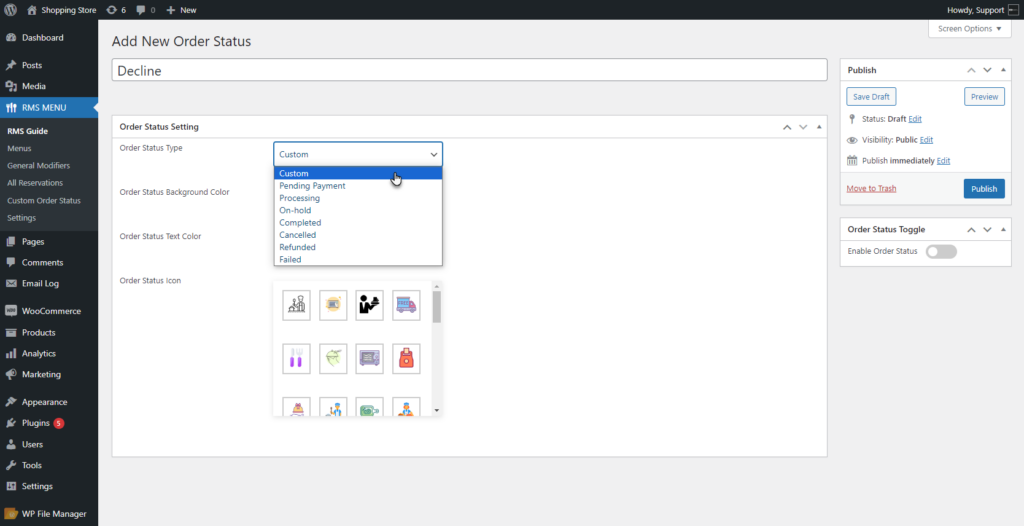
- The admin can select the Order Status Type from the drop-down list.
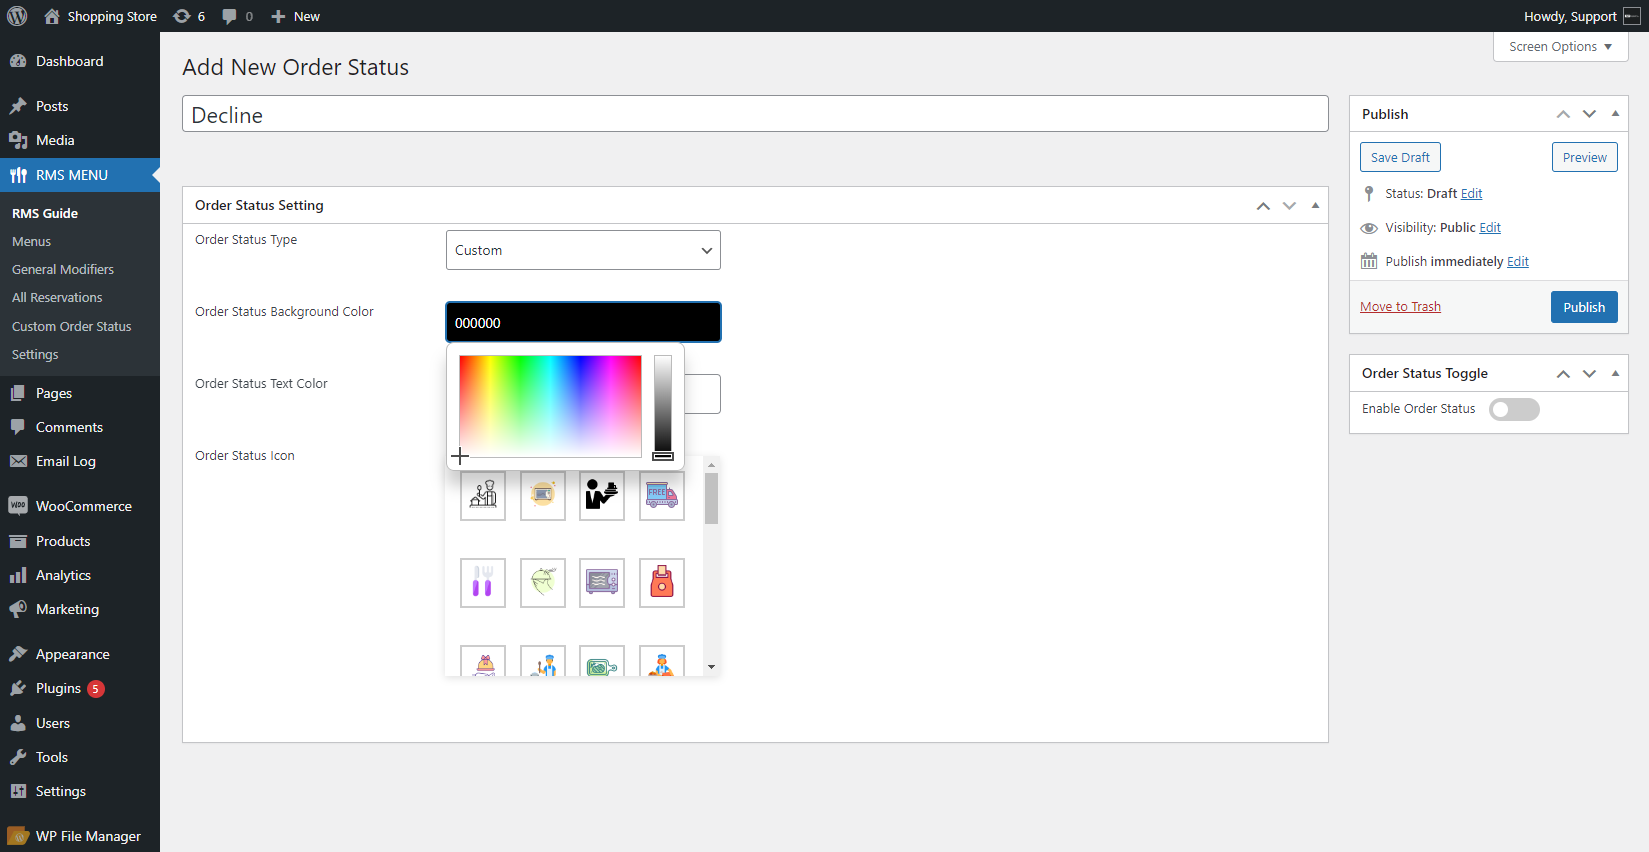
- The admin can change the background color of the order status by using the Order Status Background Color.
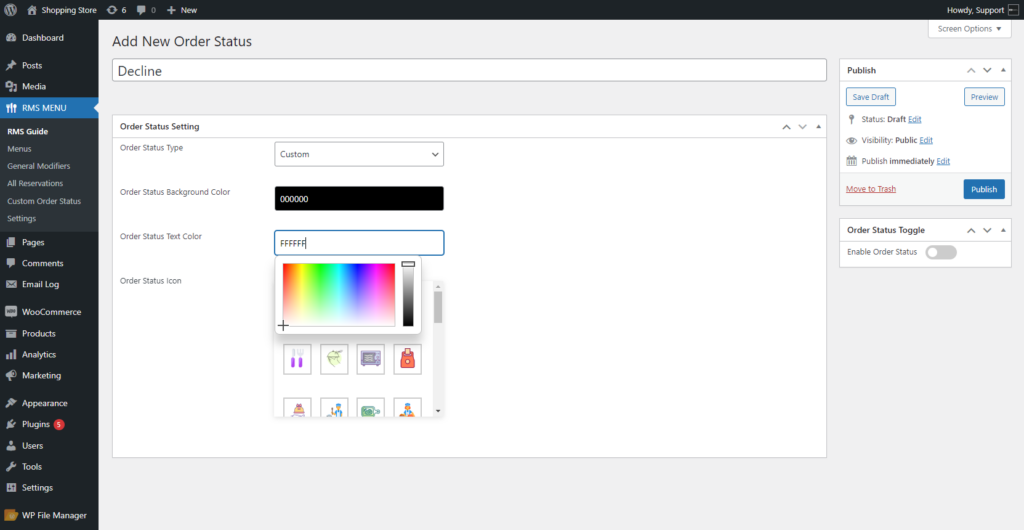
- The admin can change the text color of the order status by using the Order Status Text Color.
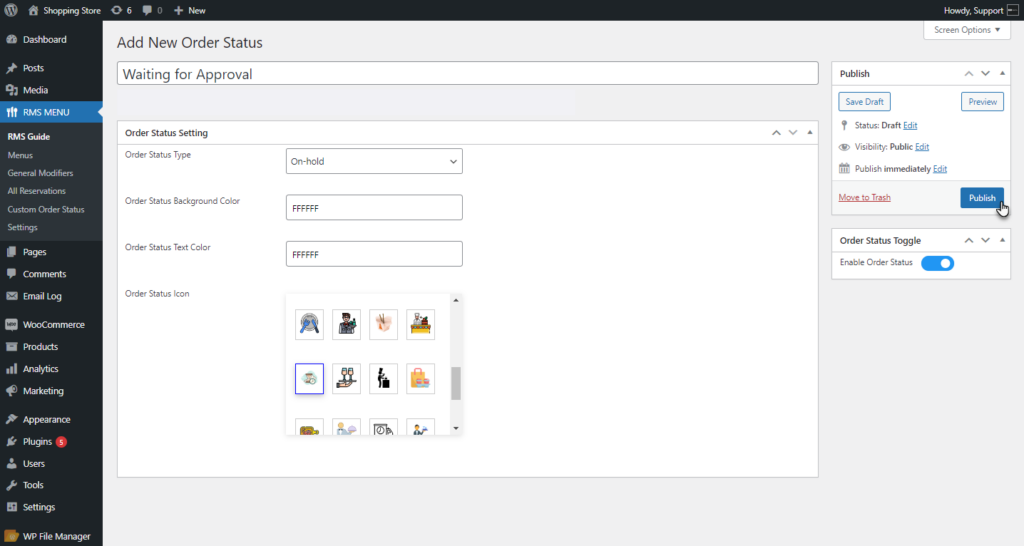
- The admin can set an icon for the Order Status Icon.
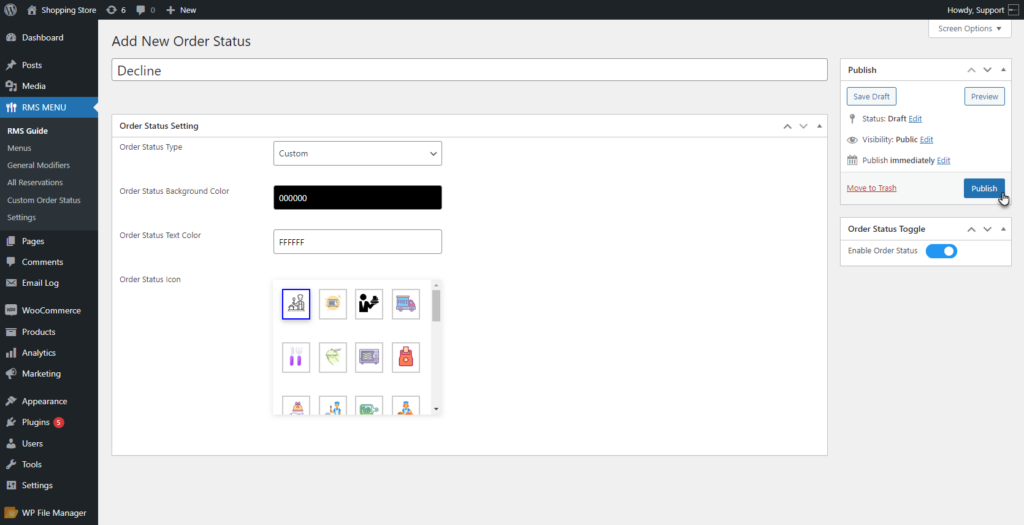
- Enable the Order Status toggle.
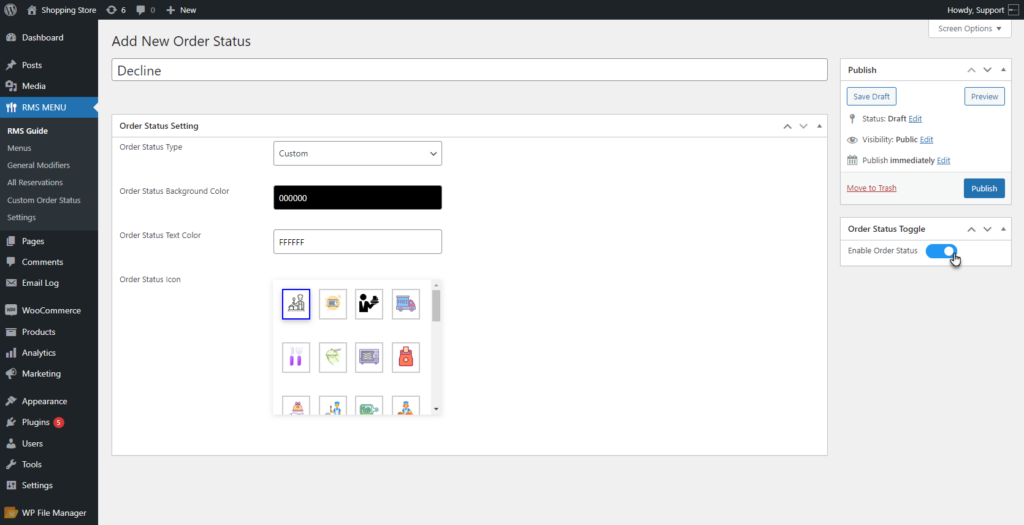
- Click on the Publish button. The Custom Order Status will be published.
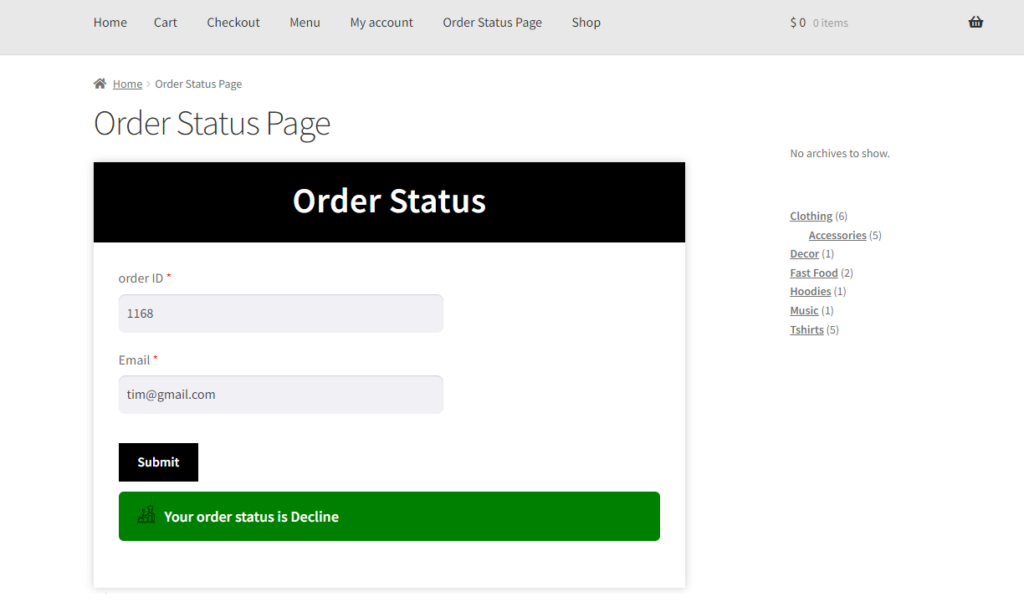
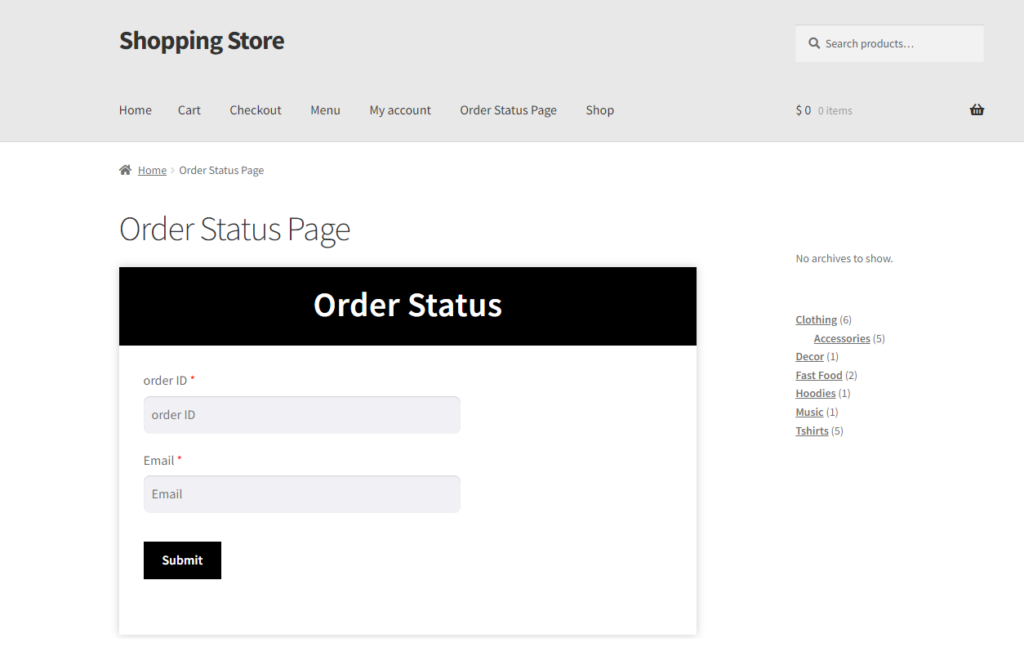
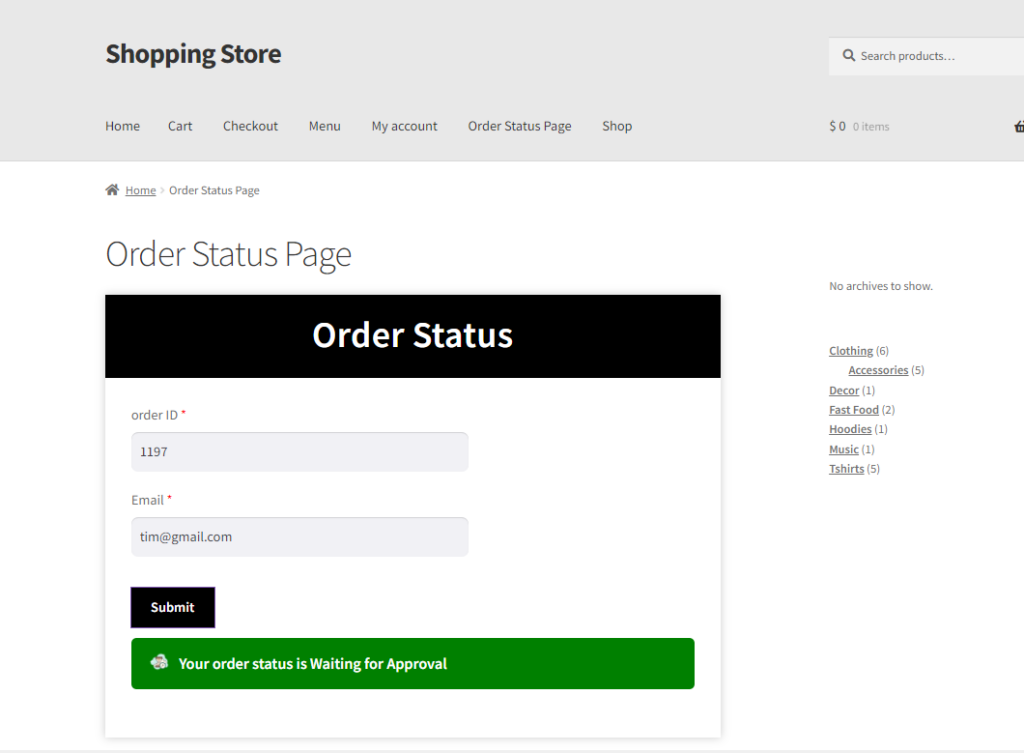
Front End Impact
- Login to your WordPress account.
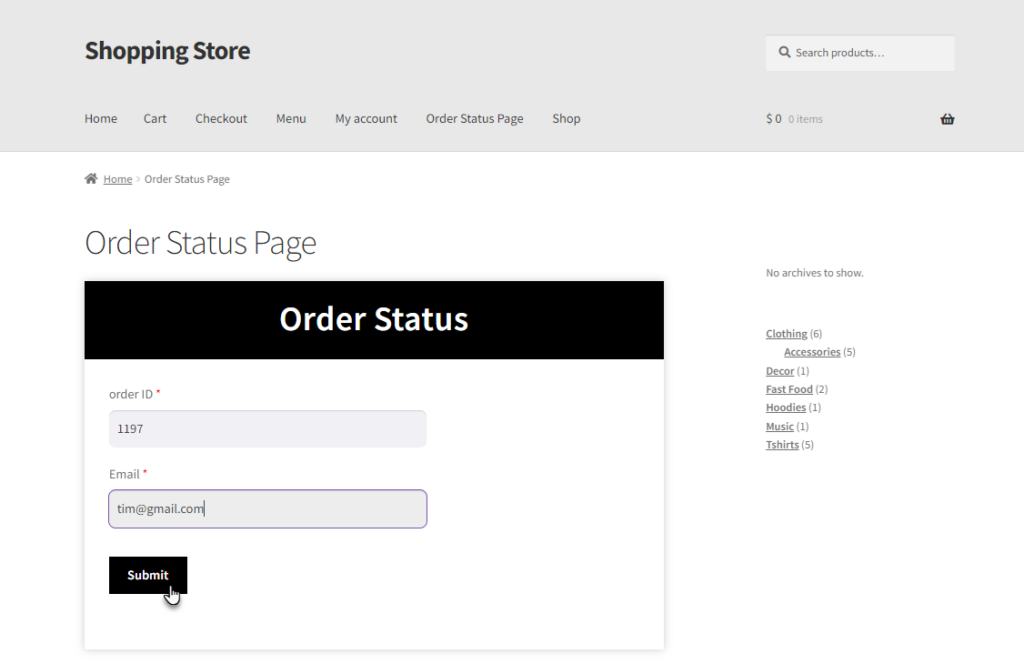
- After placing an order, go to the Order Status page.
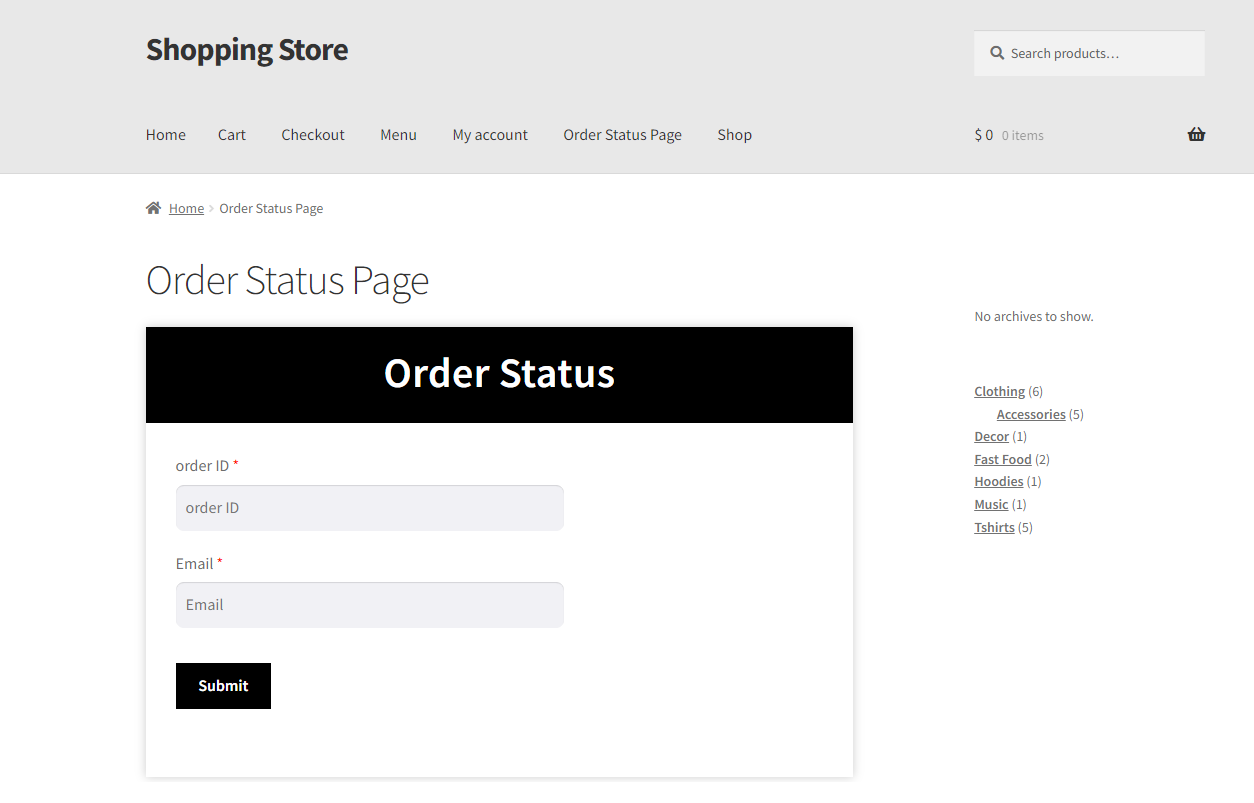
- Enter the Order ID and Email. Click on the submit button.
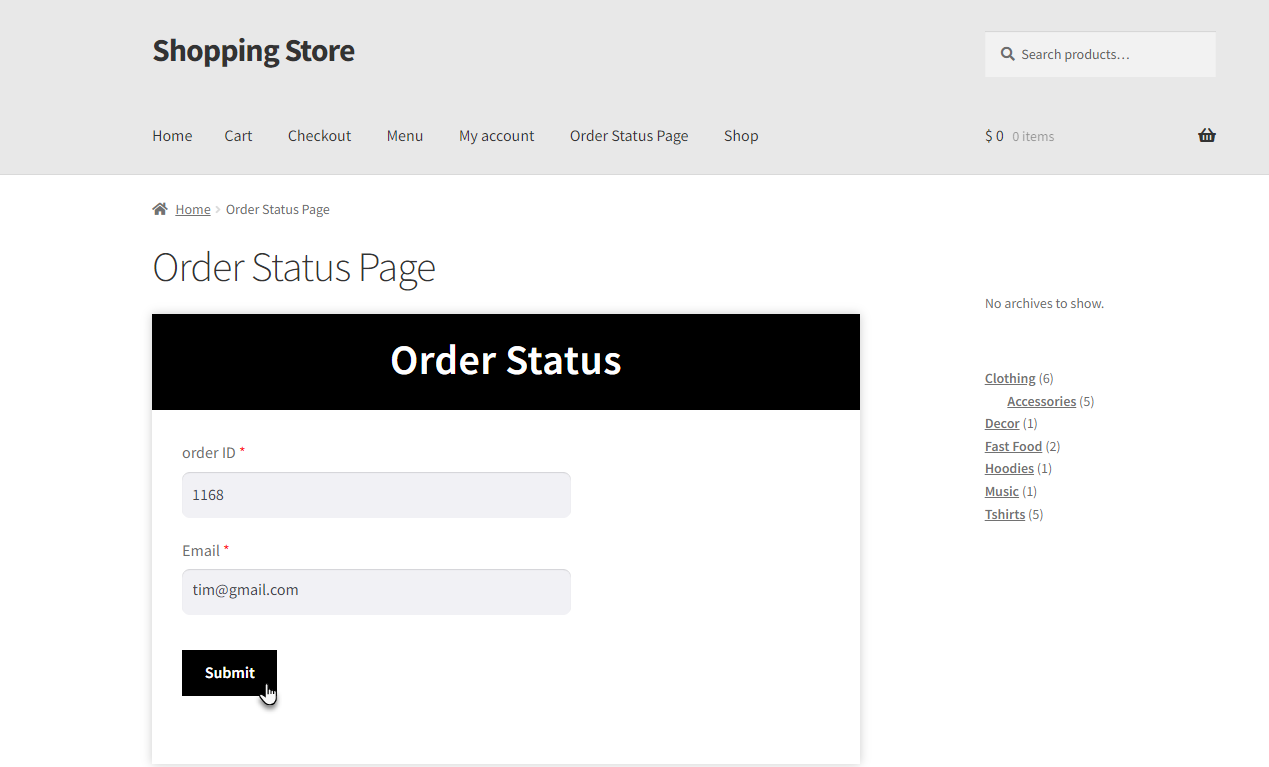
- The Custom Order Status will appear.
Updating Default Order Status to Custom Order Status
- The admin can update the default WooCommerce Order Status to Custom Order Status.
- The admin can then set the Name of the Order Status.
- Select any default Order Status from the drop-down.
- Choose an icon for the Order Status Icon.

- Enable the Order Status.
- Click on the Publish button to save the Order Status.
Front End Impact
- Login to your WordPress account.
- After placing an order, go to the Order Status page.
- Enter the Order ID and Email. Click on the Submit button.
- The Custom Order Status will appear.
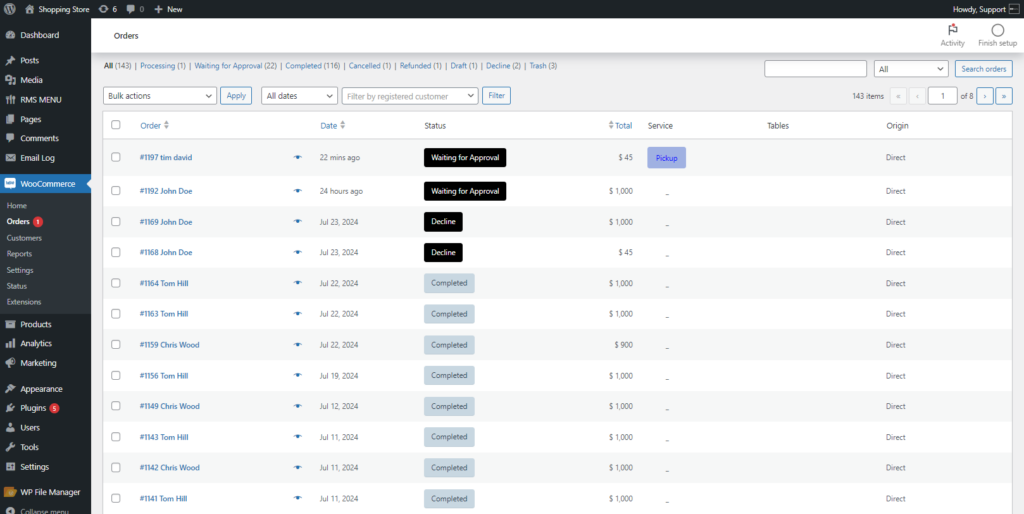
- All the created Custom Status orders will appear in WordPress Admin Dashboard > RMS MENU > Custom Order Status.
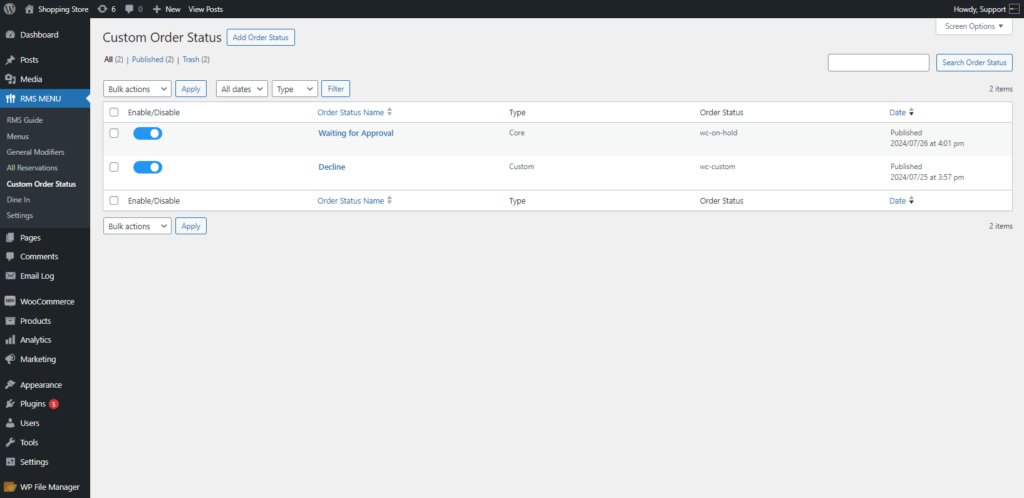
- The Custom Order Status will also be visible for the admin at WordPress Admin Dashboard > WooCommerce > Orders.

Food Labels
↑ Back to top- Admin can now add food labels to each product in menus.
- Navigate to the Dashboard => RMS MENU => Settings => General.
- After the Food Label option is Enabled, the Food Label option will appear on the left-sidebar in RMS MENU.
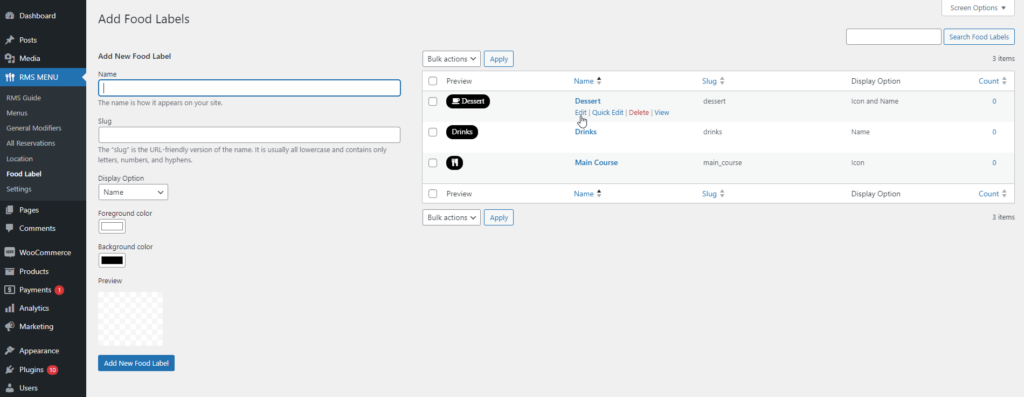
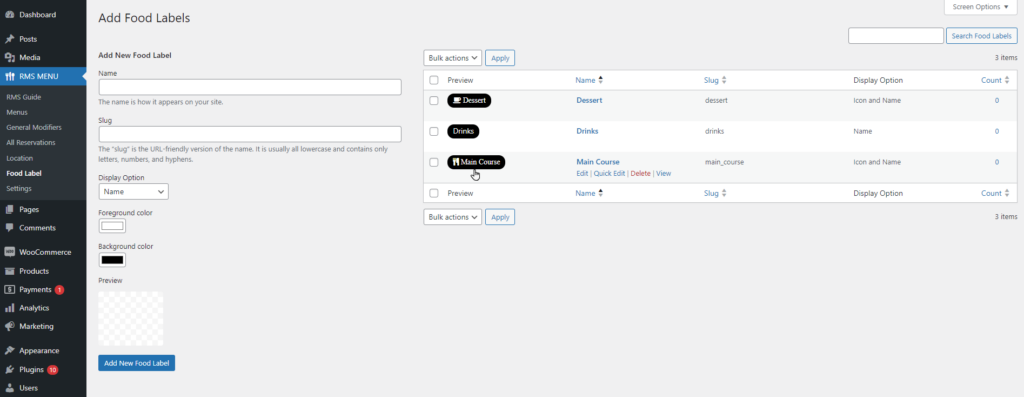
- Navigate to the Dashboard => RMS MENU => Food Label.
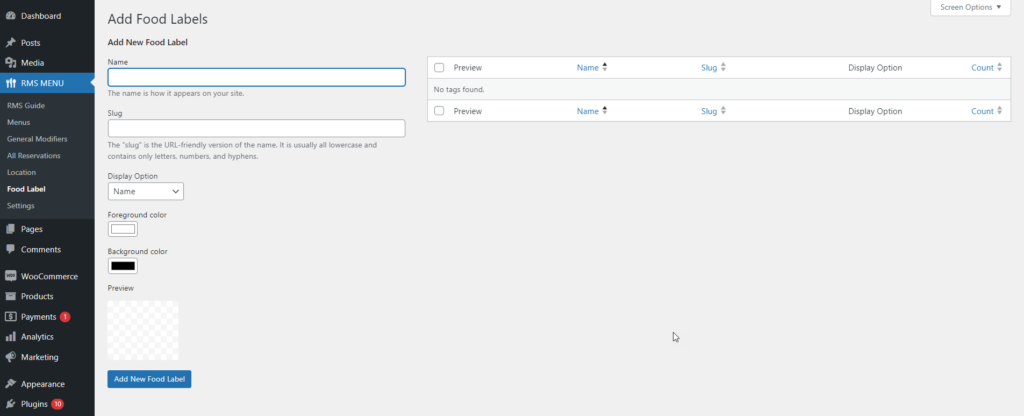
- Admin can Add a New Food Label from the left side; after clicking on a Food Label, it will appear in the table on the right side of the window.
- Navigate to the Add New Food Label => Name.
- Enter the label in the Name text box.
- Enter the Slug in the text box below slug.
- Click on the drop-down menu of the Display Option.
- Select the option given in the dropdown menu of Display Option.
Name
- Only the name will appear in the preview when the admin selects Name from the Display Options dropdown.
Icon
- When the admin selects Icon from Display Option dropdown, then in preview, only the icon will appear.
Icon and Name
- When the admin selects Name and Icon from the Display Options dropdown, both the icon and label will appear in preview.
- Navigate and click on the Foreground color, and select the color with the help of the tooltip.
- Navigate, click on the Background color, and select the color with the help of the tooltip.
- Click on the Add New Food Label button.
- Admin can Edit any Food Label in the table.
- Hover the Name in the Food Label table.
- Click on the Edit button.
- It will open the Edit Food Label tab, where admin can edit.
- Click on the Update button.
- Whatever the changes made by the admin will appear in the Food Label table.
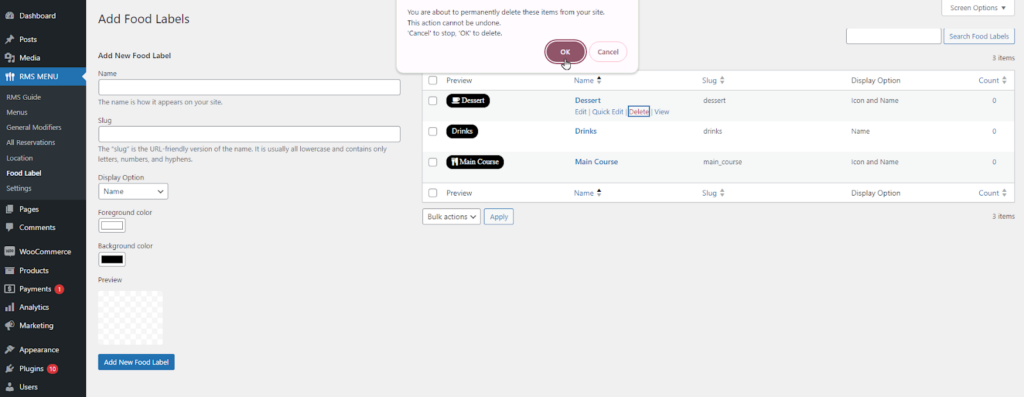
- Admin can delete the individual Food Label from the Food Label table.
- Hover on the Name in the Food Label table.
- Click on the Delete button.

- An alert box will appear. Click on Okay button to delete it completely.
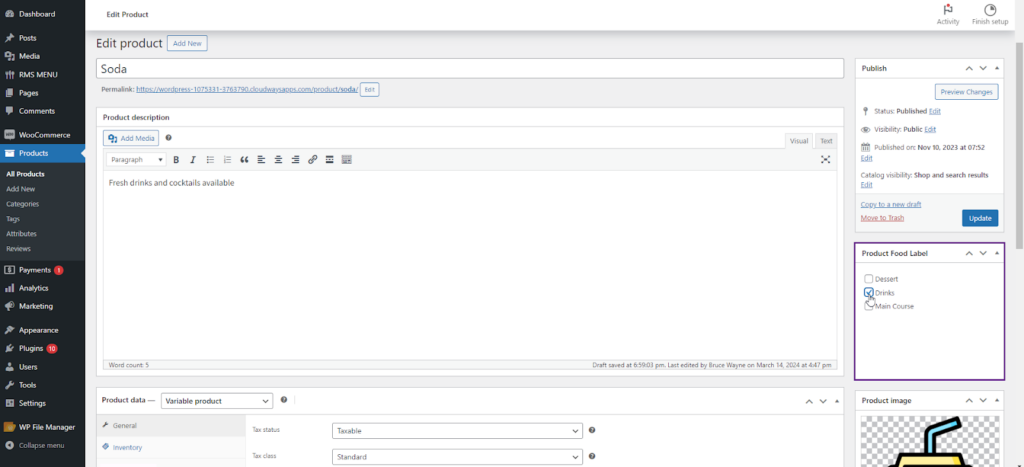
- To link a Food Label with a product, navigate to the Dashboard => RMS MENU => Products.
- Click on the Add New or Edit existing Product.
- Navigate to the Food Label section on the right-hand side.
- Select the Food Label Admin wants to link the product.
- Click on the Update button.
- Navigate to the Food Labels in the General tab.
- Enable the Food Labels option.

Label Display
- After the admin enables the Food Labels option, a Label Display option will appear, from which the admin can set the placement of labels on the front end.
- Navigate to the Label Display.
- Select the placement of the label option from the drop-down menu.
- Click on Save Changes.
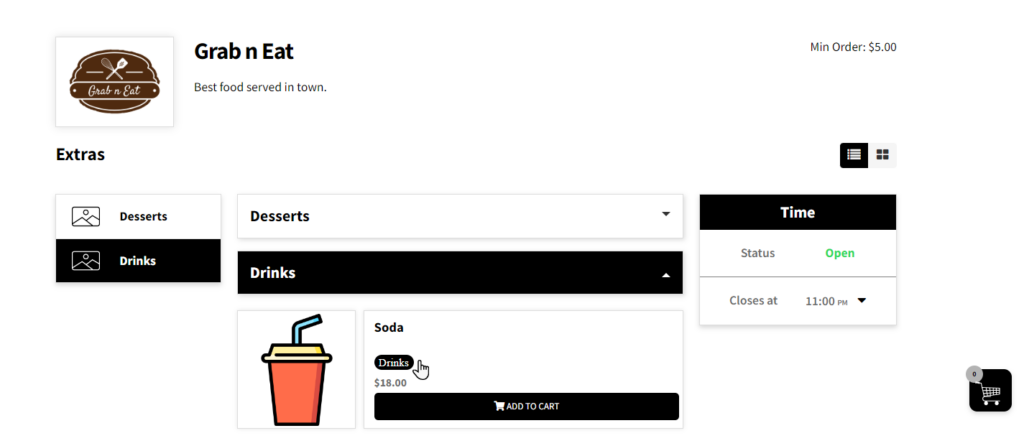
Over The Image
- Navigate to the Label Display.
- Select Over The Image from the drop-down menu.

Front-end Screenshot

Before Title
- Navigate to the Label Display.
- Select Before Title from the drop-down menu.
Front-end Screenshot

Before Price
- Navigate to the Label Display.
- Select Before Price from the drop-down menu.

Front-end Screenshot
Style settings
↑ Back to topTheme color
↑ Back to topSelect and customize a theme color
- Click on the Theme Color input field.
- Insert the color code or select the color using a color grid.
- Click on the Save Changes button.
Front-end Screenshots
Before

After
General Text Color
↑ Back to topSelect and customize general text color
- Click on the text color input field.
- Insert the color code or select the color using a color grid.
- Click on the Save Changes button.
Front-end Screenshots
Before
After
Heading Color
↑ Back to topSelect and customize the heading color
- Click on the text color input field.
- Insert the color code or select the color using a color grid.
- Click on the Save Changes button.
Front-end Screenshots
Before

After
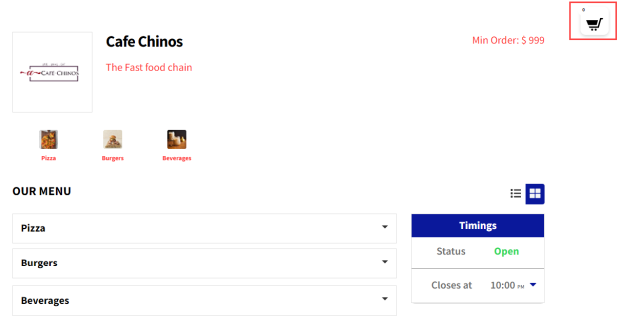
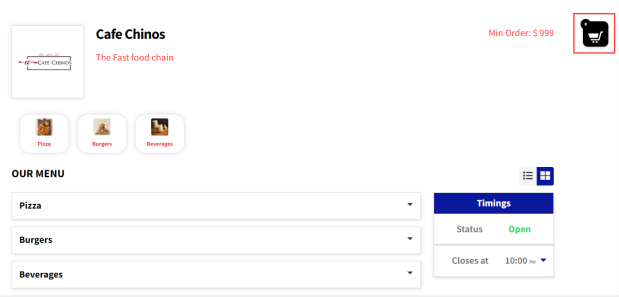
Cart Icon Position
↑ Back to topChange the cart icon position
- Select the desired position from the dropdown under the header CART ICON POSITION.
- Click on the Save Changes button.

Cart Icon Background Color
↑ Back to topSelect and customize the cart icon background color
- Click on the text color input field.
- Insert the color code or select the color using a color grid.
- Click on the Save Changes button.

Front-end Screenshots
Before
After
Sliding Cart Background Color
↑ Back to topSelect and customize the sliding cart background color
- Click on the text color input field.
- Insert the color code or select the color using a color grid.
- Click on the Save Changes button.
Front-end Screenshots
Before
After
Sliding Text Color
↑ Back to topSelect and customize the sliding cart text color
- Click on the text color input field.
- Insert the color code or select the color using a color grid.
- Click on the Save Changes button.
Front-end Screenshots
Before

After
Sliding Checkout Button Color
↑ Back to topSelect and customize the sliding checkout button color
- Click on the text color input field.
- Insert the color code or select the color using a color grid.
- Click on the Save Changes button.
Front-end Screenshots
Before

After

Sliding Checkout Button Text Color
↑ Back to topSelect and customize the sliding checkout button text color
- Click on the text color input field.
- Insert the color code or select the color using a color grid.
- Click on the Save Changes button.
Front-end Screenshots
Before
After
Label settings
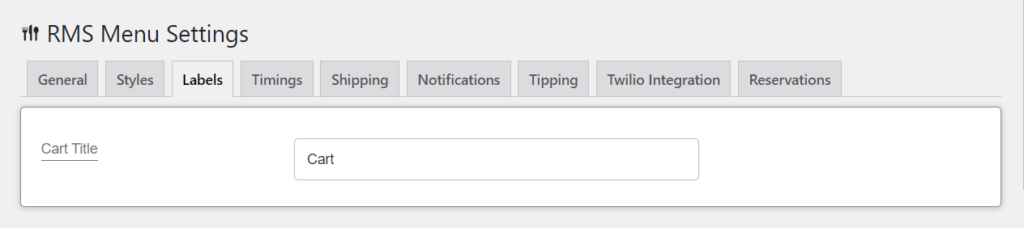
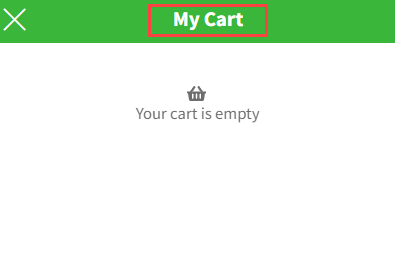
↑ Back to topCart Title
↑ Back to topDefine cart widget title
- Go to the label settings tab.
- Enter the Cart widget title in the input field.
- Click on the Save Changes button.
Front-end Screenshot
Checkout Button Text
↑ Back to topDefine checkout button text
- Enter the Checkout button text in the input field.
- Click on the Save Changes button.

Front-end Screenshot

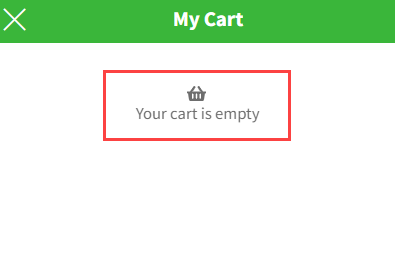
No Item Text
↑ Back to topDefine no item in the cart text
- Enter the No Item text in the input field.
- Click on the Save Changes button.

Front-end Screenshot
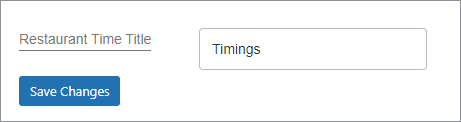
Restaurant Time Title
↑ Back to topDefine restaurant time title
- Enter the restaurant time title in the input field.
- Click on the Save Changes button.
Front-end Screenshot
Timing
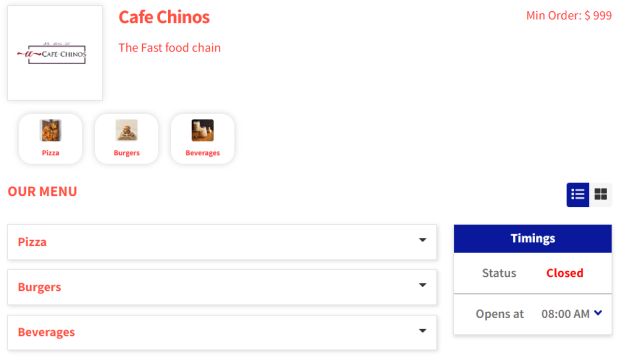
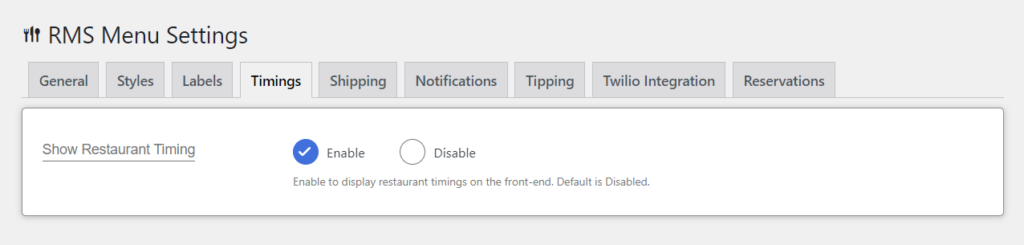
↑ Back to topShow Restaurant Timing
↑ Back to topDisplay restaurant timings
- Choose the Enable the radio button
- Restaurant timings would appear on your website. This option would be disabled by default.
Open/Closing format
↑ Back to topSelect opening/closing time format
- Select the 12-hour time format or 24-hour time format by selecting the appropriate radio button.

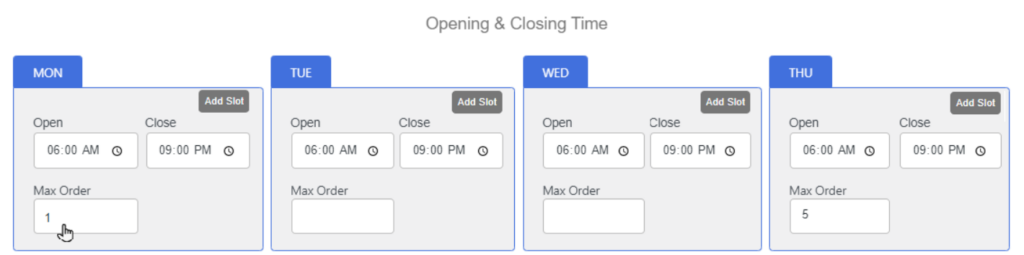
Opening and Closing Time
↑ Back to topDefine opening & closing time slots
The Admin has all days of the week, and the Admin will set the restaurant’s timings accordingly. These are the timings that will appear on the website when the Show Restaurant Timings option is enabled.
- Enter the time in the Open time slot.
- Enter the time in the Close time slot.
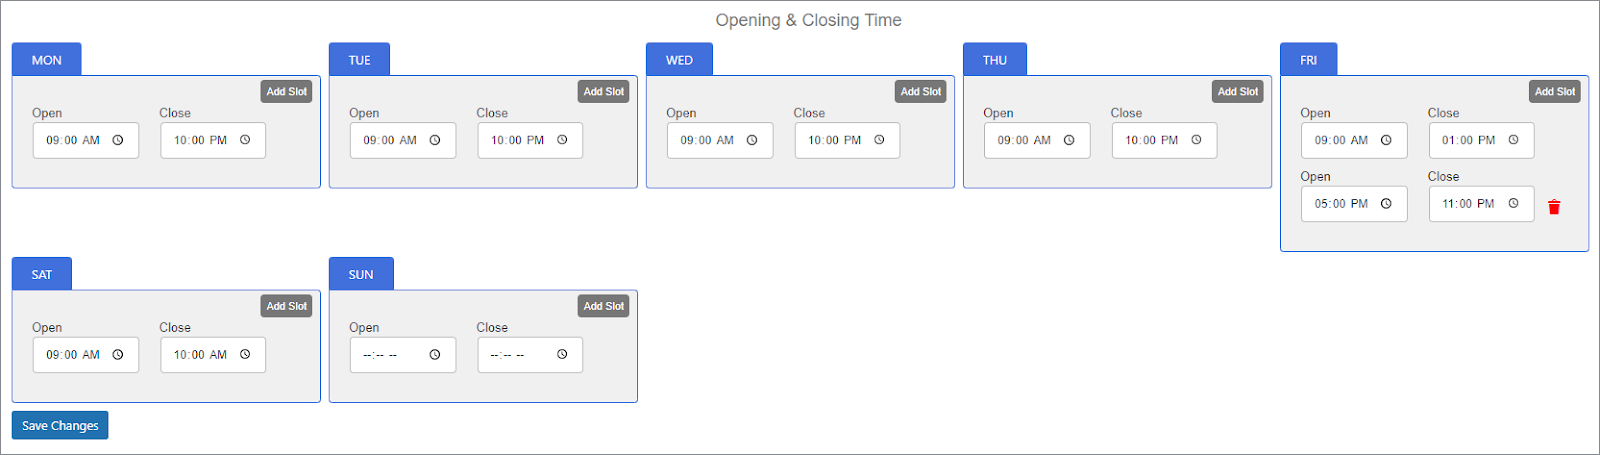
Add Slots
Add time slots for each day
- Add time slots by clicking on the Add Slot button.
- Enter the open and close time in the input field.
- Delete any slot by clicking the Trash button next to each slot.
- Click on the Save Changes button.
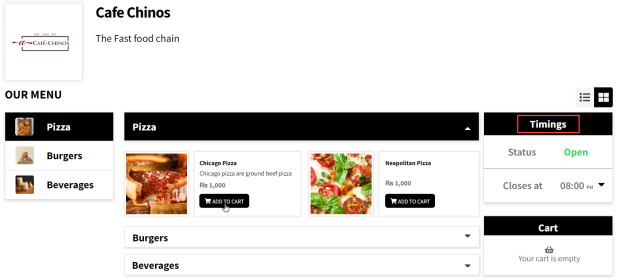
Front-end Screenshots
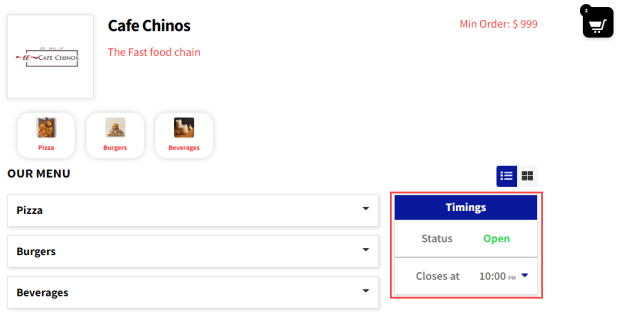
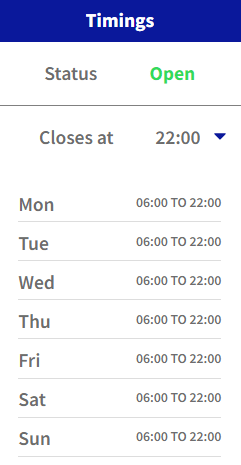
- Click on the angle-down icon to expand the opening and closing time schedule of the restaurant.

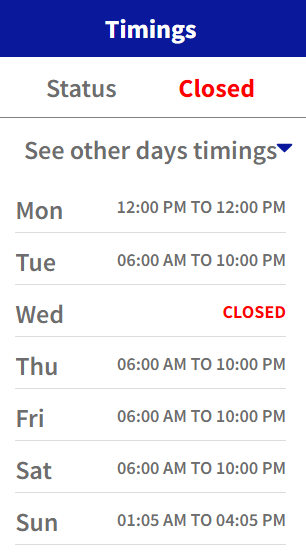
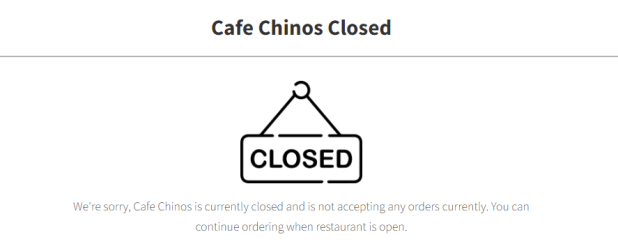
- If the user visits the restaurant on the day it is closed, the status would appear as Closed and the opening and closing timings of the entire week would be displayed when the user will click on the angle-down icon.
- If the Admin would set the Opening/Closing Format to 24 Hours.

- Click on the Save Changes button.
- Now, the website timings will be displayed in a 24-hour format.
- If the user visits the restaurant on the day it is closed, the status will appear as Closed, and the opening and closing times for the entire week will be displayed when the user clicks on the drop-down icon.
- A message is displayed if any user tries to order from the restaurant on the day it is closed.
Maximum Order Message
↑ Back to topAdd maximum order message for a time slot
The Admin can set a maximum number of orders per time slot.
- To set up the Max Orders Option, Navigate to RMS Menu → Settings → Timings.
- In the right pane, a new window will open labeled RMS Menu Settings.
- Select the Timings section.
- Add the desired Max Order Message in the text box.

Note: A message about the maximum order reached will be displayed if this field is left blank by default.
- In the Timings pane, under the Opening & Closing Time section, enter the desired Max Order limit.
Note: If the orders exceed the maximum limit for that time slot, a popup message will display stating that the restaurant is not taking any more orders on the front end.
- Now click the Save Button.
Front-end Screenshot
NOTE: Max Orders Functionality will only work with delivery orders. If the Max Order field is left empty, then there will be no max order limit, and the admin can receive any number of orders.
Holiday Date and Message
↑ Back to topAdd holidays and messages
The admin has the option to mark specific days as holidays. The restaurant will be closed on these days regardless of whether or not restaurant timings are added. Holidays can be for one day or continuous days. The Admin can add multiple holiday dates. The admin can set the holiday message displayed when the user visits the restaurant on a Holiday.
- To set the Holidays option, navigate to RMS Menu → Settings → Timings.
- In the right pane, a new window will open labeled RMS Menu Settings.
- Under the Timings section, navigate to the Add Holiday option.
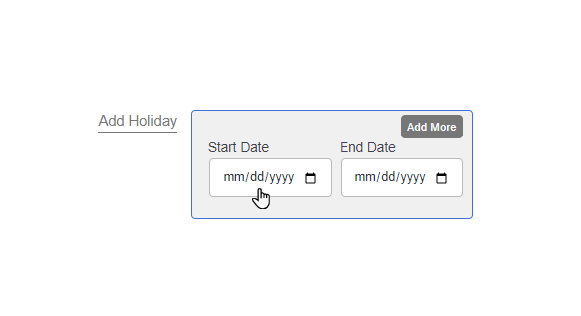
- Admin can now add a holiday for a single or a series of days.
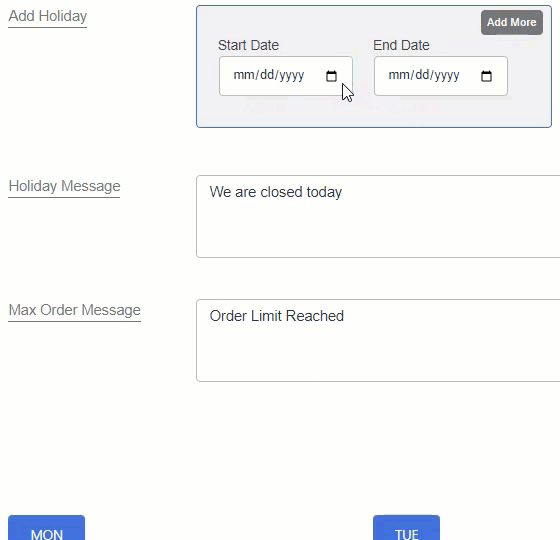
Note: Both the Holiday Start Date and End Date must be specified; if one is specified, the other cannot be left empty.
- Admin can also add the desired Holiday Message.

Note: It will be displayed as a popup when the Restaurant is closed.
- Now click the Save Button.
Front-end Screenshot
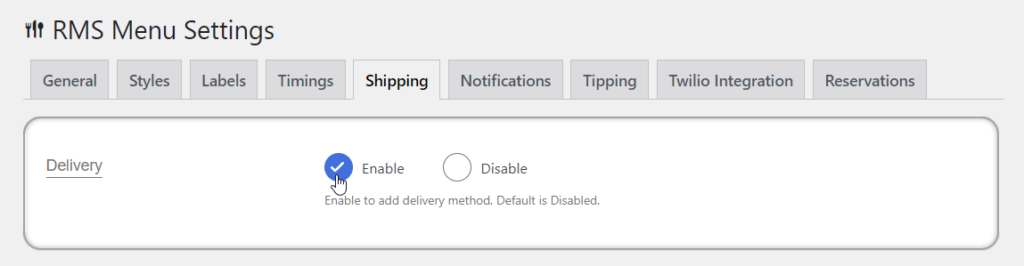
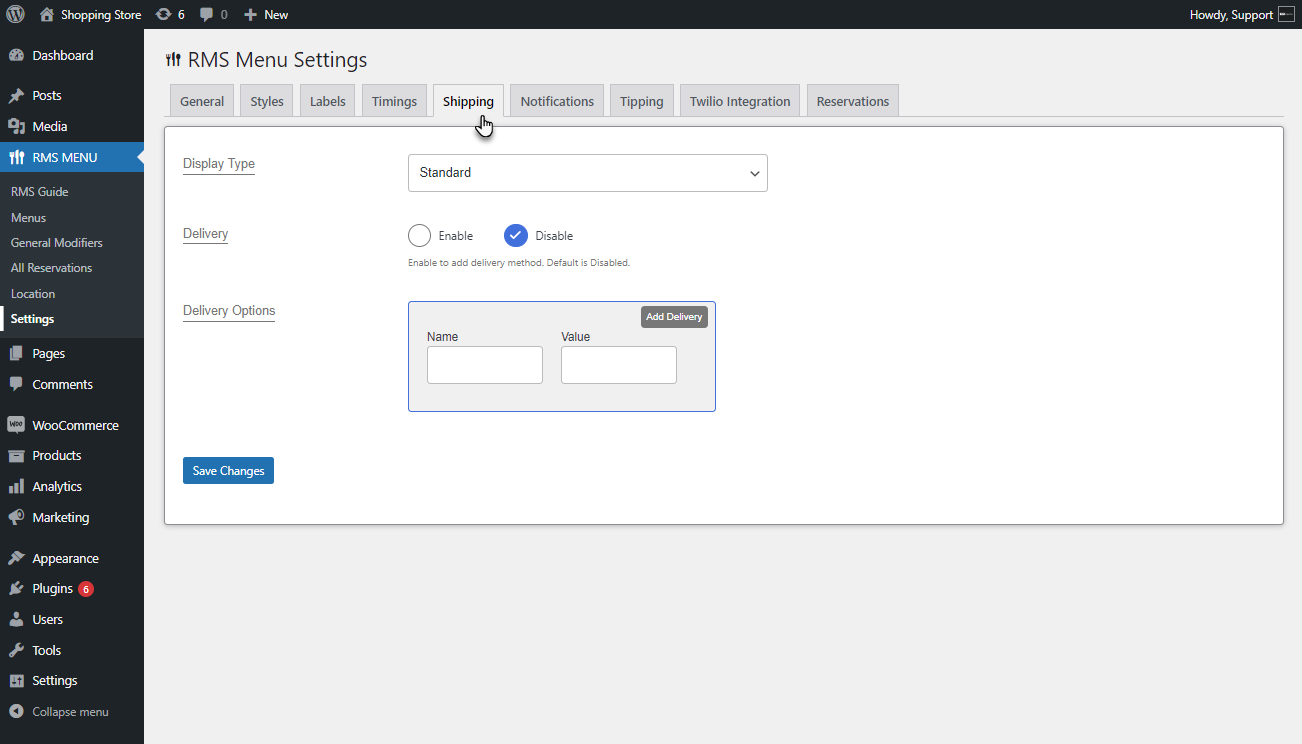
Shipping
↑ Back to topDisplay Type (Standard)
↑ Back to top- Select the Standard display type from the dropdown under the label Display Type.

- Select the Enable radio button to display the delivery options on the front-end food menu. This option would be disabled by default.
Delivery Options
↑ Back to topAdd delivery options
- Enter the name and value of the Delivery Option.
- Add more delivery options by clicking on the Add Delivery option.
- Delete the delivery option by clicking on the trash can icon next to the option.
- Click on the Save Changes button.

Front-end Screenshots
Before

After
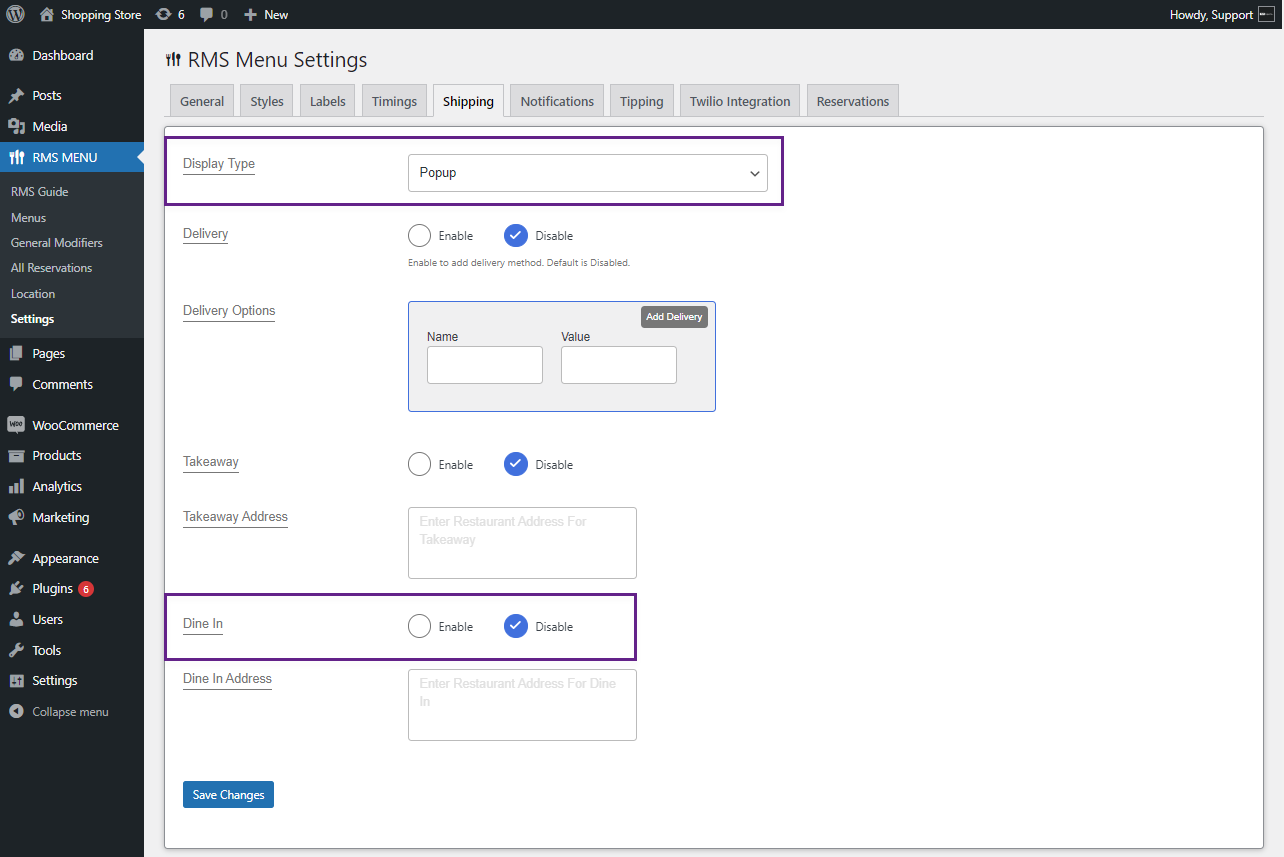
Display Type (Popup)
↑ Back to topAdd enable popup display type
- Select the Popup display type from the dropdown.
Note: For POPUP, the same options will be accessible as for Standard display, but TAKEAWAY and DINE-IN will be included for this type.

- Select the Enable radio button to display the delivery options on the front-end food menu. This option would be disabled by default.

Takeaway
↑ Back to topAdd the takeaway option
Note: This option will be available only when the Popup is selected in Display Type.
- If the Admin wants to enable the Takeaway option, they can click the Enable checkbox in the Takeaway section.

- After enabling the takeaway option, the admin must input the address in the enable Takeaway address text box.

Front-end Screenshot

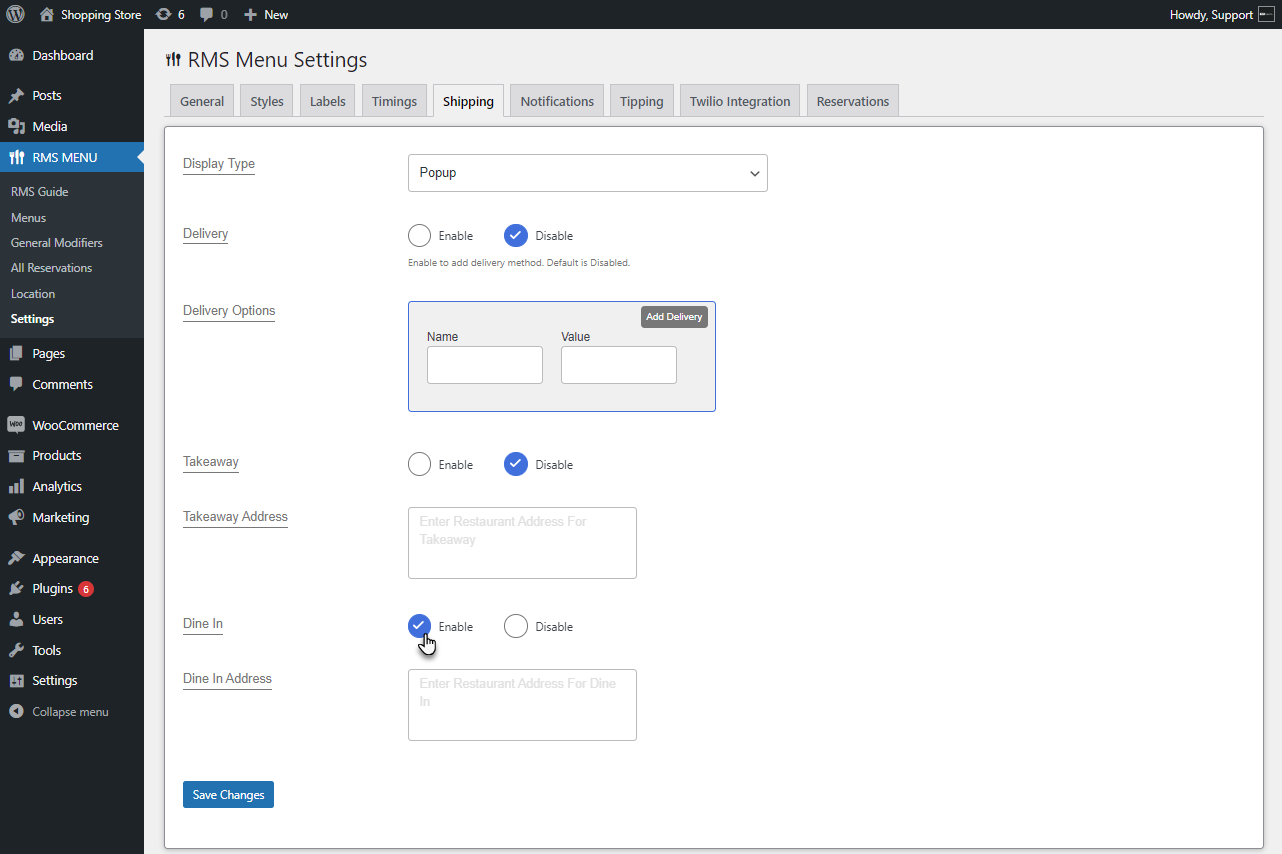
Dine-in
↑ Back to topAdd the dine-in option
Note: This option will be available only when the Popup is selected in Display Type.
- If the Admin wants to enable the Takeaway option, they can click the Enable checkbox in the Takeaway section.

- After enabling the takeaway option, the admin must input the address in the Dine-In address text box.

Front-end Screenshot
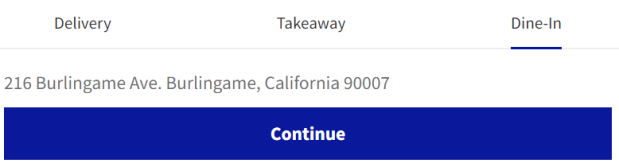
Table Ordering Via QR Code
- This feature facilitates users with table ordering via a QR code.
- Go to WordPress Admin Dashboard > RMS MENU > Settings > Shipping.
- Set the Display Type to popup. A Dine-In option will appear on the screen.
- Scroll down to the Dine In option. To enable Dine In, click on the Enable option.
Add New Dine In
- A Dine-In option will appear in the side tab. Click on it.
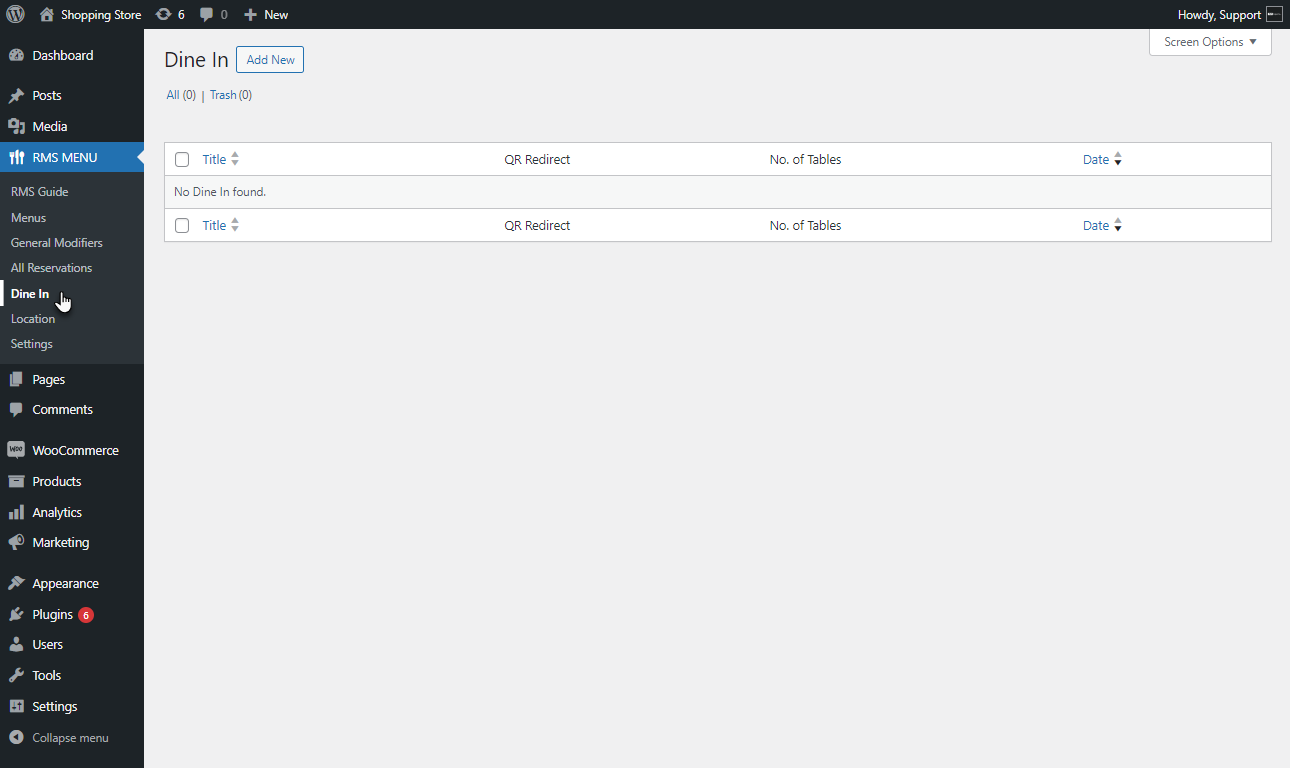
- A Dine In list page will appear. Click on the Add New button.
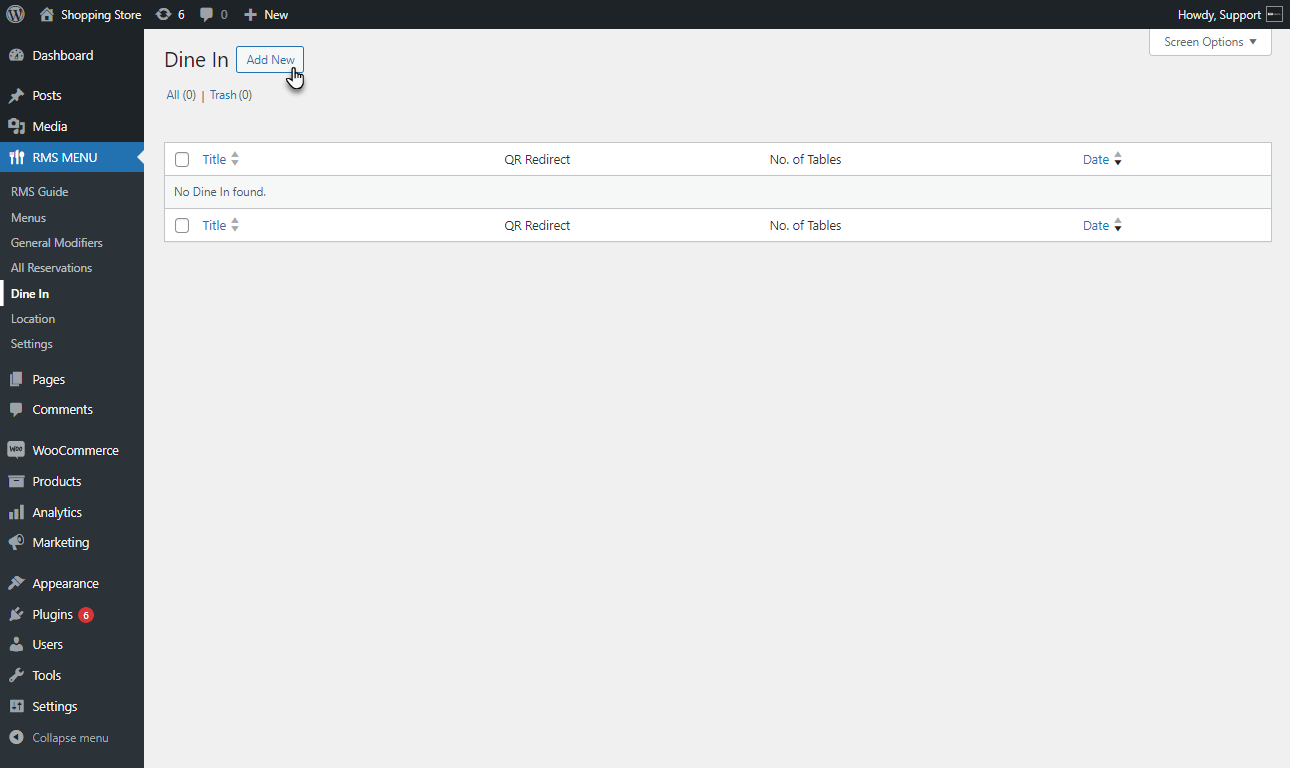
- An Add New page will appear. The admin can configure the Dine In table settings on this page and Generate the QR Codes.
Add Title
Add a title for Dine In
- Add a title in the Add Title field.
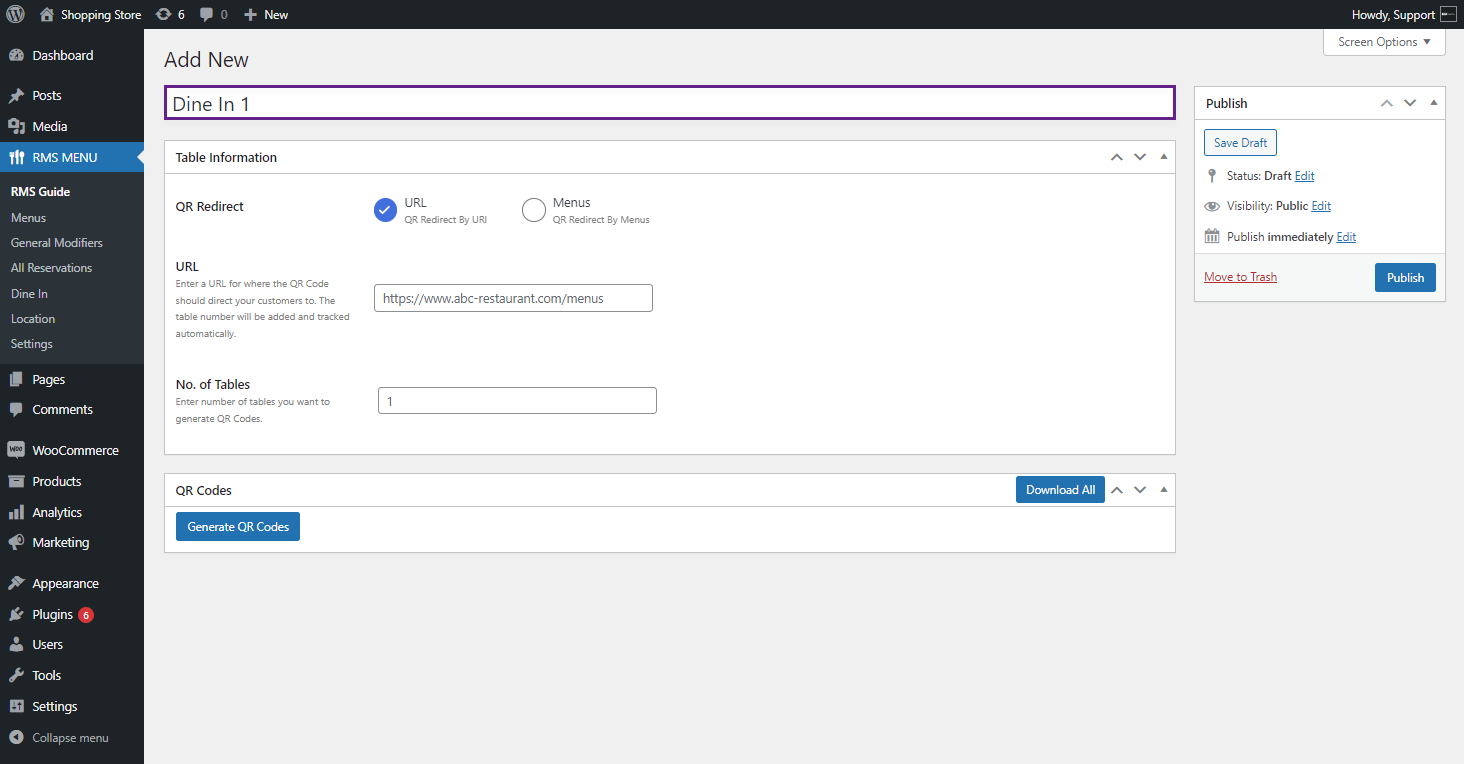
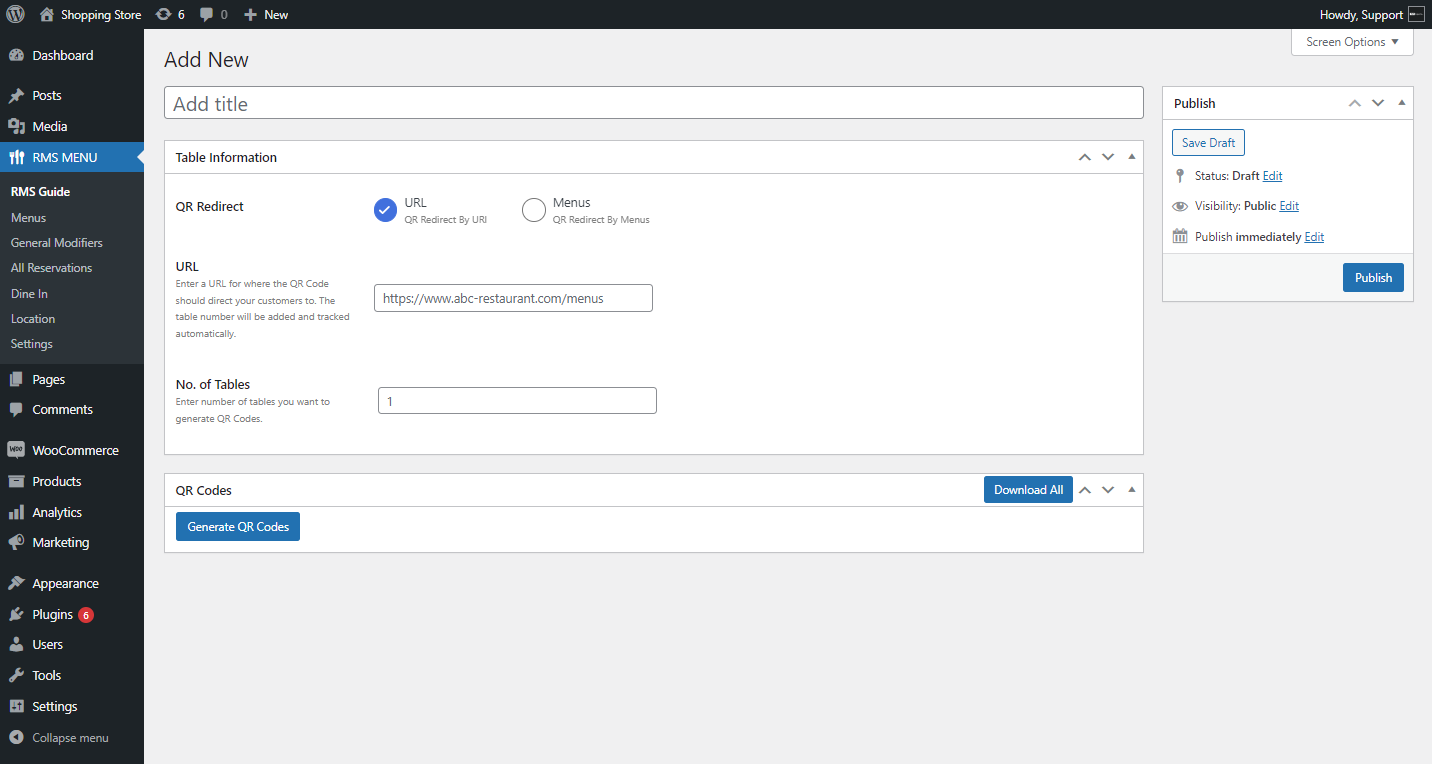
Table Information
Where to redirect the QR Redirect
- Move to the Table information section. The admin can set the QR Redirect to the following options.
URL: After scanning the QR code, the user will be redirected to the specified URL.
Menus: After scanning the QR code, the user will be redirected to the provided menu.
URL
- Select the URL in the QR redirect option. By default, the URL option will be selected.
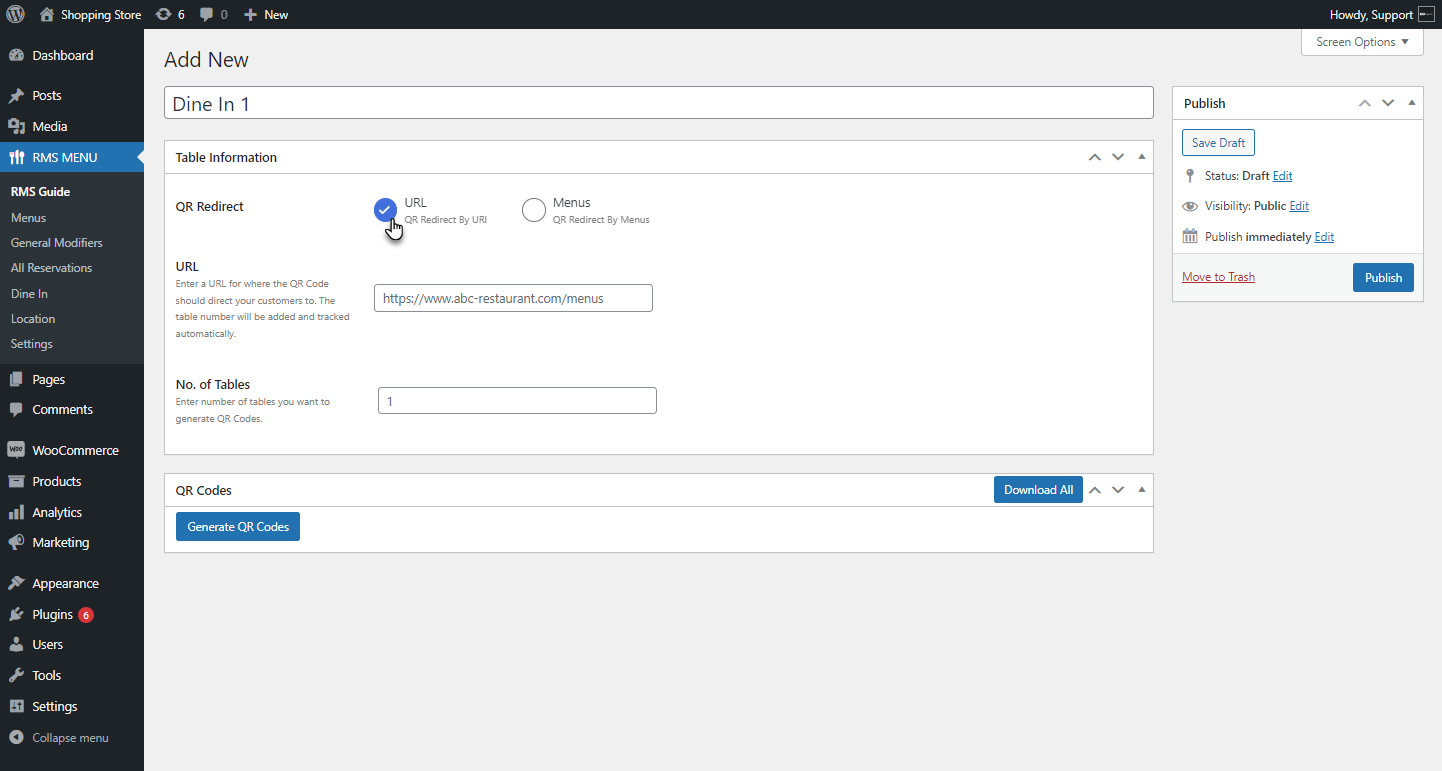
- Enter a URL where the QR Code should direct your users.
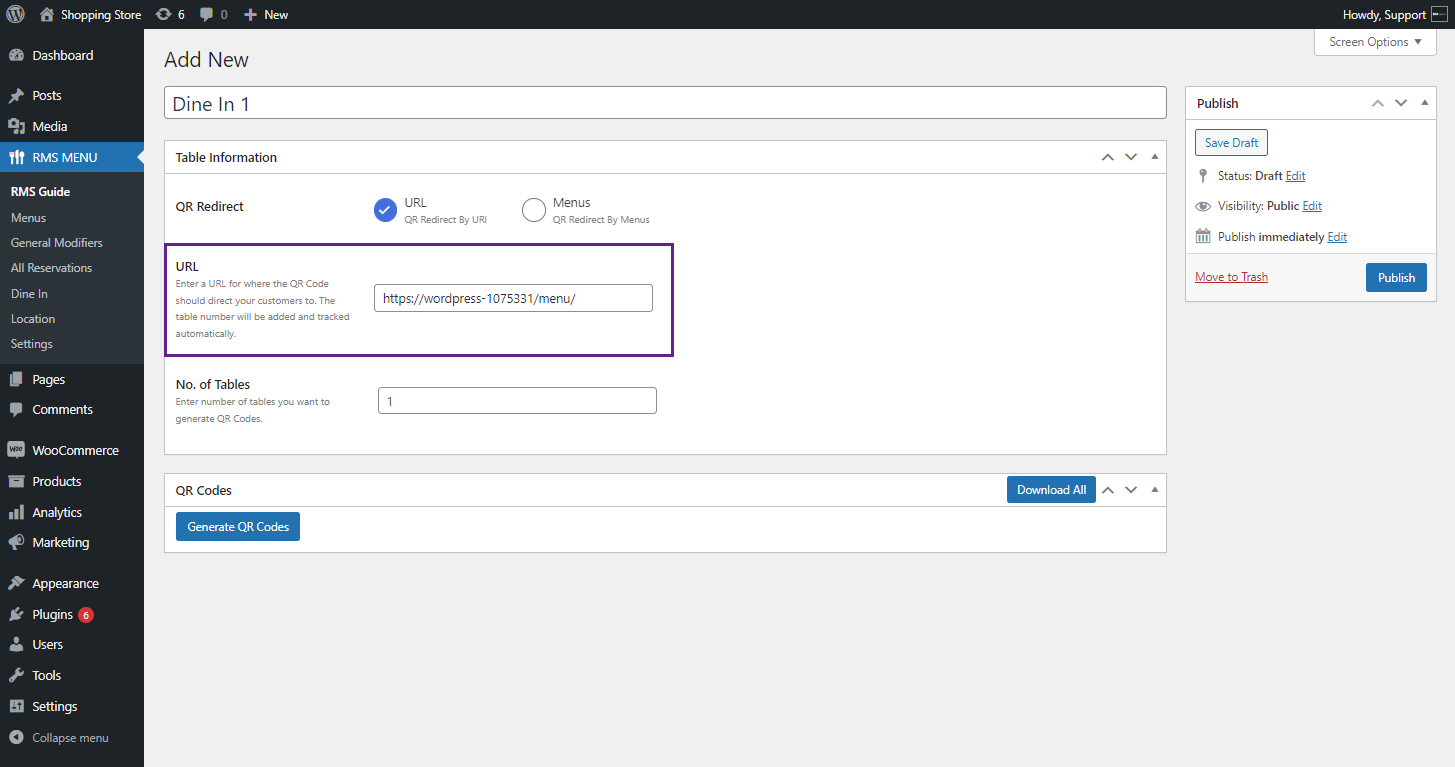
Enter the Number of tables
- Enter the No. Of Tables, you want to generate QR Codes.

QR Codes (URL)
- Now, move to the QR Codes section. Click on the Generate QR Codes button.
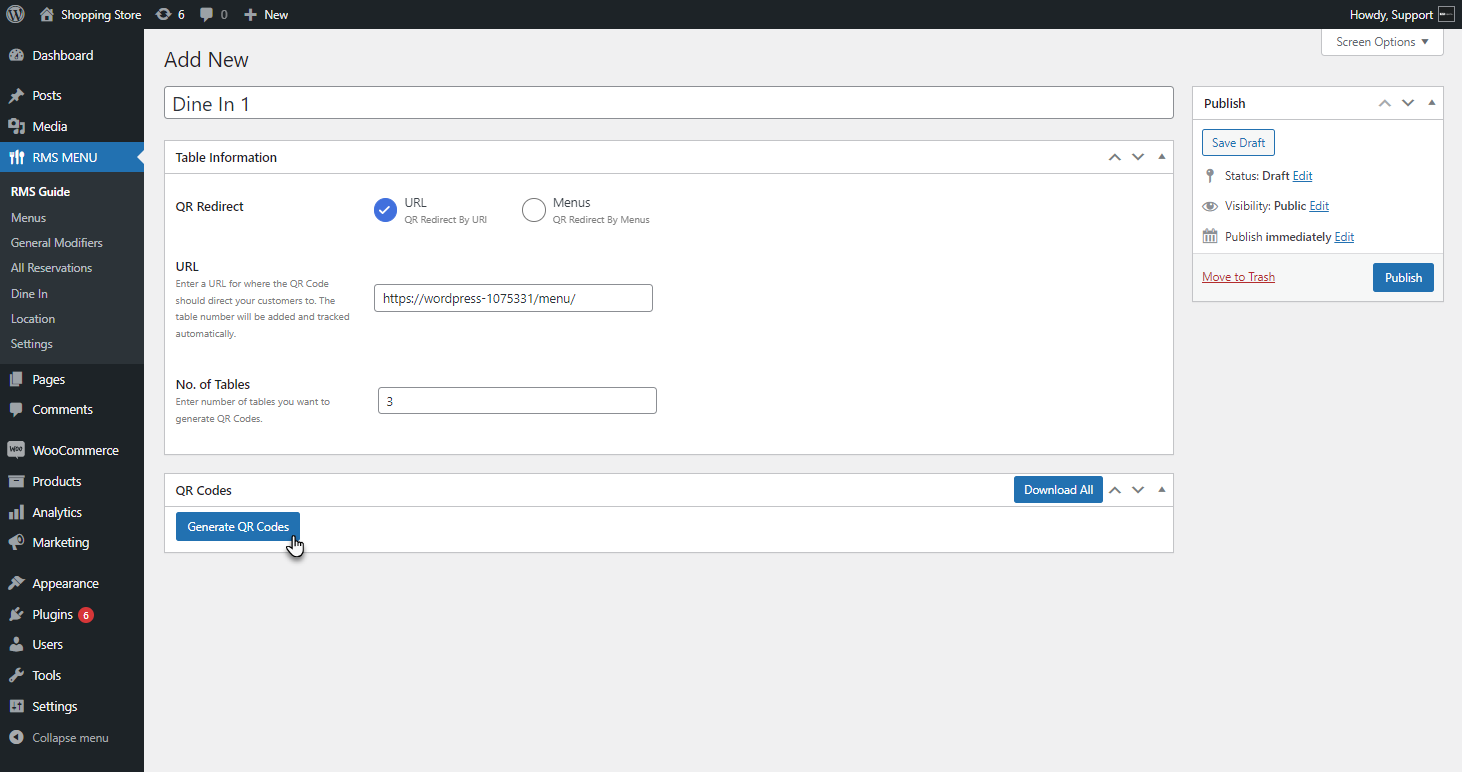
- This will generate the QR codes for the number of tables entered in the No. Of Tables option.

- The admin can download each QR code individually by clicking on the download button on the respective QR code or download all QR codes at once by clicking on the Download All button.
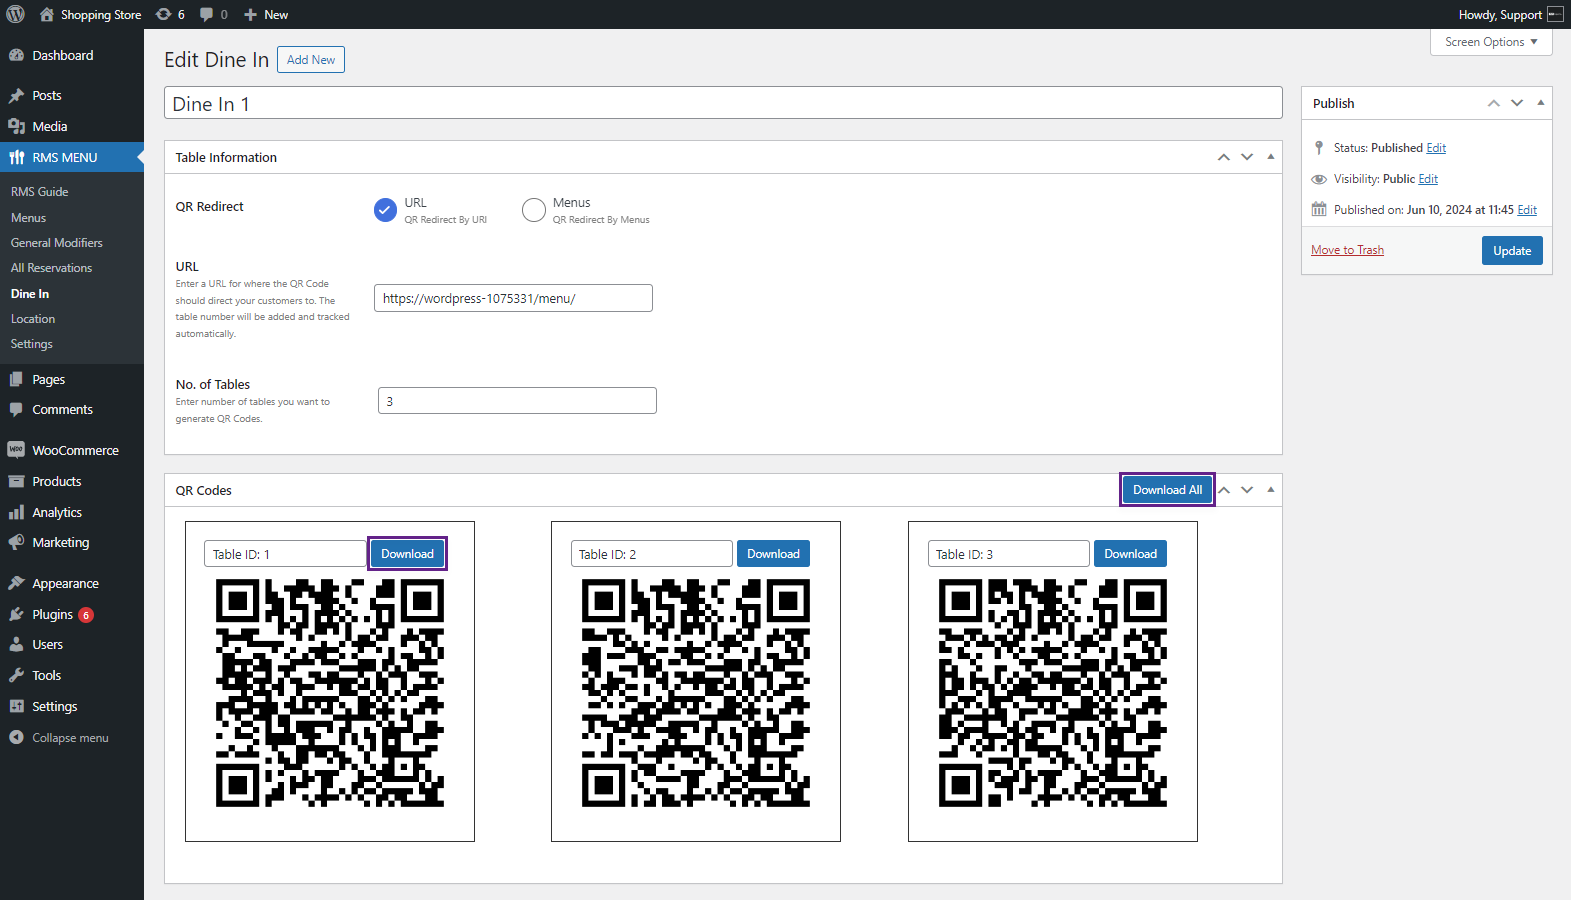
- Click on the Publish button to save your settings.

User-end Flow
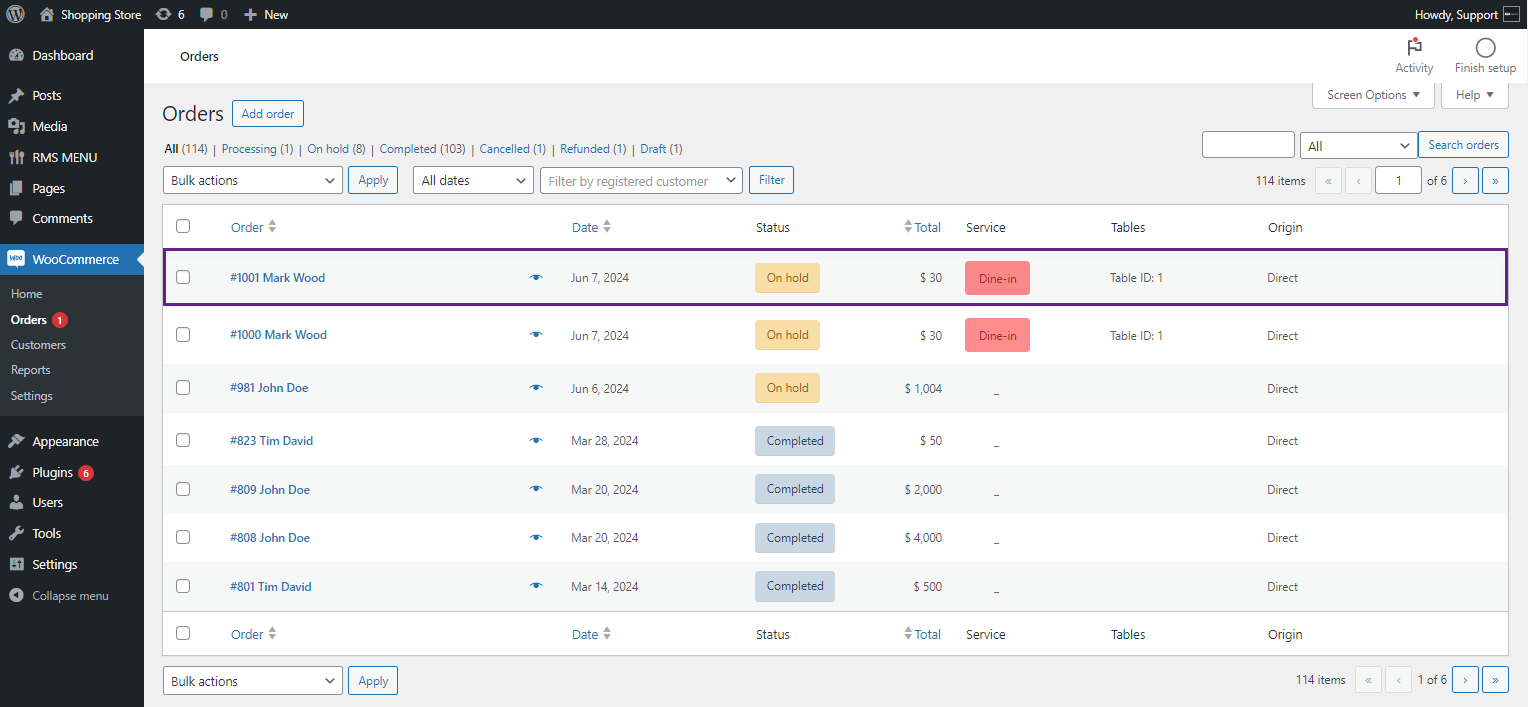
- After Scanning the QR Code, the user will be redirected to the specified URL.
- The user will place their order, and the Table number will be displayed in the Checkout and Order details and in WooCommerce Orders.
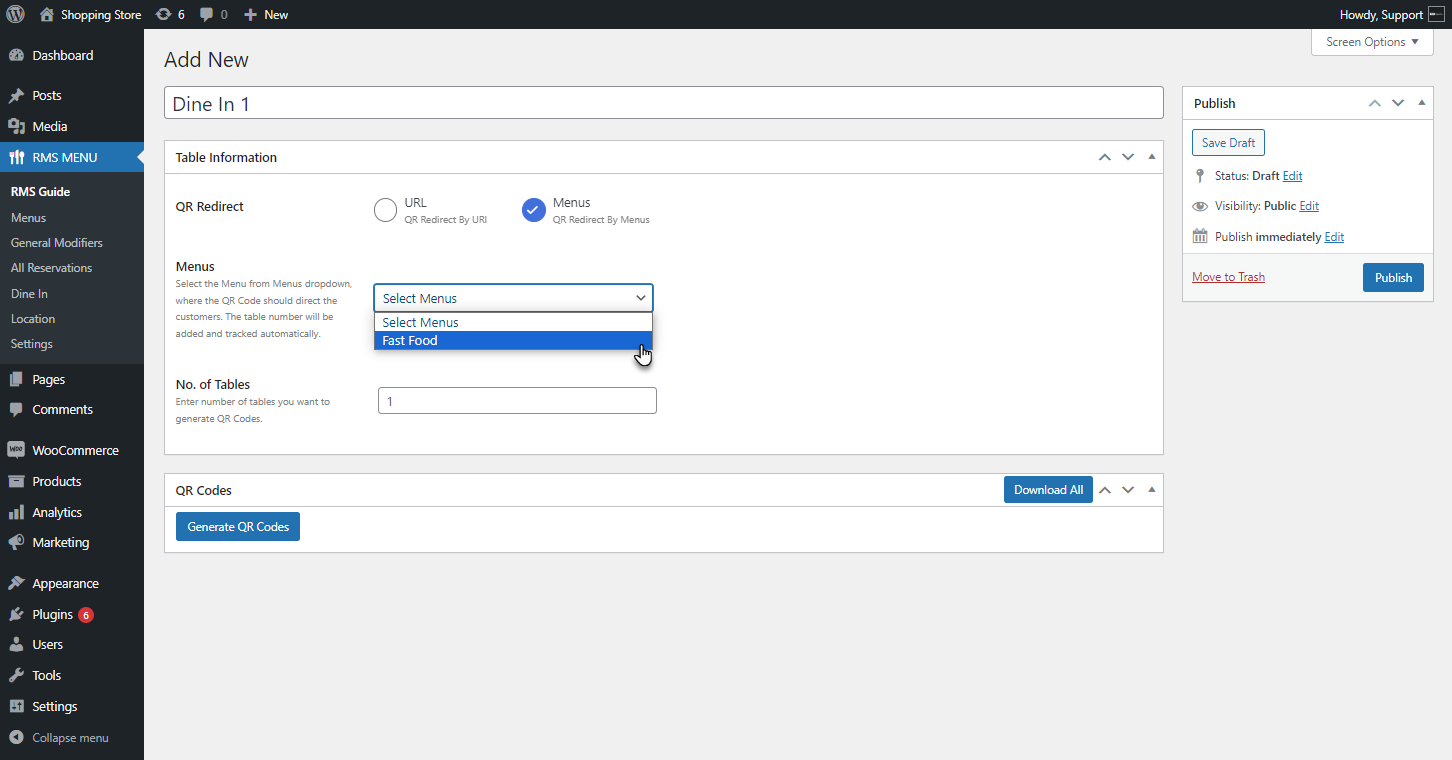
QR redirecting to a Menu
- Select the Menus in the QR redirect option.

- Select the Menu from the Menus dropdown, where the QR Code should redirect the users.
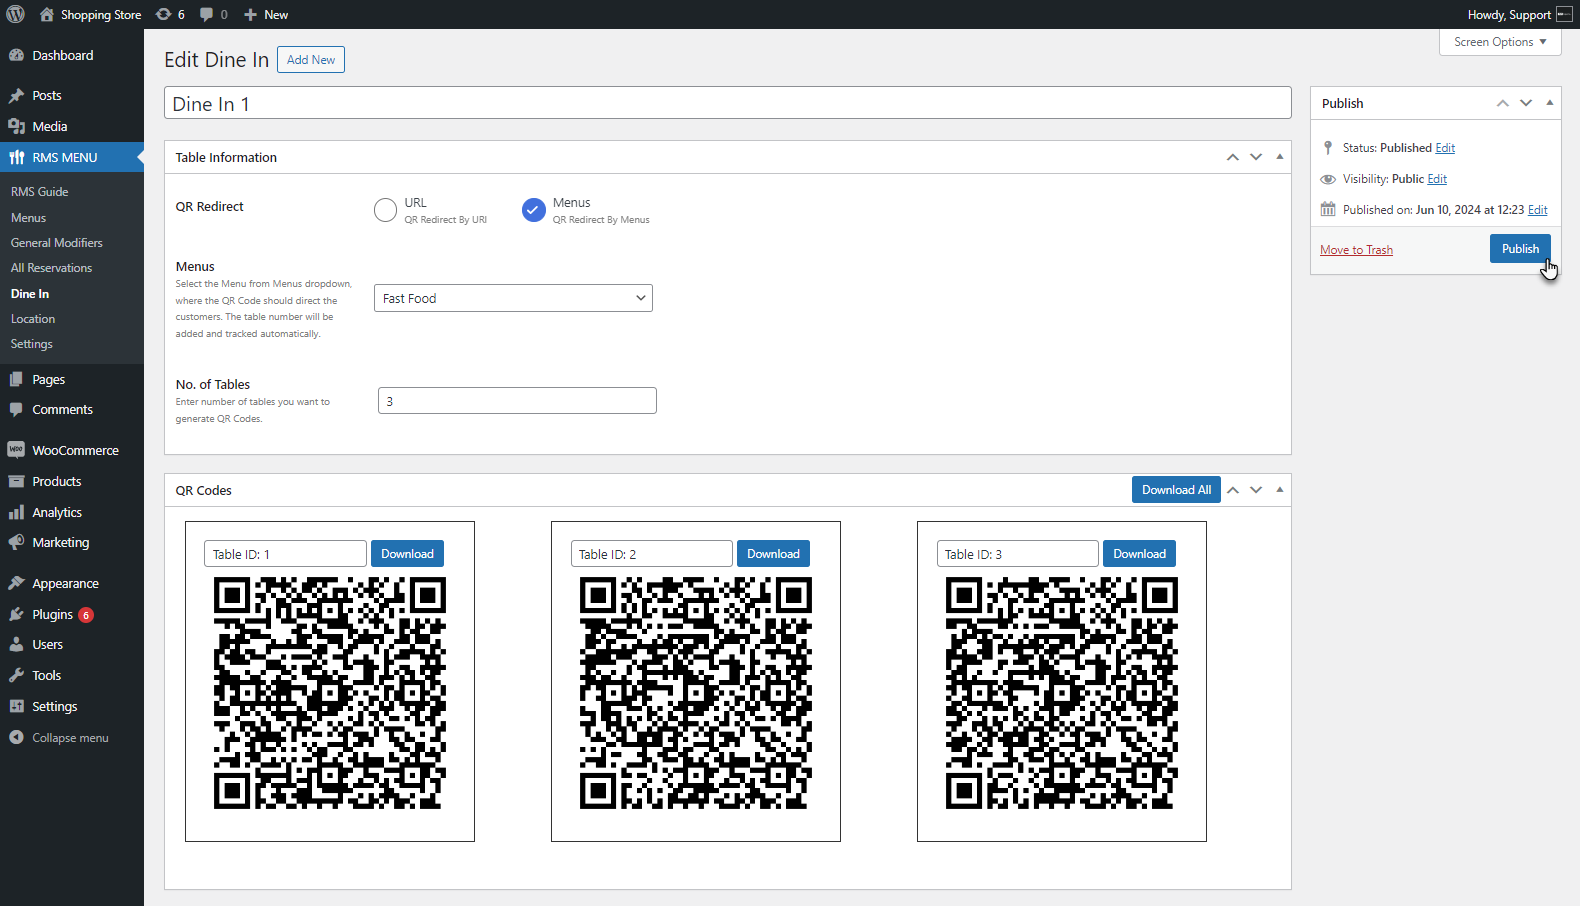
Enter the number of tables
- Enter the No. of Tables you want to generate QR Codes.

QR Code (Menu)
- Now move to the QR Codes section. Click on the Generate QR Codes button.

- This will generate the QR codes for the number of tables entered in the No. of Tables option.

- The admin can download each QR code individually by clicking on the Download button on the respective QR code or download all QR codes at once by clicking on the Download All button.

- Click on the Publish button to save your settings.
User-end Flow
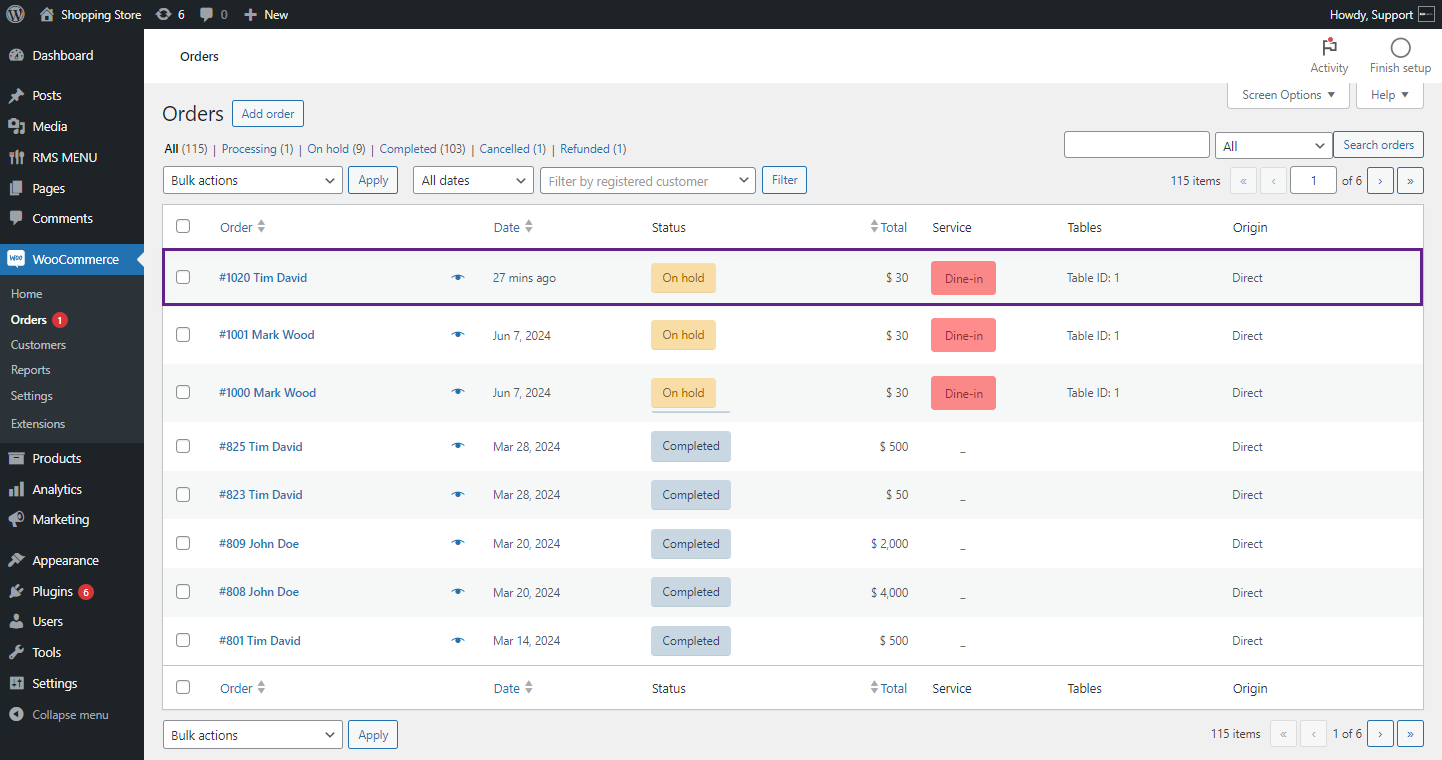
- After Scanning the QR Code, the user will be redirected to the specified Menu.
- The user will place their order, and the table number will be displayed in the Checkout and Order details and in WooCommerce Orders.
Notification settings
↑ Back to topNote: For this option to work, you must keep your dashboard logged in.
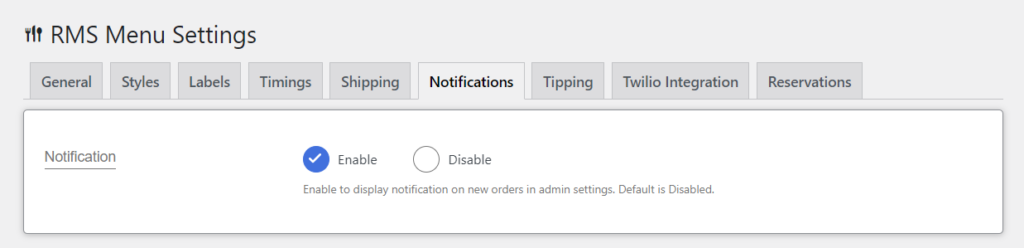
Notification
↑ Back to topEnable Notifications
- Select the Enable the radio button. This option would be disabled by default.
Notification Alert
↑ Back to topEnable notification alerts
- Select the Enable radio button to play a sound when a new order is received. This option would be disabled by default.

Alert Sound
↑ Back to topUpload alert sound
- You can select the Alert Sound from the dropdown list or upload an alert sound.
- Click on the Upload button from the Upload Sound option.
- Select the file you want to upload.
- Once done, click on the Choose Audio button.
- Once the upload is successful, a notification will appear below the upload button labeled as “File uploaded successfully”
- The uploaded audio file will appear in the Alert Sound dropdown list.
- Select the audio from the Alert Sound dropdown list.
- Click on the Save Changes button.

Front-end Screenshots
- When a user visits your website and orders from your restaurant, the admin will receive a notification at the right bottom of the page.
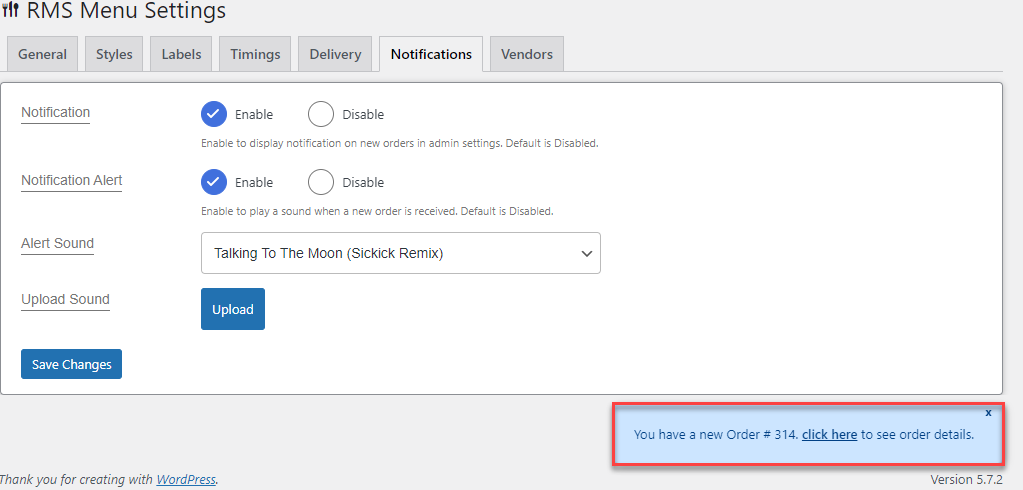
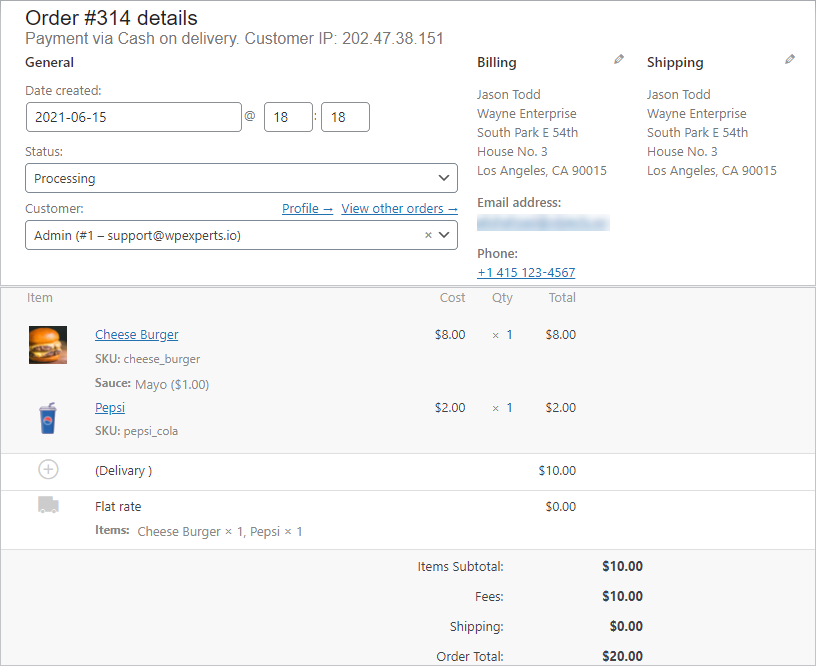
- If the Admin clicks on the link in the notification, they will be redirected to the customer’s order page.
Note: The Notification popup and the Alert Sound will function when the Admin is active on his dashboard.
Tipping
↑ Back to topEnable tipping option on checkout
The admin can let users add a tip to their orders. The admin can add labels and amounts for Tips, and Multiple Tips can be created. There is also an option to enable a Custom Tip. This field will appear on the front end, and the user can set a custom Tipping amount.
Enable Tipping
↑ Back to top- To set up Tip Option, Navigate to RMS Menu → Settings → Tipping.
- Tipping can be Enabled/Disabled using the Radio Button.

Tipping Options
↑ Back to top- Tipping Options have two fields side by side, i.e., Label and Amount. The user can set the desired Label and Amount, which will be available on the checkout page.
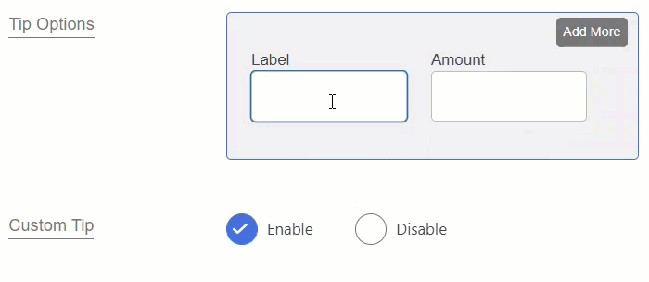
Enable Custom Tipping
↑ Back to top- Custom Tip can also be Enabled/Disabled by using Radio Button. Custom Tip allows users to set desired Tipping Amount, which will be available on the Checkout page.
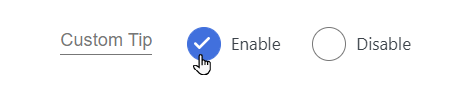
Custom Tip Label
↑ Back to top- The user can set the text of the Custom Tip Label button to select the desired custom tip.

- Now click the Save Button.
Front-end Screenshot
Twilio Integration
↑ Back to top- To set up Twilio Option, navigate to RMS Menu → Settings → Twilio Integration.
- Click on the Twilio Integration tab.

Enable Twilio Integration
↑ Back to top- Admin can Enable or Disable the Twilio Integration function.

Access Token
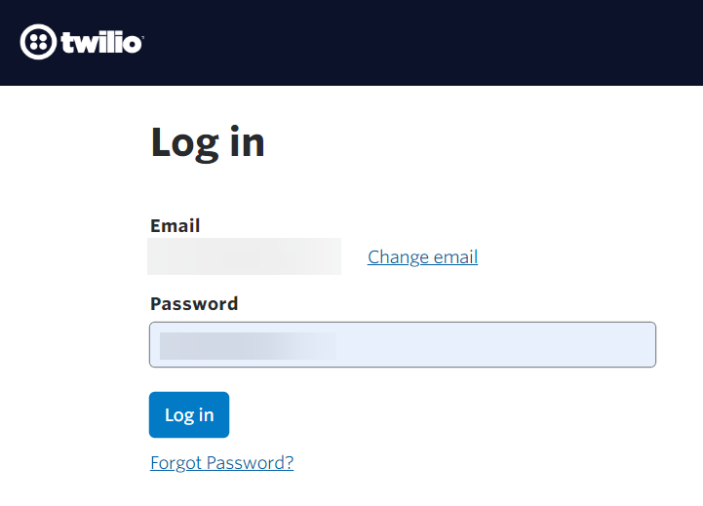
↑ Back to top- To use Twilio, you must have a Twilio Account. To log in to your Twilio Account, click the link labeled as Twilio Account below the Access Token tab.

- A new link will open on a new page. Log in with a valid Email and click Next.
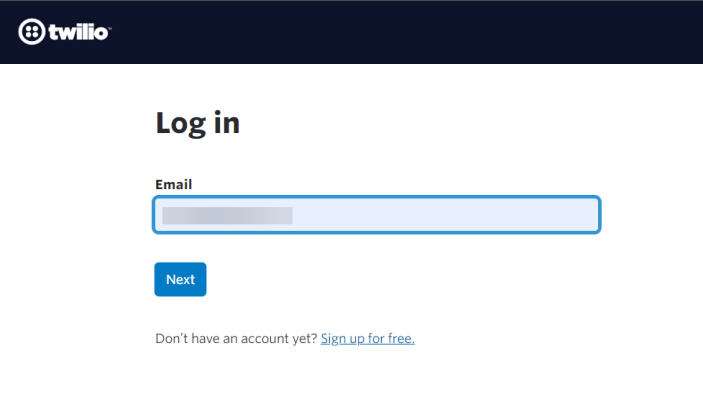
- After that, add a valid Password And click the login button.
- After logging in, the admin can Copy the Account SID, Auth Token, and My Twilio phone number.
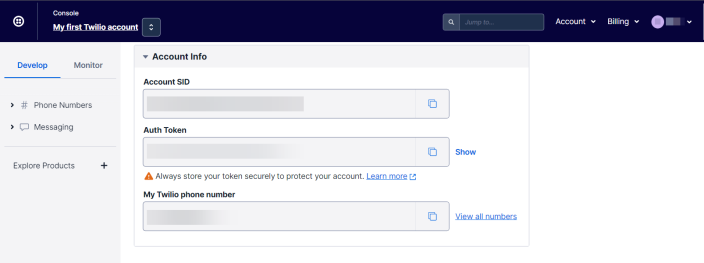
- Paste each in the relevant tabs under the Twilio integration setting.
- Twilio Access Token and SID: There will be Twilio access token and Twilio SID key, which the admin will get from their Twilio Account.
- Twilio phone number field: user can enter the phone number associated with their Twilio account. Users will see this number in the form field when the message is received.
- Twilio Custom Message: admins can enter the custom message to be sent to the user. Admin can also use the pre-defined tags to render the values in the message accordingly
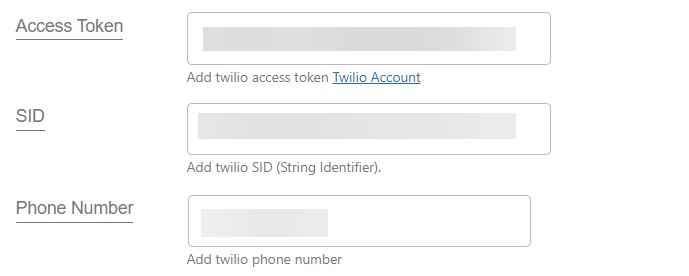
Note: The Twilio phone number is the sender’s number, which generates an SMS for the receiver’s phone number after completing an order.
- Admin can enter the desired message beside the Custom Message tab and click the Save Changes button.
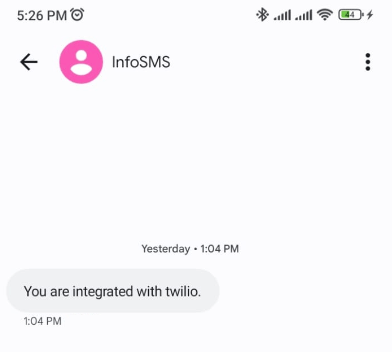
Front-end Screenshot
- Enter the information on the checkout page and place an order.
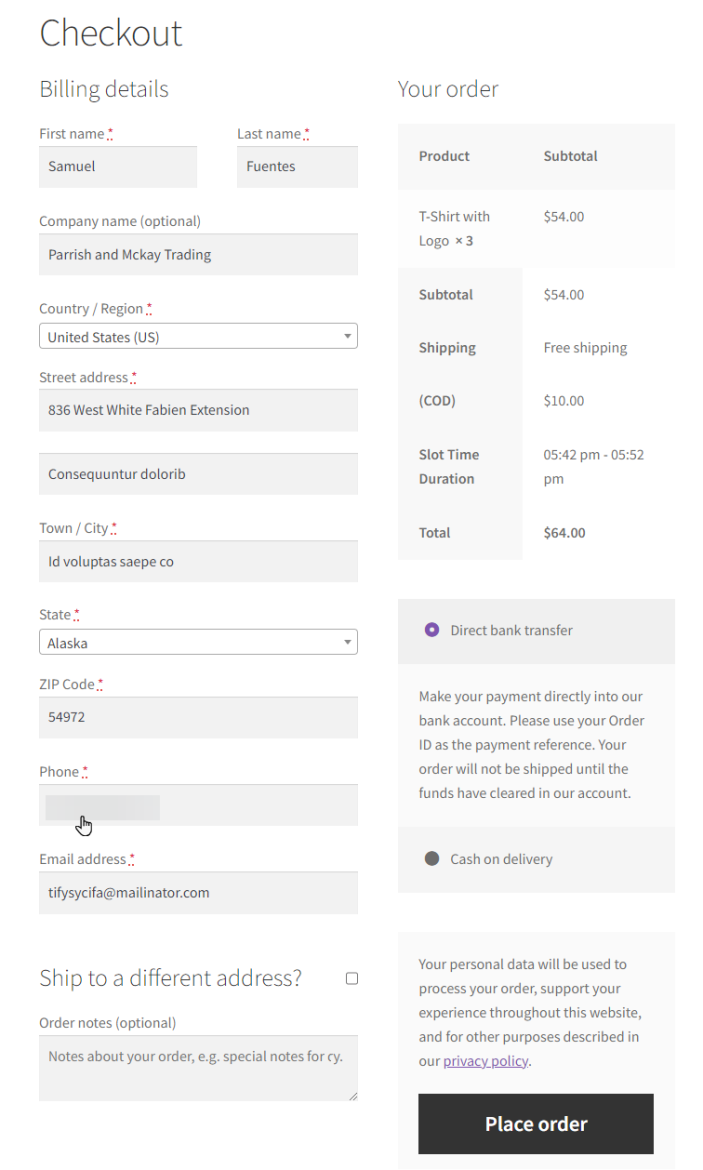
- The user will receive an sms on the phone number listed in the order.
Reservation
↑ Back to top- Now, the admin can add a reservation form for their restaurant, from where the customers can book reservations.
- Navigate to the Dashboard => RMS MENU => Settings.
- Navigate and click on the Reservations tab from the top menu bar.

Reservation Settings
● Navigate and click on the Reservation Settings.

Reservation
- Navigate to the Reservation
- Click on the Enable option.
Form Page
- Navigate to the Form Page.
- Select the page from the drop-down menu where you want to display the reservation form on the customer’s end.
- Click on the Save Changes button.
Front-end Screenshot
Generate Shortcode
- Navigate to the Generate Shortcode.
- Copy the shortcode.
- Navigate to the Dashboard => Pages.
- Navigate and click on the Add New Page or Edit the existing page.
- Click on the Add block.
- Select Shortcode and paste the shortcode copied from the Reservation setting.
- Click on the Update button.
Front-end Screenshot
Minimum Number of Guests
- Admin can set the minimum number of guests allowed for a single reservation.
- Navigate to the Minimum Number of Guests.
- Enter the number of people for whom reservation is possible in the box or use the quantity selector.
- Click on the Save Changes button.
Front-end Screenshot
- When a customer enters a lesser number of guests for reservations that are required and clicks on the Reserve Your Table button.
- An alert notification will appear above the Reservation Form.
Maximum Number of Guests
- Admin can set the maximum number of guests allowed for a single reservation.
- Navigate to the Maximum Number of Guests.
- Enter the number of people limits, on which reservation is possible in the box, or use the quantity selector.
- Click on the Save Changes button.
Front-end Screenshot
- When a customer enters a number of guests for higher than required reservations, click on the Reserve Your Table button.
- An alert notification will appear above the Reservation Form.
Earliest Reservation Time
- Admin can set the Earliest Reservation Time for customers before that time, customers cannot book a reservation.
- Navigate to the Earliest Reservation Time.
- Select from the drop-down menu, and enter the duration numeric field that appears right after the drop-down box.
- Click on the Save Changes button.
Front-end Screenshot
Note: The current date will not be included in the Earliest Duration Time the admin sets.
Reservation Pending Message
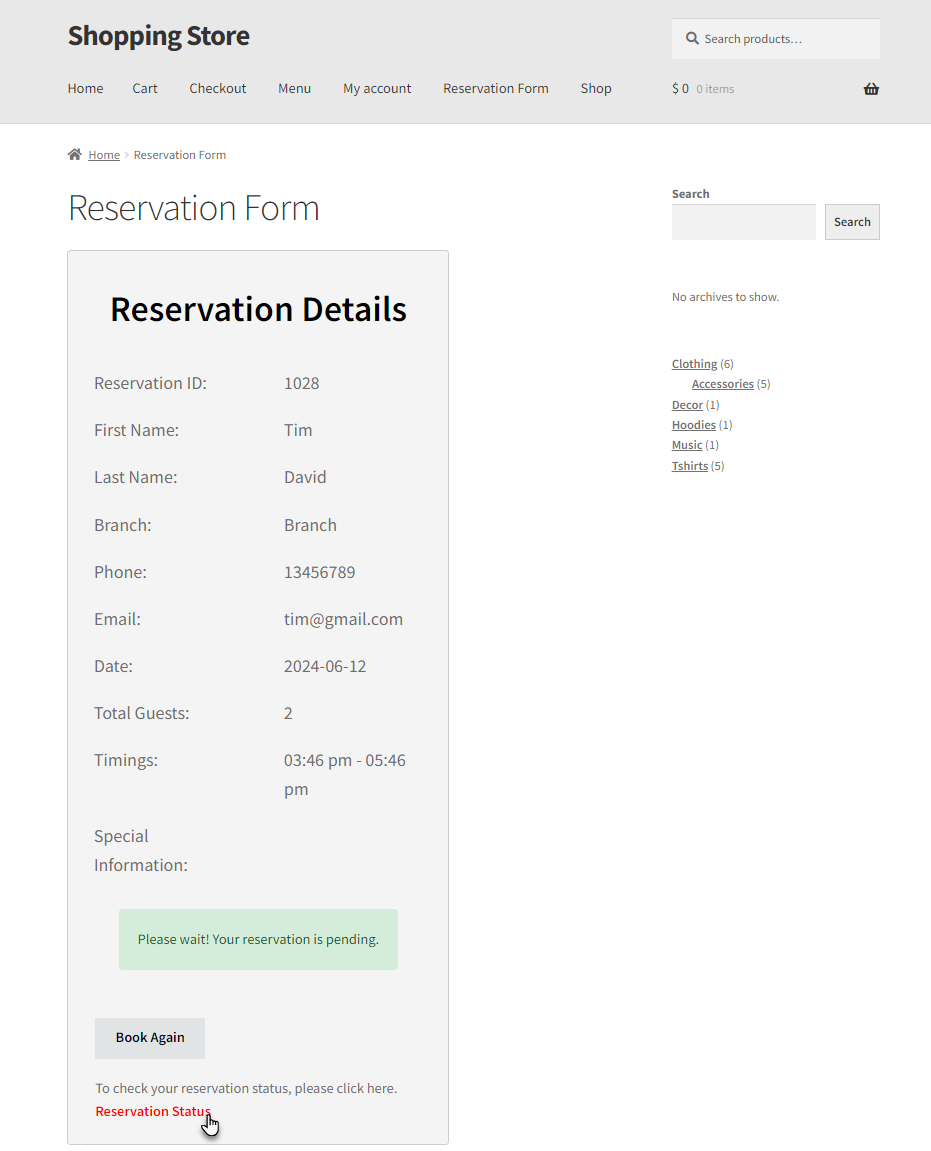
- Admin can set the Reservation Pending Message for customers, which will be displayed when the customer has successfully placed a reservation.
- Navigate to the Reservation Pending Message.
- Enter the message in the textbox of Reservation Pending Message.
- Click on the Save Changes button.

Front-end Screenshot
No Schedule Available Message
- The admin can set the No Schedule Available Message for customers, which will be displayed when the customer visits the reservation form to make a reservation.
- Navigate to the No Schedule Available Message.
- Enter the message in the textbox of No Schedule Available Message.
- Click on the Save Changes button.

Front-end Screenshot
Reservation Before Time Slot
- The admin can set the Reservation Before Time Slot for customers, but customers cannot book a reservation after that time.
- Navigate to the Reservation Before Time Slot.
- Select from the drop-down menu and enter the duration numeric field that appears right after the drop-down box.
- Click on the Save Changes button.
Reservation Before Time Slot Message
- The admin can set the last time for customer reservation messages, which will be displayed on the notification bar when the admin selects an advance booking time.
- Navigate to the Last Time for Reservation Message.
- Enter the message in the textbox of Last Time for Reservation Message.
- Click on the Save Changes button.
Note: This message will appear as a notification on the reservation form
Front-end Screenshot
Form Customization
↑ Back to top- Now, the admin can customize the reservation form for their restaurant.
- Navigate to the Dashboard => RMS MENU => Settings.
- Navigate and click on the Reservations tab from the top menu bar.
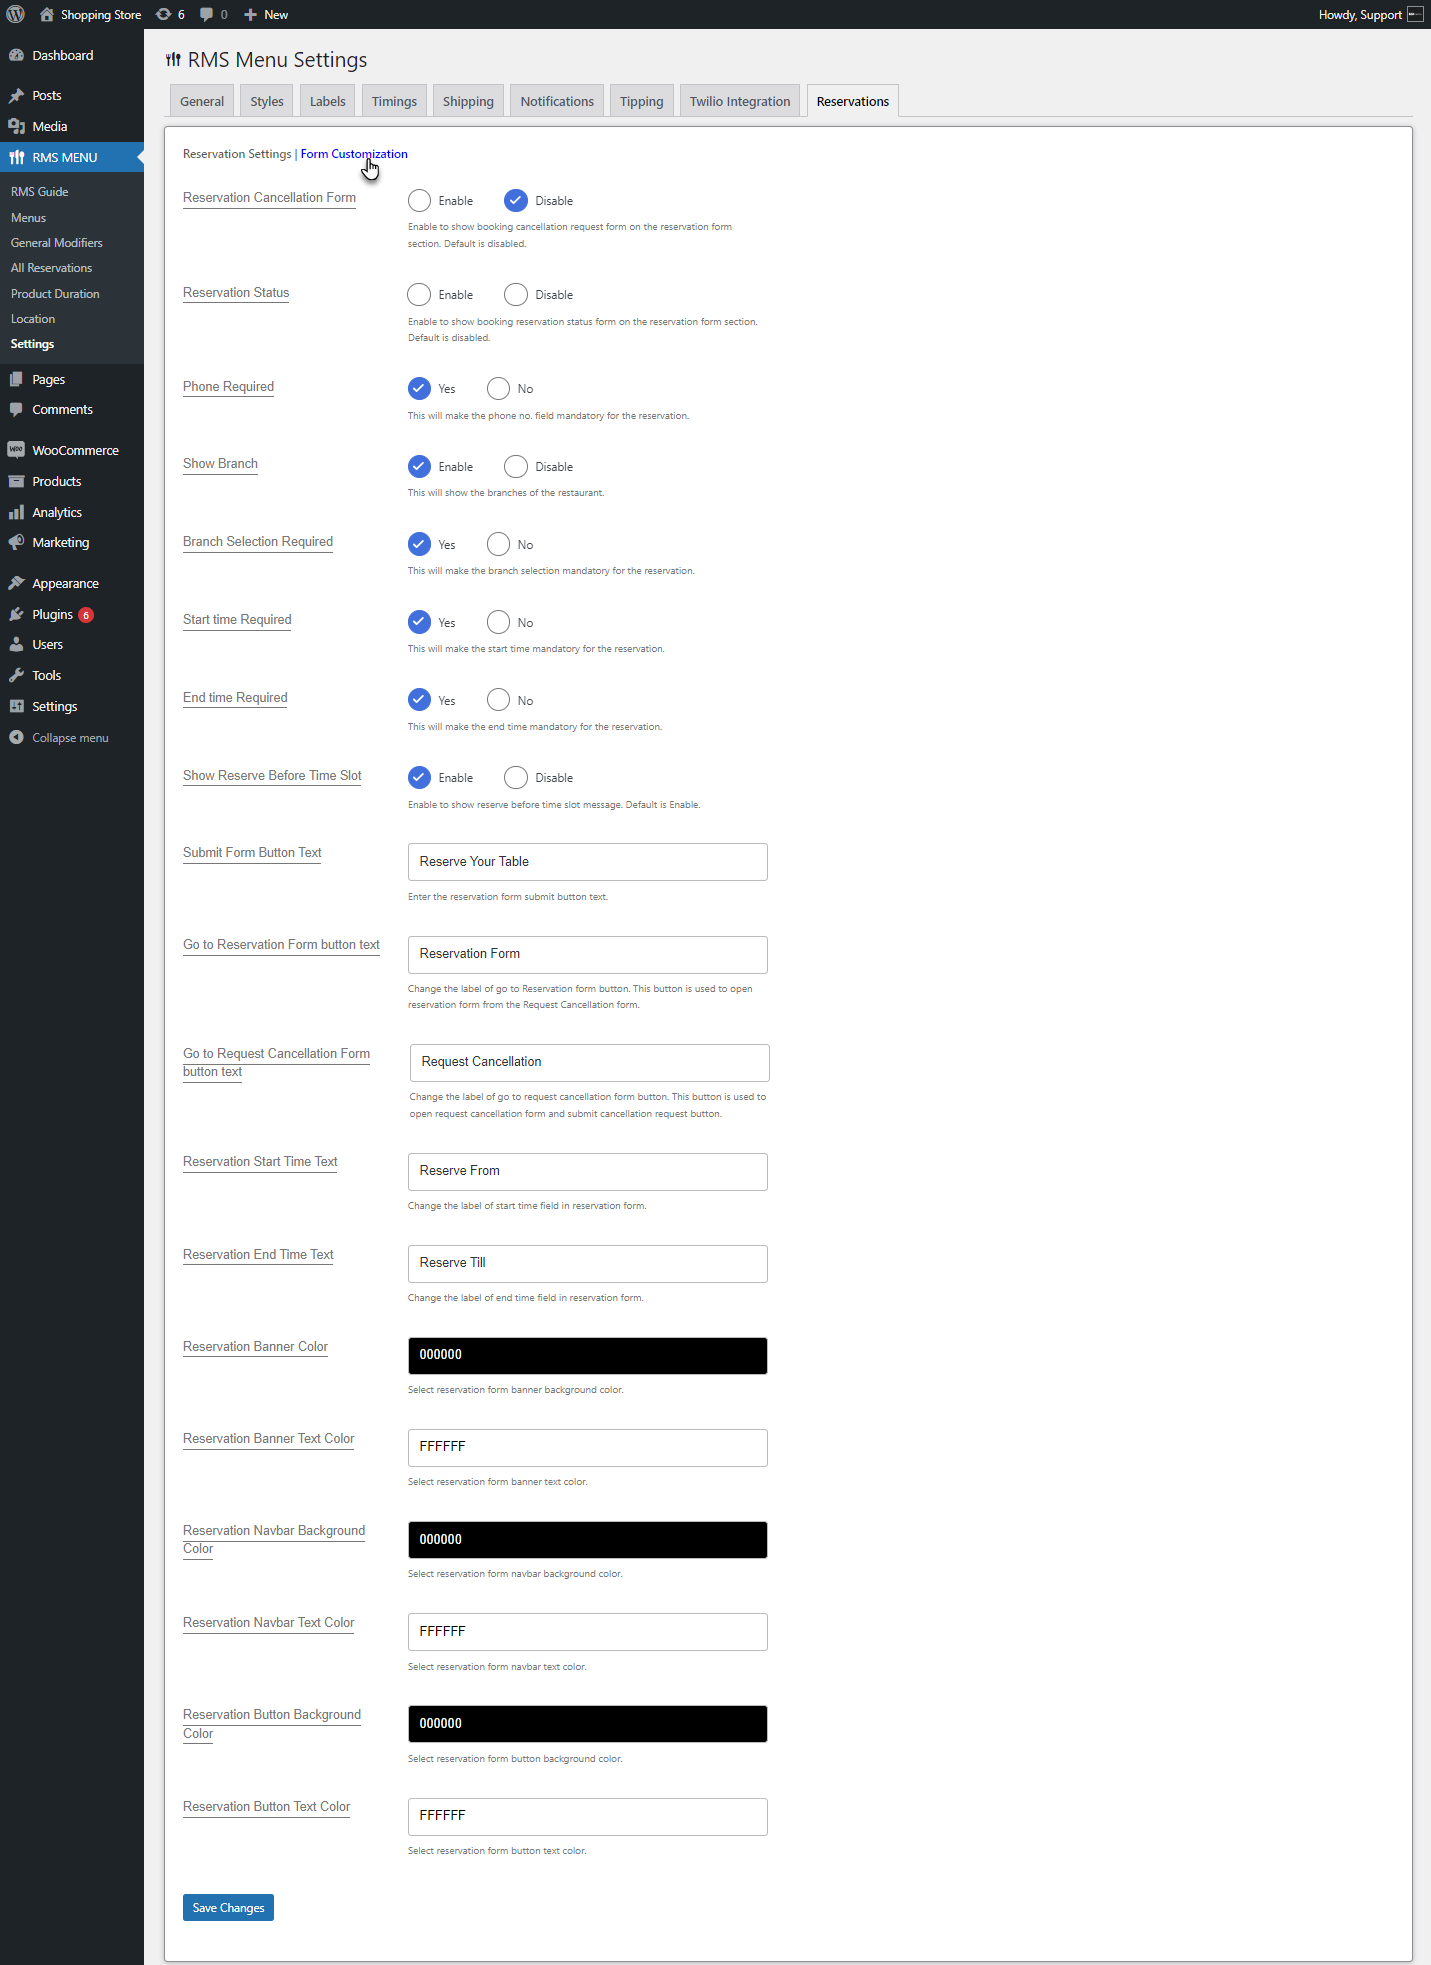
- Navigate and click on the Form Customization.

Reservation Cancellation Form
- Admin can display booking cancellation requests on the reservation form.
- Navigate to the Reservation Cancellation Form.
- Click on the Enable option.
- Click on the Save Changes button.
Front-end Screenshot
Phone Required
- Navigate to the Phone Number.
- Click on the Yes option.
- Click on the Save Changes button.

Note: By default, this option is enabled and mandatory for the reservation form.
Front-end Screenshot
Show Branch
- Navigate to the Show Branch.
- Click on the Enable option.
- Click on the Save Changes button.
Note: By default, this option is enabled and mandatory for the reservation form.
Front-end Screenshot
Branch Selection Required
- Navigate to the Branch Selection Required.
- Click on the Yes option.
- Click on the Save Changes button.

Note: This field depends on the Show Branch and will only work if the Show Branch is enabled. By default, this option is enabled and mandatory for the reservation form.
Front-end Screenshot
Start Time Required
- Navigate to the Start Time Required.
- Click on the Yes option.
- Click on the Save Changes button.

Note: By default, this option is enabled and mandatory for the reservation form.
Front-end Screenshot
End Time Required
- Navigate to the End Time Required.
- Click on the Yes option.
- Click on the Save Changes button.

Note: By default, this option is enabled and mandatory for the reservation form.
Front-end Screenshot
Show Reservation Before Time Slot
- Navigate to the End Time Required.
- Click on the Yes option.
- Click on the Save Changes Button
Note: By default, this option is enabled. If the admin wants to disable the last reservation time, the admin can Disable this option from Form Customization settings.
Front-end Screenshot
Submit Form Button Text
- Navigate to the Submit Form Button Text.
- Enter the text in the textbox.
- Click on the Save Changes button.
Front-end Screenshot
Go To Reservation Form Button Text
- Navigate to the Submit Form Button Text.
- Click on the Enable option.
Front-end Screenshot
- This text button will appear on the Request Cancellation Form, used to go back on the Reservation Form.
Go To Request Cancellation Form Button Text
- Navigate to the Submit Form Button Text.
- Click on the Enable option.

Front-end Screenshot
Reservation Start Time Text
- Navigate to the Submit Form Button Text.
- Click on the Enable option.
Front-end Screenshot

Reservation End Time Text
- Navigate to the Submit Form Button Text.
- Click on the Enable option.
Front-end Screenshot
Reservation Banner Color
- Navigate to the Reservation Banner Color.
- Select the color from the tooltip or enter the color code.
- Click on the Save Changes button.
Front-end Screenshot
Reservation Banner Text Color
- Navigate to the Reservation Banner Text Color.
- Select the color from the tooltip or enter the color code.
- Click on the Save Changes button.
Front-end Screenshot
Reservation Navbar Background Color
- Navigate to the Reservation Navbar Background Color.
- Select the color from the tool tip or enter the color code.
- Click on the Save Changes button.
Front-end Screenshot
Reservation Navbar Text Color
- Navigate to the Reservation Navbar Text Color.
- Select the color from the tooltip or enter the color code.
- Click on the Save Changes button
Front-end Screenshot
Reservation Button Background Color
- Navigate to the Reservation Button Background Color.
- Select the color from the tooltip or enter the color code.
- Click on the Save Changes button.
Front-end Screenshot
Reservation Button Text Color
- Navigate to the Reservation Button Text Color.
- Select the color from the tooltip or enter the color code.
- Click on the Save Changes button.
Front-end Screenshot
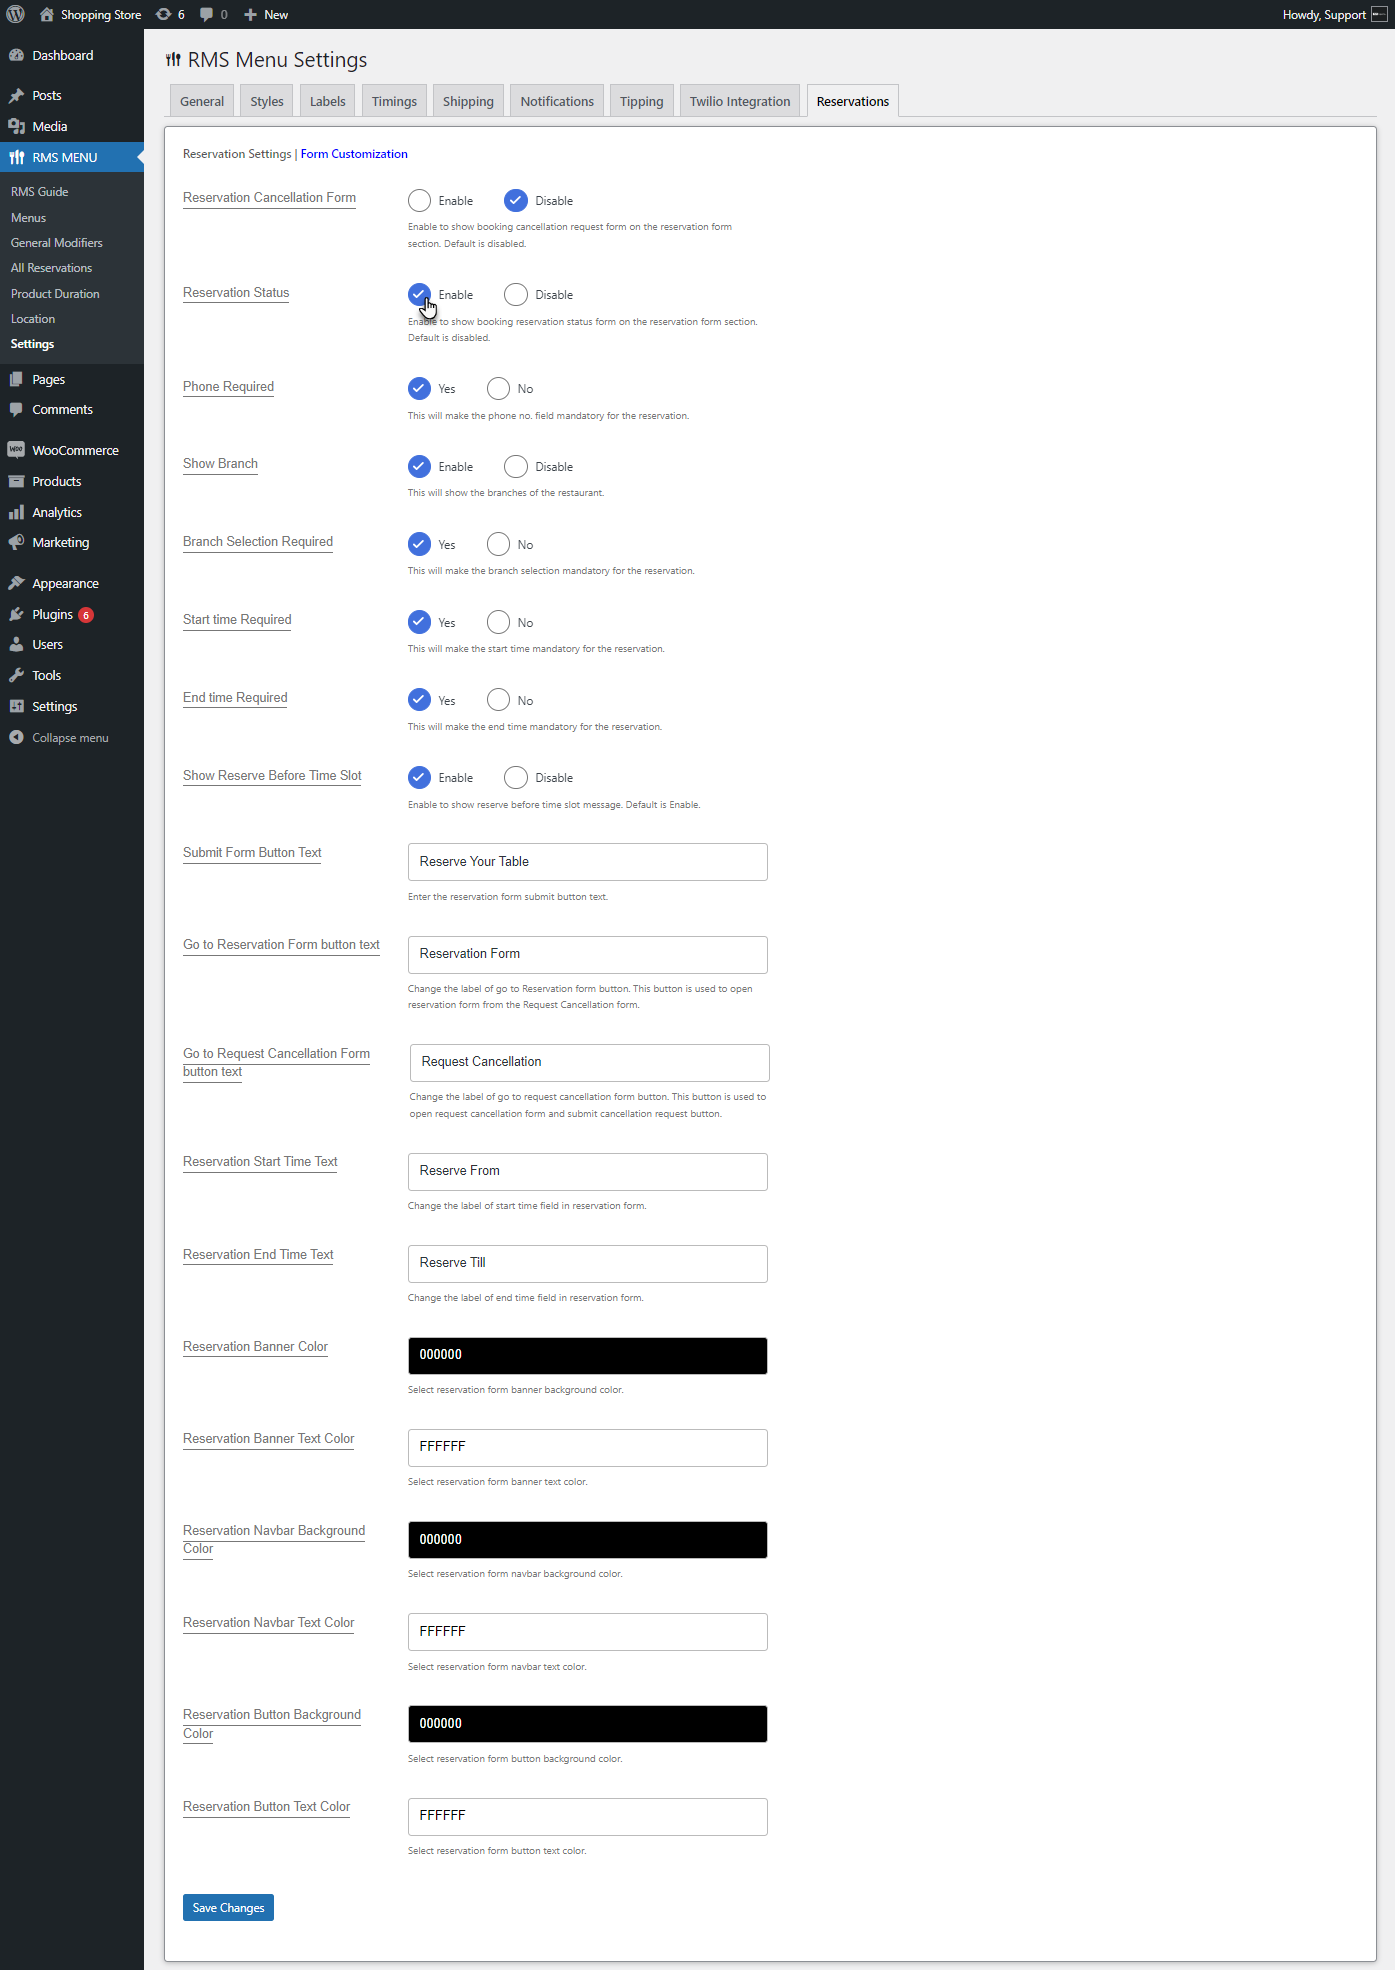
Reservation Status
- This feature allows the user to check their Reservation Status.
- Go to the WordPress Admin Dashboard > RMS MENU > Settings > Reservations.

- Switch to the Form Customization tab.
- Navigate to Reservation Status and Enable this option.
- Switch to the Reservation Settings tab.
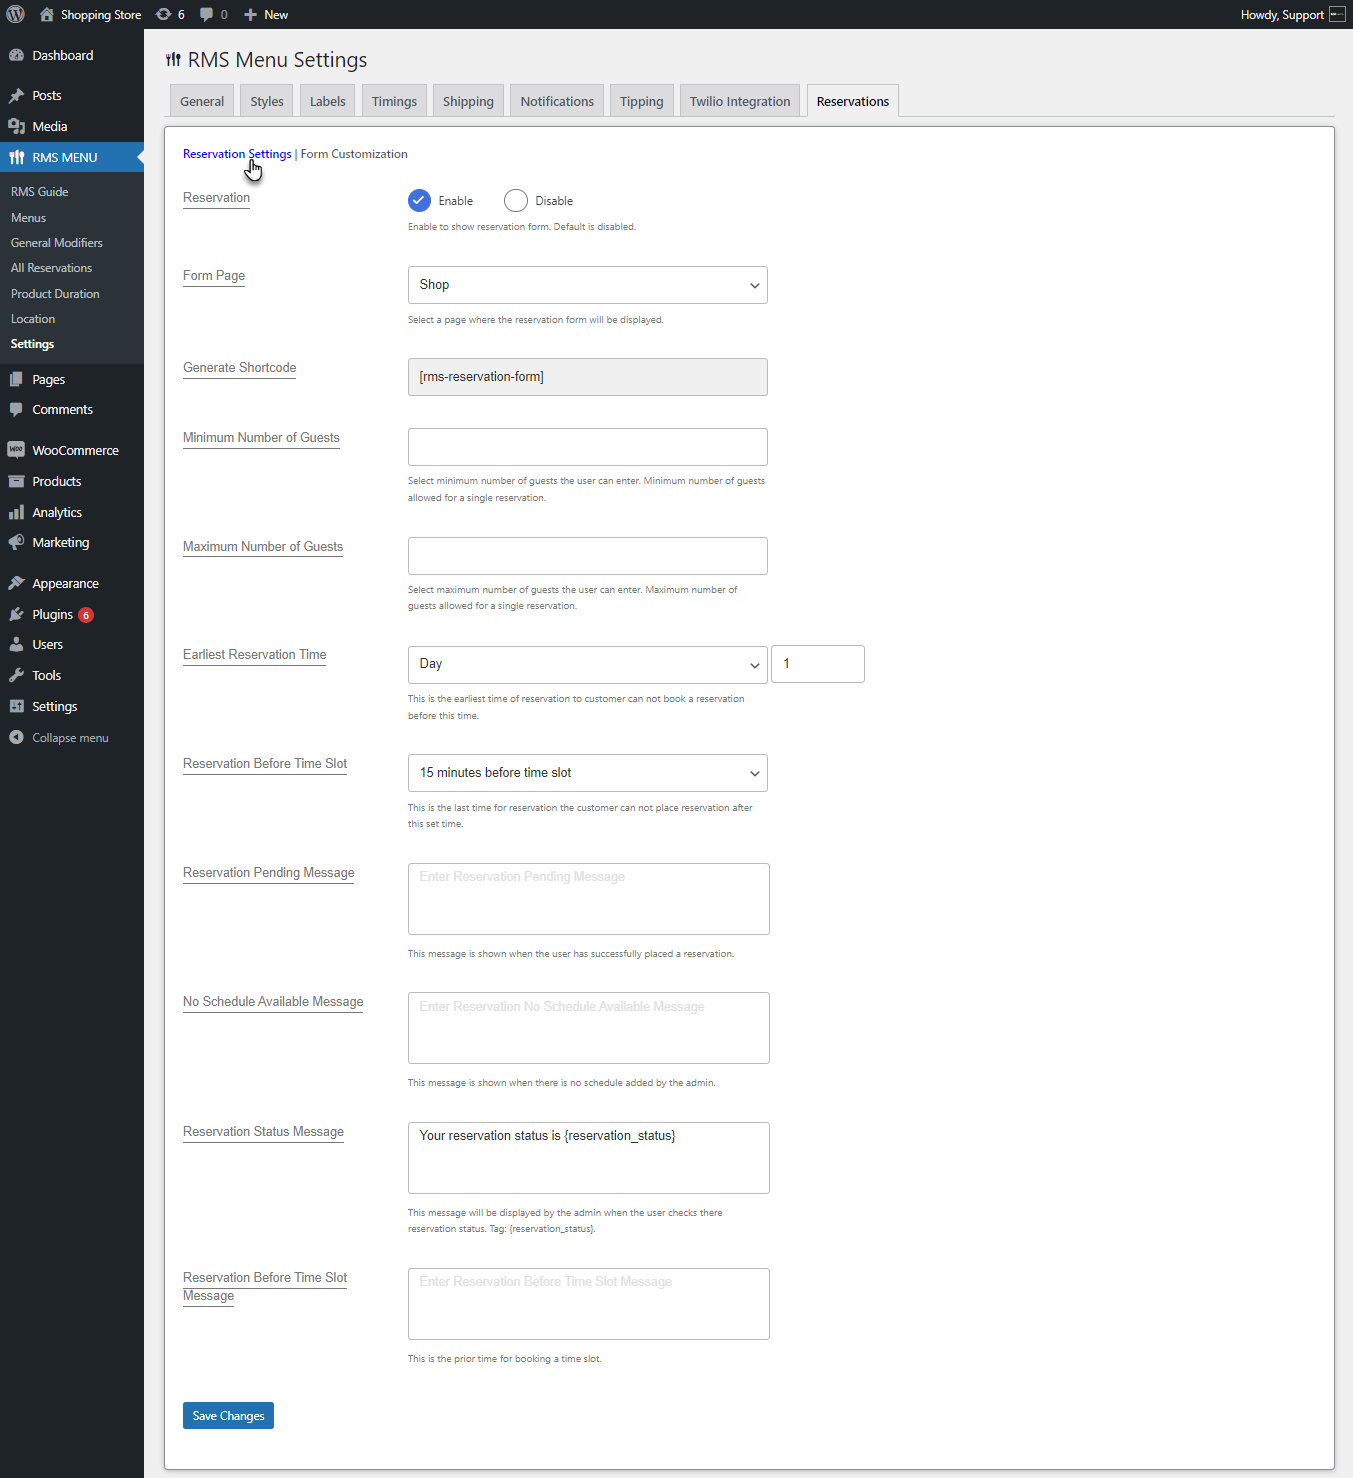
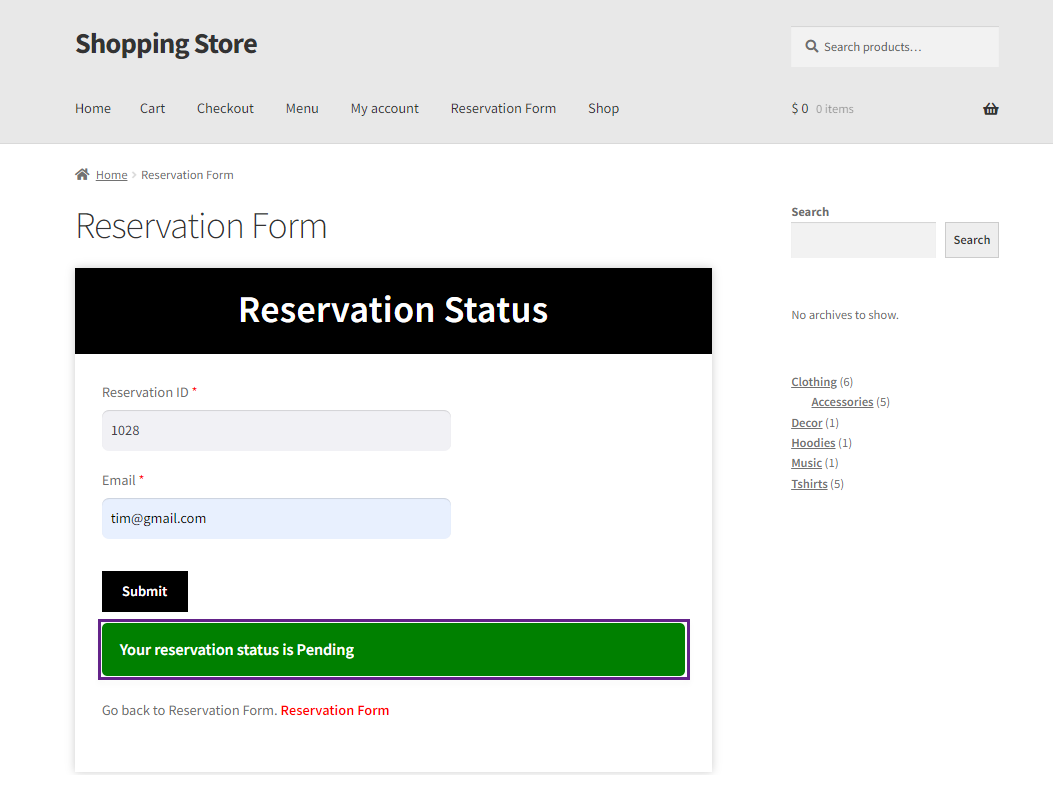
- Scroll down to the Reservation Status Message. This message will be displayed to the user when they check their reservation status and can be changed by the admin as needed.
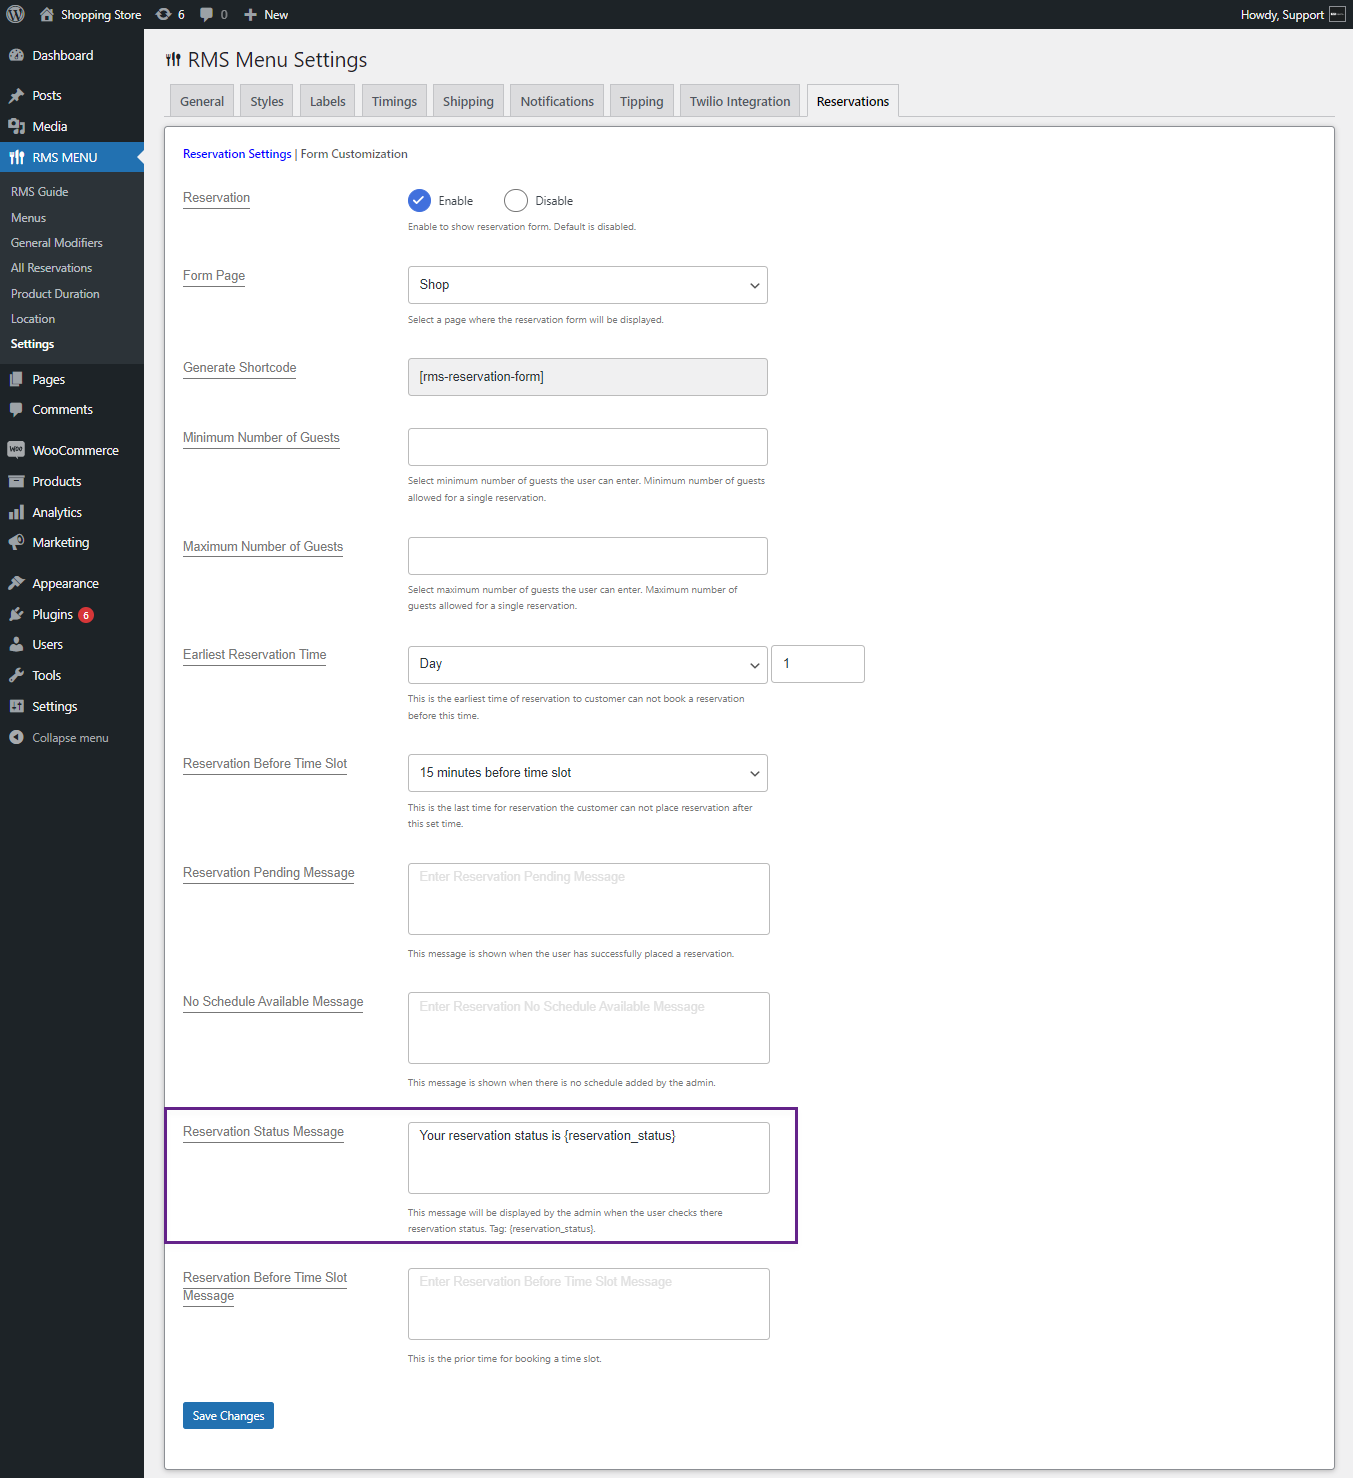
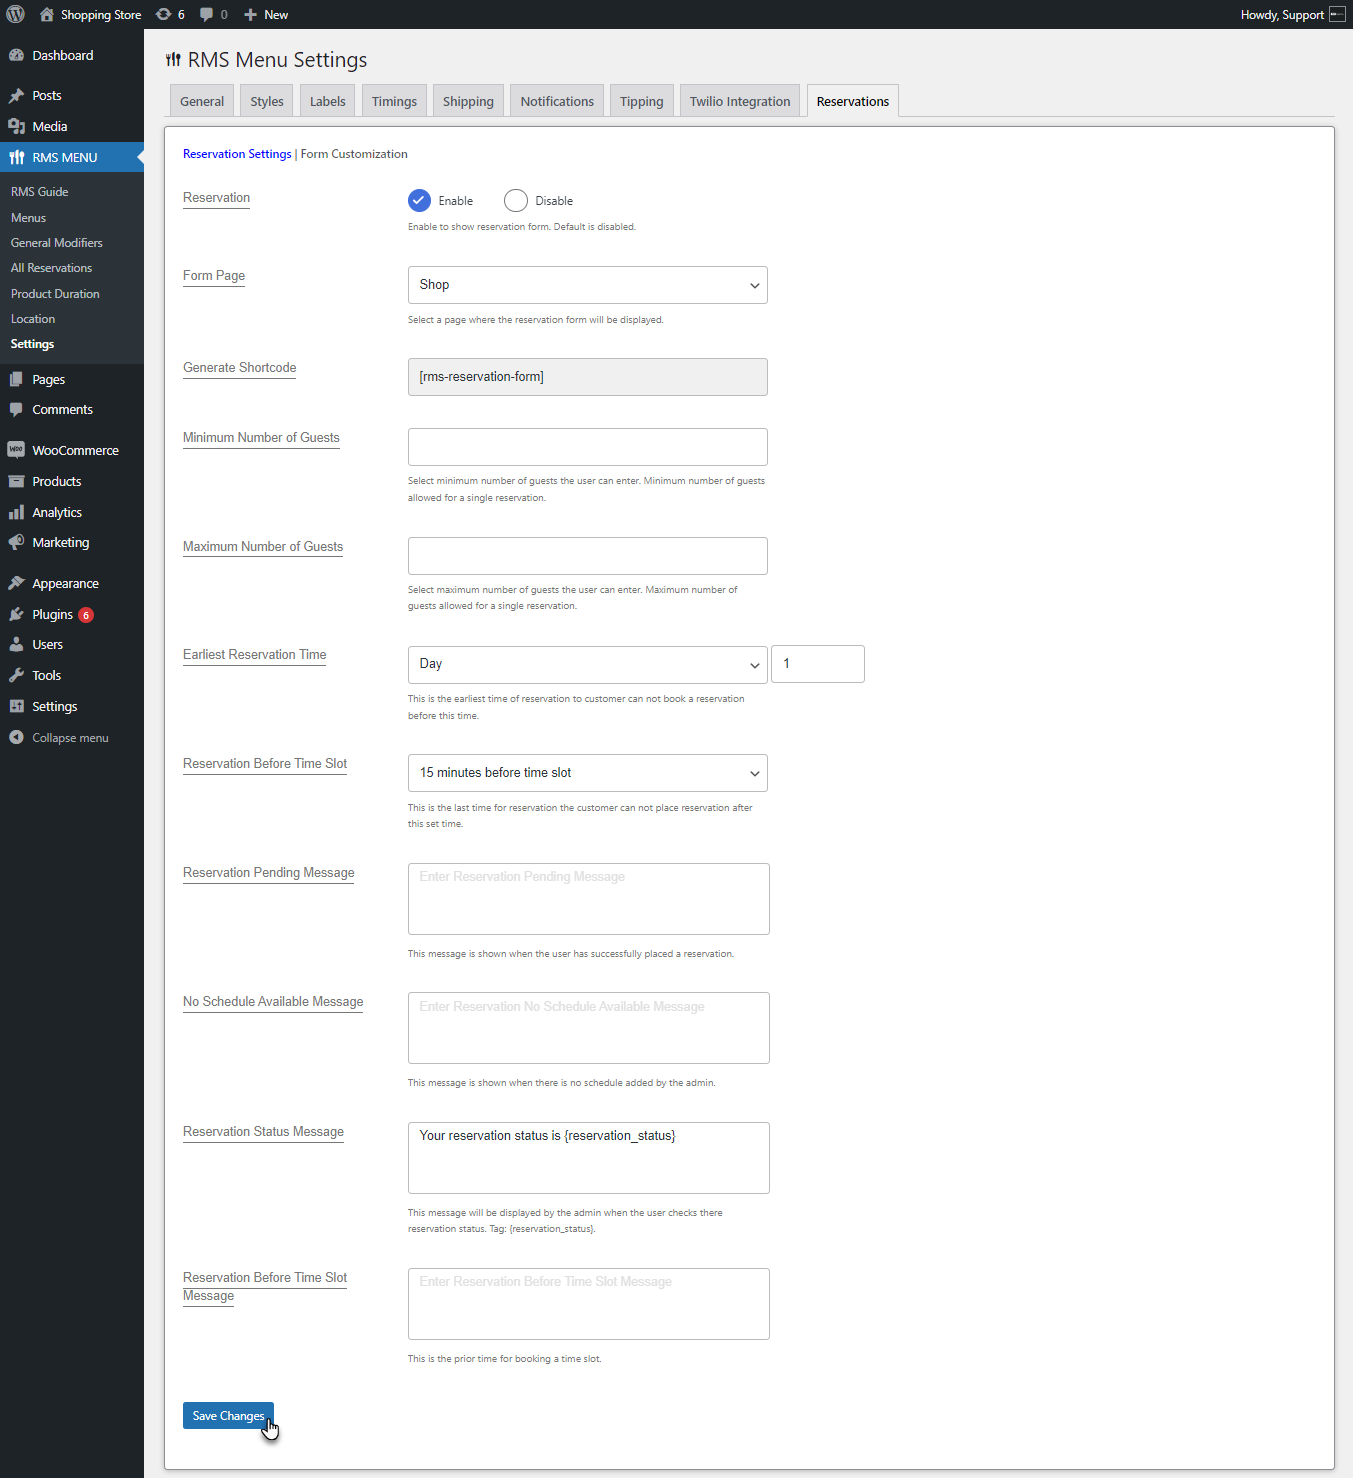
- Click on the Save Changes button to save your settings changes.
Front-end Screenshot
- Log in to your WordPress account.
- Go to the Reservation Form page.
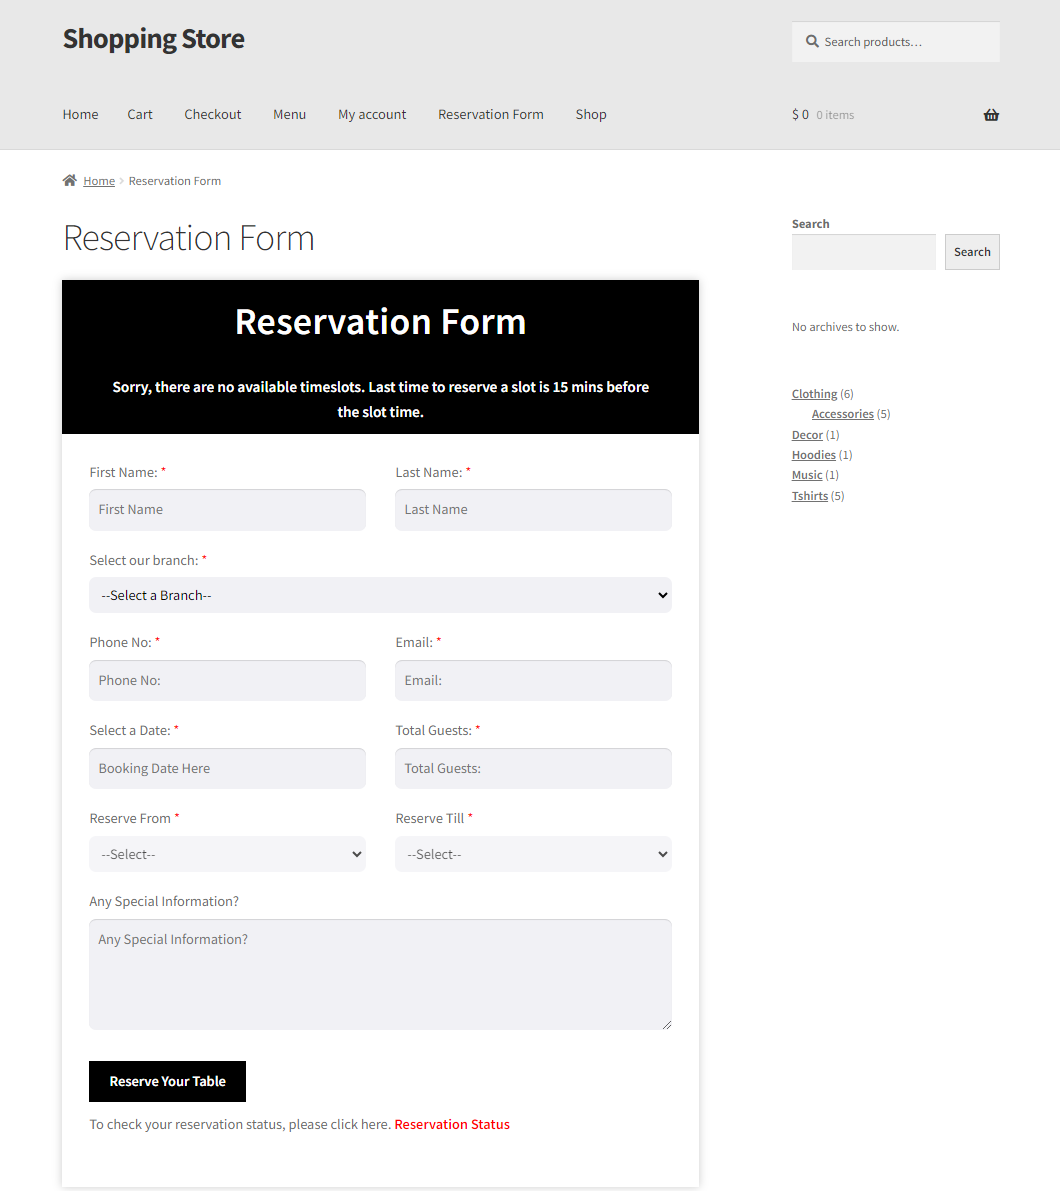
- Fill out the reservation form to reserve your table.
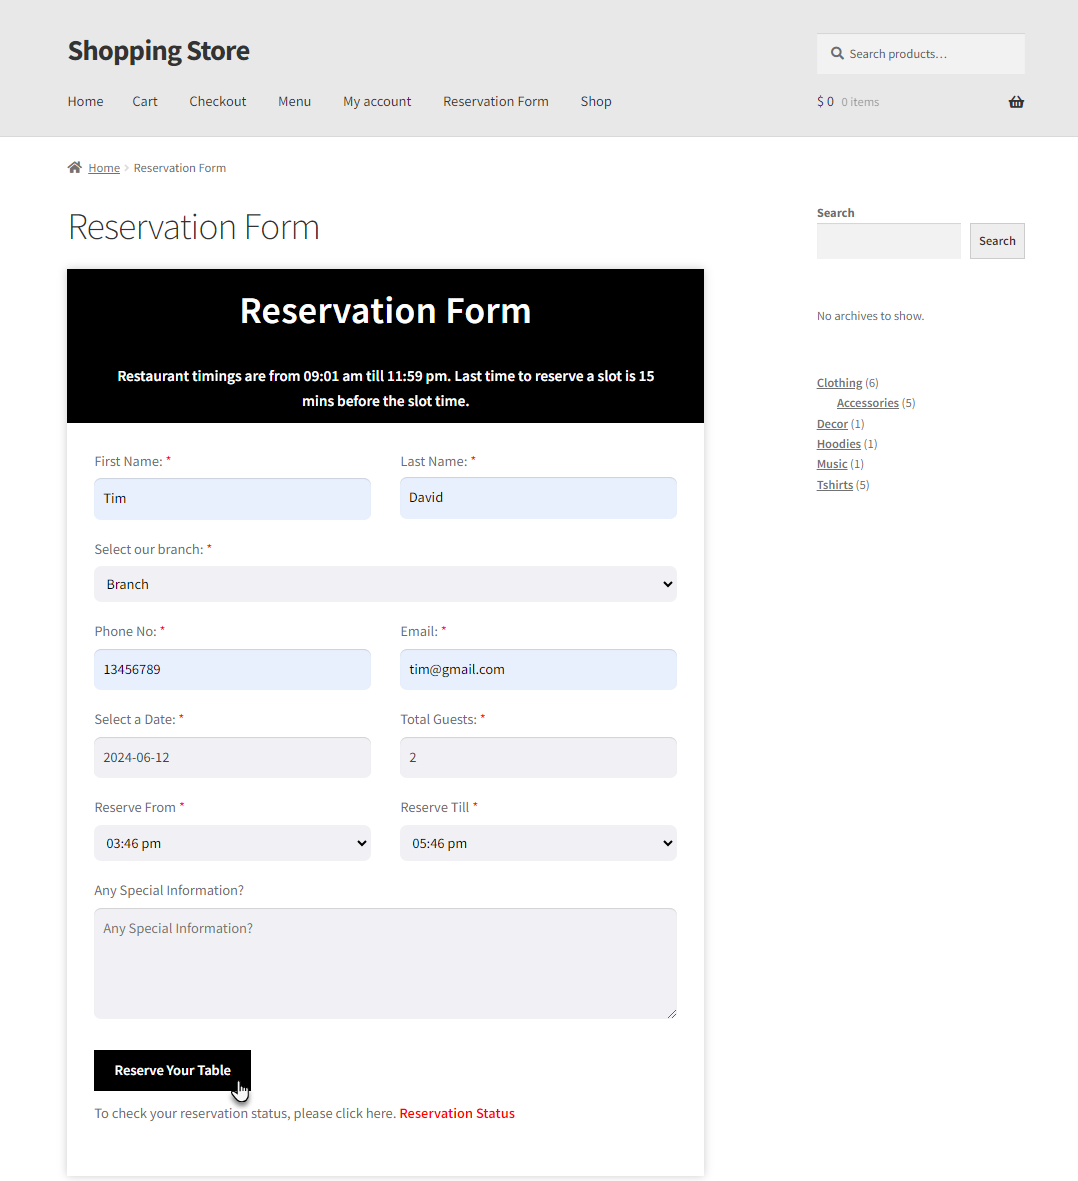
- Once the form is submitted, a Reservation Details page will appear.
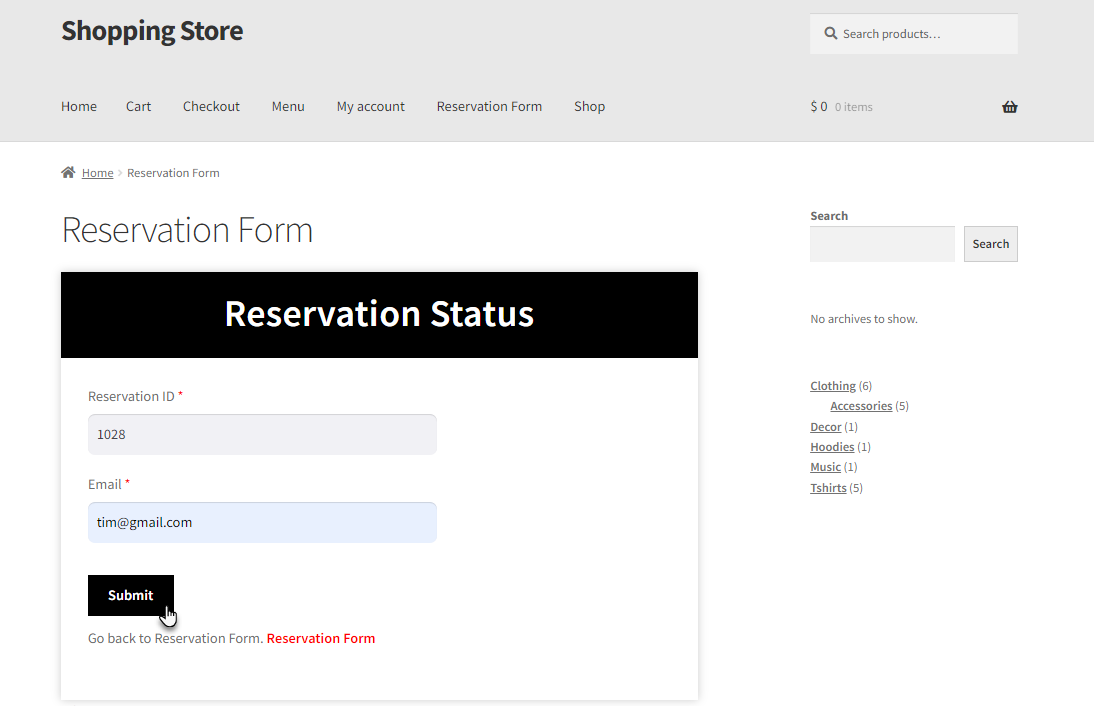
- Click on the Reservation Status option.
- Enter your Reservation ID and Email.

- Click the Submit button to check your reservation status.
- The user will be notified about the status of their reservation.
All Reservations
↑ Back to top- Now, the admin can Add Reservations for their restaurant or alter the reservations done by customers.
Add Reservation
- Navigate to the Dashboard => RMS MENU => All Reservation.
- Navigate and click on the Add Reservation button on the top menu bar.
- Enter the Customer Information and Reservation Details.
- Click on the Publish button on the left side-bar.
- Admin can check the published reservation in the Reservation List.
Front-end Screenshot
- Customers navigate to the Reservation Form.
- Fill in all the required fields.
- Click on the Reservation button.
- The admin can check and make amendments to the customer reservation.
- Navigate to the Dashboard => RMS MENU => All Reservation.
- Hover the Reservation ID in the reservation table the admin wants to edit.
- Click on the Edit button.
- The admin can make amendments to Customer Information or Reservation Details.
- Click on the Update button.
- Admin can check the updated reservation in the Reservation table.
- Admin can also apply the filters on the Reservation table list.
- Select the date from the drop-down menu box of All Dates.
- Select Branch from the drop-down menu box Filter by Branches.
- Select the date, month, and year from the Calendar filter.
- Enter the Reservation ID, Name, or Email of the customer reservation in the Search text box.
- Click on the Filter button to apply the filter.
- Admin can clear the reservation admin searched by applying filters.
- Navigate and Click on the Clear button.
- Admin can also Download CSV Reports of Reservation List.
- Select all or any reservation from the reservation table.
- Navigate to the Download CSV Reports button.
- Click on the Download CSV Reports button.
Note: Selecting a reservation from the reservation table is necessary before downloading CSV.
CSV Report
Emails
↑ Back to top- Admin can set-up Email notifications for reservations.
- Navigate to the Dashboard => WooCommerce => Settings.
- Navigate to the Emails in the top menu bar.
Pending Reservation
- Navigate to the Pending Reservation.
- Click on the Manage button.
- Click on the Admin Notification drop-down box.
- Click on the checkbox of Enable Notification.
- Enter the Email Subject in the textbox.
- Enter Message in the textbox.
- Navigate and click on the User Notification drop-down box.
- Click on the checkbox of Enable Notification.
- Enter the Email Subject in the textbox.
- Enter Message in the textbox.
- Click on the Save Changes button

Email Notification on Admin-End
Email Notification on User-End

Cancel Reservation (Admin-end)
- Navigate to the Cancel Reservation.
- Click on the Manage button.
- Click on the Admin Notification drop-down box.
- Click on the checkbox of Enable Notification.
- Enter the Email Subject in the textbox.
- Enter Message in the textbox.
- Navigate and click on the User Notification drop-down box.
- Click on the checkbox of Enable Notification.
- Enter the Email Subject in the textbox.
- Enter Message in the textbox.
- Click on the Save Changes button.
Email Notification on Admin-End

Email Notification on User-End
Cancel Reservation (Customer-end)
- Navigate to the Reservation Form.
- Navigate and click on the Request Cancellation button.
- It will redirect the user to the Cancel Reservation form.
- Enter the Reservation ID in the textbox.
- Enter the Email address in the textbox.
- Click on the Request Cancellation.
Email Notification on Admin-End
Email Notification on User-End
Complete Reservation
- Navigate to the Complete Reservation.
- Click on the Manage button.
- Click on the Admin Notification drop-down box.
- Click on the checkbox of Enable Notification.
- Enter the Email Subject in the textbox.
- Enter Message in the textbox.
- Navigate and click on the User Notification drop-down box.
- Click on the checkbox of Enable Notification.
- Enter the Email Subject in the textbox.
- Enter Message in the textbox.
- Click on the Save Changes button.
Email Notification on Admin-End
Email Notification on User-End

Confirmed Reservation
- Navigate to the Confirm Reservation.
- Click on the Manage button.

- Click on the Admin Notification drop-down box.
- Click on the checkbox of Enable Notification.
- Enter the Email Subject in the textbox.
- Enter Message in the textbox.
- Navigate and click on the User Notification drop-down box.
- Click on the checkbox of Enable Notification.
- Enter the Email Subject in the textbox.
- Enter Message in the textbox.
- Click on the Save Changes button.
Email Notification on Admin-End
Email Notification on User-End

Fast Cart – Instant checkout
↑ Back to topEnable Fast Cart
↑ Back to top- Admin will have a Fast Cart option, which is now the default cart for the RMS menu.
- The user will be able to instantly access the option checkout page via the fast cart functionality. As a result, the woocommerce cart page is eliminated.
- There is a payment option available in the fast cart to pay directly without redirecting to the cart or checkout page, such as the pay with PayPal or Google Pay option.
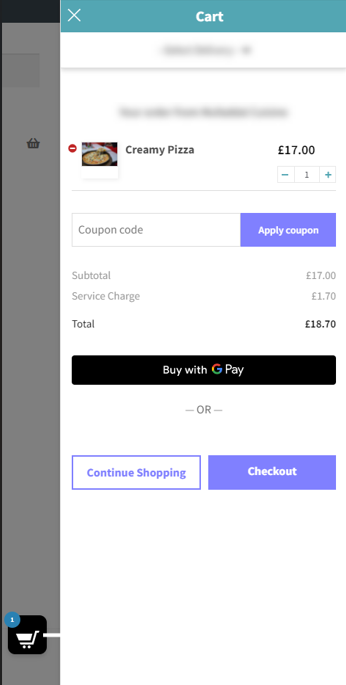
- A coupon field is also available for the user to apply a coupon code directly into the fast cart.
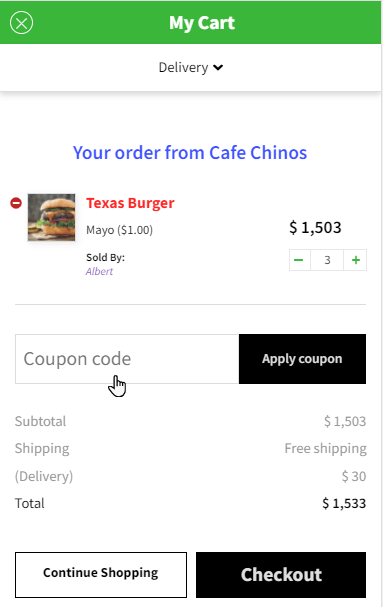
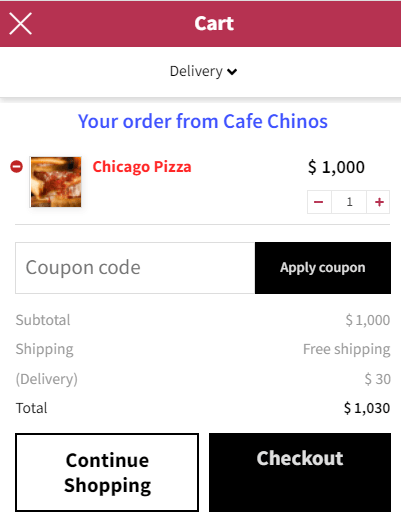
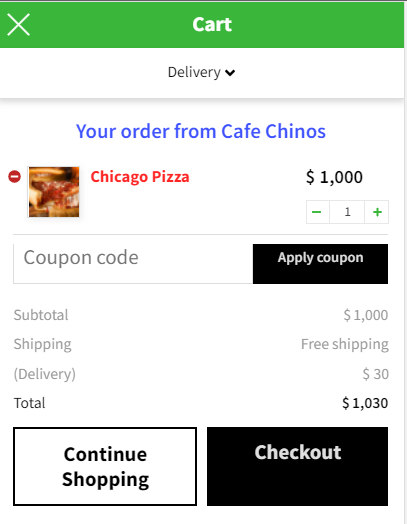
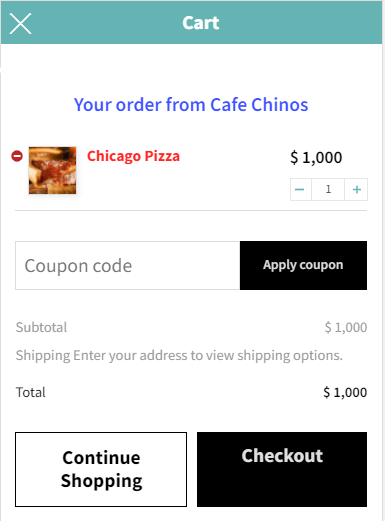
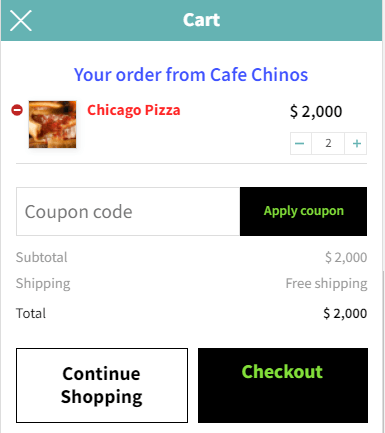
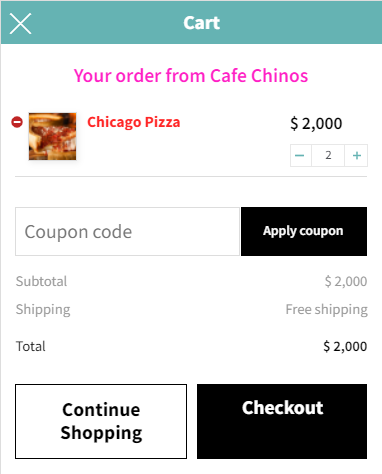
- The user has two buttons on the Fast Cart: checkout and Continue Shopping. Continue shopping will close the cart and keep the user on the restaurant page while checkout will redirect to the checkout page.

Front-end Screenshot
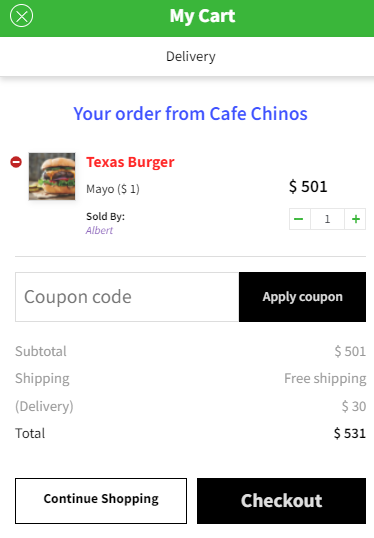
- WooCommerce Coupon can be applied here. The discount will be the same as in the coupon payment option. It will appear in Cart so that users can pay directly.
- Continue shopping will redirect to the Restaurant Page.
- Checkout will redirect to the Woocommerce checkout page without going to the Cart Page.
Rest API
↑ Back to topAuthorization
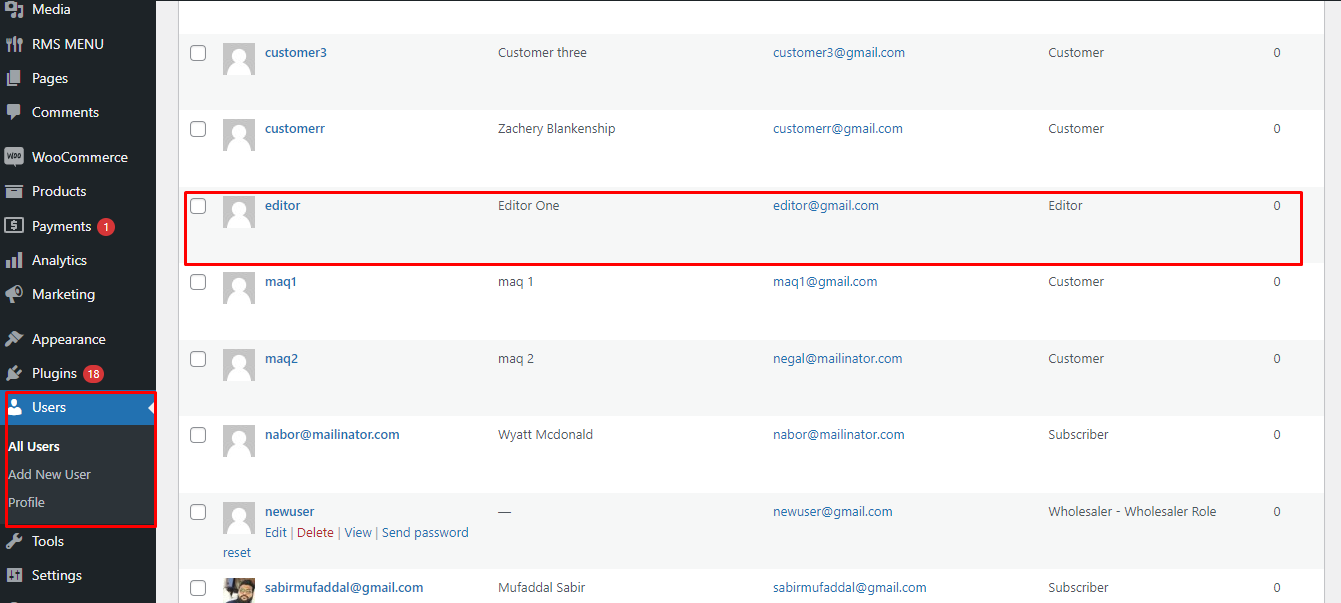
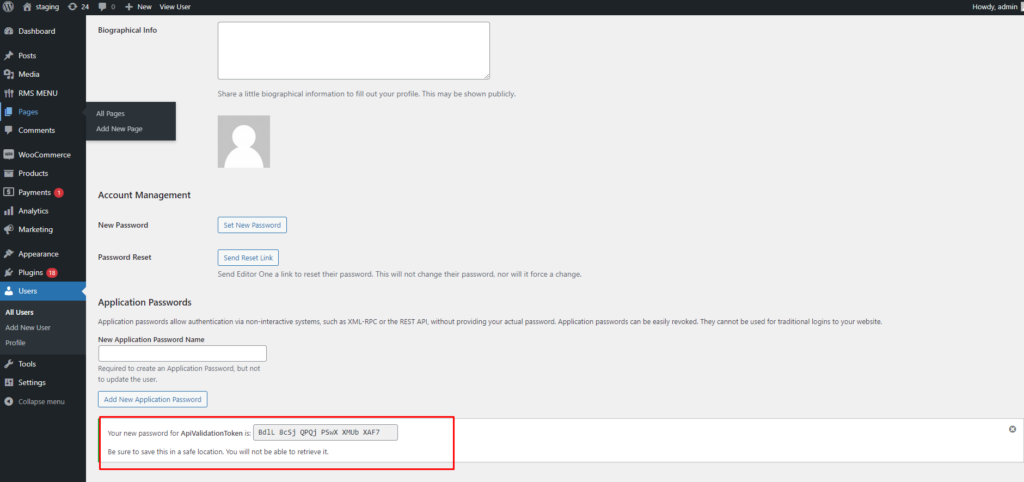
↑ Back to top- Go to Users.
- Select and Edit any user you want to assign authorization of APIs.
- In the User Edit Page insert any name of your application password.
- Click on the Add New Application password.
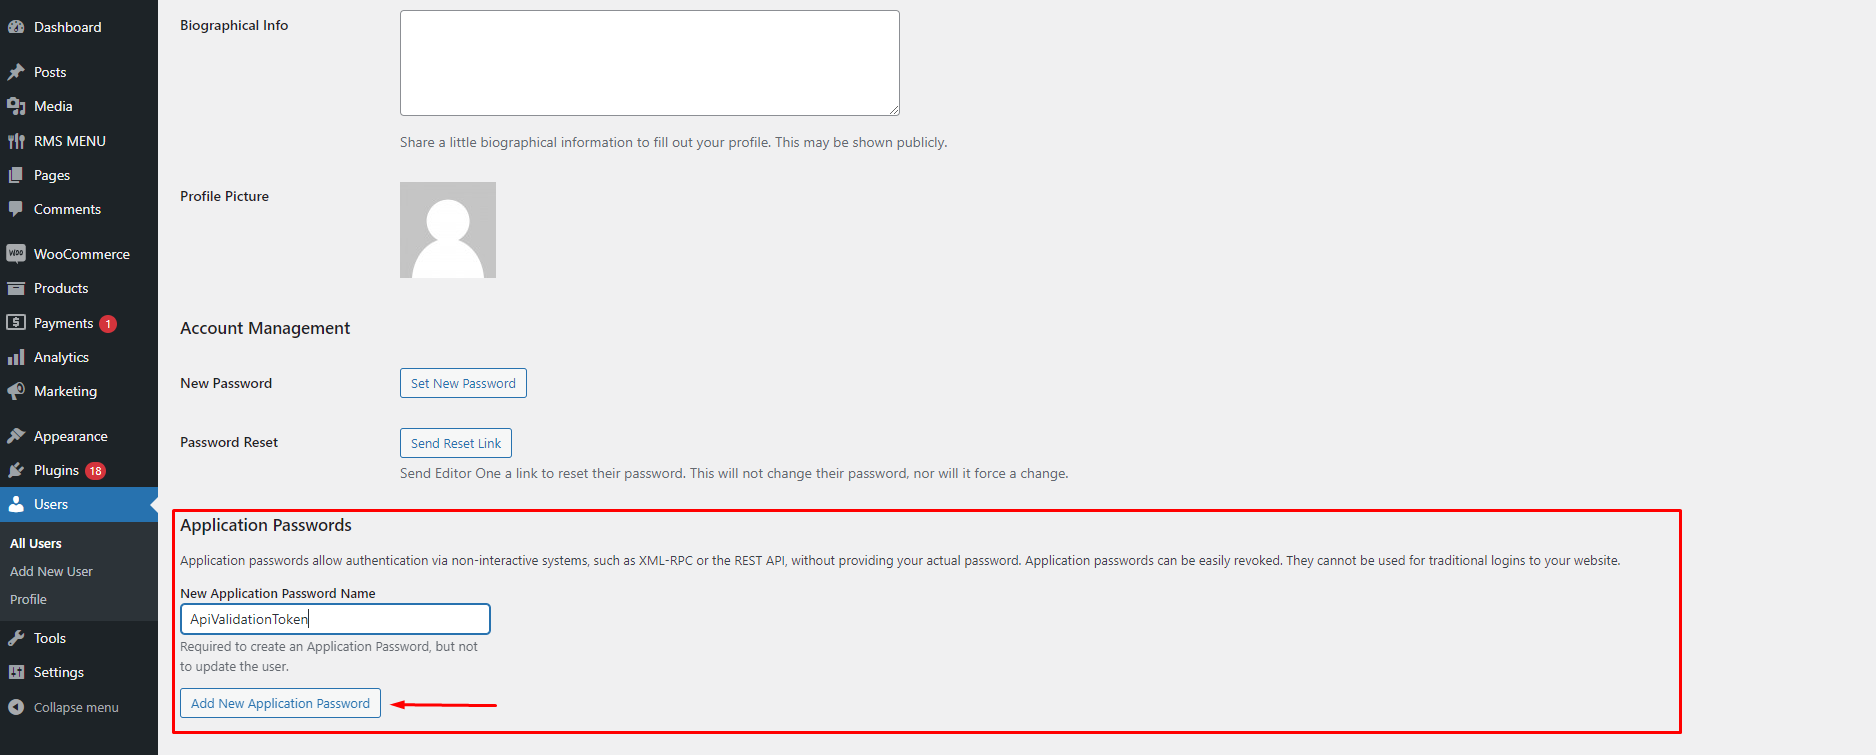
- After Click on New Application Password Unique password will be generated.
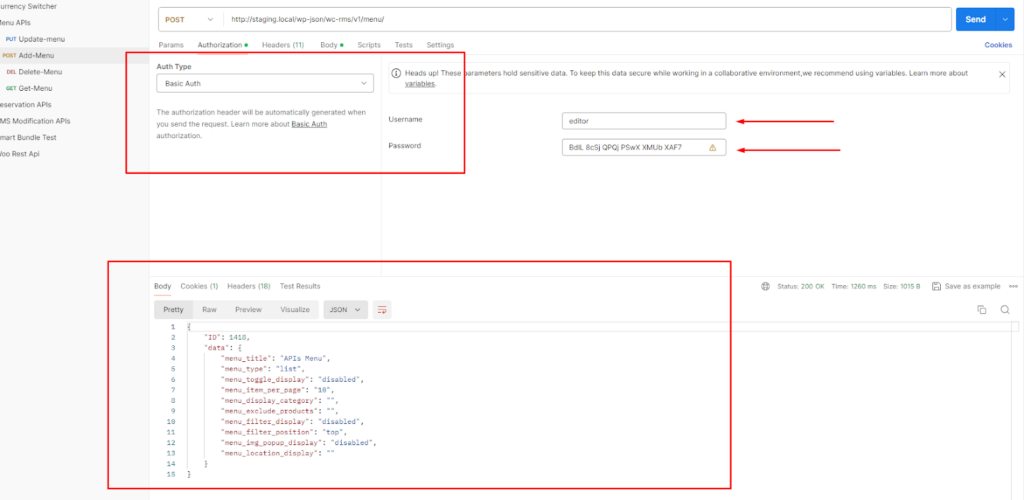
- In the Postman Select Basic Auth from Auth Type from the Authorization Tab.
- Insert username and Application password in Basic Auth.
- After configuration, click on Send button to test the authorization.
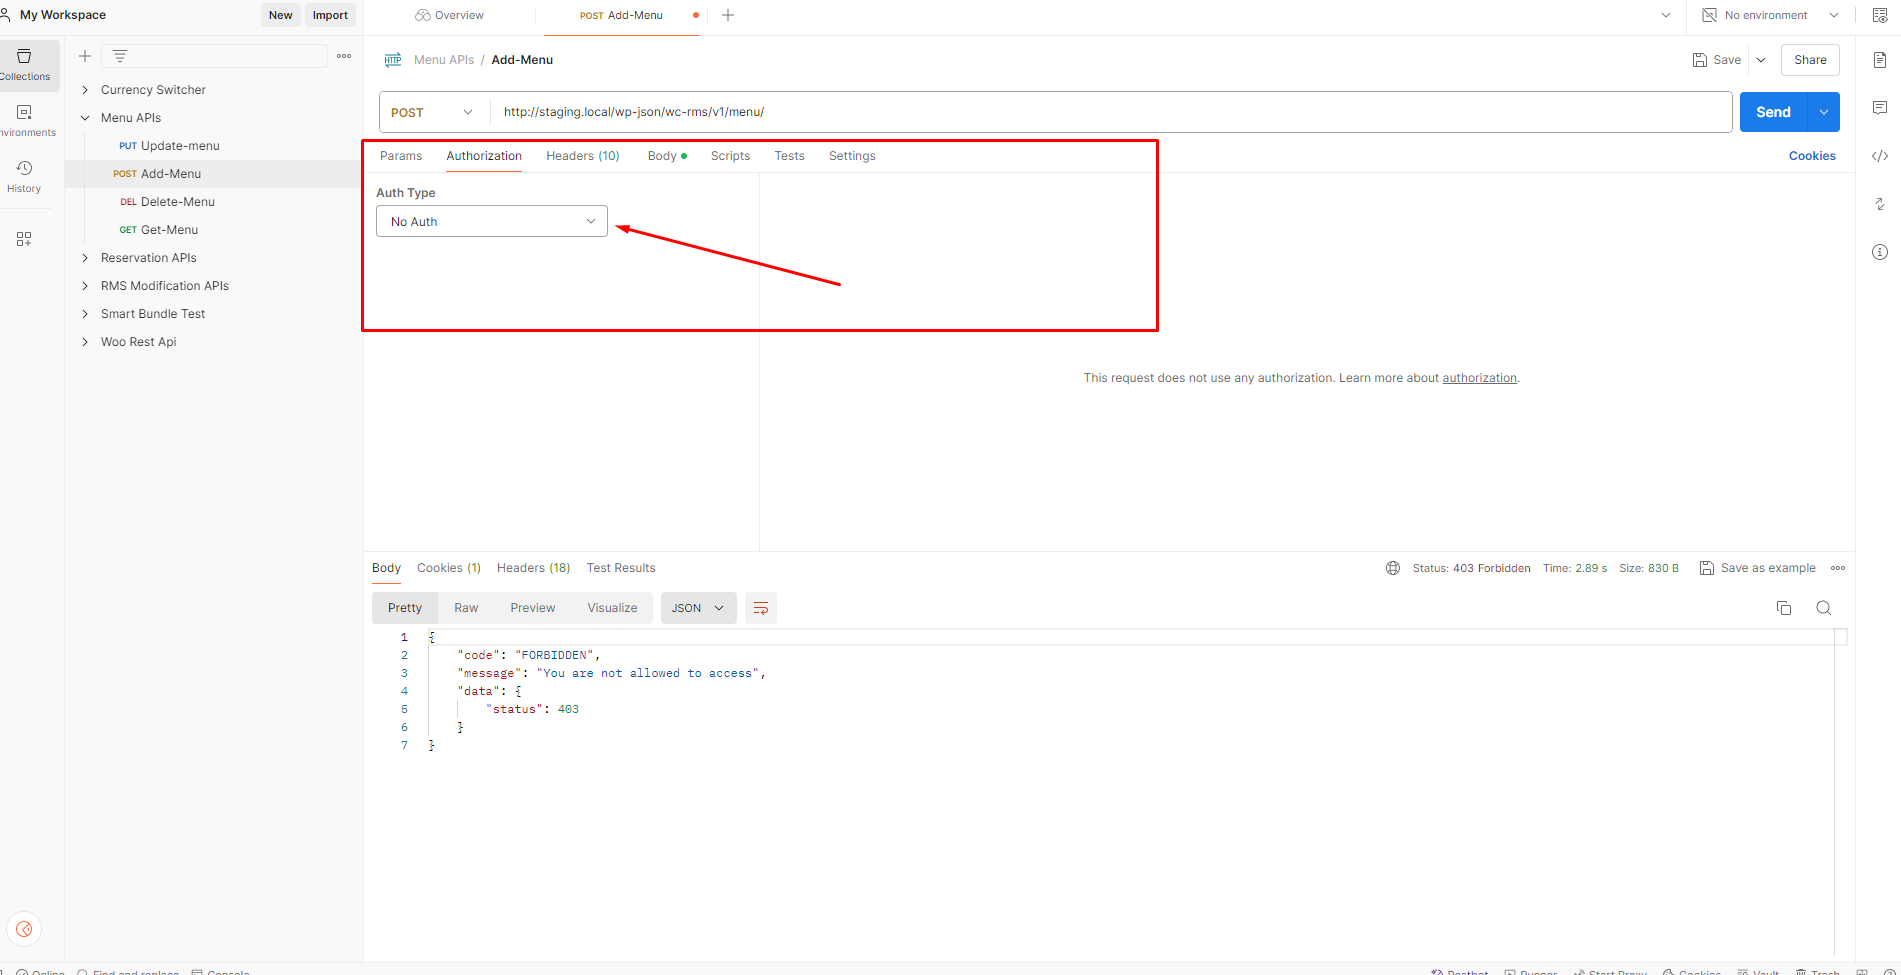
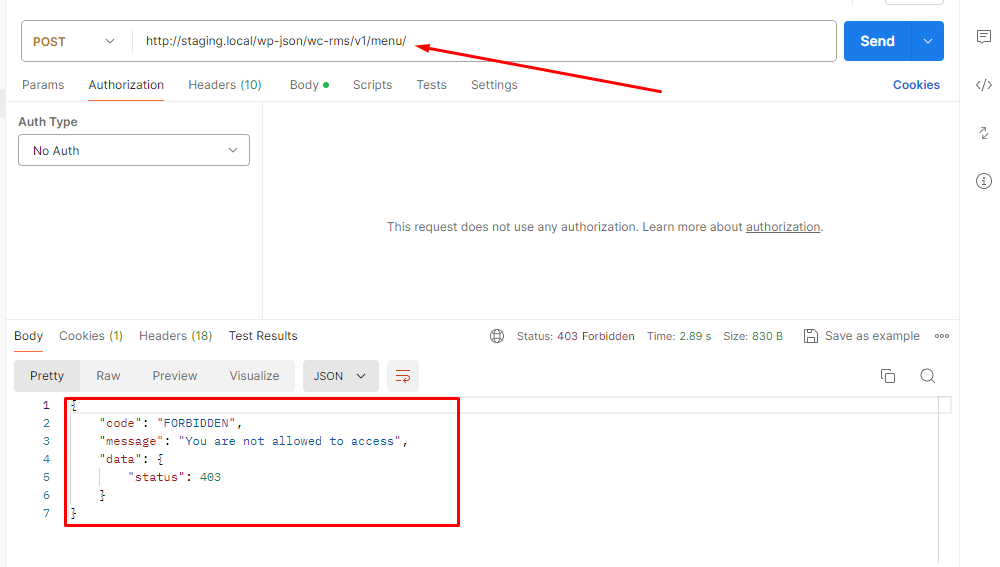
Without Authorization.
↑ Back to top- Trying using API without Authorization.
Menus
The Menus API provides functionality for generating, displaying, modifying, and removing Menus.
Available Routes are mentioned below:
- GET: wp-json/wc-rms/v1/menu
- GET: wp-json/wc-rms/v1/menu/{menu_id} .
- POST: wp-json/wc-rms/v1/menu
- PUT: wp-json/wc-rms/v1/menu/{menu_id}
- DELETE: wp-json/wc-rms/v1/menu/{menu_id}
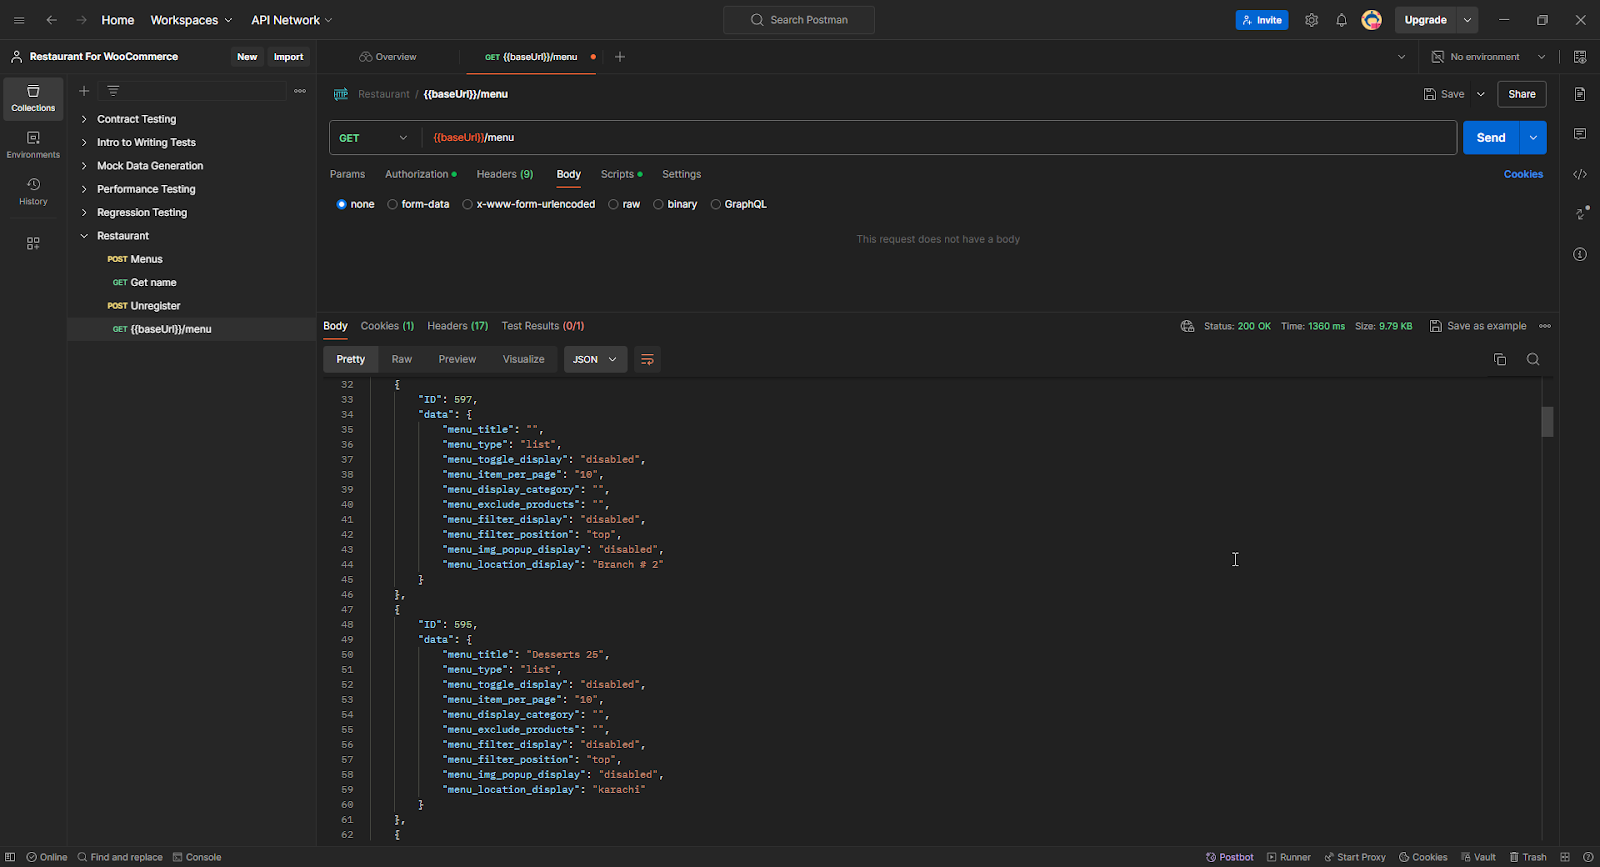
List Of Menus (GET)
Request Example
- METHOD: GET
- ENDPOINT: /wp-json/wc-rms/v1/menu
- POSTMAN: Fetch all Menus
- POST: wc-rms/v1/menu
Response Example
- STATUS: 200 OK (Fetch all Menus)
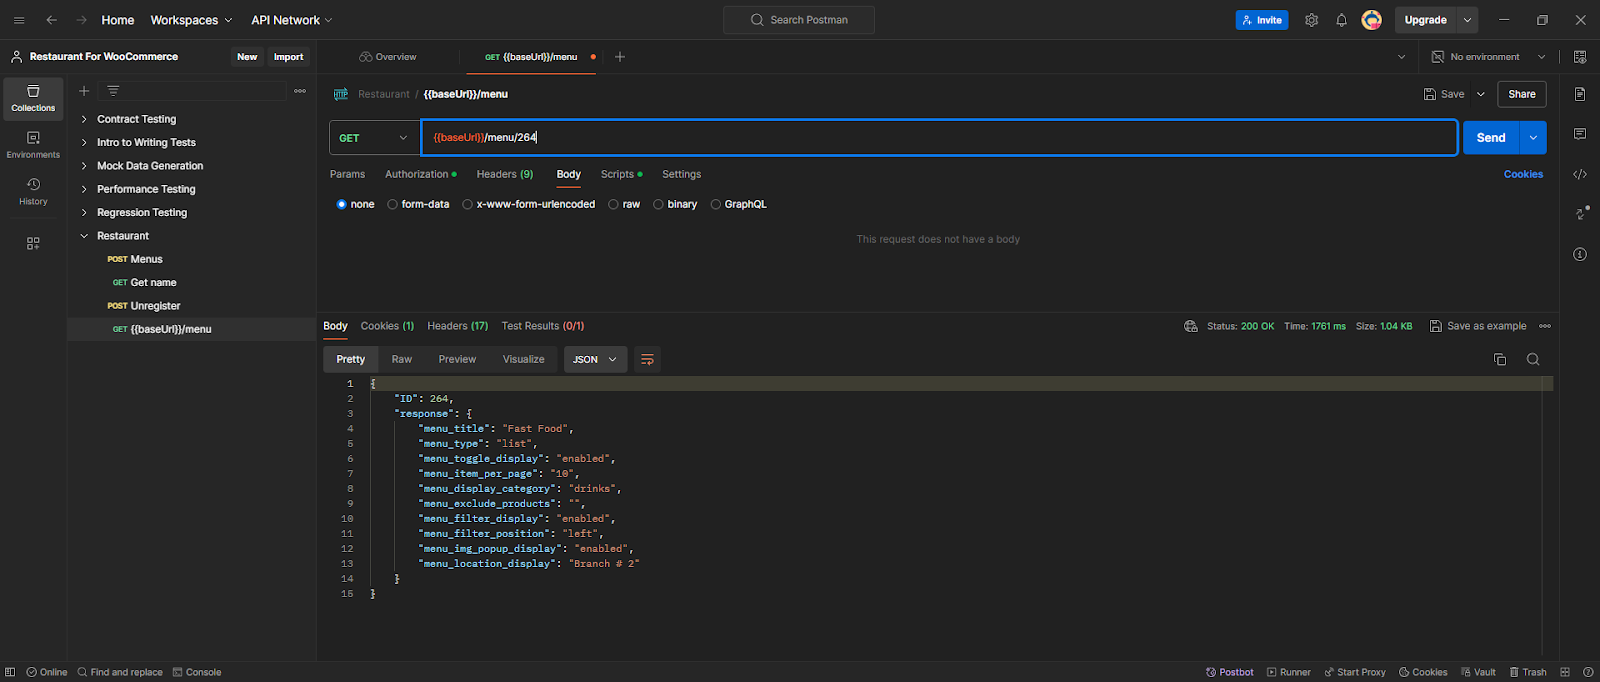
Retrieve a Menu (GET)
Request Example
- METHOD: GET
- ENDPOINT: /wp-json/wc-rms/v1/menu/{menu_id}
- POSTMAN: Fetch a specific Menu
- POST: wc-rms/v1/menu/menu_id
Response Example
- STATUS: 200 OK (Fetch a specific Menu)
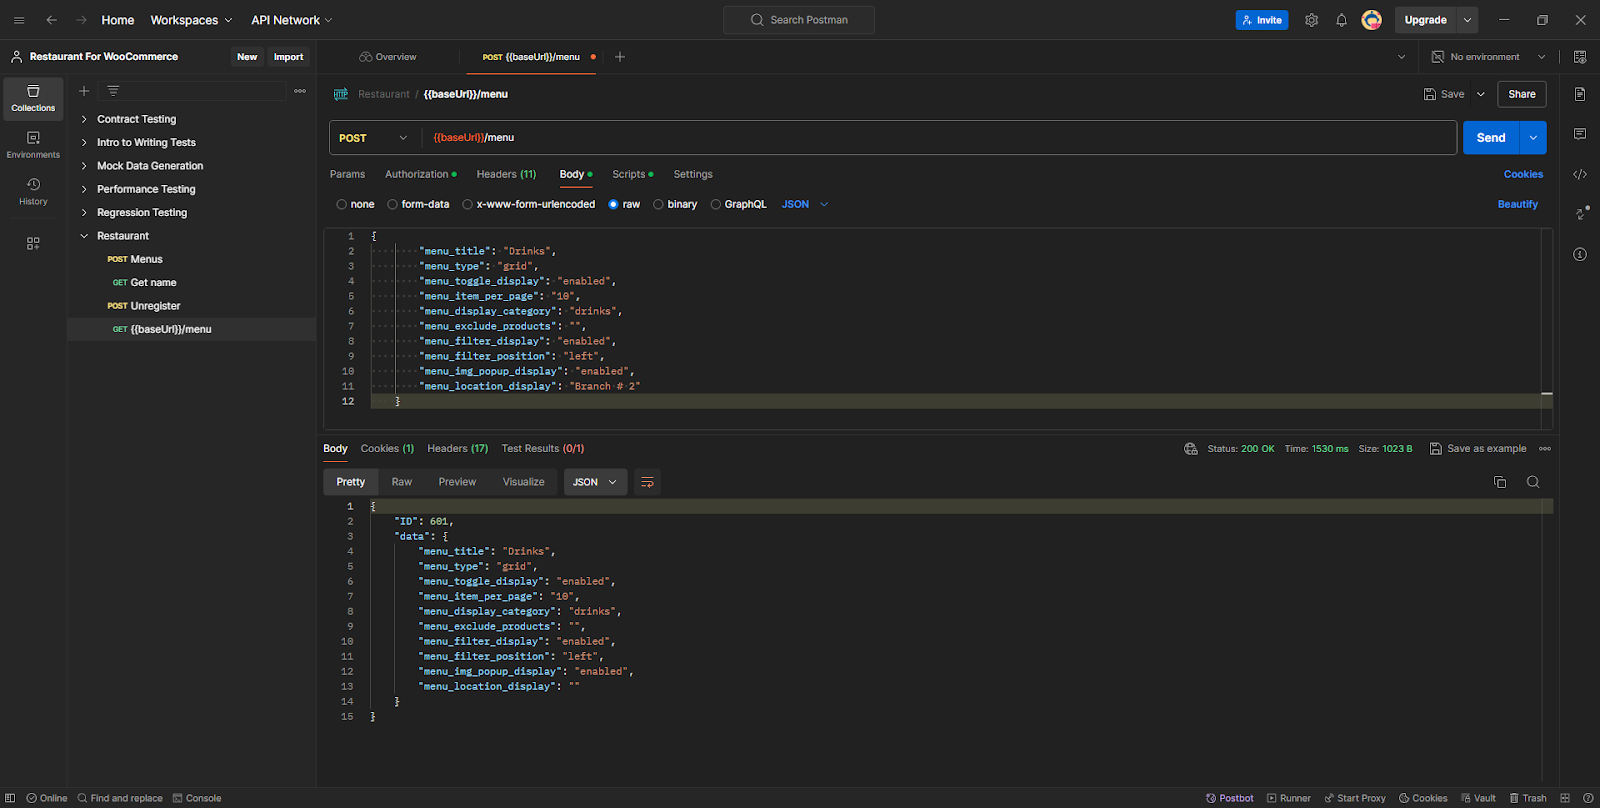
Create a Commission Category (POST)
Request Example
- METHOD : POST
- ENDPOINT : /wp-json/wc-rms/v1/menu
- POSTMAN : Create a Menu
- POST : wc-rms/v1/menu
- JSON Body :
{
“menu_title”: “Drinks”,
“menu_type”: “grid”,
“menu_toggle_display”: “enabled”,
“menu_item_per_page”: “10”,
“menu_display_category”: “drinks”,
“menu_exclude_products”: “”,
“menu_filter_display”: “enabled”,
“menu_filter_position”: “left”,
“menu_img_popup_display”: “enabled”,
“menu_location_display”: “”
}
Response Example
- STATUS: 200 CREATED (Menu created successfully)
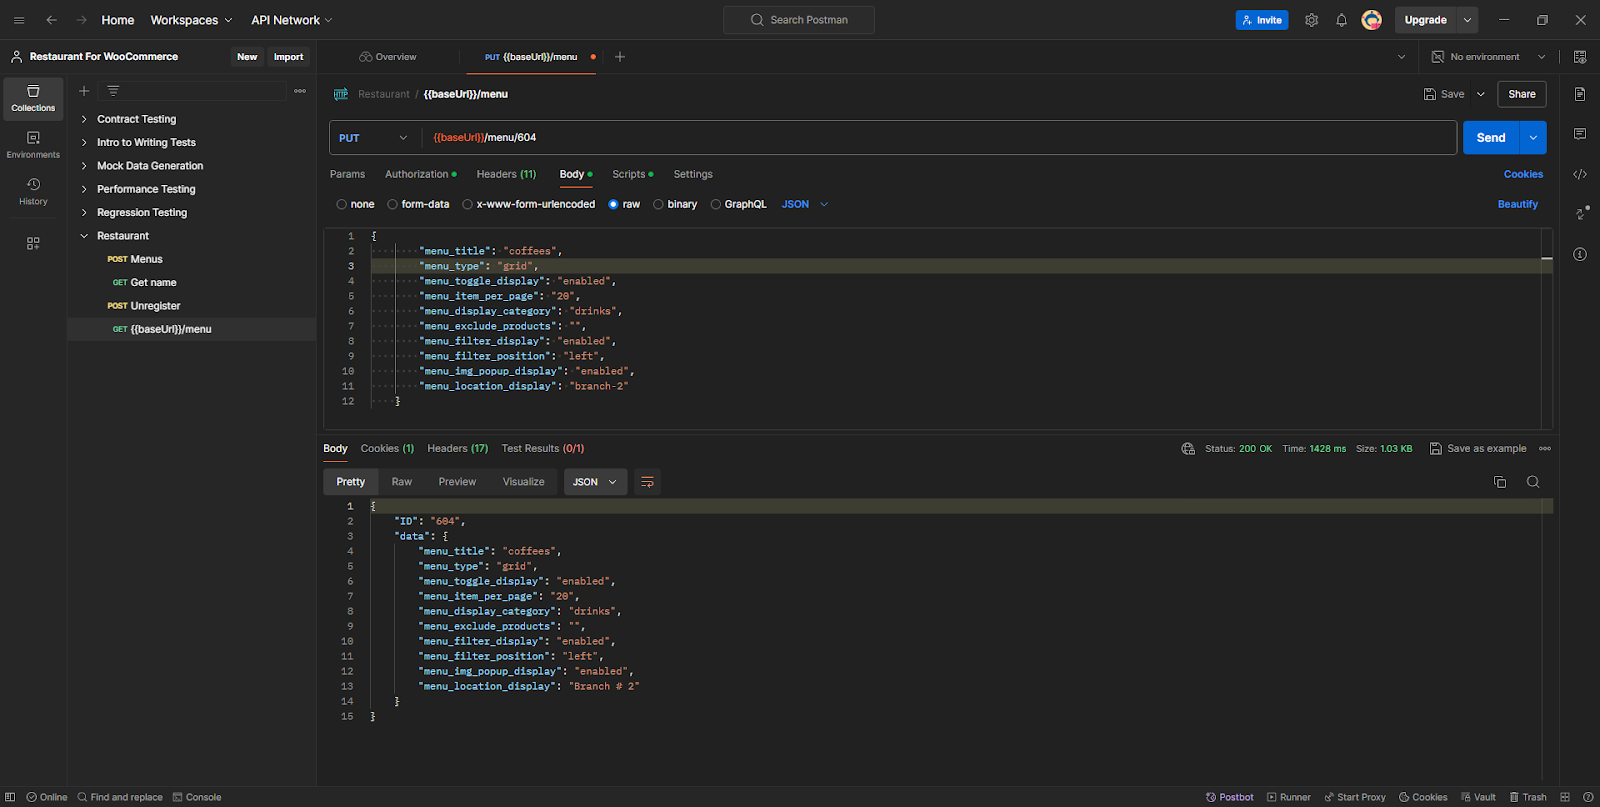
Update a Menu(PUT)
Request Example
- METHOD : PUT
- ENDPOINT : wp-json/wc-rms/v1/menu/{menu_id}
- POSTMAN : Update Menu
- POST : wc-rms/v1/menu/menu_id
- JSON Body :
{
“menu_title”: “coffees”,
“menu_type”: “grid”,
“menu_toggle_display”: “enabled”,
“menu_item_per_page”: “20”,
“menu_display_category”: “drinks”,
“menu_exclude_products”: “”,
“menu_filter_display”: “enabled”,
“menu_filter_position”: “left”,
“menu_img_popup_display”: “enabled”,
“menu_location_display”: “branch-2”
}
Response Example
- STATUS: 200 OKAY (Menu is updated successfully)
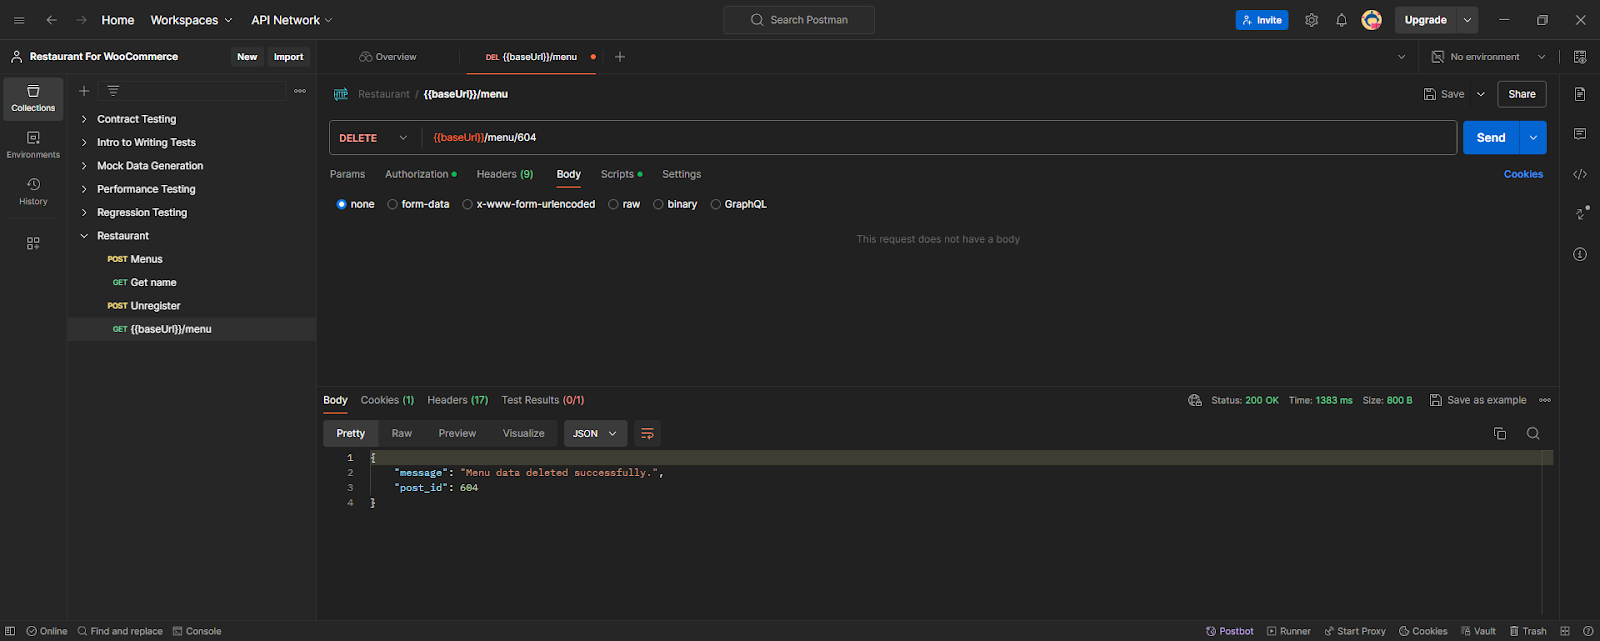
Delete a Menu (DELETE)
Request Example
- METHOD: DELETE
- ENDPOINT: /wp-json/wc-rms/v1/menu/{menu_id}
- POSTMAN: Fetch all Menu
- POST: wc-rms/v1/menu/menu_id
Response Example
- STATUS: 200 OK (Delete Menu)
All Reservations
The All Reservation API provides functionality for displaying Menus.
Available Routes are mentioned below:
- GET: wp-json/wc-rms/v1/reservation
- GET: wp-json/wc-rms/v1/reservation/{reservation_id}
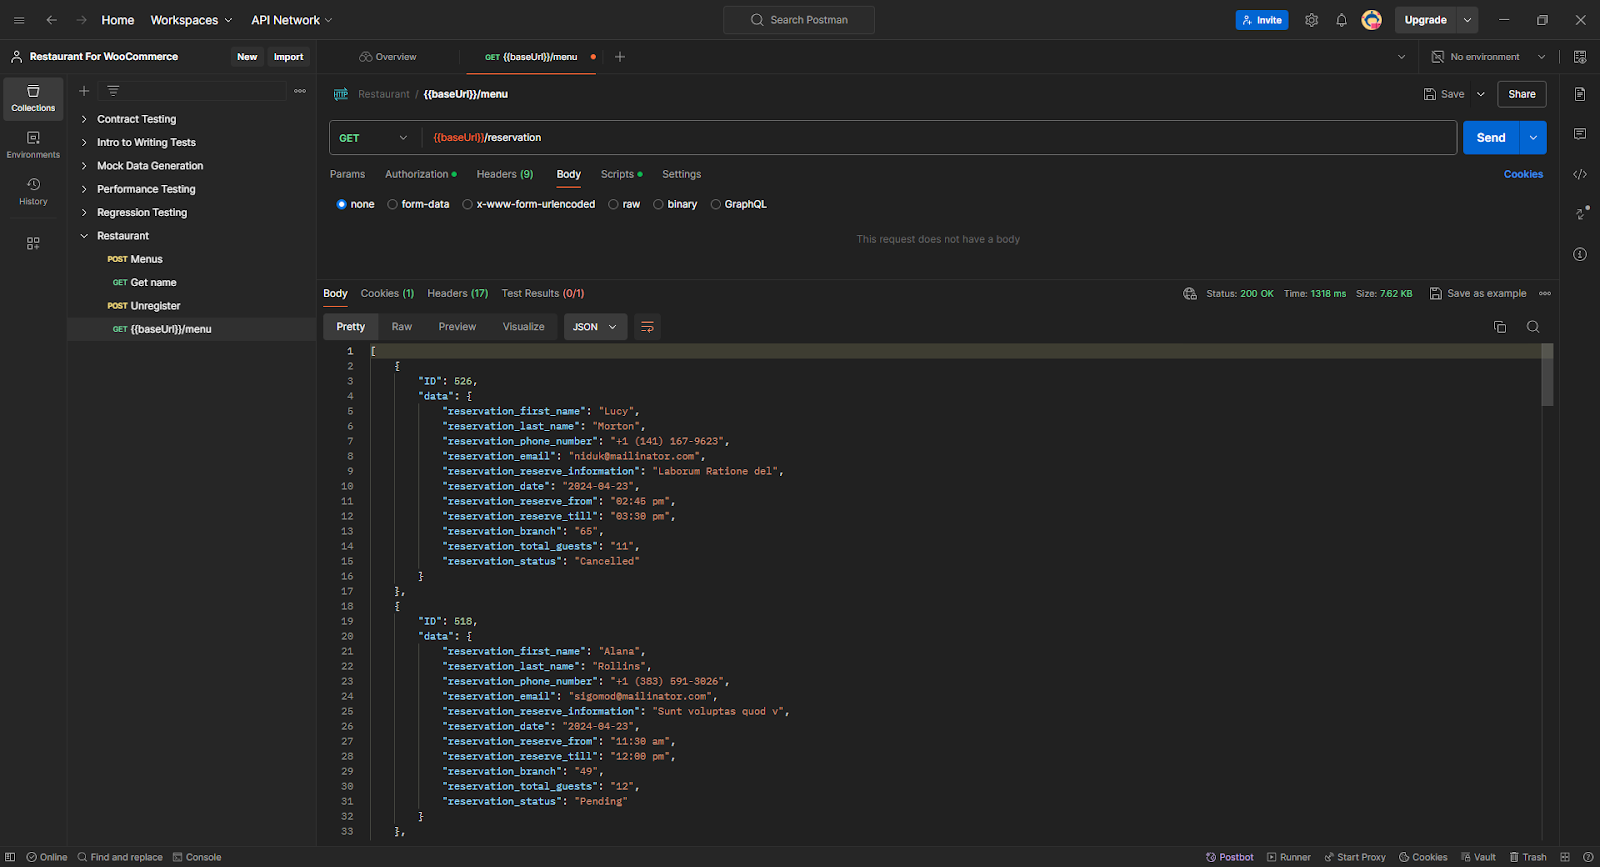
List All Reservation (GET)
Request Example
- METHOD: GET
- ENDPOINT: /wp-json/wc-rms/v1/reservation
- POSTMAN: Fetch all Reservations
- POST: wc-rms/v1/reservation
Response Example
- STATUS: 200 OK (Fetch all Reservations)
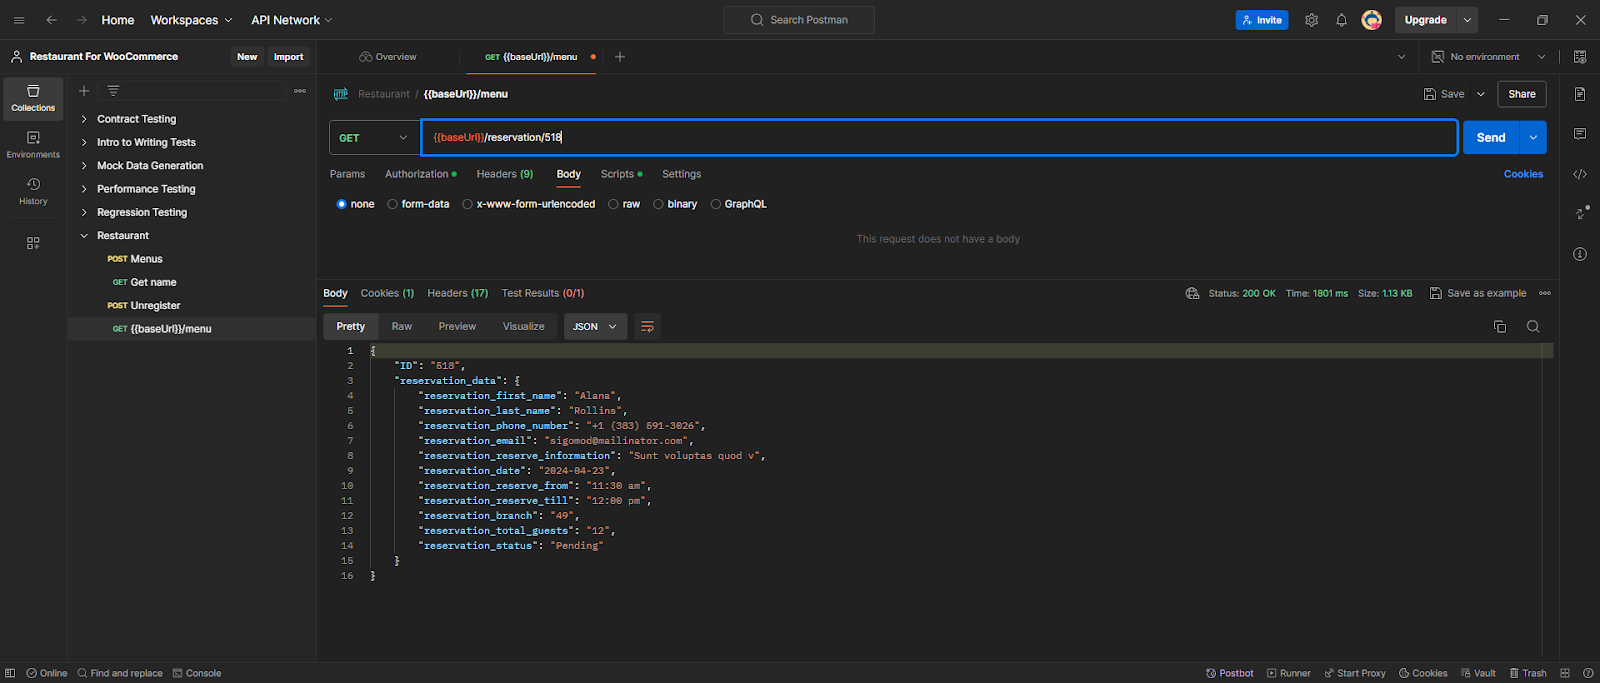
Retrieve a Sales Agent (GET)
Request Example
- METHOD: GET
- ENDPOINT: /wp-json/wc-rms/v1/reservation/{reservation_id}
- POSTMAN: Fetch a specific Reservation
- POST: wc-rms/v1/reservation/reservation_id
Response Example
- STATUS: 200 OK (Fetch a specific Reservation)
General Modifiers
↑ Back to topThe General Modifier API provides functionality for generating, displaying, modifying, and removing RMS Modifiers.
Available Routes are mentioned below:
- GET: wp-json/wc-rms/v1/modifier
- GET: wp-json/wc-rms/v1/modifier/{modifier_id} .
- POST: wp-json/wc-rms/v1/modifier
- PUT: wp-json/wc-rms/v1/modifier/{modifier_id}
- DELETE: wp-json/wc-rms/v1/modifier/{modifier_id}
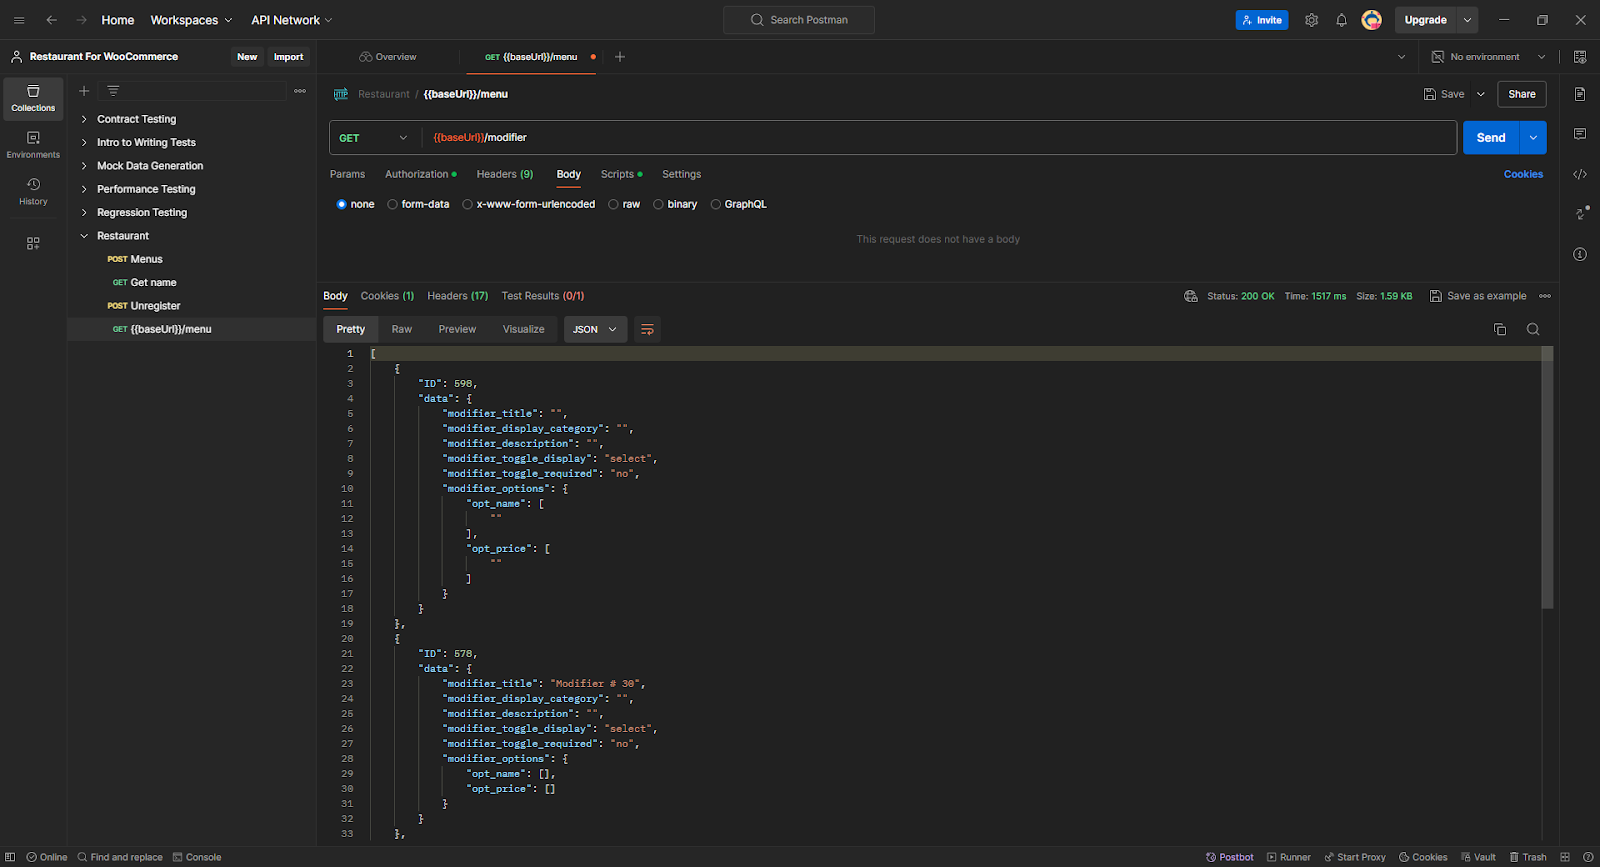
List Of Modifiers (GET)
Request Example
- METHOD: GET
- ENDPOINT: /wp-json/wc-rms/v1/modifier
- POSTMAN: Fetch all Modifier
- POST: wc-rms/v1/modifier
Response Example
- STATUS: 200 OK (Fetch all Modifier)
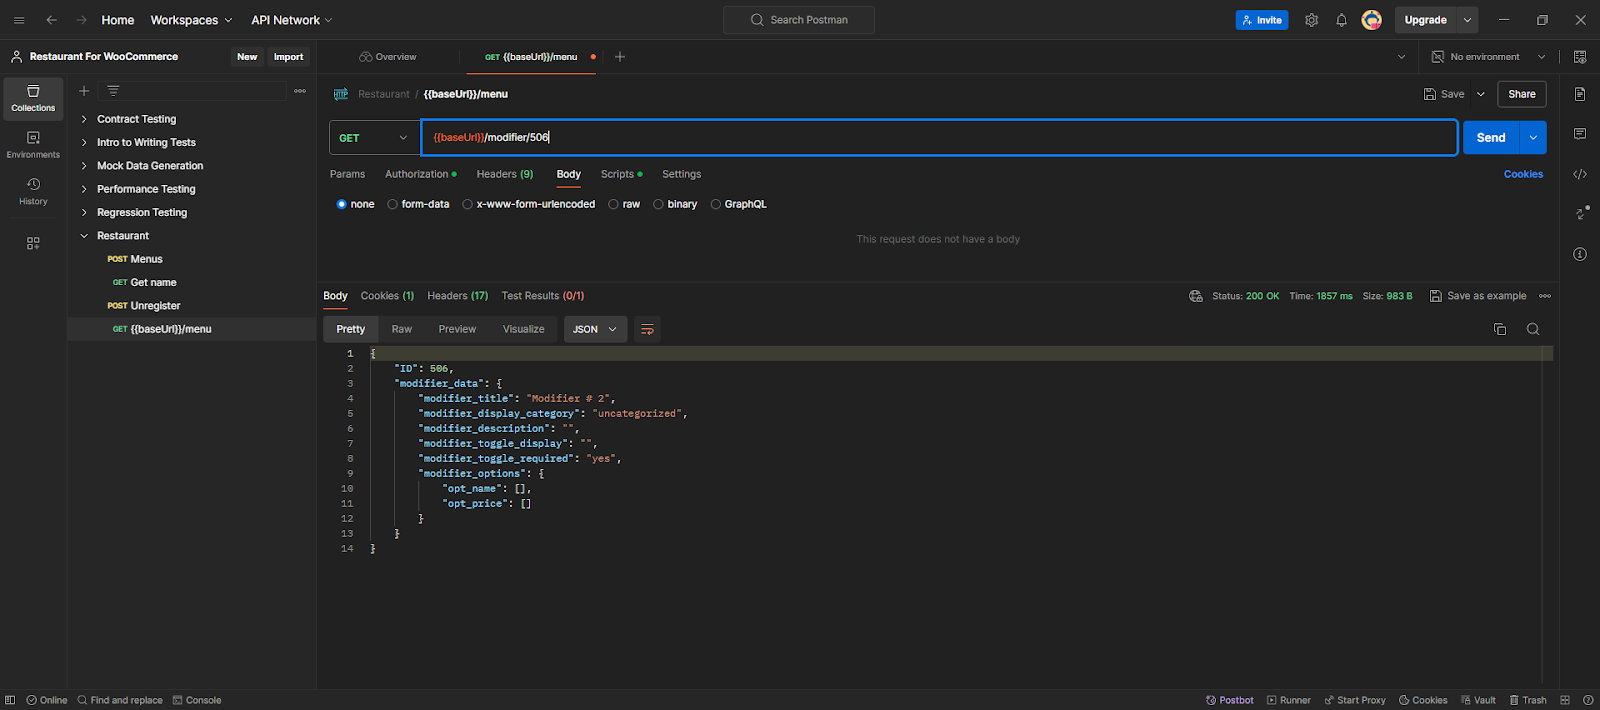
Retrieve a Modifier (GET)
Request Example
- METHOD: GET
- ENDPOINT: /wp-json/wc-rms/v1/modifier/{modifier_id}
- POSTMAN: Fetch a specific Modifier
- POST: wc-rms/v1/modifier/modifier_id
Response Example
- STATUS: 200 OK (Fetch a specific Modifier)
Create a Modifier (POST)
Request Example
- METHOD : POST
- ENDPOINT : /wp-json/wc-rms/v1/modifier
- POSTMAN : Create a Modifier
- POST : wc-rms/v1/modifier
- JSON Body :
{
“modifier_title”: “Modifier # 2”,
“modifier_display_category”: “drinks”,
“modifier_description”: “”,
“modifier_toggle_display”: “”,
“modifier_toggle_required”: “yes”,
“modifier_options”: {
“opt_name”: [],
“opt_price”: []
}
}
Response Example
- STATUS: 200 CREATED (Modifier created successfully)

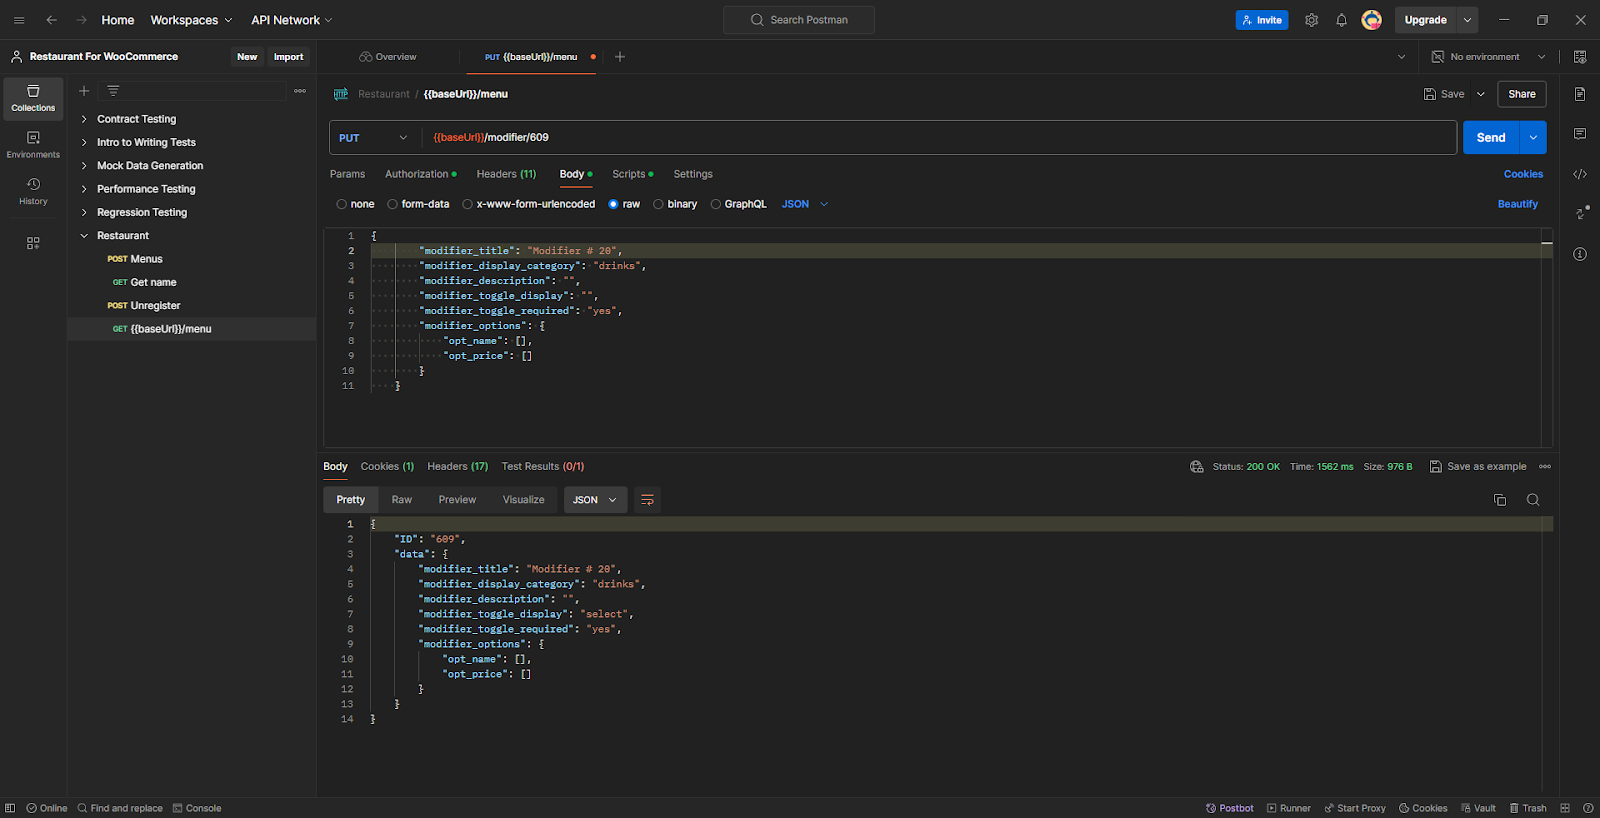
Update a Modifier (PUT)
Request Example
- METHOD : PUT
- ENDPOINT : wp-json/wc-rms/v1/modifier/{modifier_id}
- POSTMAN : Update Modifier
- POST : wc-rms/v1/modifier/modifier_id
- JSON Body :
{
“modifier_title”: “Modifier # 20”,
“modifier_display_category”: “drinks”,
“modifier_description”: “”,
“modifier_toggle_display”: “”,
“modifier_toggle_required”: “yes”,
“modifier_options”: {
“opt_name”: [],
“opt_price”: []
}
}
Response Example
- STATUS: 200 OKAY (Modifier is updated successfully)
Delete a Modifier (DELETE)
Request Example
- METHOD: DELETE
- ENDPOINT: /wp-json/wc-rms/v1/modifier/{modifier_id}
- POSTMAN: Delete all Modifier
- POST: wc-rms/v1/modifier/modifier_id
Response Example
- STATUS: 200 OK (Delete Modifier)
