Add paid or free product options through radio buttons, checkboxes, drop-down menus, and custom text inputs and more to enhance our WooCommerce store.
Setup and Installation
↑ Back to topInstallation:
↑ Back to top1. Download the Custom Product Fields.zip file from your
WooCommerce account.
2. Go to WordPress Admin > Plugins > Add New and Upload Plugin.
3. Click on Choose File to upload the file you downloaded.
4. Install Now and Activate the extension
Configuration:
↑ Back to topAfter you have installed and activated the Custom Product Fields Woo extension,
Go to WooCommerce > Settings > Custom Product Fields tab to configure the following settings.
Here you can manage already created rules, edit, delete, Sorting, and apply conditions on fields.
Add New Rule:
↑ Back to topClick on the Add New Rule button to add custom product fields that you want to display on the product.
Rule Settings:
↑ Back to topAfter Clicking on the Add new rule button you have a Rule setting option in which you can set Rule Name & Enable Rule.
Fields Settings:
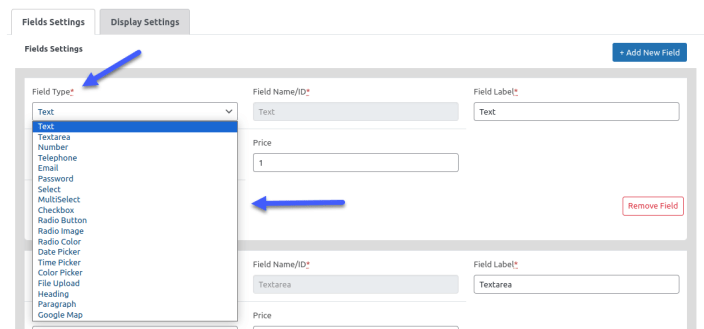
↑ Back to topIn fields Settings you have 19 different field types. You can add fields according to your requirements. Each fields have their multiple option which includes:
- Field Name
- Field Label
- Placeholder
- Field Price
- Make Field Mandatory
- Replace price with product price
- and much more

Display Settings:
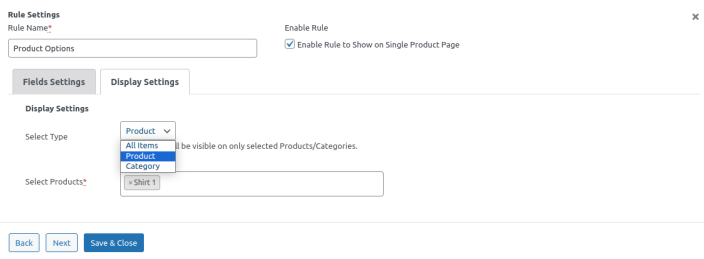
↑ Back to topIn this tab you can select products or categories on which you want to display all created fields in this rule.

Set Conditions:
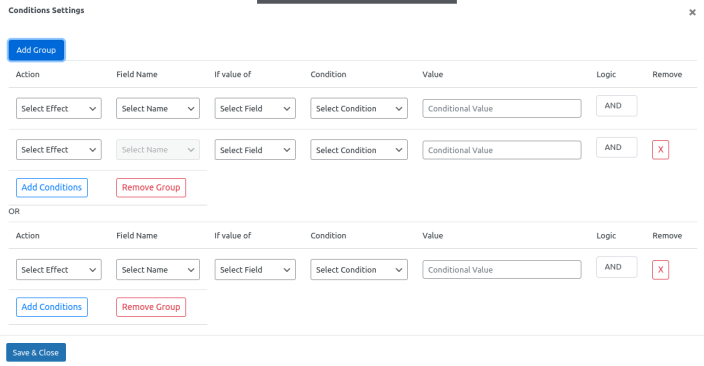
↑ Back to topIn WooCommerce > Settings > Custom product Fields tab you have multiple rules, you can apply conditions by clicking the Set Conditions button in each rule Actions Column. You can Apply AND or OR Conditions between fields.
The relation between Conditions is AND & relation Between Groups is OR.

Sort Fields:
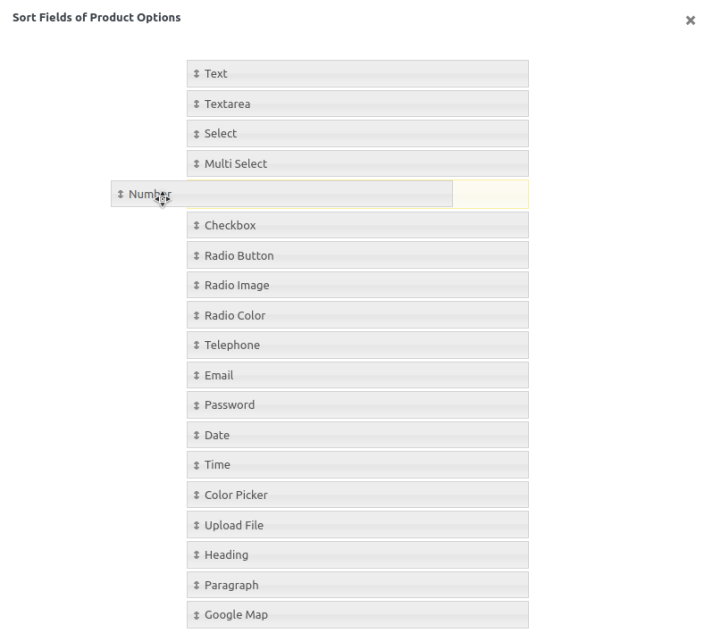
↑ Back to topIn WooCommerce > Settings > Custom product Fields tab you can Sort the positions of custom Product fields of each rule by clicking on the Sort Fields Button in each rule Actions Column.

