Product Disclaimer for WooCommerce allows you to set up a pop-up or On-Page Disclaimer based on Age verification and Terms & Conditions, which will appear when clicking Add to Cart Button. Only by agreeing to Age verification and Terms and conditions, the products will be added to Cart. Otherwise, they will be rejected. Upon rejection, a Custom URL can be set and redirected when rejecting the disclaimer. Disclaimer can be set using the following types:
- Specific
- Global
- Sitewide
- Cart/Checkout
Multiple Disclaimers can be created using different customization options as per requirement.
Store Owner’s Guide
↑ Back to topFeatures
↑ Back to top- Select the Disclaimer Name and Description.
- Select the Disclaimer Cover Image.
- Select the Disclaimer Priority.
- Select Disclaimer Type Enabled/Disabled.
- Select Disclaimer Type (Specific, Global, Sitewide, Cart/Checkout).
- Enable/Disable User Role.
- Select the User Roles on which the disclaimer will be displayed.
- Enable/Disable Categories
- Select the Categories on which the disclaimer will be displayed.
- Enable/Disable Products.
- Select the Products in Include Products on which the disclaimer will be displayed.
- Select the Products in Exclude Products on which the disclaimer will not be displayed.
- Select the Display Type (Popup and Onpage).
- Enable/Disable Age Verification.
- Set the Age in years.
- Enable/Disable Terms & Condition.
- Set the message for Terms & Conditions.
- Set the Reject Button Text.
- Set the Reject URL.
- Set the Accept Button Text.
- Select the Popup style (Modern and Modern(Rounded)).
- Set the Popup Background Color.
- Set the Popup Text Color.
- Set the Button Background Color.
- Set the Button Text Color.
- Upload the Thumbnail for disclaimer. (When Onpage display type is selected and Cart/Checkout is selected as Disclaimer Type)
- Set the Disclaimer Background Color. (When Onpage display type is selected and Cart/Checkout is selected as Disclaimer Type)
- Set the Disclaimer Text Color. (When Onpage display type is selected and Cart/Checkout is selected as Disclaimer Type)
- Enabled/Disabled Cookie Activation (Global and Sitewide).
- Set the Cookie Duration (Global and Sitewide).
- Enabled/Disabled Log Disclaimer Activity (Global).
Installation Guide
↑ Back to top- Log in to your WordPress Admin Panel.
- Navigate to the WordPress Admin Dashboard → Plugins → Add New.

- Click on the Upload Plugin button on the top left corner of your screen.
- Next, click the Choose file button in the box that appears below.
- Select the zip file that you have downloaded and upload it.
- Click on the Activate Plugin button.
Getting Started
↑ Back to top- Once the plugin is installed, a menu will appear on the WP Admin Dashboard titled WCPD.

All Disclaimer
↑ Back to top- Navigate to the WordPress Admin Dashboard → WCPD → All Disclaimer.

- Now you’re on the WC Product Disclaimer page.
- Click on the Add New button on the top of the page to add a new disclaimer.
NOTE: We can also add a new disclaimer by navigating to the WordPress Admin Dashboard → WCPD → Add New.

- Once done, now you’ll be on the Add New Disclaimer page.
Title
- Add the Title of the disclaimer.
Description
- Add the Description of the disclaimer.

Disclaimer Cover Image
- This option allows the Administrator to select a cover image for the disclaimer.
- Click on the Set Disclaimer Image button in the Disclaimer Cover Image section.
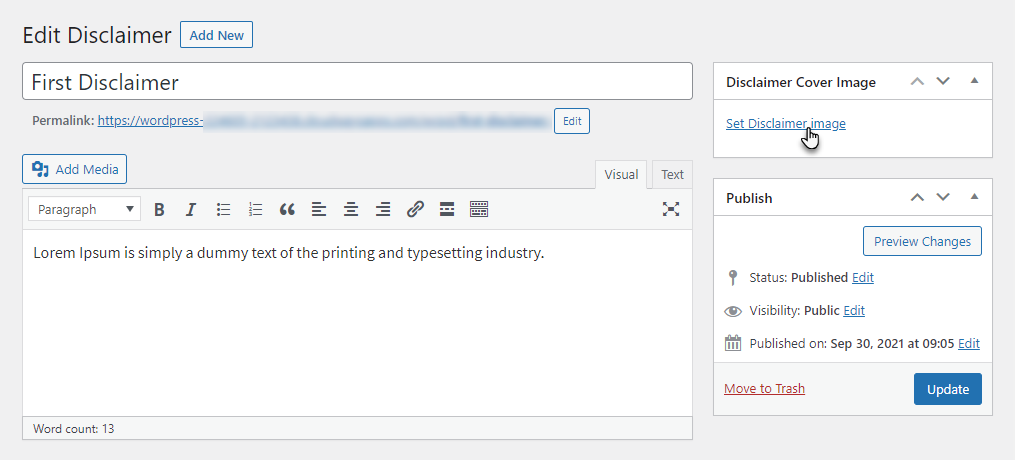
- Select the image for the disclaimer cover.
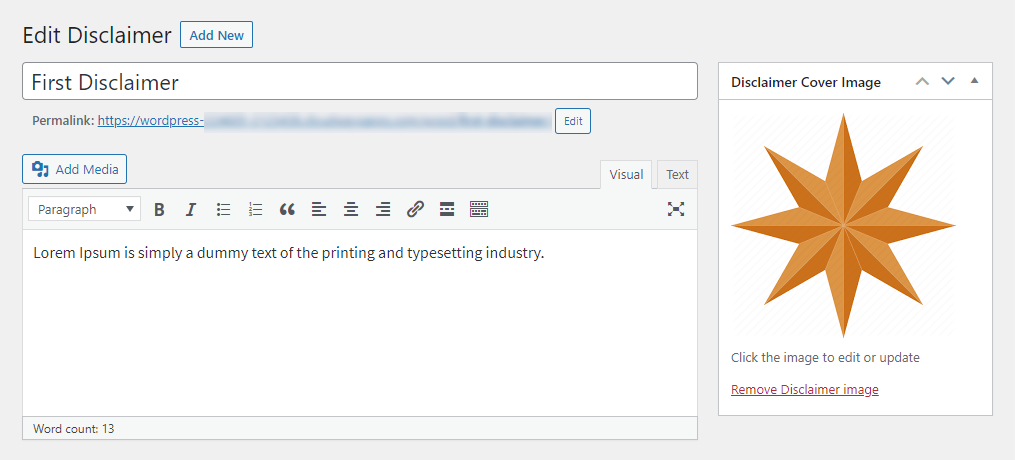
- Click on the Set Disclaimer image button.
- Once done, click on the Publish/ Update button to save your disclaimer cover image.
Enable Disclaimer
- This option allows the Administrator to Enable and Disable the disclaimer.
Select Disclaimer Type
- This option allows the Administrator to select the disclaimer type.
- We have four types of disclaimers:
- Specific
- Global
- Sitewide
- Cart/checkout
- Each disclaimer type has its unique properties.
Specific
↑ Back to top- When the Specific disclaimer type is selected, then the following options will appear.
User Roles
a. Enable User Roles
- This option allows the Administrator to Enable and Disable the User Roles for disclaimer.

b. Select User Role
- Select user roles for which the disclaimer will be displayed.
- Multiple user roles can be selected.
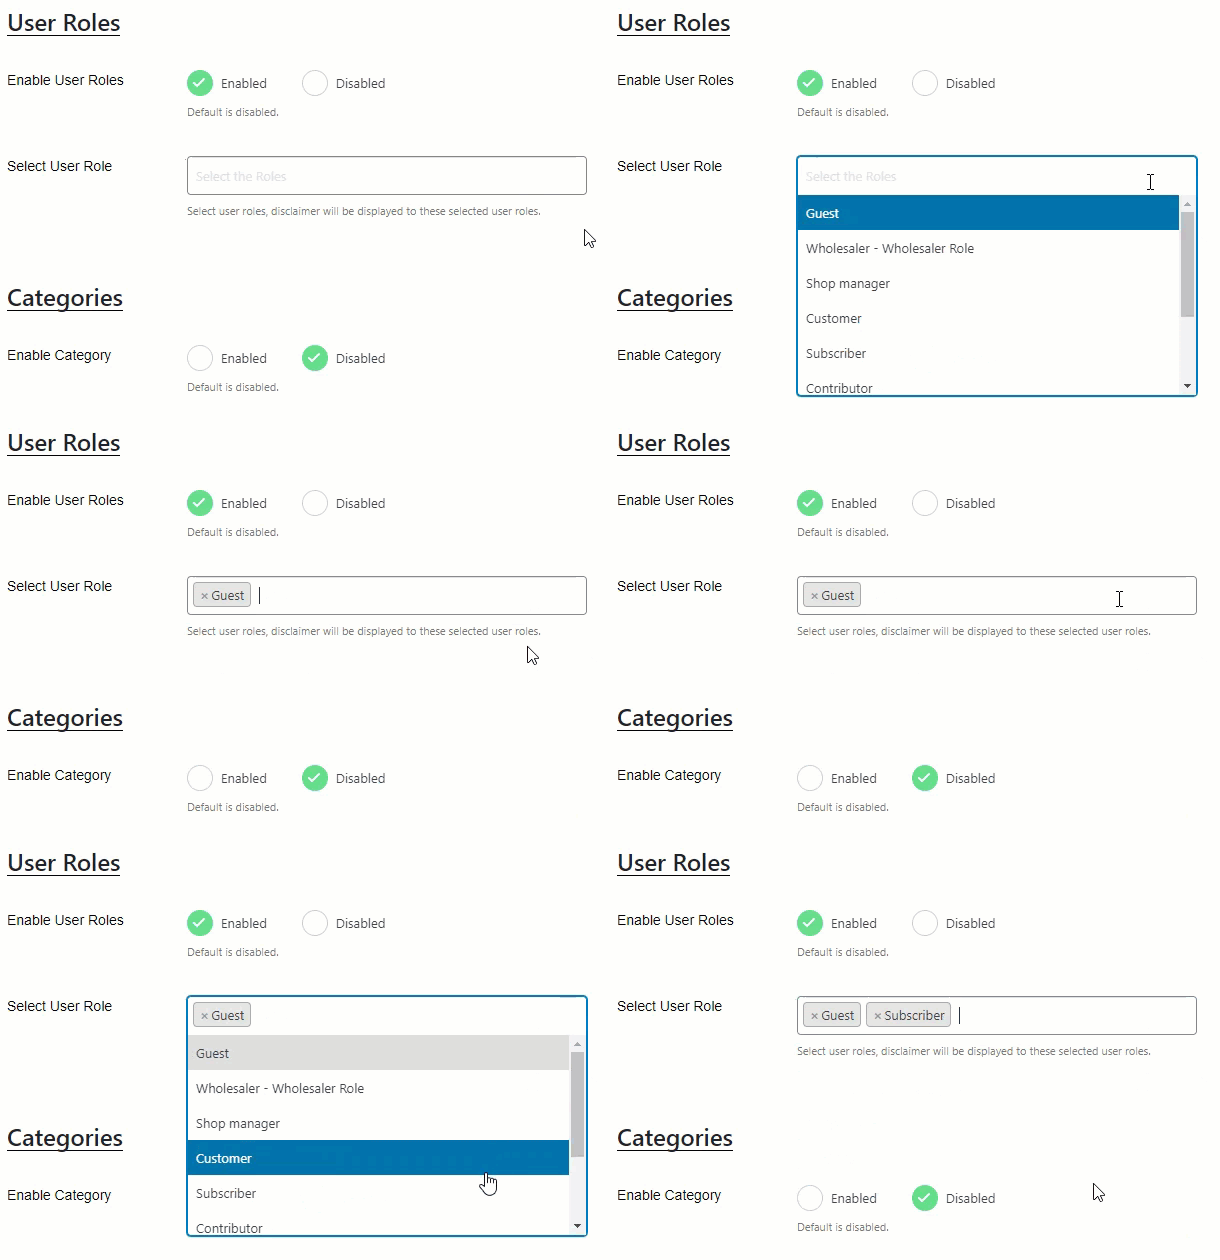
NOTE: If we do not select any User Role in this section, the disclaimer would be applied to all the User Roles.
Categories
a. Enable Category
- This option allows the Administrator to Enable and Disable the Category for disclaimer.

b. Select Category
- Select the categories for which the disclaimer will be displayed.
- Multiple categories can be selected.

NOTE: If we do not select any Category in this section, the disclaimer would be applied to all the Categories.
Products
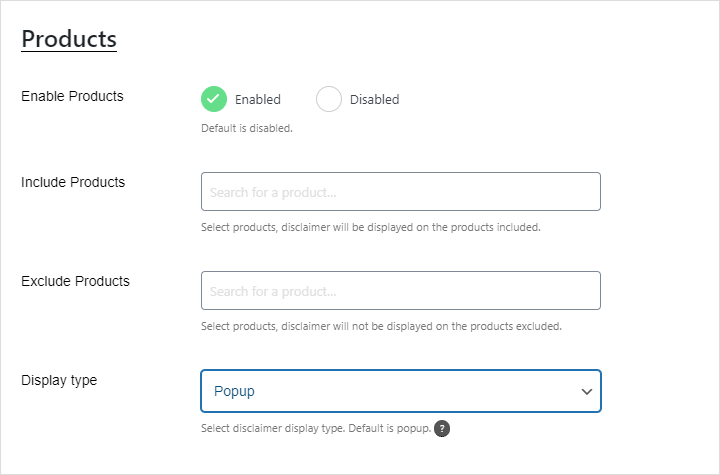
a. Enable Products
- This option allows the Administrator to Enable and Disable the Products for disclaimer.

b. Include Products
- Select the products in the include products section for which the disclaimer will be displayed to those products only.
- Multiple products can be selected.

NOTE: If we do not select any product in this section, all the products will be included.
c. Exclude Products
- Select the products in the exclude products section for which the disclaimer will not be displayed to those products.
- Multiple products can be selected.
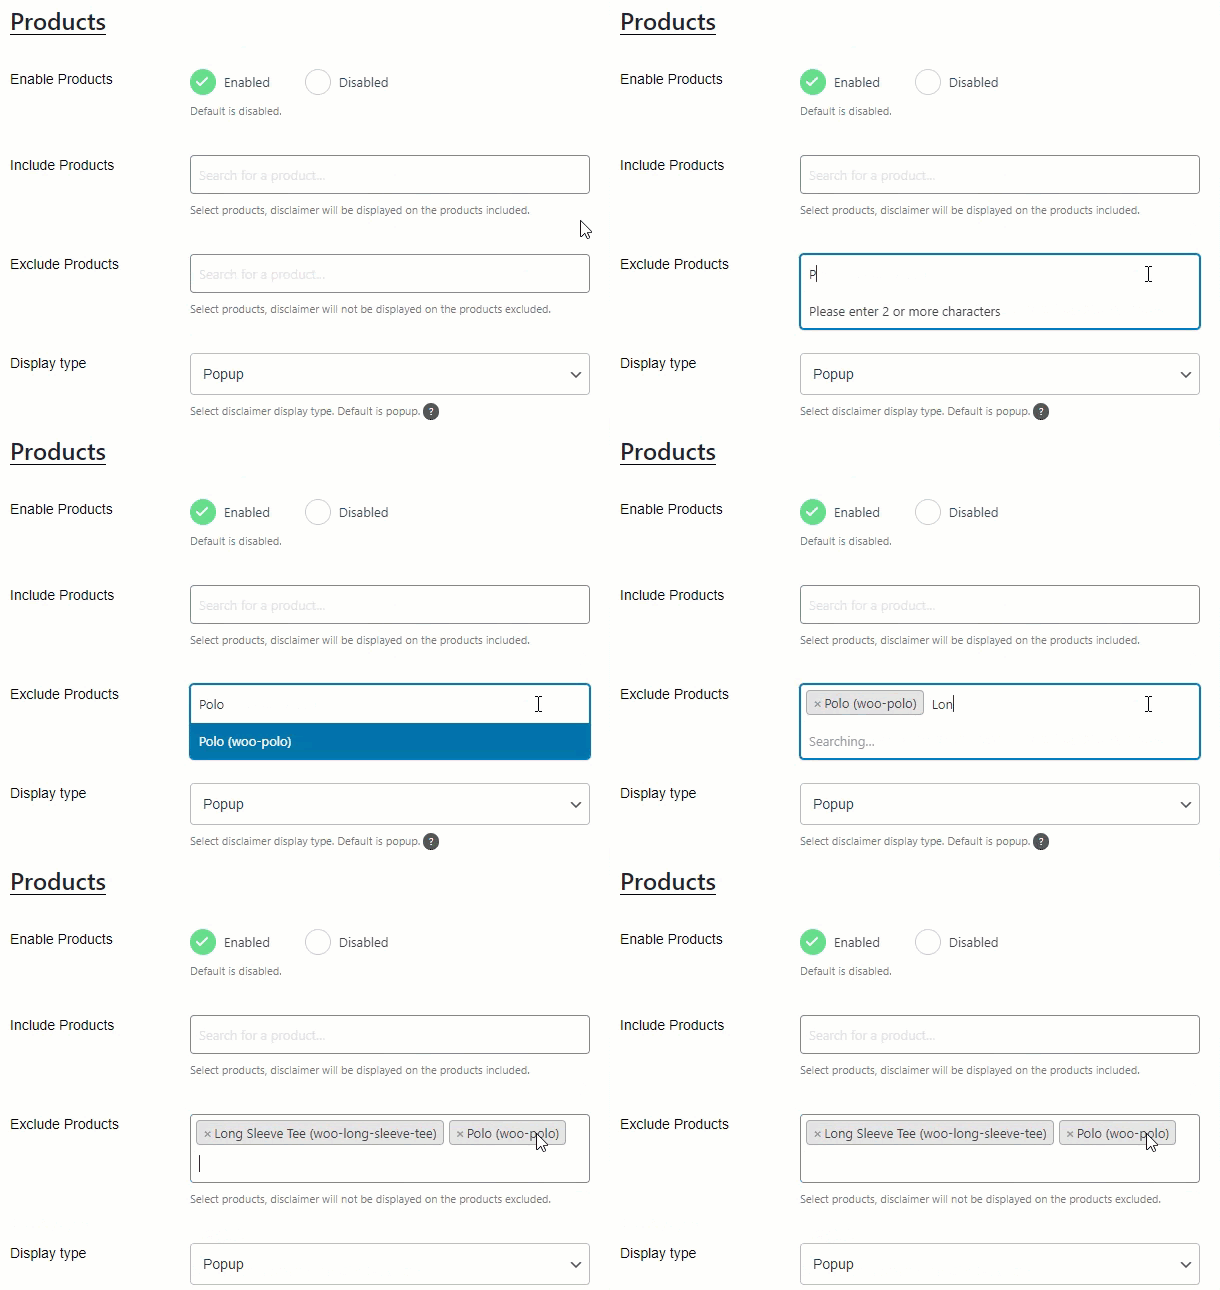
NOTE: If we do not select any product in this section, no product will be excluded.
d. Display type
- This option allows the Administrator to select the disclaimer display type.
- We have two disclaimers display types:
- Popup
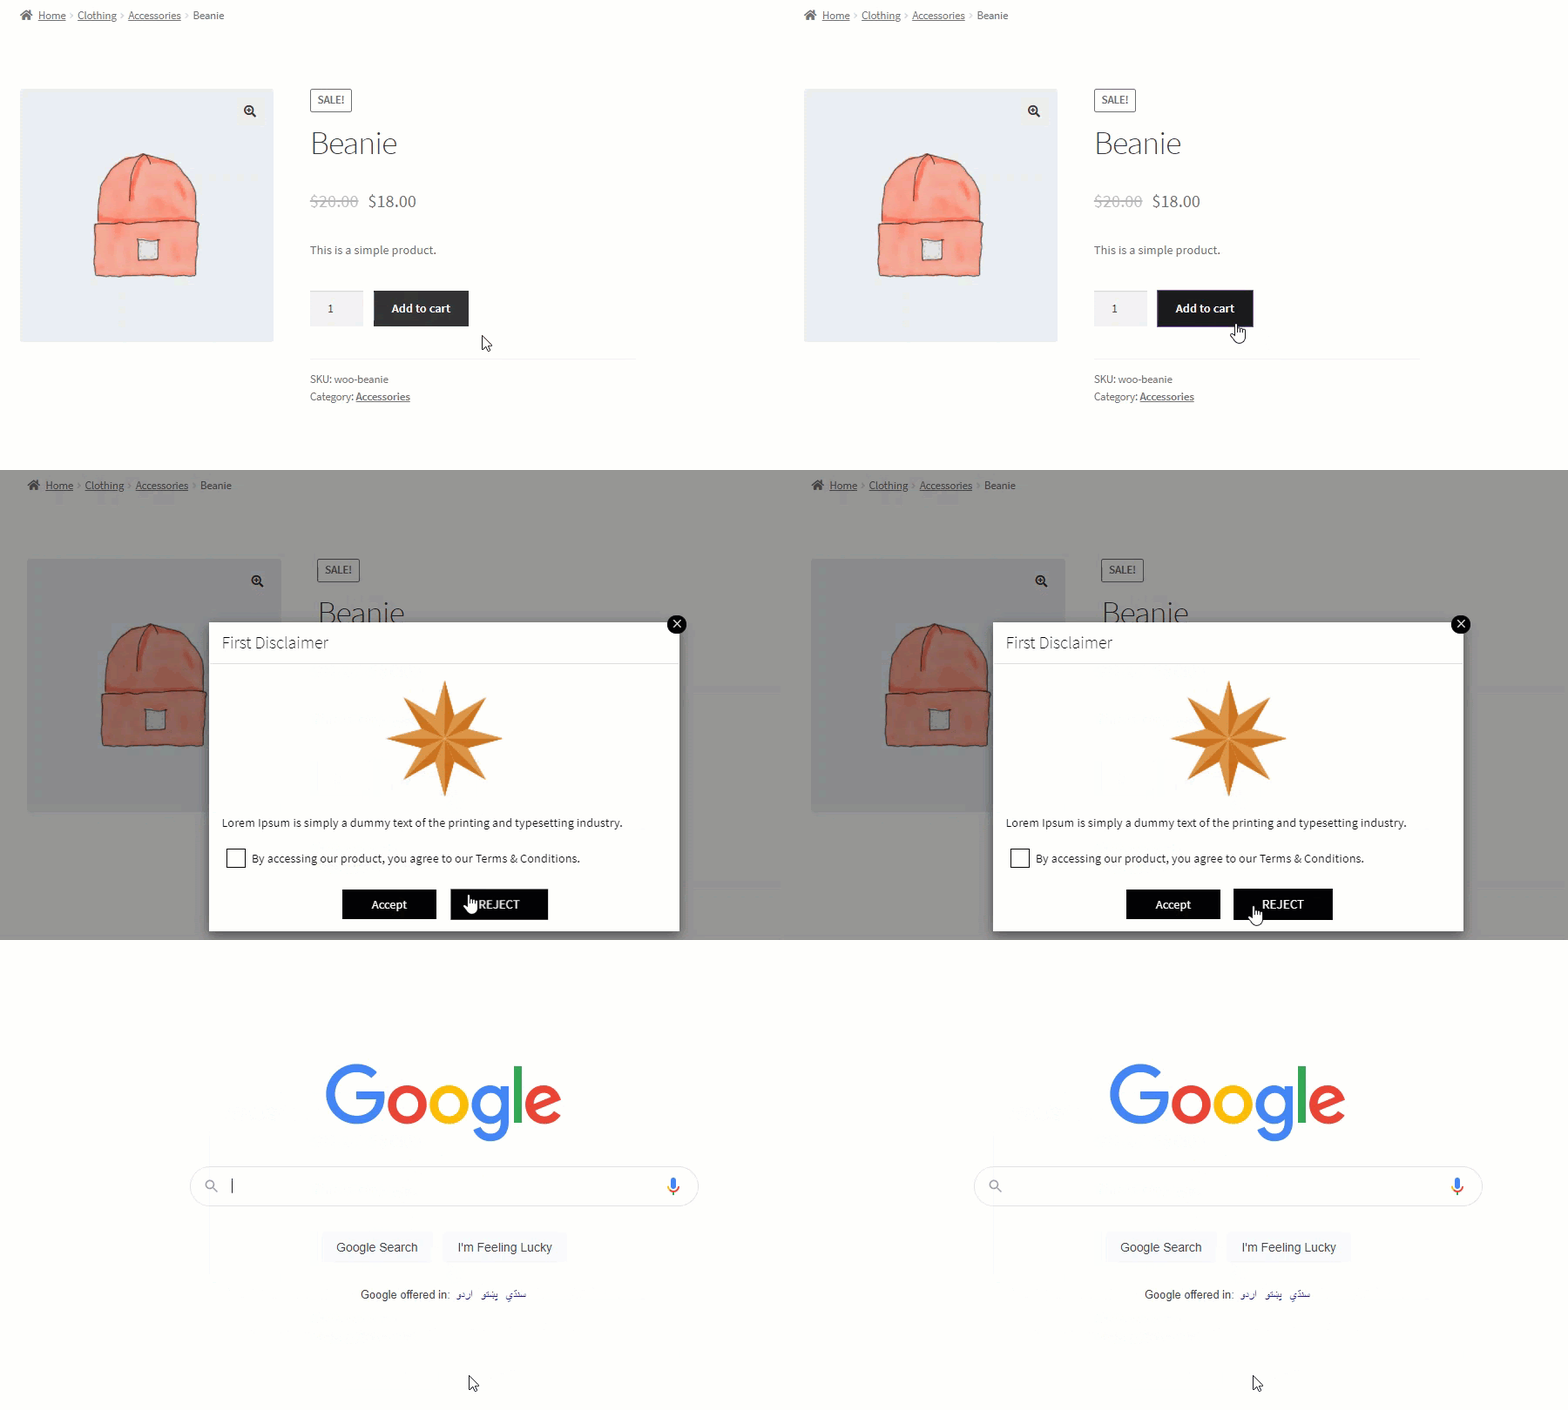
- When the Popup display type is selected, the disclaimer will be displayed on the Shop and Single Product page.
Front-End Impact

NOTE: The Reject button will only appear when a URL is entered in the Reject URL option.
2. On Page
- When the On Page display type is selected, the disclaimer will be displayed on the Single Product page.

Front-End Impact

NOTE: When the On Page is selected as a display type, only Customization options are shown.
Age Verification
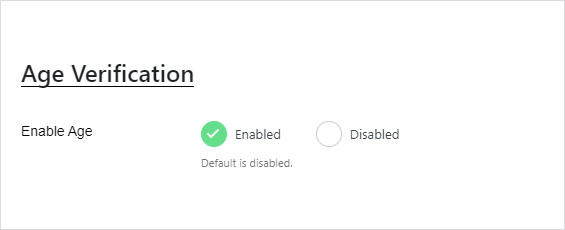
a. Enable Age
- This option allows the Administrator to Enable and Disable the Age Verification for disclaimer.
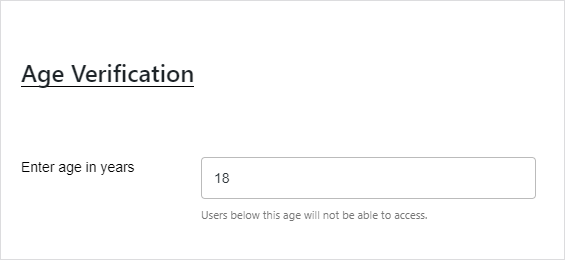
b. Enter age in years
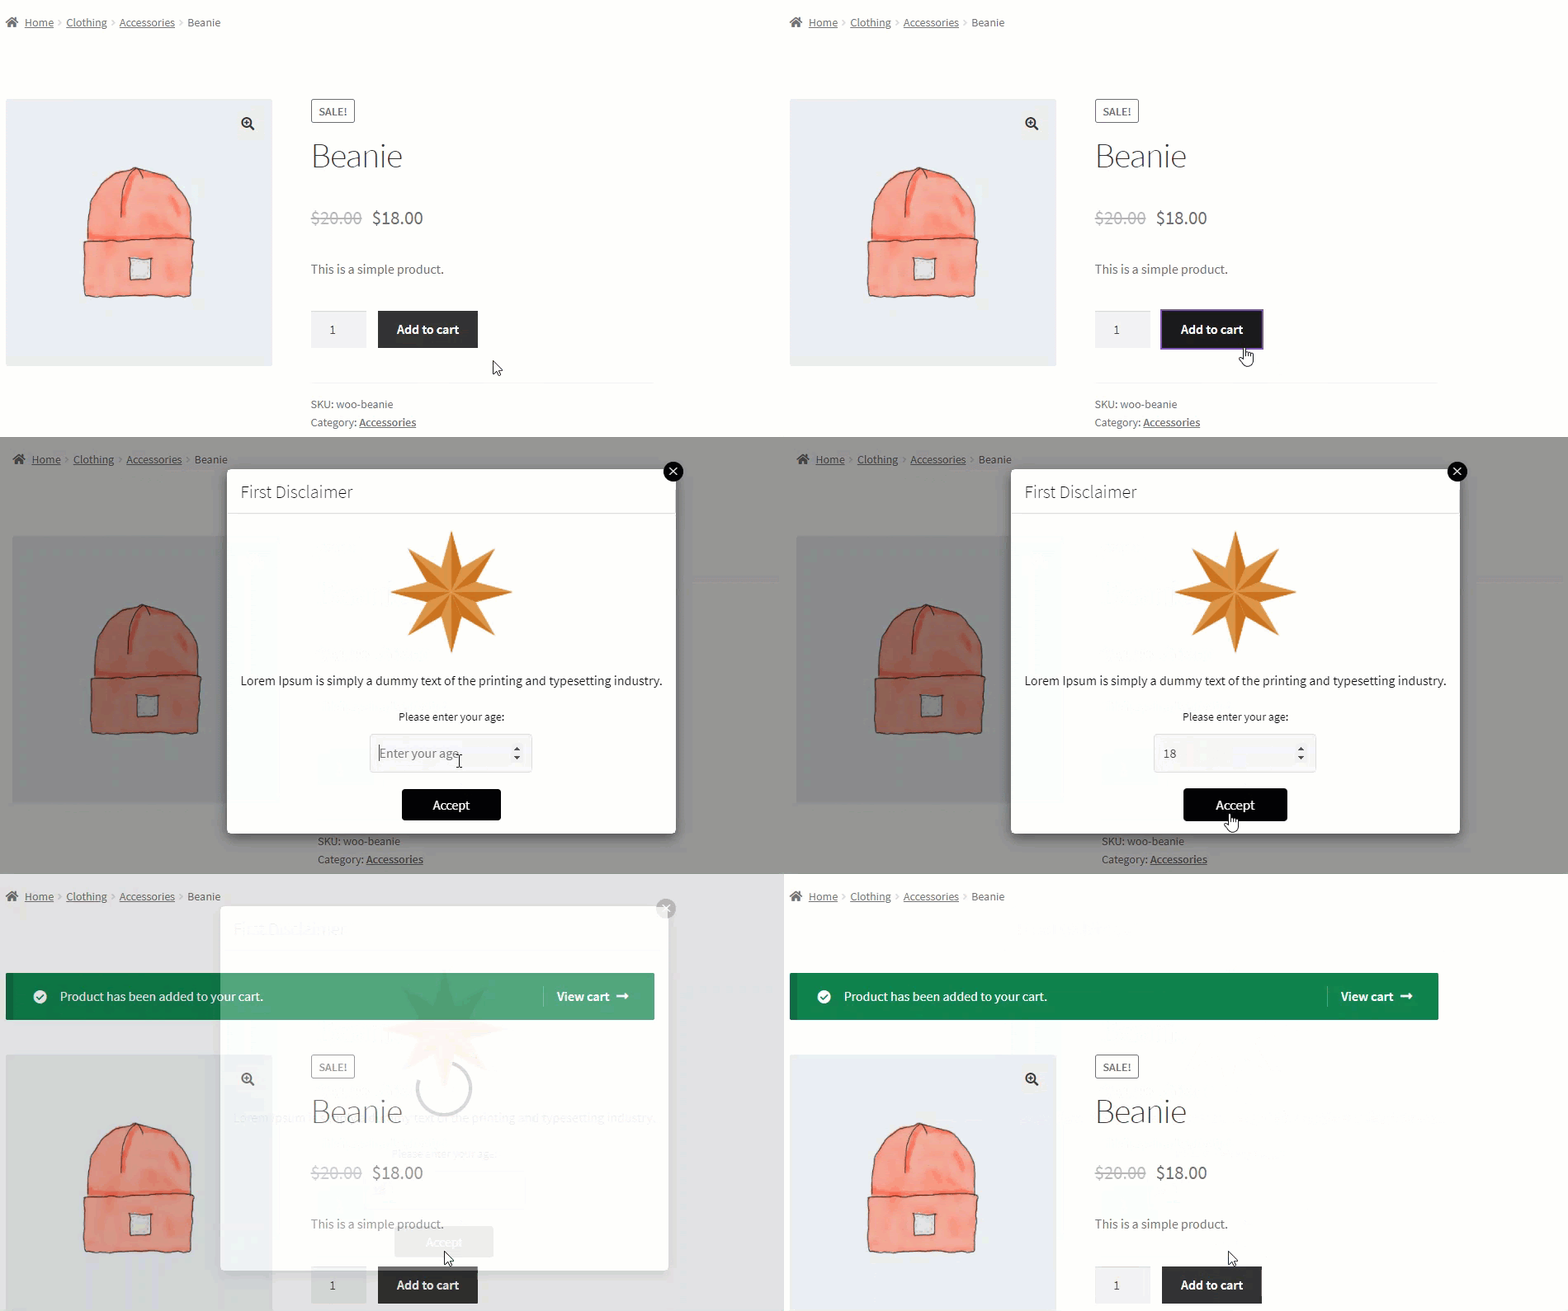
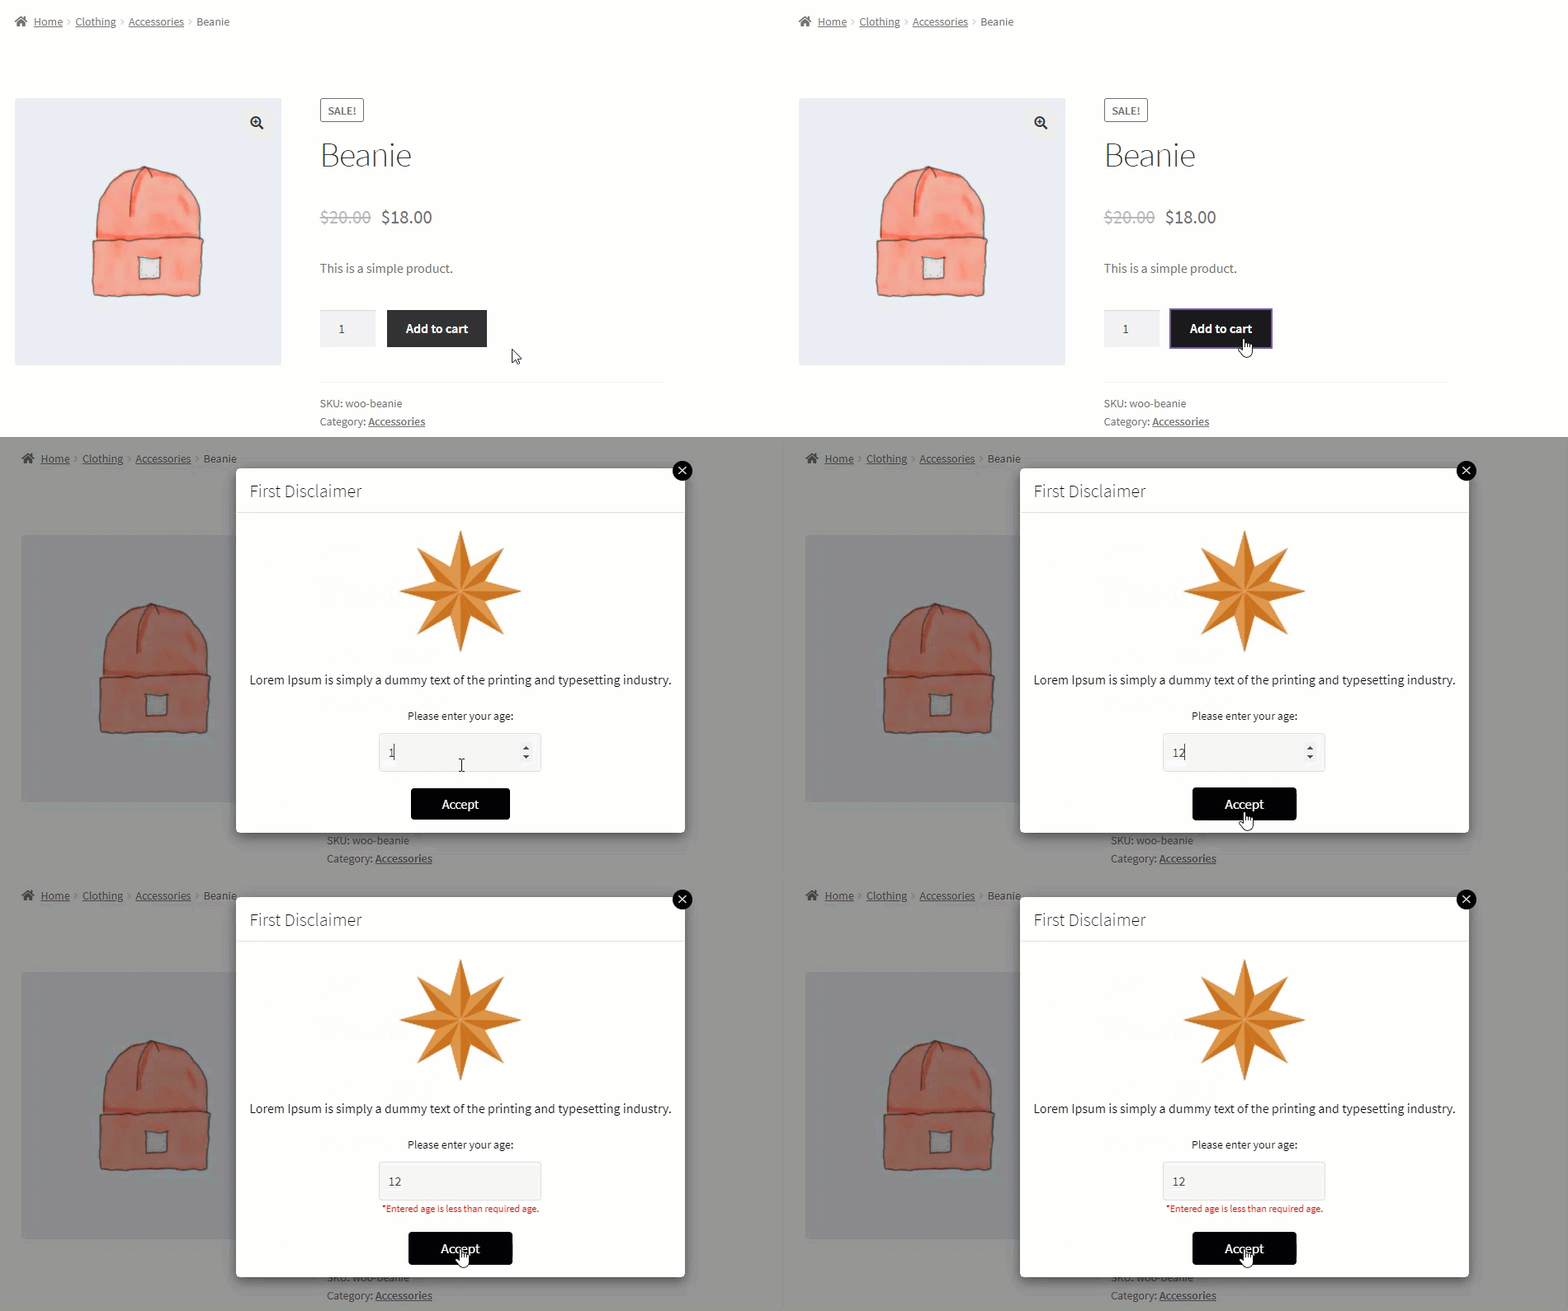
- Enter the age in years in the text box so that users equal to or greater than that age number can get access to purchase your products. Any underage user will not be allowed to purchase any products.
Front-End Impact
- CASE 1: If the user’s age is equal to or greater than the age mentioned in the back-end configuration.
- CASE 2: If the user’s age is less than the age mentioned in the back-end configuration.
Terms & Condition
a. Enable Terms & condition
- This option allows the Administrator to Enable and Disable the Terms & Conditions for disclaimer.

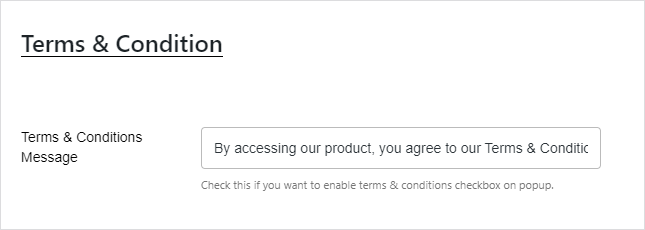
b. Terms & Conditions Message
- Enter the message in the text box. which will be displayed on the disclaimer popup.
Front-End Impact

NOTE: The checkbox will not appear on the disclaimer if the Terms & Condition message text box is left empty.
Geolocation
↑ Back to topThe Geolocation feature enables you to display product disclaimers only to users from specific countries. This is useful for applying country-specific laws, regulations, or notices on your WooCommerce store.
Enable Geolocation
↑ Back to top- Go to: WordPress Admin Dashboard > WCPD

- Navigate to the Enable Geolocation switch to activate the feature. (By default, this is disabled.)

Select Countries
↑ Back to top- A drop-down list of countries will appear. Select one or more countries where you want the disclaimer to be shown.

- Click the Update or Publish button to apply your settings.

Front-End Impact
↑ Back to top- Visit the store using an IP address from a selected country.
- Go to a Simple or Subscription Product.
- The Product Disclaimer pop-up will automatically appear as configured.

Customization
- When the Sitewide disclaimer type is selected, only the Popup display type is available in the Customization configuration.
a. Reject Button Text
- This option allows the Administrator to Enable and Disable the Terms & Conditions for disclaimer.

b. Reject URL
- Enter the message in the text box, which will be displayed on the disclaimer popup.

Front-End Impact

NOTE: The Reject button will only appear when a URL is entered in the Reject URL option.
c. Accept Button Text
- Enter the message in the text box, which will be displayed on the disclaimer popup.

Front-End Impact
d. Popup style
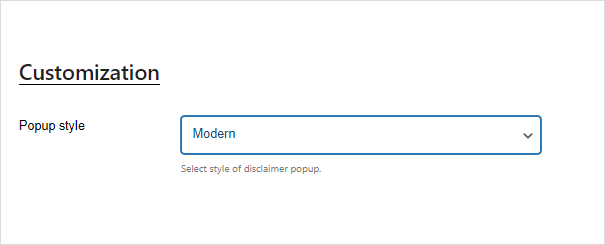
- This option allows the Administrator to select the Popup style for the disclaimer.
- We have two Popup styles:
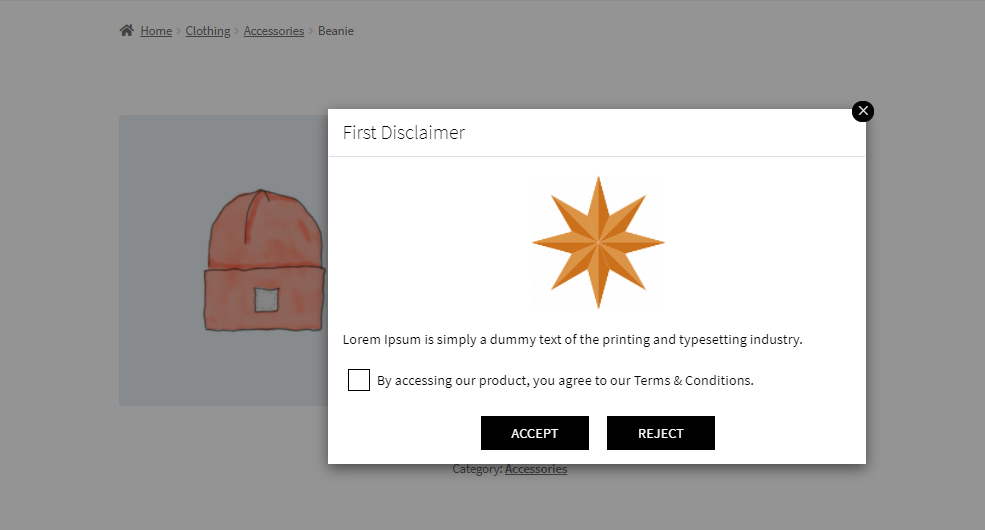
1. Modern
- When the Morden Popup style is selected, the Terms & Conditions checkbox and the Accept and Reject buttons appear in a square shape on the disclaimer.
Front-End Impact
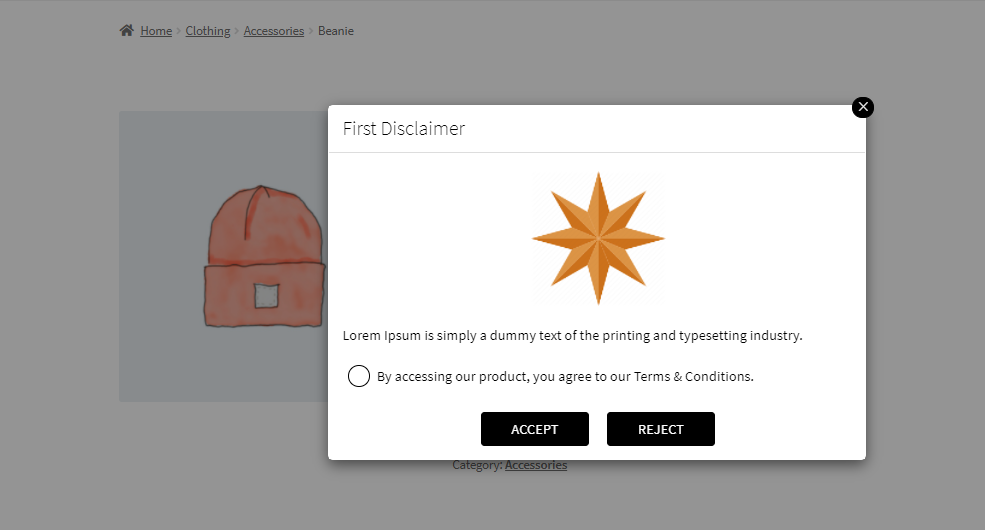
2. Modern (Rounded)
- When the Morden (Rounded) Popup style is selected, the Terms & Conditions checkbox and the Accept and Reject buttons appear in circle shape on the disclaimer.

Front-End Impact
e. Popup Background Color
- This option allows the Administrator to set the Popup background color from the color grid for the disclaimer.
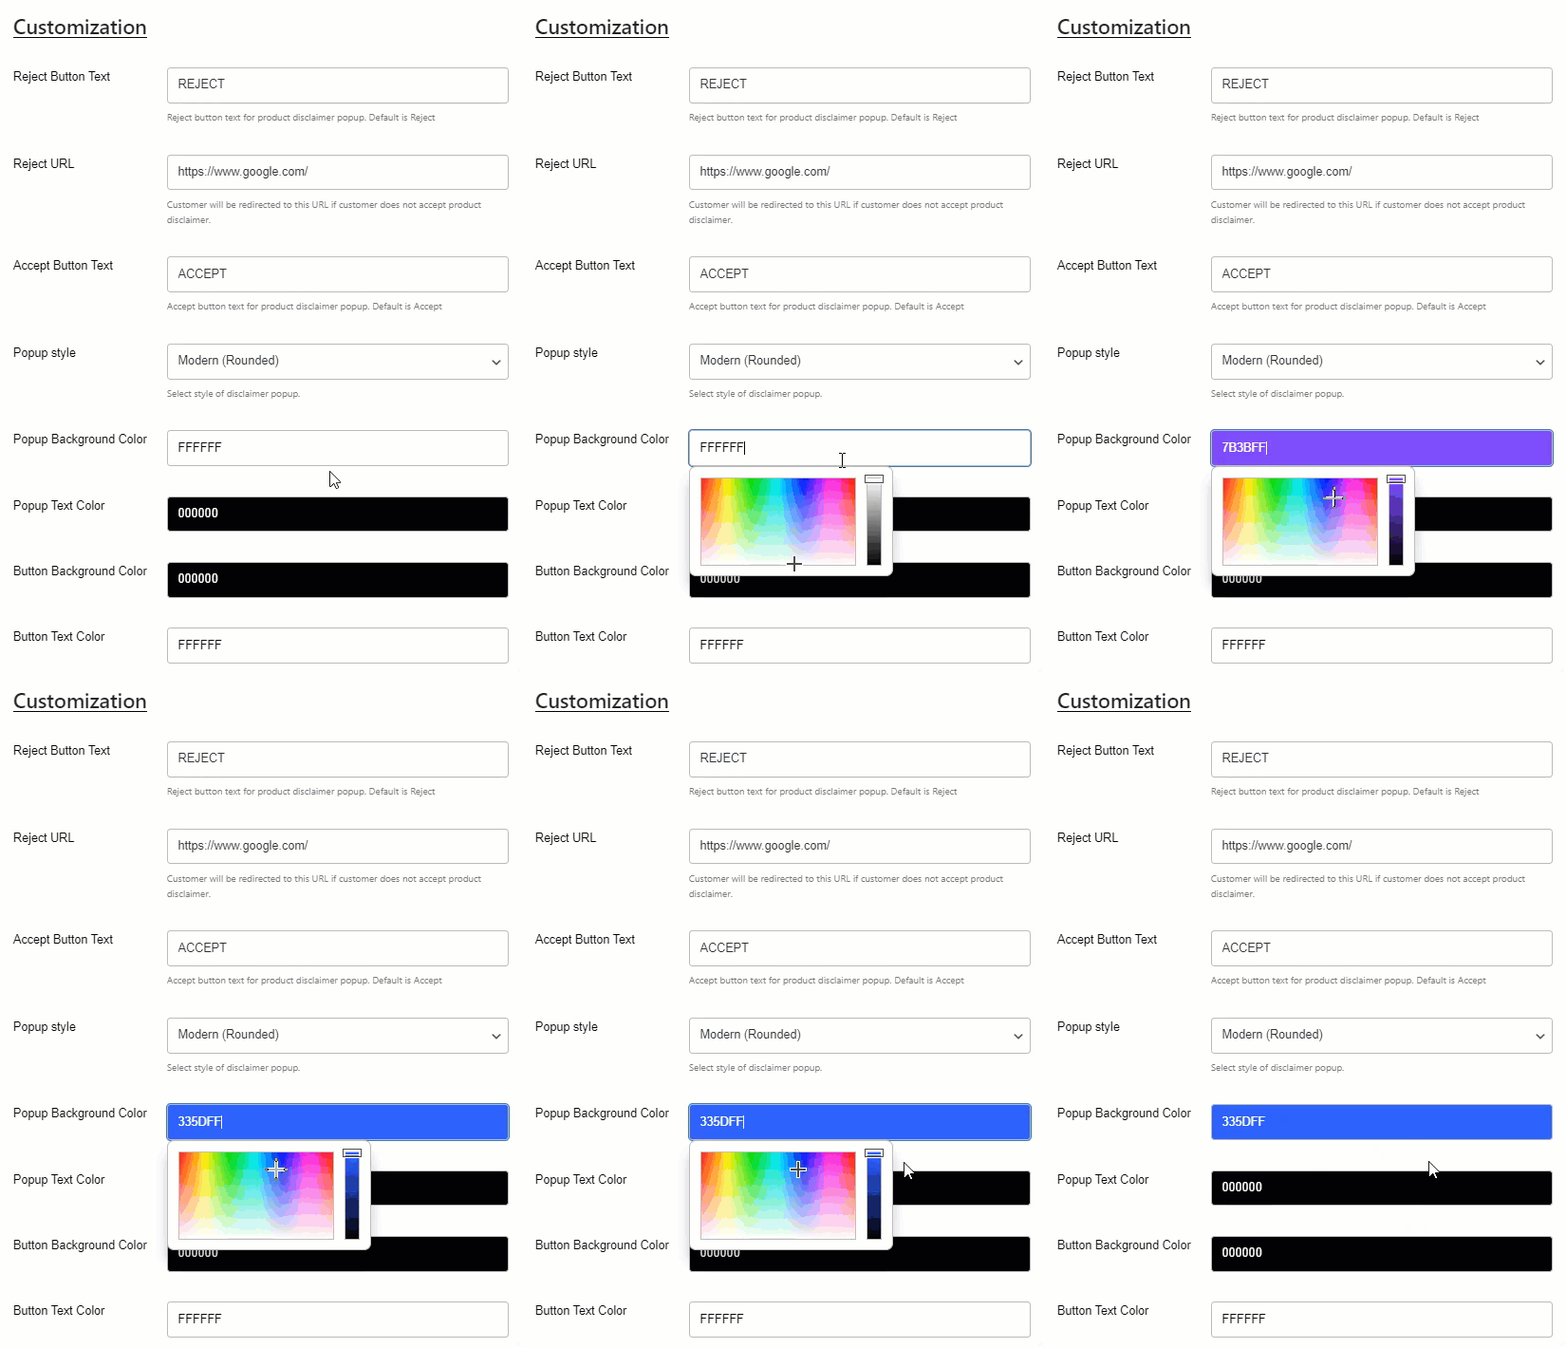
Front-End Impact
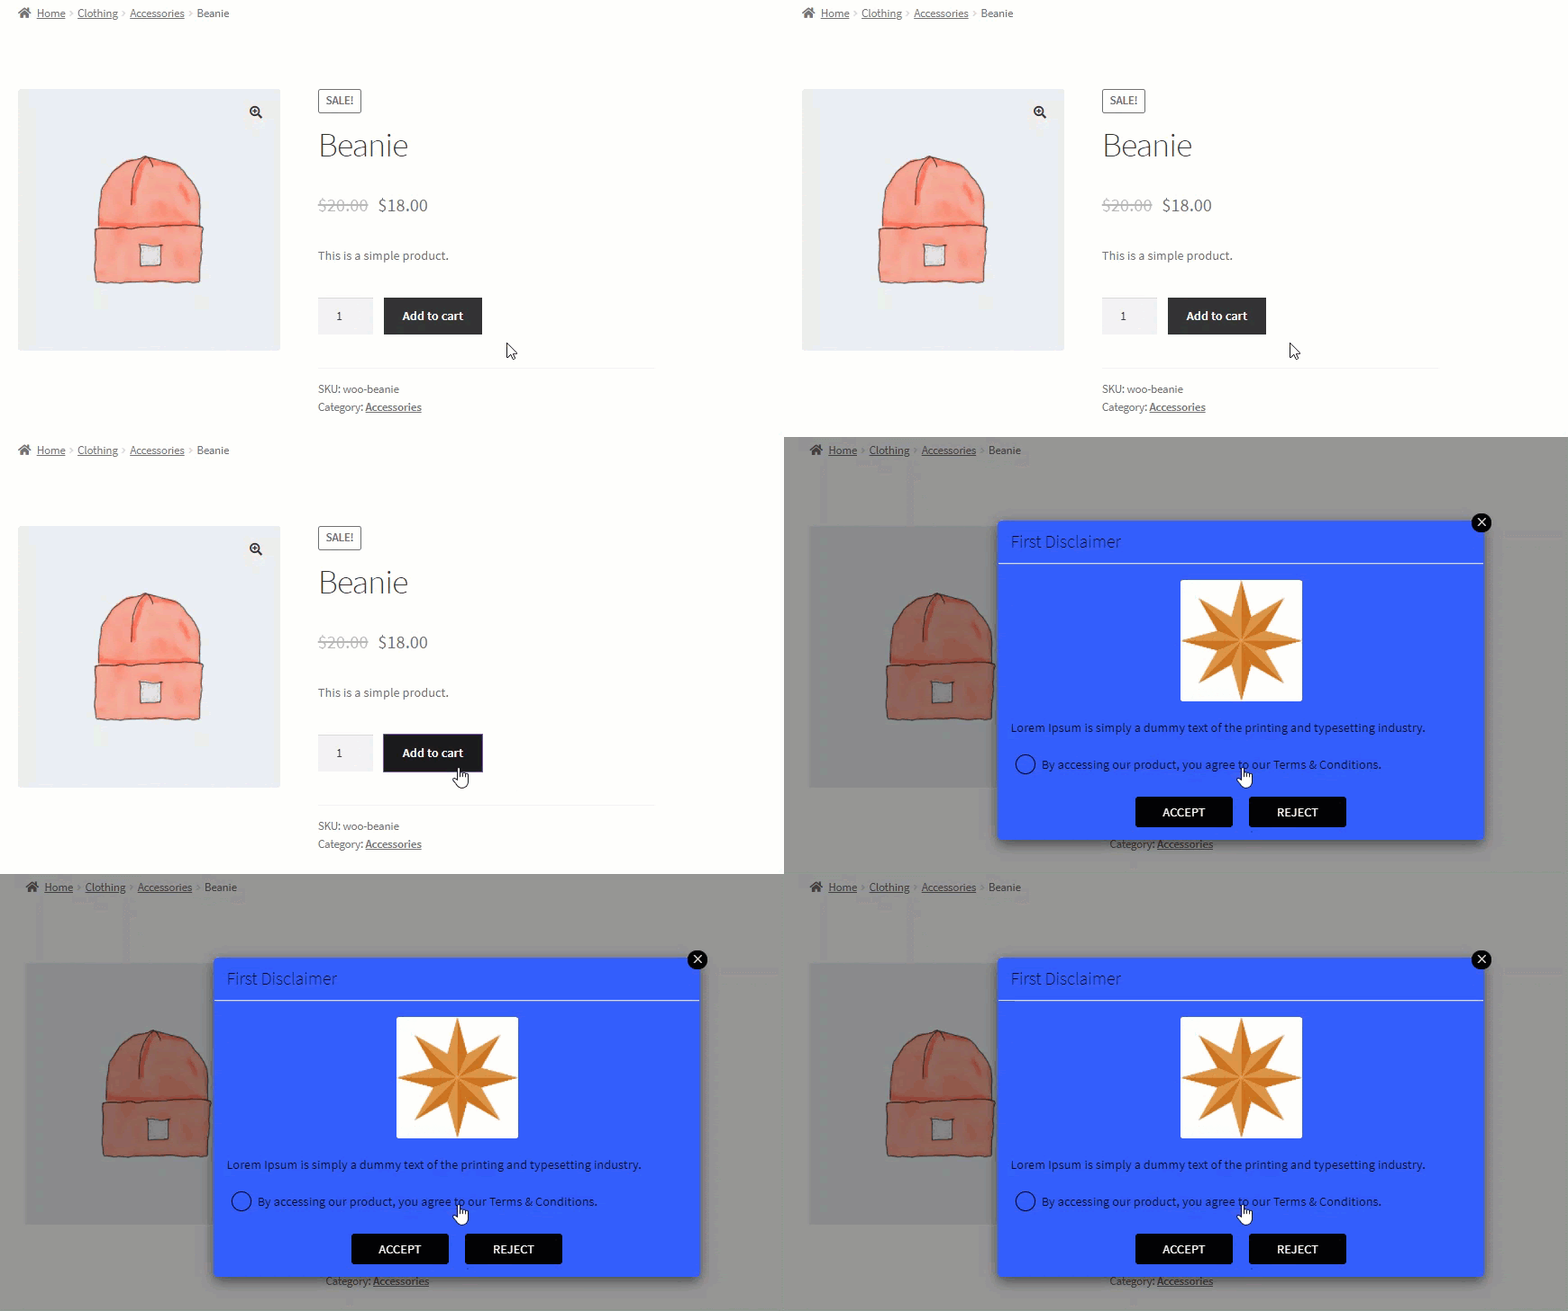
f. Popup Text Color
- This option allows the Administrator to set the Popup background color from the color grid for the disclaimer.
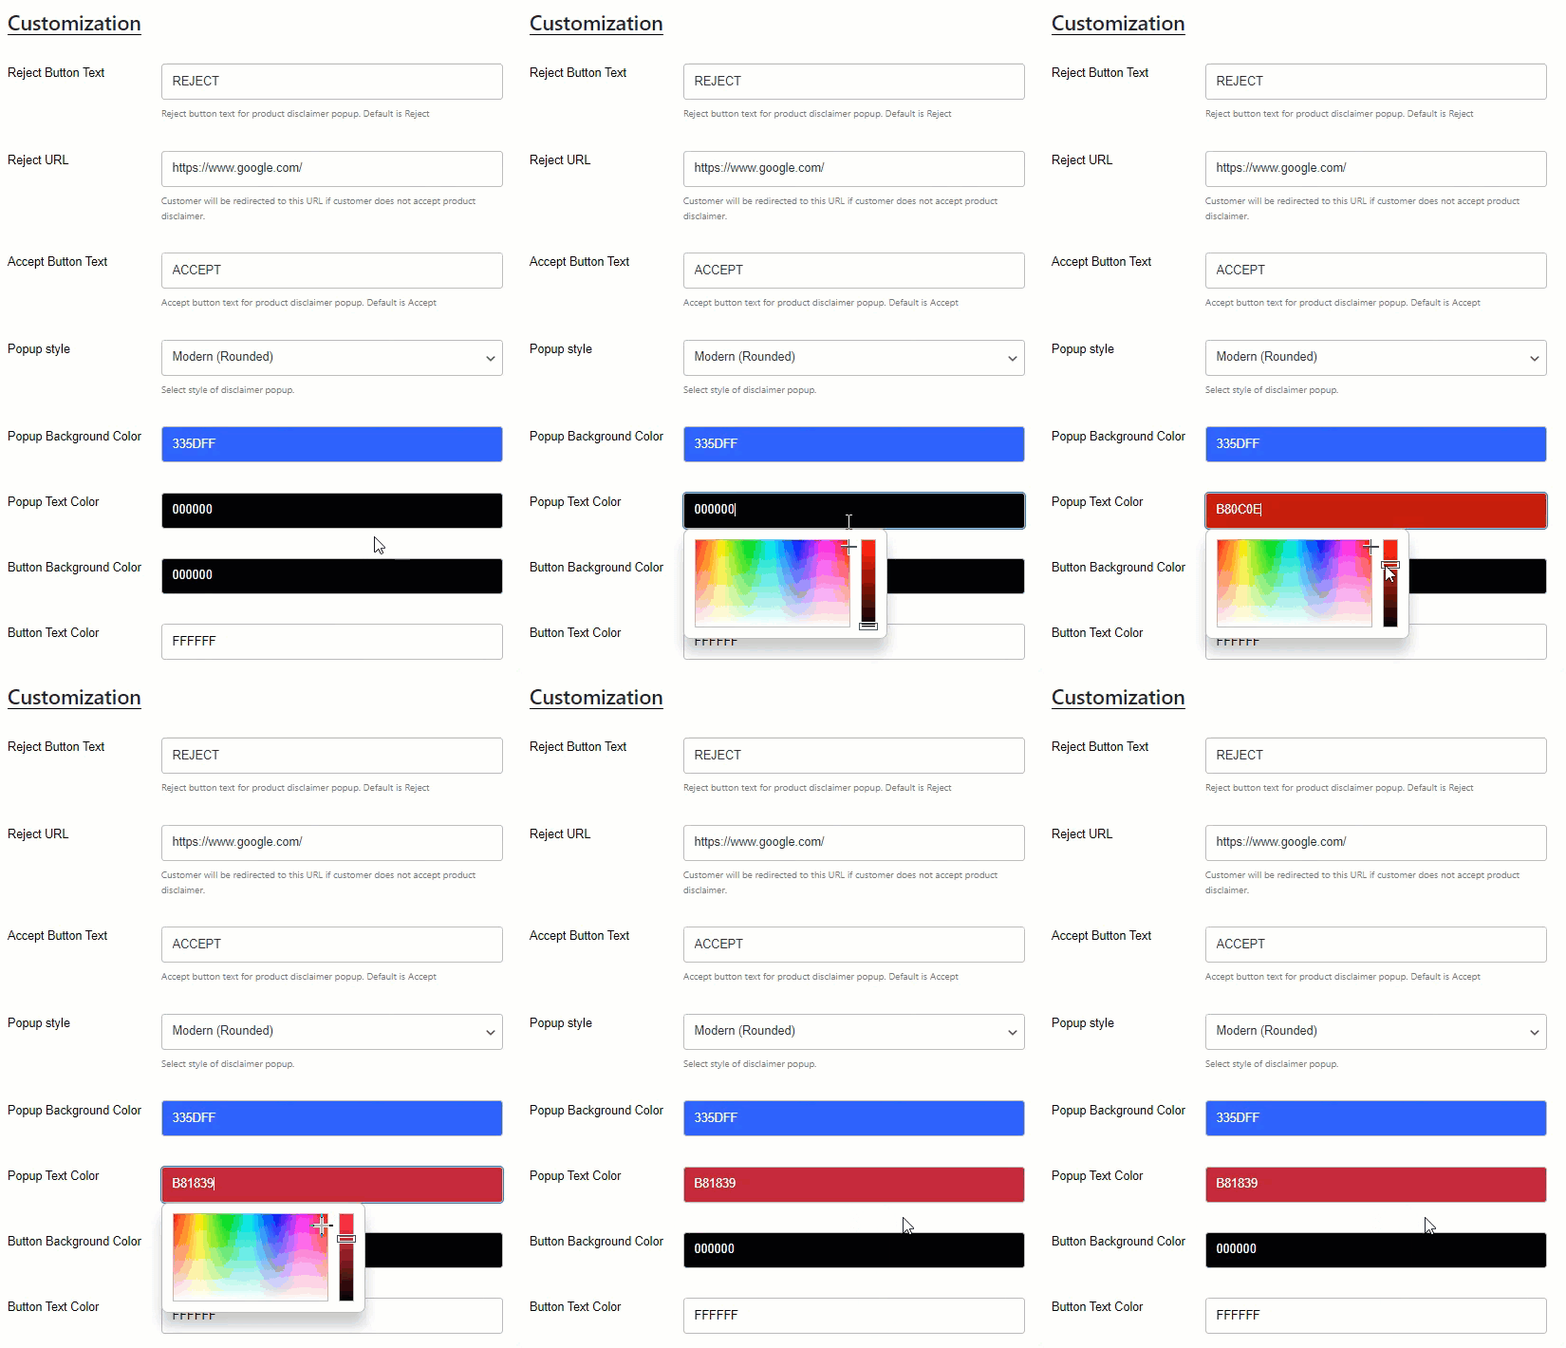
Front-End Impact
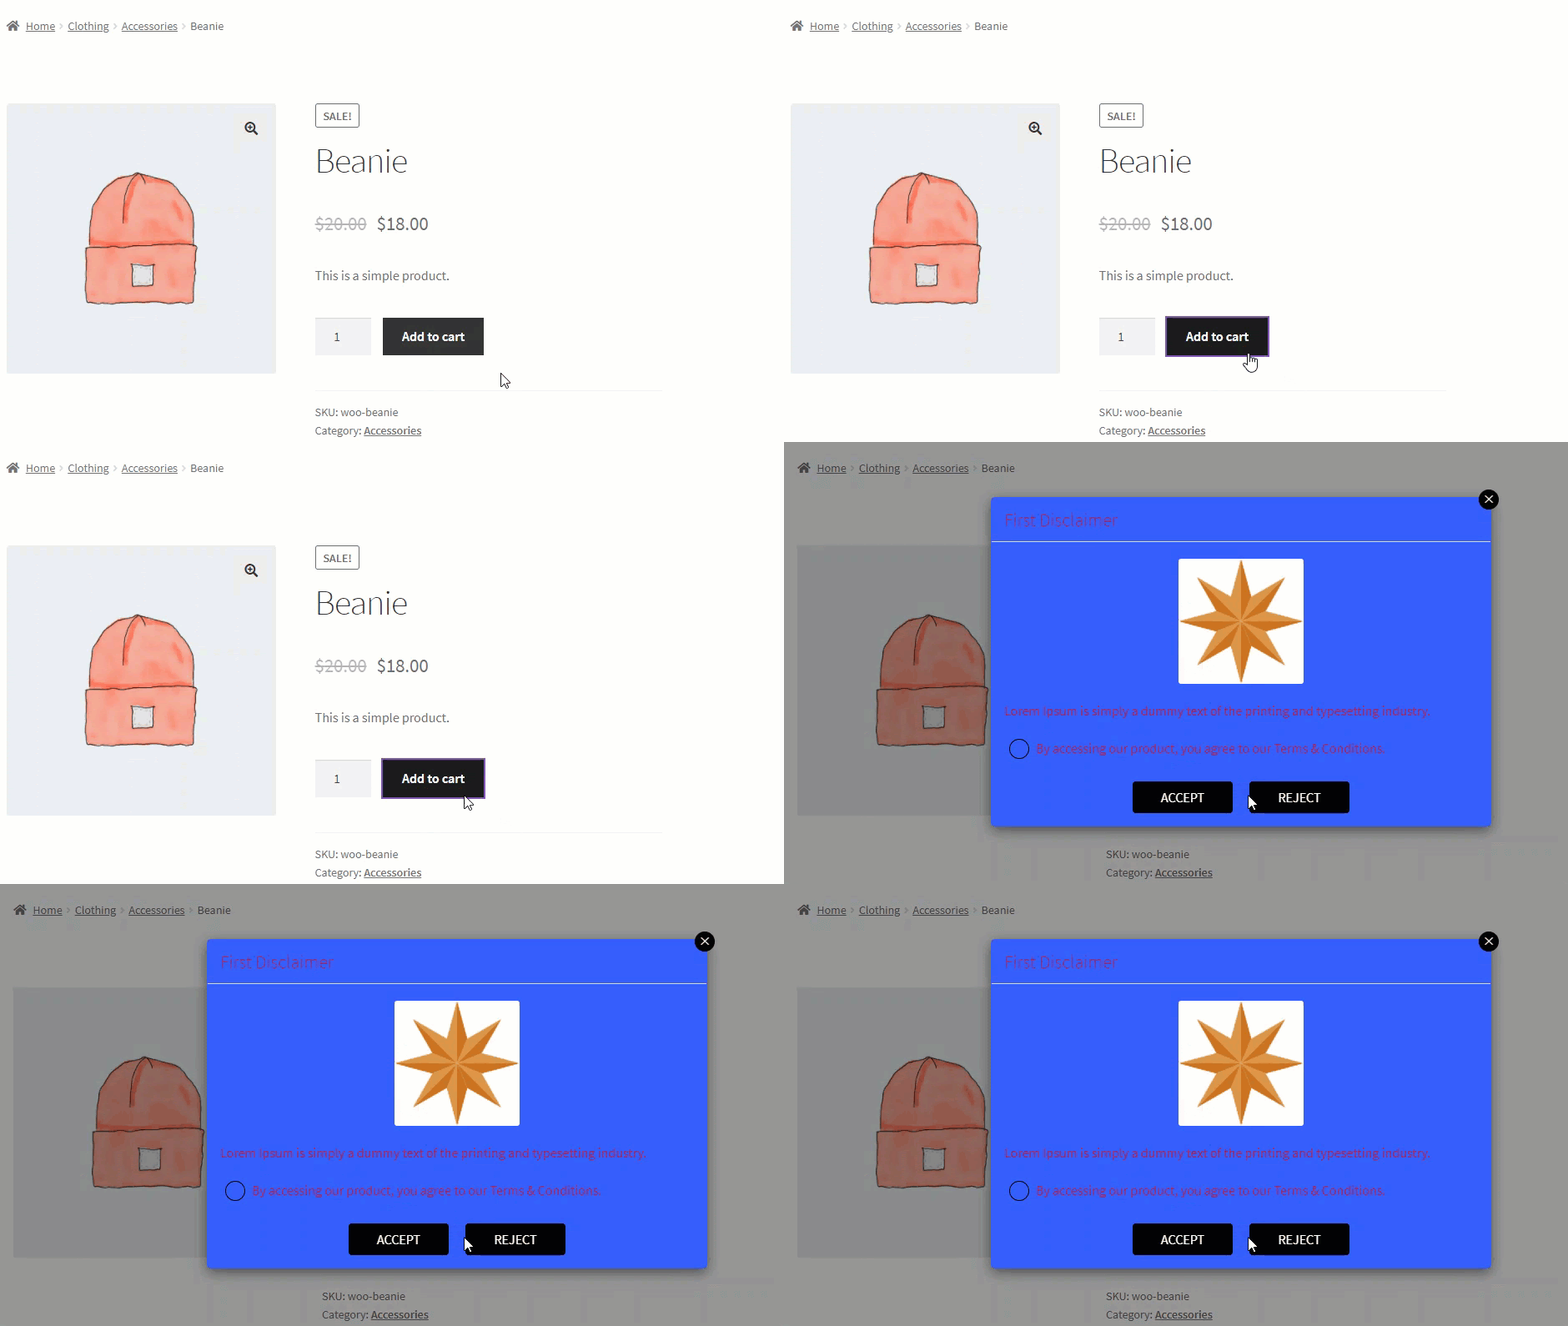
g. Button Background Color
- This option allows the Administrator to set the Popup background color from the color grid for the disclaimer.

Front-End Impact

h. Button Text Color
- This option allows the Administrator to set the text color from the color grid for the Popup disclaimer.
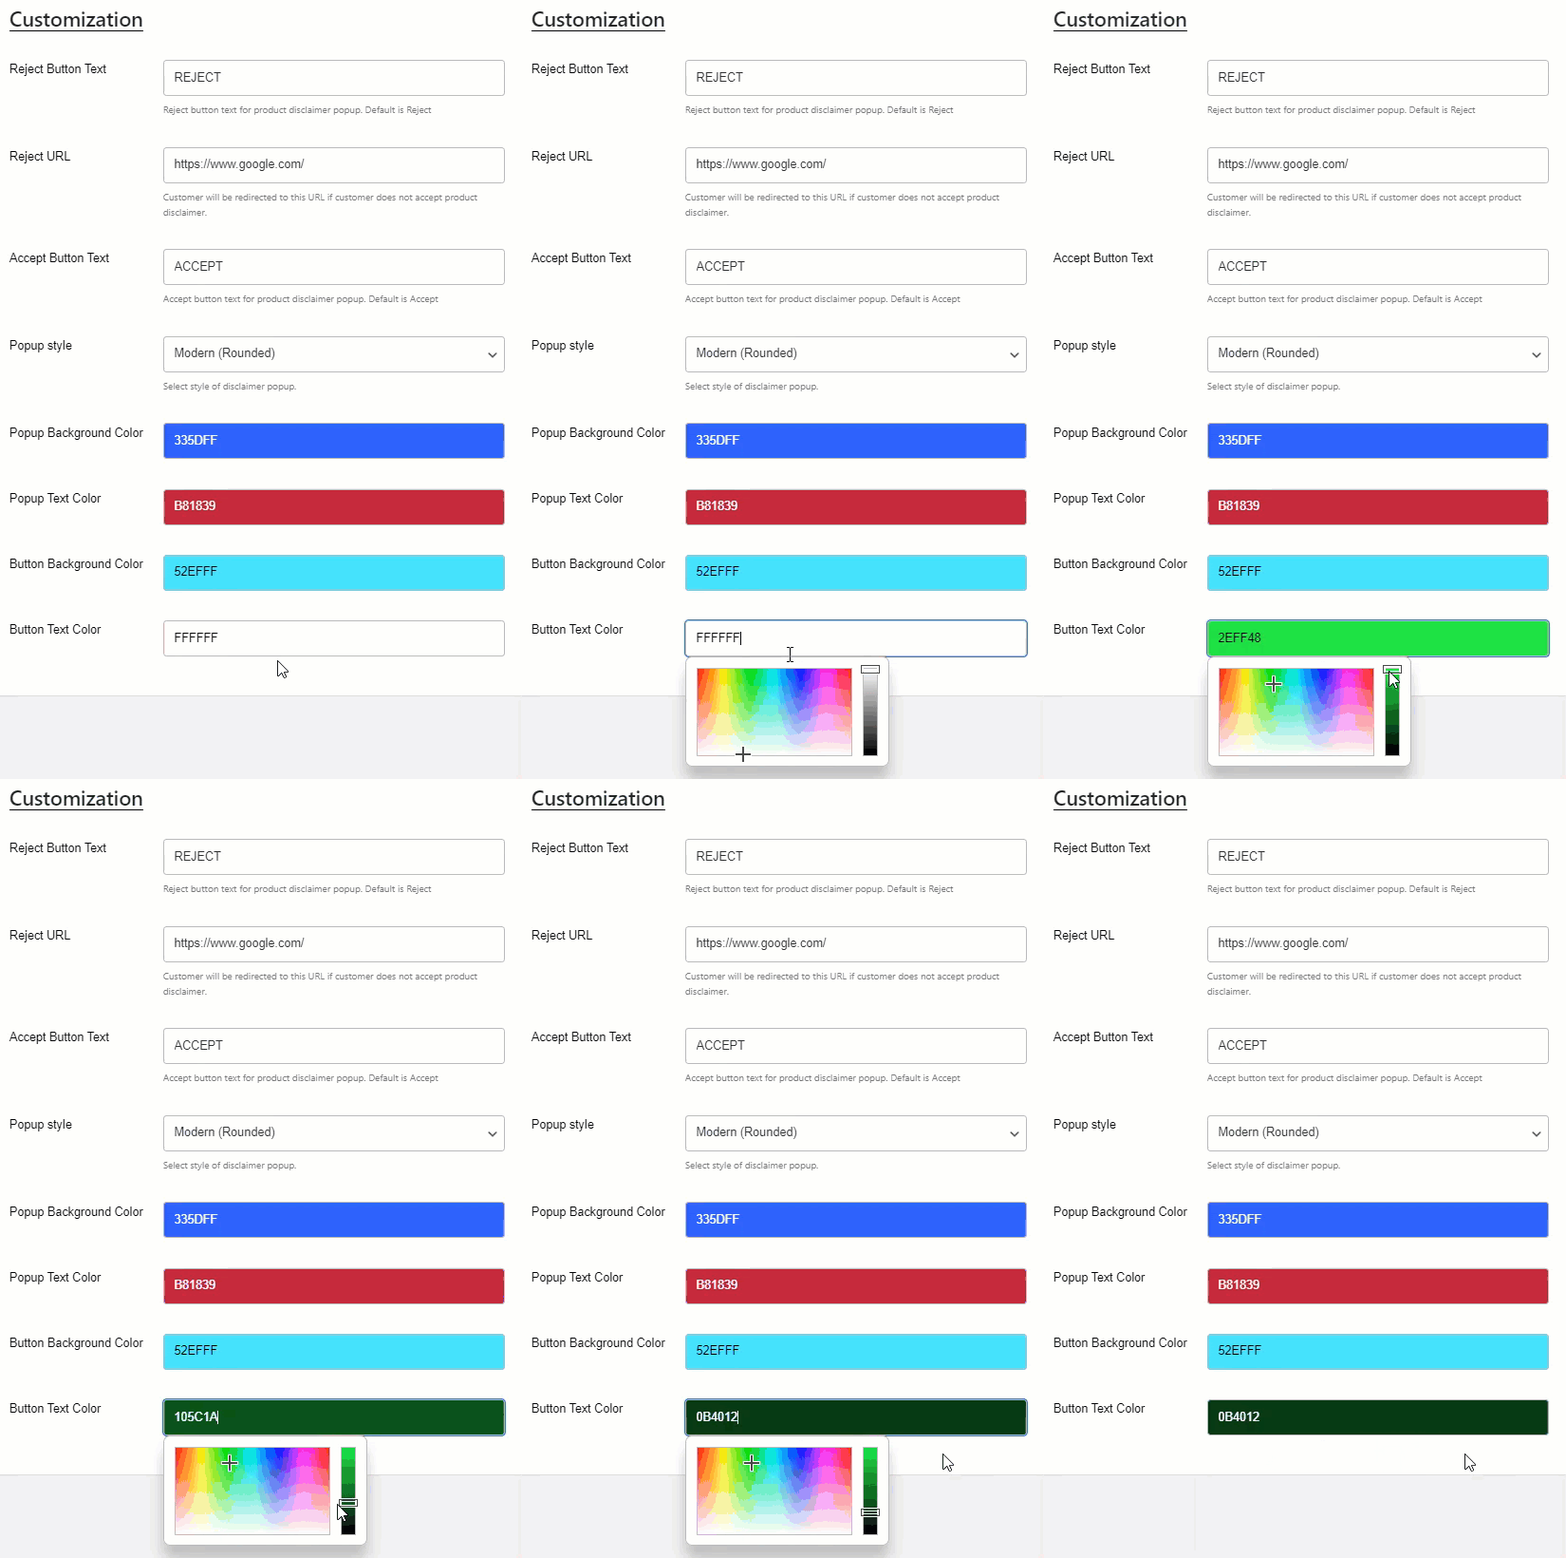
Front-End Impact
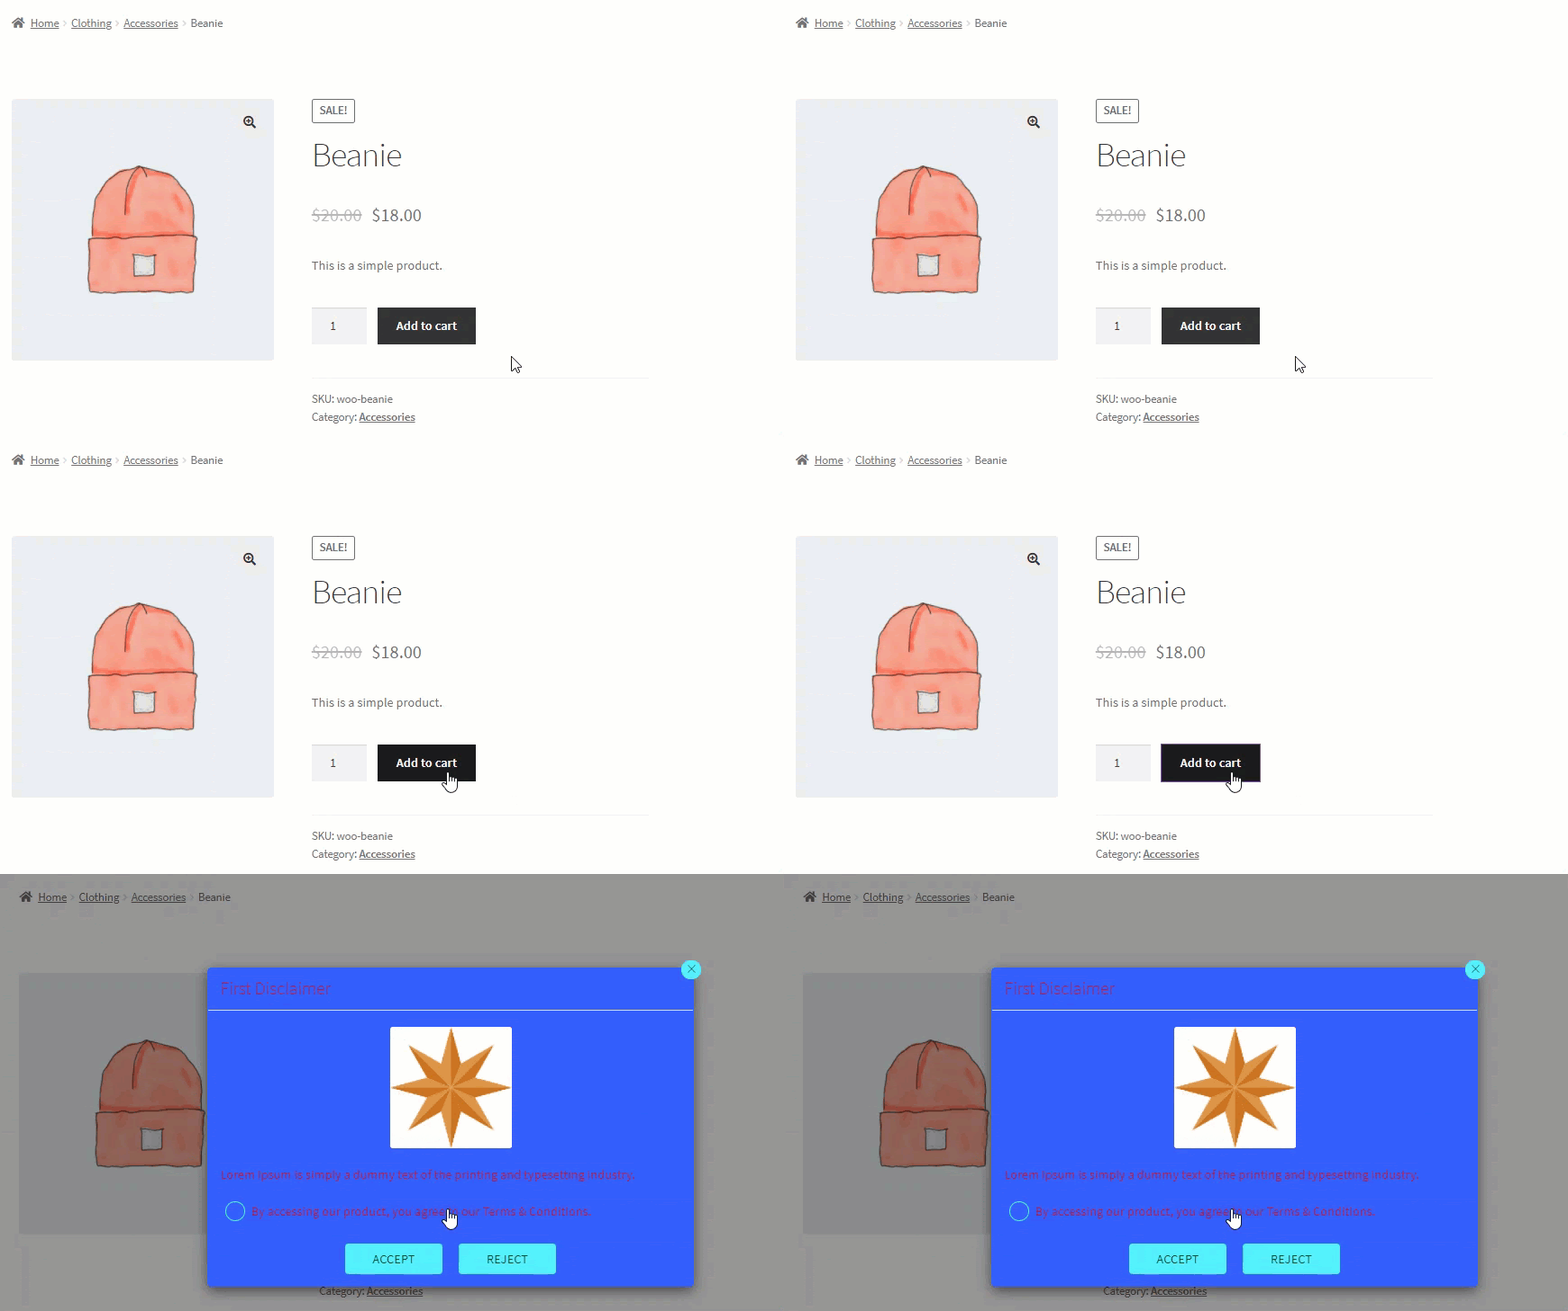
Customization when On Page is selected as the display type
a. Upload Thumbnail
- This option allows the Administrator to select a thumbnail image for an On Page disclaimer.

- Click on the Upload button.
- Select the thumbnail for the disclaimer.

- Once done, click on the Publish/ Update button to save your disclaimer thumbnail.
Front-End Impact
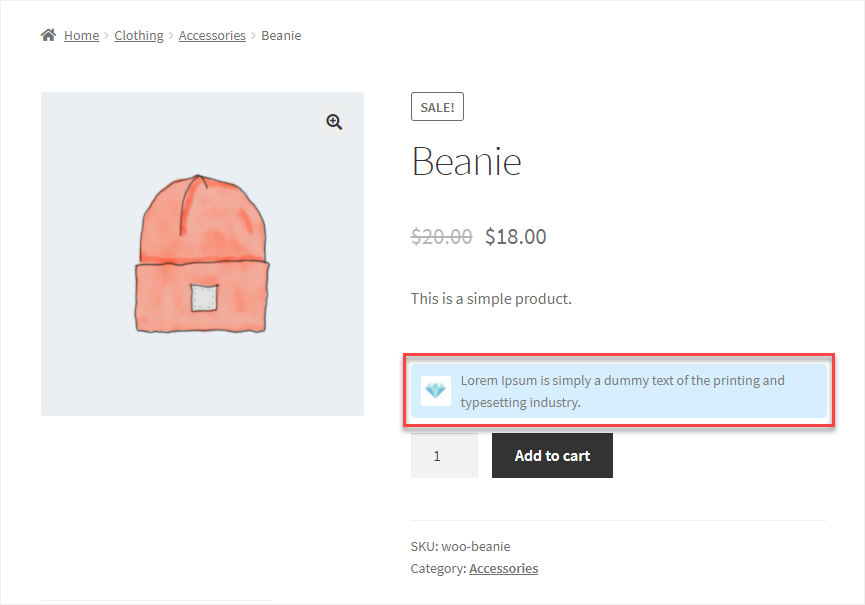
b. Disclaimer Background Color
- This option allows the Administrator to set the On Page background color from the color grid for the disclaimer.

Front-End Impact
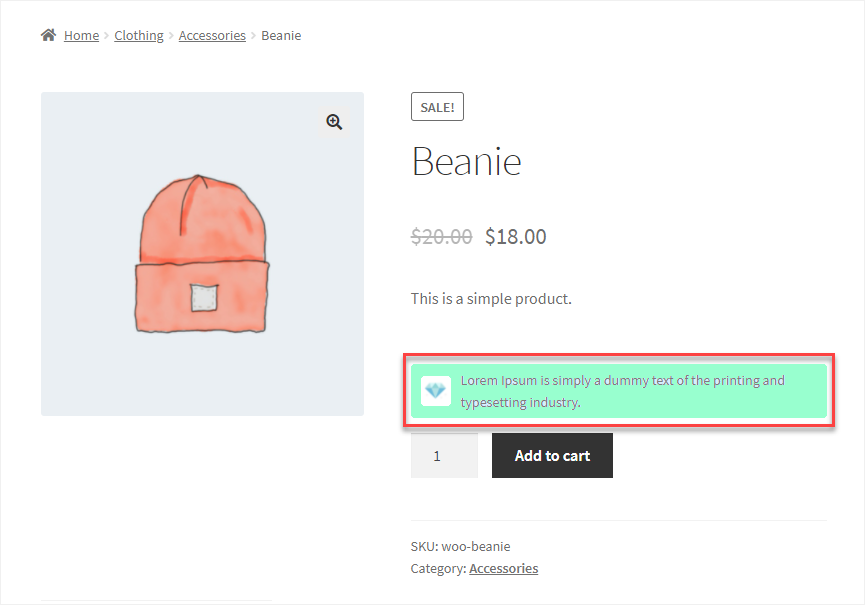
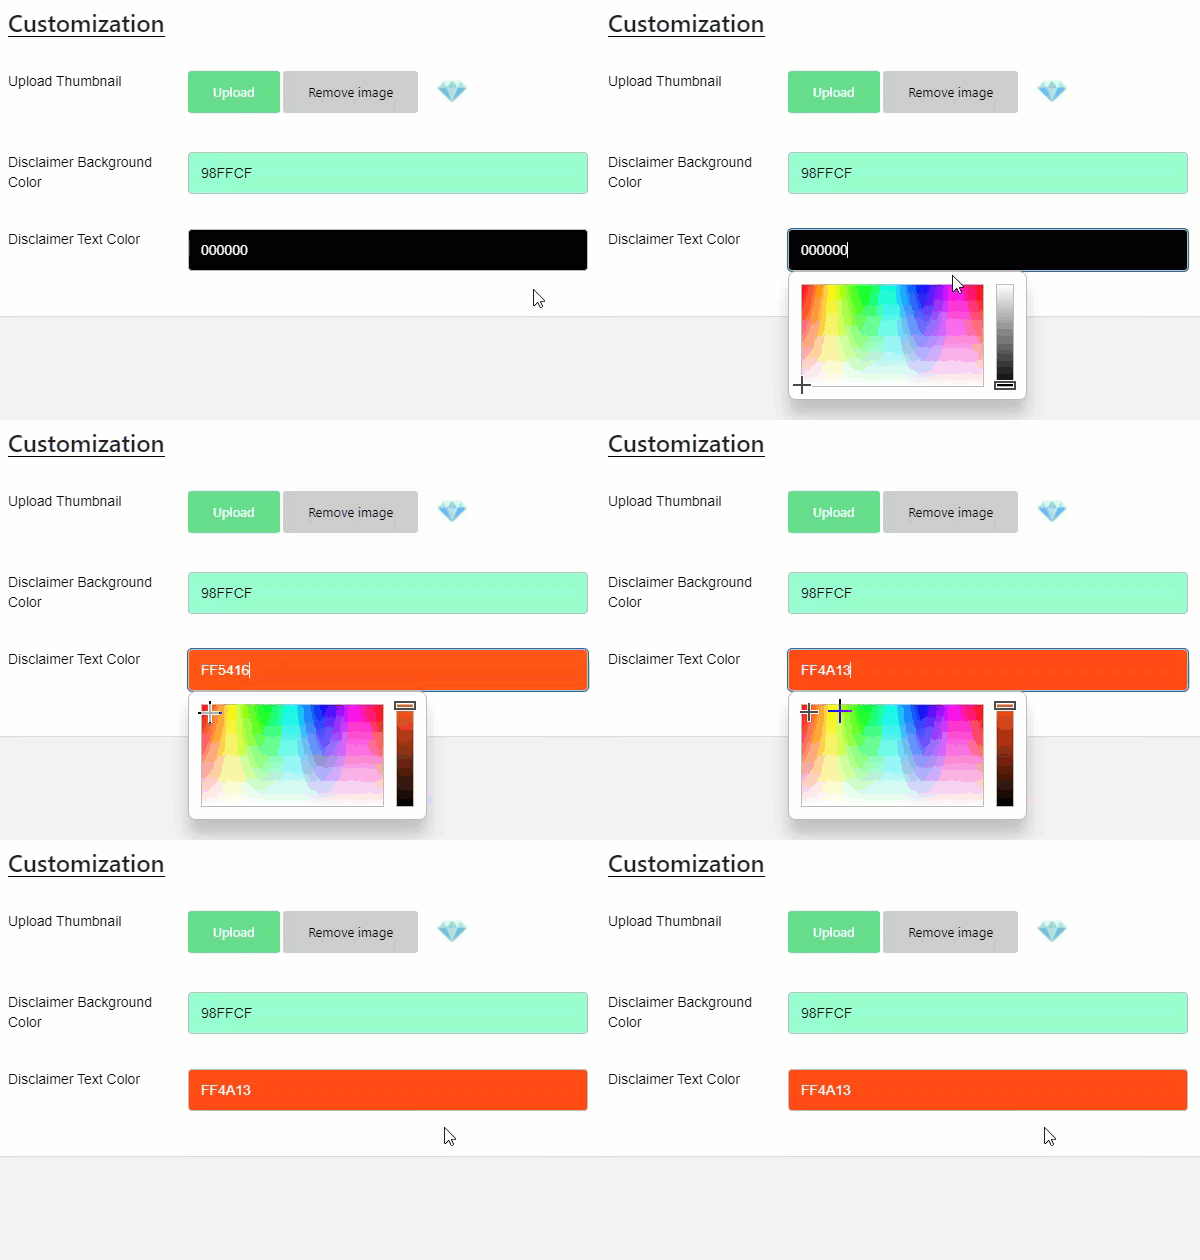
c. Disclaimer Text Color
- This option allows the Administrator to set the text color from the color grid for the Popup disclaimer.
Front-End Impact

Global
↑ Back to top- When the Global disclaimer type is selected, then the following options will appear. It will be applied to all the User Roles, Categories, and Products.
Age Verification
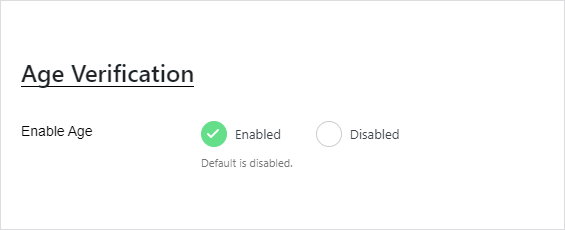
a. Enable Age
- This option allows the Administrator to Enable and Disable the Age Verification for disclaimer.
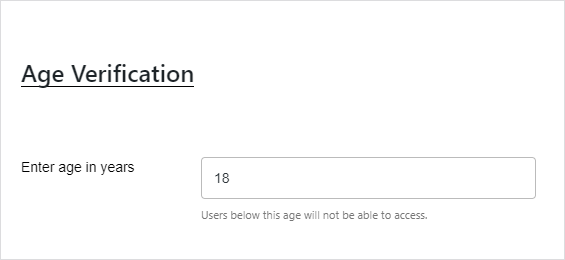
b. Enter age in years
- Enter the age in years in the text box so that users equal to or greater than that age number can get access to purchase your products. Any underage user will not be allowed to purchase any products.
Front-End Impact
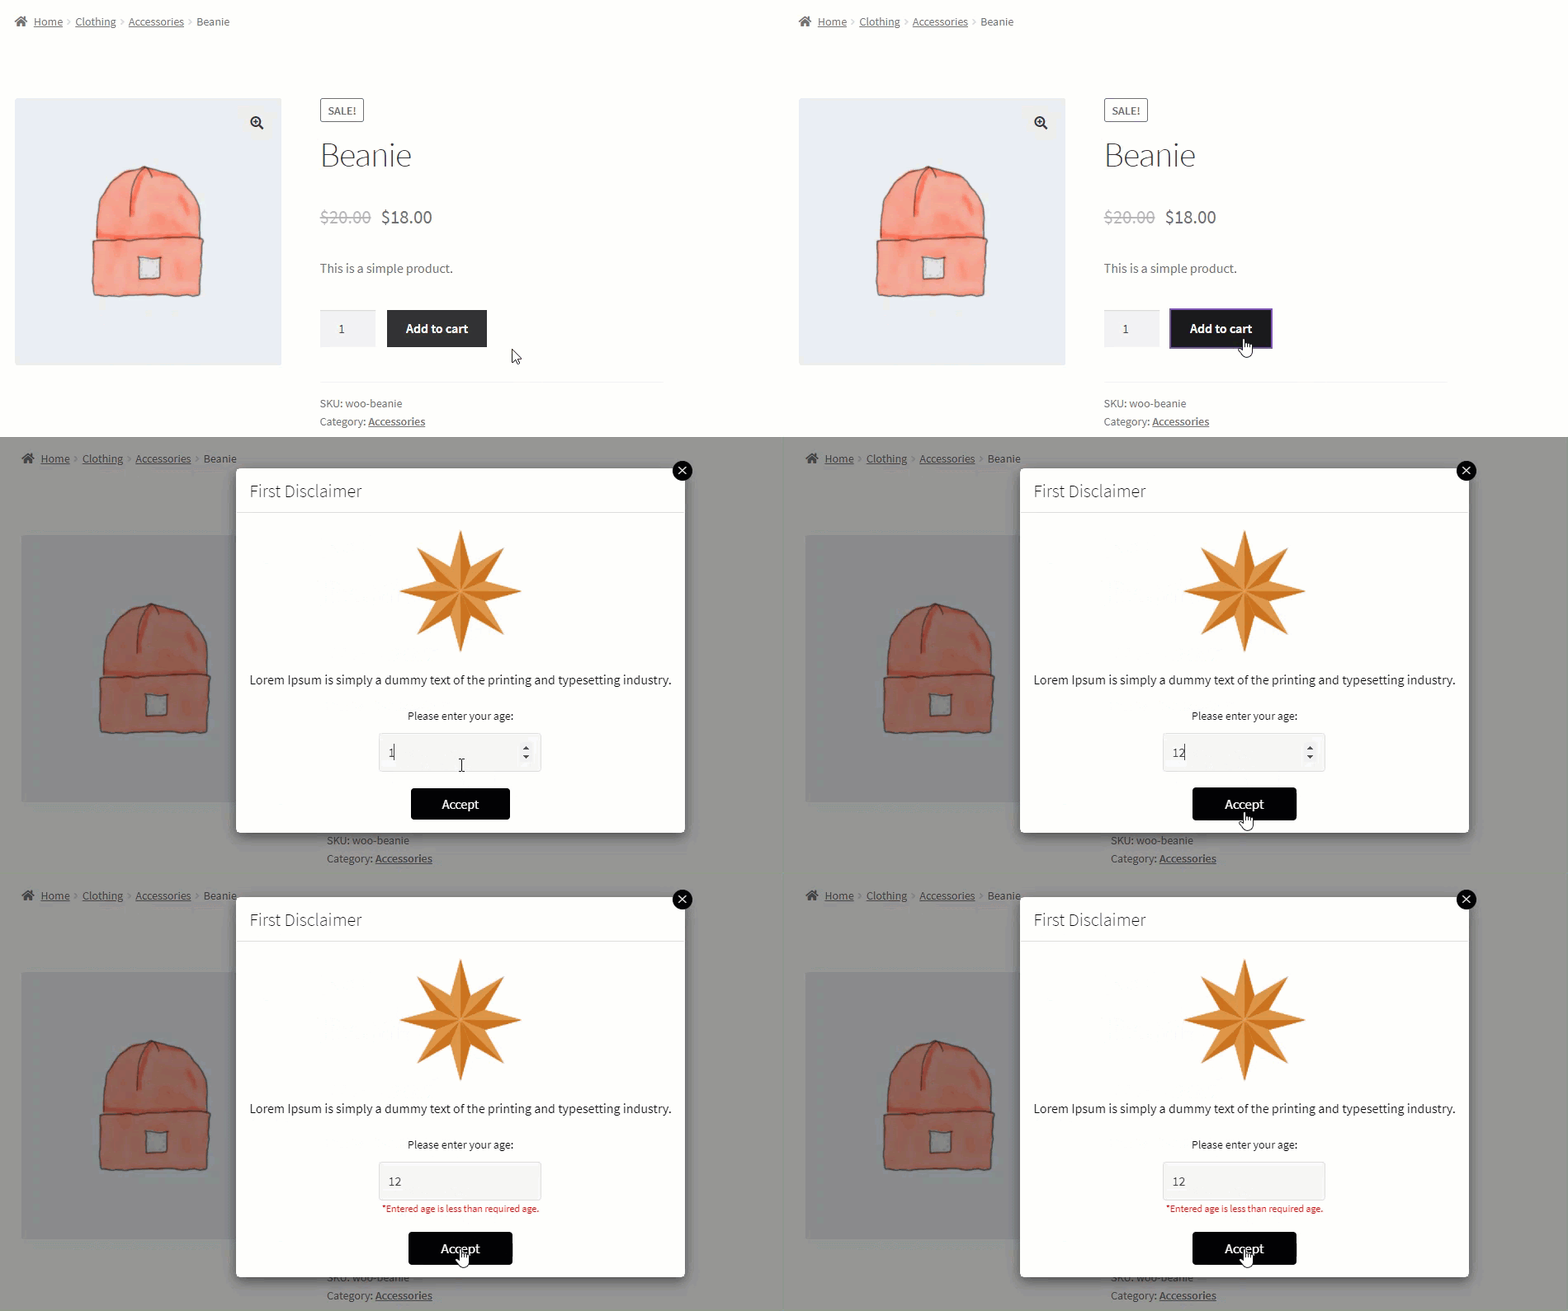
- CASE 1: If the user’s age is equal to or greater than the age mentioned in the back-end configuration.

- CASE 2: If the user’s age is less than the age mentioned in the back-end configuration.
Terms & Condition
a. Enable Terms & condition
- This option allows the Administrator to Enable and Disable the Terms & Conditions for disclaimer.

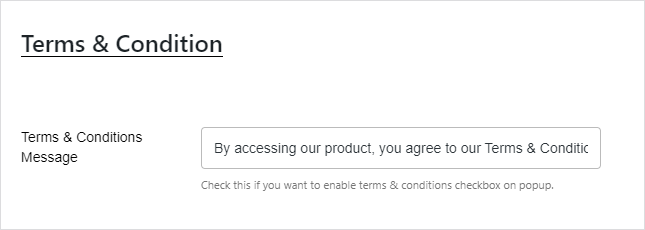
b. Terms & Conditions Message
- Enter the message in the text box. which will be displayed on the disclaimer popup.
Front-End Impact

NOTE: The checkbox will not appear on the disclaimer if the Terms & Condition message text box is left empty.
Customization
When the Sitewide disclaimer type is selected, only the Popup display type is available in the Customization configuration.
a. Reject Button Text
- This option allows the Administrator to Enable and Disable the Terms & Conditions for disclaimer.

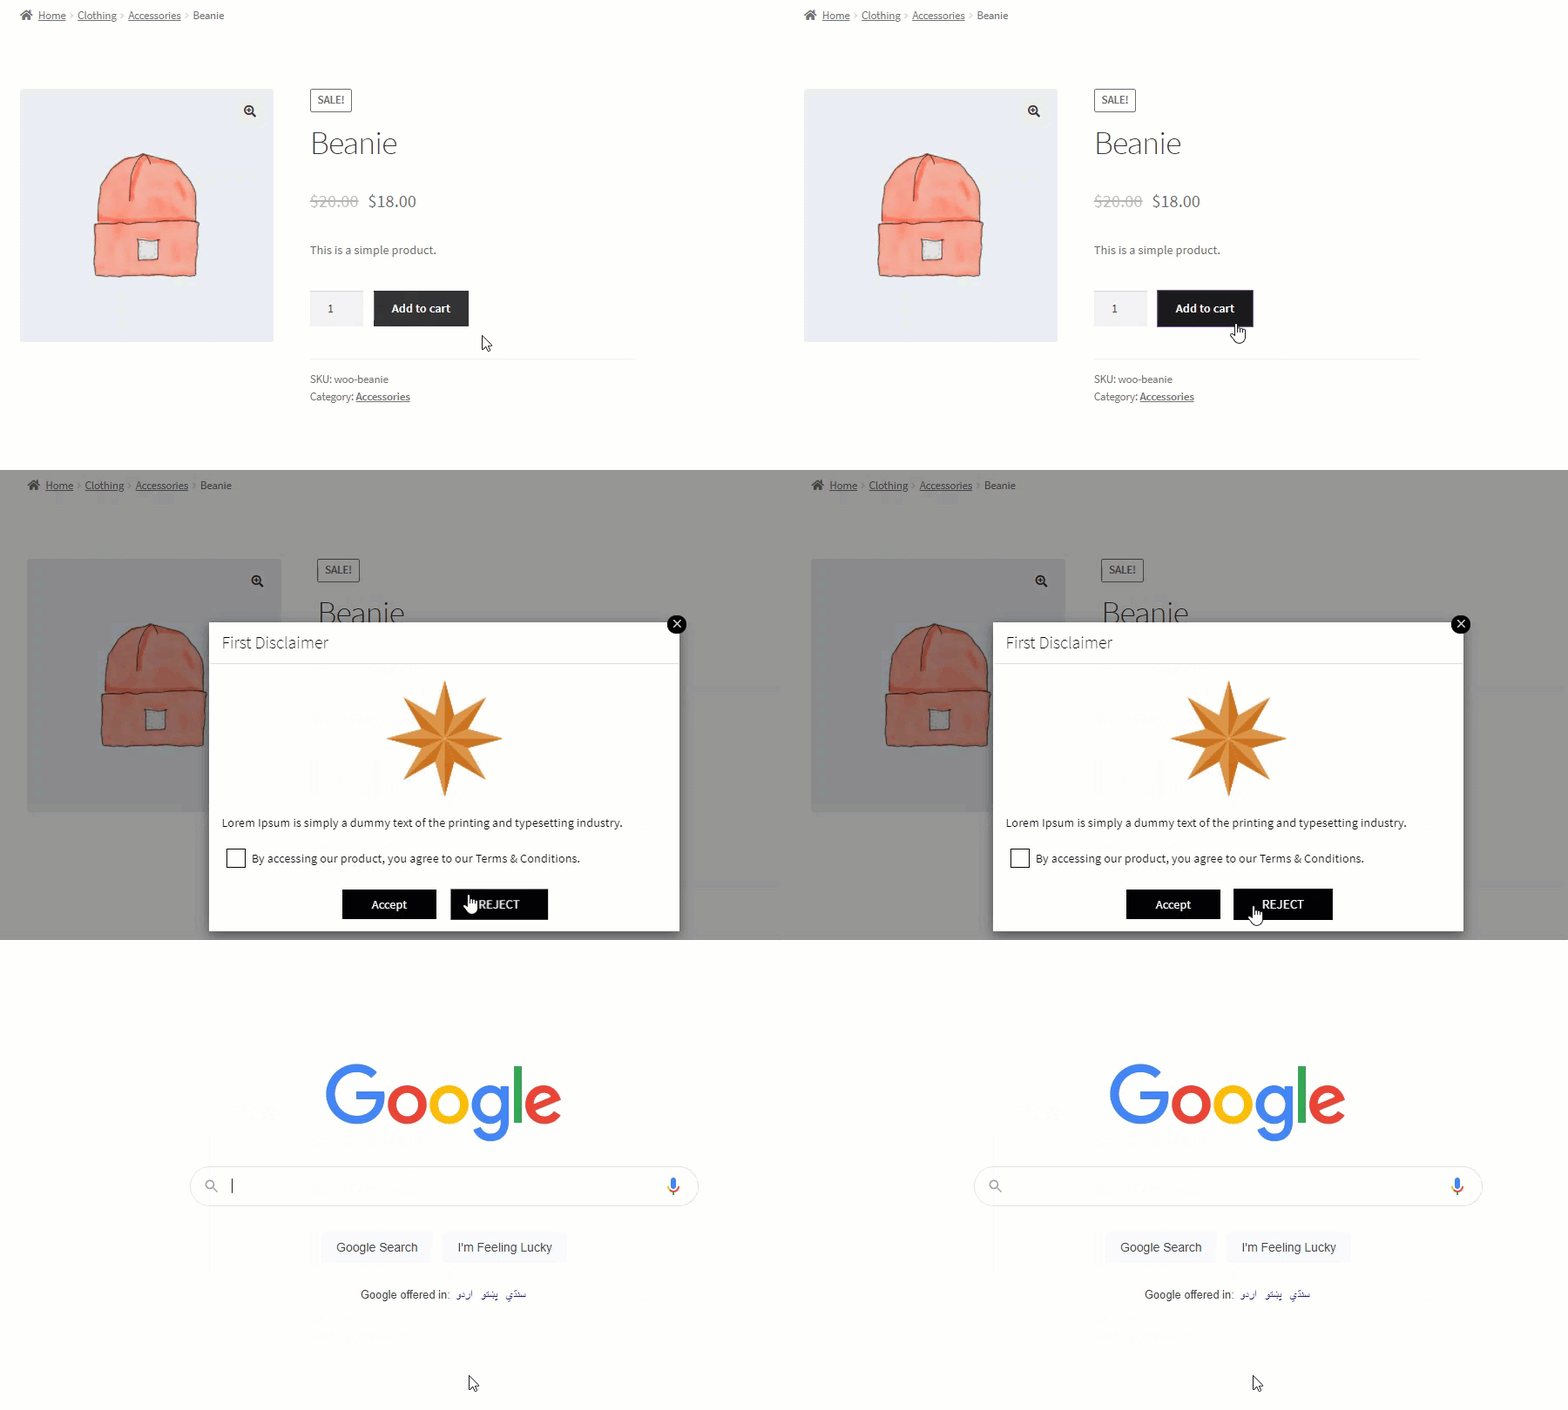
b. Reject URL
- Enter the message in the text box, which will be displayed on the disclaimer popup.

Front-End Impact
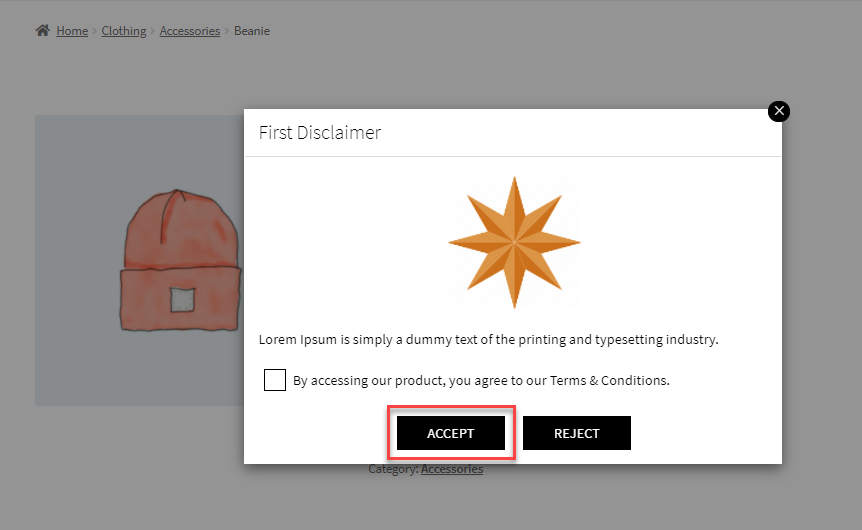
c. Accept Button Text
- Enter the message in the text box, which will be displayed on the disclaimer popup.

Front-End Impact
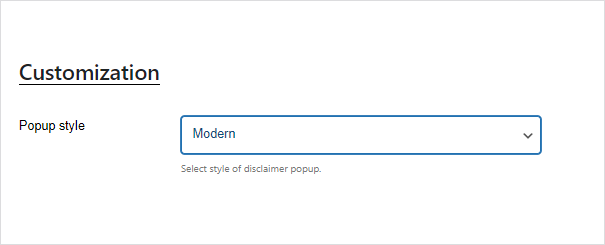
d. Popup style
- This option allows the Administrator to select the Popup style for the disclaimer.
- We have two Popup styles:
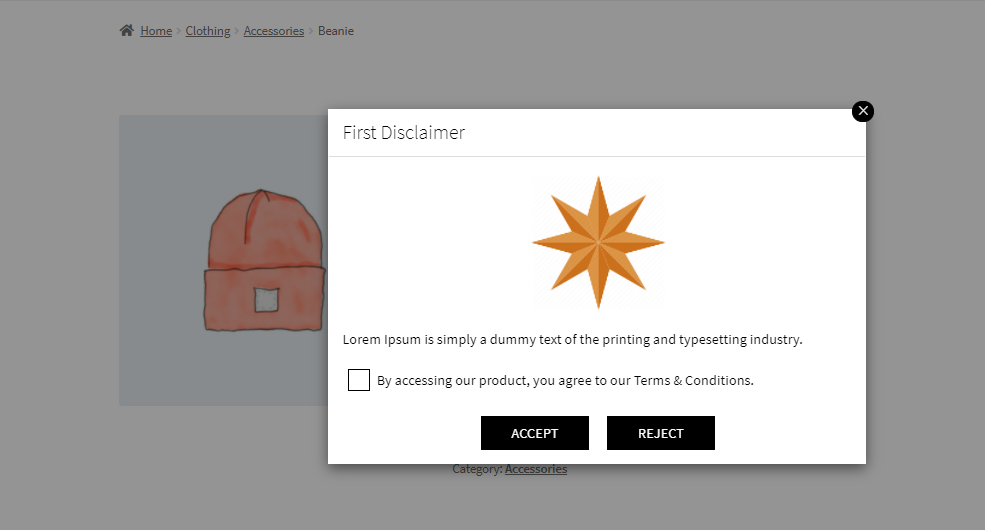
1. Modern
- When the Morden Popup style is selected, the Terms & Conditions checkbox and the Accept and Reject buttons appear in a square shape on the disclaimer.
Front-End Impact
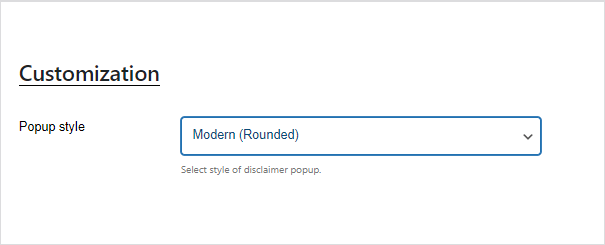
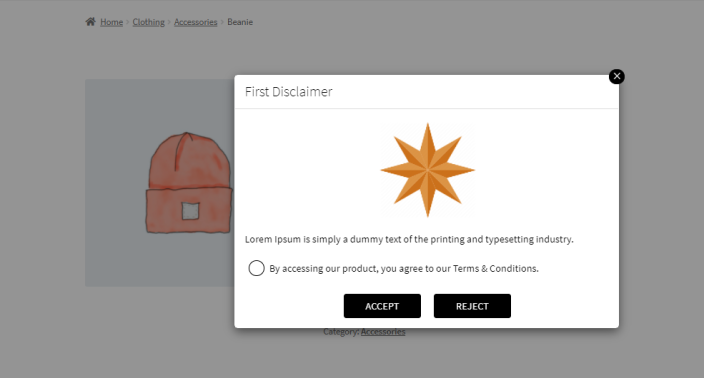
2. Modern (Rounded)
- When the Morden (Rounded) Popup style is selected, the Terms & Conditions checkbox and the Accept and Reject buttons appear in circle shape on the disclaimer.
Front-End Impact
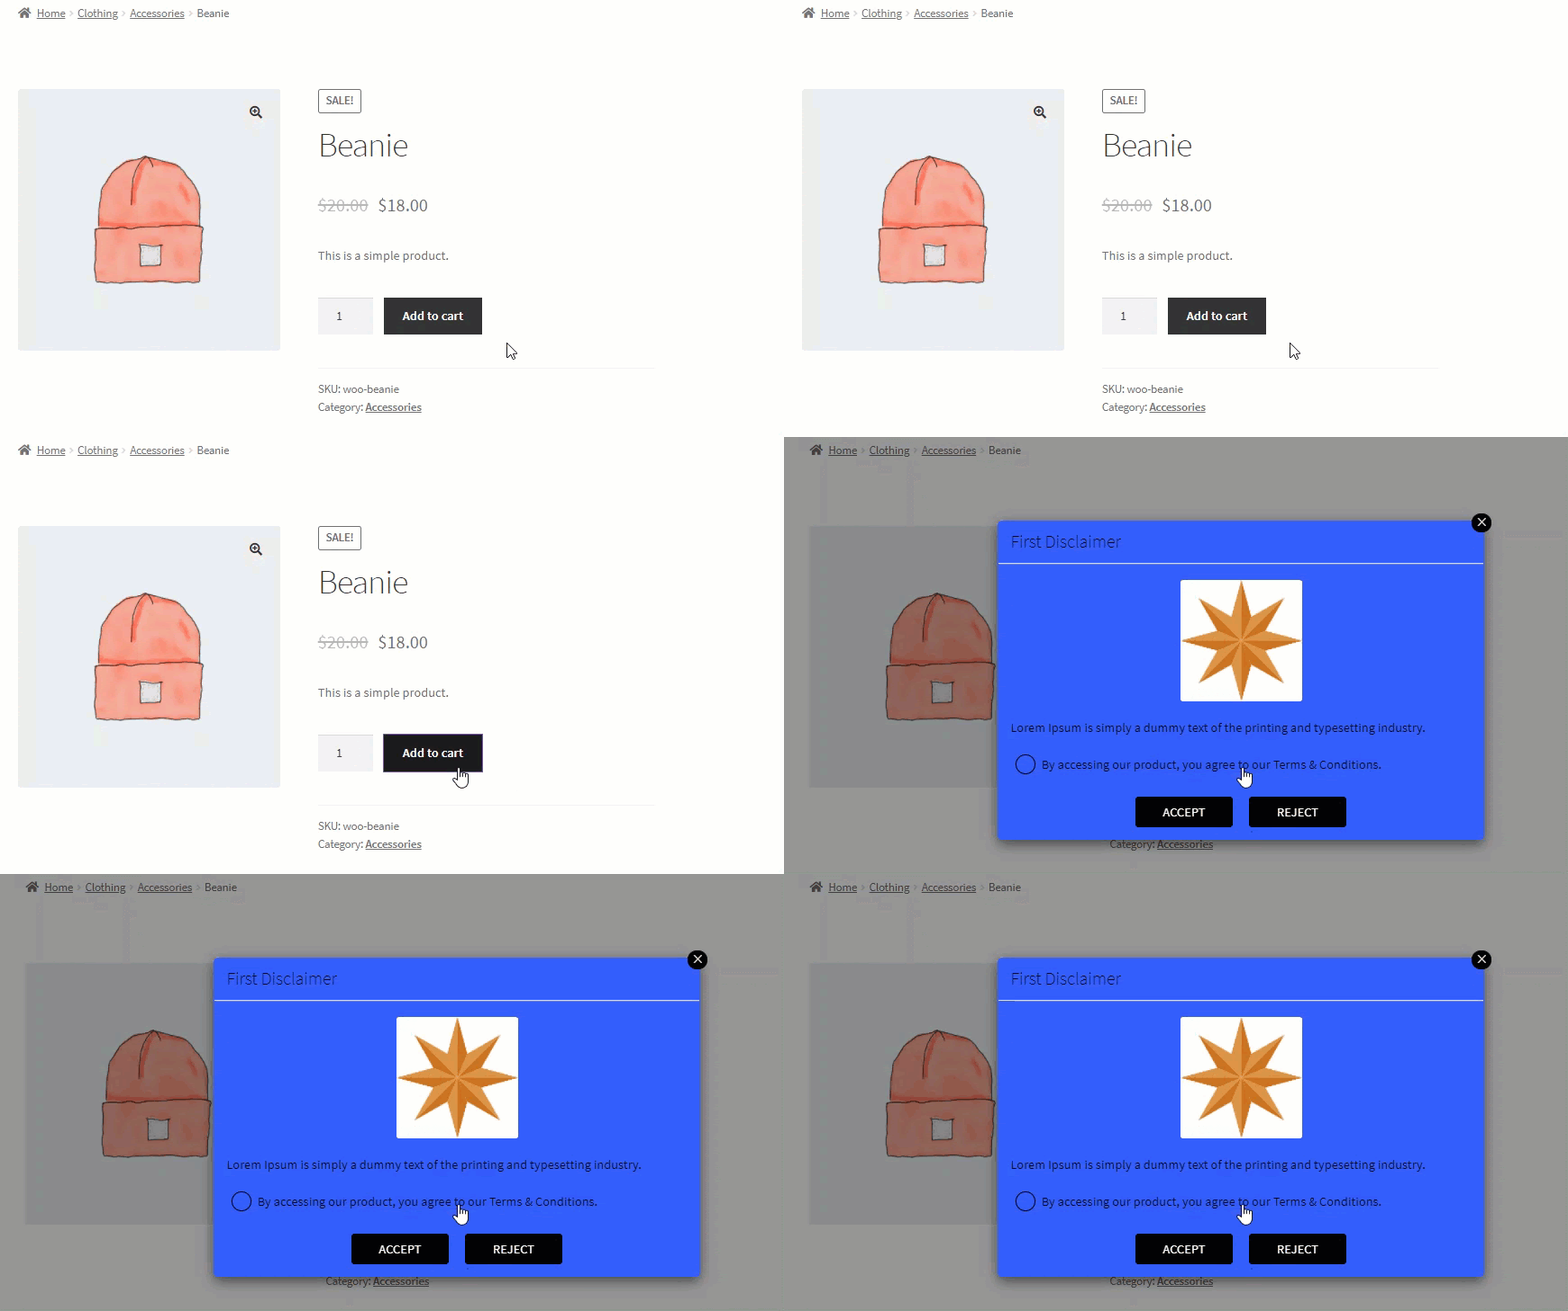
e. Popup Background Color
- This option allows the Administrator to set the Popup background color from the color grid for the disclaimer.

Front-End Impact
f. Popup Text Color
- This option allows the Administrator to set the Popup background color from the color grid for the disclaimer.

Front-End Impact
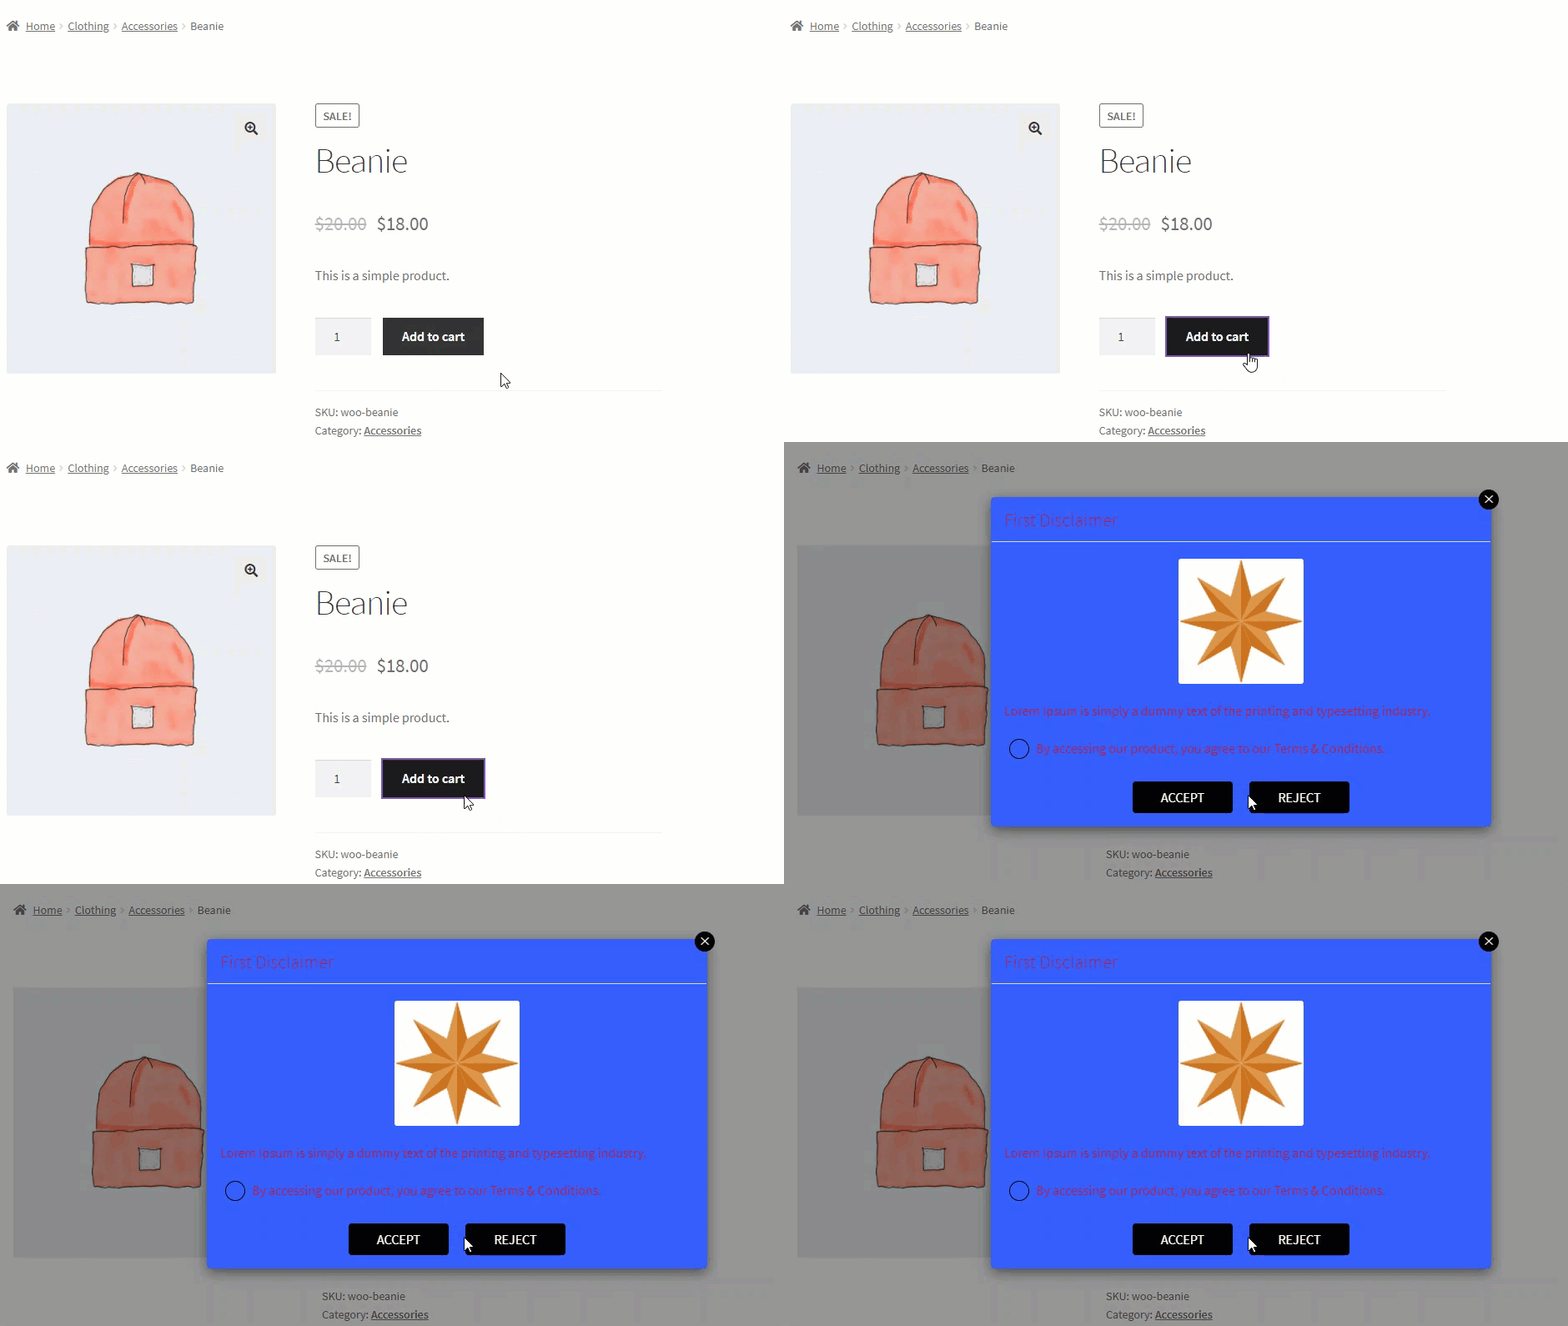
g. Button Background Color
- This option allows the Administrator to set the Popup background color from the color grid for the disclaimer.
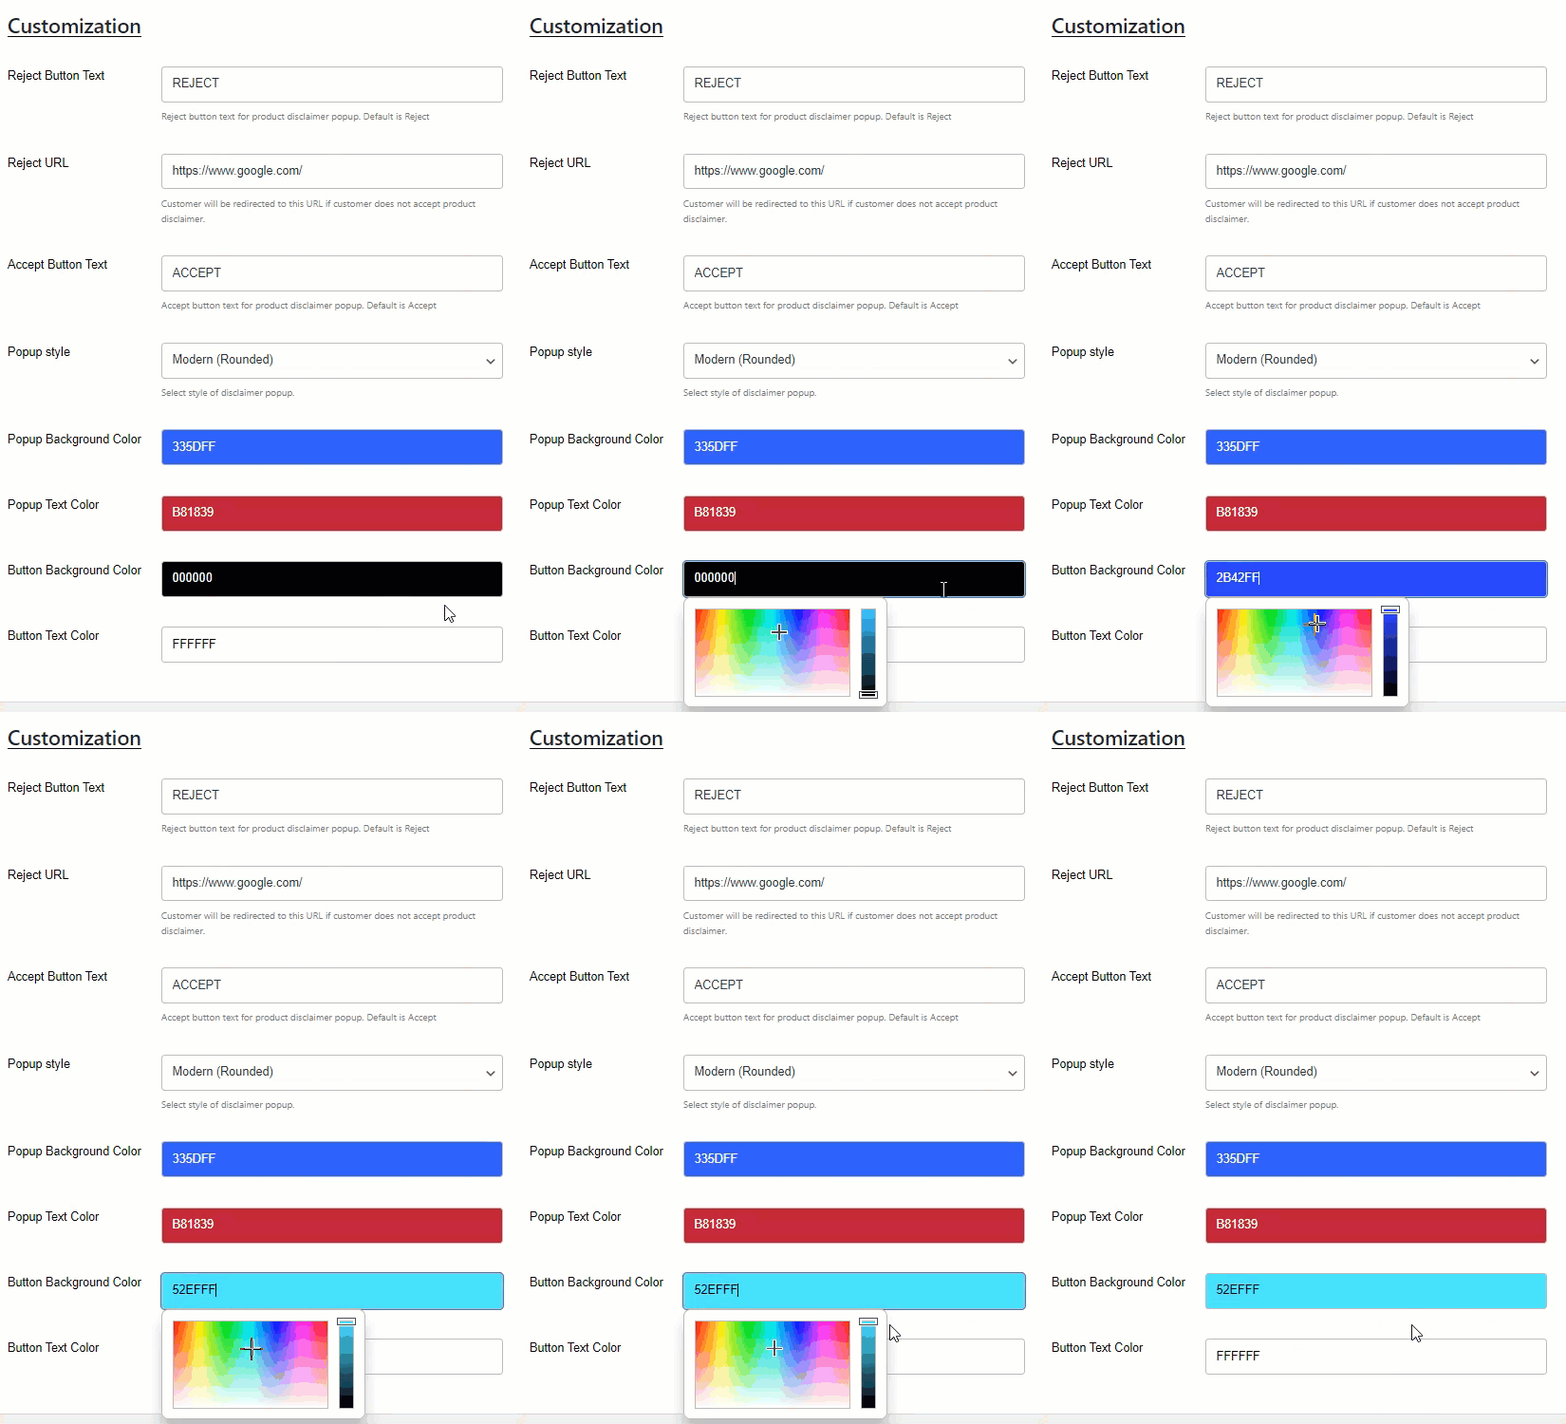
Front-End Impact
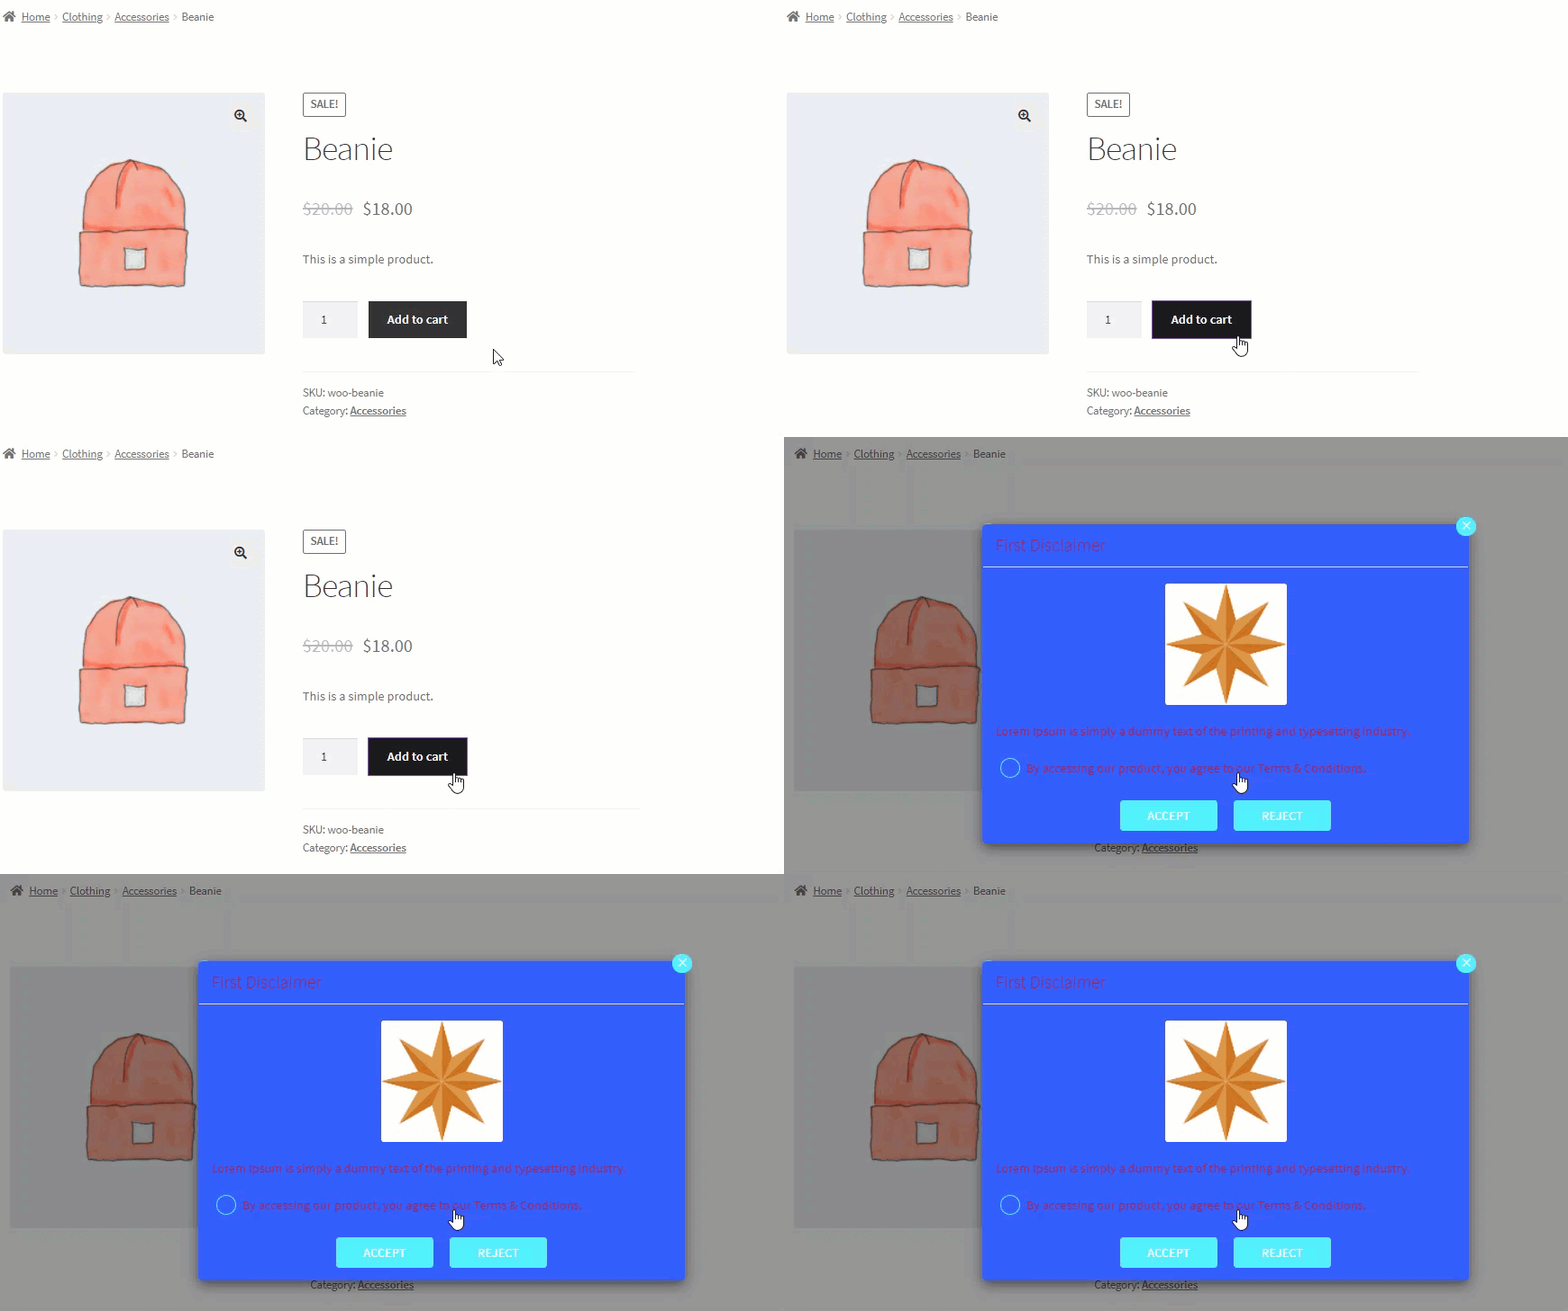
h. Button Text Color
- This option allows the Administrator to set the text color from the color grid for the Popup disclaimer.
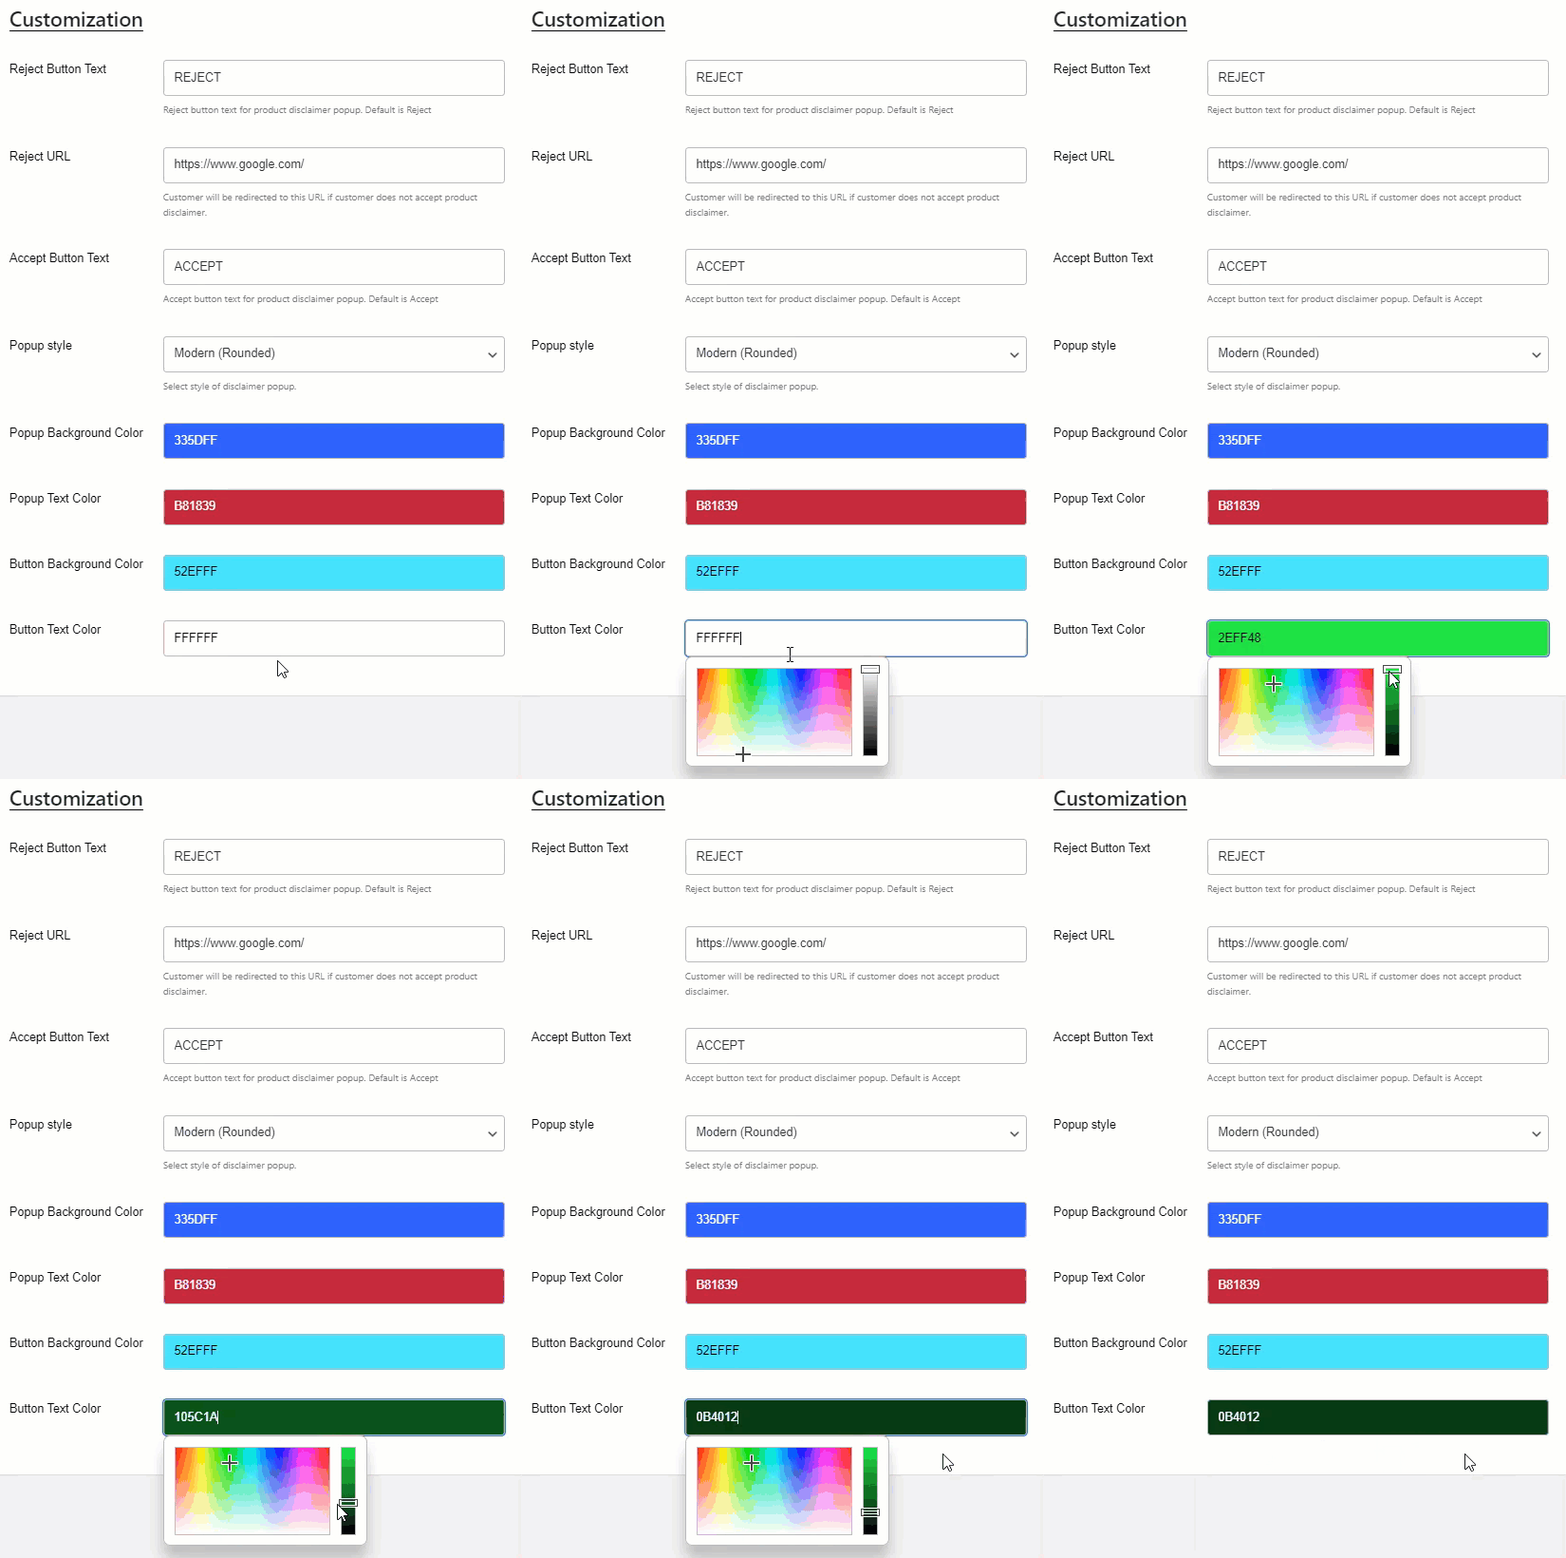
Front-End Impact

Sitewide
↑ Back to top- When the Sitewide disclaimer type is selected, then the following options will appear. It will be applied to all the User Roles, Categories, and Products.
- When Sitewide is selected, the disclaimer will appear whenever the user lands on a new page of your website.

Age Verification
a. Enable Age
- This option allows the Administrator to Enable and Disable the Age Verification for disclaimer.
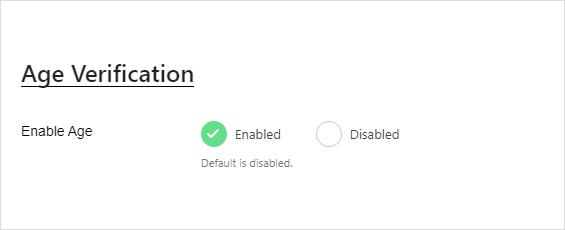
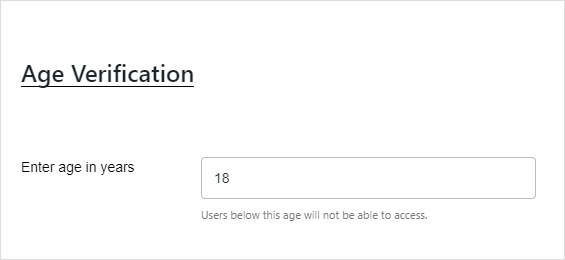
b. Enter age in years
- Enter the age in years in the text box so that users equal to or greater than that age number can get access to purchase your products. Any underage user will not be allowed to purchase any products.
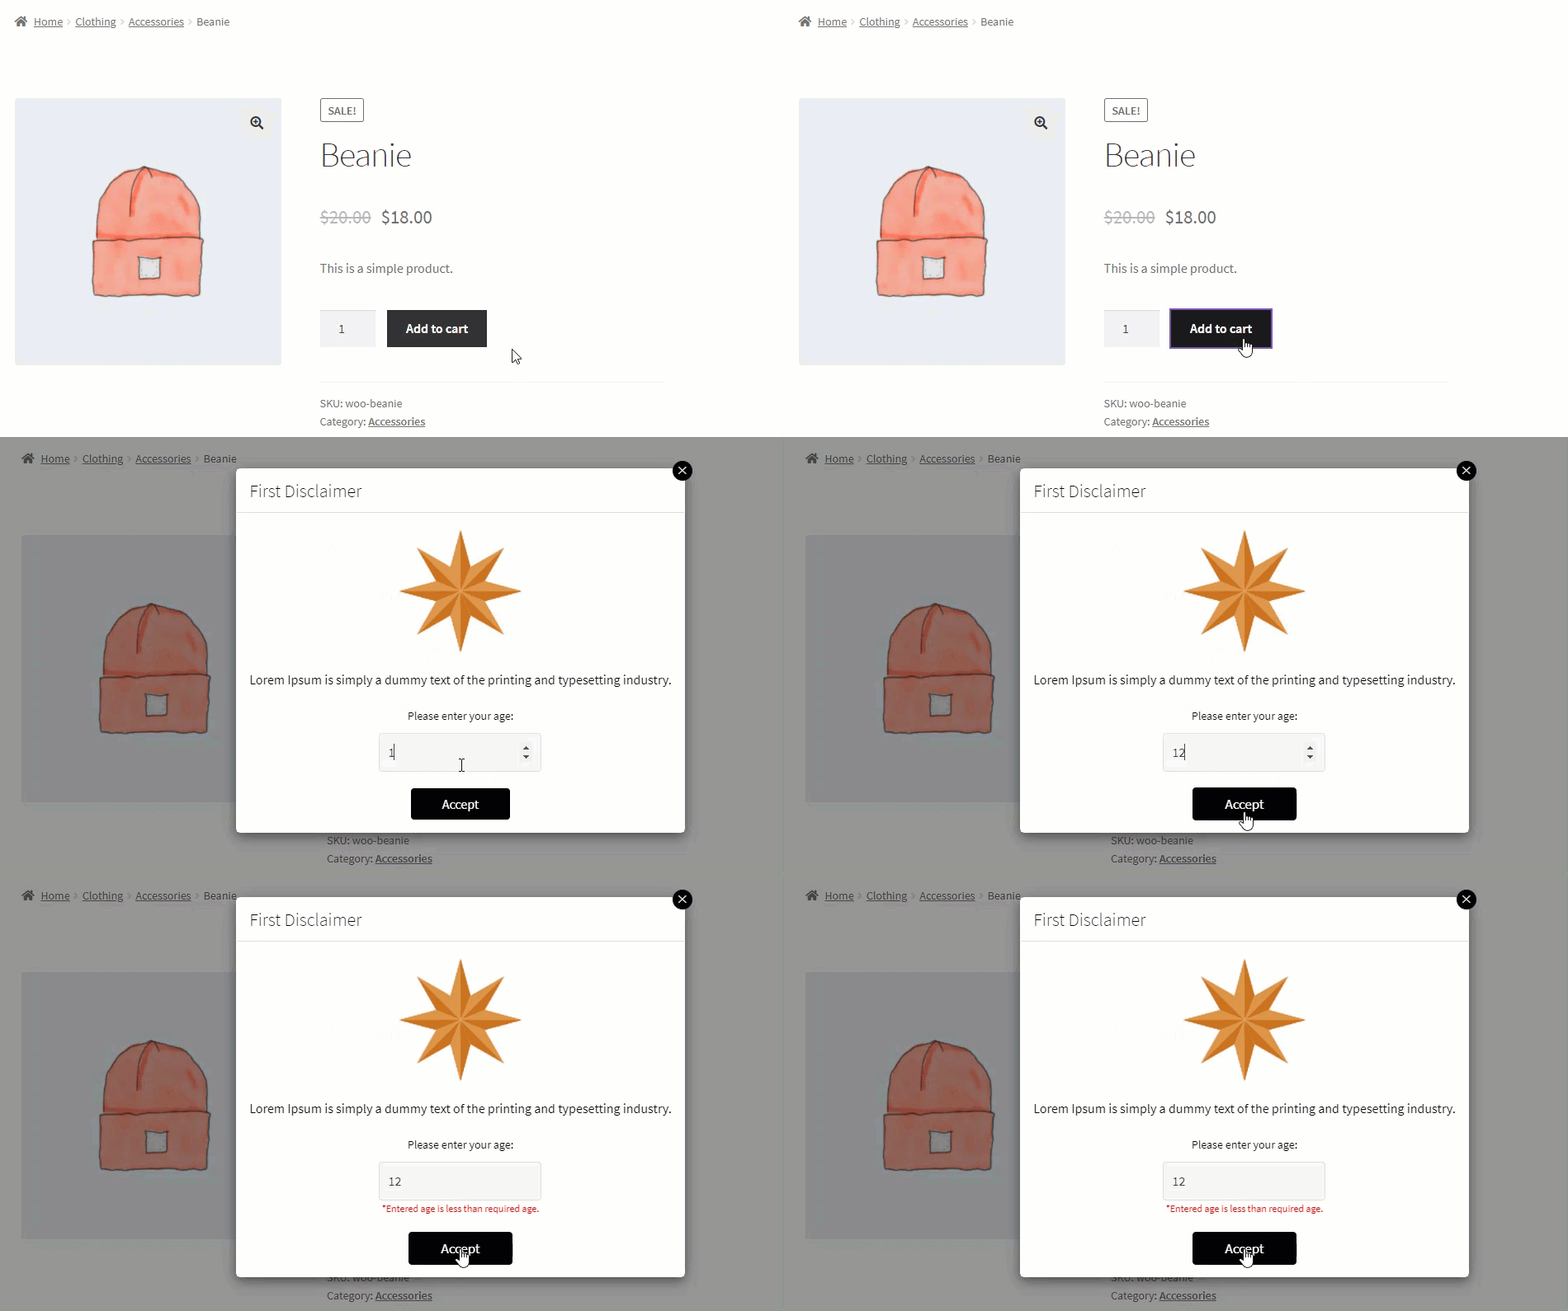
Front-End Impact
- CASE 1: If the user’s age is equal to or greater than the age mentioned in the back-end configuration.

- CASE 2: If the user’s age is less than the age mentioned in the back-end configuration.
Terms & Condition
a. Enable Terms & condition
- This option allows the Administrator to Enable and Disable the Terms & Conditions for disclaimer.

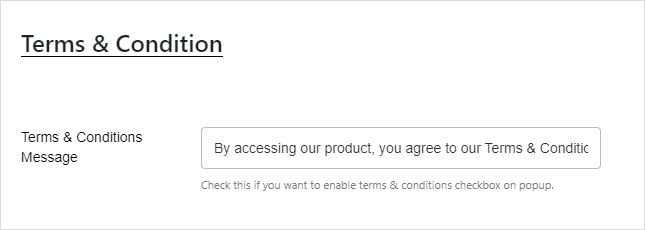
b. Terms & Conditions Message
- Enter the message in the text box. which will be displayed on the disclaimer popup.
Front-End Impact
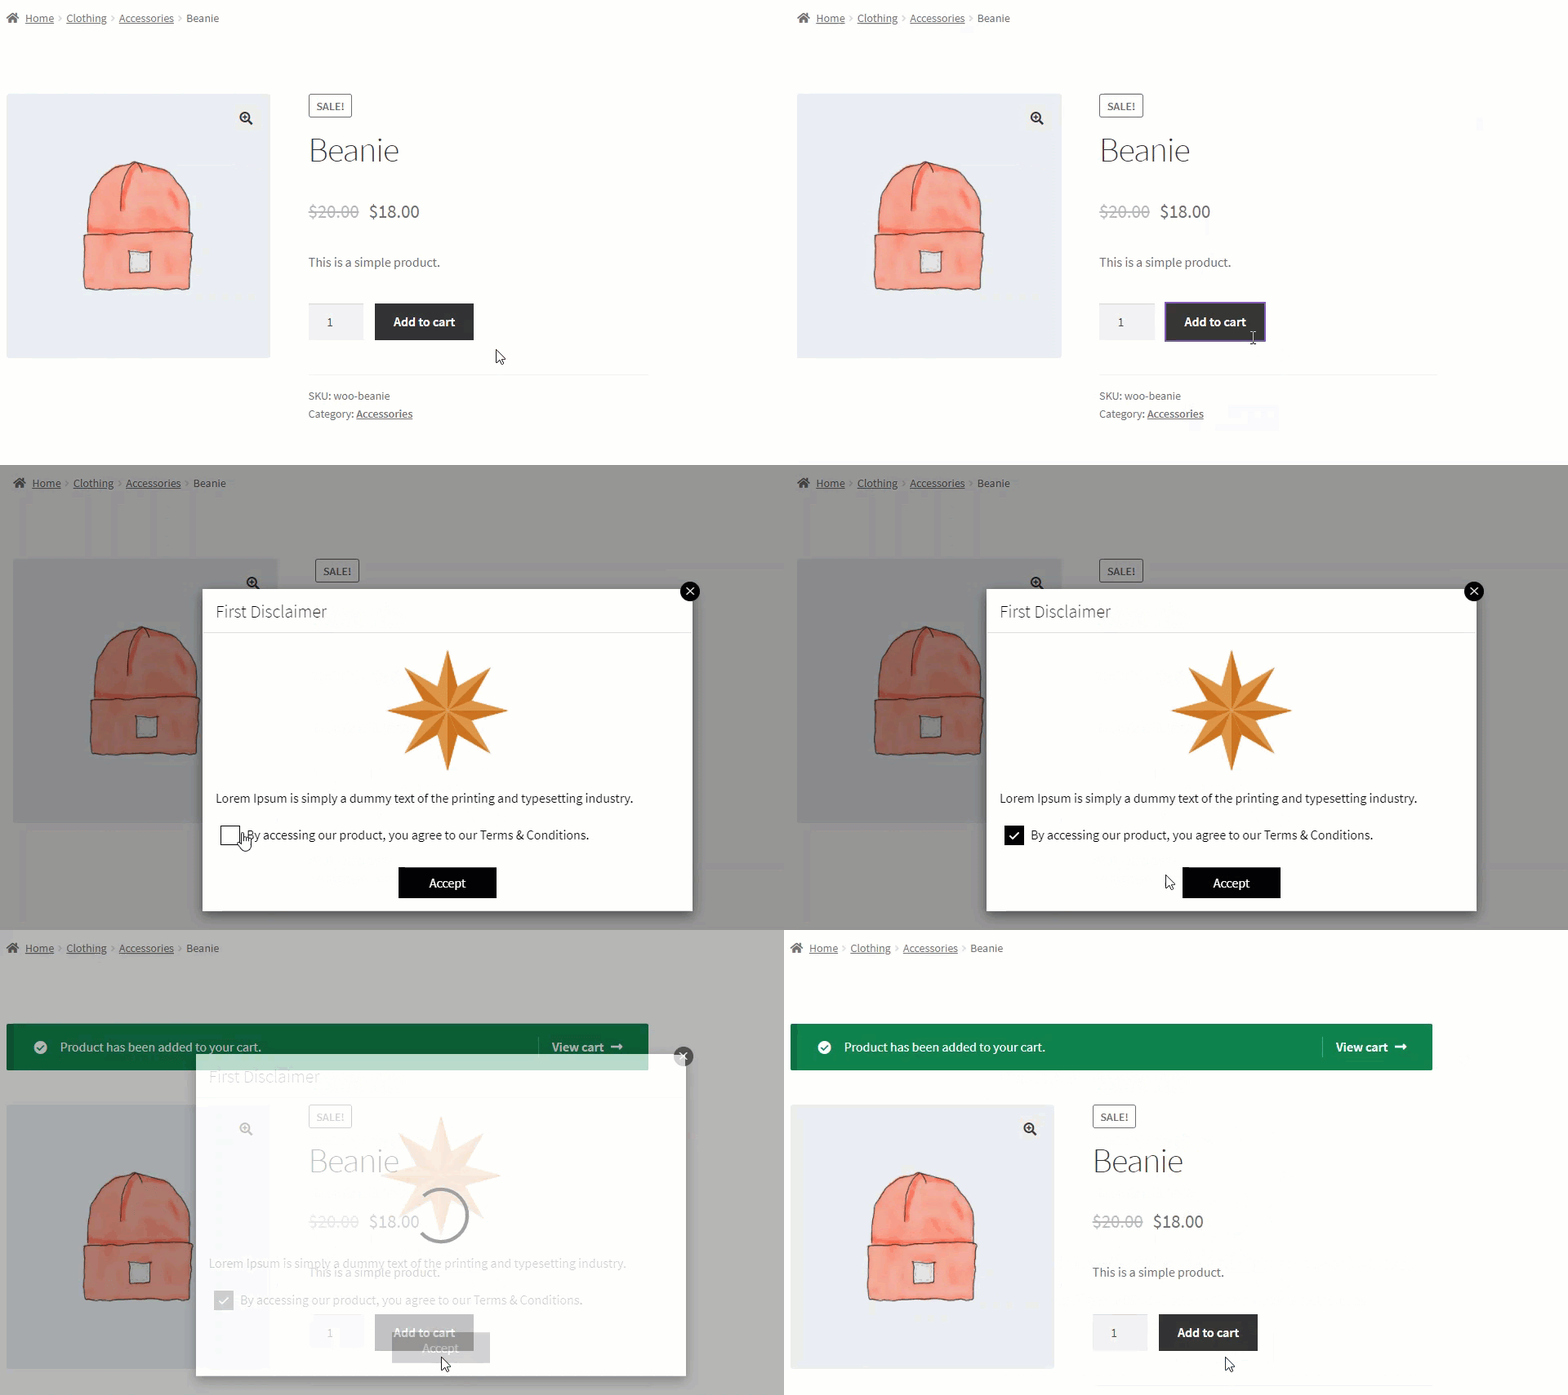
NOTE: The checkbox will not appear on the disclaimer if the Terms & Condition message text box is left empty.
Customization
- When the Sitewide disclaimer type is selected, only the Popup display type is available in the Customization configuration.
a. Reject Button Text
- This option allows the Administrator to Enable and Disable the Terms & Conditions for disclaimer.

b. Reject URL
- Enter the message in the text box, which will be displayed on the disclaimer popup.

Front-End Impact
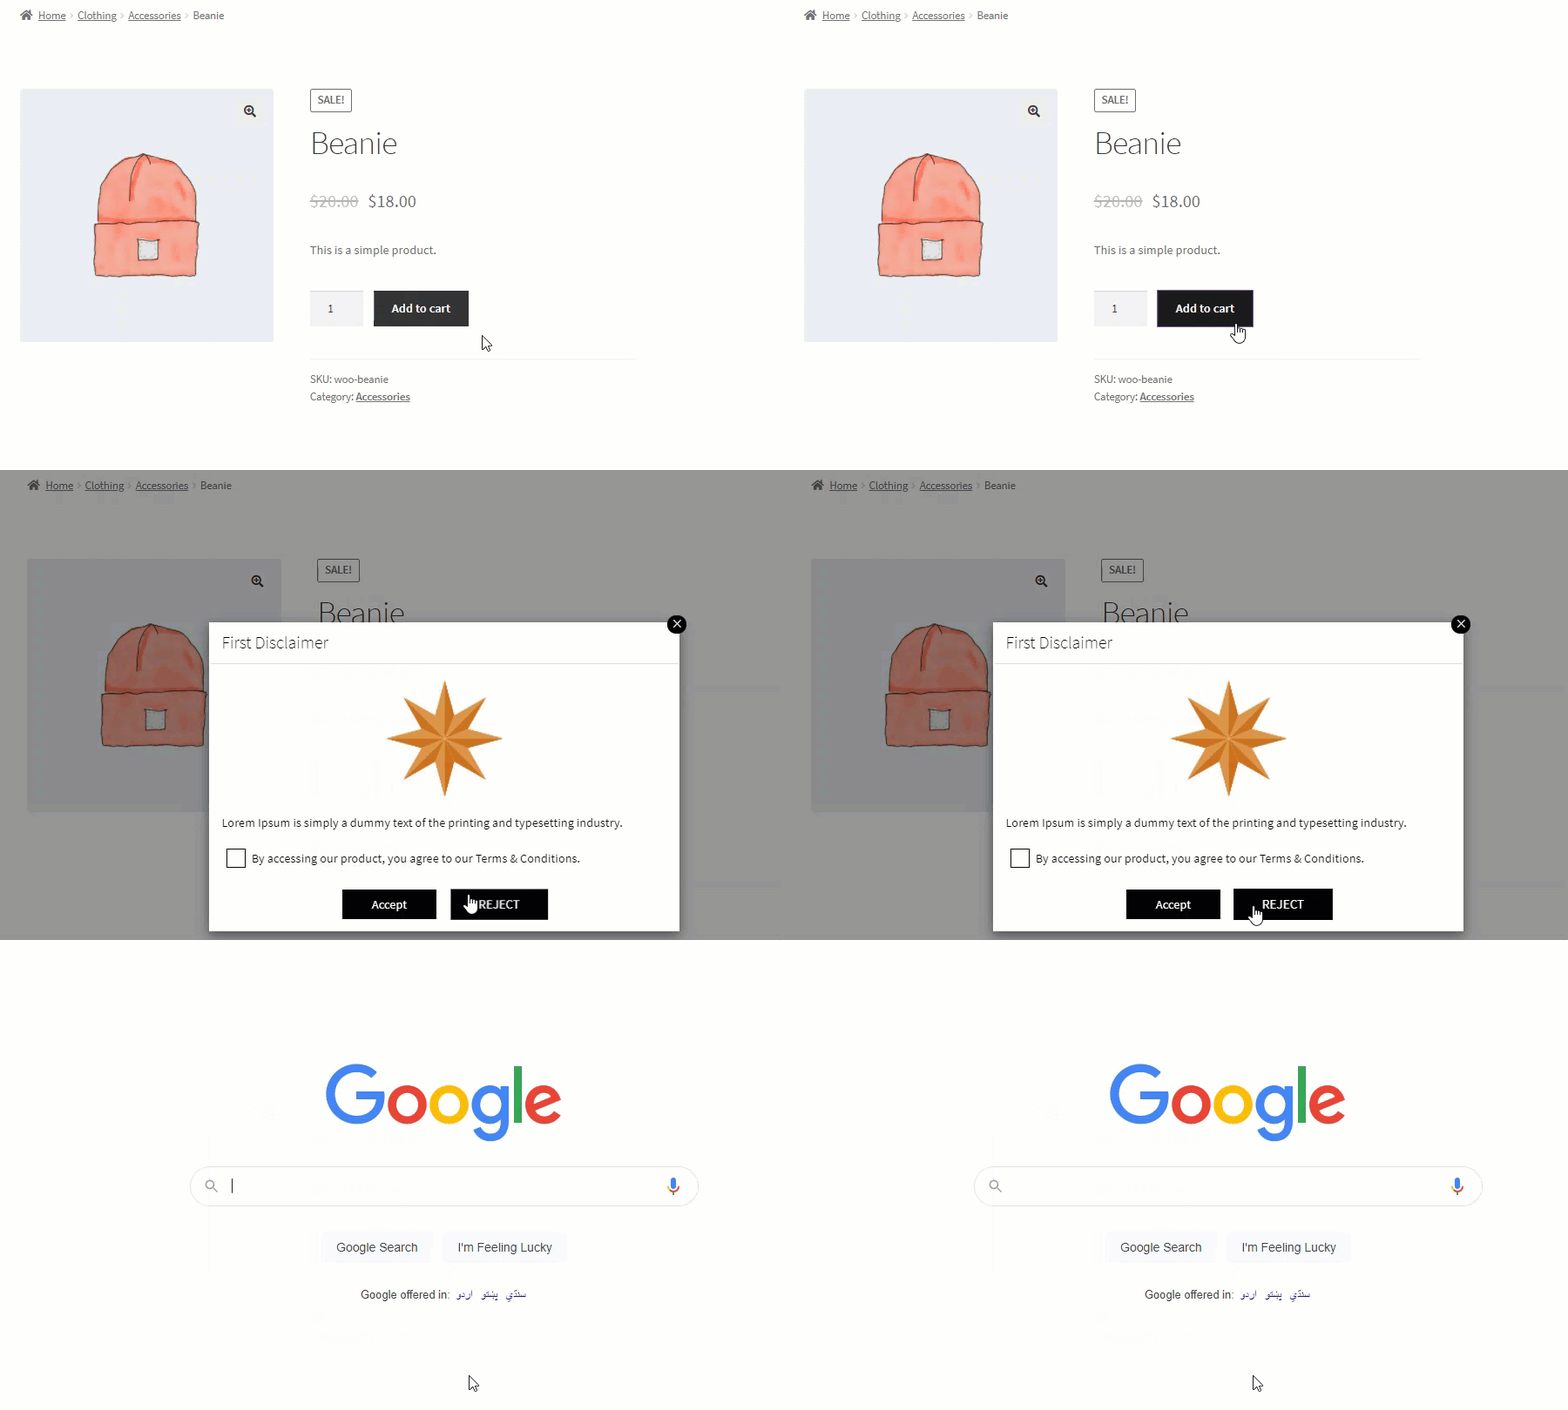
c. Accept Button Text
- Enter the message in the text box, which will be displayed on the disclaimer popup.

Front-End Impact

d. Popup style
- This option allows the Administrator to select the Popup style for the disclaimer.
- We have two Popup styles:
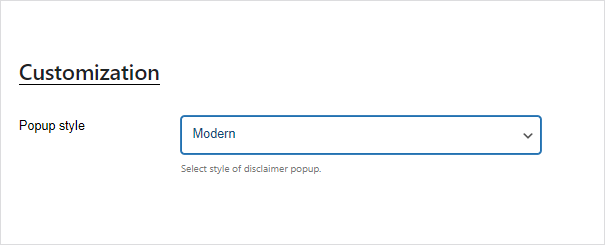
1. Modern
- When the Morden Popup style is selected, the Terms & Conditions checkbox and the Accept and Reject buttons appear in a square shape on the disclaimer.
Front-End Impact
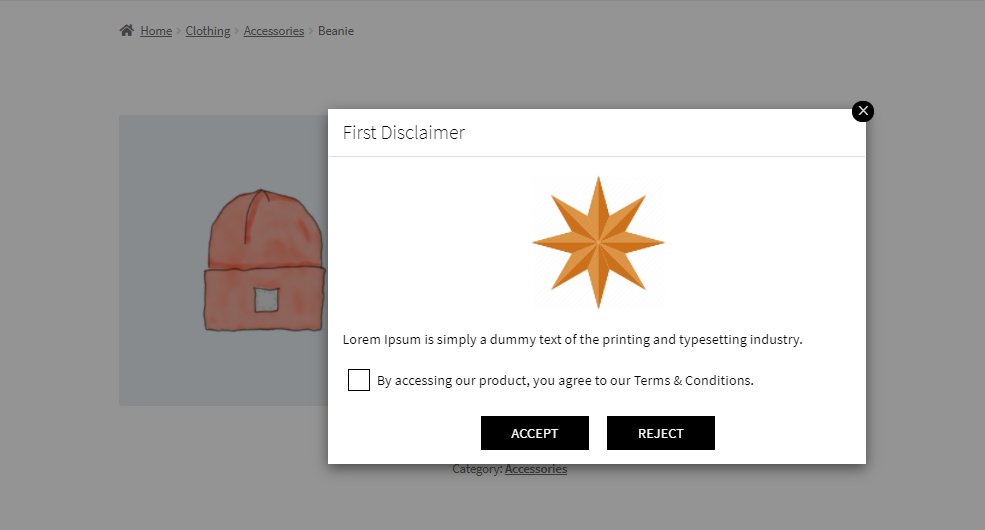
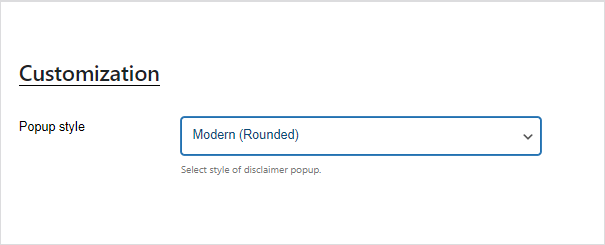
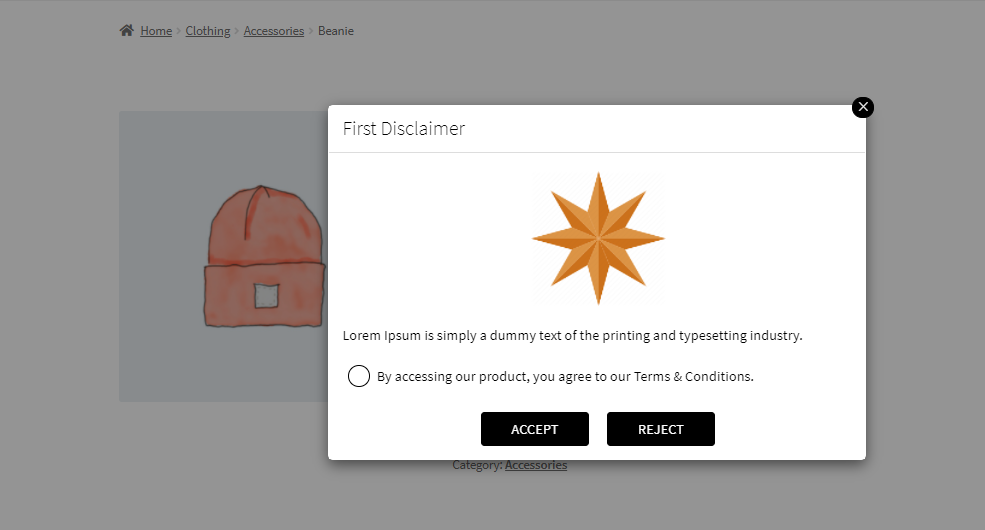
2. Modern (Rounded)
- When the Morden (Rounded) Popup style is selected, the Terms & Conditions checkbox and the Accept and Reject buttons appear in circle shape on the disclaimer.
Front-End Impact
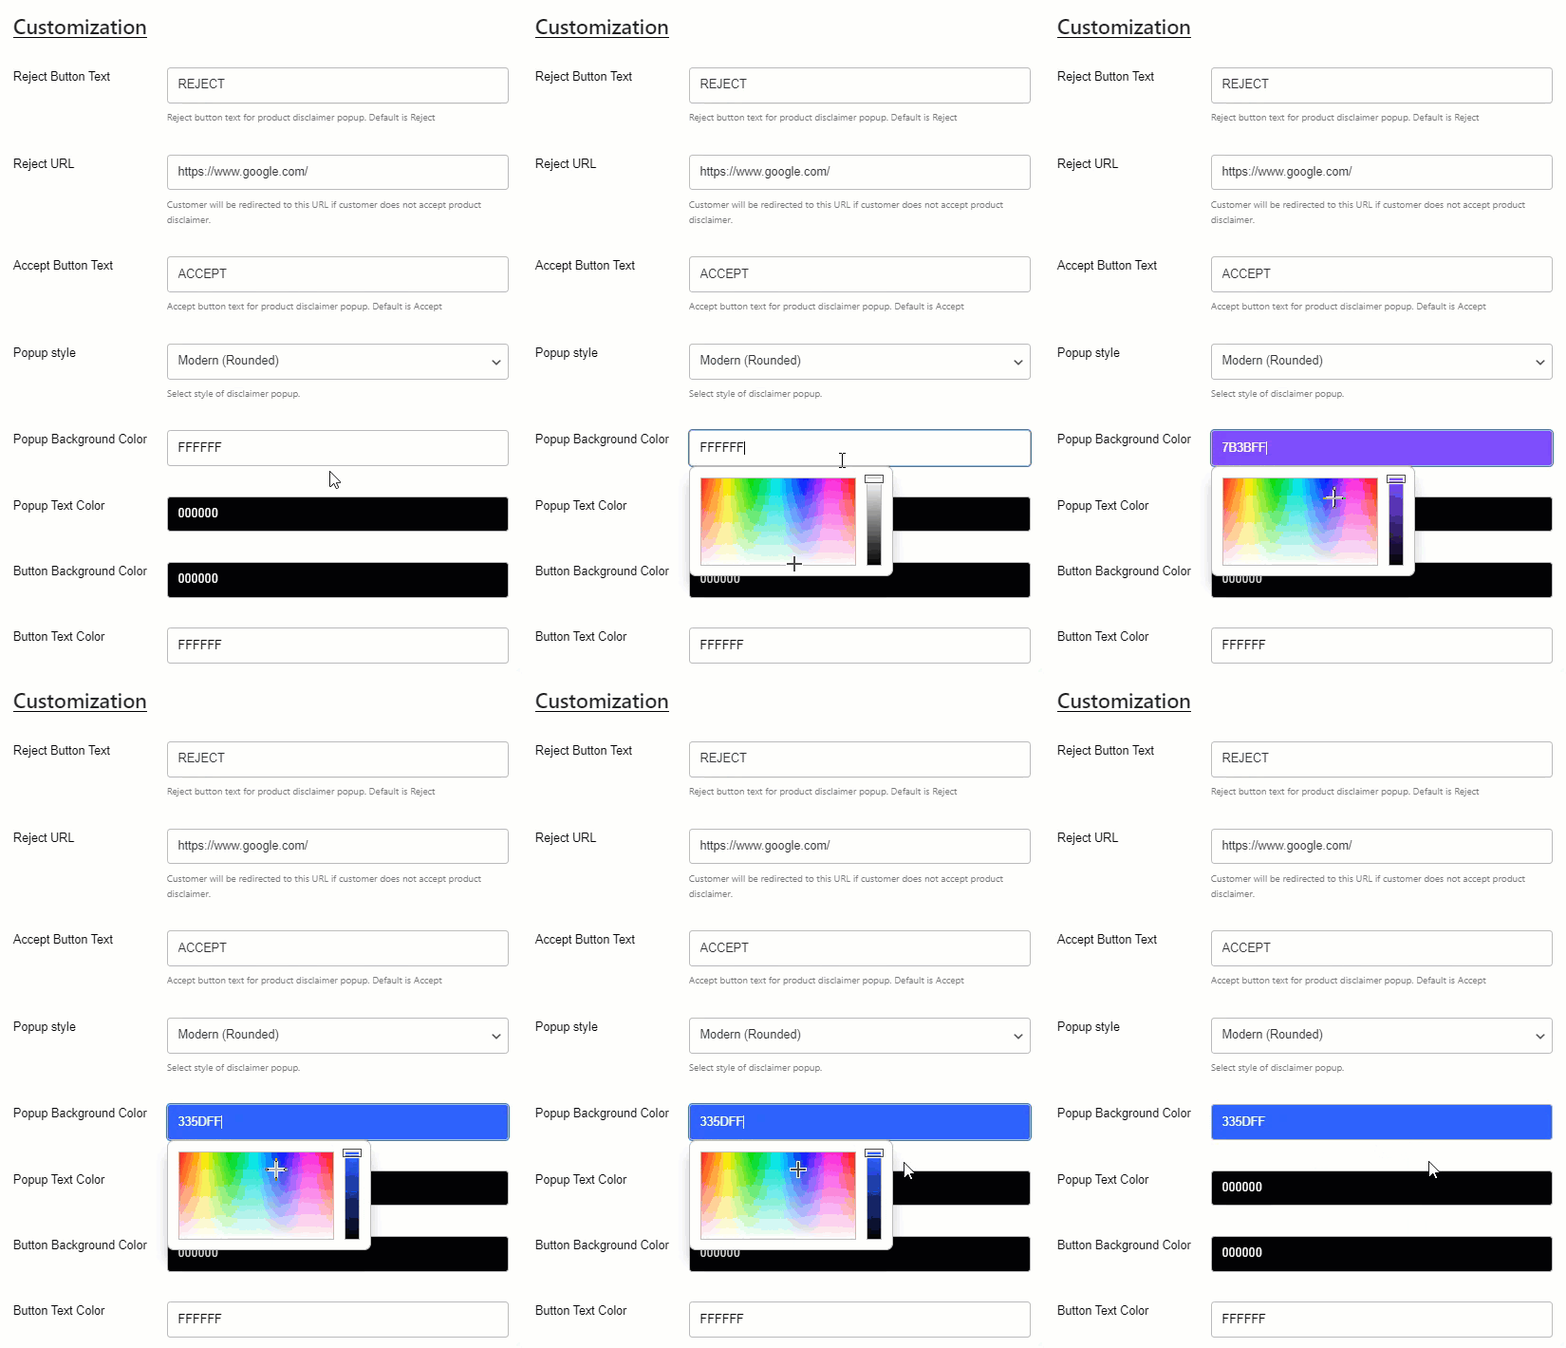
e. Popup Background Color
- This option allows the Administrator to set the Popup background color from the color grid for the disclaimer.
Front-End Impact

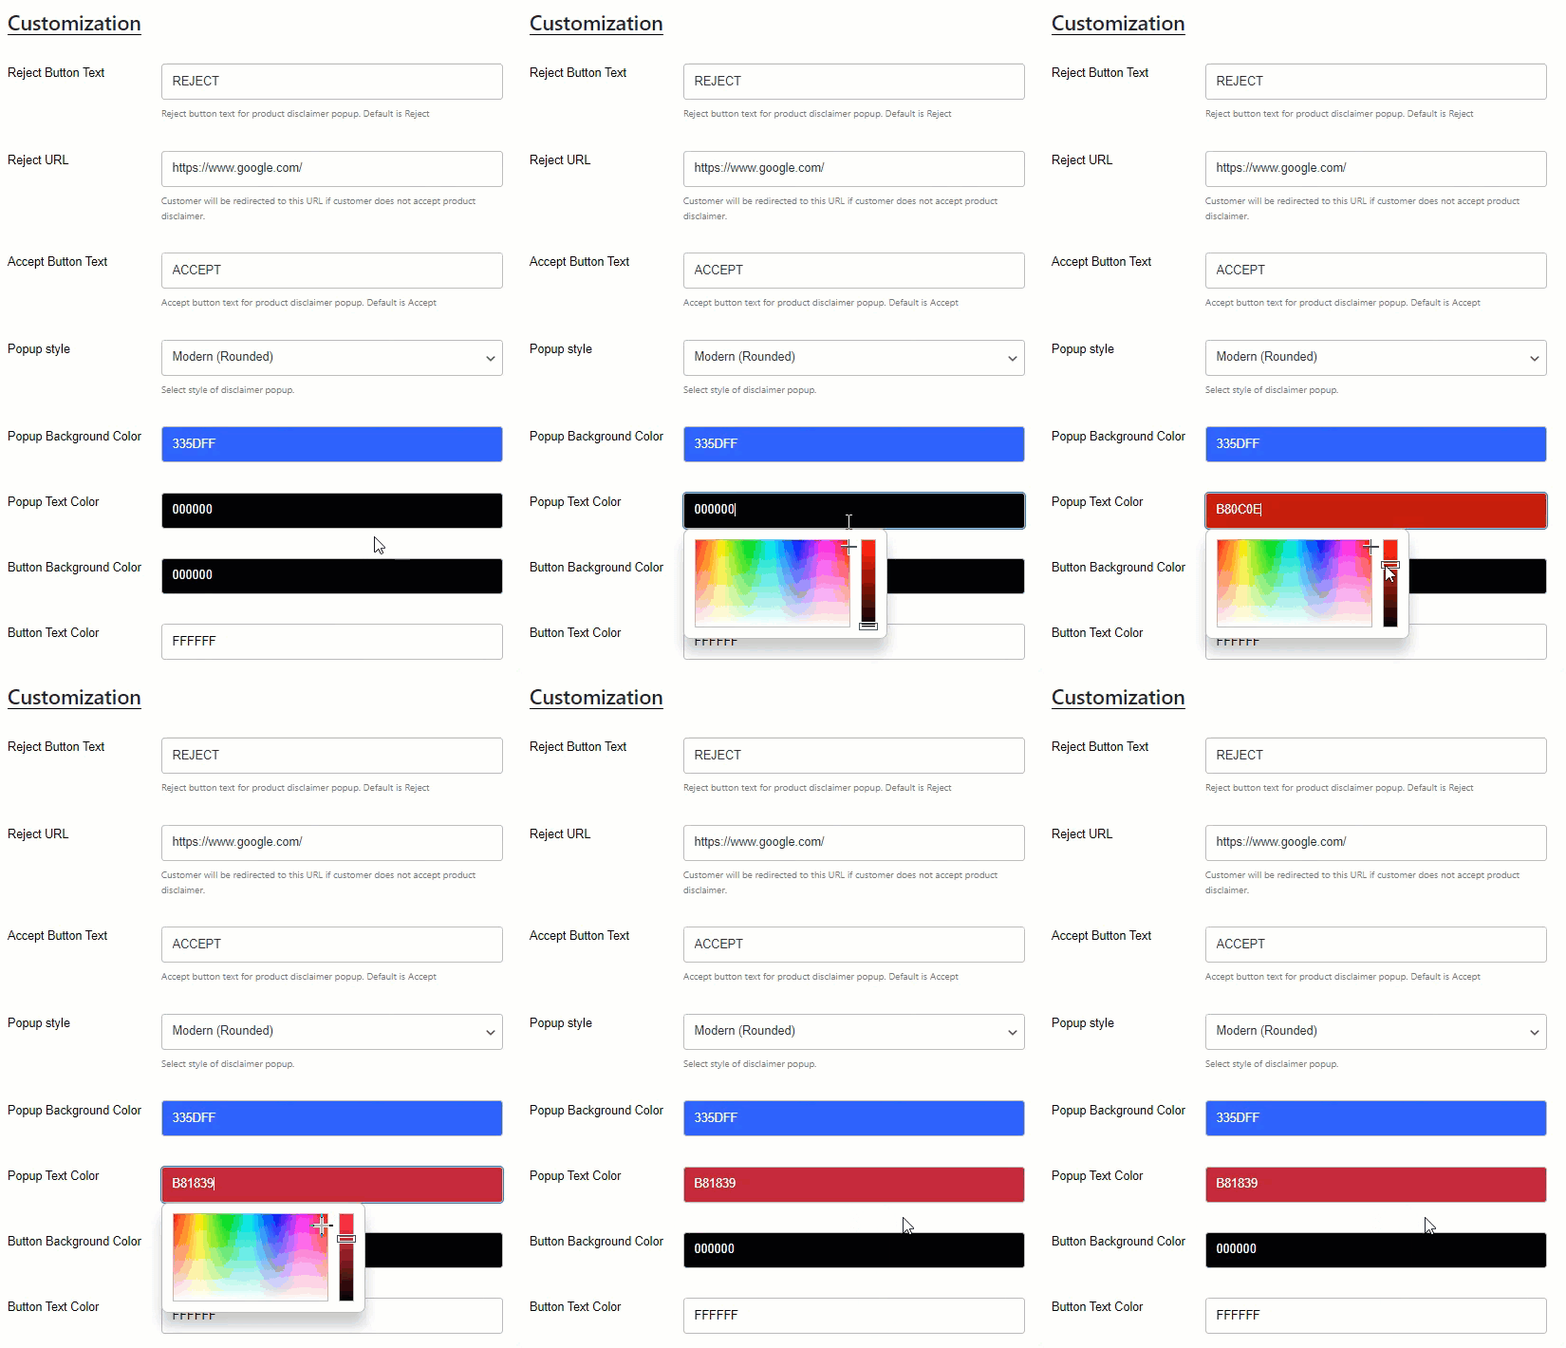
f. Popup Text Color
- This option allows the Administrator to set the Popup background color from the color grid for the disclaimer.
Front-End Impact

g. Button Background Color
- This option allows the Administrator to set the Popup background color from the color grid for the disclaimer.
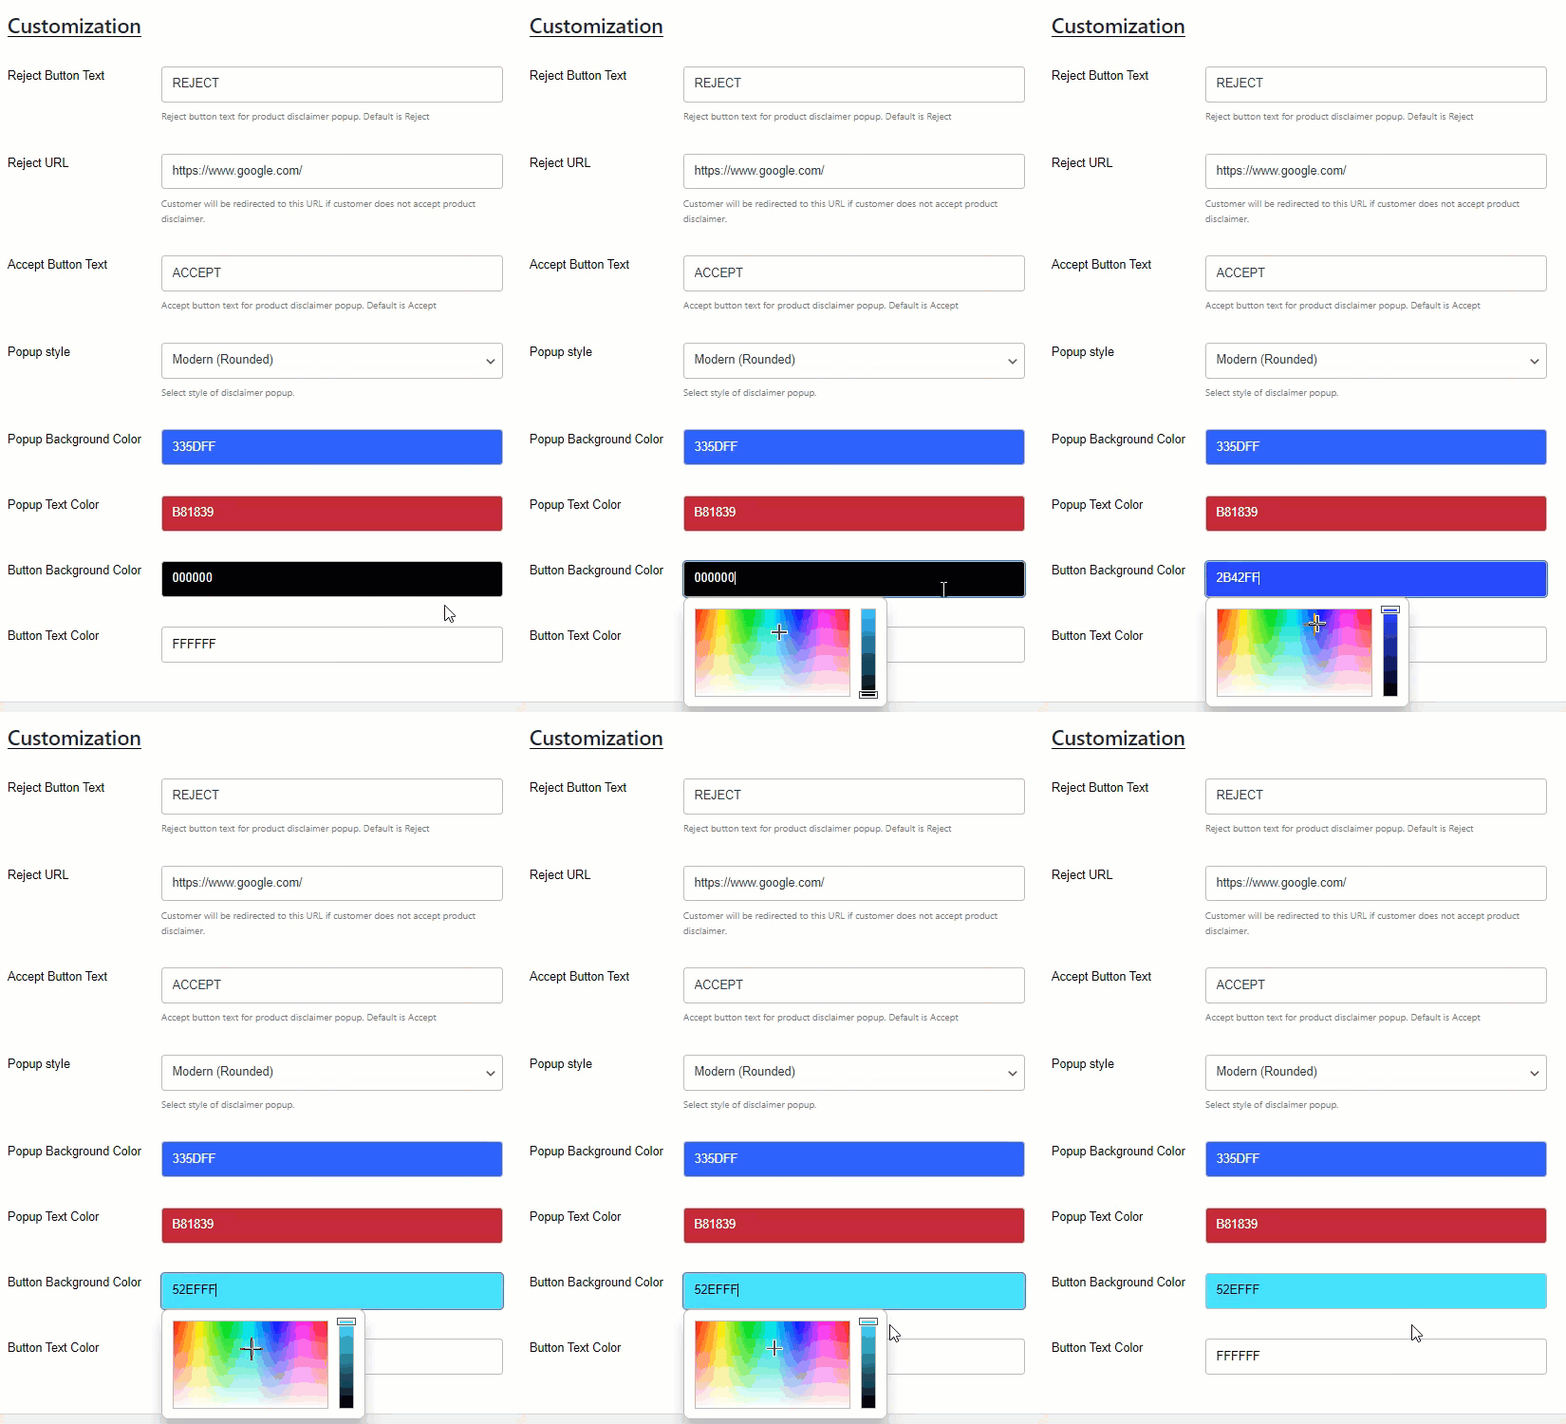
Front-End Impact

h. Button Text Color
- This option allows the Administrator to set the text color from the color grid for the Popup disclaimer.
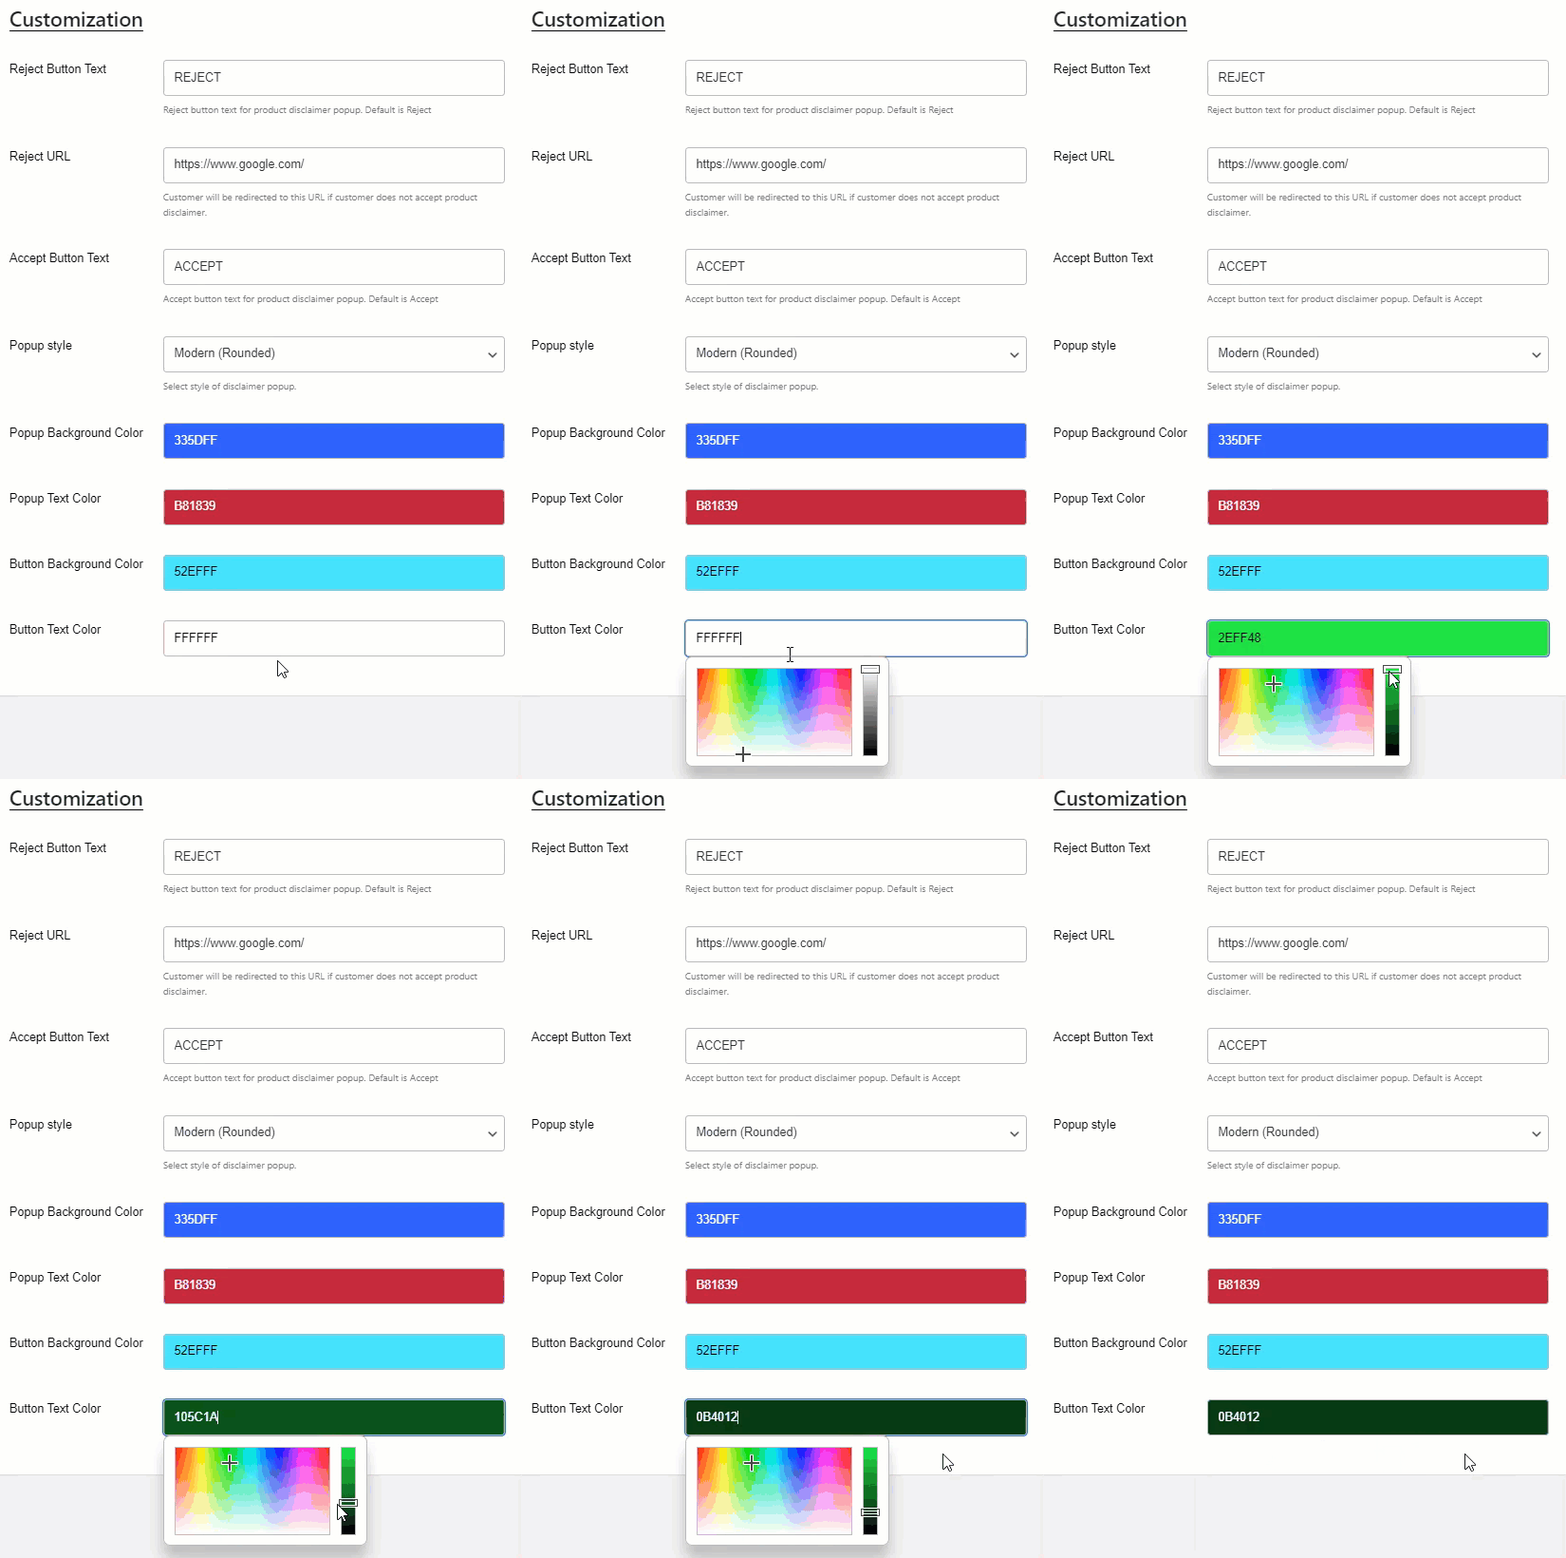
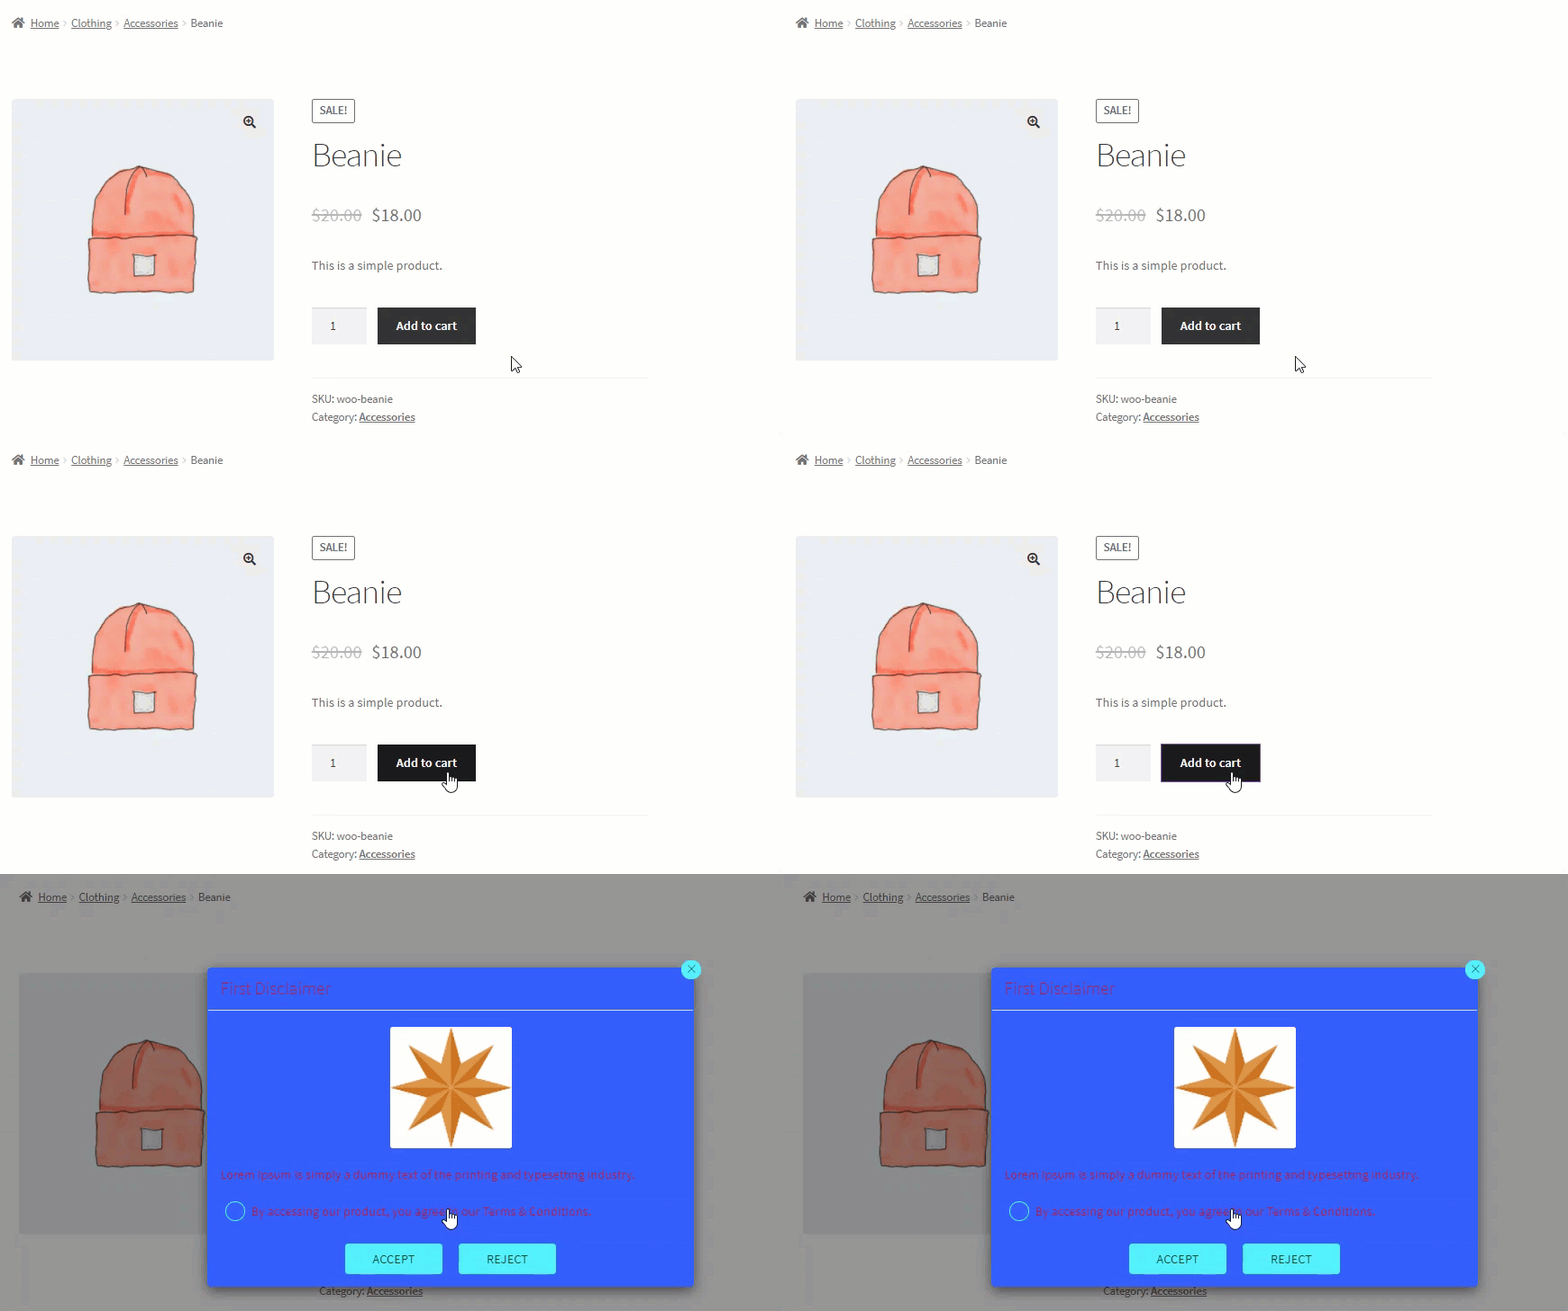
Front-End Impact
Cart/checkout
↑ Back to top- When the Cart/checkout disclaimer type is selected, then the following options will appear. It will be applied to all the User Roles, Categories, and Products.
- When Cart/checkout is selected, the disclaimer will appear on the Cart page and the Checkout page of your website.
Customization
a. Upload Thumbnail
- This option allows the Administrator to select a thumbnail image for an On Page disclaimer.

- Click on the Upload button.
- Select the thumbnail for the disclaimer.

- Once done, click on the Publish/ Update button to save your disclaimer thumbnail.
Front-End Impact

b. Disclaimer Background Color
- This option allows the Administrator to set the On Page background color from the color grid for the disclaimer.
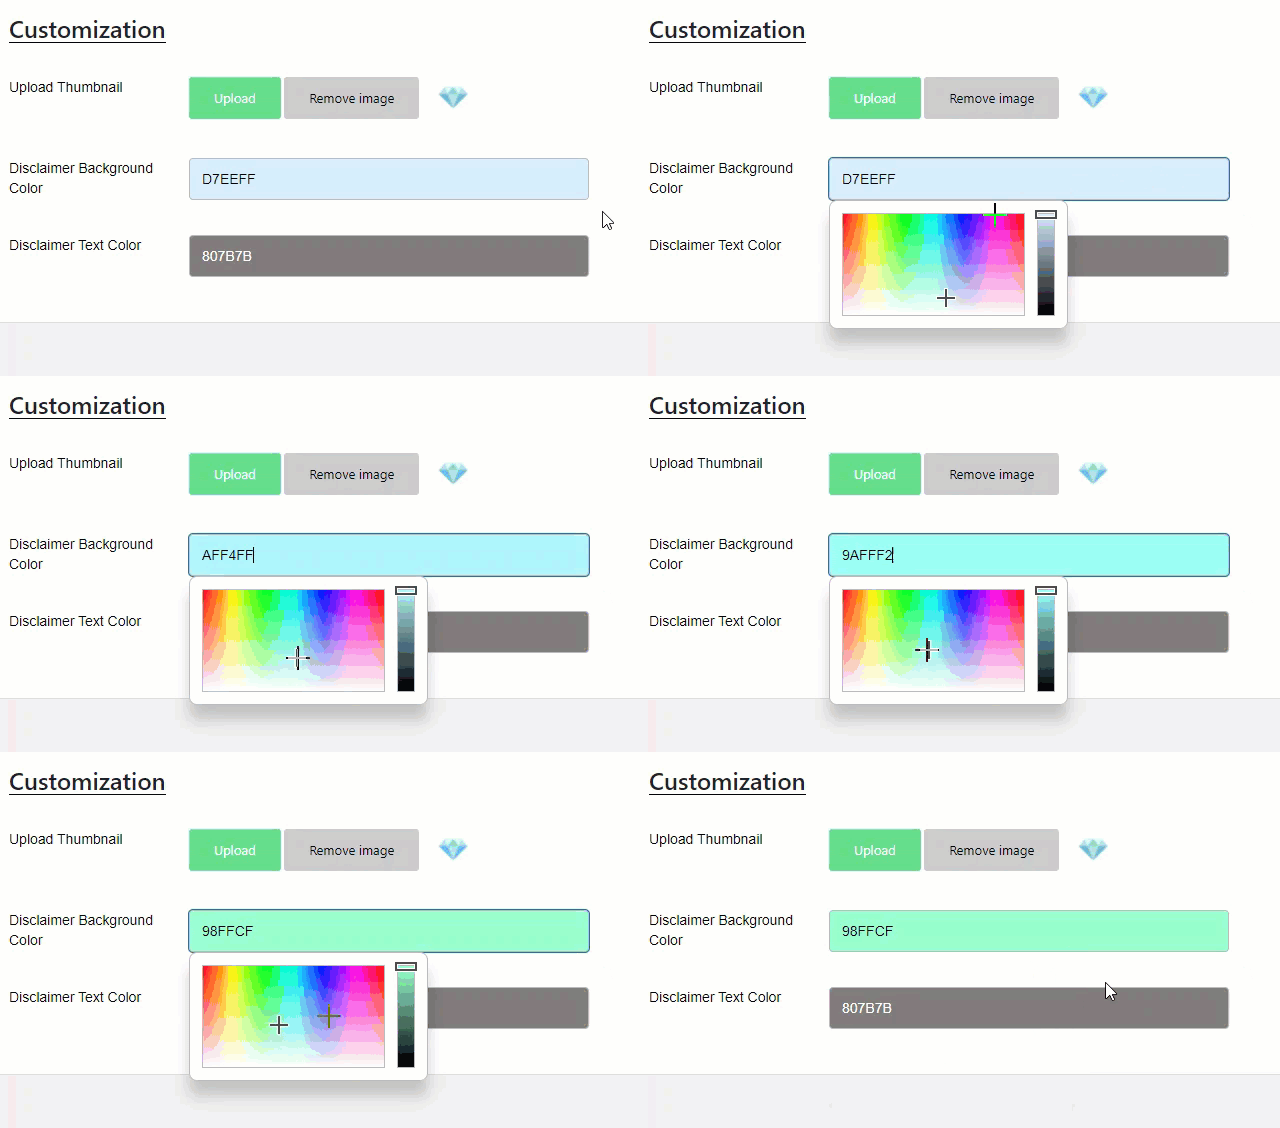
Front-End Impact

c. Disclaimer Text Color
- This option allows the Administrator to set the text color from the color grid for the Popup disclaimer.
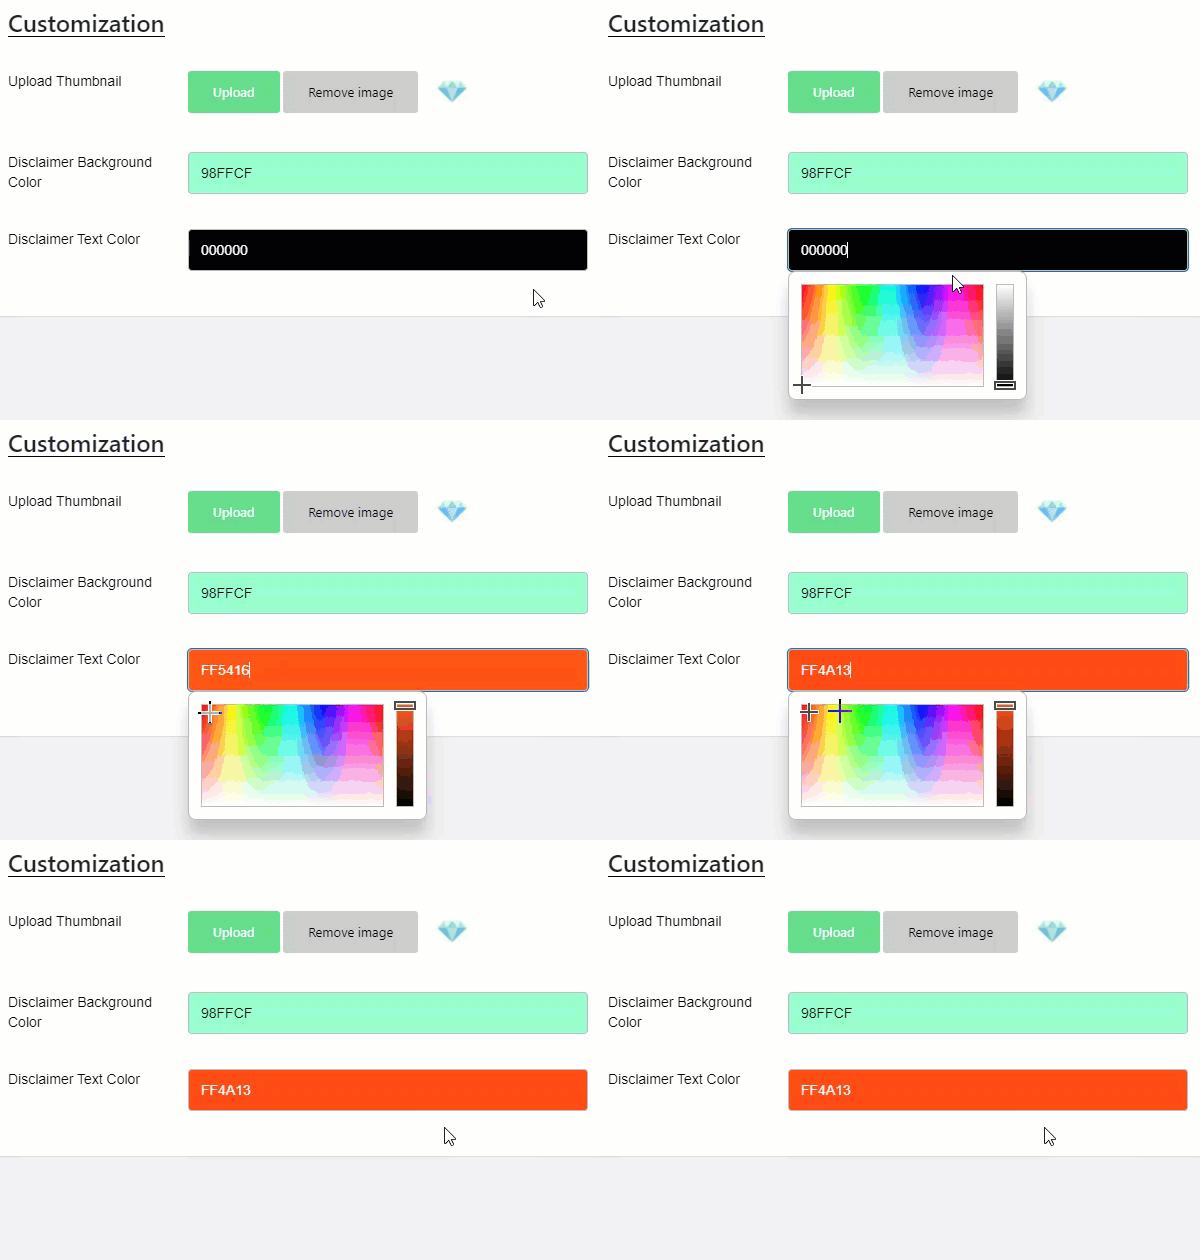
Front-End Impact

Disclaimer Priority
↑ Back to top- Navigate to the WordPress Admin Dashboard → WCPD → All Disclaimer.

- Now you’re on the WC Product Disclaimer page. All the disclaimers are present on this page.
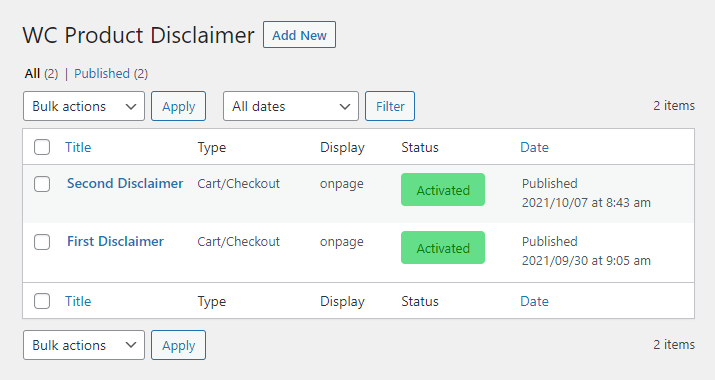
- We have two disclaimers here having the same configuration.
- Hover over each disclaimer and click on the Edit button.
- Now you’re on the Edit Disclaimer page.
- On this page, we have a Disclaimer Priority section.
Case 1: If the Disclaimer Priority of both disclaimers is equal
Back-End Configuration
- Set the Disclaimer Priority of both the disclaimers equal; for First Disclaimer and the Second Disclaimer, the disclaimer priority will be 1.
- Click on the Update button on the respective disclaimer Edit Disclaimer page of both disclaimers.
First Disclaimer

Second Disclaimer

Front-End Impact
- In this case, when both the disclaimers have the same Disclaimer Priority, the disclaimer created initially will reflect its configuration on the website.

Case 2: If the Disclaimer Priority of both disclaimers is different
Back-End Configuration
- Set the Disclaimer Priority of both the disclaimers differently; for First Disclaimer, the disclaimer priority will be 1 and, for Second Disclaimer, the Disclaimer Priority will be 0.
- Click on the Update button on the respective disclaimer Edit Disclaimer page of both disclaimers.
First Disclaimer
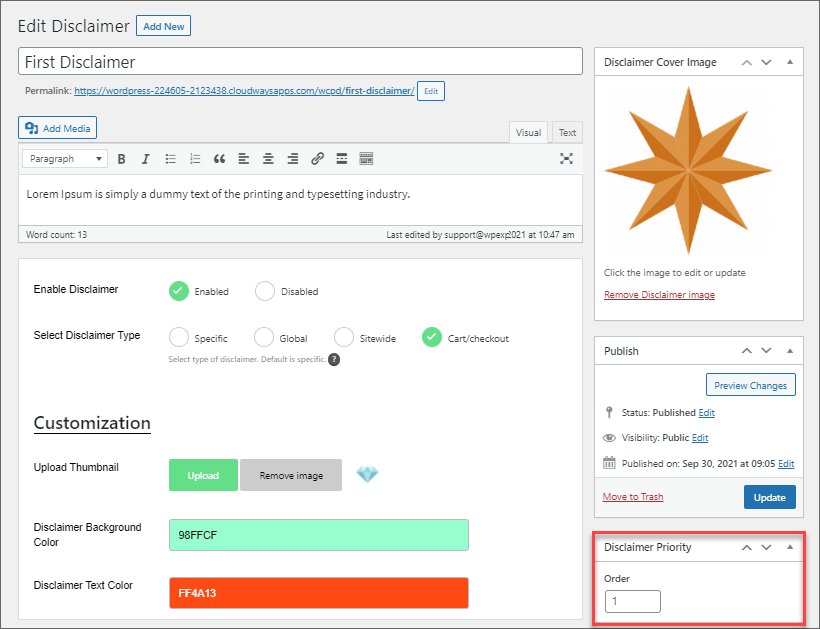
Second Disclaimer

Front-End Impact
- In this case, the disclaimers in which Disclaimer Priority is set to 0 will reflect its configuration on the website.

WCPD General Settings
↑ Back to top- Navigate to the WordPress Admin Dashboard → WCPD → Settings.

- Now you’re on the WCPD General Settings page.
- There are two tabs on the WCPD General Settings page.
a. Global
General (Default)
1. Cookie Activation
- This option allows the Administrator to Enable and Disable the Cookie Activation.
- When enabled, a One-time disclaimer message will be displayed when the Add to Cart button is clicked against any product until the next cookie expires.

2. Cookie Duration
- Cookie Duration will show how much time the disclaimer message should not appear when clicking the Add to Cart against any product.
- Cookie duration can be set to the following:
- Session
- 1 Day
- 1 Week
- 1 Month
- Forever

3. Log Disclaimer Activity
- This option allows the Administrator to Enable and Disable the Log Disclaimer Activity.
- When enabled, logs of the disclaimers will be created.
- Click on the Save Changes button.

Front-End Impact
NOTE: This functionality will only work when the Global disclaimer type is selected.
BEFORE
- When the Cookie Activation is disabled, and the Cookie Duration is not configured.
- The disclaimer would appear whenever the user clicks on the Add to Cart button against any product.
- Even when the user accepts the disclaimer and clicks on the Add to Cart button against that product again, the disclaimer will still pop up.

AFTER
- When the Cookie Activation is enabled and the Cookie Duration is configured.
- The disclaimer would appear once when the user clicks on the Add to Cart button against any product.
- Even when the user accepts the disclaimer and clicks on the Add to Cart button against that product again, the disclaimer will not appear again.
- The disclaimer would appear again according to the Cookie Duration configured.

- When the Log Disclaimer Activity is enabled, the logs will be generated for every disclaimer.
- Navigate to the WordPress Admin Dashboard → WCPD → Logs.

- Now you’re on the WCPD Logs page.
- All the logs are saved on this page with all the details.

b. Sitewide
Sitewide
1. Site Cookie Activation
- This option allows the Administrator to Enable and Disable the Site Cookie Activation.
- When enabled, a One-time disclaimer message will be displayed when the user lands on the website until the next cookie expires.

2. Cookie Duration
- Cookie Duration will show how much time the disclaimer message should not appear when clicking the Add to Cart against any product.
- Cookie duration can be set to the following:
- Session
- 1 Day
- 1 Week
- 1 Month
- Forever
- Click on the Save Changes button.

Front-End Impact
NOTE: This functionality will only work when the Sitewide disclaimer type is selected.
BEFORE
- When the Site Cookie Activation is disabled and the Site Cookie Duration is not configured.
- The disclaimer will appear whenever the user lands on a new page of your website.

AFTER
- When the Site Cookie Activation is enabled and the Site Cookie Duration is configured.
- The disclaimer will appear one time whenever the user lands on the website.

Compatibility
↑ Back to topInstallation of WooCommerce Subscription
↑ Back to top- Download and Install the WooCommerce Subscriptions.
- Follow the WooCommerce Subscriptions documentation to set up and configure the plugin.
Simple Subscription Product
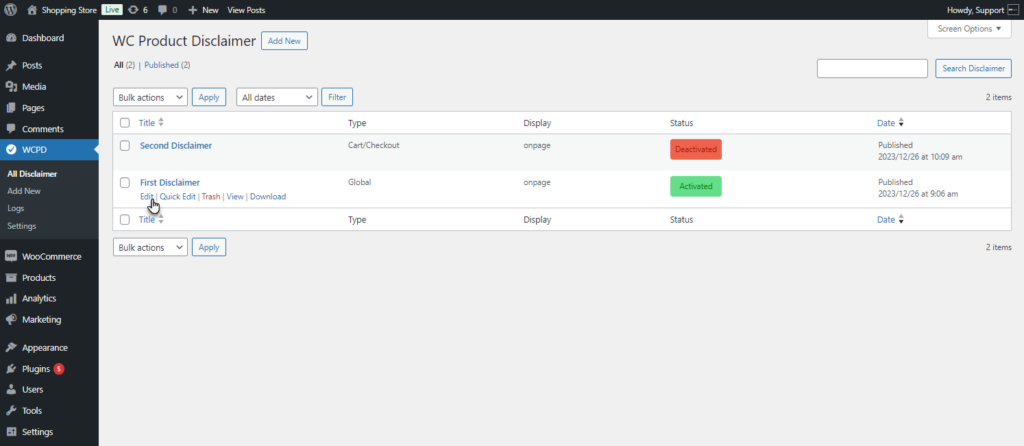
↑ Back to top- Go to the WordPress Admin Dashboard> Products > All Products > Simple Subscription Product.
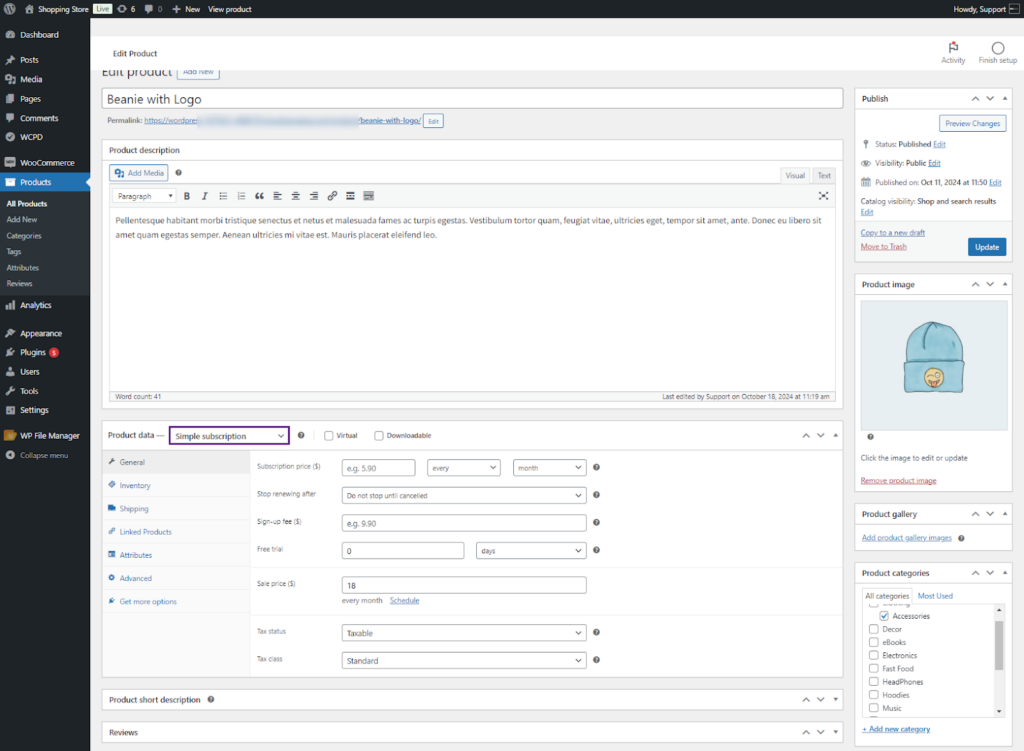
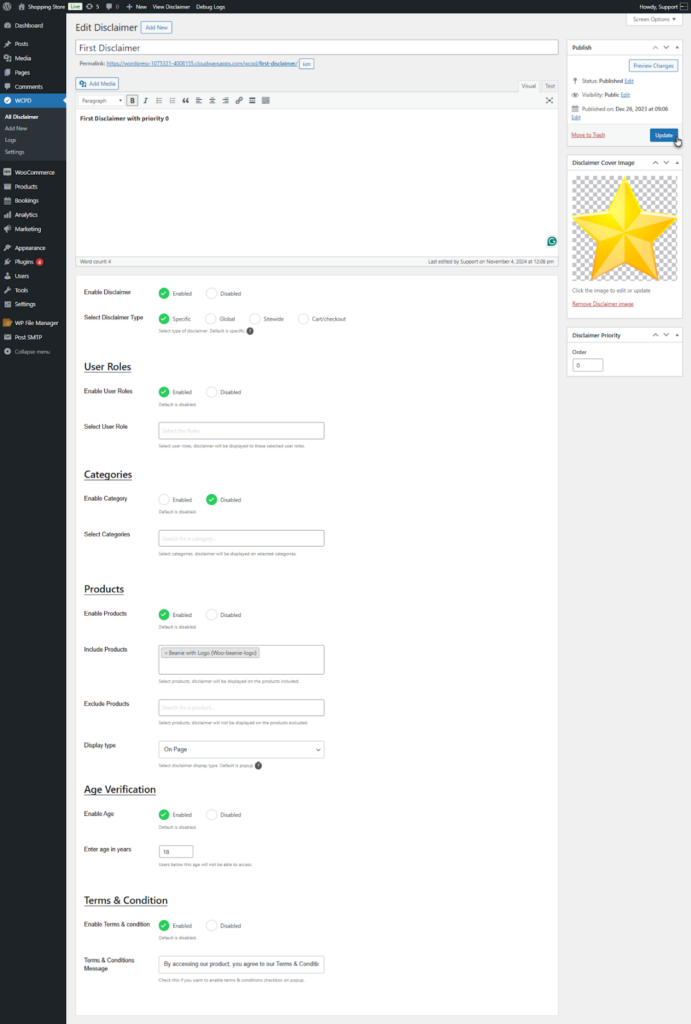
- After selecting the Simple Subscription Product, Go to the WordPress Admin Dashboard > WCPD > All Disclaimer > Edit Disclaimer.
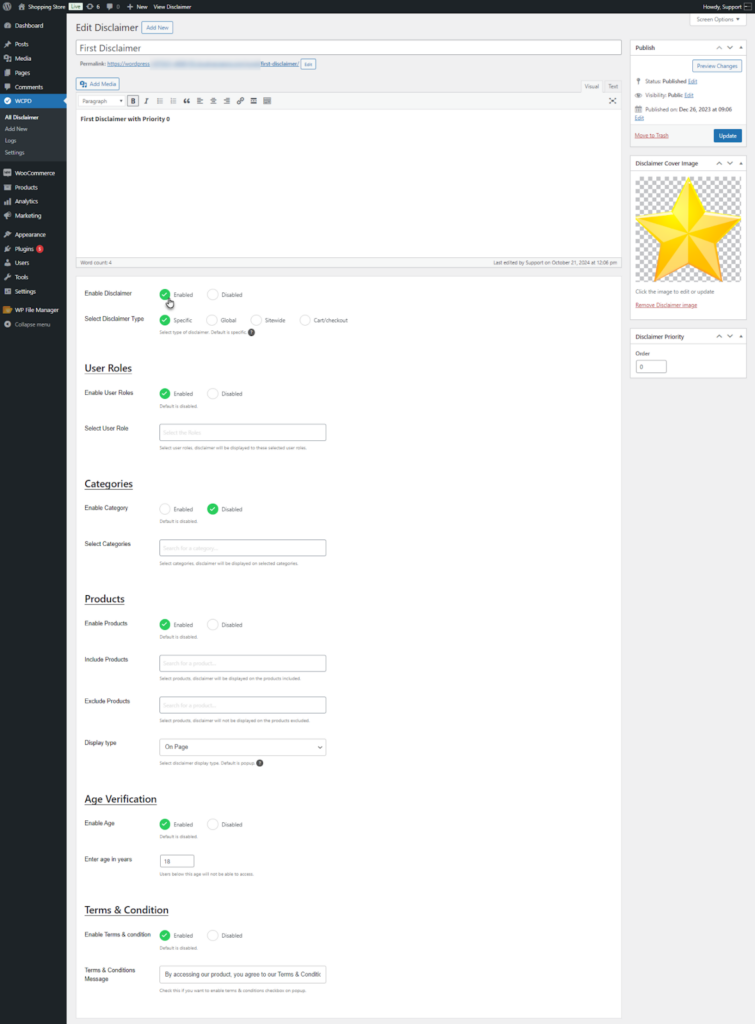
- Edit Disclaimer screen will appear. Enable the Disclaimer.
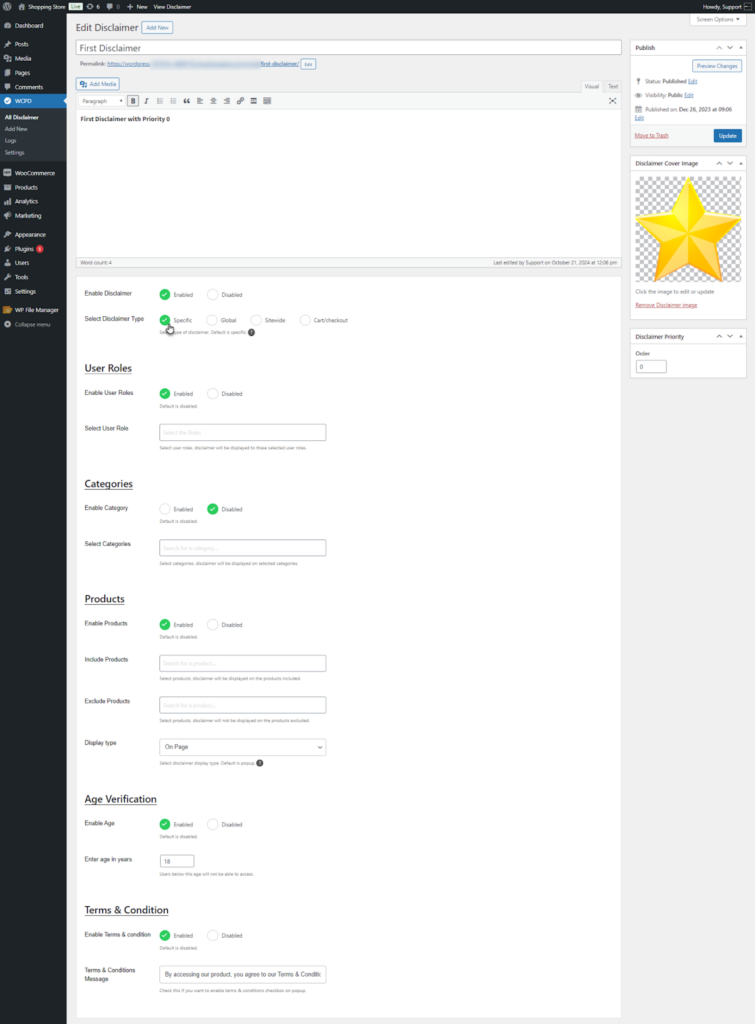
- Select the Disclaimer Type.
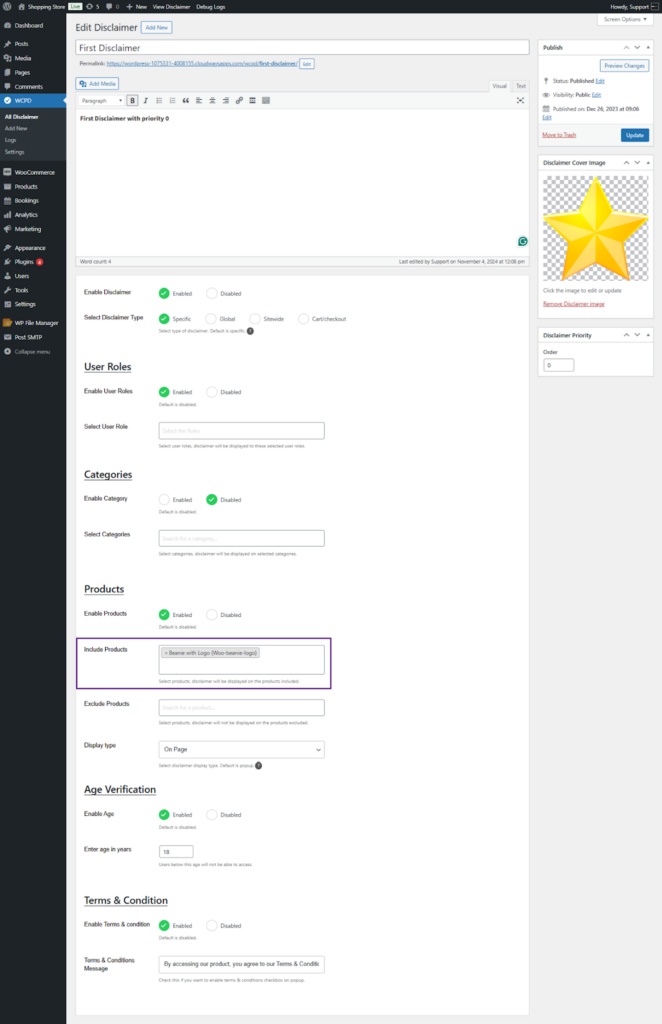
- Navigate and Enable the Products option. Select the Simple Subscription Product.
- Click on the Update button to save the Changes.
Front End Impact
Specific
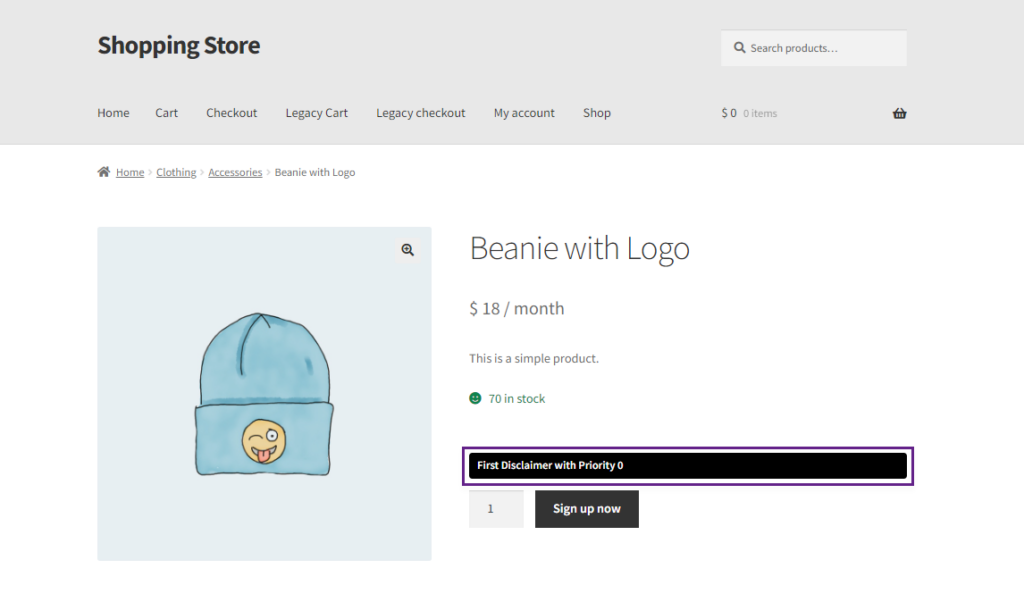
- Login to your account.
- Go to the Single Subscription product page.
- The Product Disclaimer will appear.
Global
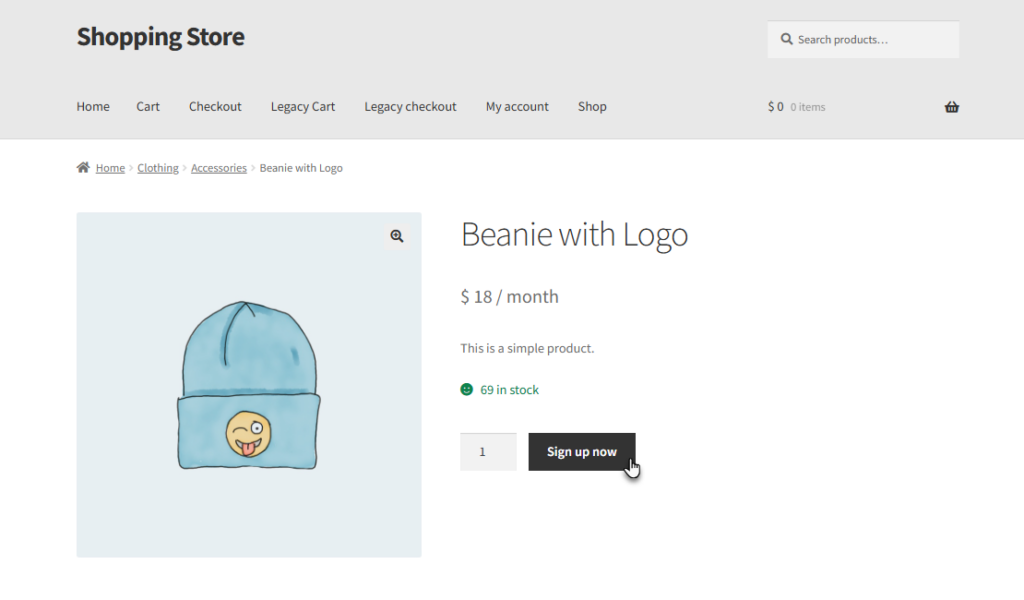
- Go to the Simple Subscription Single Product page when the Disclaimer Type is set to Global.
- Click on the Sign Up Now button.
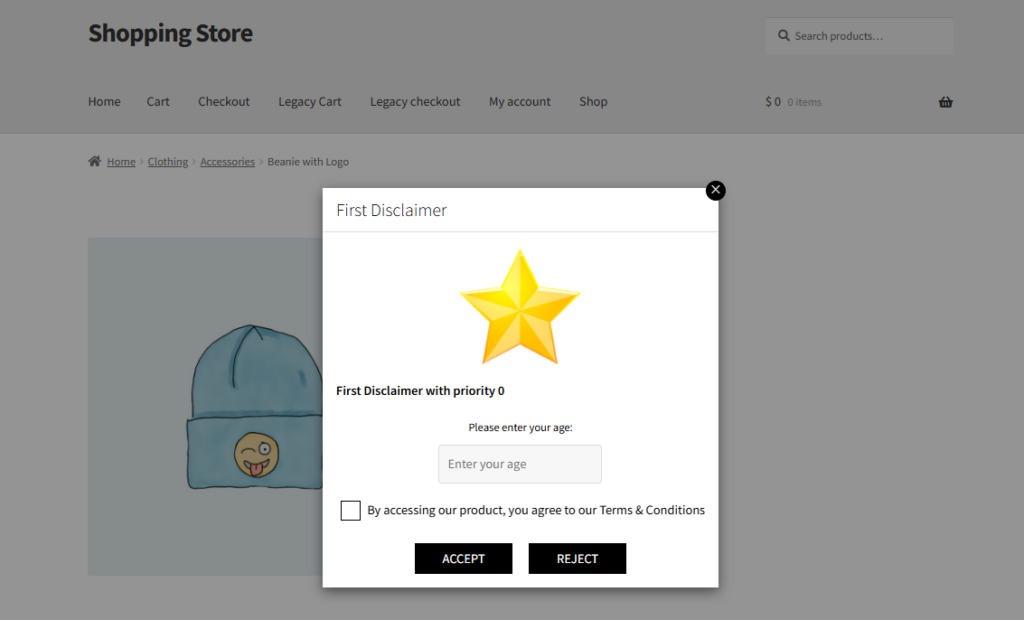
- The Disclaimer will appear.
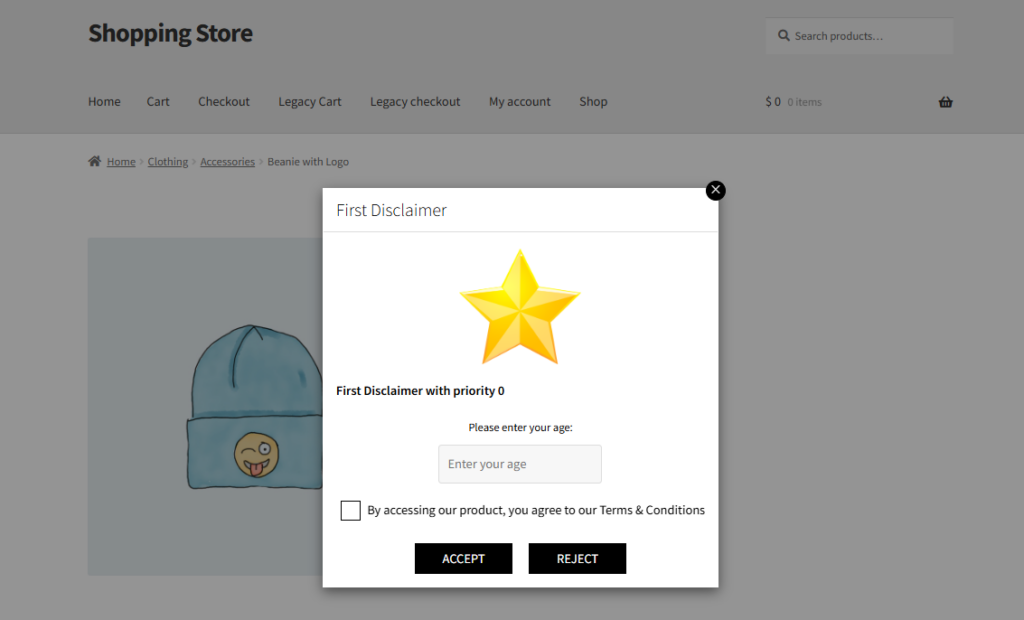
Sitewide
- Go to the Simple Subscription Single Product page when the Disclaimer Type is set to Sitewide.
- The Disclaimer will appear on the page.
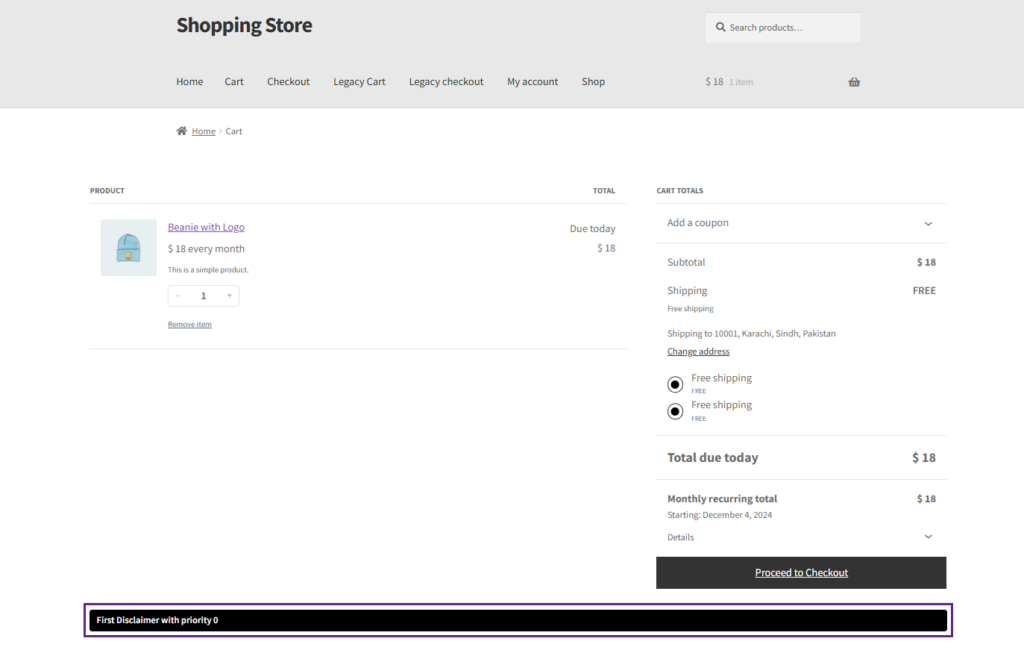
Cart/Checkout
- Add a Simple Subscription product when the Disclaimer Type is set to Cart/Checkout.
- The Disclaimer will appear on the Cart page.
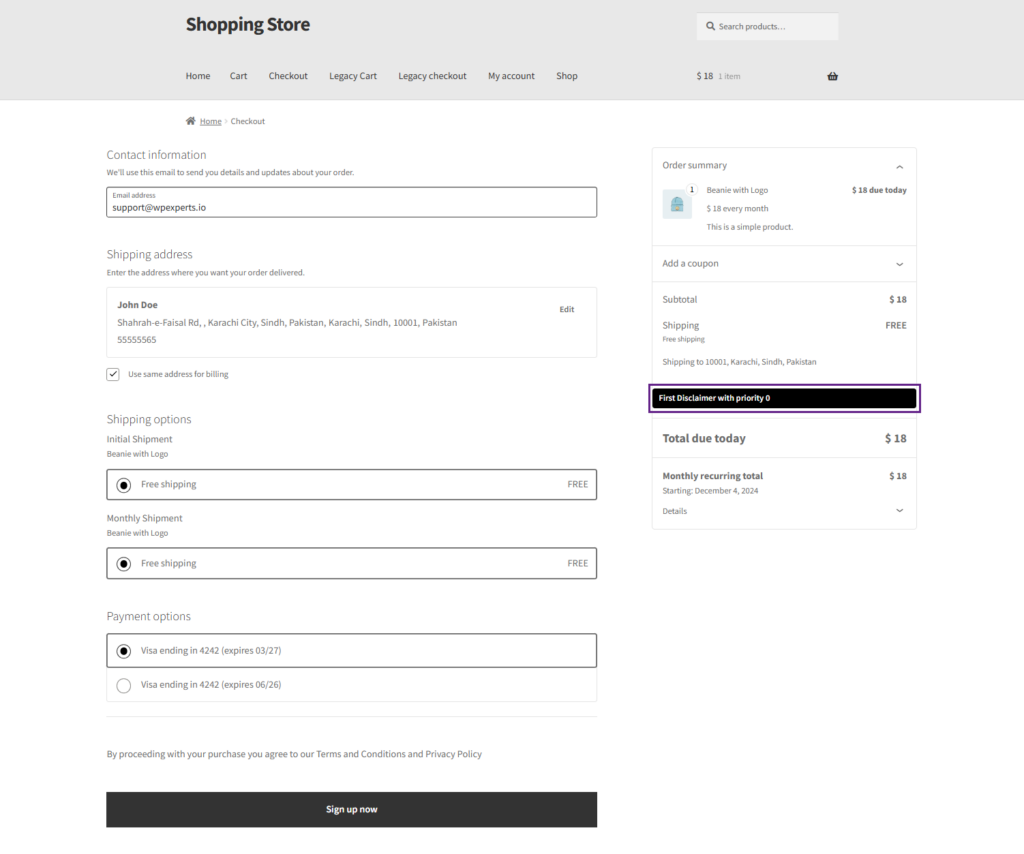
- The Disclaimer will also appear on the Checkout page.
Variable Subscription Product
↑ Back to top- Go to the WordPress Admin Dashboard> Products > All Products > Variable Subscription Product.
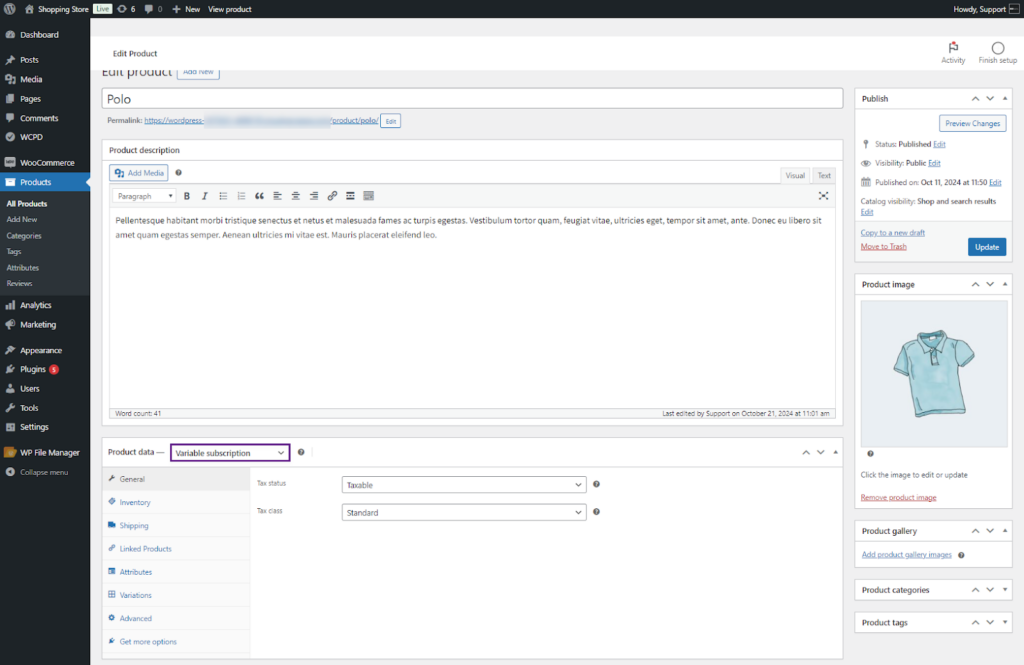
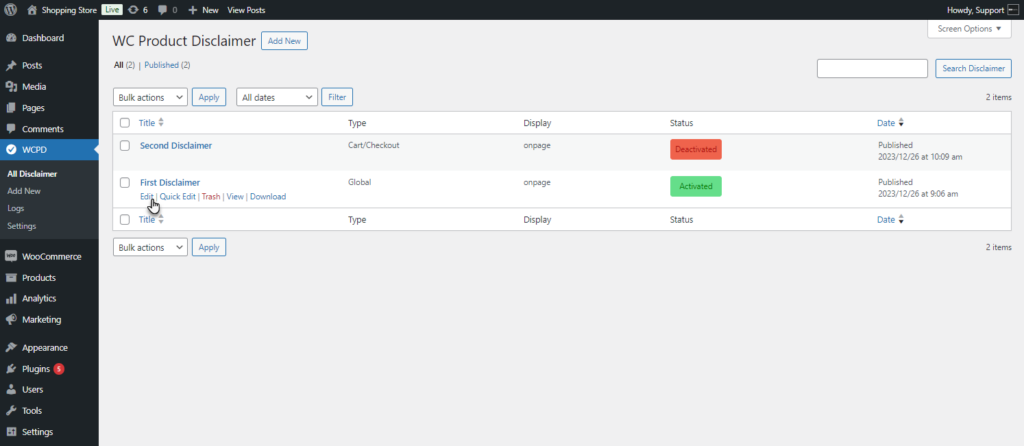
- After selecting the Variable Subscription Product, Go to the WordPress Admin Dashboard > WCPD > All Disclaimer > Edit Disclaimer.
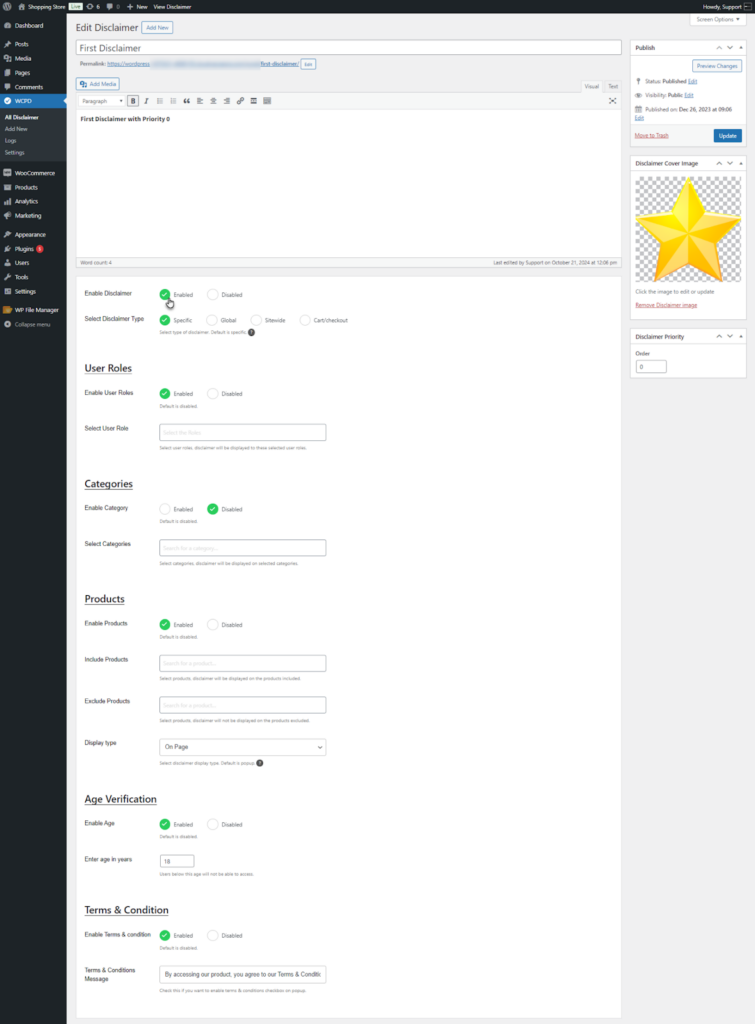
- Edit Disclaimer screen will appear. Enable the Disclaimer.
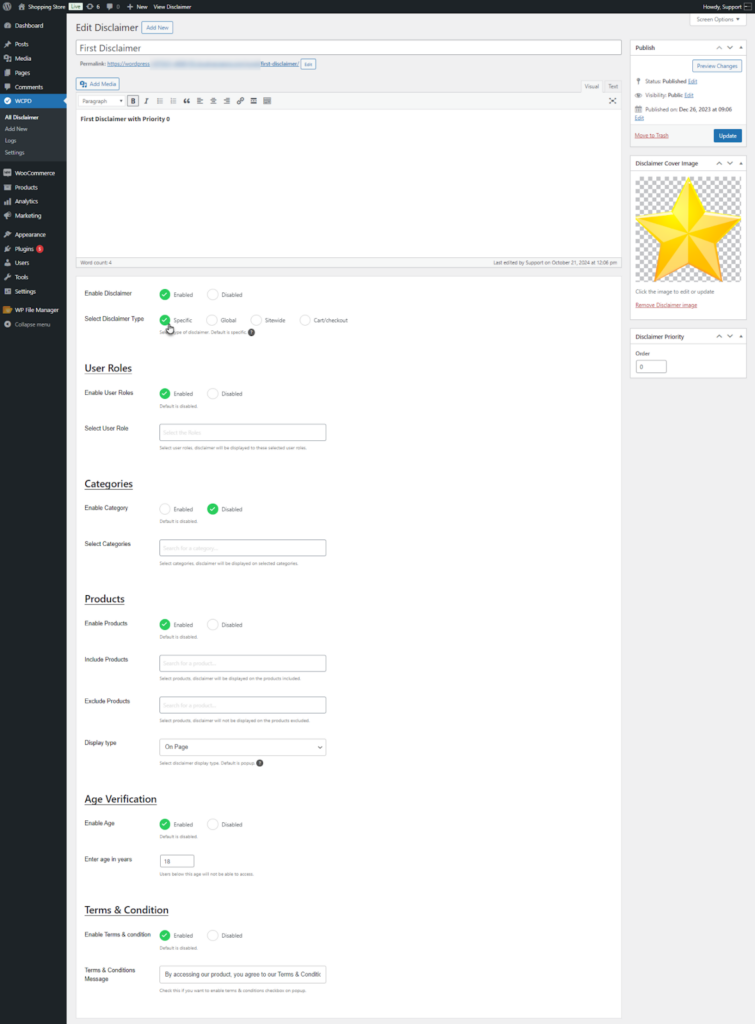
- Select the Disclaimer Type.
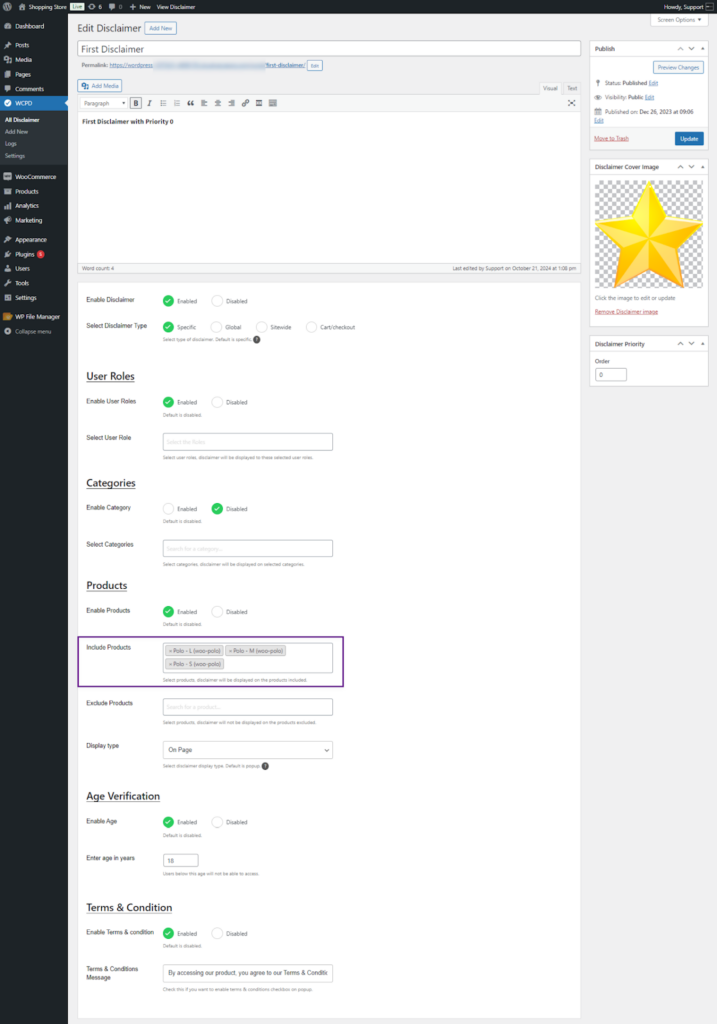
- Navigate and Enable the Products option. Select the variations of the Variable Subscription Product.
- Click on the Update button to Save the Changes.
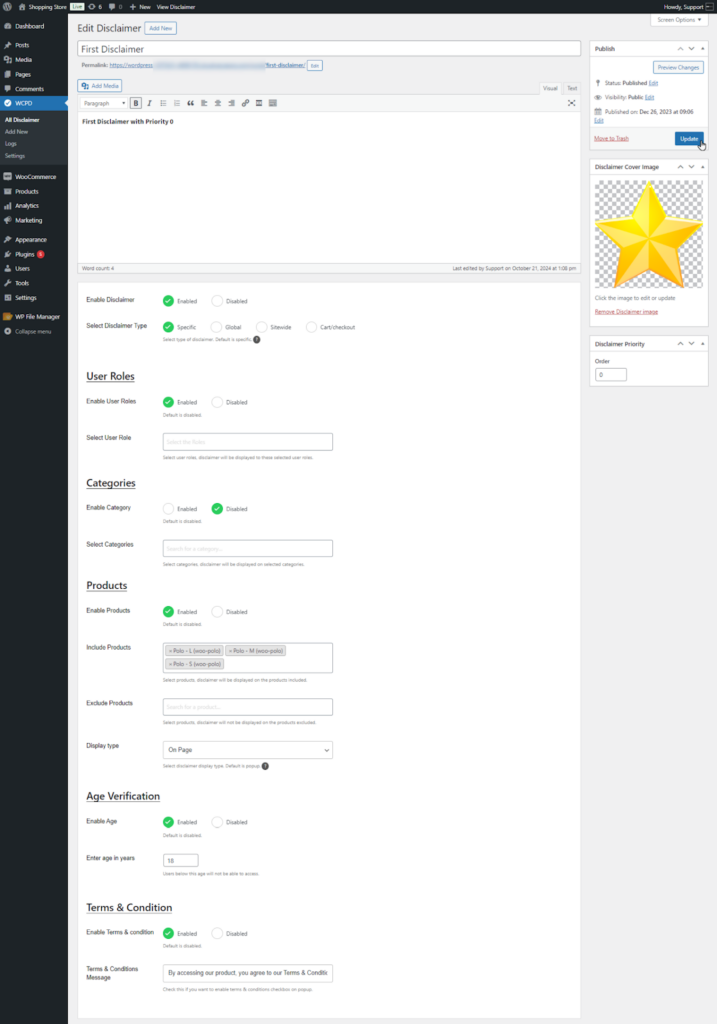
Front End Impact
Specific
- Login to your account.
- Go to the Variable Subscription product page.
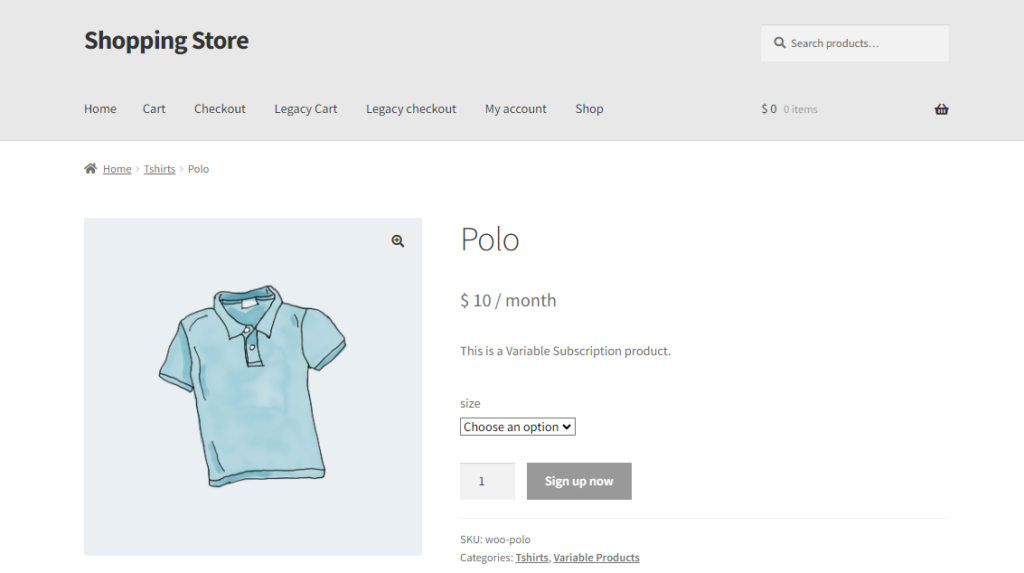
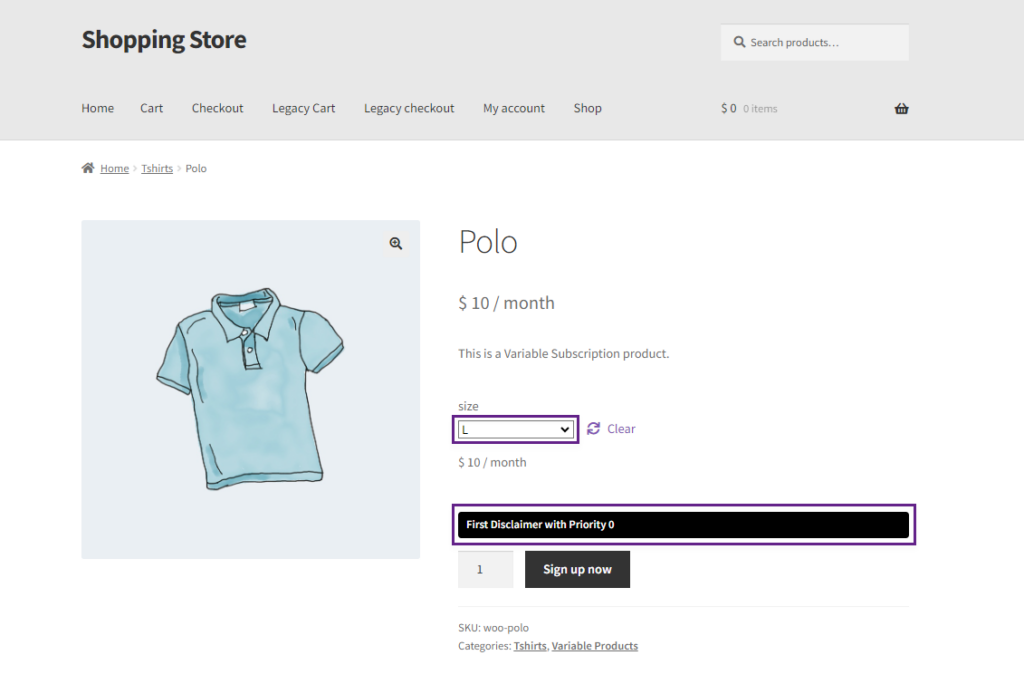
- Select the variation of the Variable Subscription product. The Product Disclaimer will appear.
Global
- Go to the Variable Subscription Single Product page when the Disclaimer Type is set to Global.
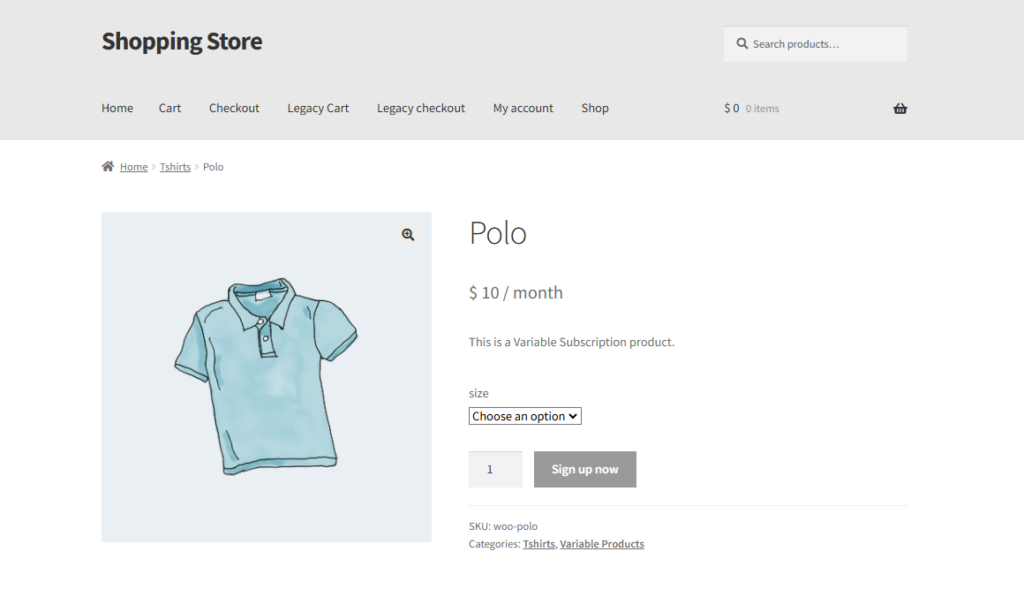
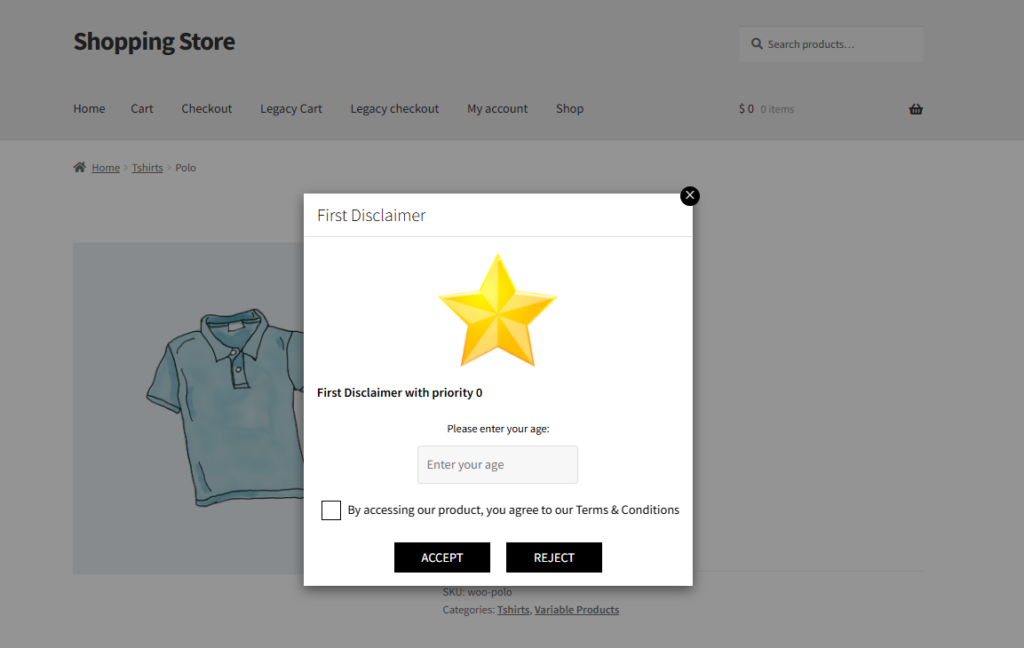
- Select the Variation of the product and Click on the Sign up now button.
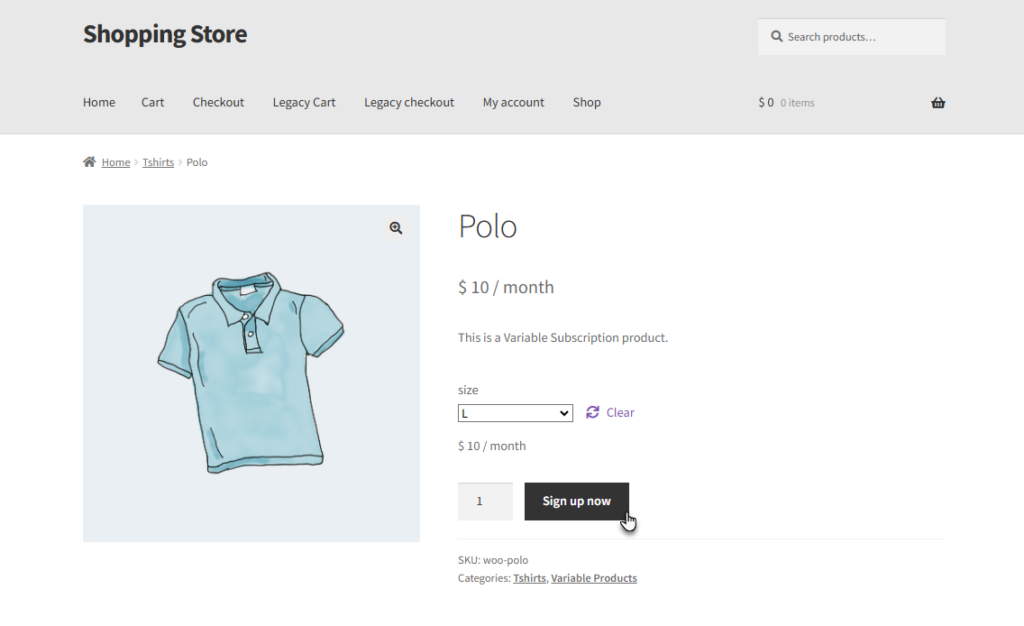
- The Disclaimer will appear.
Sitewide
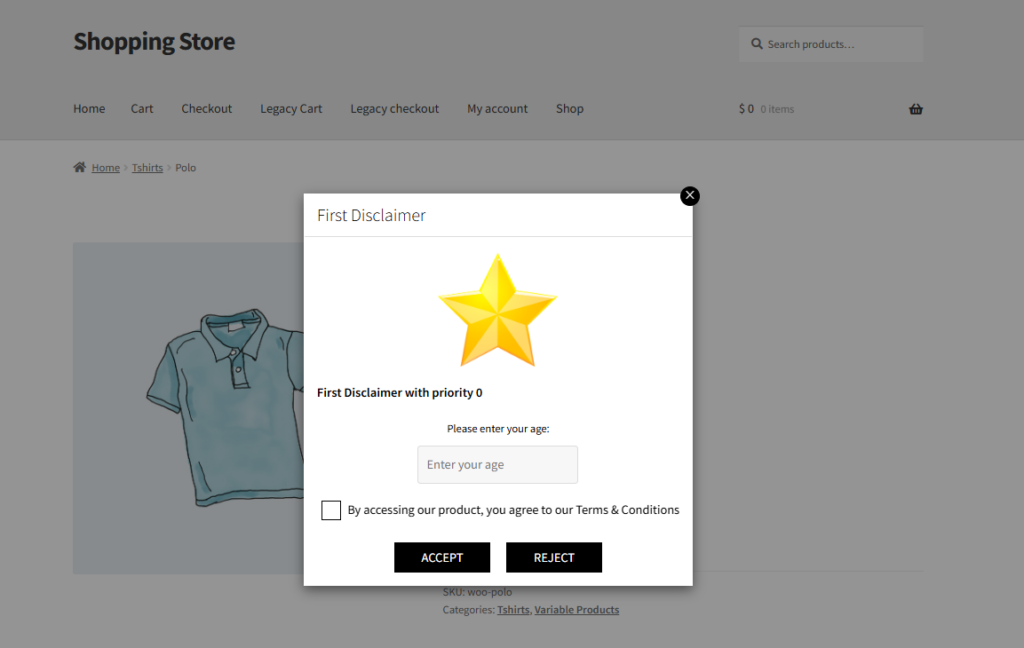
- Go to the Variable Subscription Single Product page when the Disclaimer Type is set to Sitewide.
- The Disclaimer will appear on the page.
Cart/Checkout
- Add a Variation of the Variable Subscription product when the Disclaimer Type is set to Cart/Checkout.
- The Disclaimer will appear on the Cart page.
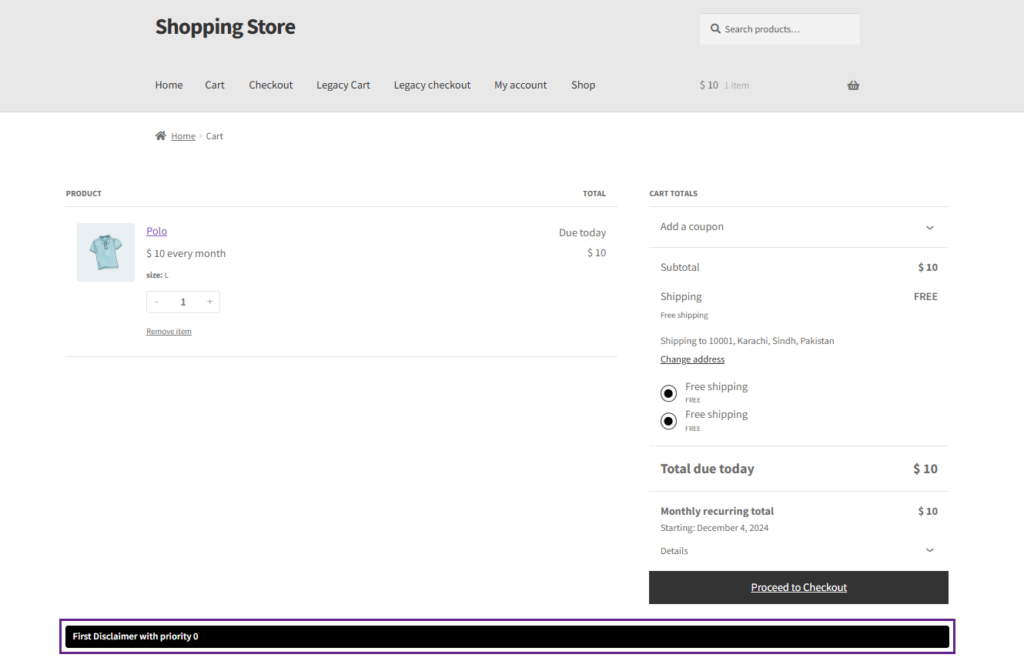
- The Disclaimer will also appear on the Checkout page.
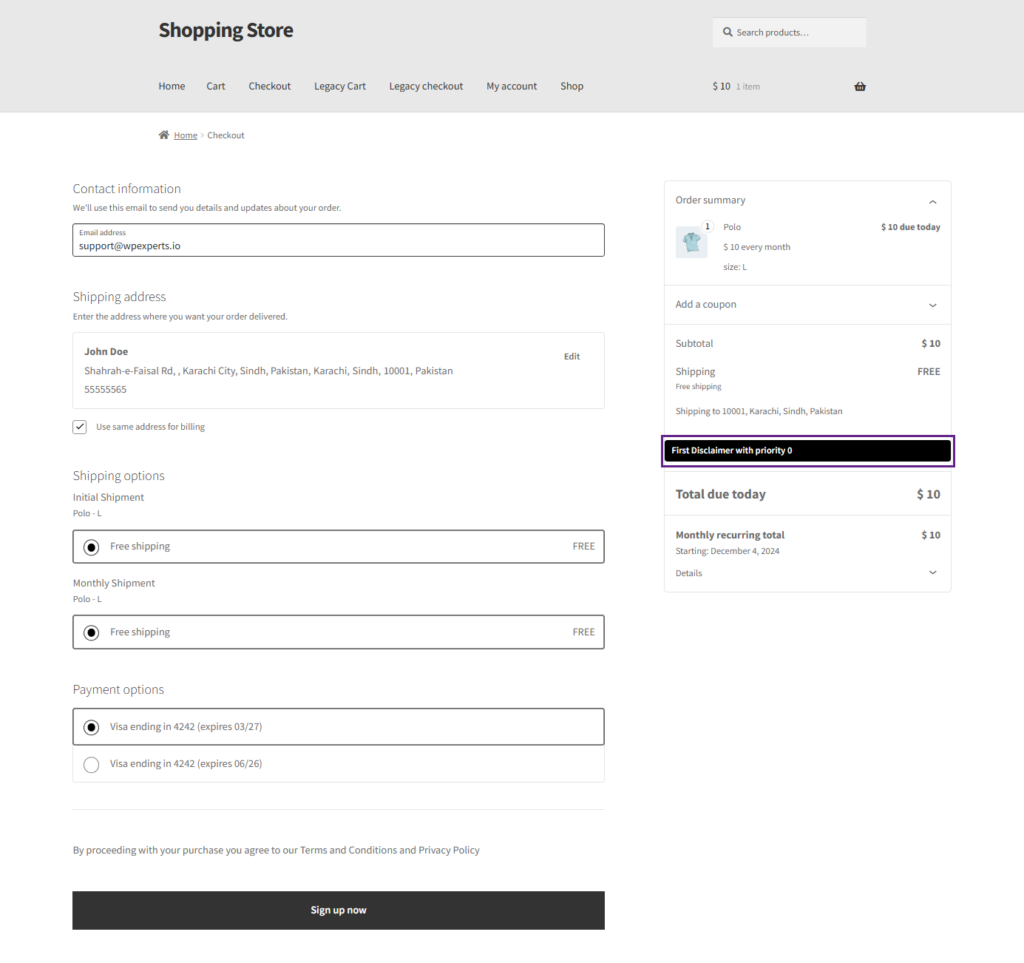
Installation of WooCommerce Bookings
↑ Back to top- Download and Install the WooCommerce Bookings.
- Follow the WooCommerce Bookings documentation to set up and configure the plugin.
Bookable Product
↑ Back to top- Go to the WordPress Admin Dashboard> Products > All Products > Bookable Product..
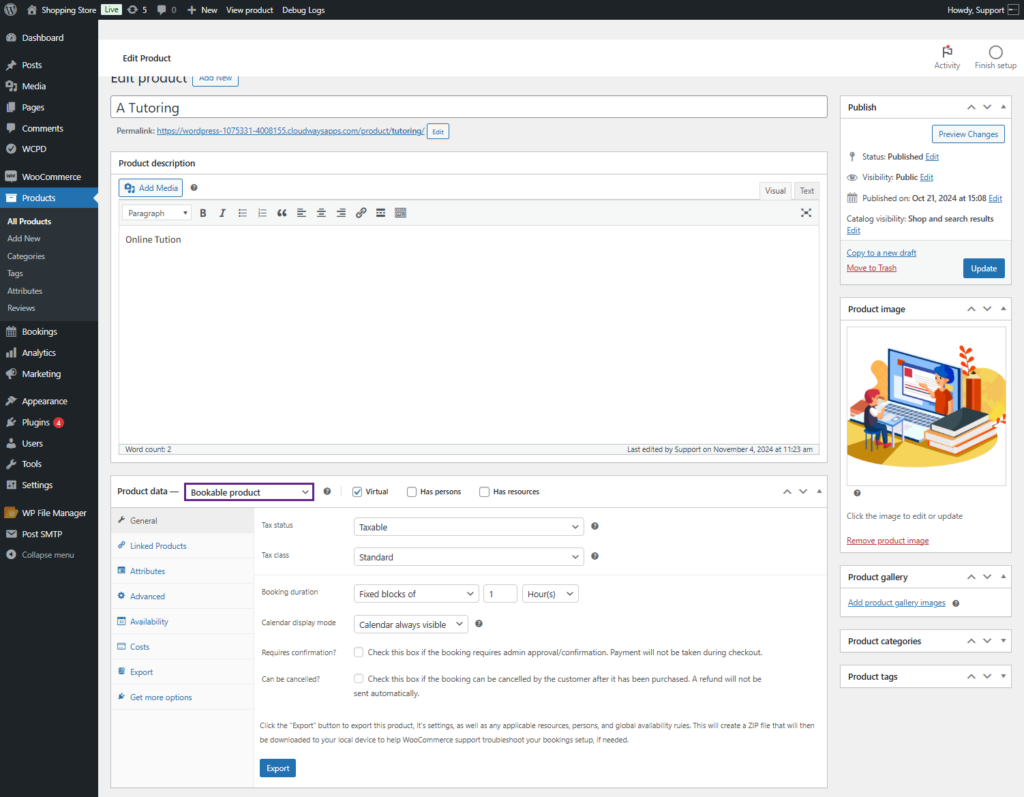
- After selecting the Bookable Product, Go to the WordPress Admin Dashboard > WCPD > All Disclaimer > Edit Disclaimer.
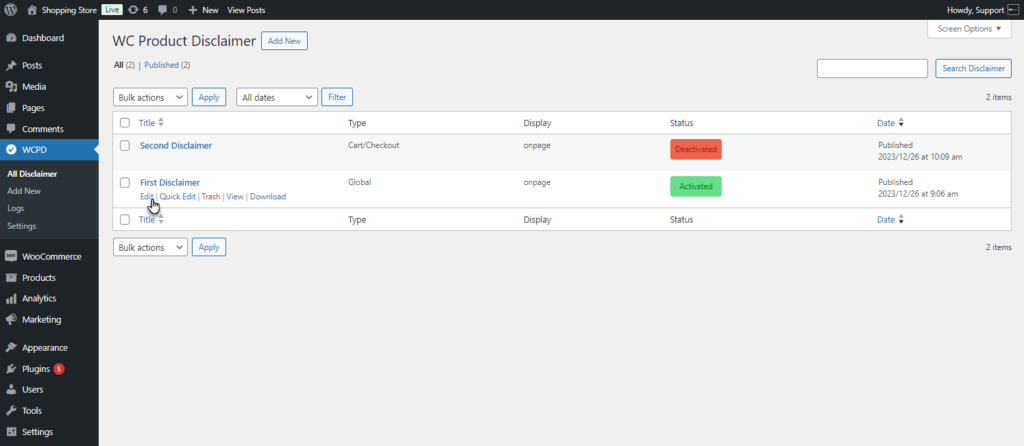
- Edit Disclaimer screen will appear. Enable the Disclaimer.
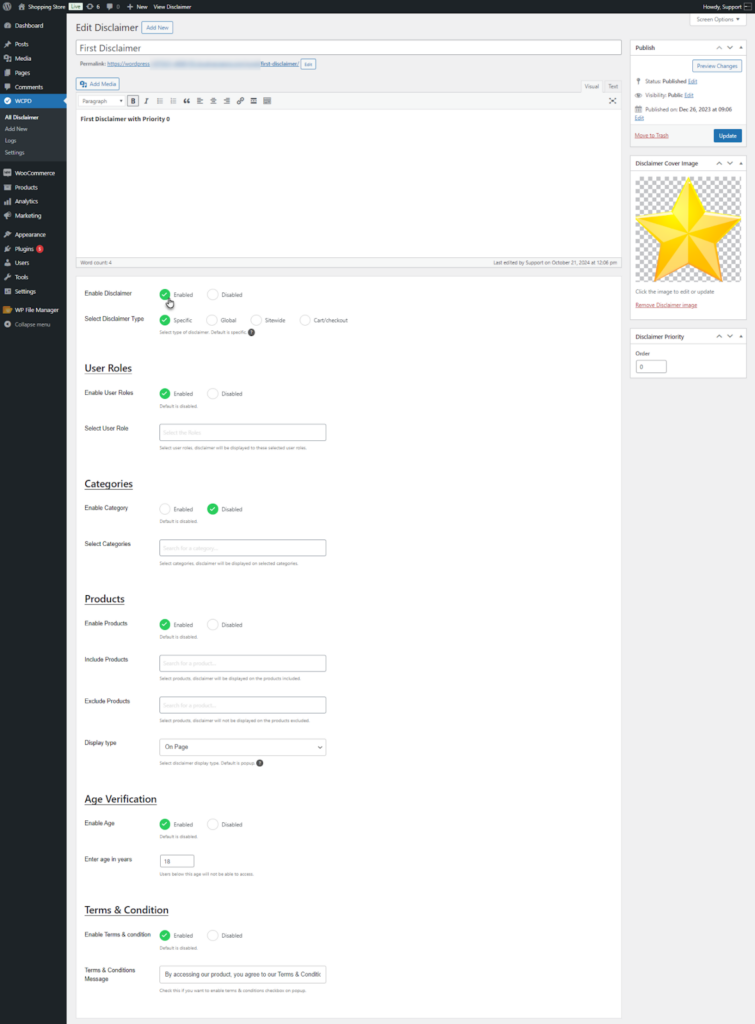
- Select the Disclaimer Type.
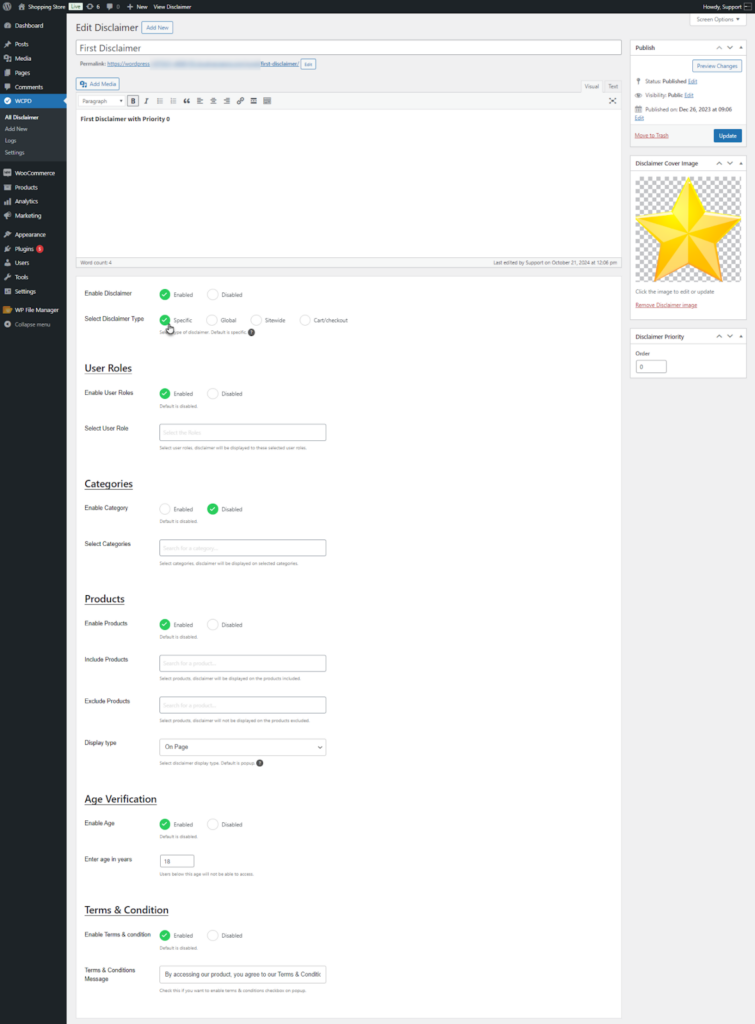
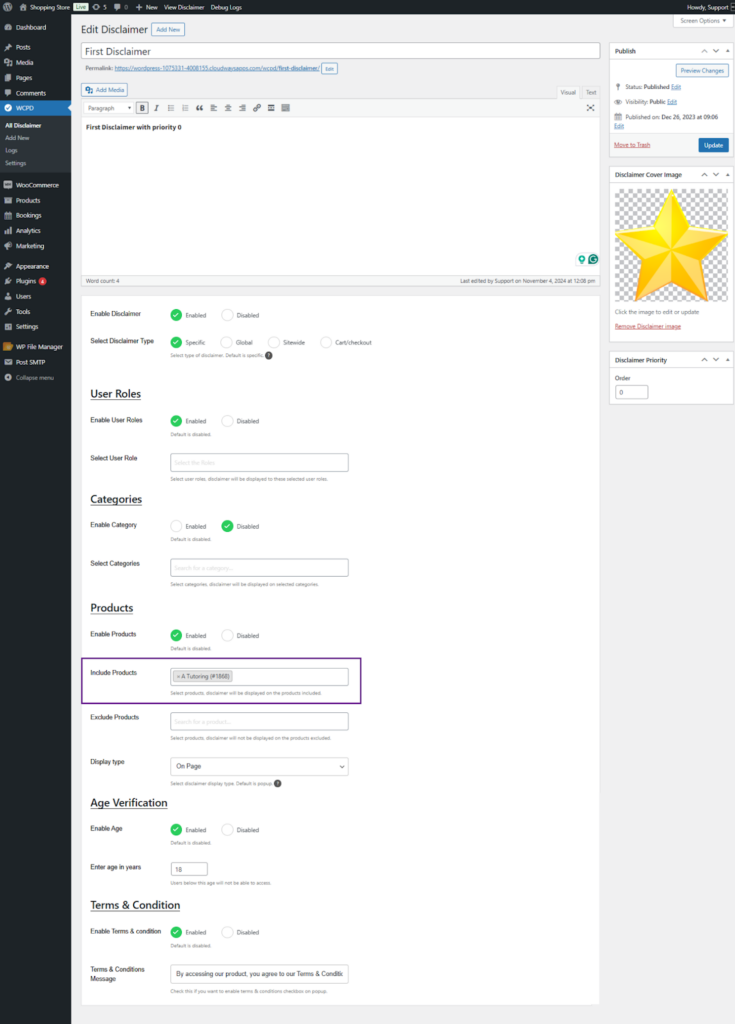
- Navigate and Enable the Products option. Select the Bookable Product.
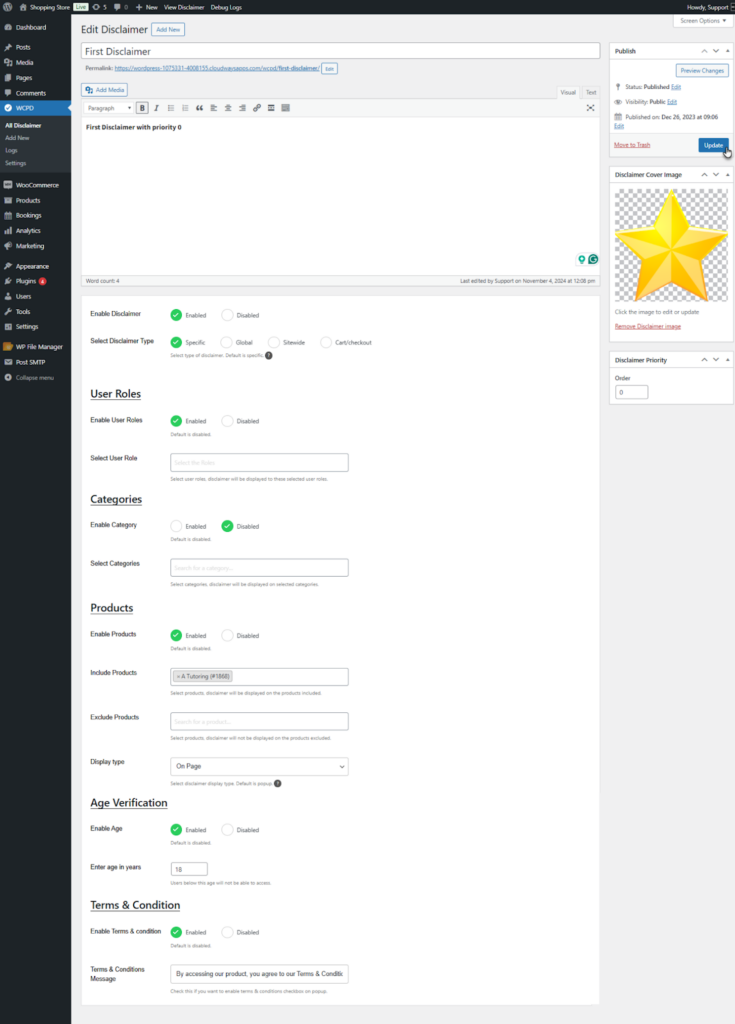
- Click on the Update button to save the Changes.
Front End Impact
Specific
- Login to your account.
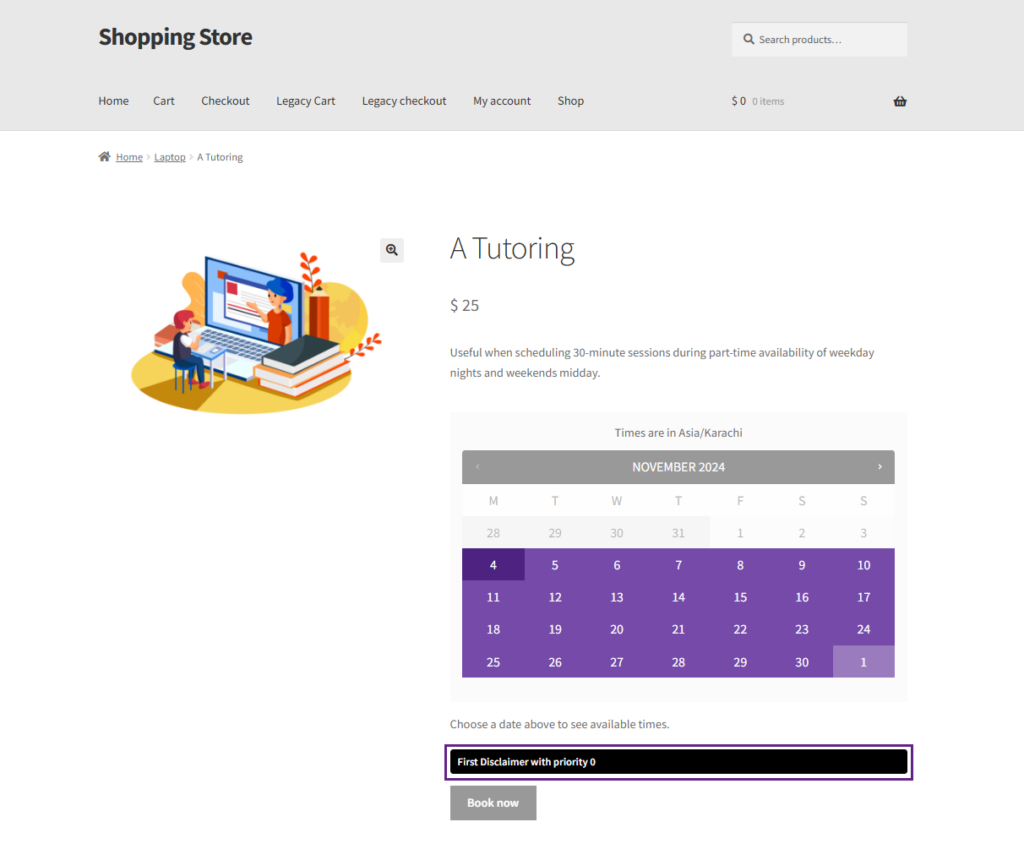
- Go to the Bookable product page. The Disclaimer will appear on the page.
Global
- Go to the Bookable Single Product page when the Disclaimer Type is set to Global.
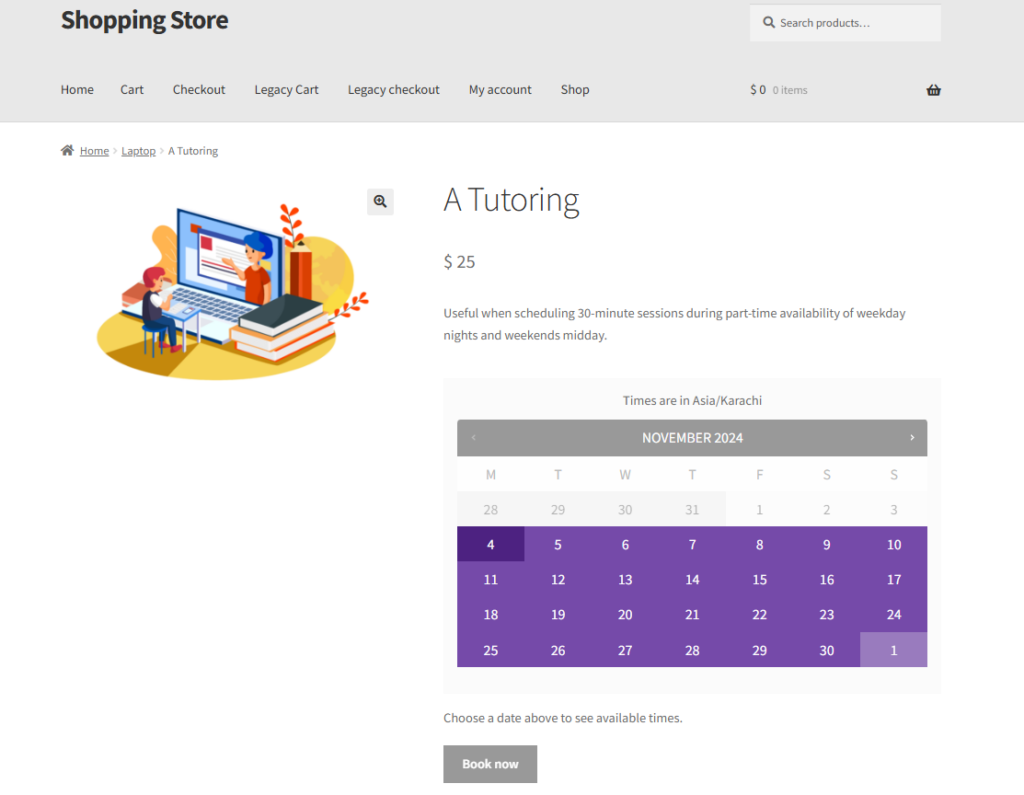
- Select the Date and Time slot for the product. Click on the Book Now button.
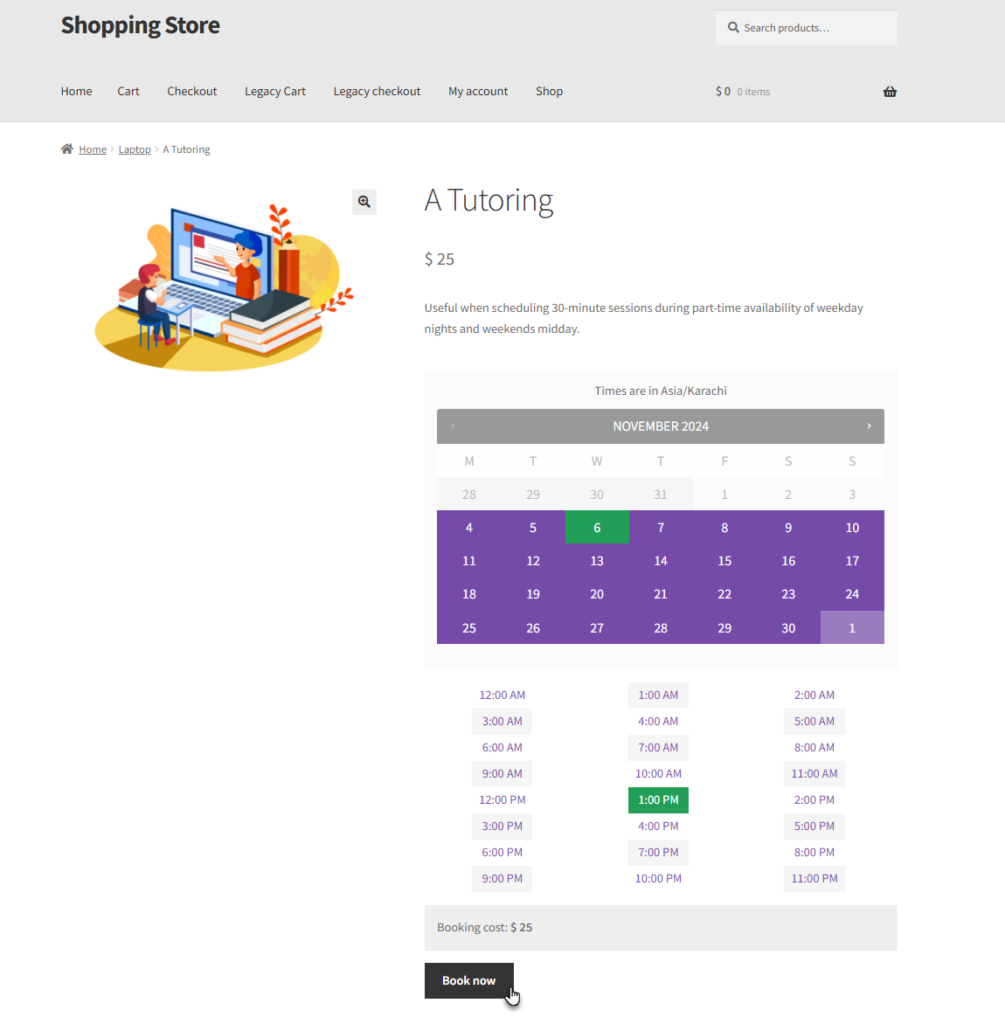
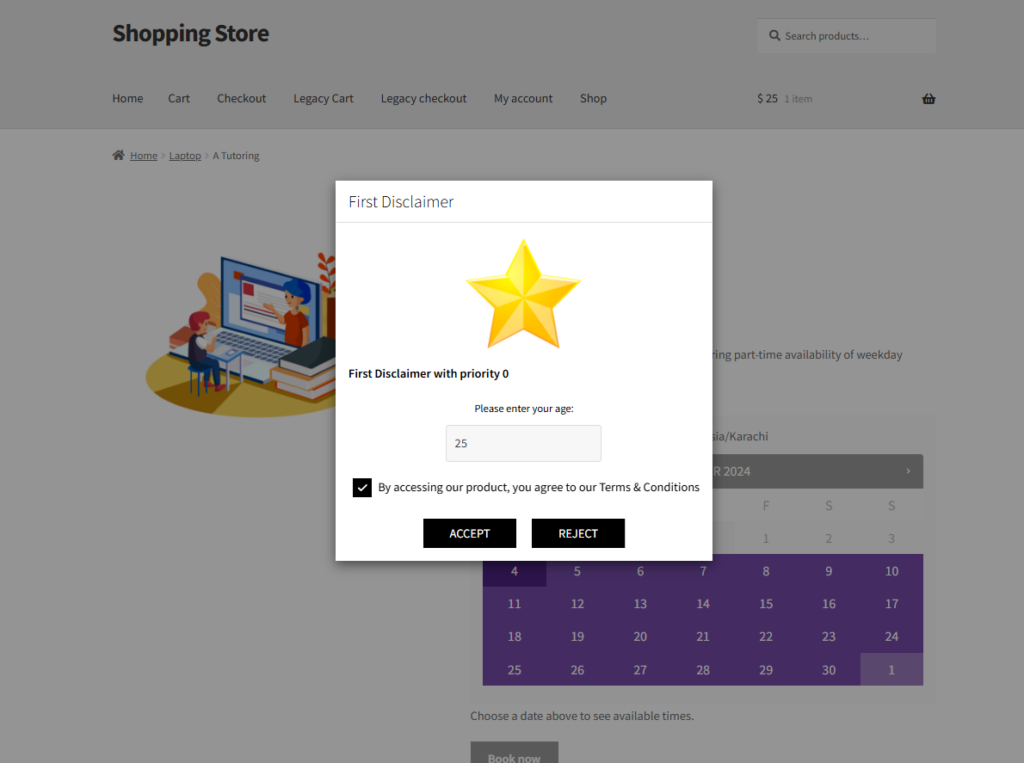
- The Disclaimer will appear.
Sitewide
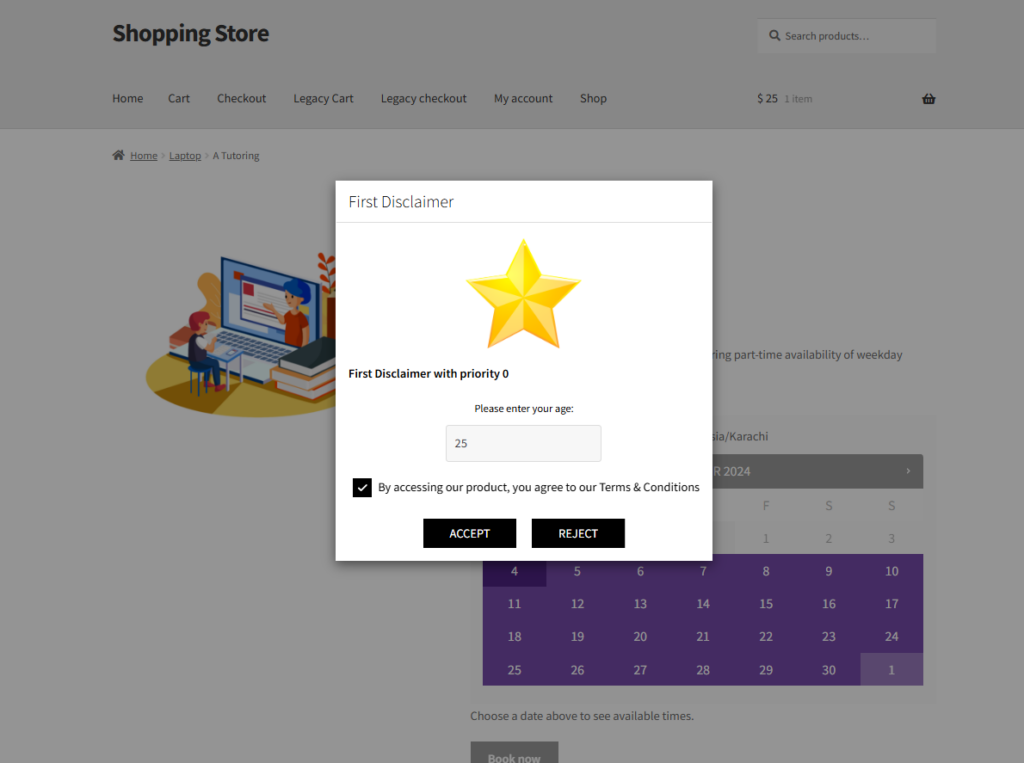
- Go to the Bookable Single Product page when the Disclaimer Type is set to Sitewide.
- The Disclaimer will appear on the page.
Cart/Checkout
- Add a bookable product when the Disclaimer Type is set to Cart/Checkout.
- The Disclaimer will appear on the Cart page.
- The Disclaimer will also appear on the Checkout page.
