Installation
↑ Volver al principioTo install the Artistry theme you must first have a working WordPress installation. For information on installing WordPress, please see Installing WordPress, from the WordPress Codex. You can install your theme following these instructions:
WordPress Dashboard:
- Download the theme from your account.
- Login to your WordPress dashboard (e.g., yourdomain.com/wp-admin).
- Navigate to Appearance > Themes > Add New > Upload, and select your zipped theme folder.
- Click “Install Now”.
- Activate the theme.
Please Note: If you use Safari as your primary browser you may find that your theme folder is not zipped after downloading it. You will need to re-compress your theme folder before initiating the second installation process.
Setup Wizard
↑ Volver al principio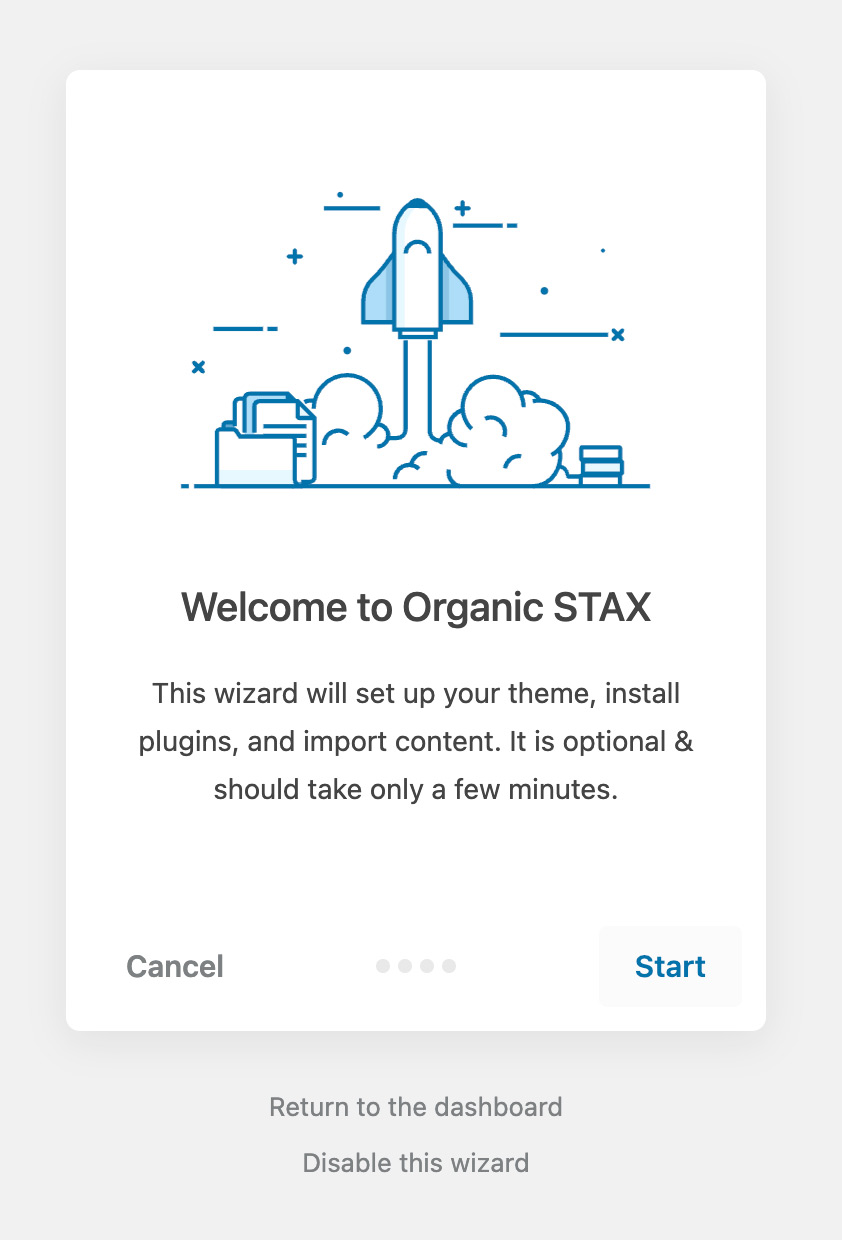
Upon successfully activating the Artistry theme, you should be greeted by the setup wizard. It’s highly recommended you go through each step in the process to complete the wizard. Please Note: If you choose to disable the wizard, please read the bottom section regarding Skipping The Wizard.
Completing The Wizard:
The setup wizard consists of 2 steps:
- Plugin Activation: Install and activate recommended and required plugins. This step is highly recommended.
- Demo Content: Install the theme demo content. This step may take a few minutes. It’s highly recommended.
Upon successfully completing the setup wizard, your site should appear exactly like the theme demo.
Skipping The Wizard:
If you disable the wizard, you will not be able to open it again. Should you choose to skip the setup wizard, you will still need to install the required plugins in order for the theme to function properly.
Add A Logo
↑ Volver al principioThe logo can be added within the “Header” template part. You can modify the header template part within the Site Editor by following the instructions below:
- Navigate to Appearance > Editor > Template Parts > Header within the WordPress admin.
- Click on the Header to edit the template part.
- Click the Site Logo block.
- Upload and Select your logo.
- Save the changes to the Header template part.
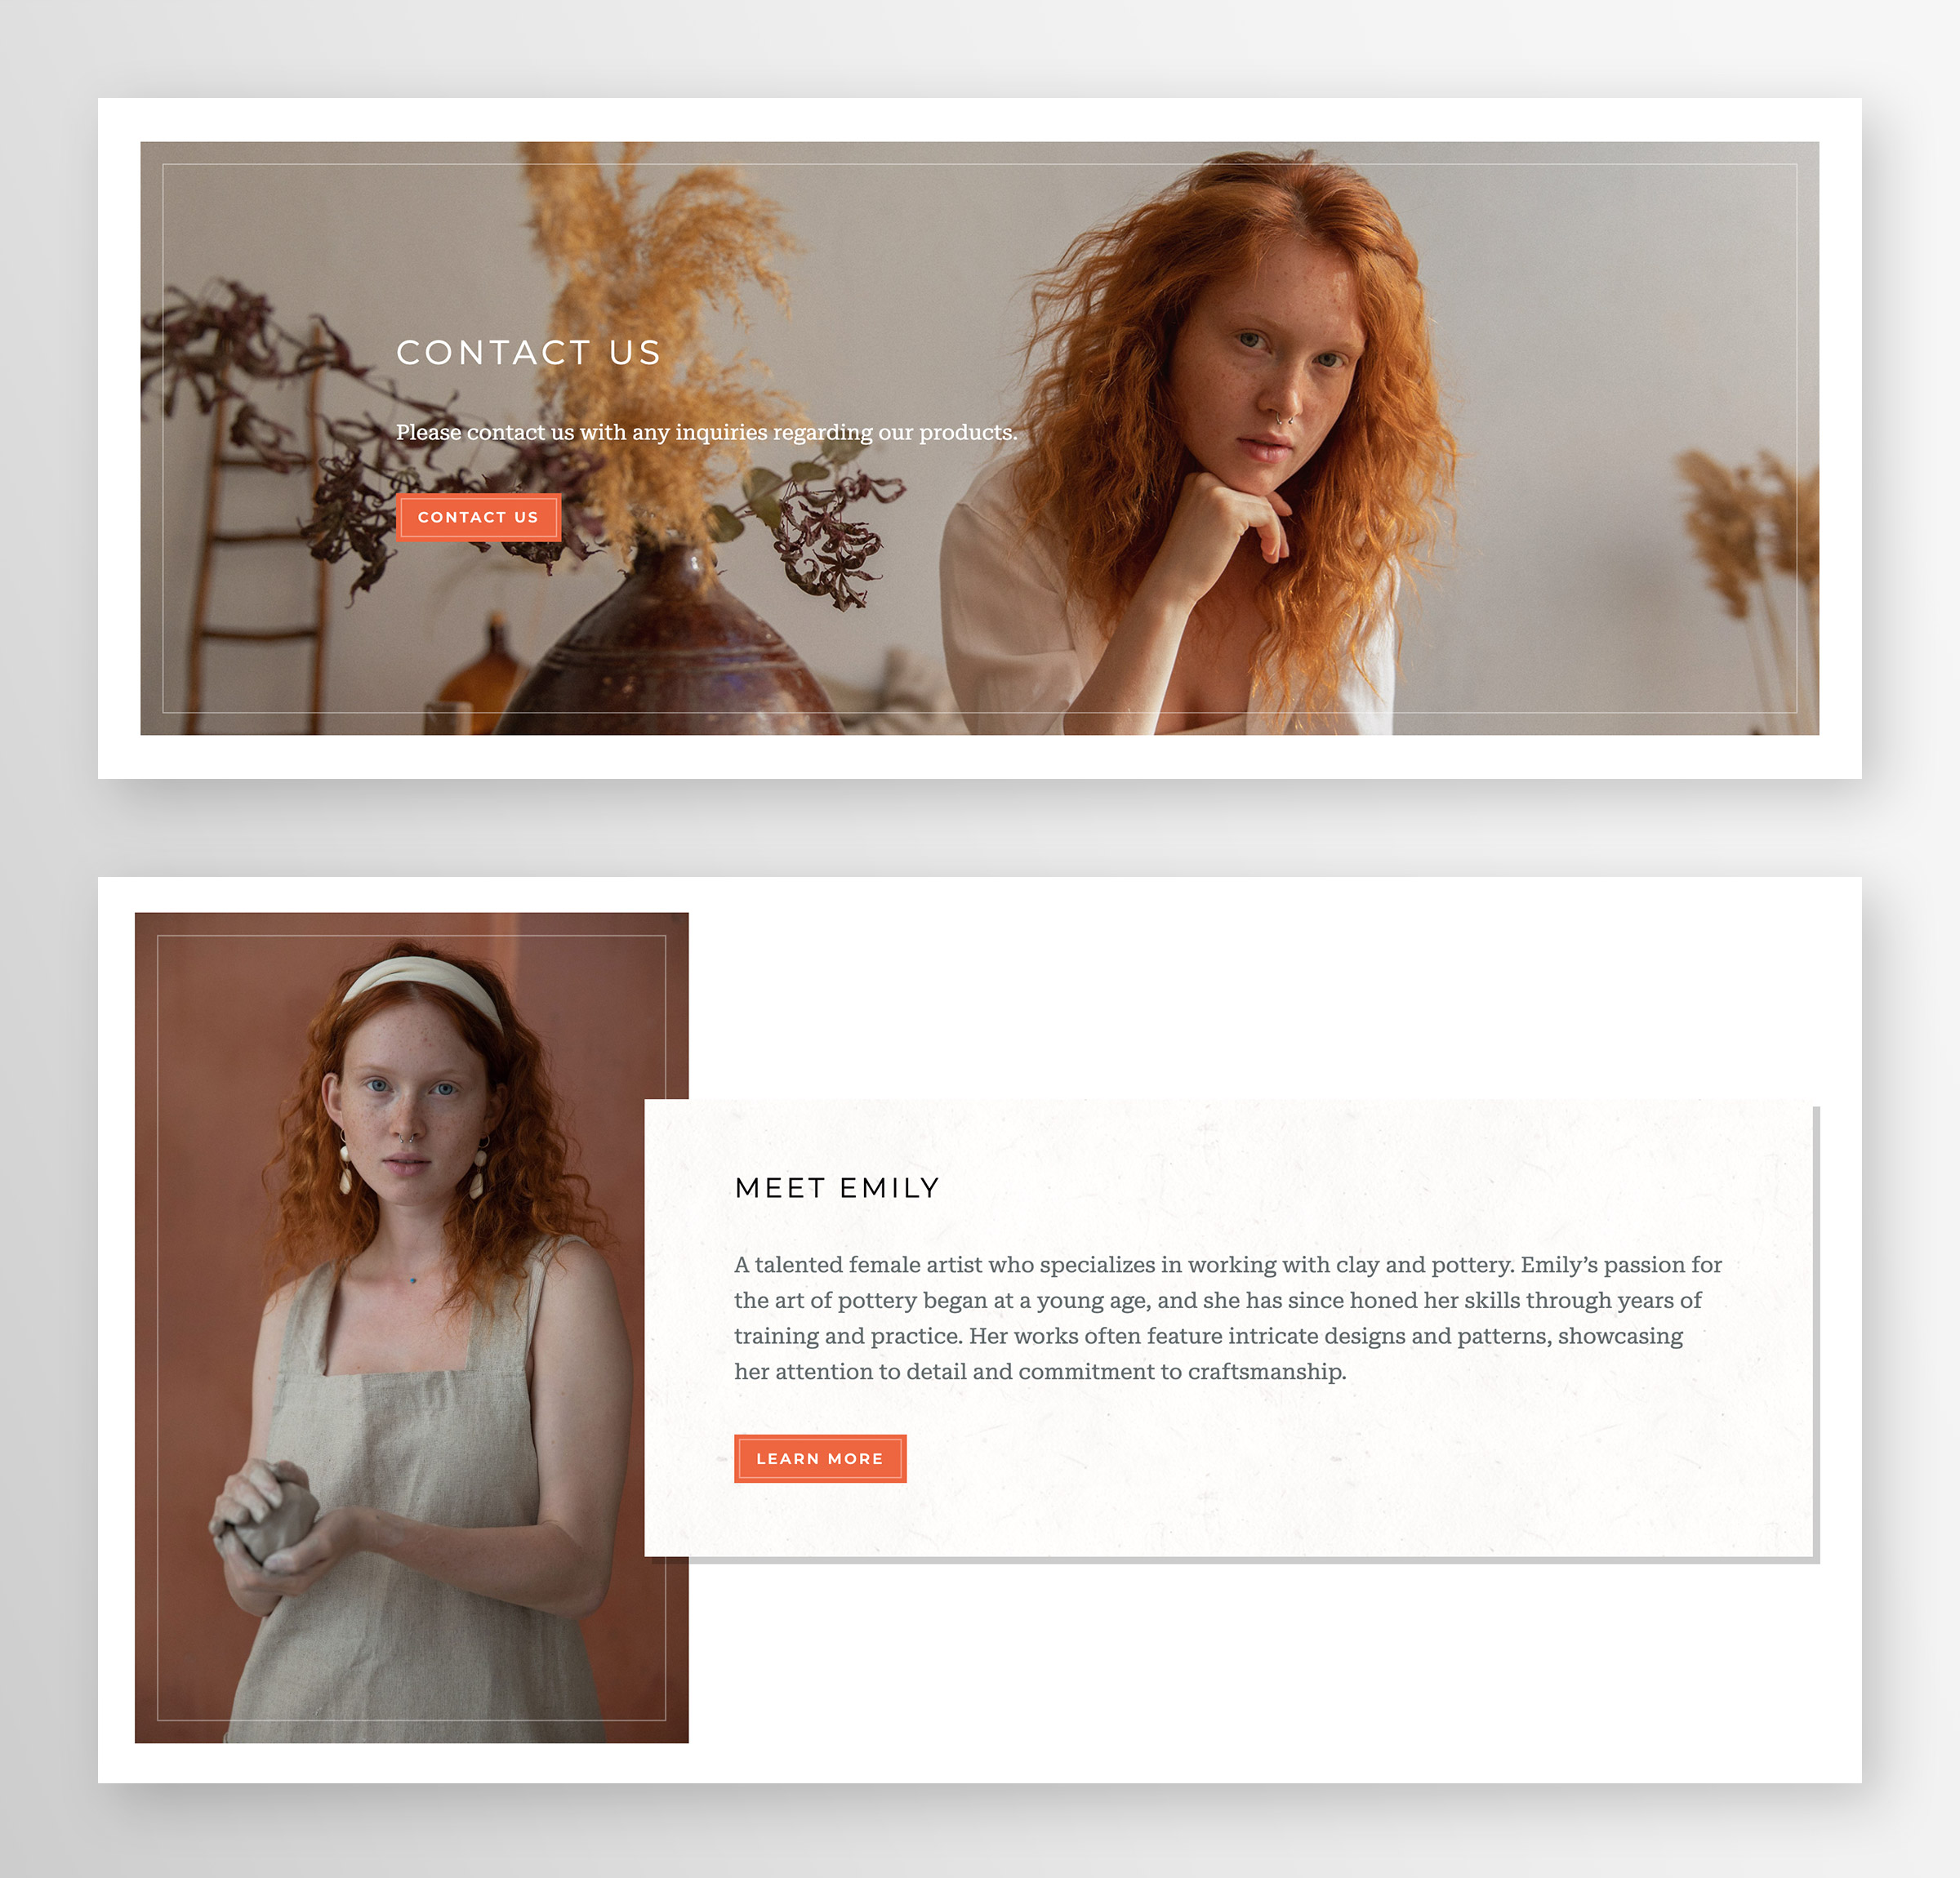
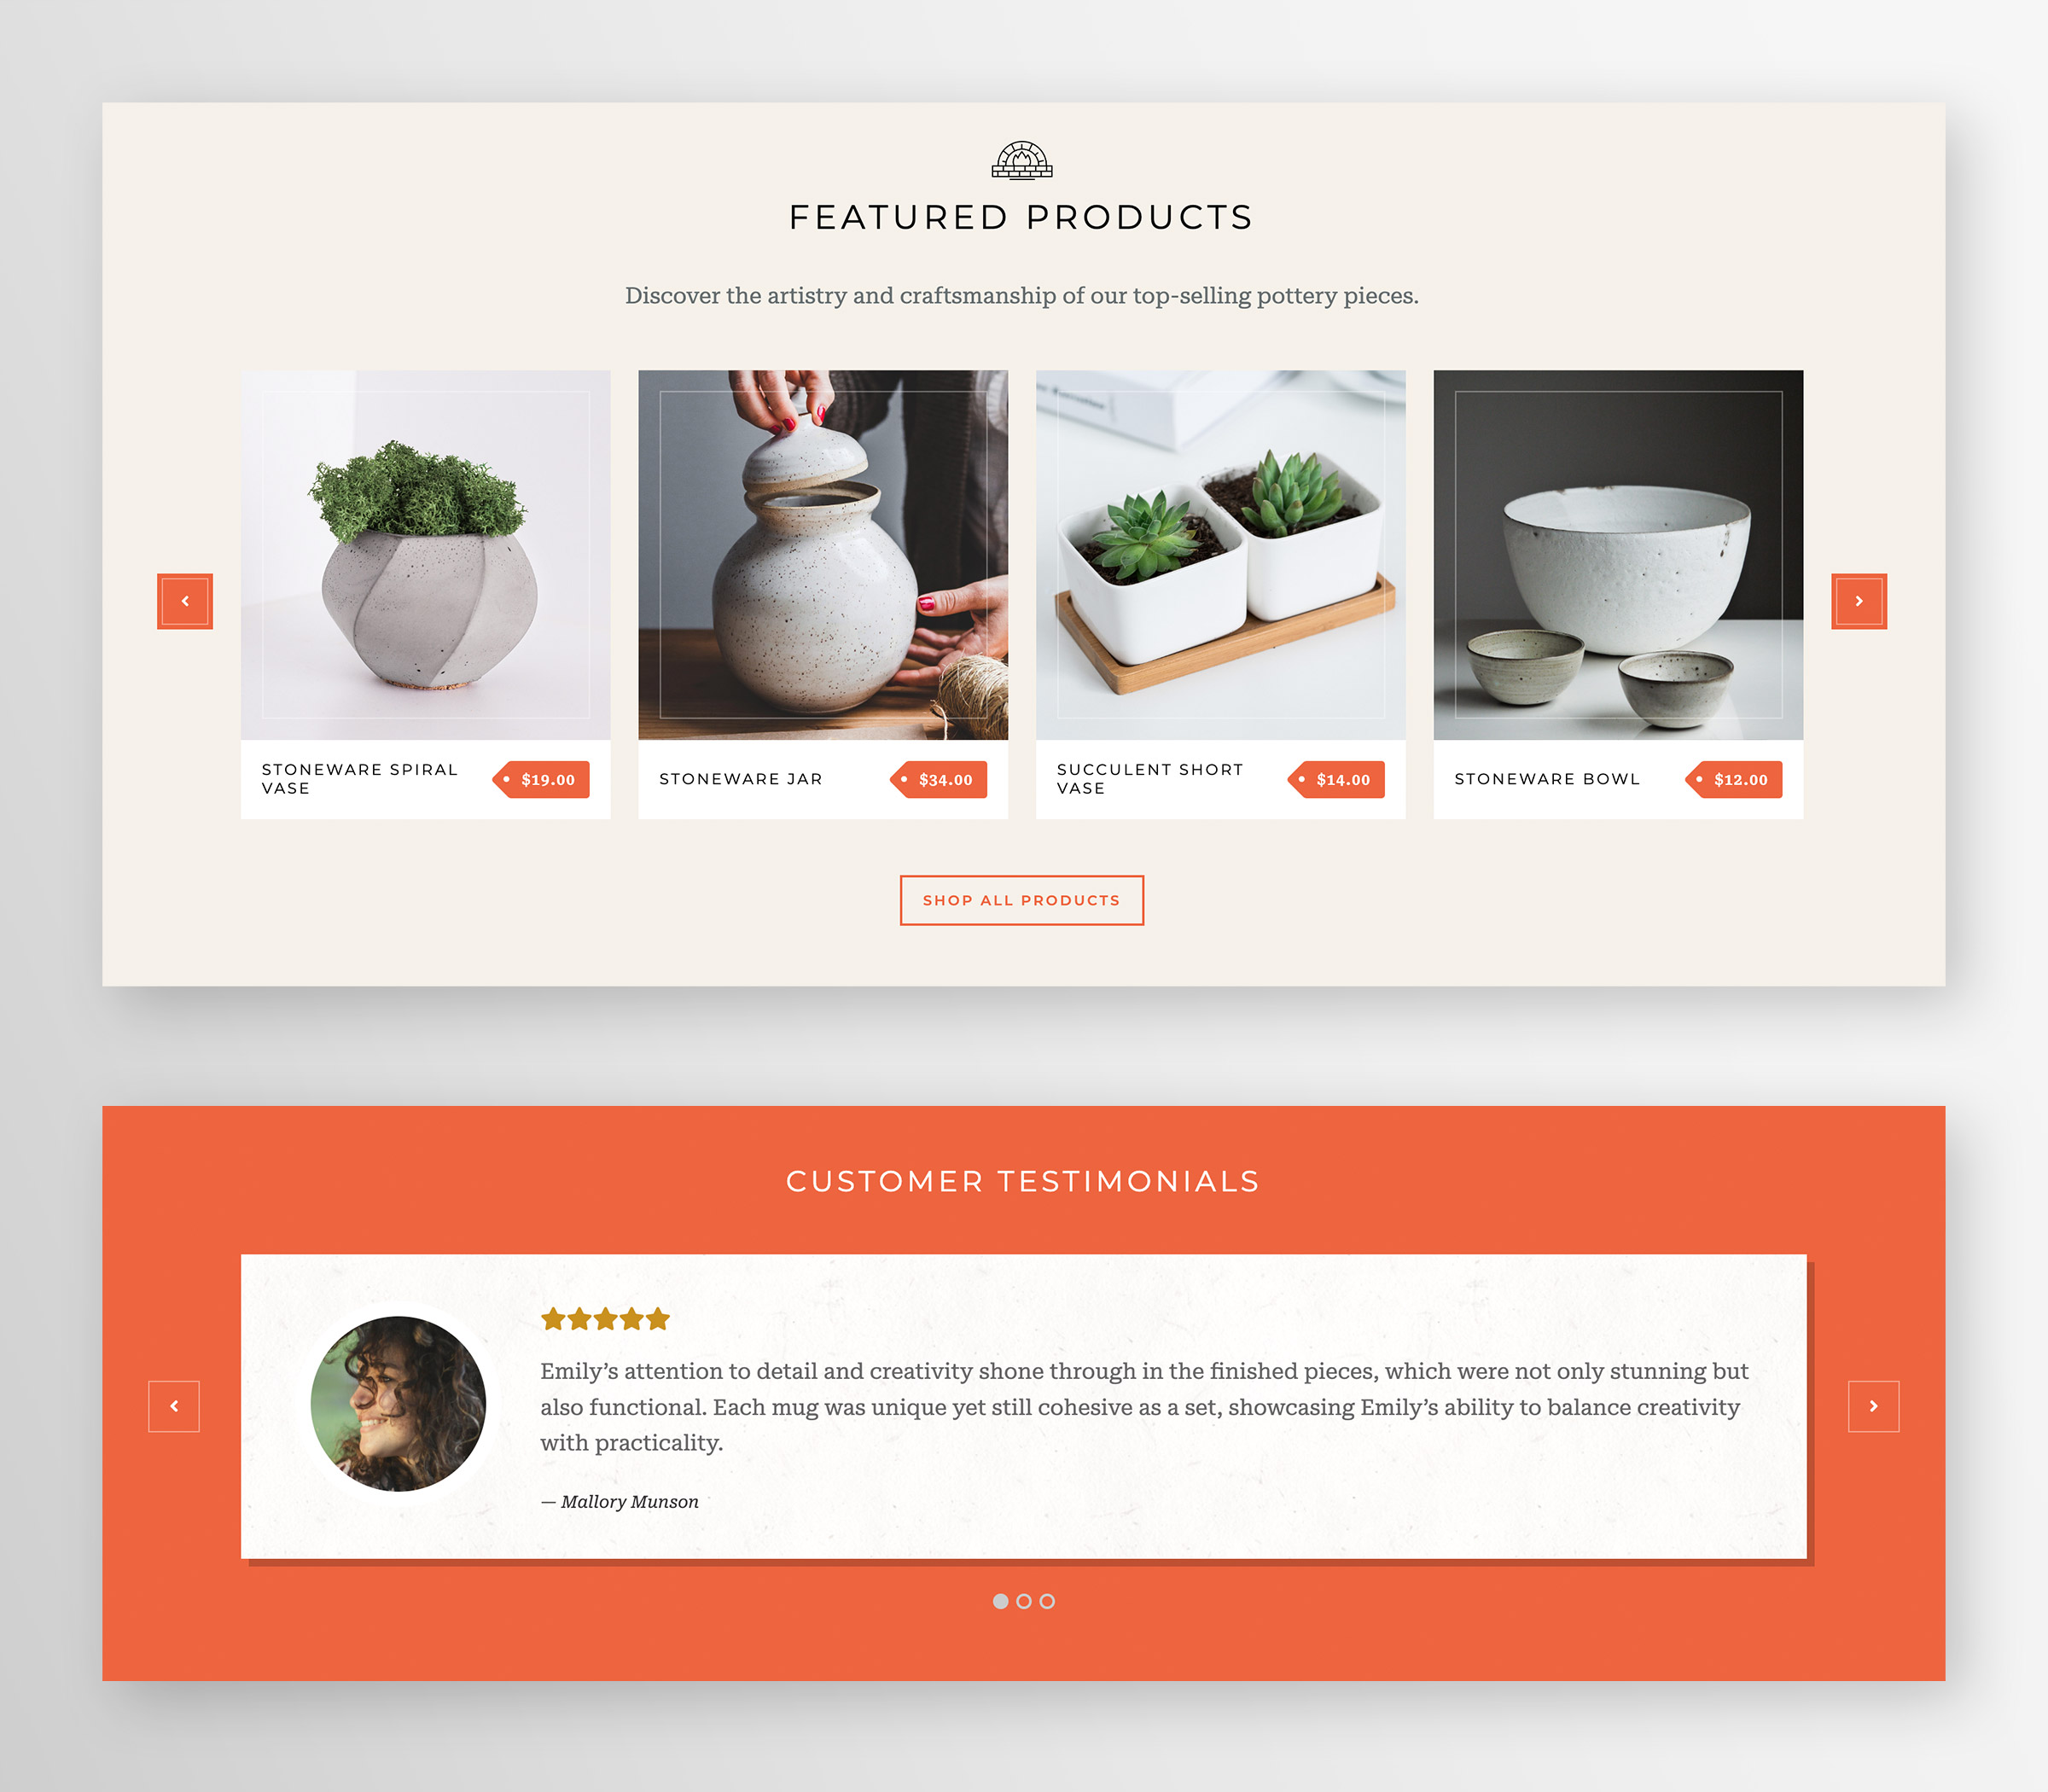
Home Page Setup
↑ Volver al principioDemo Content Home Page
The following instructions refer to editing the home page content if you chose to install the demo content.
Please follow these steps to edit the Home page demo content:
- Navigate to Pages > Home within the WordPress admin.
- If the options panel is not visible on the right side of the editor, click the “Gear” icon in the top right corner to reveal the panel.
- Click on the blocks on the page you wish to edit, the block options will be revealed in the right side options panel.
- You may move and edit the blocks and sections as you desire.
- Save your changes.
Home Page Layout
If you skipped the demo content installation, you can still setup the home page as it appears in the theme demo. You can recreate the home page layout and content using the patterns provided by the theme.
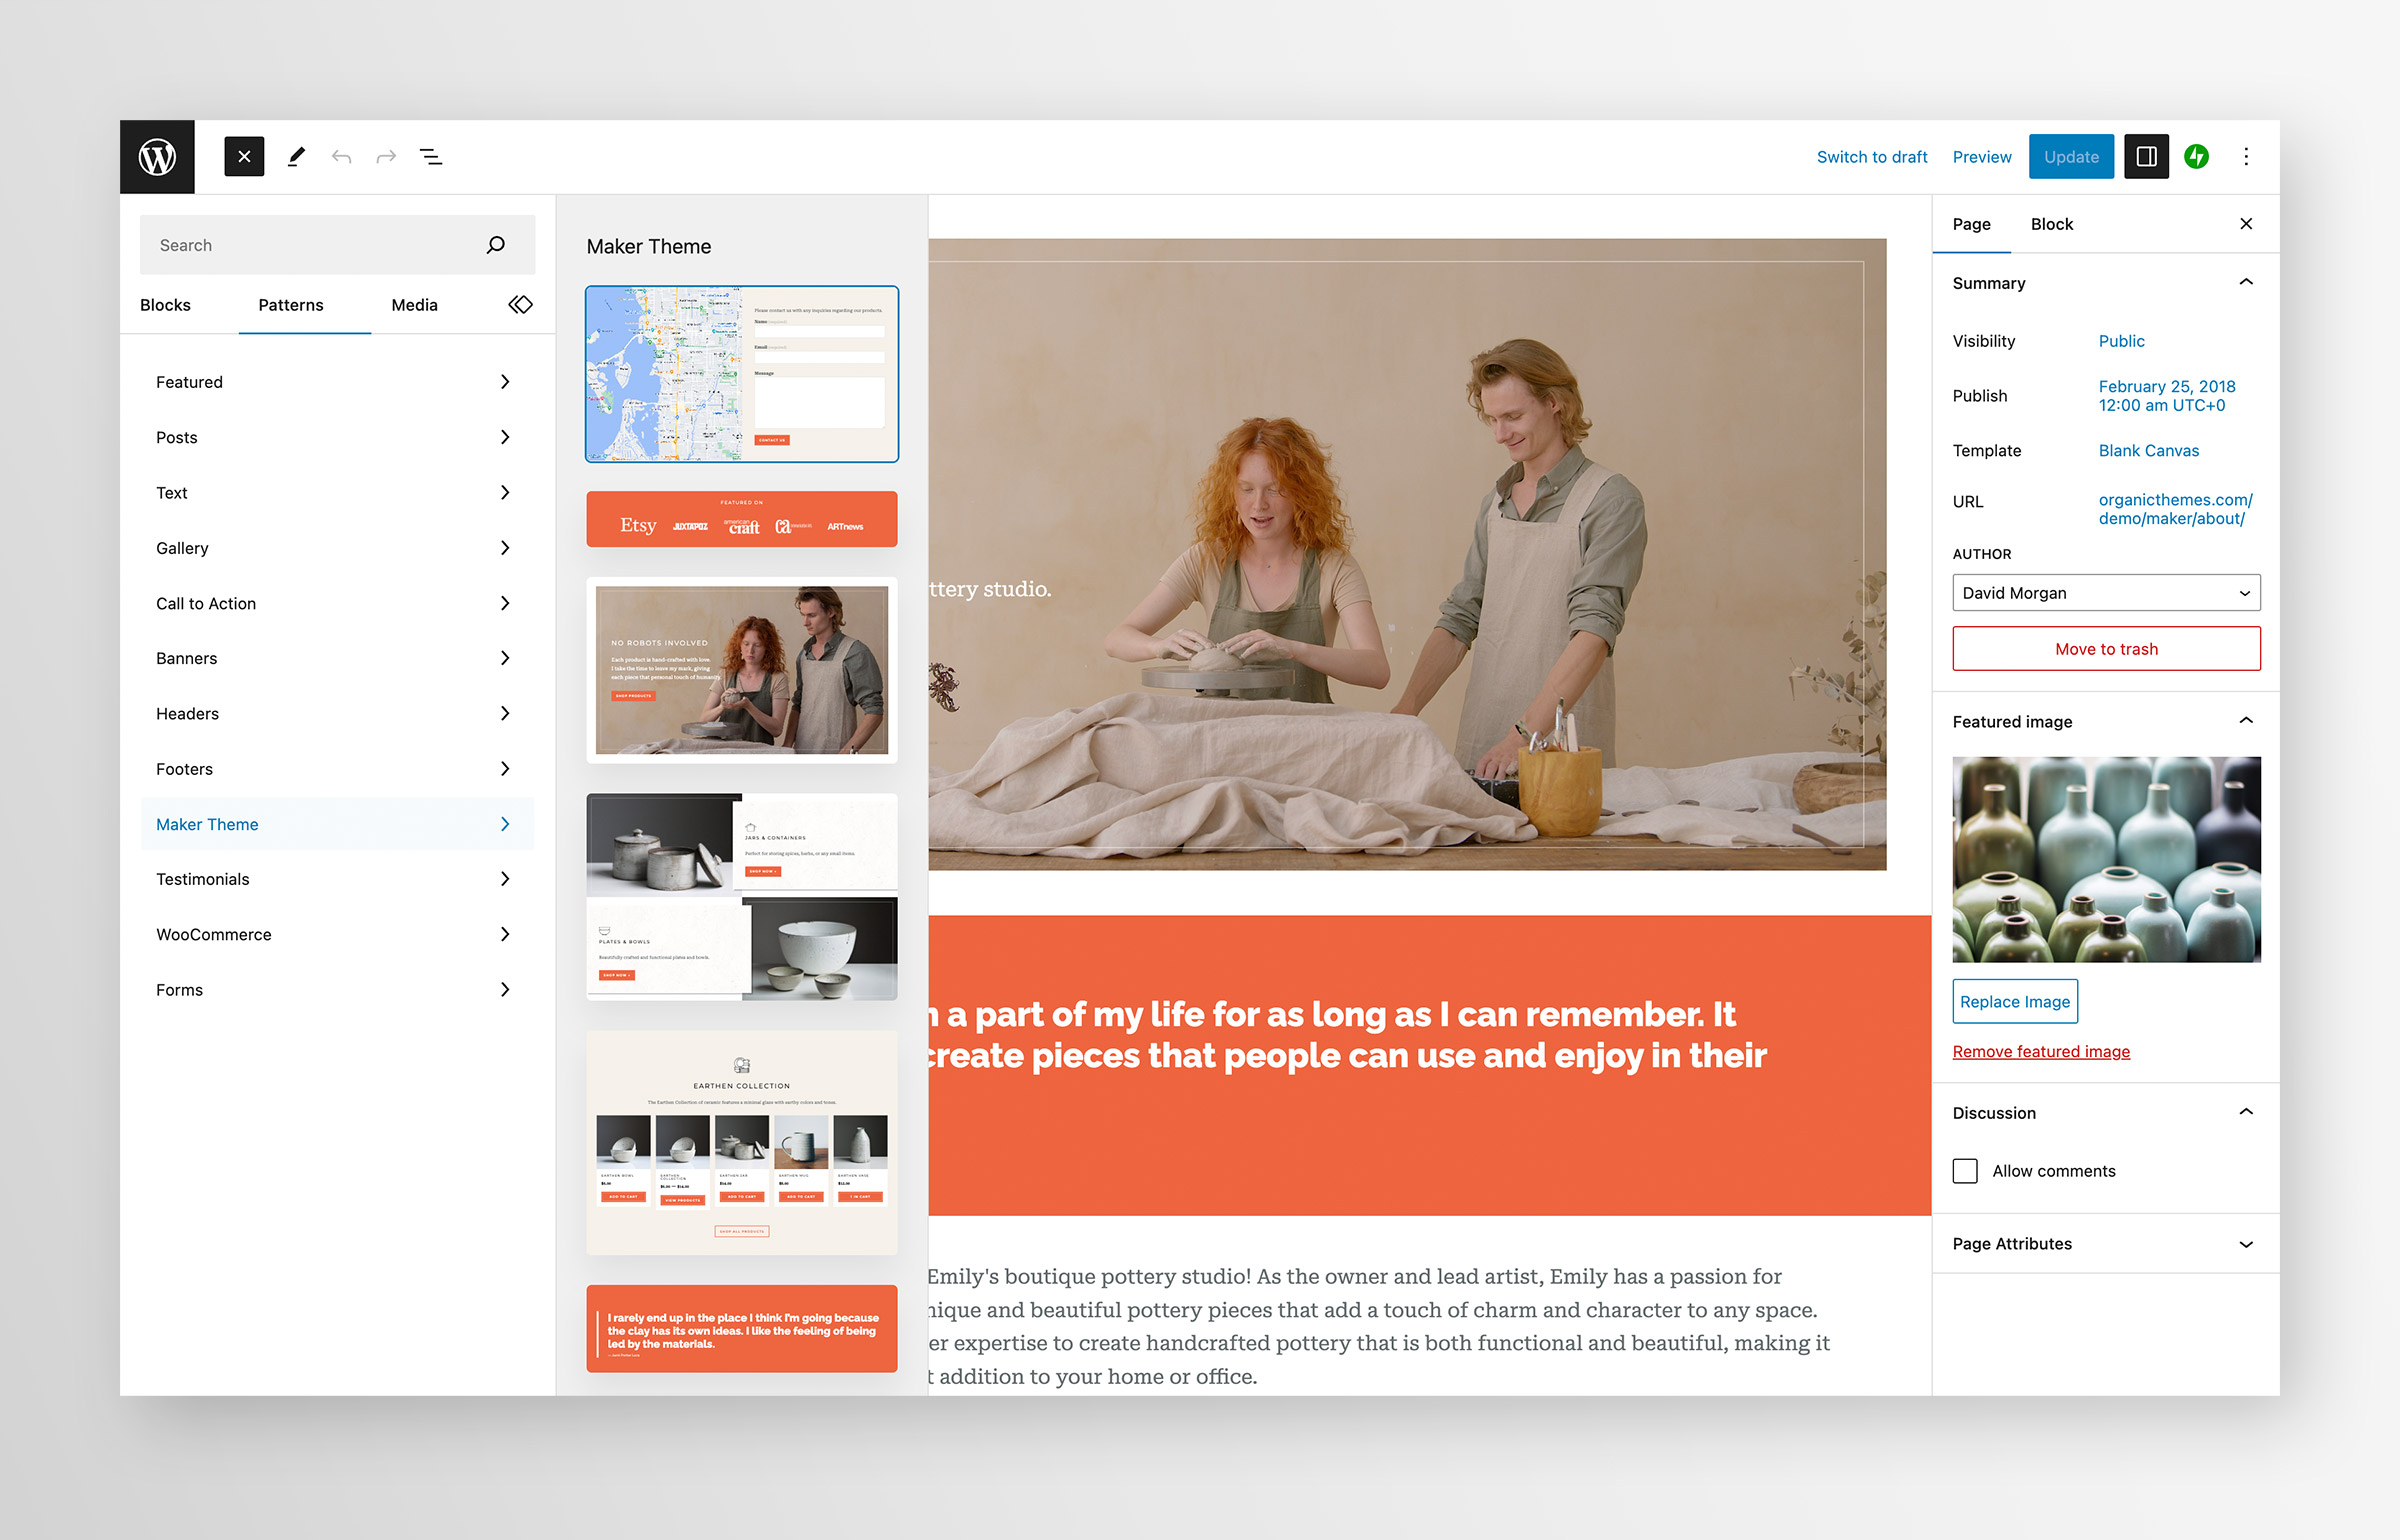
Using Patterns
This is an à la carte method of recreating the home page layout using patterns.
- Navigate to Pages > Add New within the WordPress admin.
- Click the blue “+” icon in the top left of the editor.
- Select the “Patterns” tab.
- Locate the “Artistry Patterns” patterns among the list.
- Select the home page patterns you would like to add.
- Publish the page.
Blog & Shop Page Templates
↑ Volver al principioPlease Note: The Blog and Shop page layout must be edited within the WordPress Full-Site Editor.
Please follow these steps to edit the Blog and Shop page templates:
- Navigate to Appearance > Editor > Templates within the WordPress admin.
- Click the “Index” template in the list to edit the Blog page template.
- Click the “Product Archive” template to edit the Shop page template.
- If the options panel is not visible on the right side of the editor, click the “Gear” icon in the top right corner to reveal the panel.
- Click on the blocks on the page you wish to edit, the block options will be revealed in the right side options panel.
- You may move and edit the blocks and sections as you desire.
- Save your changes. This will update the page template.
Plugins
↑ Volver al principioSTAX recommends or requires the following plugins:
- Organic Blocks – Required
- WooCommerce – Recommended
- Jetpack – Recommended
- Gutenberg – Recommended
Custom Styles
↑ Volver al principioDiscover the power of customization with Artistry’s unique registered styles for the Cover, Group, Media, and Image blocks. Effortlessly toggle these features on and off to craft a distinct look that truly represents your brand. Unleash your creative potential and captivate your audience with tailor-made layouts that elevate your hand-made products like never before!
20 Premium Blocks
↑ Volver al principioArtistry features 20 premium blocks that allow you to display unique and engaging content on your website. Provided by the powerful Organic Blocks plugin, these blocks include product sliders, testimonial sliders, portfolios, pop-ups, pricing tables, toggles, and much more.
Helpful Patterns
↑ Volver al principioExperience boundless design possibilities with Artistry’s diverse range of patterns for displaying captivating content sections. Easily mix and match these pre-built designs to create a visually striking showcase that highlights your hand-made products in the most engaging way.
Patterns
↑ Volver al principioThe theme features several patterns that can used to quickly create layouts and content sections found throughout the demo. Patterns can be accessed within the editor following these instructions:
- Click the blue “+” icon in the top left corner of the block editor.
- Click on the “Patterns” tab.
- Select your desired pattern.
- Publish or Save your changes.