Organize product attributes into multiple groups to enhance user experience using WooCommerce group attributes plugin.
Installation
↑ Back to top- Download Group Attributes .zip file from your WooCommerce account.
- At the WordPress Admin Panel, go to Plugins > Add New and Upload Plugin with the file you downloaded after purchase.
- Install Now and Activate Plugin.
More information at: Install and Activate Plugins/Extensions.
Configuration
↑ Back to topGroup Attributes:
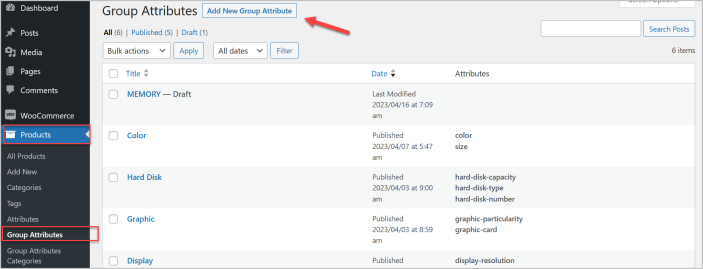
↑ Back to topGo to Products>Group Attributes and add the new group attribute.
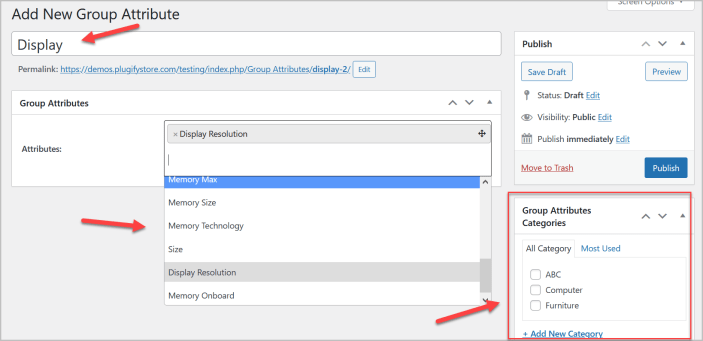
In group attribute settings you can name the attribute group and select the existing attribute values you want to display under this group. You can also create or select the group category for this group.
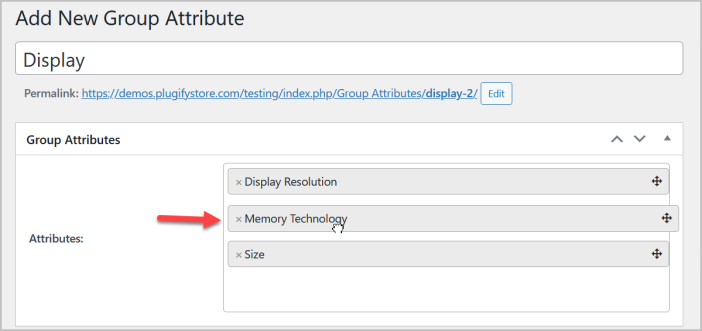
Drag and drop the attribute values to sort them in your preferred order.
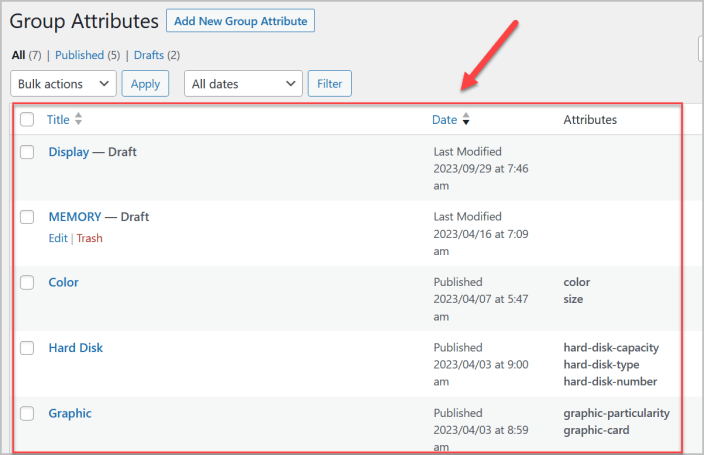
You can see all the group attributes created by you in Products>Group Attributes tab.
Group Attributes Categories:
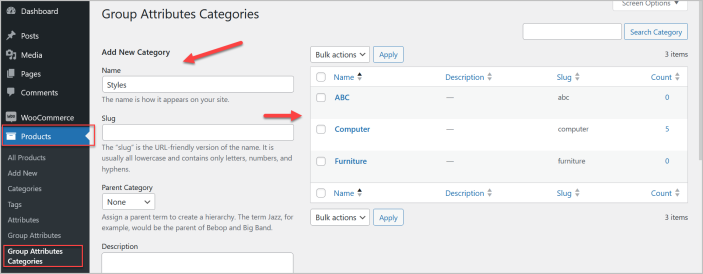
↑ Back to topGo to Products>Group Attributes Categories to create new group category that you can attach with group attributes in each group attribute settings.
Load Group Attributes or Categories for each Product:
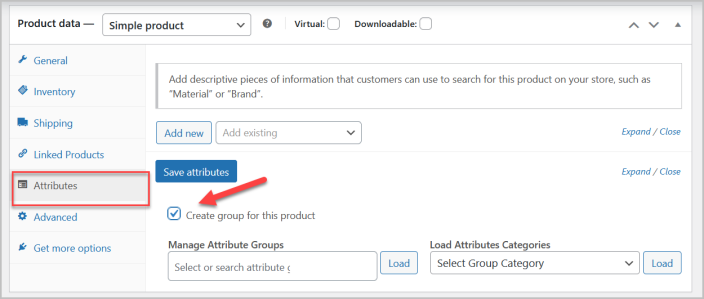
↑ Back to topNow go to products and edit or add a new product, toggle to “Product Data” section and click “Attribute” tab and check the option “Create group for this product”.
You can load multiple groups one by one using “Manage Attribute Groups” select box field. After selecting the right group attributes click the “Load” button to load all the attributes associated with that groups.
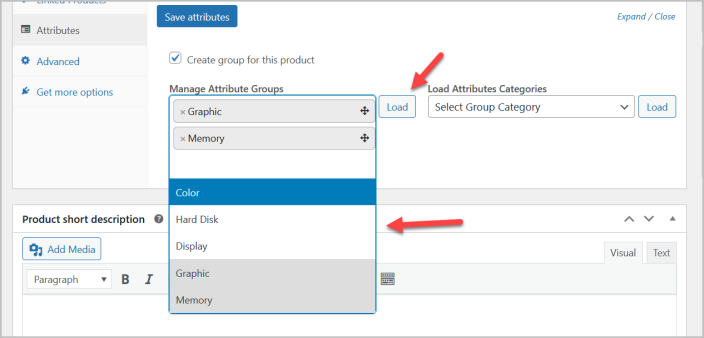
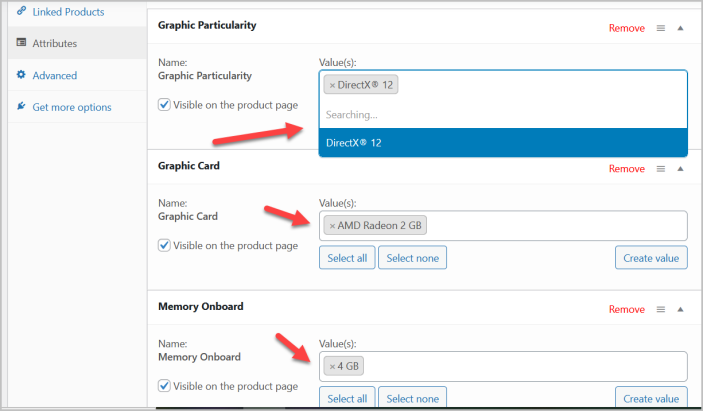
After loading the groups attributes you can select the attribute values which you want to display on product page.
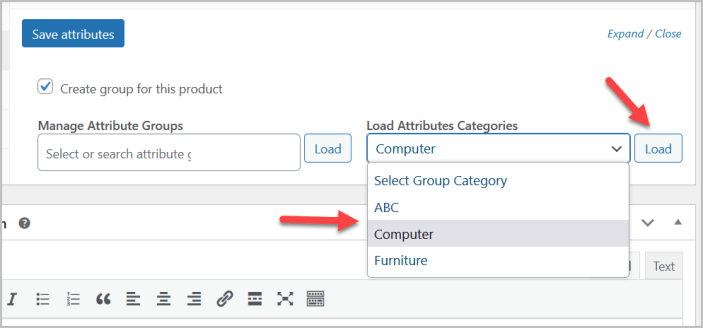
Load multiple group attributes at once using “Load Group Categories” field.
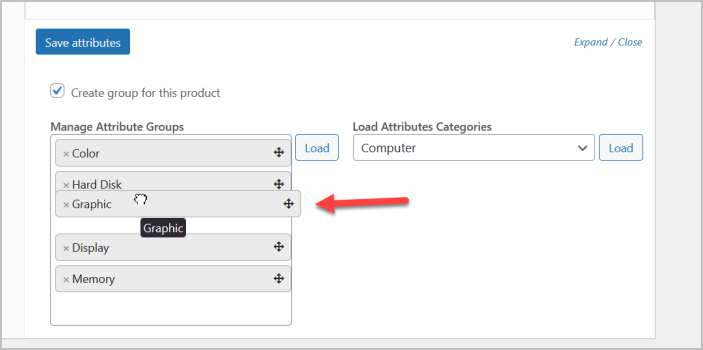
Drag and drop the attribute groups to sort them in order to your accordingly.
General Settings:
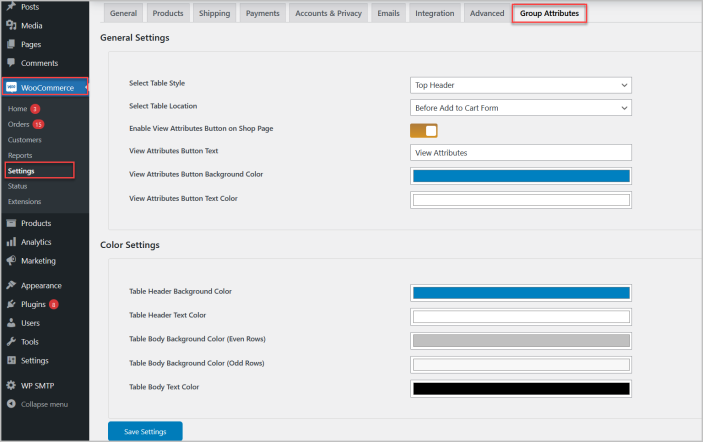
↑ Back to topFor general settings go to WooCommerce>Settings>Group Attributes where you choose the table style, location, customize the table colors, and enable the “View Attribute” button on the shop page.
