Save for Later for WooCommerce allows your customers to remove products from their cart which they are not planning to purchase as of now and add it to a Save for Later list.
The products in the Save for Later list will be displayed in the cart page. Customers can add those products to the cart and complete their purchase.
Installation
↑ Back to top- Download the save-for-later-for-woocommerce.zip file from your WooCommerce account.
- Go to: WordPress Admin > Plugins > Add New and Upload Plugin with the file you downloaded with Choose File.
- Install Now and Activate the extension.
More information at: Install and Activate Plugins/Extensions.
Setup and Configuration
↑ Back to topTo set up the plugin, go to: WordPress Dashboard > Save for Later > Settings
General
↑ Back to topGeneral Settings
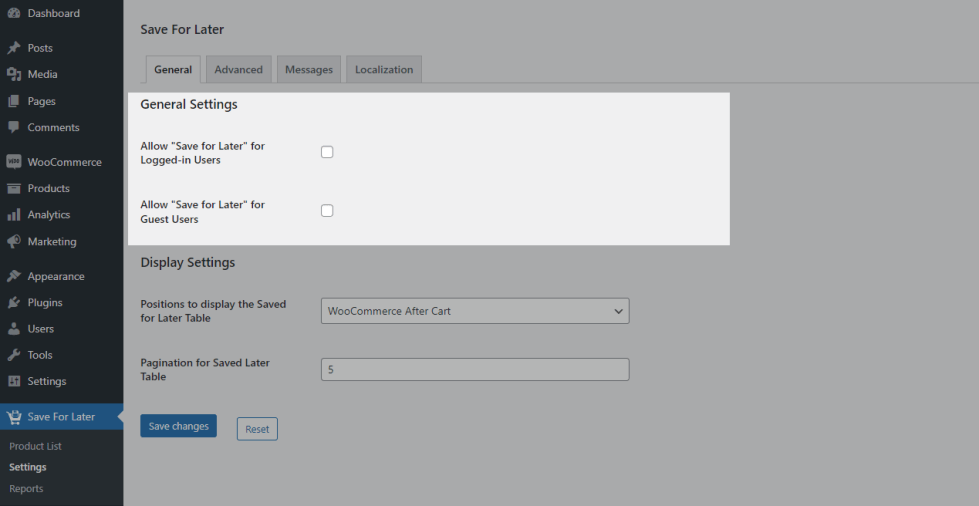
- If you want to allow your logged-in users to use the Save for Later functionality, then enable the “Allow “Save for Later” for Logged-in Users” checkbox.
- If you want to allow your guest users to use the Save for Later functionality, then enable the “Allow “Save for Later” for Guest Users” checkbox.
- By default, the Products added to the Save for Later list by guest will be available for 60 Minutes. You can customize this duration in “Set a time to display the”Saved For Later” products on cart page for Guest Users ” option.
Display Settings
↑ Back to top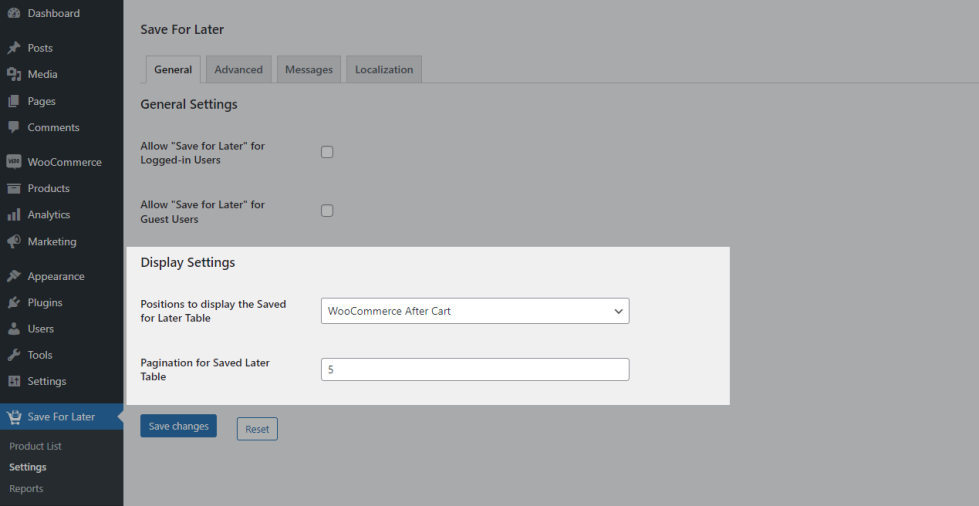
- By default, the Save for Later Table will be displayed to the user after the cart table. You can customize the position on which the table is displayed by customizing the “Position to display the Saved for Later Table” option.
- You can customize the number of products displayed per page by customizing the “Pagination for Saved Later Table” option.
Advanced
↑ Back to top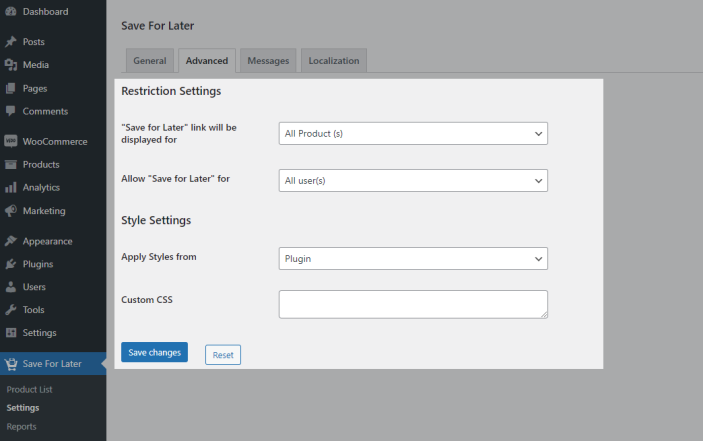
- By default, Save for Later functionality will be available for All Products. If you want restrict Save for Later functionality to particular products/categories, you can do so by using the “Save For Later” link will be displayed for option.
- By default, Save for Later functionality will be available for All Users. If you want restrict Save for Later functionality to particular Users/User roles, you can do so by using the “Allow “Save for Later” for” option.
- By default, the Saved for Later Table on the cart page uses the Plugin’s styles. If you want the Saved for Later Table to use the Theme’s styles, you can do so by changing the “Apply Styles from” option to “Theme”.
Messages
↑ Back to top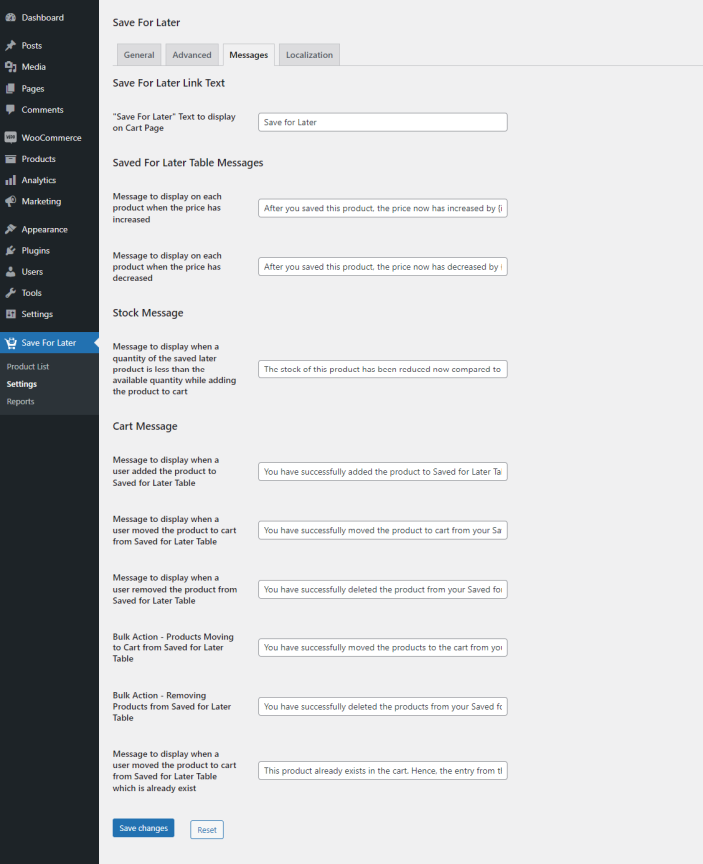
You can customize messages displayed to the user from the Save for Later list.
Localization
↑ Back to top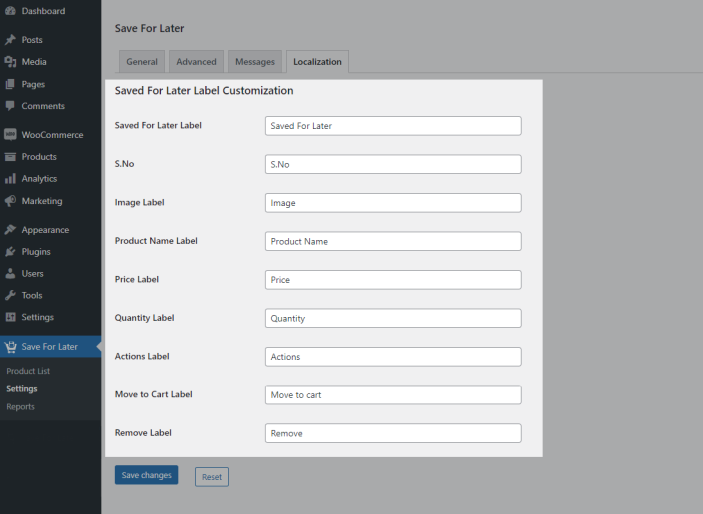
You can customize the following labels displayed on the Saved For Later Table at cart,
- Saved For Later
- Image
- Product Name
- Price
- Quantity
- Actions
Usage
↑ Back to top- Once the extension is set up, based on the restriction settings, A Save for Later link will be displayed below the product Title in the cart page.
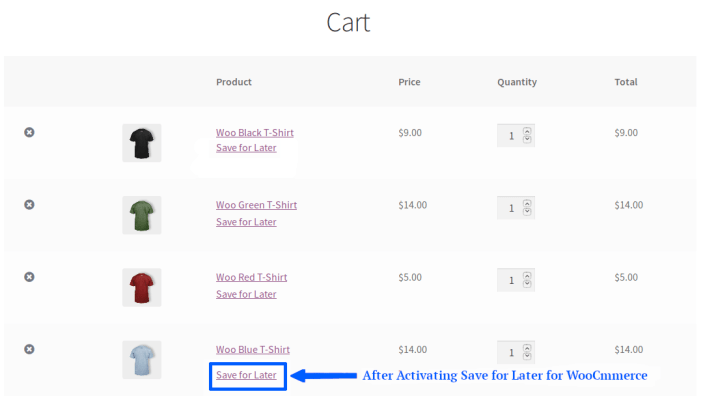
- The Users can make use of the “Save for Later” link to move the products which they are not planning to purchase as of now from the cart to a Save for Later list.
- The products which are saved for later will be displayed in the cart page in a separate table below the cart total table.
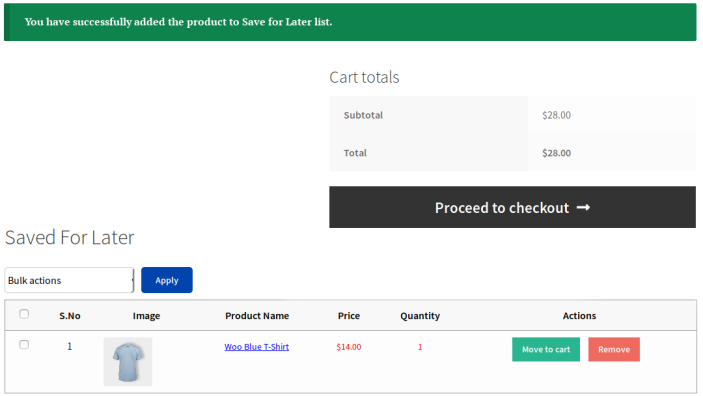
- The products added to Save for Later list by logged-in users will be available indefinitely without any restrictions.
- The products added to Save for Later list by guest users will be available for a fixed duration. This duration can be customized.
Plugin Performance Tracker for Admin
↑ Back to topThis plugin comes bundled with a feature where the products added/purchased and deleted to and from the Save for Later list by logged-in users will be captured and displayed.
To data for Save for Later can be accessed from WordPress Dashboard > Save for Later > Product List
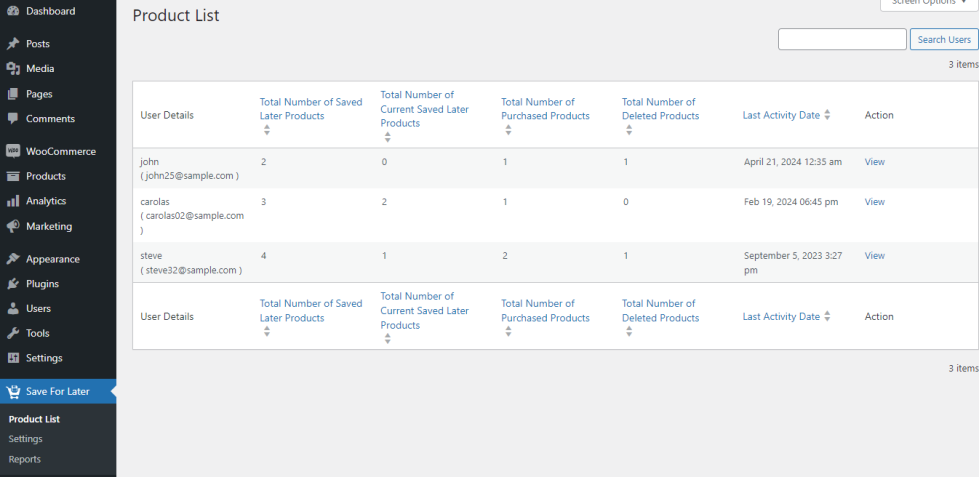
You can see the following data captured by the plugin from WordPress Dashboard > Save for Later > Reports.
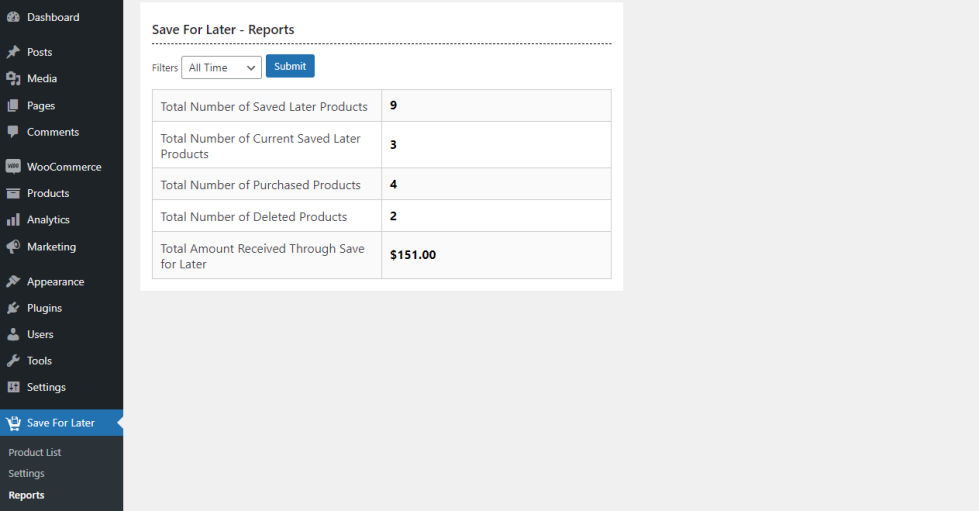
- Total Number of Saved Later Products
- Total Number of Current Saved Later Products
- Total Number of Purchased Products
- Total Number of Deleted Products
- Total Amount Received Through Save for Later
Translation
↑ Back to topSave For Later for WooCommerce is translation ready, meaning you can edit the po files by which you can translate the text to any language. Steps to perform the translation are as follows. For example, a translation to French.
- Download and install Poedit
- Open the file save-for-later-for-woocommerce > languages > save-for-later-for-woocommerce.pot using Poedit.
- Create a new translation file by clicking Create new translation button
- Choose the Source text and set its corresponding French text in Translation Text Area.
- Save the changes.
- Save the file name as save-for-later-for-woocommerce-fr_FR.po.
- If you are using WordPress Version 3.9.13 or below, then in wp-config.php define the WPLANG as French. Syntax is define(‘WPLANG’, ‘fr_FR’);
- If you are using WordPress Version 4.0 or above, then go to WordPress dashboard > Settings > General and select the Site Language as French
Questions and Feedback
↑ Back to topHave a question before you buy? Please fill out this pre-sales form.
Already purchased and need some assistance? Get in touch with us via the Help Desk.
