Introduction
↑ Back to topEnhance the customer experience and increase your conversion rate with a sliding cart preview that can be accessed from anywhere on your WooCommerce store. No need to take your customers to a separate cart page and reduce conversions by extra unnecessary clicks.
You can customize virtually all visual elements of the side AJAX cart page:
- Mobile-first design for better conversion rates
- Text string translation to your local language
- View Cart, Checkout, Continue Shopping areas are fully customizable
- Customize cart page width, height, colors, layout, and almost any text/visuals
- Choose how Ajax cart page looks like and easily enable/disable elements you want to show in the cart
- Products sorting order in a cart page
- Disable off-canvas cart and floating cart icon on specific (or even all non-WooCommerce) pages
- Custom CSS stylesheet for extra flexibility
System Requirements
↑ Back to top- WordPress version 5.6 or higher
- PHP version 7 or higher
- MySQL version 5.6 or higher
- Installed and activated WooCommerce 5.5 or higher
Installation
↑ Back to topBefore you install Floating Sticky Cart for WooCommerce, make sure you’ve already installed and activated the WooCommerce plugin for WordPress.
After purchase, download .zip file of the plugin from your WooCommerce account and save it on your computer.
To install the plugin, go to Dashboard > Plugins > Add New.

Click the Upload Plugin button.
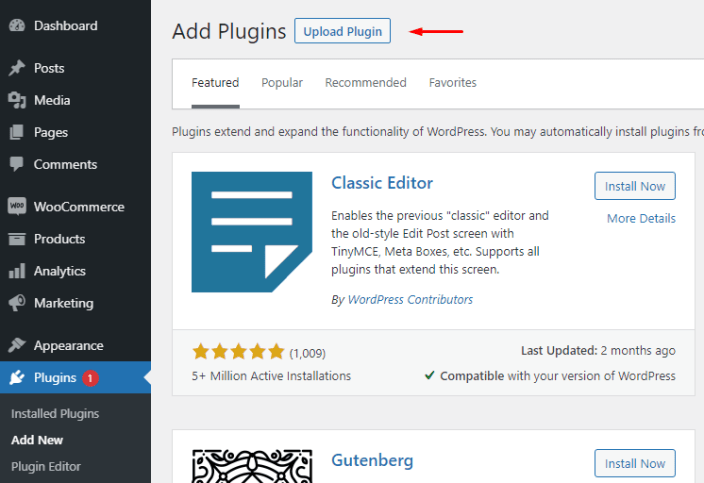
Upload the plugin file and click Install Now.

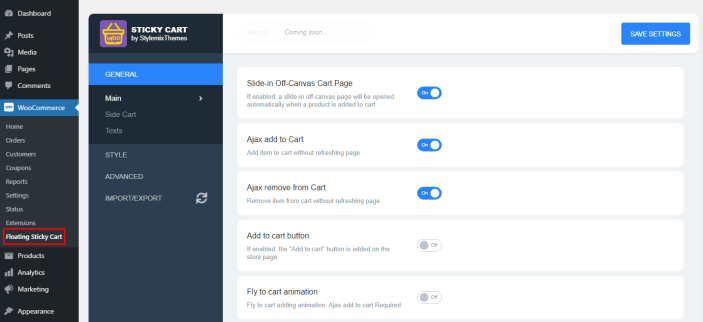
The plugin settings will appear in the WooCommerce section.
Update
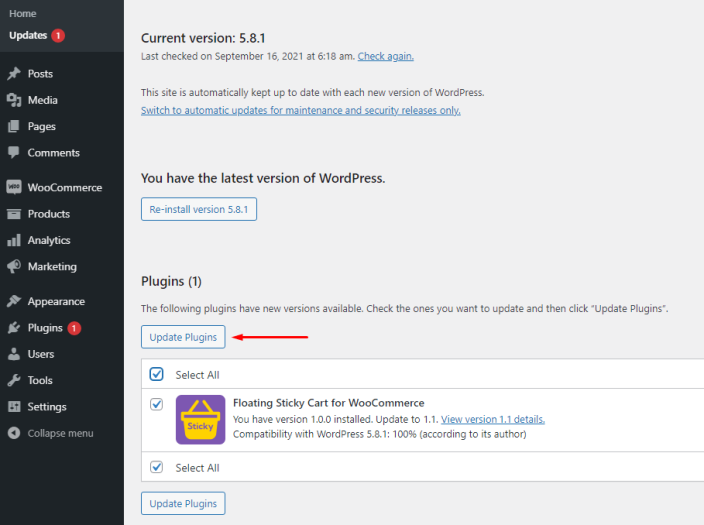
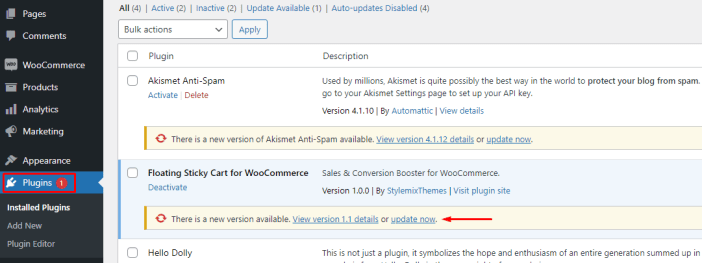
↑ Back to top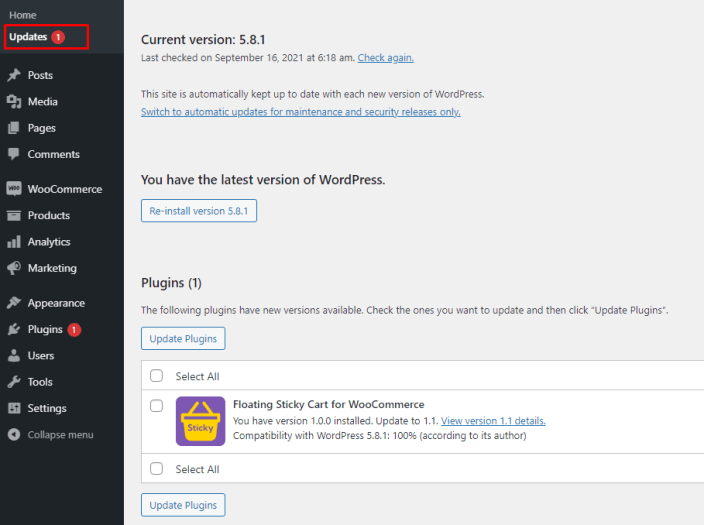 In the Plugins section find Floating Sticky Cart, select it, and click Update Plugins.
 Also, you can open Plugins > Installed Plugins and update the plugin there. Find Floating Sticky Cart from the list and click Update Now if there is an update available.
General Settings
↑ Back to topMain
↑ Back to top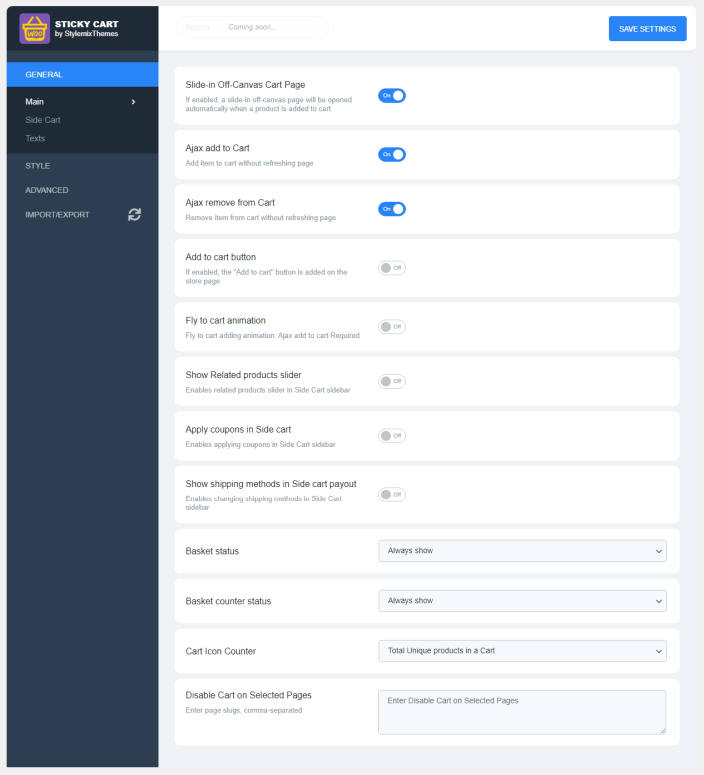 Slide-in Off-Canvas Cart Page allows opening the side cart when adding the product to the cart.
Ajax add to Cart allows the item to be added to the cart without refreshing the page. AJAX add to cart buttons on archives option in WooCommerce Settings should be enabled for this option to work properly.
Ajax remove from Cart allows removing items from the cart without refreshing the page.
Add to cart button allows plugin to add the buttons for adding a product to the cart if the theme does not provide such option.
Fly to cart animation effect activates by adding an item to the cart. Ajax add to Cart option should be enabled for this option to work.
Show Related products slider allows showing related products to your chosen item. Related items will be displayed as sliders in the cart off-canvas. Related products will not be displayed if there is only one product in the store and you add it to the cart.
Apply coupons in Side cart allows to add different promotion coupons to the items. After enabling this option, you can create the coupons in Marketing > Coupons. You can get detailed information about the coupon creation process on the Coupon Management page of WooCommerce documentation.
Show shipping methods in Side cart payout allows users to order delivery for their products by specifying the address of their location. By default, the shipping is free of charge, shipping price and shipping zones specified in the WooCommerce settings. You can get detailed information about the shipping settings on the Setting up Shipping Zones page of WooCommerce documentation.
Basket status will define whether to show the basket icon on the web page.
Basket counter status will define whether to display the counter under the basket icon on the web page. If the Basket status option is set to Always hide, the counter will be not visible.
Cart Icon Counter determines whether to count only unique items in the cart or all selected items.
Disable Cart on Selected Pages disables displaying the side cart icon on the selected pages. Page slugs should be written in the field, separated by commas. Side Cart will be automatically opened if the user adds a product to the cart.
Slide-in Off-Canvas Cart Page allows opening the side cart when adding the product to the cart.
Ajax add to Cart allows the item to be added to the cart without refreshing the page. AJAX add to cart buttons on archives option in WooCommerce Settings should be enabled for this option to work properly.
Ajax remove from Cart allows removing items from the cart without refreshing the page.
Add to cart button allows plugin to add the buttons for adding a product to the cart if the theme does not provide such option.
Fly to cart animation effect activates by adding an item to the cart. Ajax add to Cart option should be enabled for this option to work.
Show Related products slider allows showing related products to your chosen item. Related items will be displayed as sliders in the cart off-canvas. Related products will not be displayed if there is only one product in the store and you add it to the cart.
Apply coupons in Side cart allows to add different promotion coupons to the items. After enabling this option, you can create the coupons in Marketing > Coupons. You can get detailed information about the coupon creation process on the Coupon Management page of WooCommerce documentation.
Show shipping methods in Side cart payout allows users to order delivery for their products by specifying the address of their location. By default, the shipping is free of charge, shipping price and shipping zones specified in the WooCommerce settings. You can get detailed information about the shipping settings on the Setting up Shipping Zones page of WooCommerce documentation.
Basket status will define whether to show the basket icon on the web page.
Basket counter status will define whether to display the counter under the basket icon on the web page. If the Basket status option is set to Always hide, the counter will be not visible.
Cart Icon Counter determines whether to count only unique items in the cart or all selected items.
Disable Cart on Selected Pages disables displaying the side cart icon on the selected pages. Page slugs should be written in the field, separated by commas. Side Cart will be automatically opened if the user adds a product to the cart.
Side Cart
↑ Back to top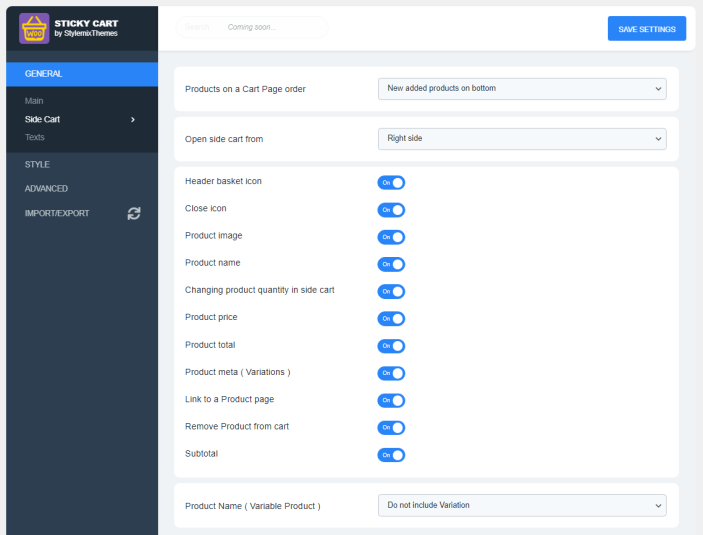 Products on a Cart Page order setting will define whether to add a new products to the top of the cart or to the bottom.
Open side cart from setting is responsible for the opening direction of the cart.
Header basket icon setting will define whether to display the header basket icon.
Close icon setting will define whether to display the close icon in the header part of the cart.
Product image setting will define whether to display the product’s image in the cart.
Product name setting will define whether to show the product’s name in the cart.
Changing product quantity in side cart setting defines whether users can change the quantity of the product after adding it to the cart.
Product price setting is responsible for price displaying for each product.
Product total setting is responsible for total price displaying for each product.
Product meta setting is responsible for displaying additional info, such as color and size, in the body of the product in the side cart.
Link to a Product page allows users to go to the product single page by clicking on the Product Image or Product name.
Remove Product from cart setting is responsible for displaying Remove button for each product in the side cart.
Subtotal price can be displayed in the footer part of the side cart.
Product name (Variable Product) allows to choose position of displaying product variations in the side cart.
Products on a Cart Page order setting will define whether to add a new products to the top of the cart or to the bottom.
Open side cart from setting is responsible for the opening direction of the cart.
Header basket icon setting will define whether to display the header basket icon.
Close icon setting will define whether to display the close icon in the header part of the cart.
Product image setting will define whether to display the product’s image in the cart.
Product name setting will define whether to show the product’s name in the cart.
Changing product quantity in side cart setting defines whether users can change the quantity of the product after adding it to the cart.
Product price setting is responsible for price displaying for each product.
Product total setting is responsible for total price displaying for each product.
Product meta setting is responsible for displaying additional info, such as color and size, in the body of the product in the side cart.
Link to a Product page allows users to go to the product single page by clicking on the Product Image or Product name.
Remove Product from cart setting is responsible for displaying Remove button for each product in the side cart.
Subtotal price can be displayed in the footer part of the side cart.
Product name (Variable Product) allows to choose position of displaying product variations in the side cart.
Texts
↑ Back to top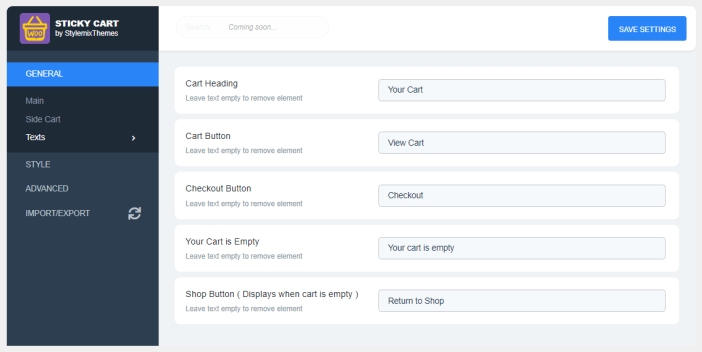 Cart Heading can be specified in the first field. The element will be removed by leaving this field empty.
Cart Button title can be specified in cart footer. The element will be removed by leaving this field empty.
Checkout Button title can be specified in cart footer. The element will be removed by leaving this field empty.
Your Cart is Empty annotation text can be specified. The element will be removed by leaving this field empty.
Cart Heading can be specified in the first field. The element will be removed by leaving this field empty.
Cart Button title can be specified in cart footer. The element will be removed by leaving this field empty.
Checkout Button title can be specified in cart footer. The element will be removed by leaving this field empty.
Your Cart is Empty annotation text can be specified. The element will be removed by leaving this field empty.
Style Settings
↑ Back to topMain
↑ Back to top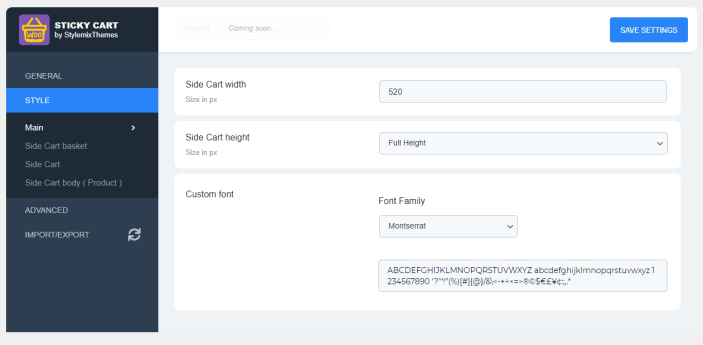
Side Cart Basket
↑ Back to top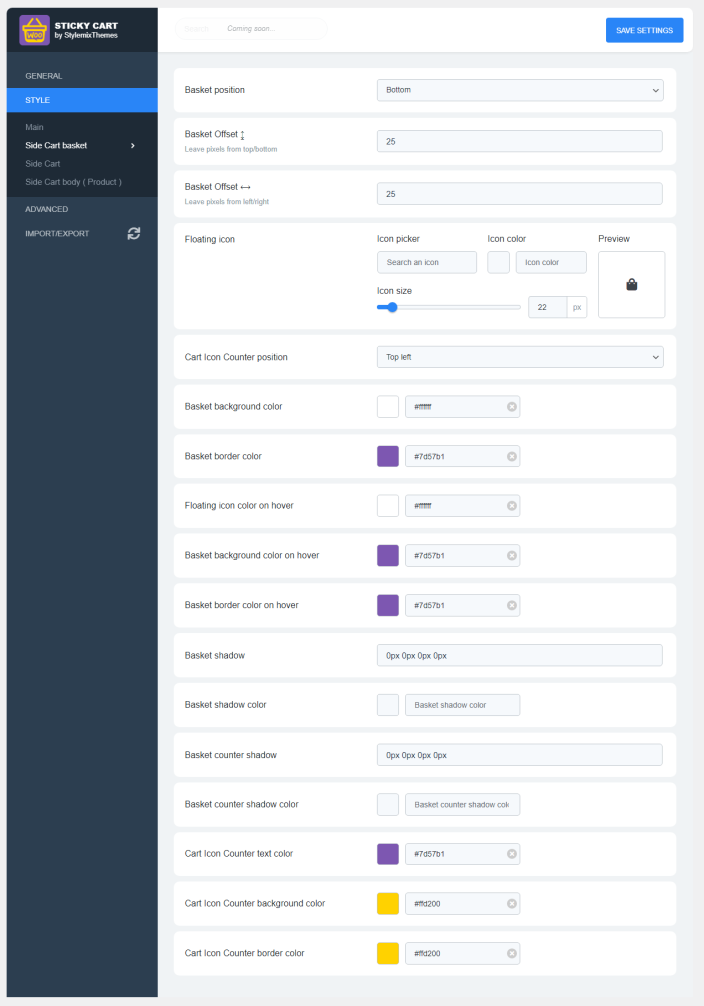
Side Cart
↑ Back to top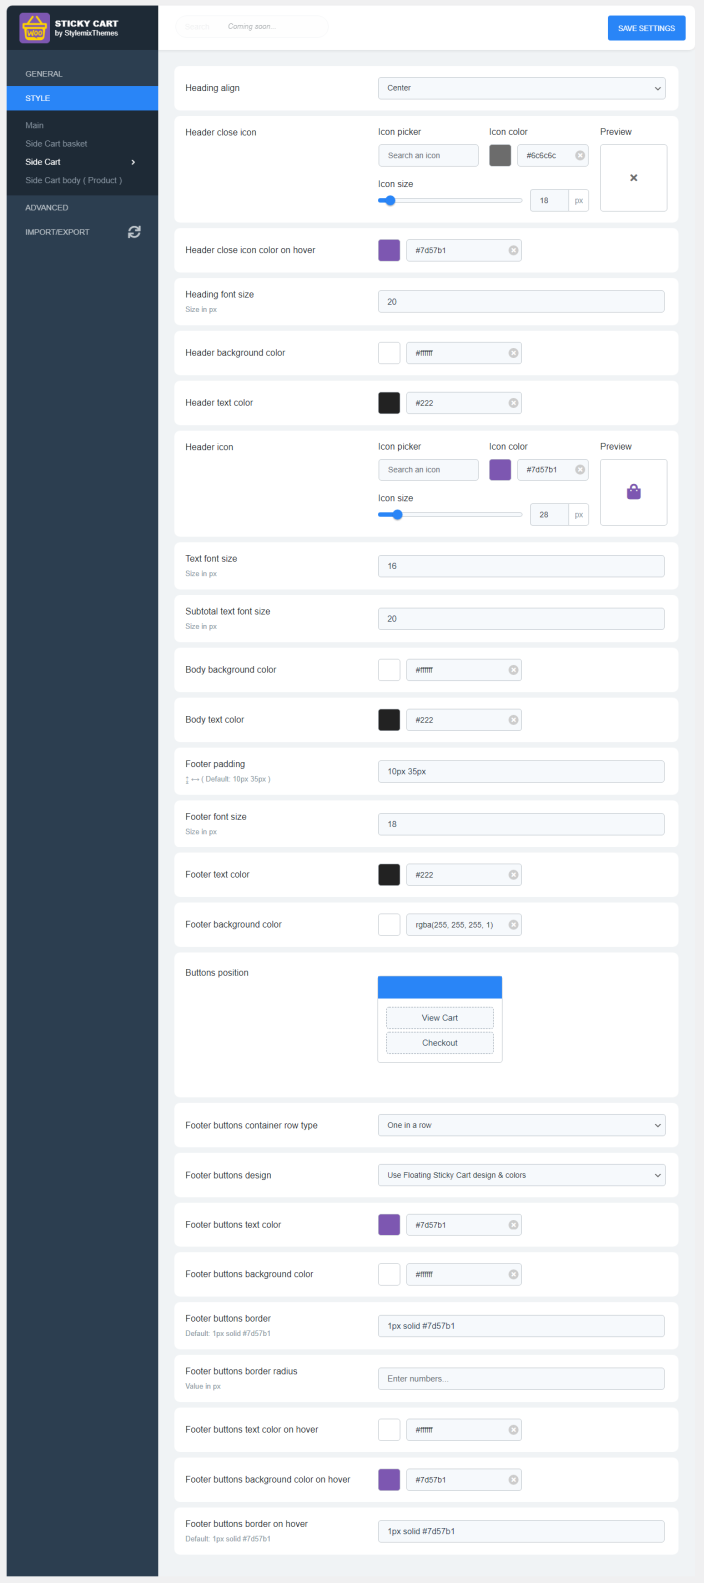
Side Cart Body (Product)
↑ Back to top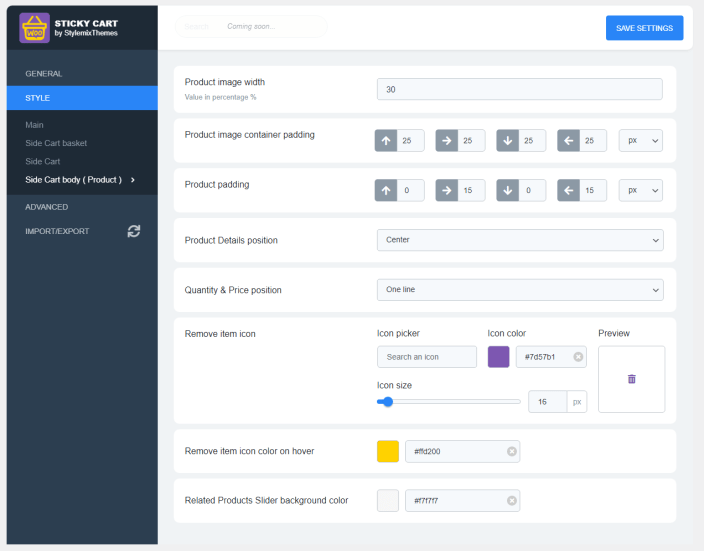
Advanced (Custom CSS)
↑ Back to top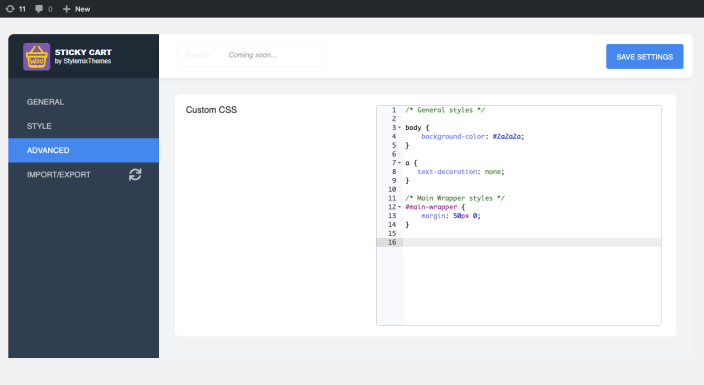
Settings Import & Export
↑ Back to topSettings Export
↑ Back to topSettings Import
↑ Back to top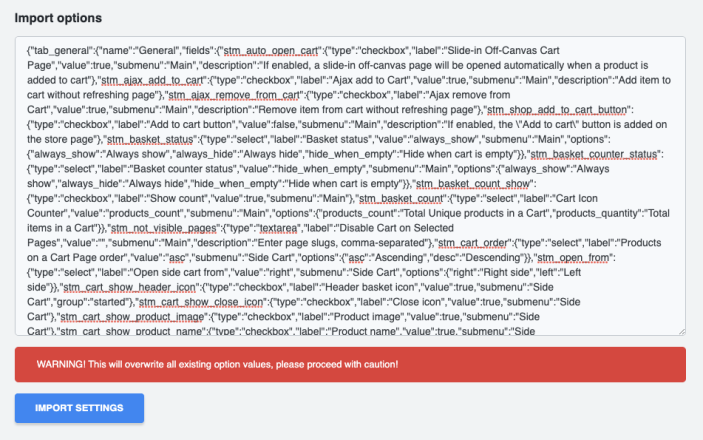
PayPal Setup
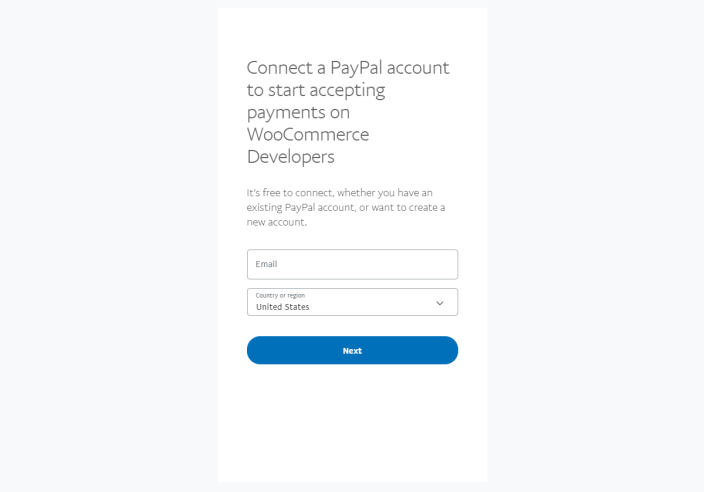
↑ Back to top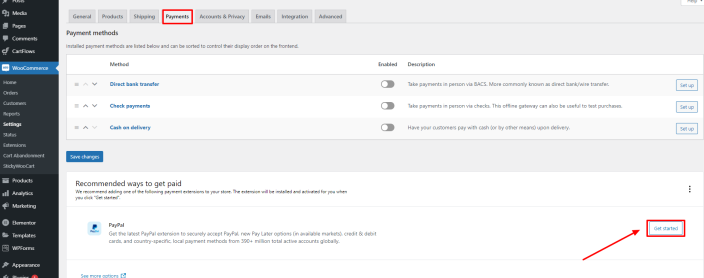 Afterward, you can connect your account to PayPal.
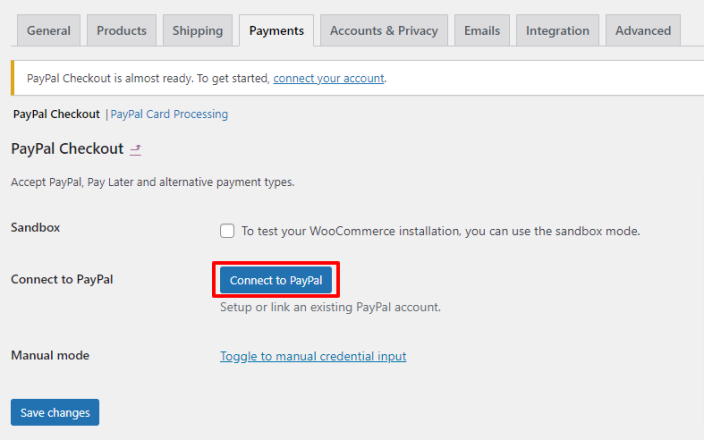 Click the Connect to PayPal button which forwards you to the official PayPal webpage.
 After connecting your account to PayPal, you can change the payment gateway settings in the Payments section of WooCommerce Settings.
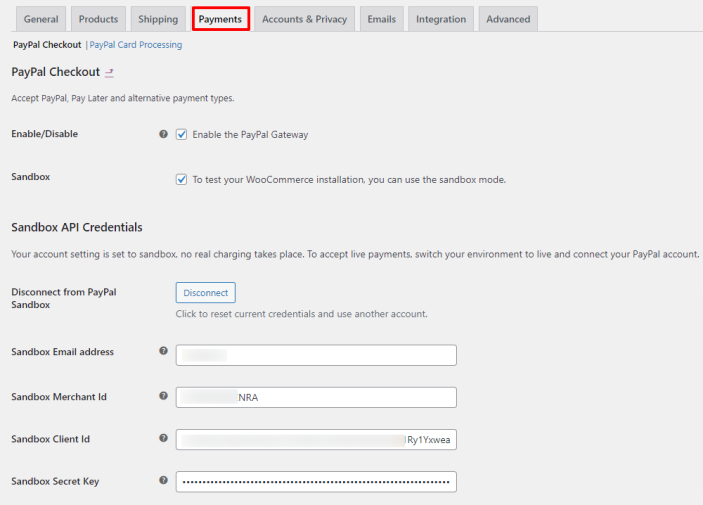 The PayPal payment option will be available to use on website after saving changes.
Follow the documentation page of the PayPal extension for WooCommerce to get more information about payment gateway settings.
The PayPal payment option will be available to use on website after saving changes.
Follow the documentation page of the PayPal extension for WooCommerce to get more information about payment gateway settings.
A floating cart is added to ensure more leads are generated and better Facebook pixel warming which leads to more conversion events and better optimization.