TrustCommerce is a fast and secure direct payment approach that allows you to accept
all major credit cards and
ACH/eCheck payments on your WooCommerce store.
The extension supports:
- Regular product payments
- Subscription product payments
- Pre-Order product payments
- Refunds from the Order Edit screen
- Capture previously authorized payments from the Order Edit screen
- An SSL Certificate
- A TrustCommerce account
- Download the .zip file from your WooCommerce account.
- Go to: WordPress Admin > Plugins > Add New and Upload Plugin with the file you downloaded with Choose File.
- Install Now and Activate the extension.
More information at
Install and Activate Plugins/Extensions.
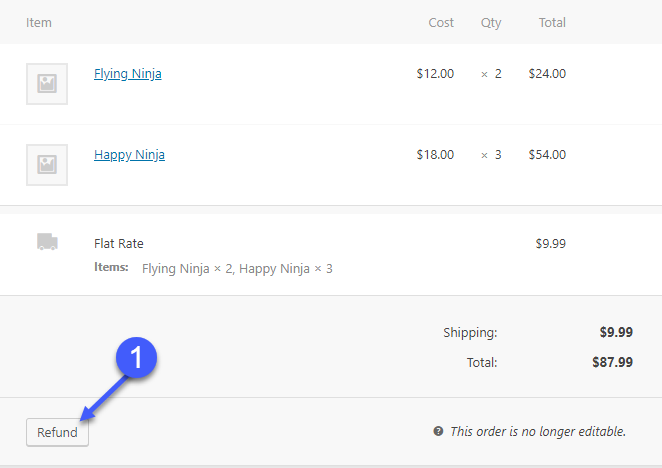
If your store accepts refunds, then you will want to be able to refund the transaction directly within the Order Edit screen. The TrustCommerce gateway does have this functionality in place and here is how you refund the transaction:
- Go to the Order Edit screen of the order you are refunding
- Under the items meta box, at the bottom left corner, you will see a Refund button. Click it to expose the Refund fields.

- Enter the amount you want to refund and optionally a reason note.
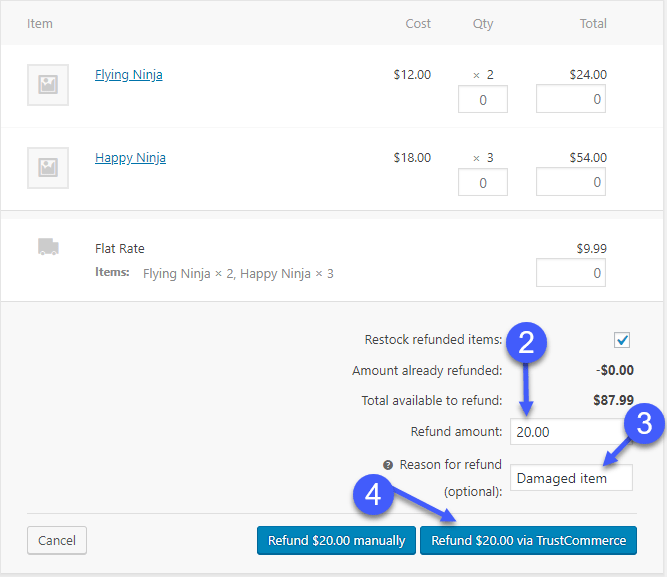
- Press the Refund with TrustCommerce button
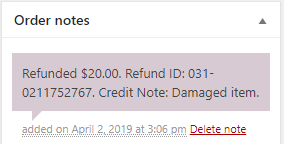
- An order note will be left detailing the refund transaction.

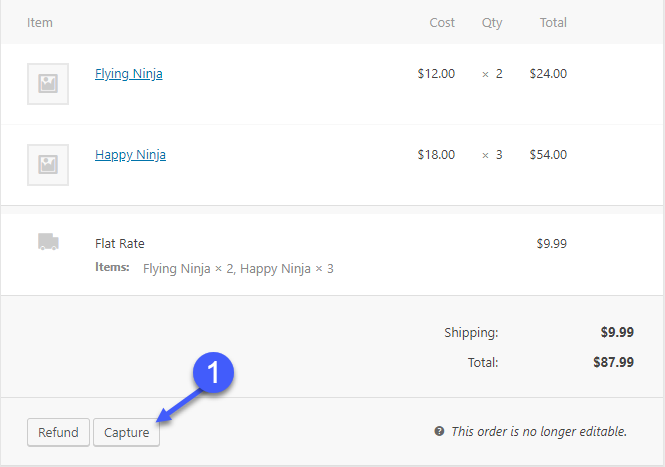
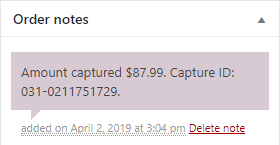
If you set your gateway to perform only authorization, then you would want to be able to capture the payment once the order is completed. You can do that directly from the Order Edit screen.
Here are the steps to do it:
- Go to the Order Edit screen of the order you are about to capture the transaction for.
- Under the items meta box, at the bottom left corner, you will see a Capture button. Click it to expose the Capture fields.
- Enter the amount you want to capture. Note: The amount can’t be more than the originally authorized amount!
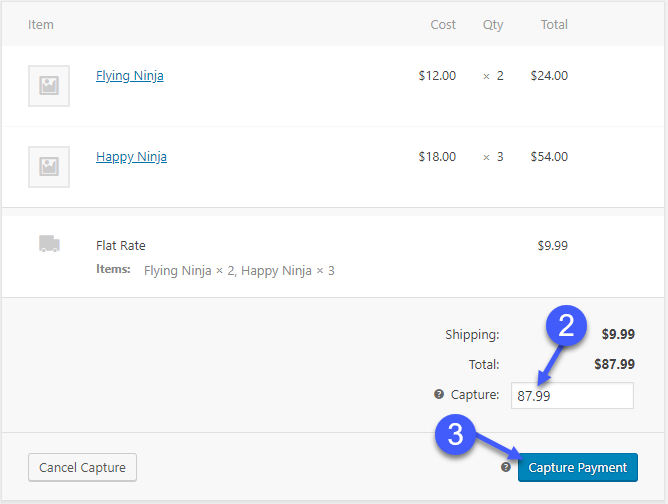
- Click on the Capture Payment button.
- An order note will be left with details about the transaction.
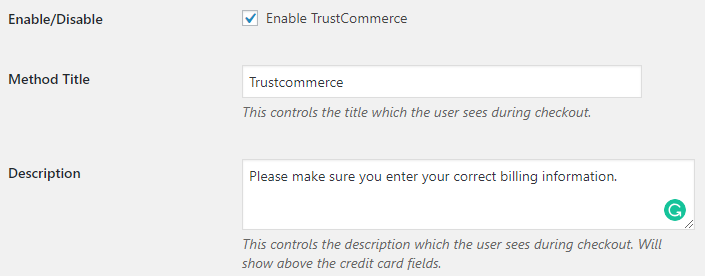
- Enable TrustCommerce:
- Method Title:
- The title of the gateway displayed on the checkout page.
- Description:
- The description displayed on the checkout page.

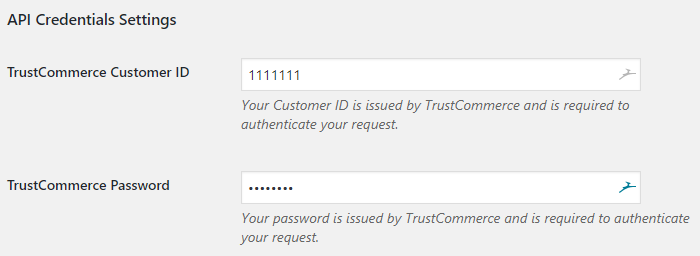
- TrustCommerce Customer ID:
- Your Customer ID is issued by TrustCommerce and is required to authenticate your request.
- TrustCommerce Password:
- Your password is issued by TrustCommerce and is required to authenticate your request.
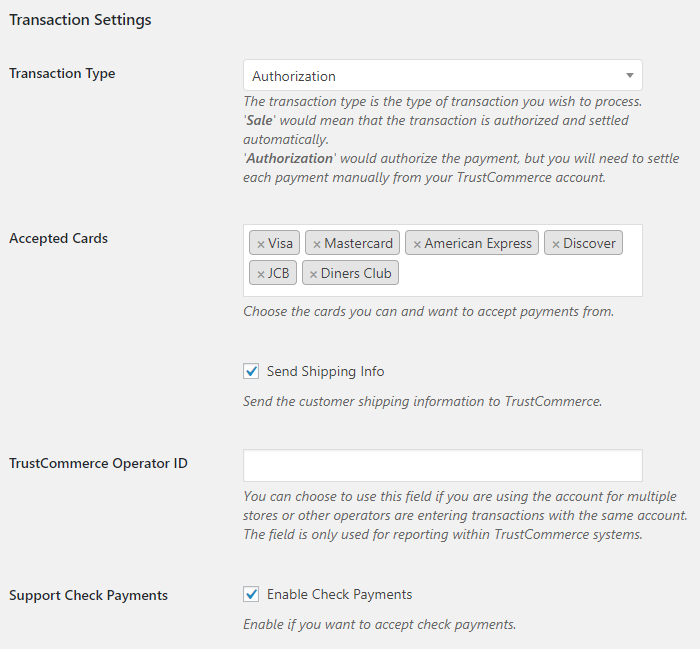
- Transaction Type:
- The transaction type is the type of transaction you wish to process.
- Sale – would mean that the transaction is authorized and settled automatically.
- Authorization – would authorize the payment, but you will need to settle each payment manually from your TrustCommerce account.
- Accepted Cards:
- This option shows all the credit cards TrustCommerce can process at the moment. You can choose which ones you want to enable and accept payments from.
- Send Shipping Info:
- Send the customer shipping information to TrustCommerce.
- TrustCommerce Operator ID:
- You can choose to use this field if there are multiple operators that are potentially entering transactions. The operator field is only used for reporting within TrustCommerce systems.
- Support Check Payments:
- Enabling this option will add support for ACH(eCheck) payments to your store.
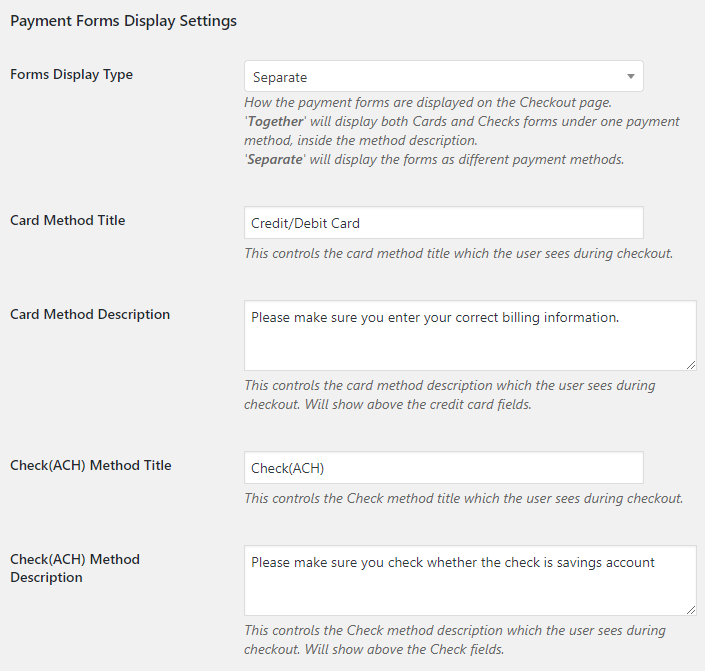
Please note that when “Forms Display Type” is set to “separate”, the Method Title and Description from the General Settings will not be used. The payment type Title and Description in this section will be used instead.
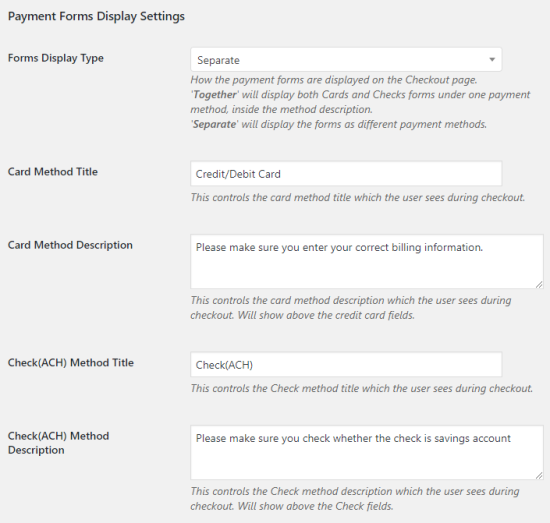
- Forms Display Type:
- ‘Together‘ will display both Cards and Checks forms under one payment method, inside the method description.
- ‘Separate‘ will display the forms as different payment methods.
- Card Method Title (Separate only):
- Controls the card method title which the user sees during checkout
- Card Method Description (Separate only):
- Controls the card method description which the user sees during checkout. Will show above the credit card fields.
- Check(ACH) Method Title (Separate only):
- Controls the Check method title which the user sees during checkout.
- Check(ACH) Method Description (Separate only):
- Controls the Check method description which the user sees during checkout. Will show above the Check fields.

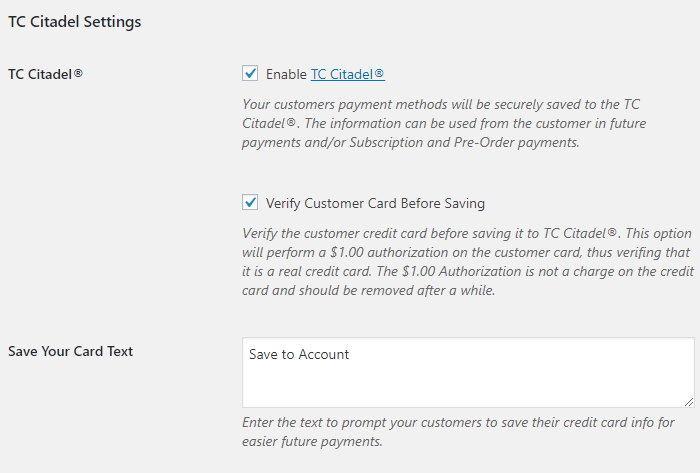
- Save Customers to TC Citadel®:
- Your customers will be securely saved to the TC Citadel®. The information can be used from the customer in future payments and for Subscription payments.
- Verify Customer Card Before Saving:
- The process will verify the customer credit card before saving it to TC Citadel. A $1.00 authorization on the customer card will be placed, thus verifying that it is a real credit card. The $1.00 authorization is not a charge on the credit card and will be removed after a while.
- Save Your Card Text:
- Enter the text to prompt your customers to save their credit card info for easier future payments.
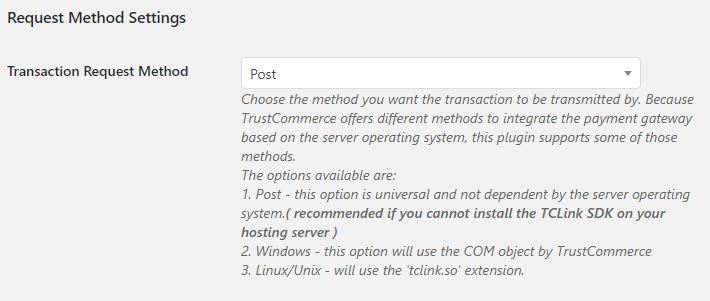
- Transaction Request Method:
- This option show the method you want the transaction to be transmitted by. Because TrustCommerce offers different methods to integrate the payment gateway based on the server operating system, this plugin supports some of those methods. Please ask your TrustCommerce sales rep or support for help with the installation of the payment method you need.
- The options available are:
- Post – this option is universal and not dependent by the server operating system. ( recommended if you cannot install the TCLink SDK on your hosting server )
- Windows – this option will use the COM object by TrustCommerce.
- Linux/Unix – will use the ‘tclink.so’ extension.
- Linux/Unix Extension Path – (ONLY if method is Linux/Unix):
- Please write in the “tclink.so” extension path relative to the “class.trustcommerce.php” file.
If your hosting server operating system is Linux or Unix and you decide to build the TCLink extension and install it on the server, you will have two options of enabling it for use by this plugin.
- Include it through the php.ini file (Recommended)
- Including it at run time. In which case you need to specify the relative path to the “tclink.so” file.( Example: “../../../modules/tclink.so” )
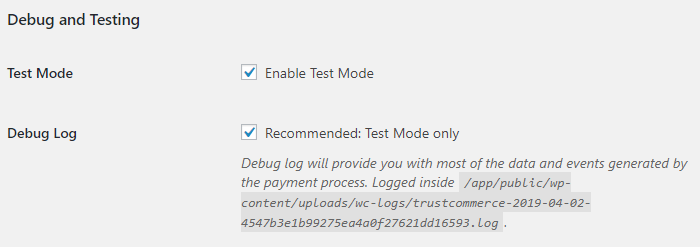
- Test Mode:
- Enable TrustCommerce Test Mode.
- Debug Log:
- Debug log will provide you with most of the data and events generated by the payment process. Location of the debug log is in the description
Have a question before you buy?
Please fill out this pre-sales form.
Already purchased and need some assistance?
Get in touch the developer via the Help Desk.