Deals for WooCommerce allows you to offer Limited Duration Deals on Individual Products and Payments Gateways.
Once a deal is configured, it will be displayed in a separate Deals page. The deals displayed in the Deals page can be categorized into,
- Current Deals
- Upcoming Deals
- Past Deals
Installation
↑ Back to top- Download the .zip file from your WooCommerce account.
- Go to: WordPress Admin > Plugins > Add New and Upload Plugin with the file you downloaded with Choose File.
- Install Now and Activate the extension.
More information at: Install and Activate Plugins/Extensions.
Setup and Configuration
↑ Back to topInitial Setup
↑ Back to top
- For Initial setup of the plugin go to Deals > Settings > Advanced.
- Once the plugin is installed, a new page “Deals” will be automatically created by the plugin. All the deals will be displayed on this page. If you want to display the Deals on a different page, then place the “[dfw_deal_products]” shortcode on the page you want to display the deals and select the new Deals page in Deal Page option and save the settings.
- By default, a user can avail the same Product Deal/Payment Gateway Deal any number of times. If you want to restrict a Product Deal/Payment Gateway Deal once per user, you can do so by enabling the “Deal Restriction” Checkbox.
- If you wish to display Deals for Guest Users, you can do so by enabling the “Deals for Guest Users” option.
- If you want to display a Deal badge on the shop and category pages for the products with deals, then enable the “Enable Deal Badge” checkbox.
- You can customize the messages and labels which is displayed on Deals Page, shop and category pages and single product pages.
Product Deals Configuration
↑ Back to top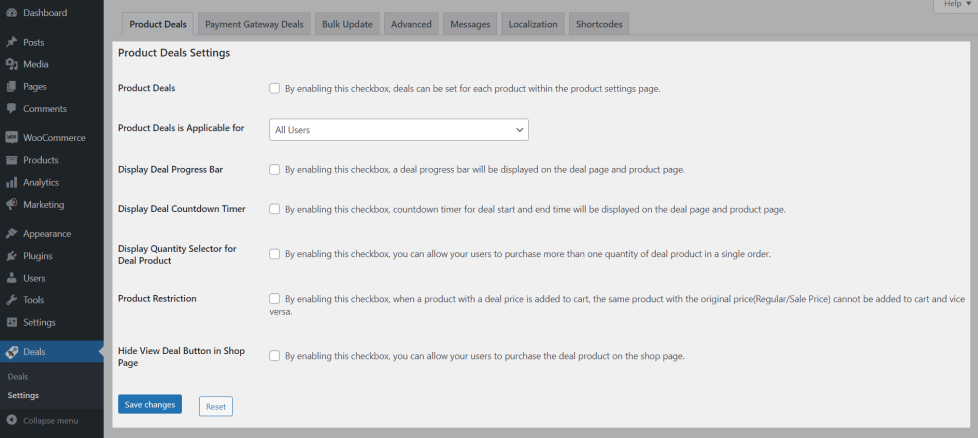
To setup Product Deals go to Deals > Settings > Product Deals
- Enable the Product Deals checkbox.
- By default, all users can avail the Deals. If you want to restrict the deals to specific users, you can do so by using the “Product Deals is Applicable for” option.
- If you want to display a Deal progress bar for the products on the deal, you can do so by enabling the “Display Deal Progress Bar”.
- If you want to display a Deal countdown timer for the products on the deal, you can do so by enabling the “Display Deal Countdown Timer” option.
- By default, the quantity selector will not be displayed to the user for deal products. If you wish to display the quantity selector, you can do so by enabling the “Display Quantity Selector for Deal Product” option.
- By default, a user can add a single quantity of a product with deal price and additional quantities of the same product without the deal price to the same cart and complete the purchase and vice versa. If you want to restrict this behaviour so that when a product with a deal price is added to cart, the same product with the original price(Regular/Sale Price) cannot be added to cart and vice versa, then enable the “Product Restriction” checkbox.
- If you wish to hide the View Deals button, you can do so by enabling the “Hide View Deal Button in Shop Page” option.
Product Level Configuration

- Once the basic settings are completed, create a new product/edit a new product for configuring the deal.
- Enable the “Enable Deals for this Product” checkbox.
- Click the “Add Rule” button.
- Enable the “Enable this Deal” checkbox.
- Give a name for this Deal in the “Deal Name” option.
- In the “Deal Type” option choose the type of deal which you want to offer and set a value.
- In the “Deal Type” option choose the type of deal which you want to offer and set a value.
i) Percentage of the Price – A fixed percentage of the product’s price will be offered as a discount.
ii) Fixed Discount – A fixed discount will be offered on the product’s price.
iii) Fixed Price – The value set in this option will be offered as the deal price for the product. - In the “Deal Duration” option, set a validity for the deal.
- In the “Deal Usage Limit” set the number of orders for which the deal should be valid.
Note
You can configure any number of rules for each product.
Bulk Update
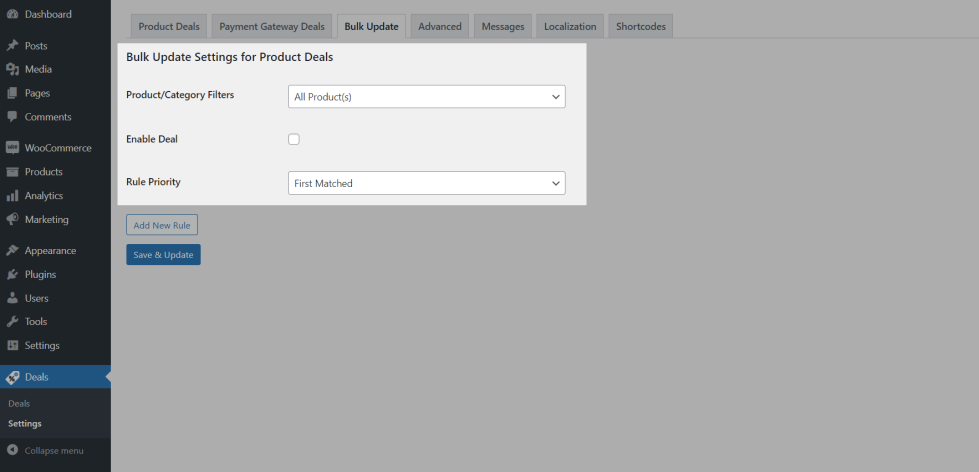
- If you wish to configure product deals for multiple products at once, you can do so by using the bulk update option.
- In the Product/Category Filter, select the products for which the Product Deal has to be configured.
- Enable the “Enable this Deal” checkbox.
- Give a name for this Deal in the “Deal Name” option.
- In the “Deal Type” option choose the type of deal which you want to offer and set a value.
Payment Gateway Deals Configuration
↑ Back to top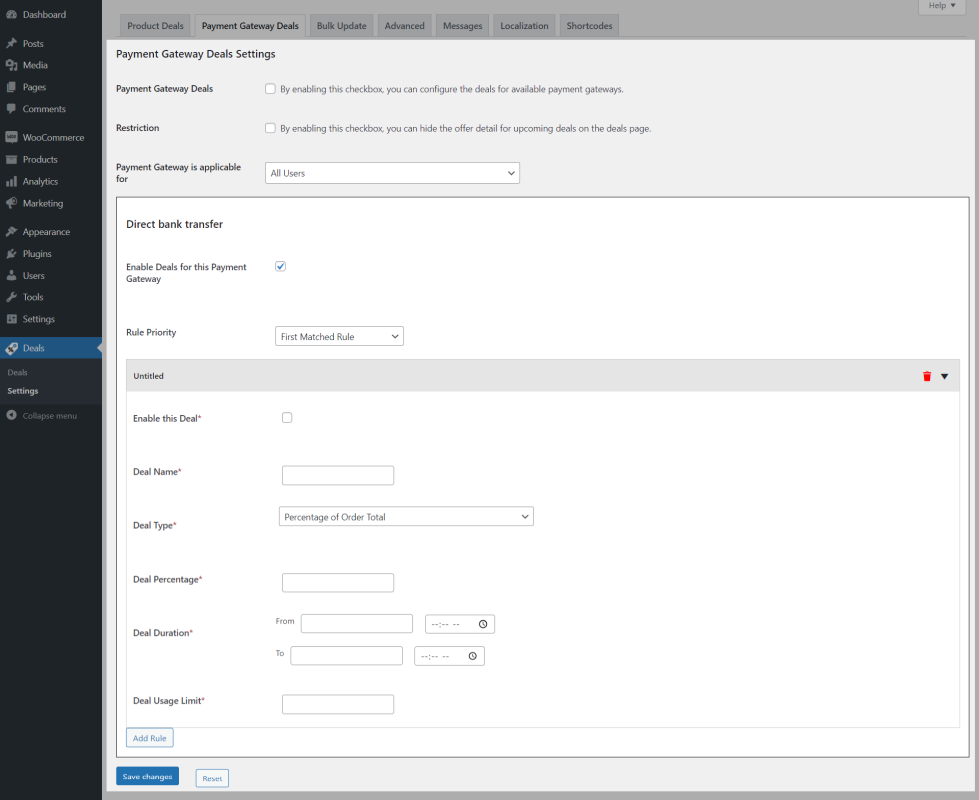
To setup Payment Gateway Deals go to Deals > Settings > Payment Gateway Deals
- Enable the “Payment Gateway Deals” checkbox.
- If you wish to hide the deals on the Upcoming deals page, you can do so by enabling the “Restriction” option.
- By default, payment gateway deals is applicable for all users. If you wish to restrict payment gateway deals to specific users or user roles, you can do so by customizing the “Payment Gateway is applicable for” option.
- Select a payment gateway for which you want to offer a deal and enable the “Enable Deals for this Payment Gateway” checkbox.
- Click the “Add Rule” button.
- Enable the “Enable this Deal” checkbox.
- Give a name for this Deal in the “Deal Name” option.
- In the “Deal Type” option choose the type of deal which you want to offer and set the Value.
i) Percentage of the Price – A fixed percentage of the order total will be offered as a discount.
ii) Fixed Discount – A fixed discount will be offered on the order total. - In the “Deal Duration” option, set a validity for the deal.
- In the “Deal Usage Limit” set the number of orders for which the deal should be valid.
Note:
- You can configure the Payment Gateway Deals only for the payment gateways which is currently enabled on the site.
- You can configure any number of rules for each payment gateway.
Messages
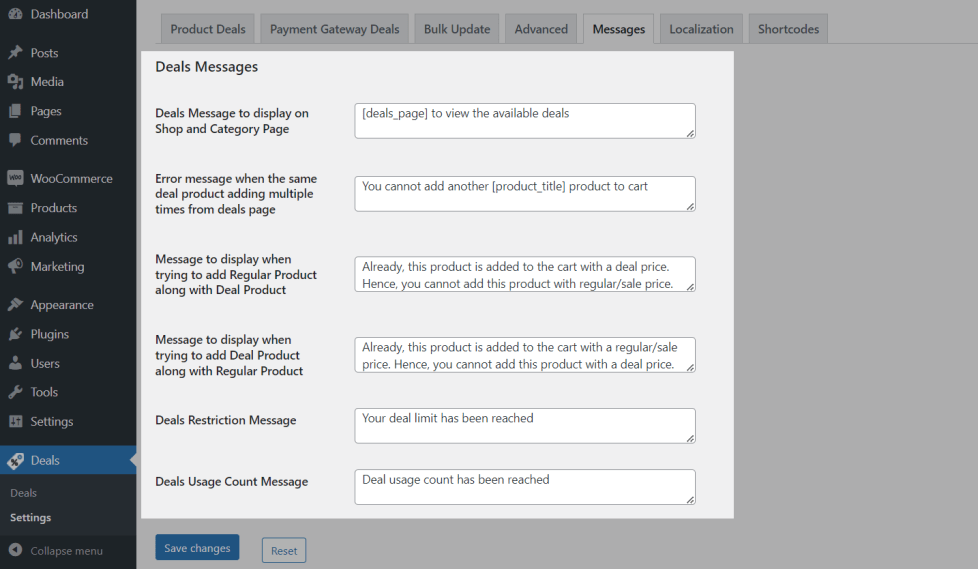
You can customize the messages displayed at frontend[Shop Page, Category Page, Product Page & Deals Page].
Localization

You can customize the strings displayed at frontend[Deals Page & Product Page].
Shortcodes
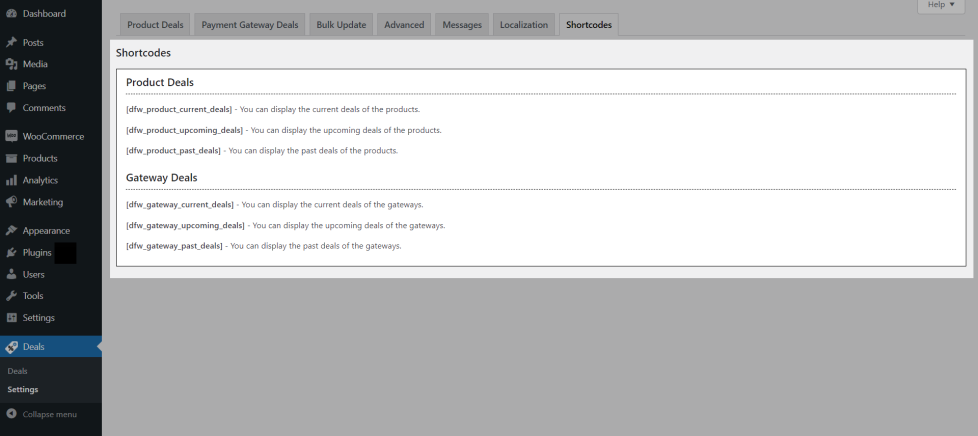
You can display the current deals, upcoming deals & past deals of both Product & Gateway Deals separately through shortcodes.
Usage
↑ Back to top- Once the plugin is setup, based on the restriction settings configured, both product deals and payment gateway deals will be displayed on the Deals page.
- To avail a product deal, your customers can directly click the “Add to Cart” button which is displayed below the product title on the deal page.
- By default, the quantity is restricted to 1 per order for products which currently offer a deal price. If you want to purchase multiple quantities of the product when it is on a deal, then your customers should visit the Product Details page and they must choose “Regular Price” to be able to choose the quantity.
- To avail a payment gateway deal, your customers should add products to the cart and proceed to the checkout page.
- When your customers selects to pay with a payment gateway which is currently offering a deal, then a discount will be applied to your customer’s cart. If the customer changes the payment gateway, the discount will be removed from the cart.
Admin Reports
↑ Back to top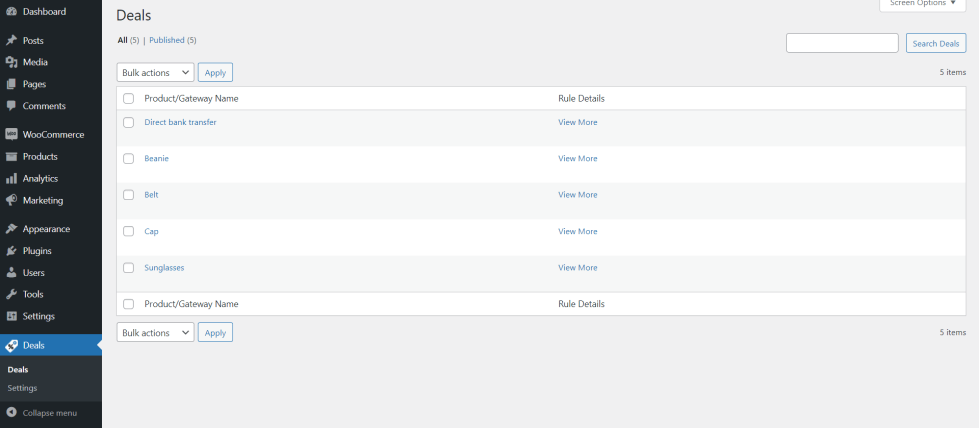
This plugin allows to track the performance of deals which are being offered in your site. To view the Admin Reports go to Deals > Deals.
Translation
↑ Back to topDeals for WooCommerce is translation ready, meaning you can edit the po files by which you can translate the text to any language.
The steps to perform the translation are as follows. For example, a translation to French.
- Download and install Poedit
- Open the file deals-for-woocommerce > languages > deals-for-woocommerce.pot using Poedit.
- Create a new translation file by clicking Create new translation button
- Choose the Source text and set its corresponding French text in Translation Text Area.
- Save the changes.
- Save the file name as deals-for-woocommerce-fr_FR.po
- If you are using WordPress Version 3.9.13 or below, then in wp-config.php define the WPLANG as French. Syntax is define(‘WPLANG’, ‘fr_FR’);
- If you are using WordPress Version 4.0 or above, then go to WordPress dashboard > Settings > General and select the Site Language as French.
Questions and Feedback
↑ Back to topHave a question before you buy? Please fill out this pre-sales form.
Already purchased and need some assistance? Get in touch with us via the Help Desk.
