Connecting to Your MYOB Company File
↑ Back to topStep 1: Accessing the plugin’s settings:
↑ Back to topHow to Access the Plugin Settings Page
Upon activating the plugin for the first time, there should be a yellow notice at the top of your screen. Click the link to access the plugin’s settings.

Alternatively, you can access the settings using the method below:
- In your WordPress admin page, navigate to WooCommerce > Settings
- Click the Integration > MYOB AccountRight tab at the top of the screen.
How to Download MYOB AccountRight & Create an Account
Download MYOB AccountRight & Creating an Account
↑ Back to topIf you already have a ‘my.MYOB’ account set up, feel free to skip this step.
Getting started without an MYOB Account. How to create an account?
- Aussies click here and Kiwis click here, to sign up and activate your free trial.
- Upon activating your MYOB account, a serial number will be sent to your email address. The email will also include links for downloading MYOB AccountRight.
- Go to my.myob.com and select New Zealand or Australia for your country.
- You will be asked for the serial number provided in the email sent to you. Enter it into this form along with your other details.
- Install the application on your computer using the link given in the email.
Step 2: Linking your website to MYOB AccountRight
↑ Back to topHow to Link your WooCommerce Site to MYOB AccountRight
To connect your website with MYOB AccountRight software, you must have an existing account. If not, you will need to follow the steps mentioned here.
- To integrate the MYOB Integration Plugin, navigate to WordPress Admin > WooCommerce > Settings to connect your WC Store to the MYOB Server
- Click on Integration > MYOB AccountRight. to access the MYOB plugin settings.
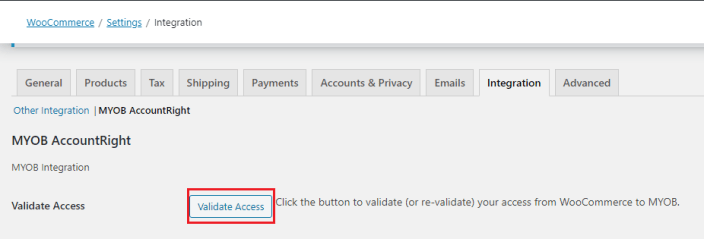
- Click the Validate Access button to authorise the connection between WordPress and MYOB.
Where to find the Validate Access button?
WooCommerce > Settings > Integration > MYOB AccountRight

Authenticating with MYOB
- Next, You’ll be redirected and requested to authenticate your WooCommerce website. Click on the link to authenticate.

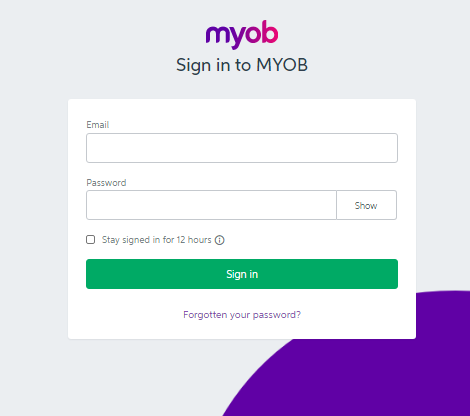
- You will be redirected to the MYOB sign-in page. Enter your credentials and click Sign in

- An authentication successful message will appear. Now, click on Return to Plugin Page for further settings of your MYOB Accountright integration.

- Once you return to the MYOB Integration settings page on your WC site, you’ll see company files loaded from your MYOB AccountRight system. This can be seen WooCommerce MYOB AccountRight Integration page WooCommerce > Settings > Integration > MYOB AccountRight. Save changes and go to the next step.
Step 3: Connecting your Company File in the Admin Page Settings
↑ Back to topCompany File Username and Password
You will now need to enter the company file username and password for your specific company file. This will be set up when the company file is created.
What if you do not know your Company File Username and Password?
If you do not know the Company File username and password please try the following options:
- Use the default Company File Username (‘Administrator’) and leave the password field blank.
- Contact your MYOB Account Manager and request the details required.
Enter your Company file username and password to connect your store via your account and click save Changes at the bottom of the plugin tab. If the default company file username and password do not work this means the password has been updated, please contact MYOB.

Note: Leave the password filed for the company file password empty if you haven’t set it. Keep it blank.
Step 4: Reload Accounts List
↑ Back to topLoad account lists by clicking Reload Account List. You can click the button anytime when needed to reload accounts again.
How to Reload the Accounts list?
More about the MYOB Company File
↑ Back to topIf you have multiple company files, you can select the one you wish to use for this instance of WooCommerce using pulldown menu.

If you choose another company file you will be required to re-enter the company file details, including the Company file Username and Password.
OAuth in MYOB Plugin: Impact of Firewalls like Jetpack
↑ Back to topThe MYOB Integration Plugin for WooCommerce uses OAuth (Open Authorization) to securely connect your WooCommerce store to your MYOB Online account. OAuth provides a secure way for the plugin to authenticate and authorize access to your MYOB data without directly handling sensitive credentials, ensuring a secure exchange between your store and MYOB’s services.
Impact of Firewalls on OAuth
↑ Back to topFirewalls, including those implemented by security plugins like Jetpack, can impact the OAuth process by blocking the external connections required for authentication. Since OAuth involves redirecting requests between your WooCommerce site and MYOB’s servers, any restriction on outbound connections or web requests can interrupt this process, leading to errors such as:
• 403 Forbidden Errors: Occur when the server or firewall blocks the OAuth request.
• Failed Authentication: If the OAuth token exchange is interrupted, the plugin cannot validate your MYOB credentials.
Best Practices
↑ Back to top- Ensure External Connections Are Allowed: Configure your firewall or security plugins to allow outbound connections specifically for the MYOB plugin.
- Whitelist MYOB Domains: Add MYOB’s OAuth endpoints to your security plugin’s whitelist to prevent them from being blocked.
- Monitor Plugin Conflicts: Regularly check for conflicts between your security plugin and MYOB Integration to avoid disruptions in OAuth authentication.

