Quick View & Buy for WooCommerce allows your customers to quickly view products in customized popup and directly add to cart them on the shop page
Setup and Installation
↑ Back to top- Download the .zip file for Quick View & Buy for WooCommerce.
- Go to: WordPress Admin > Plugins > Add New to upload the file you downloaded with Choose File
- Now, Install and Activate the extension.
More information at: Install and Activate Plugins/Extensions
Configuration
↑ Back to topGo to WooCommerce > Settings > Quick Product View. Here, you will find all the configuration settings for Quick View.
General Settings
↑ Back to topTo configure the general settings, go to WooCommerce > Settings > Quick Product View, then click on General.
Here, you can adjust the following options:
- Enable/Disable: Toggle this setting to activate or deactivate the plugin.
- Quick View Button Placement: Choose where the quick view button appears:
- After the “Add to Cart” button
- Before the “Add to Cart” button
- After the product title
- Before the product title
- On product hover
- Close Quick View: Enable this option to automatically close the quick view popup when a product is added to the cart.
- Redirect to Checkout: Automatically redirect customers to the checkout page after adding a product to the cart from the quick view popup.
- Enable/Disable on Mobile Devices: Check this option to enable this feature on mobile devices.
- Add Custom CSS: Insert custom CSS for styling adjustments.
- Add Custom JS: Add custom JavaScript for additional functionality.

Show/Hide Content on Quick View
↑ Back to topNavigate to WooCommerce > Settings , then click on Quick View Content.
Here, you can choose to show or hide the following product details in quick view:
- Product Title: Show or hide the product title.
- Quantity Box & Add to Cart Button: Allow customers to adjust the quantity and add the product to the cart.
- Product Prices: Show or hide the product price.
- Product Rating: Display or hide the product rating.
- Product SKU: Show or hide the product SKU.
- Product Featured Image: Display or hide the main product image.
- Gallery Images: Show or hide additional product images from the gallery.
- Product Categories: Display or hide product categories.
- Product Tags: Show or hide product tags.
- Product Description: Enable or disable the product description.
- Related Products: Show or hide related products.

Quick View Button Design
↑ Back to topTo personalize the appearance of the Quick-view Button, navigate to:
WooCommerce > Settings > Customization & Colors.
Here you will find the following settings:
- Display Quick View Button As: Choose between Text, Icon, or Both (Text & Icon).
- Button Text: Set the text for the Quick View button.
- Button Icon: Select an icon for the Quick View button.
- Button Text Color: Choose the color for the button text.
- Button Background Color: Set the background color of the button.
- Button Hover Color: Define the color displayed when hovering over the button.
- Button Radius: Adjust the border radius for a rounded or square button.
- Button Font Style: Select a font style for the Quick View button text.

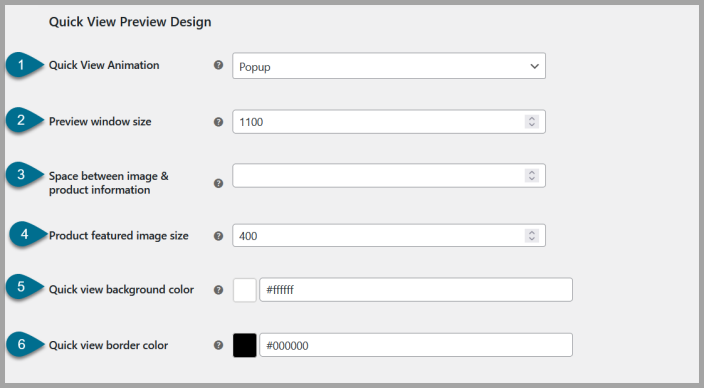
Customize Quick View Popup Preview
↑ Back to topTo personalize the appearance of the Quick Product View popup, navigate to:
WooCommerce > Settings > Customization & Colors, scroll down and you will find the following settings.
- Quick View Animation: Choose an animation effect for the popup (Popup, Slide, Zoom, or Fade).
- Preview Window Size: Select the size of the Quick View popup.
- Space Between Image & Product Information: Adjust the spacing between the product image and its details.
- Product Featured Image Size: Set the size of the featured image displayed in the Quick View popup.
- Quick View Background Color: Choose the background color of the Quick View popup.
- Quick View Border Color: Set the border color for the Quick View popup.
Please Note: If you change the popup size, you’ll also need to change the product image size to make it look right.