The Customer Email Verification helps you to reduce registration spam and fake orders by requiring customers to verify their email address when they register an account or before they can place an order on your store.
How it works
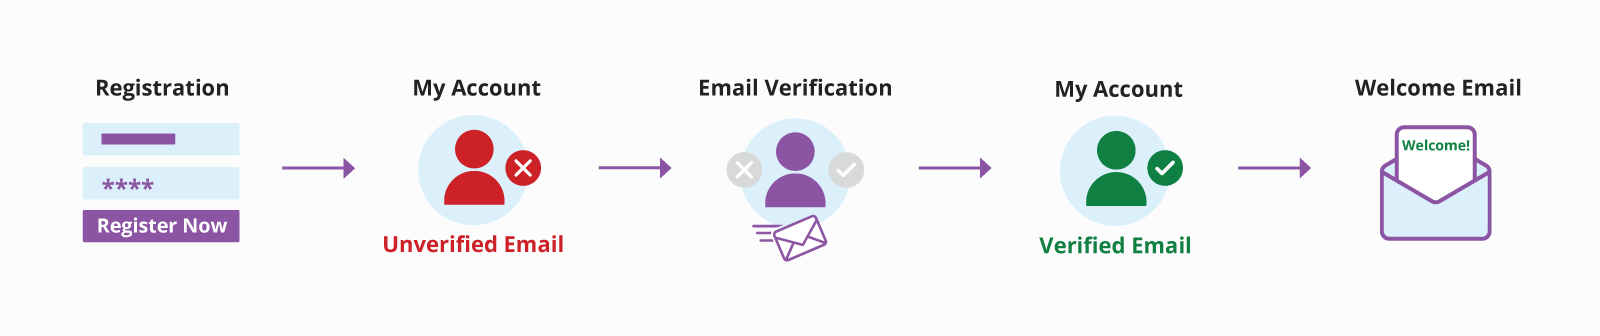
↑ Volver al principioEmail Verification Flow – Registration
↑ Volver al principio
- When a customer sign up for an account in your store, the account is flagged as Unverified Email
- The verification popup will display on all account pages and will allow the customers to enter a verification code to verify their email and activate their account to access the account area.
- The verification code and a verification link are sent to the new customer email address and they can verify their email by entering the verification code or by clicking on the Verification link in the email.
- Once a customer verifies the email address on the account and will be redirected to the account dashboard (or any other page you choose) , and the Customer account will be flagged as Verified Email.
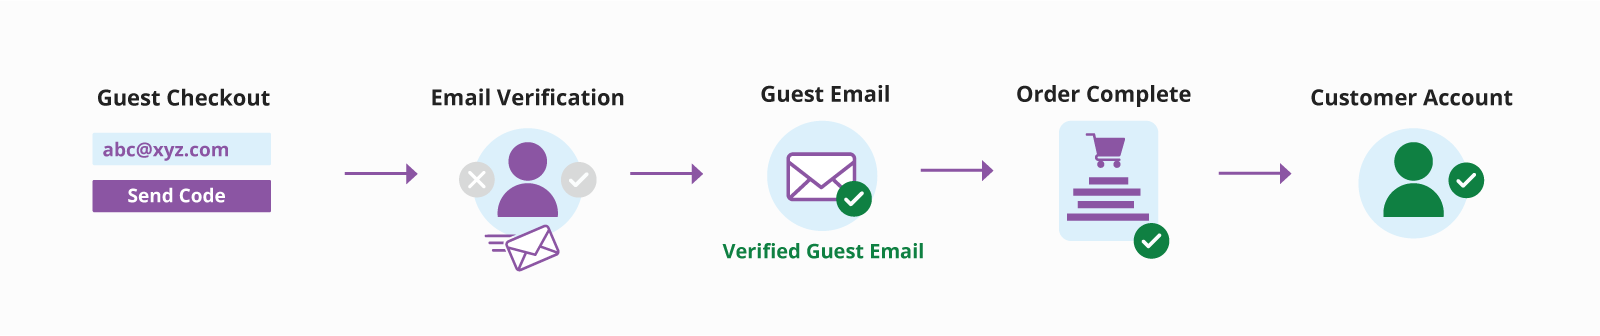
Email Verification Flow – Checkout
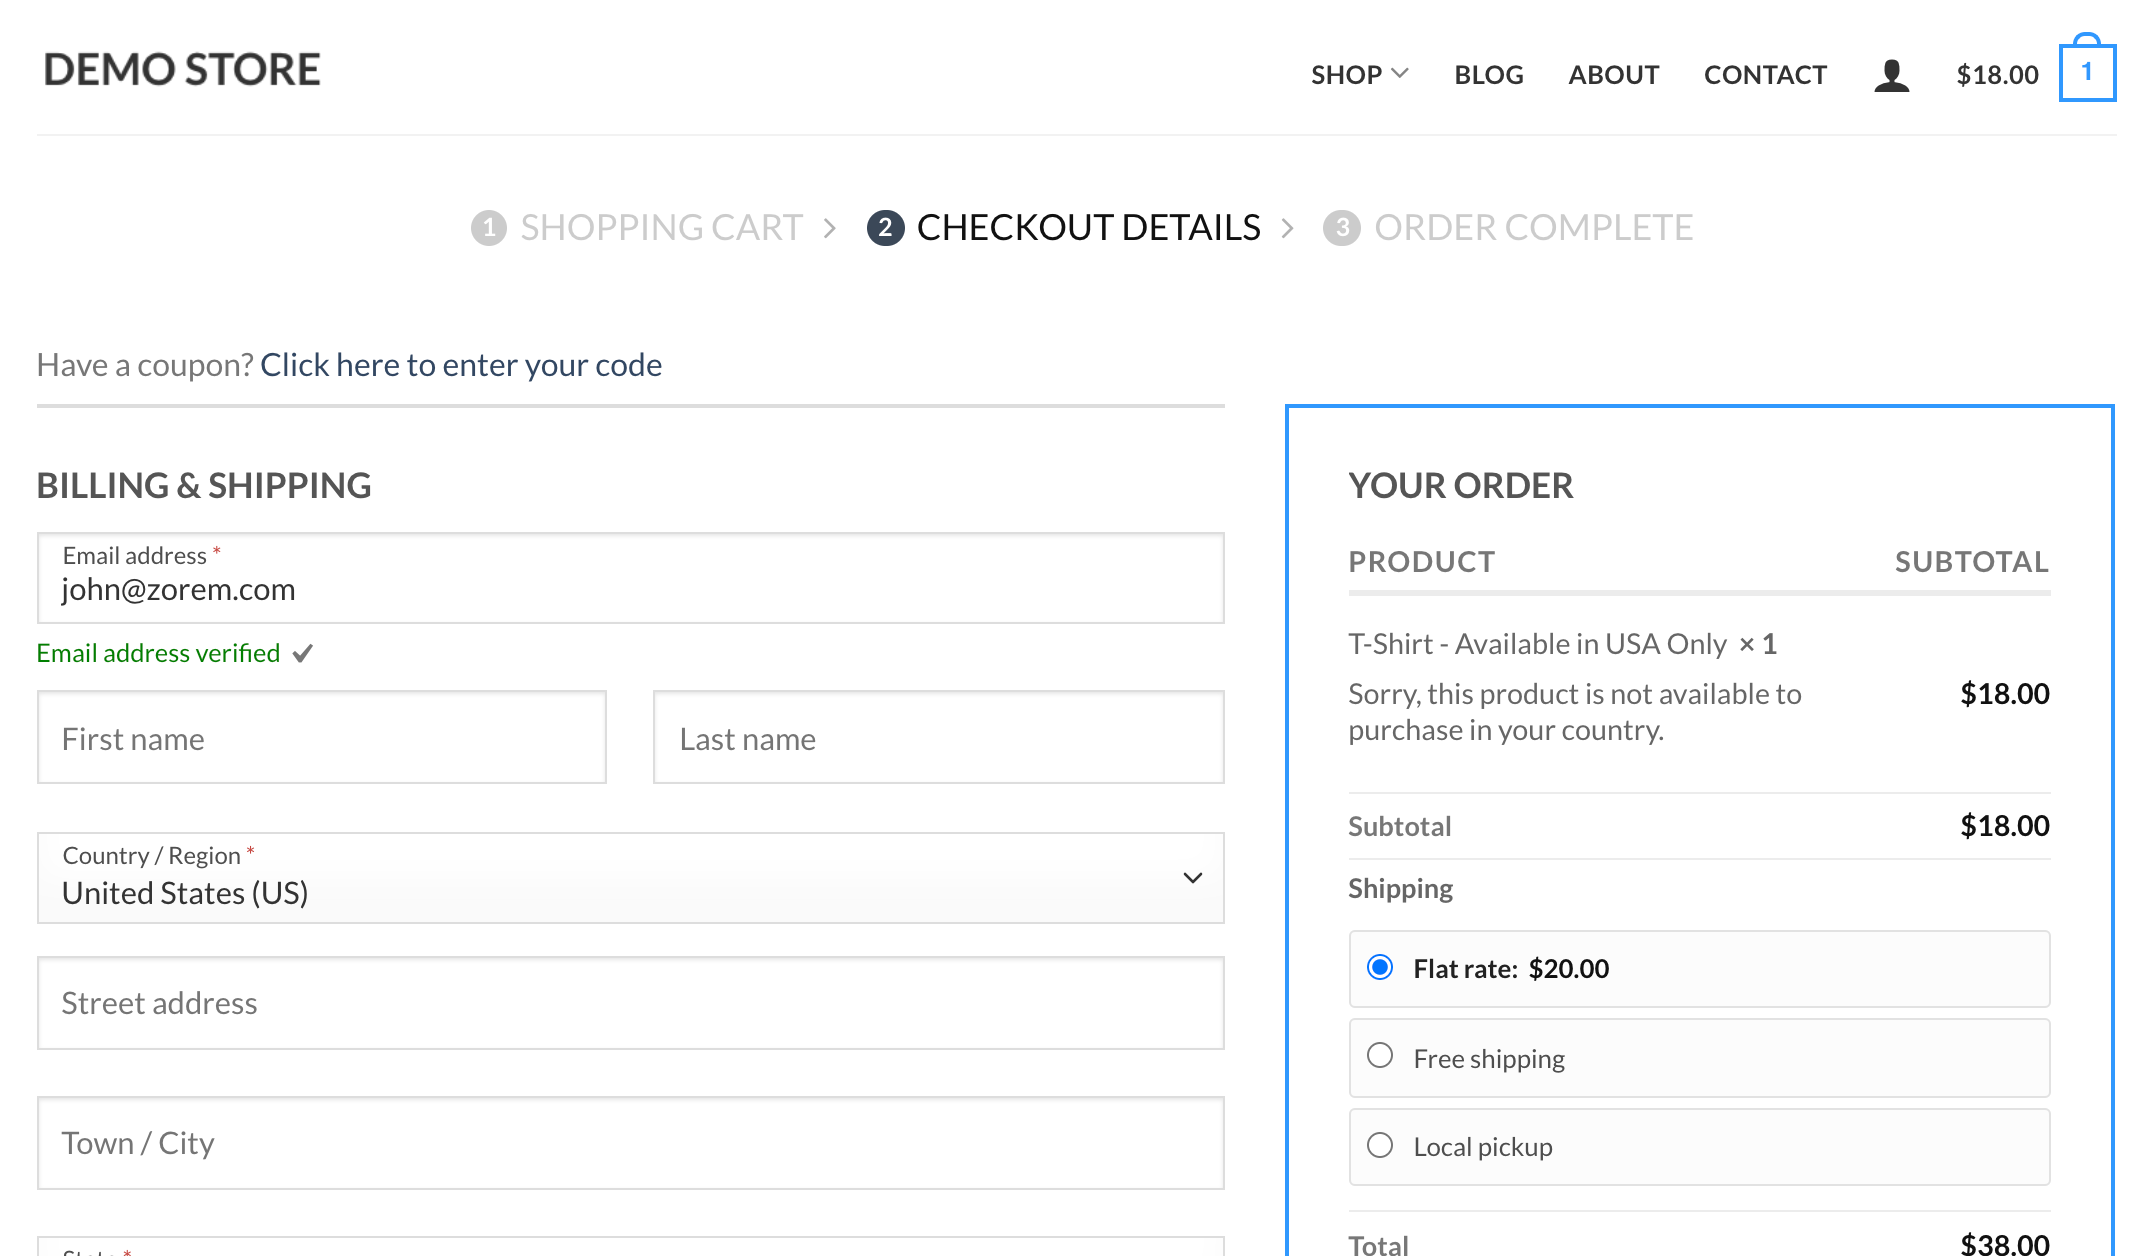
↑ Volver al principio- Guest customer proceeds to checkout on your store
- The verification popup overlay will allow the customer to enter his email address and the verification code and a verification link are sent to the new customer email address
- Customers can verify their email by entering the verification code in the verification popup or by clicking on the Verification link in the verification email
- The Customer is directed to checkout to complete the order
- The Customer created an account during checkout, the customer account will be flagged as Verified Email.
Customer Experience
↑ Volver al principioVerification Popup
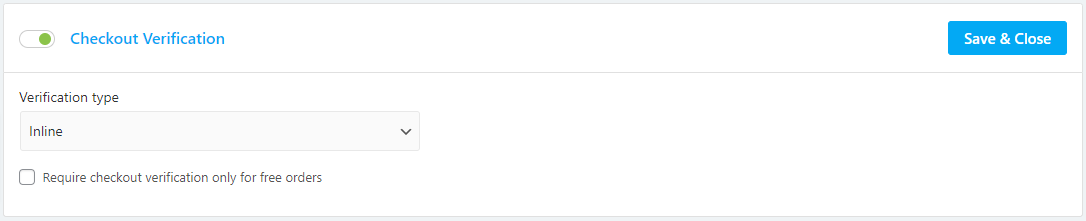
↑ Volver al principio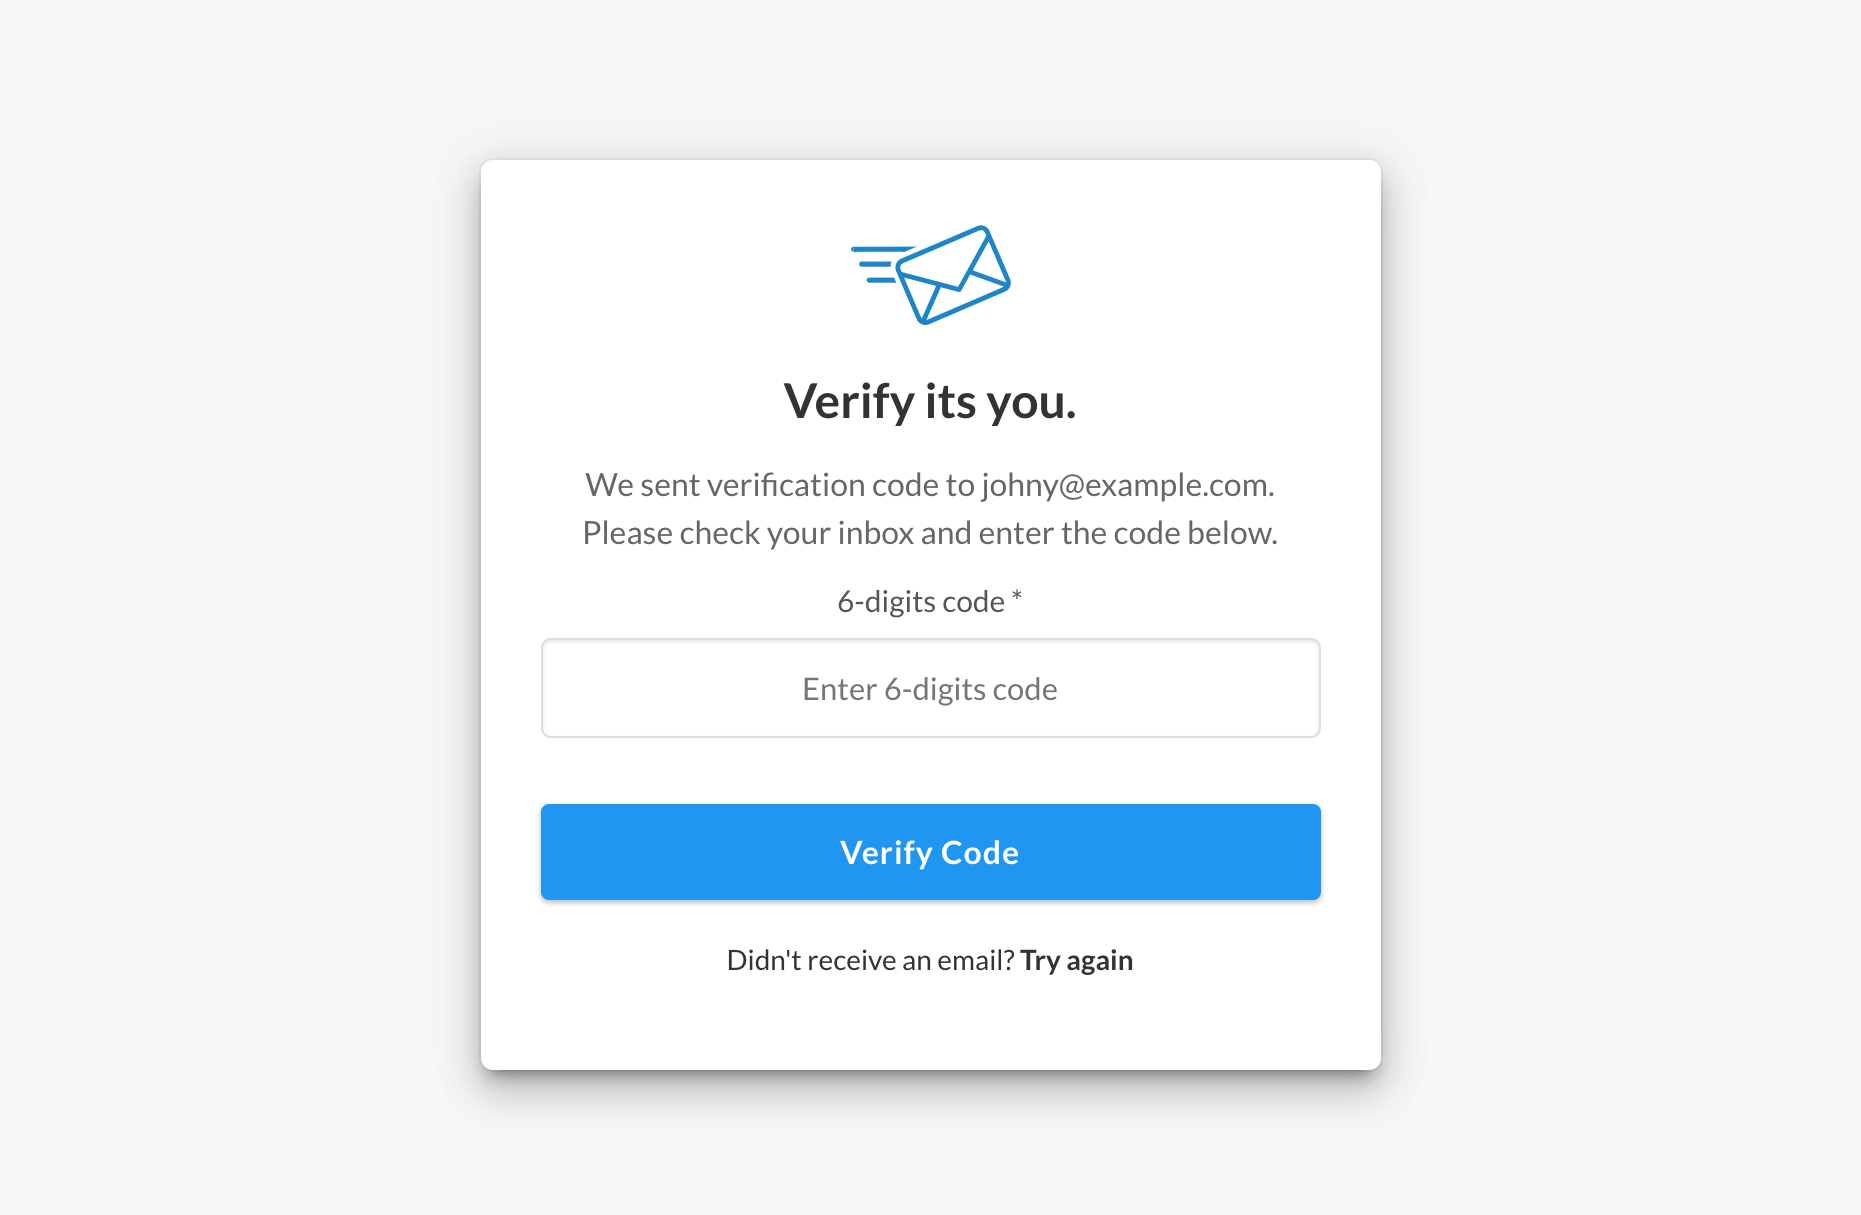 Inline Email Verification (Checkout)
The inline works after the customer enters the email address during checkout, verification code and link will be sent to the customer and they will have the option to enter the verification code to verify the email address. In case the email was not received, the customer can request to resend the verification email.
Inline verification – step 1
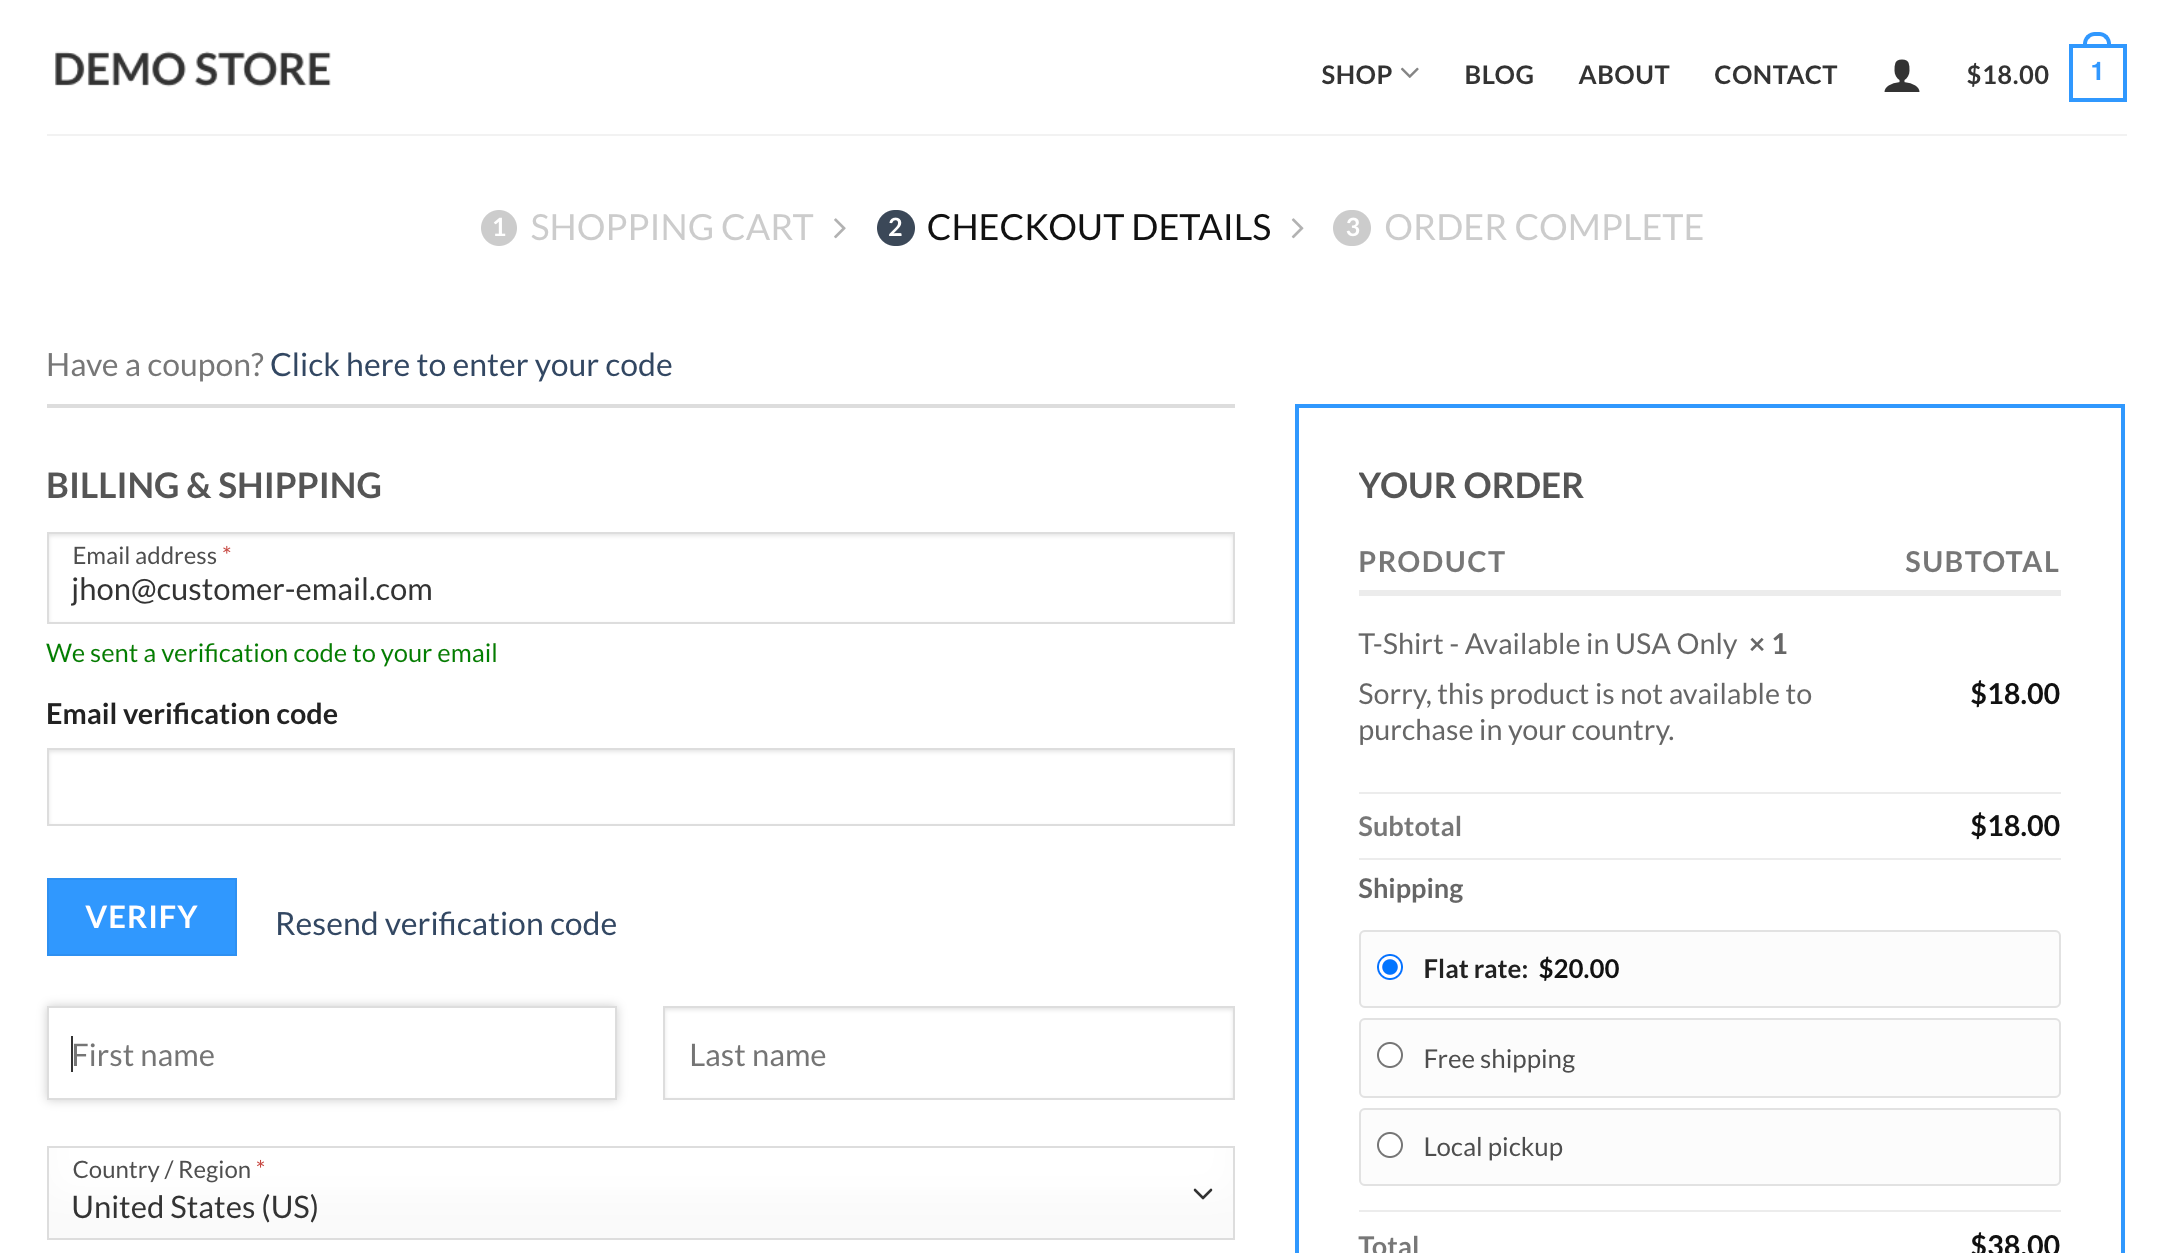 Inline verification – step 2
Verification Email
↑ Volver al principio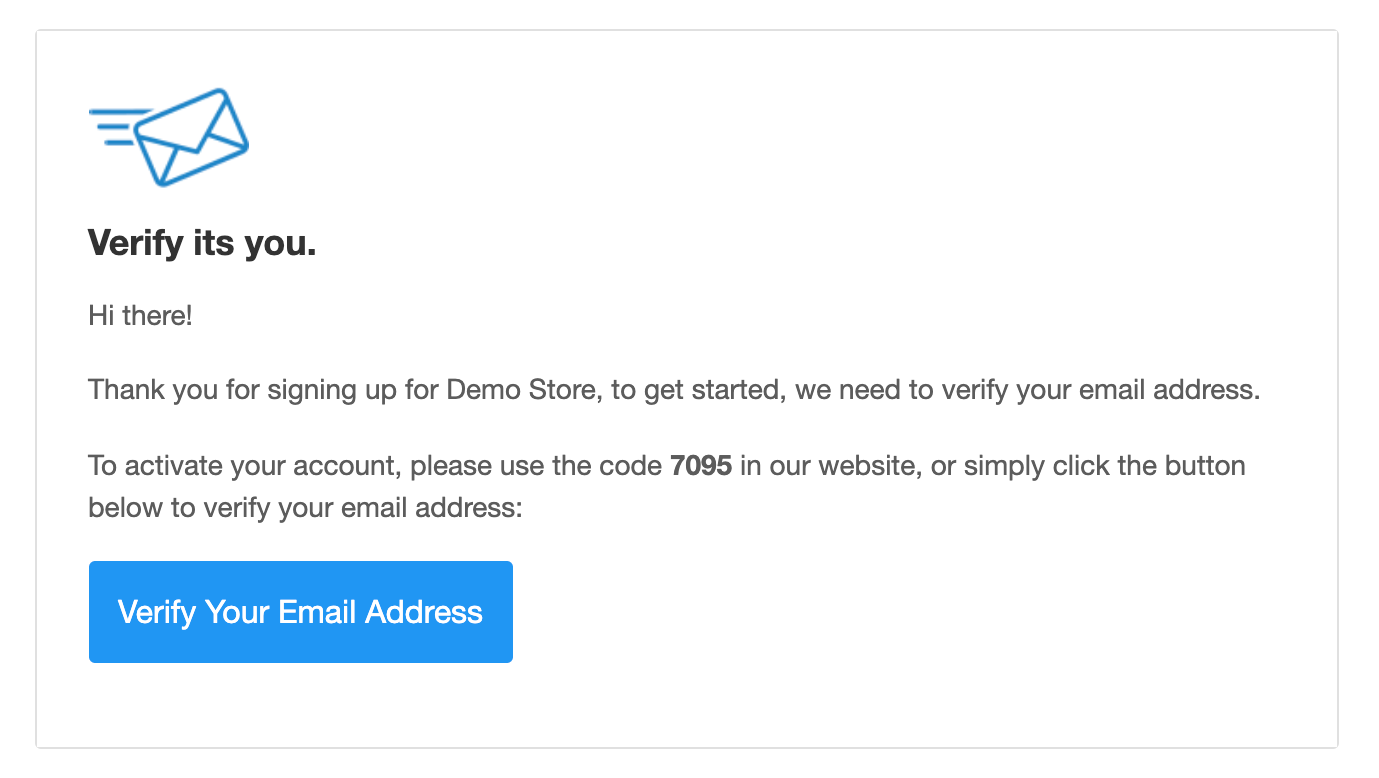
Verify updated email address in customer account
↑ Volver al principio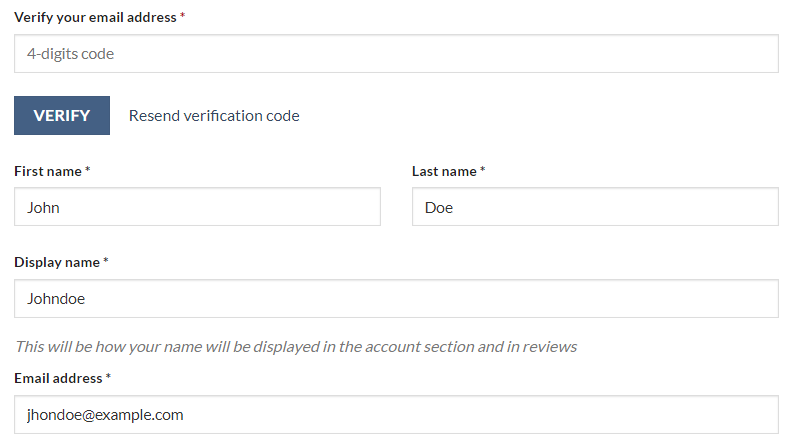
Setup & Configuration
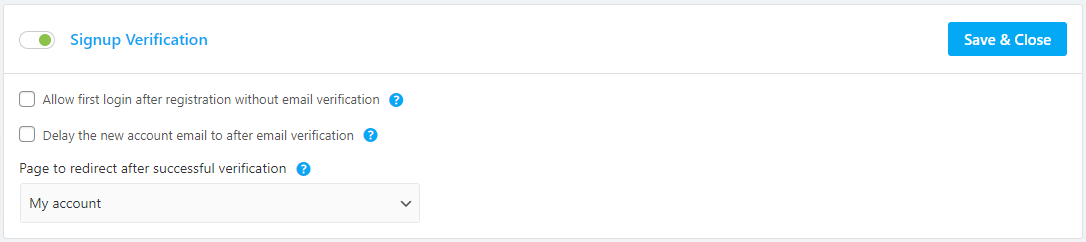
↑ Volver al principioEmail verification for new customer accounts
↑ Volver al principio- Allow first login after registration without verification – allow your customers to access their account for the first time after registration before they verify the email address
- Verification Code in new account email – if you select this option, the verification message, code and link will be added in New Account Emails. The separate email verification will be sent only when the customer (or admin) resend verification.
- Delay account email until successful email verification – Delay the WooCommerce New Account email and send it to the customer only after successful verification.
 Please note: the email verification for new accounts does not apply to customers who register an account during checkout or when registering accounts with social plugins.
Email verification before checkout
↑ Volver al principio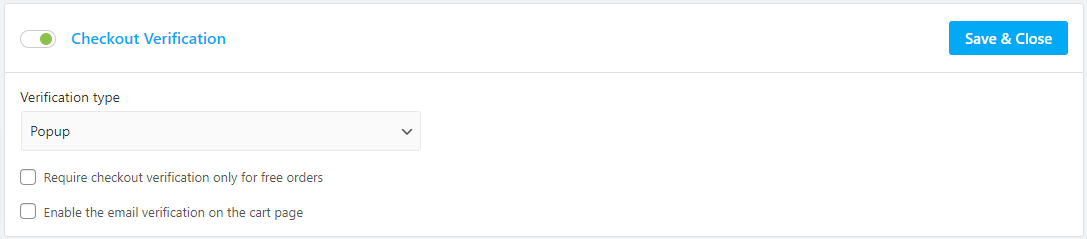
- Enable the email verification on cart page – enable the email verification before checkout.
- Require email verification only for Free Orders – this will require customers to verify their email address before checkout only when there is no payment (free products)
 Please note: if a guest customer verified his email address during checkout and created an account during checkout, his email address on the account will be verified automatically.
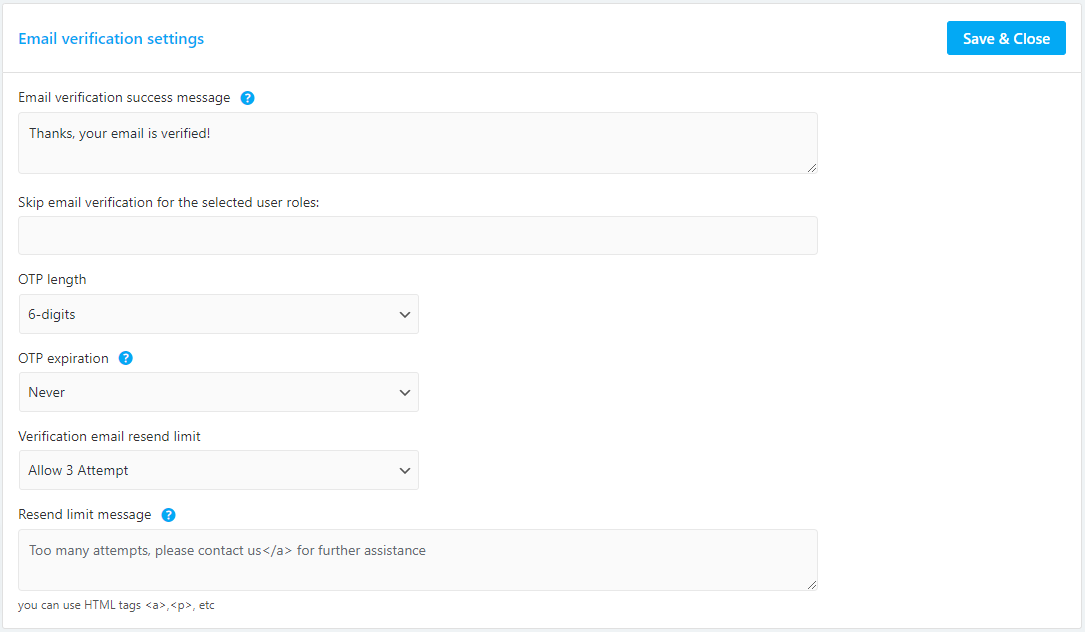
Email Verification Options
↑ Volver al principio- Verification success message – the message that will appear on the top of the my-account or checkout page after successful email verification.
- Page to redirect after successful verification – select a page to redirect users after successful verification. In case the email verification was during checkout, the user will be directed to checkout.
- Skip email verification for the selected user roles – You can skip the email verification for the selected user roles and automatically set them as verified.
- Verification code length – available options 4-digits, 6-digits, 9-digits (defaults to 4-digits)
- Verification code expiration – choose if you wish to set expiry time to the verification code / link – Never, 10 min, 30 min, 1 Hour, 24 Hours, 72 Hours (defaults to Never expires).
- Limit Resend – limit the amount of times the user can resend the verification email. Choose between once, 3 times, never.
- Limit Resend Message – defaults to “Too Many attempts” – you can use HTML to add a link to your contact page.
Customize
↑ Volver al principio To customize the verification popup and email, go to WooCommerce > Email Verification, and click on the Customize option on the settings menu.
Customizer Panels
↑ Volver al principio- Verification Popup
- Popup Style
- Popup Content – Registration/Checkout
- Verification Email
- Email Style
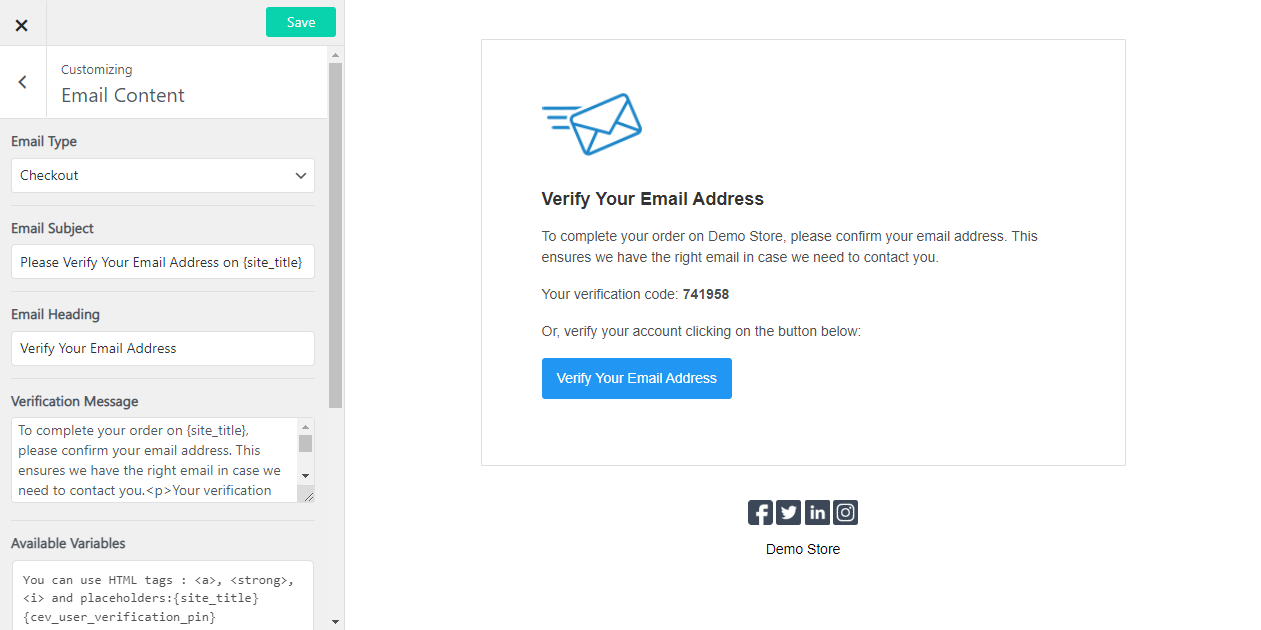
- Email Content – Registration/Checkout
Customize the Popup Design
↑ Volver al principio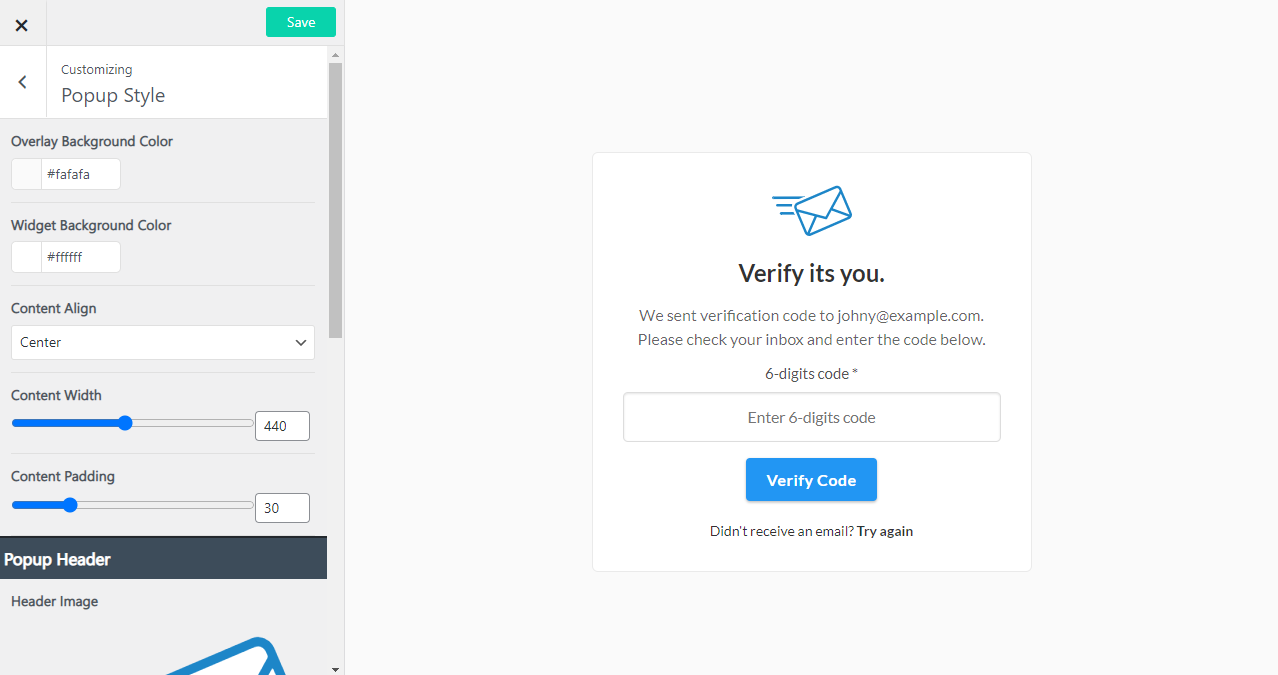
- Popup Background Color – select the widget background
- Overlay Background Color – select the lightbox overlay background color
- Content width – The popup widget width
- Content Padding – The popup widget padding
- Content Alignment – Center, Left
Popup Header
- Header Image – choose image to display on the widget header
- Header image width – select the header image width
- Header font size
Verification button
- Button color
- Button font color
- Button font size
- Button Padding
- Expand Button – option to expand the button to full content width.
Customize the Popup Content
↑ Volver al principio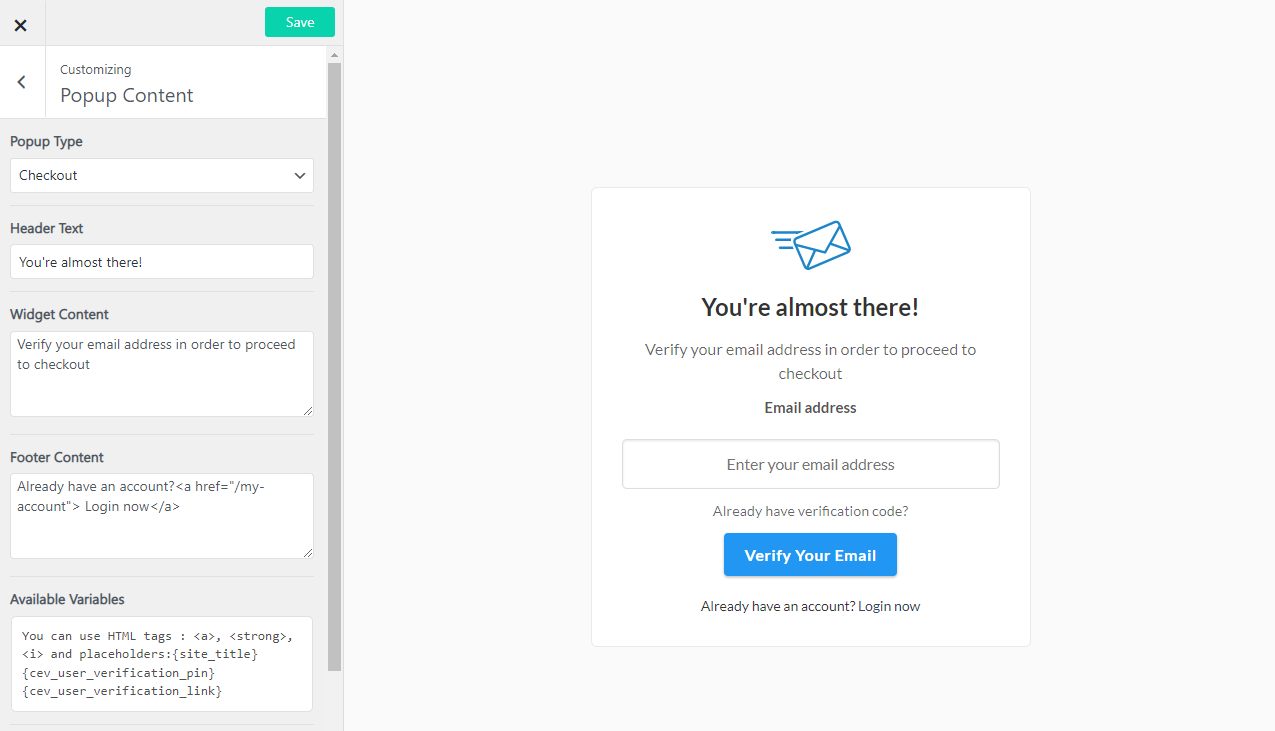
- Widget Type – navigate between the registration widget and the Checkout widget to customize the widget content
- Header text – Select the title for the Widget. Defaults to: “Verify it’s you.”
- Content message – default to “We sent verification code to {customer_email}. To verify your email address, please check your inbox and enter the code below.”
- Additional Footer text – Select the title for the Widget. Defaults to: “Didn’t receive an email? {cev-resend-verification}”
- Button Text – the verification button text (verify code)
Customize the Email Design
↑ Volver al principio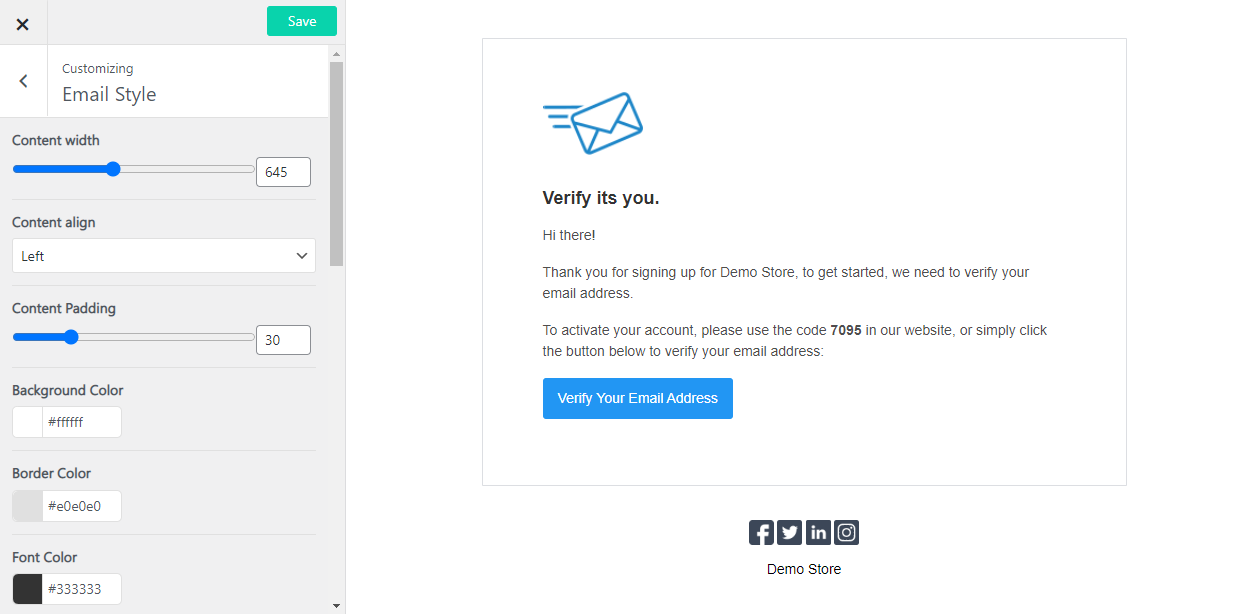
- Content width – The email content width
- Content Padding – The email content padding
- Content Alignment – Center, Left
- Background Color – select the email content background
- Border Color – select the lightbox overlay background color
- Font Color – select the font color
Email Header
- Header Image – choose image to display on the email header
- Header image width – select the header image width
- Header font size
Verification button
- Button color
- Button font color
- Button font size
- Button Padding
- Expand Button – option to expand the button to full content width.
Footer
- Footer content – additional text under the verification button
Customize the Email Content
↑ Volver al principio- Widget Type – navigate between the registration widget and the Checkout widget to customize the email content
- Heading text – Select the title for the Widget. Defaults to: “Verify it’s you.”
- Content message – default to “We sent verification code to {customer_email}. To verify your email address, please check your inbox and enter the code below.”
- Additional Footer text – Select the title for the Widget. Defaults to: “Didn’t receive an email? {cev-resend-verification}”
- Verification Button Text – the verification button text (verify code)
Manage Customers
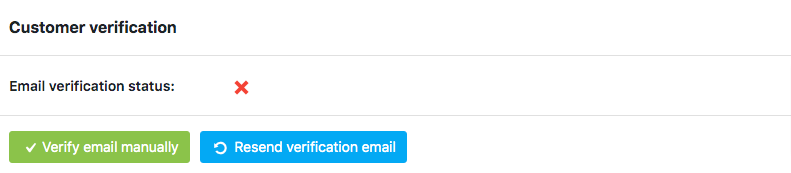
↑ Volver al principio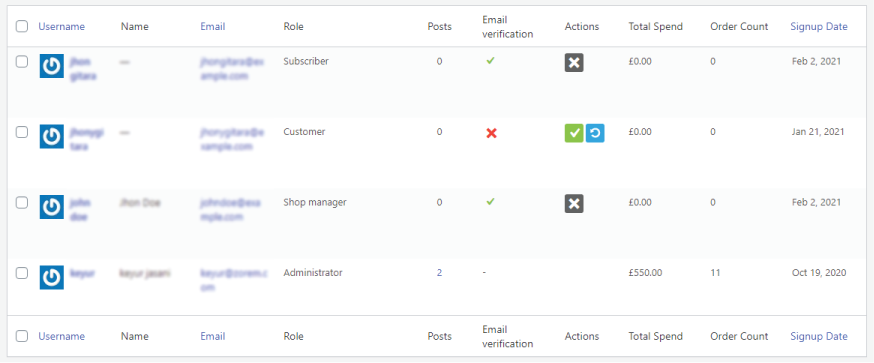 you can also verify, resend the verification and un-verify from a single user admin:
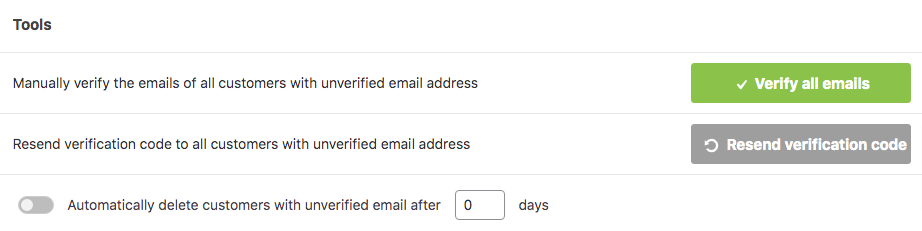
Tools
↑ Volver al principio- Manually Verify the emails of all Customers with unverified email address
- Resend Verification Code to all Customers with unverified email address
- Automatically delete users that did not verify their emails after X days (select the number of days)
Compatibility
↑ Volver al principioCheckout WC
↑ Volver al principioWooCommerce Social Login
↑ Volver al principioNextend Social Login and Register
↑ Volver al principioWooCommerce Memberships
↑ Volver al principioWooCommerce Checkout & Funnel Builder by CartFlows
↑ Volver al principioAffiliate For WooCommerce
↑ Volver al principio- When an affiliate user signs up for an affiliate account in your store, the account is flagged as an Unverified Email
- The verification popup will display on all account pages and will allow the user to enter a verification code to verify their email and activate their account to access the account area.
- The verification code and a verification link are sent to the new user’s email address and they can verify their email by entering the verification code or by clicking on the Verification link in the email.
- Once a user verifies the email address on the account and will be redirected to the account dashboard, and the user account will be flagged as Verified Email.
Smart Manager
↑ Volver al principio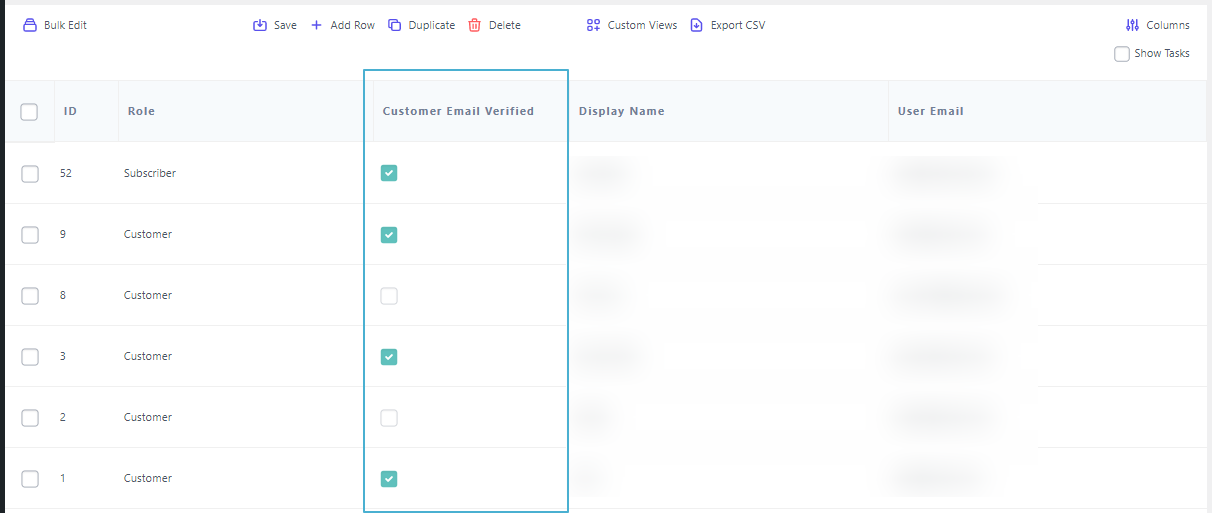
Email Customizer Pro by StoreApps
↑ Volver al principio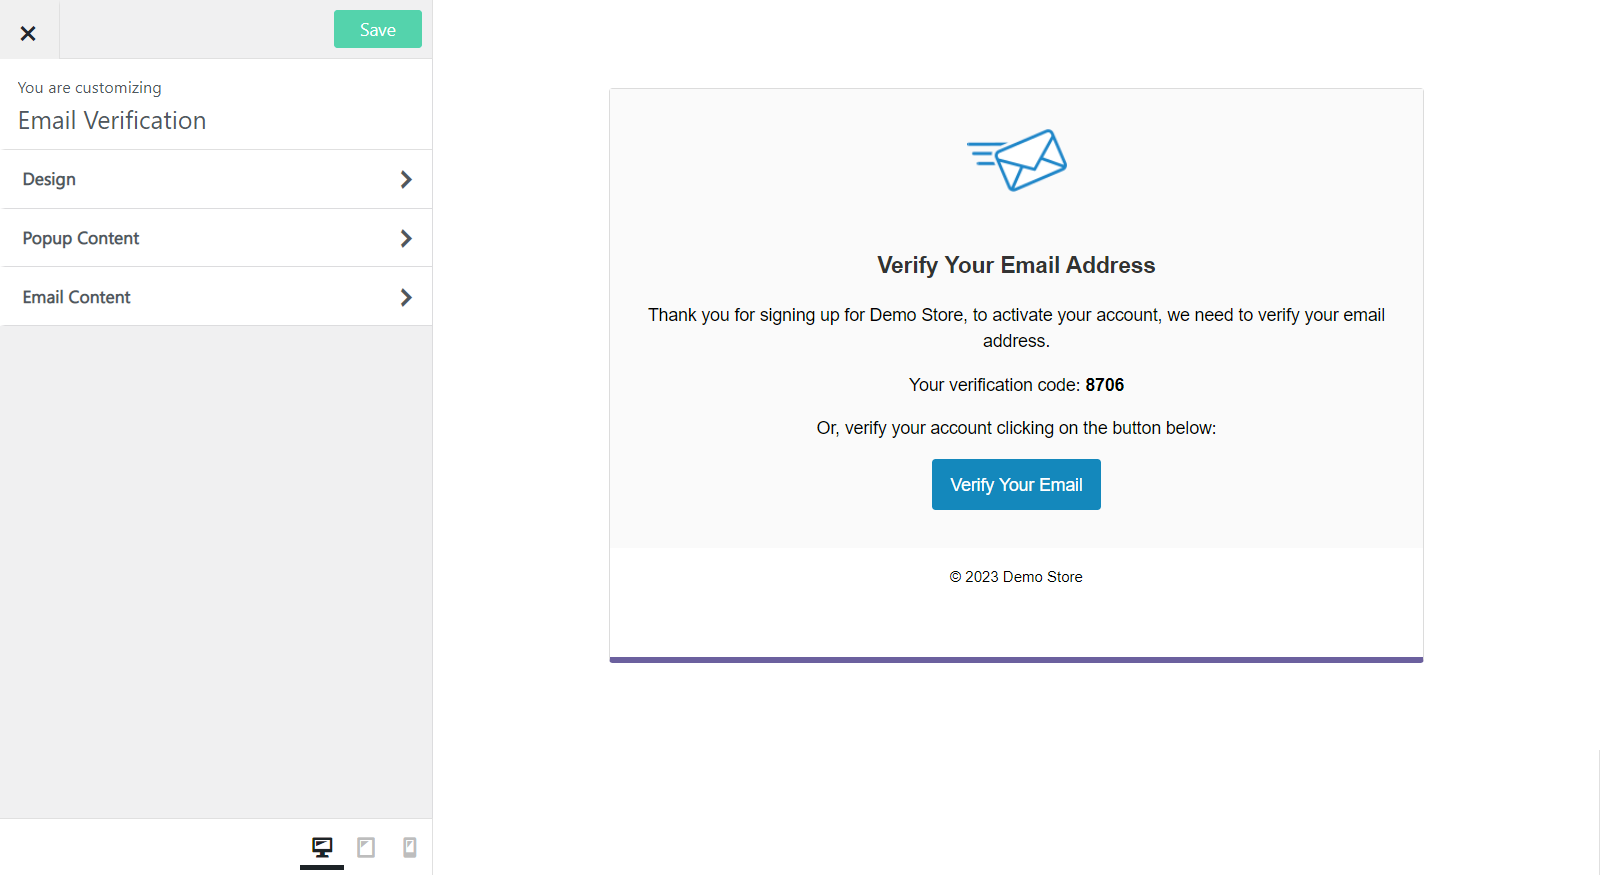
Cashier
↑ Volver al principio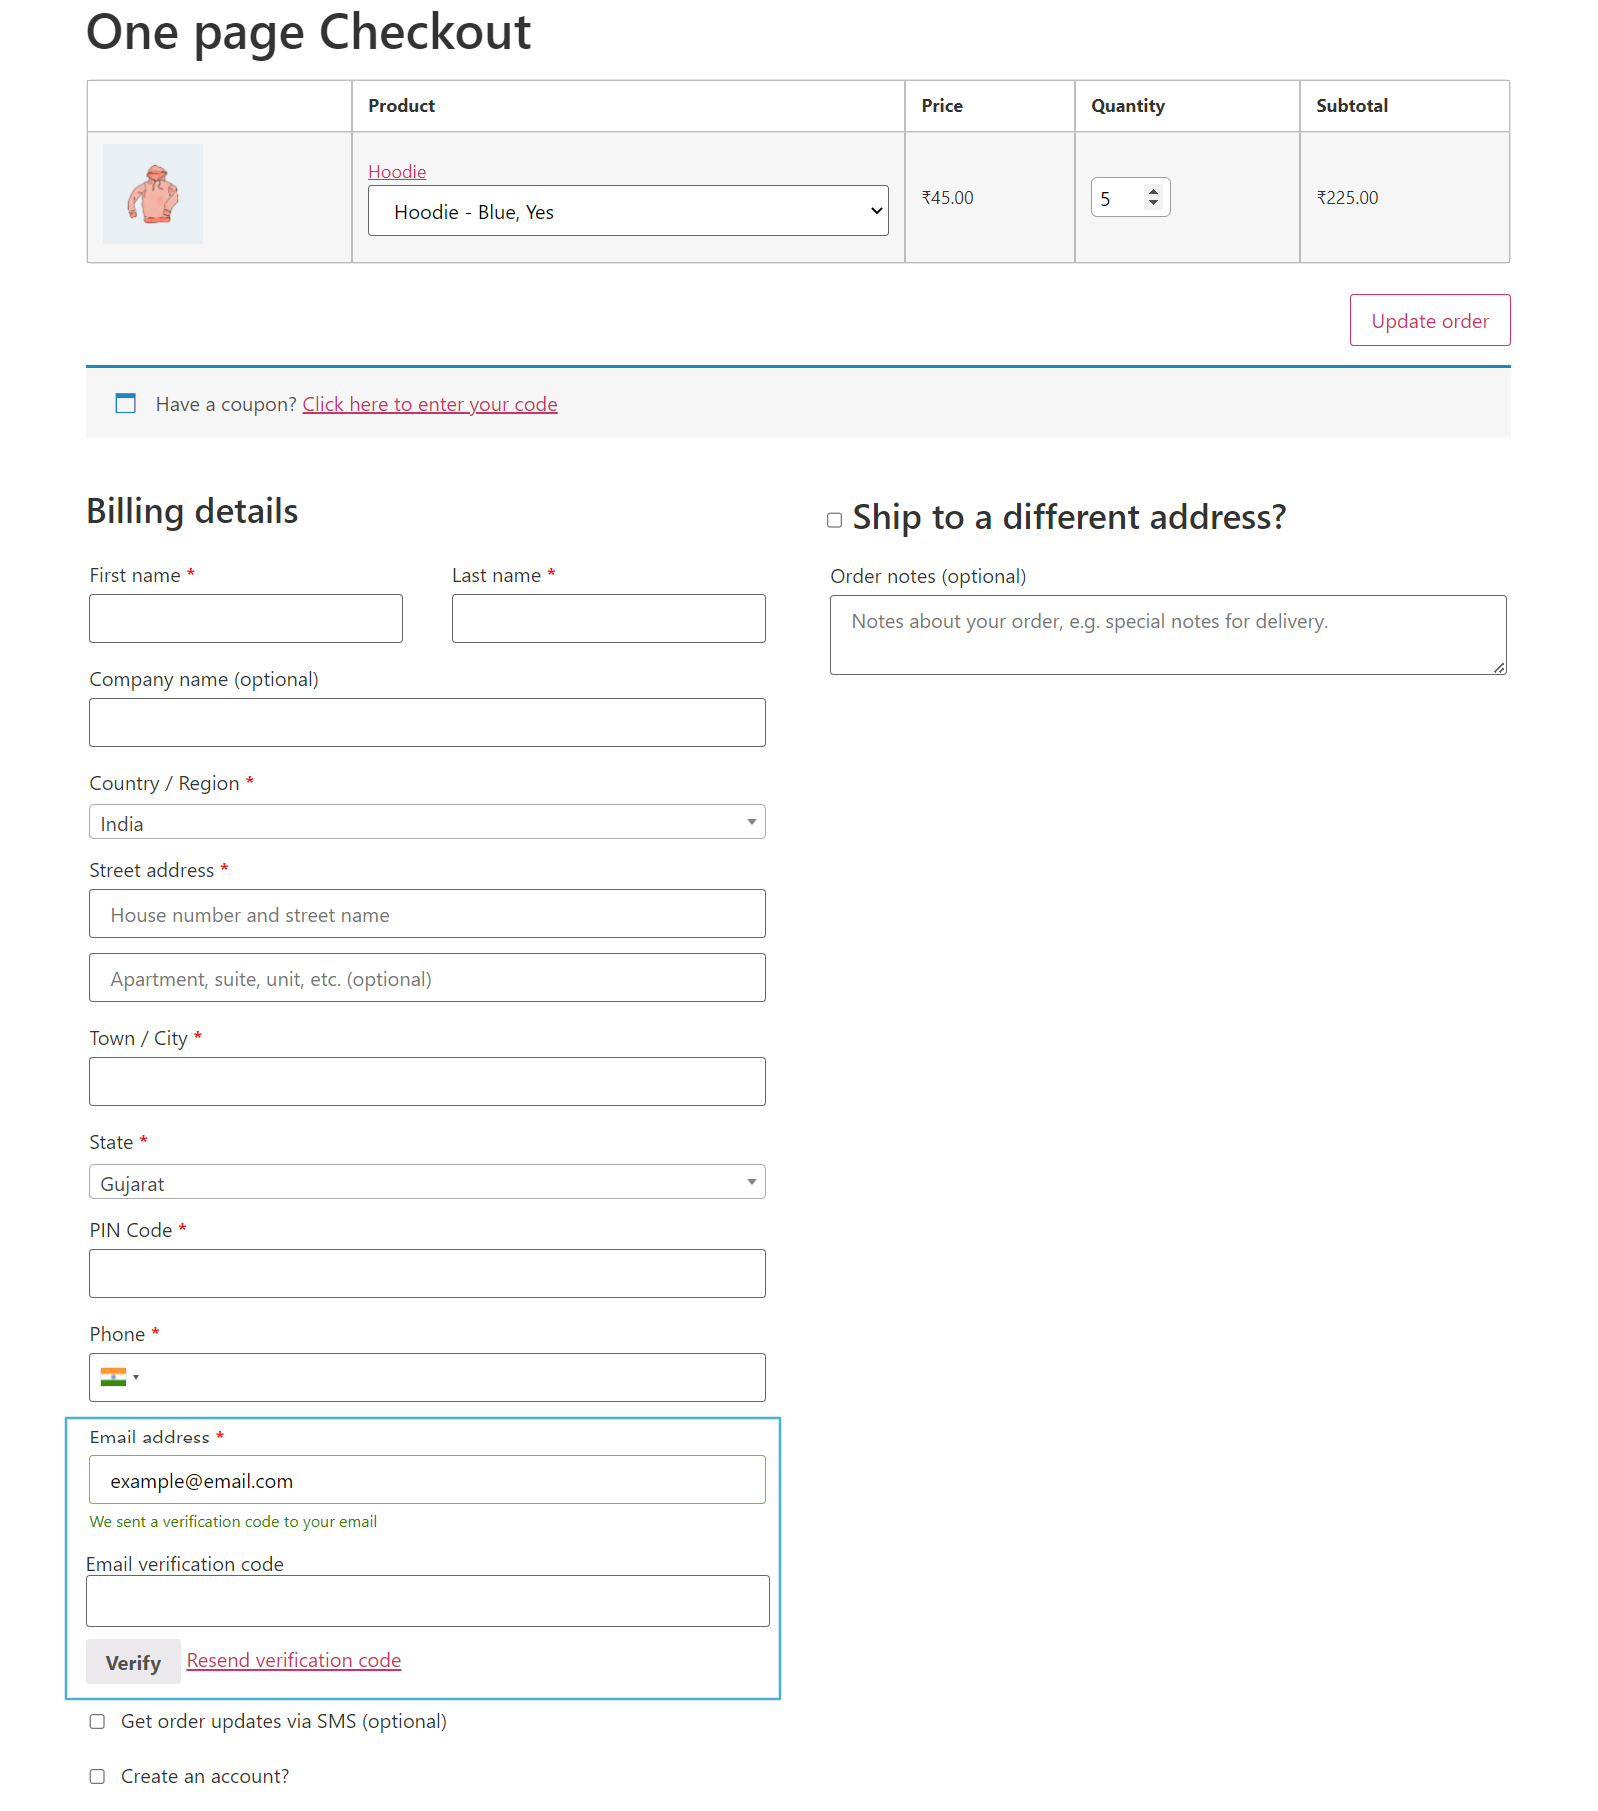 Popup Verification
