After activating WooCommerce Top Bar plugin, you can see the “Top Bar” in the WordPress Admin menu. Click to add a new notification bar.
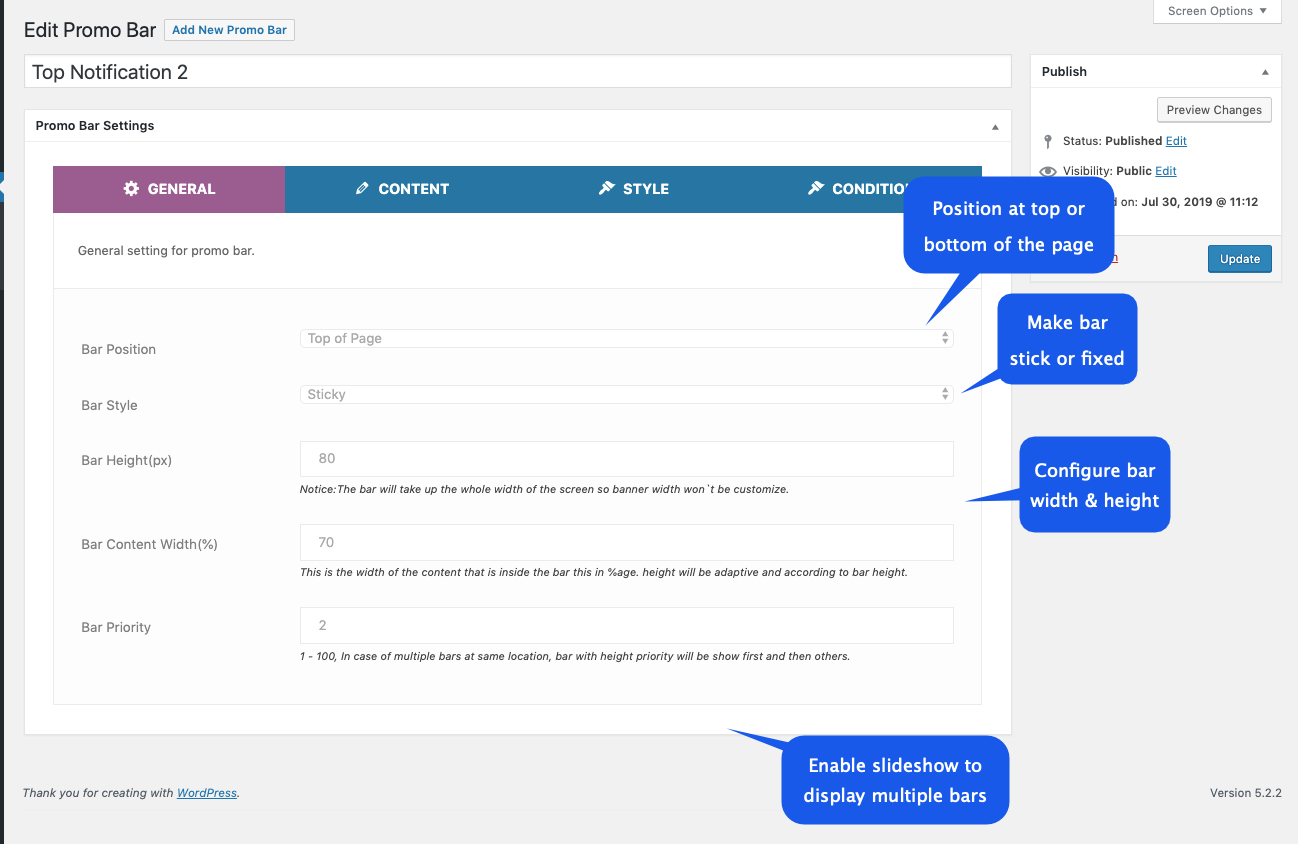
In the settings, you can specify the basic options for your new top bar which includes,
- Bar Position
- Height
- Content Width (This is the percentage width of the content inside the bar.)
- Priority
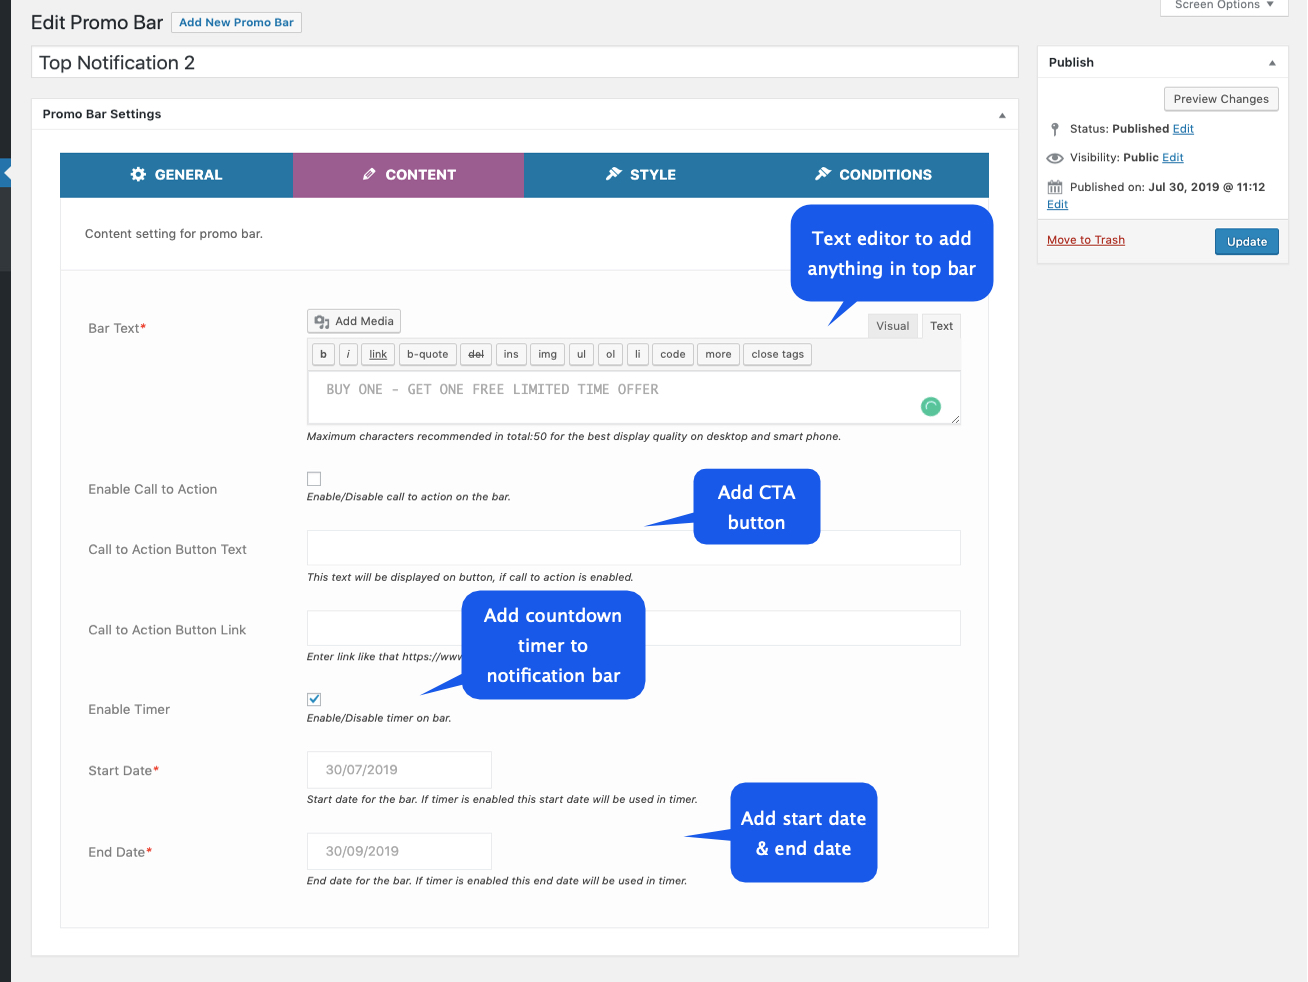
Here you can specify the content that should appear in the notification bar along with the button. You also specify start and end date as well as enable/disable countdown timer.
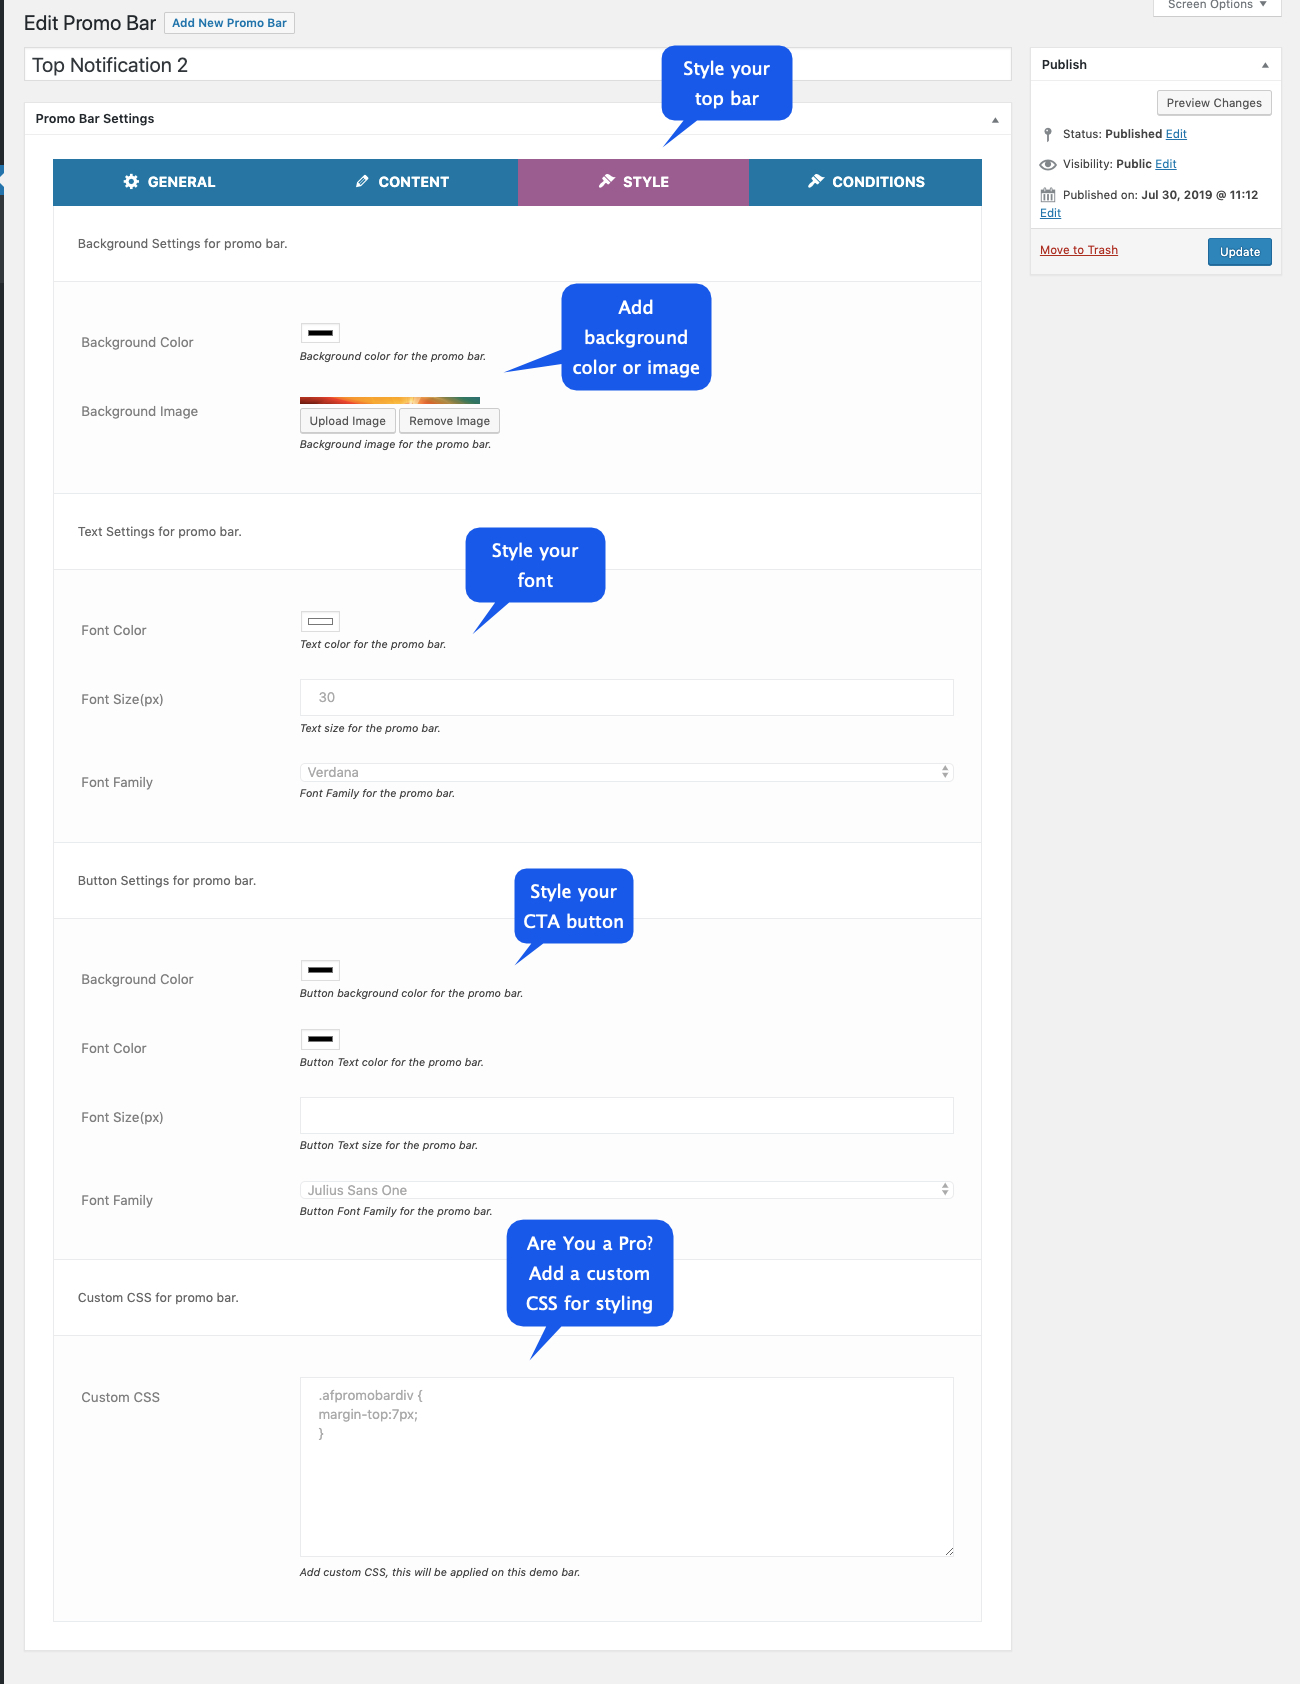
You can utilize the following options to style content of your notification bar.
- Customize font color, size & family
- Add a custom background image or use any color
- Customize button background color, text color, font size & font family
- If you are pro, you can add custom CSS to enhance design
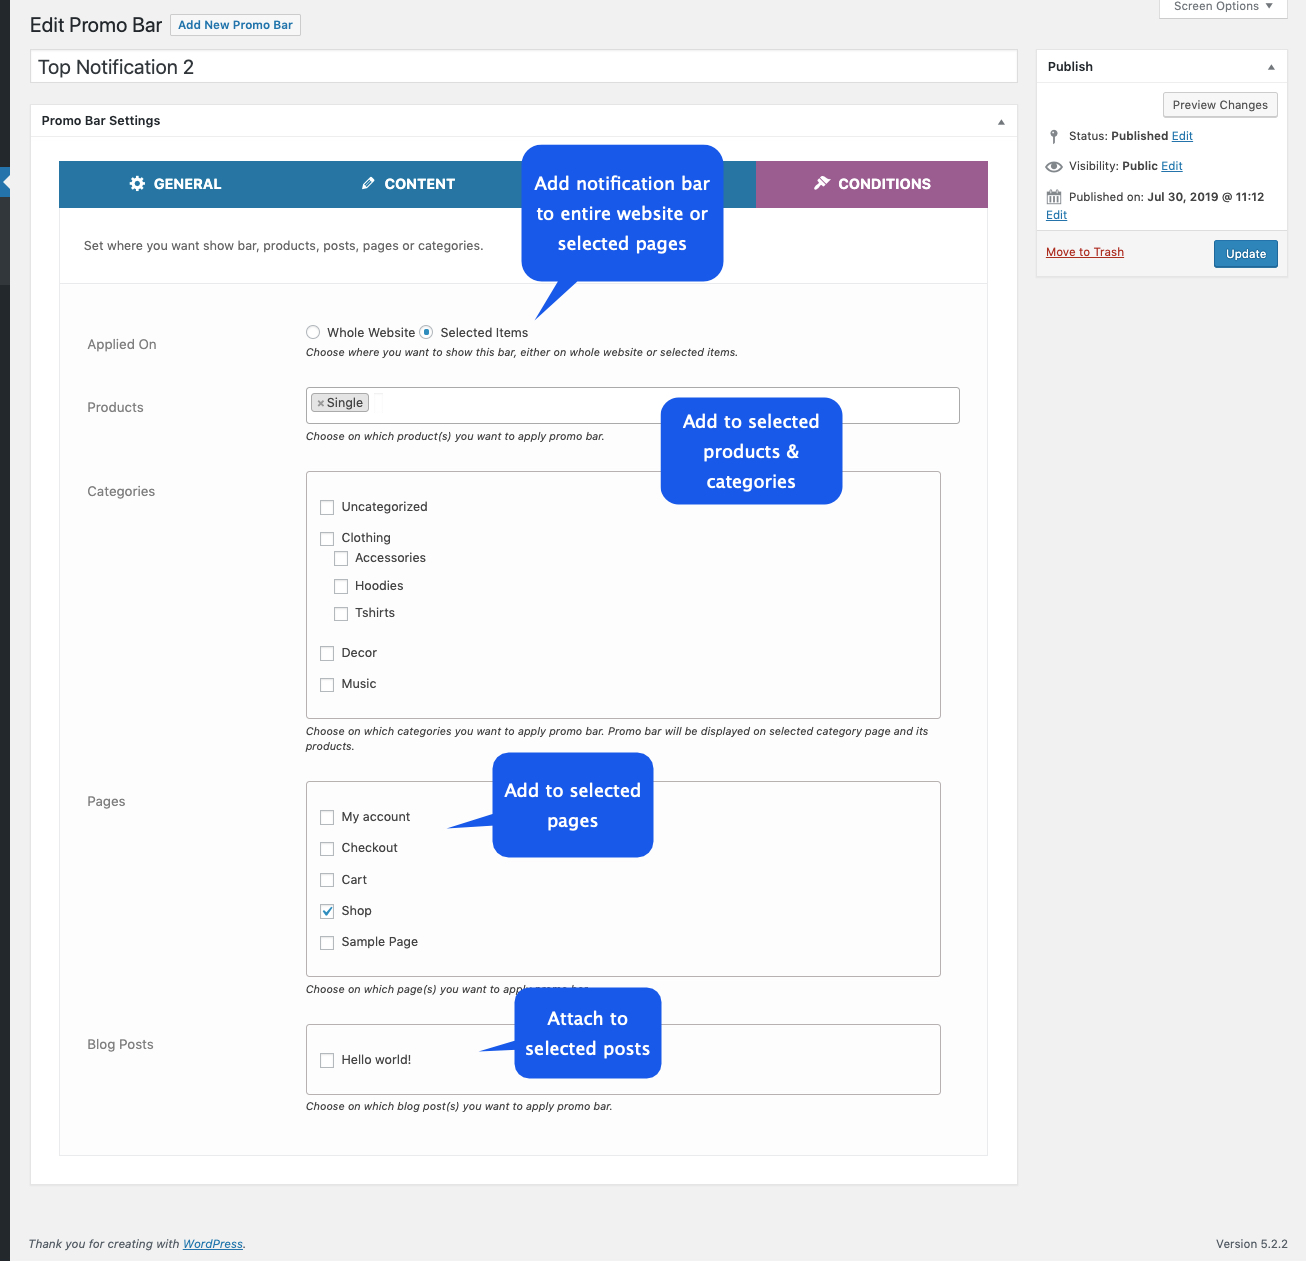
Using conditions, you can specify where do you want to show your notification bar. You can choose to display it on specific products, categories, pages, and blog posts
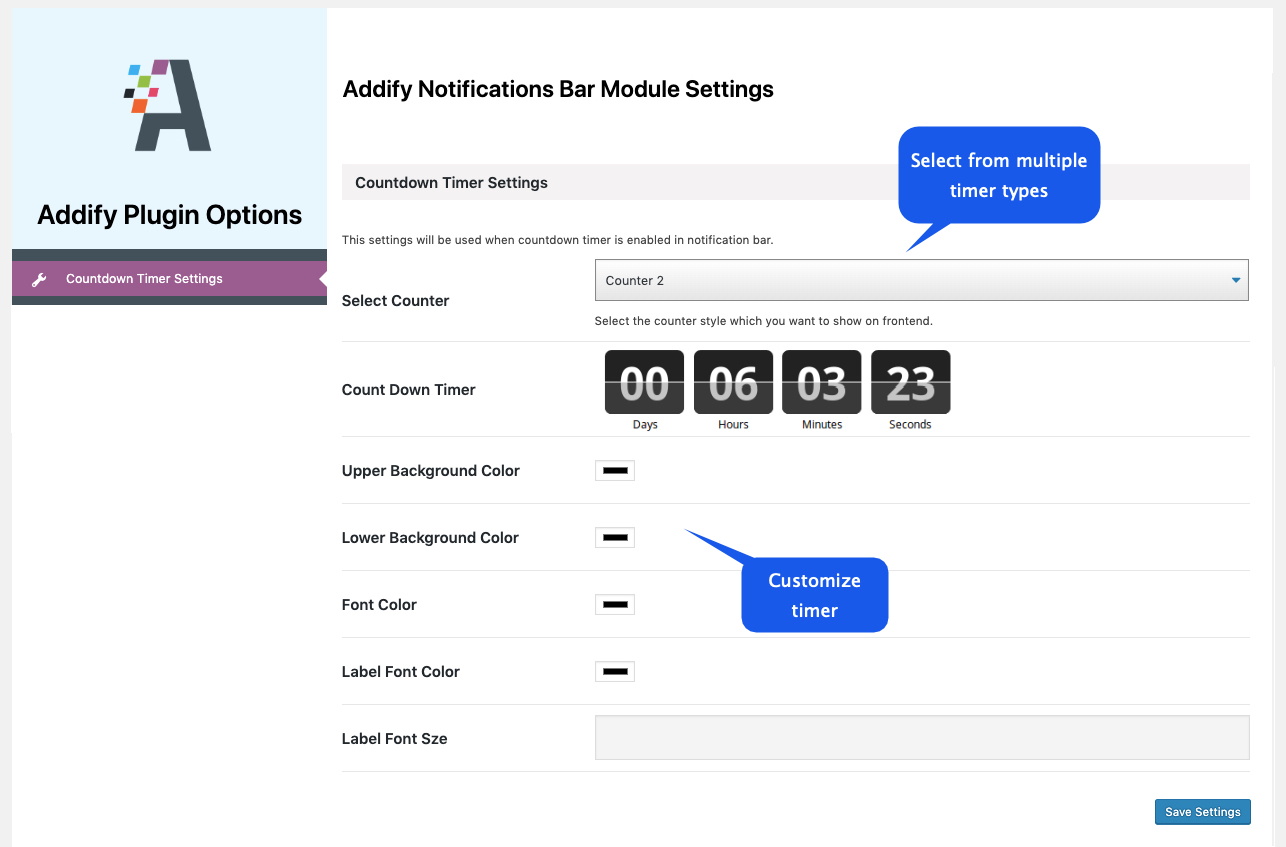
Click on settings under the top bar menu to access the configuration page. Here you can configure Countdown Timer settings.