
Customer Upload files for the WooCommerce plugin allows customers to upload files directly from the product, cart, and checkout pages with their orders. Store owners can control file types, sizes, upload rules, and restrictions while collecting customer files and notes to process orders accurately.
Installation
↑ Back to top- Download Customer Upload Files for WooCommerce and have your .zip file
- In the WordPress admin panel, go to the Plugins section, and click ‘Add New’ to upload and install the plugin you just downloaded from WooCommerce.
- Upload the .zip file to proceed with the installation.
- Wait until the plugin installs. After successful installation, activate the plugin and move on to configuration settings.
Configuration
↑ Back to topIn the admin panel, go to WooCommerce > Settings> Upload Files, and here you can configure the settings for the file upload plugin. You can configure the following settings:
Add Rule
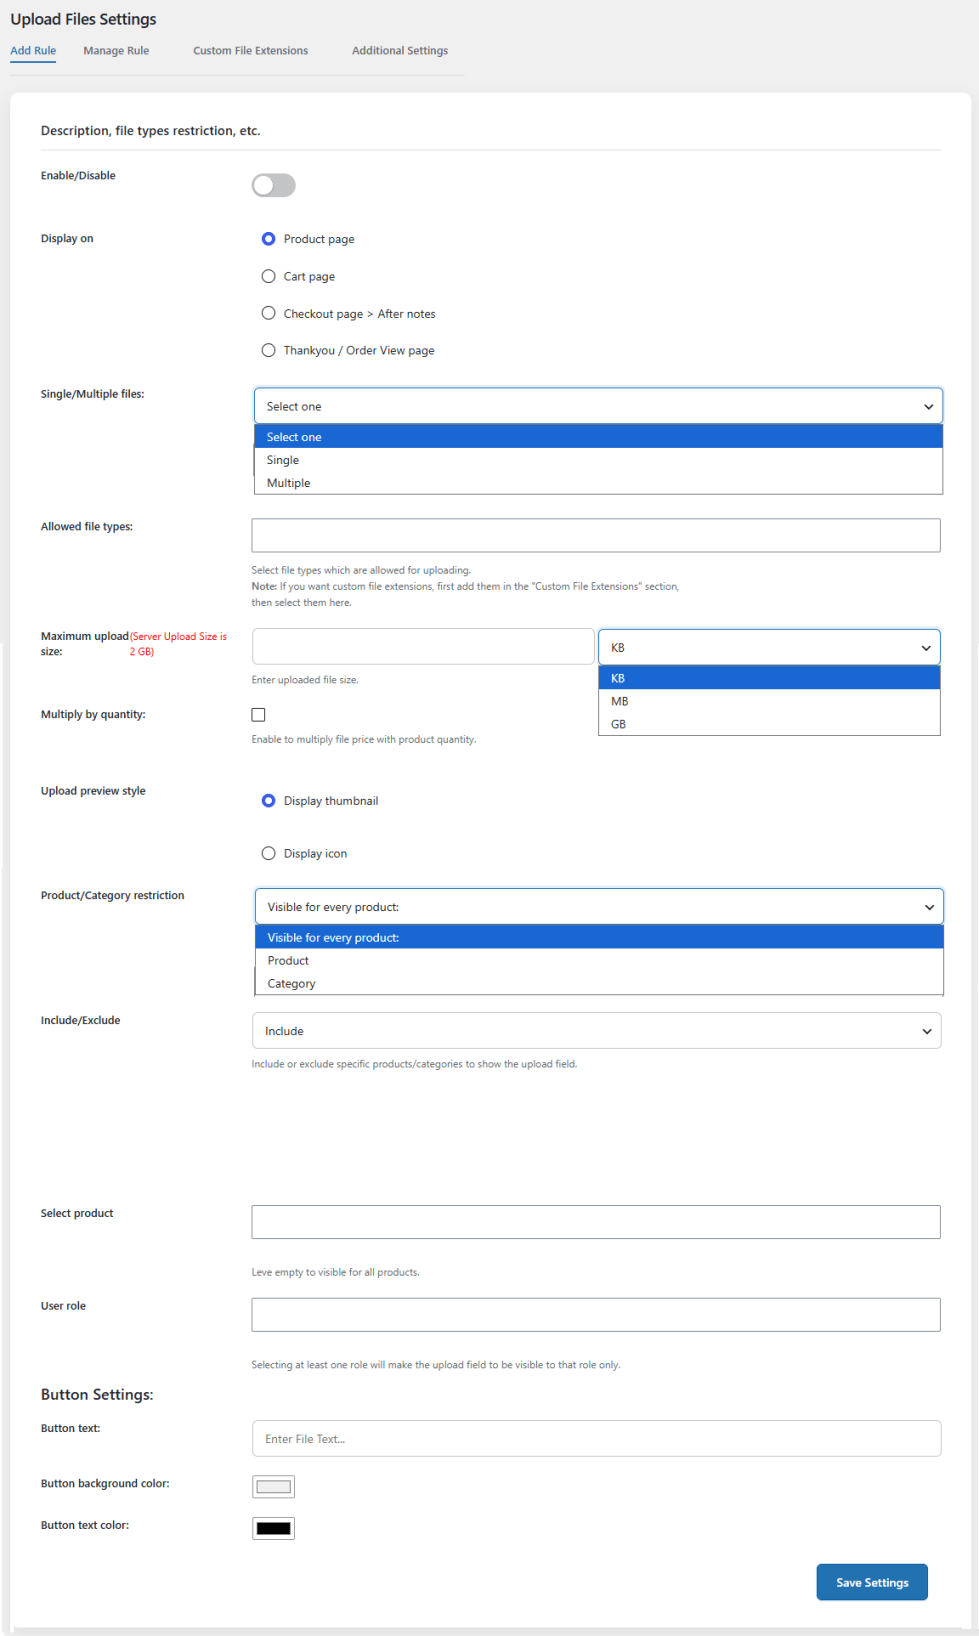
↑ Back to topGo to WooCommerce > Settings > Upload Files > Add Rule and create rules for file upload on your store. Configure the following:
- Enable/Disable: Enable or disable the file upload rule.
- Display On: Choose the pages where you want to display the file upload option for this rule. You have the following options:
- Product page
- Cart page
- Checkout page > After notes
- Thank You / Order View page
- Single/Multiple Files: Select if you want to allow uploading single or multiple files.
If you select “Single,” then the following settings will appear:
- Price: Set a price for the file upload.
- Discount Type: Choose what type of discount you want to offer. You can choose between a fixed or percentage discount.
- Discount Value: Add a value for the discount.
- Required: Make it mandatory to upload the file. Note: If you are using add to cart AJAX on the single product page, then the required feature may not work.
- Customer Notes: Enable the checkbox to include customer notes with the file upload.
- Marketing Use Approval: Click the checkbox to show a checkbox with each file uploaded and ask for user approval for using the file for marketing purposes.
- Hide Details on Frontend: Click to hide the details on the frontend.
- Description: Add a description for the file upload.
If you select “Multiple,” you can click on the “Plus” button to add multiple files. For each file upload, you can configure the same settings that include:
- Price
- Discount Type
- Discount Value
- Required
- Customer Note
- Marketing Use Approval
- Hide Details on Frontend
- Description
- Allowed File Types: Select the file types that are allowed for uploading. Note: If you want custom file extensions, first add them in the “Custom File Extensions” section, then select them here.
- Maximum Upload Size: Set a maximum size for uploading files. You can set the file size in KB, MB, or GB.
- Multiply by Quantity: Enable this to multiply the price by the product quantity.
- Upload Preview Style: Select the preview style for uploading files. You have the following options:
- Display Thumbnail
- Display Icon
- Product/Category Restriction: Choose the visibility for the file upload option. You can restrict based on:
- All Products
- Product
- Category
- Include/Exclude: Select if you want to include or exclude the selected products/categories from the rule.
- Select Product/Category: Select the specific product or category for which you want to create the rule.
- User Role: Select the user roles for which you want to display the file upload option.
Button Settings
↑ Back to top- Button Text: Add text for the file upload button.
- Button Background Color: Choose the background color for the file upload button.
- Button Text Color: Select the color for the text on the file upload button.
Manage Rule
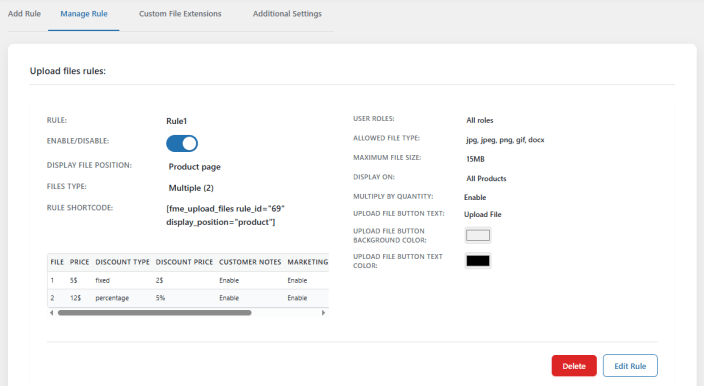
↑ Back to topTo manage rules, go to WooCommerce > Settings > Upload Files > Manage Rule. Here you can see all the rules you have created and edit or delete any rule you want.
Custom File Extension
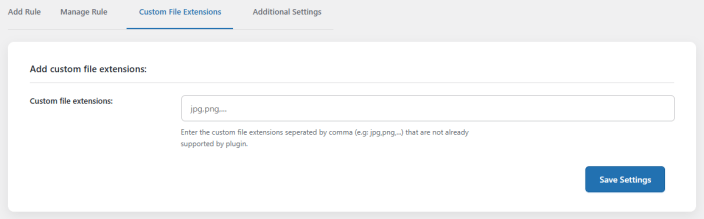
↑ Back to topGo to WooCommerce > Settings > Upload Files > Custom File Extension and create custom file extensions.
Enter the custom file extensions separated by a comma (e.g., jpg, png,…) that are not already supported by the plugin.
Additional Settings
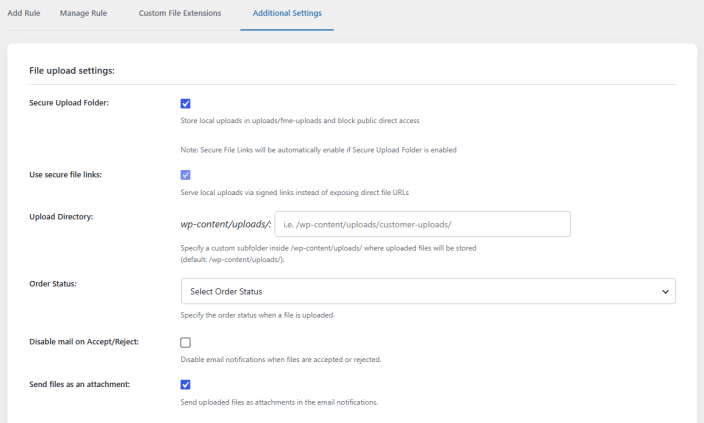
↑ Back to topTo configure additional settings for the file upload plugin, go to WooCommerce > Settings > Upload Files > Additional Settings.
- Secure Upload Folder: Click the checkbox to store local uploads in a secure folder and block public direct access. Note: Secure File Links will be automatically enabled if Secure Upload Folder is enabled.
- Use Secure File Links: Enable the checkbox to serve local uploads via signed links instead of exposing direct file URLs.
- Upload Directory: Specify a custom subfolder inside /wp-content/uploads/ where uploaded files will be stored (default: /wp-content/uploads/).
- Order Status: Specify order status when a file is uploaded. You can choose between the following order statuses.
- Pending Payment
- On Hold
- Processing
- Completed
- Cancelled
- Refunded
- Failed
- Draft
- Disable Mail on Accept/Reject: Disable email notifications when files are accepted or rejected.
- Send Files as an Attachment: Enable teh checkbox to send uploaded files as attachments in the email notifications.
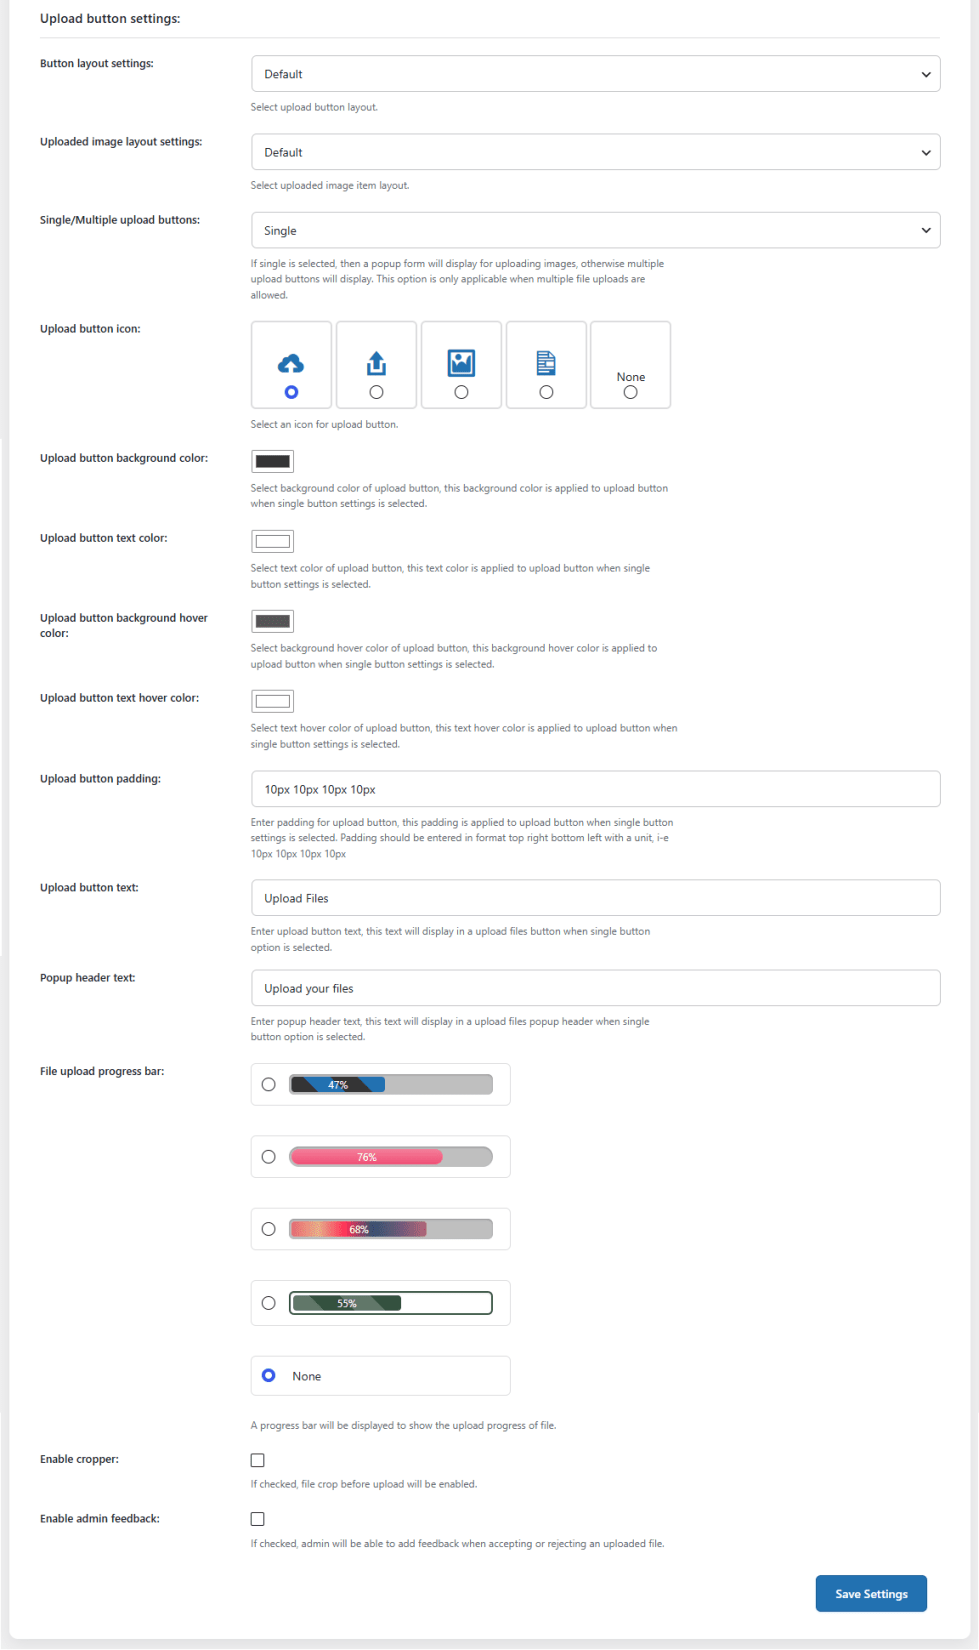
Upload button settings
↑ Back to top- Button Layout Settings: Choose the preferred layout for the file upload button.
- Default
- Minimal
- Simplistic
- Uploaded Image Layout Settings: Select teh layout for the uploaded image item. You have the following options:
- Default
- Name Only
- Name and Image
- Icons Only
- Single/Multiple Upload Buttons: Select if you want to show just a single upload button or multiple (for both single and multiple files). If single is selected, a popup form will display for uploading images; otherwise, multiple upload buttons will be displayed. This option is only applicable when multiple file uploads are allowed.
- Upload Button Icon: Select an icon for the file upload button.
- Upload Button Background Color (Single Button): Choose the background color for teh file upload button.
- Upload Button Text Color (Single Button): Select the color for the text on the file upload button.
- Upload Button Background Hover Color (Single Button): Choose the color for the file upload button upon hover.
- Upload Button Text Hover Color (Single Button): Choose teh color for the text of the file upload button when hovering.
- Upload Button Padding (Single Button): Set padding for the file upload button.
- Upload Button Text (Single Button): Add text for the file upload button.
- Popup Header Text (Single Button): Add text to display at the header of the file upload popup.
- File Upload Progress Bar: Select between the different styled file upload progress bars.
- Enable Cropper: Click the checkbox to enable the file crop option.
- Enable Admin Feedback: Check the box to allow the admin to add feedback when accepting or rejecting an uploaded file.
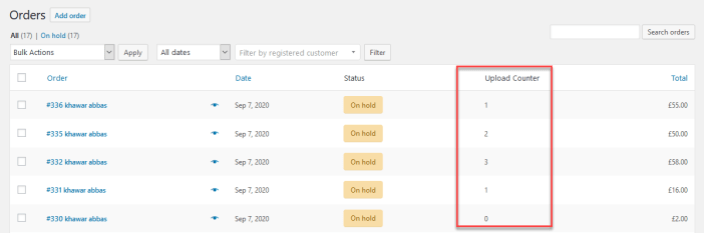
Upload Counter
↑ Back to topGo to WooCommerce > Orders to find a new “Upload Counter” column in the order table. This column shows which customers uploaded files and the total number of files uploaded with each order.
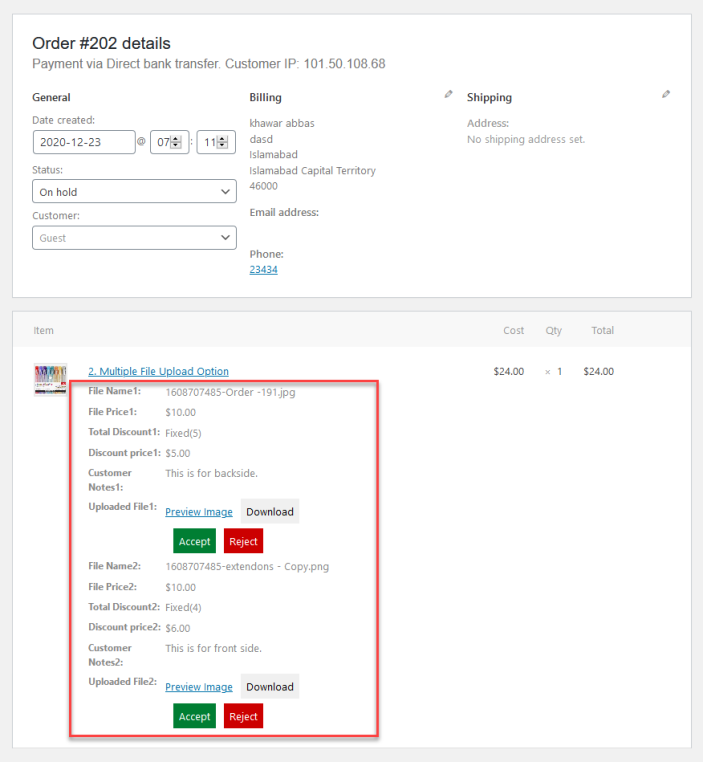
View, Download & Approve/Disapprove Customer Uploaded Files
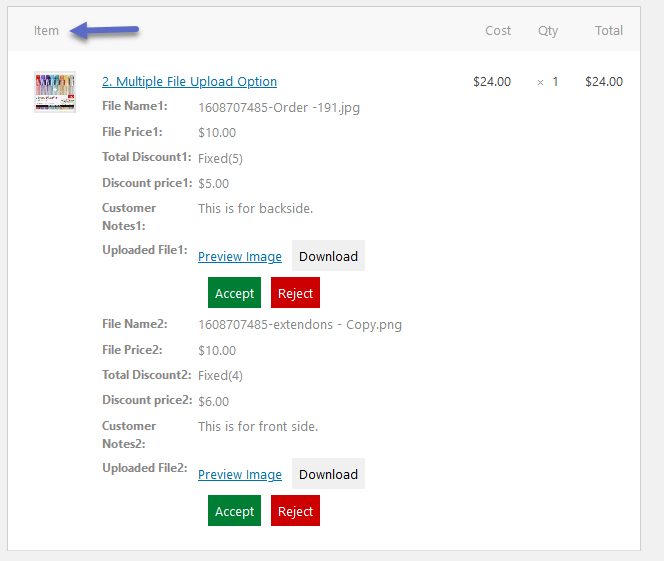
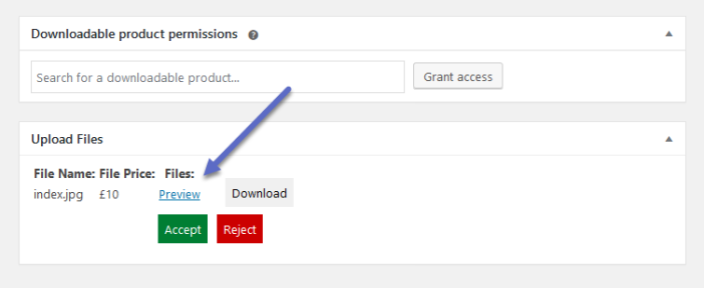
↑ Back to topOpen any order to view the files uploaded by the customer. You can download the uploaded files and approve or disapprove them directly from the order.
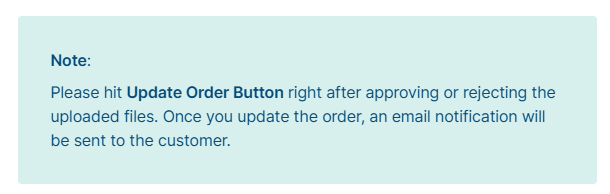
{Note:
↑ Back to topPlease hit the Update Order Button right after approving or rejecting the uploaded files. Once you update the order, an email notification will be sent to the customer.}
Will be added in a highlighted box.
If customers upload the file from the product page, then the uploaded will be displayed in the Item section of the order detail page.
If customers upload the file from the cart or checkout page, then the uploaded file will be displayed at the bottom of each order in the Upload File section.
FAQs
↑ Back to top- Is it possible to restrict the size or type of file the user uploads?
Yes, the upload file checkout WooCommerce plugin allows you to set the minimum and maximum file size for all or selective products and also restricts file types that the user can upload.
- Does the WooCommerce checkout file upload plugin allow multiple file uploads?
Yes, you can easily configure if you want to allow multiple uploads for all or specific products. Create rules to set the number of files that can be uploaded for a single plugin.
- On which pages can you upload the files?
With the checkout files upload for WooCommerce plugin you can enable the file upload button on the product, cart, shop, and checkout page.

