Overview
↑ Back to topAll In One Files Upload for WooCommerce facilitates custom orders by allowing users to add or upload essential files such as images, documents, audio, and video within the product page as well as to the cart, checkout, and order pages.
With All In One Files Upload for WooCommerce, admin users have the option to set specific parameters on file uploads such as specified file size, file type, file upload price, include note field, require file upload, etc.
Features
↑ Back to top- Allow customers to upload a custom image, document, audio, and video files on product pages
- Option to allow customers to upload notes to add instructions, questions, or clarifications
- Option to require file uploads with specific products
- Option to restrict file size or file type
- Option to charge a fee for file uploads
- Customers can add the upload file fee to their carts when they purchase the product
- Option to add a popup tooltip on the product page for user information
- Options to display uploaded files in the cart and at checkout
- Options to customize button text, plugin text, labels
- Offer JPEG, JPG, PNG, GIF, ICO, PDF, DOC, DOCX, XLS, XLSX, MP4, MOV, WEBM, MP3 file types
Installation:
↑ Back to top- Download the .zip file from your WooCommerce account.
- Go to WordPress Admin > Plugins > Add New and Upload Plugin. Choose File for the file you downloaded.
- Install Now and Activate Plugin.
Settings
↑ Back to top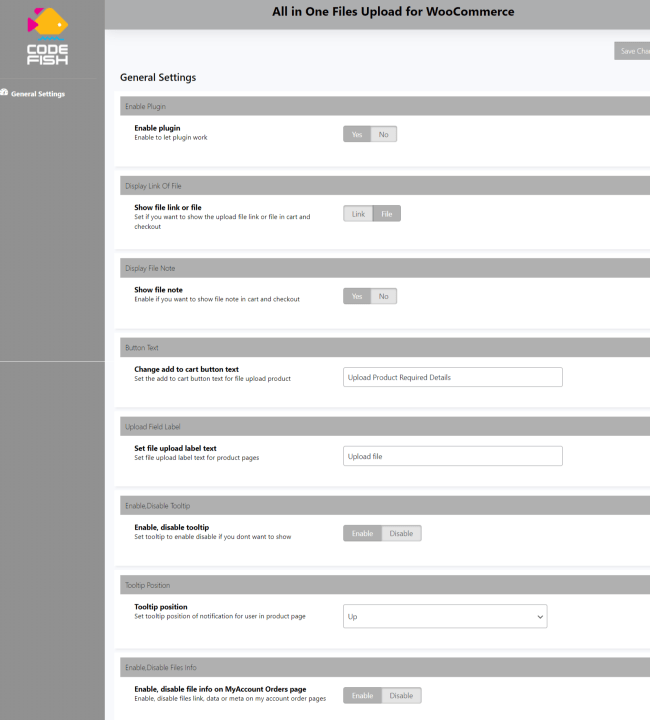
Configuration
↑ Back to topOnce the plugin is installed and activated, the All In One Files Upload extension settings will be available under WooCommerce > Files Upload.
To configure the extension:
- Enable plugin functionality by selecting “Yes.”
- Select whether to display upload file link on cart and checkout pages.
- Select whether to display file note on cart and checkout pages.
- Option to customize Add-To-Cart button text (only for products that have custom file upload enabled).
- Set file upload label text.
- Option to enable and disable tooltip on file upload field.
- Option to set tooltip position.
Adding File Upload to Product Page
↑ Back to top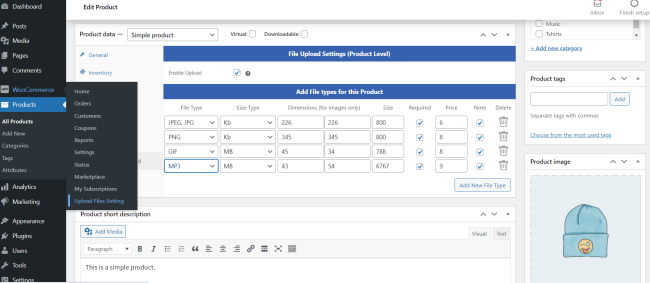
To add a file upload setting to a product page: navigate to Products > All Products. Edit the applicable product and a Custom File Upload tab is available within Product Data settings and configure the following setting options:
- Select the Enable Upload checkbox.
- Set file type (JPEG, JPG, PNG, GIF, ICO, DOC, PPT EXCEL, SVG, MP3, MP4, MOV, WebM, WMV).
- Set file size type (MB, KB).
- Set file dimensions (for images only).
- Set maximum file size.
- Option to require upload file field.
- Option to add a price for custom file upload.
- Option to enable an additional note field.
You can add as many file types for a product as needed by selecting Add New File Type.

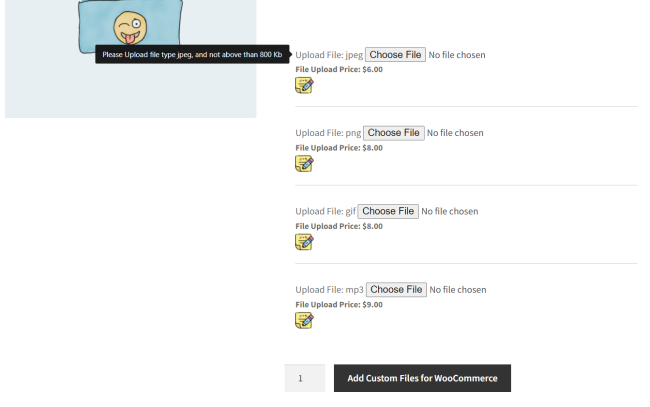
Custom File Upload (Frontend)
After file upload settings have been configured, the custom file upload will display on the frontend as shown below. The required file type along with the maximum file size, price and file note field (if applicable) will be displayed. If a price is set for a custom file upload, the customer can then add to their cart and will display in checkout.
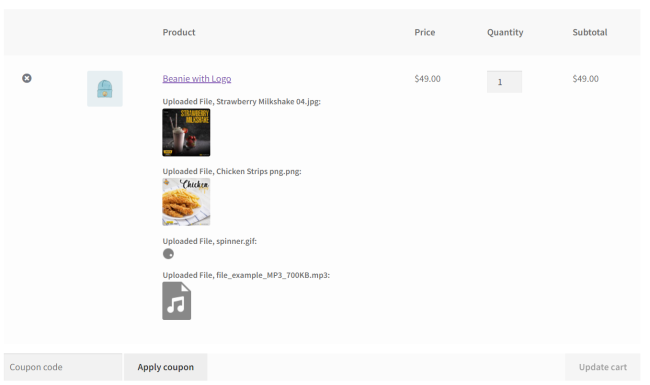
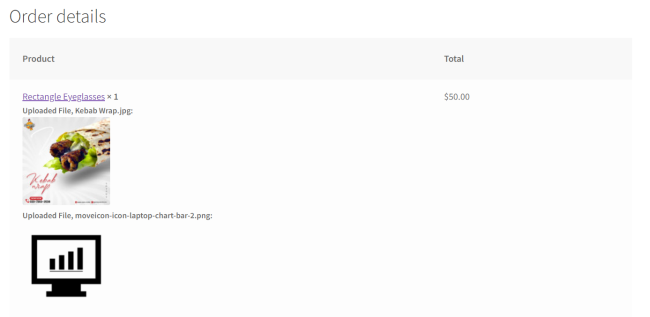
Cart Page with Custom Files Upload (with files)
To display the upload file on the cart and checkout pages, go to WooCommerce > Files Upload and under “Show file link or file”, select File.
The file will display on the cart and checkout page as shown below.
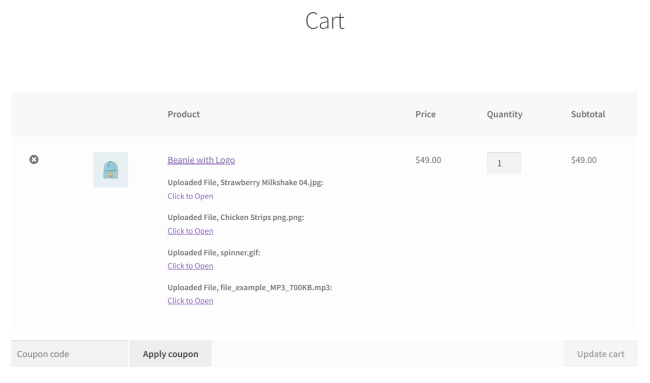
Cart Page with Custom Files Upload (with Links).
To display the upload file link on the cart and checkout pages, go to WooCommerce > Files Upload and under “Show file link or file”, select Link.
The file link will display on the cart and checkout page as shown below.
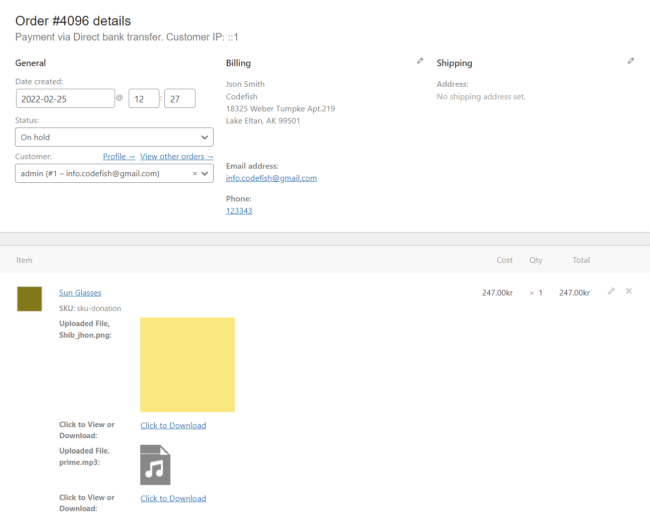
File/Link displays on orders
The file and/or file link will display on the order details page as shown below.
Admin users can also view and download the file under Orders > Edit Orders in the WordPress admin dashboard.
Pre Translation.
Plugin includes a .pot language file to use and translate to other languages easily.