B2B Company Credits & Permissions let B2B companies deliver a complete self-service experience to their business buyers. With powerful role management and account management features, B2B Company Credits & Permissions allows B2B storeowners to accommodate not just a single buyer but the internal hierarchy of the entire organization.
Installation Guide
↑ Back to top- Log in to your WordPress Admin Panel.
- Navigate to the WordPress Admin Dashboard → Plugins → Add New.
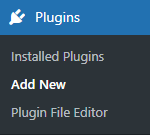
- Click the Upload Plugin button on the top left corner of your screen.
- Next, click the Choose file button in the box that appears below.
- Select the zip file that you have downloaded and upload it.
- Click on the Activate Plugin button.
Getting Started
↑ Back to top- In order to use the plugin, the WooCommerce plugin must have been installed previously.
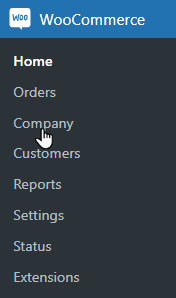
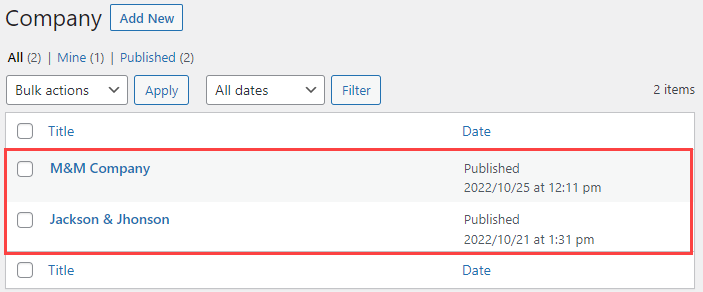
- To create a Company, navigate to WordPress Admin Dashboard → WooCommerce → Company → Add New.
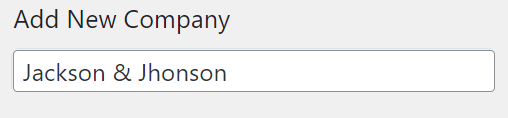
- Now add the company name
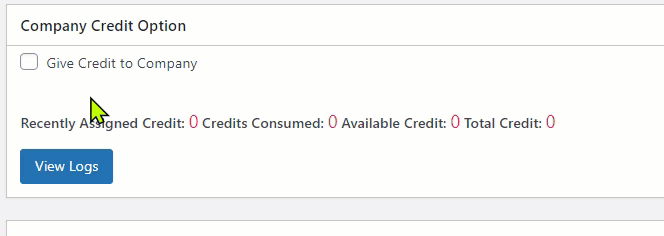
- Click the checkbox Give Credit to Company
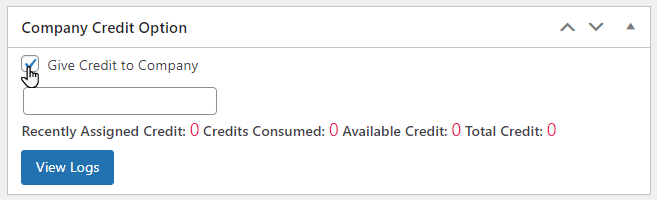
- Add the Credit in the text box below the Give Credit to Company.
Note: The Manager and Members associated with the company can utilize the credited amount which will be deducted from the company’s credits and will be displayed in the Credit Logs.
- Admin can also add the email of the Company under the header Company Email.

- Now under the header of Company User, admin can add the Manager under the Add Managers header.
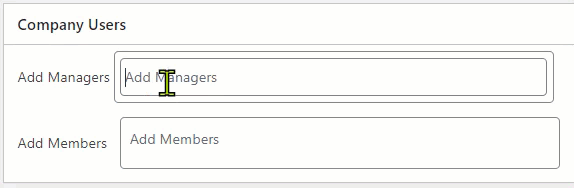
NOTE: Users must be available at the backend in the WordPress user’s directory; the same users can be selected as a Manager or Member in each field, respectively.
If the user is both a Manager and a Member by default, the user will be Manager.
- Similarly, under the header of Company User, the admin can add the Member under Add Members header.
- In order to add new users, navigate to WordPress Admin Dashboard →User→Add New.
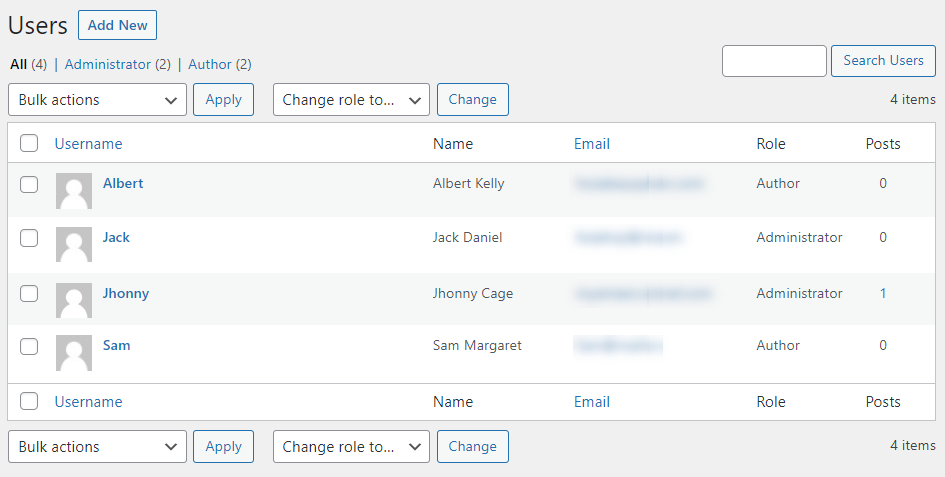
- Admin can set the roles of the users from the backend as well as the front end
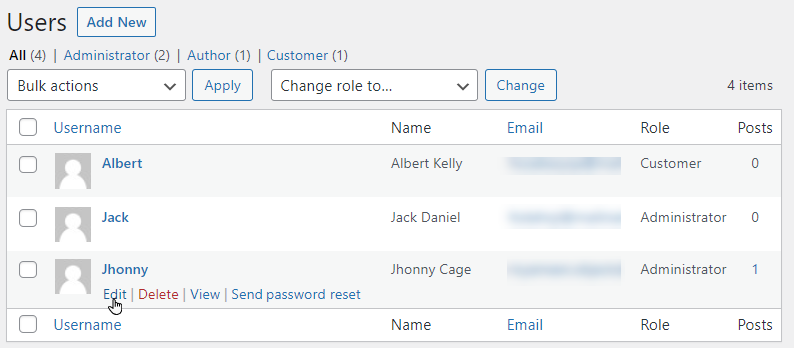
- In order to assign roles from the back end navigate to WordPress Admin Dashboard → User → All Users.
- Click the Edit button of the desired User.
- A window will appear where the admin can set the Company of the selected User.
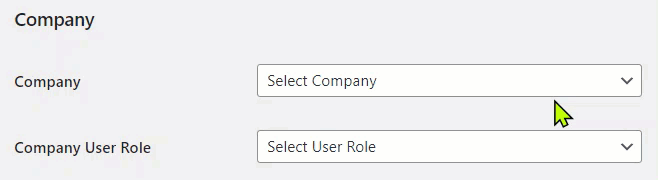
- And now the Company User Role can be assigned through the dropdown located under the Company header.
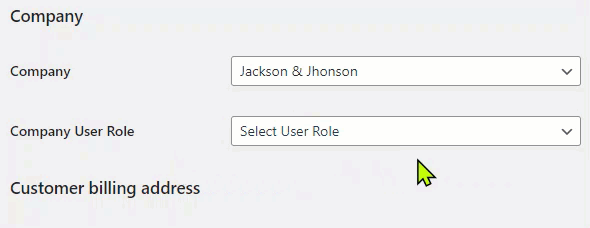
NOTE: The admin can select the Owner, Manager, or Member.
- Now the company is created, Admin can add multiple companies using the above-described method.
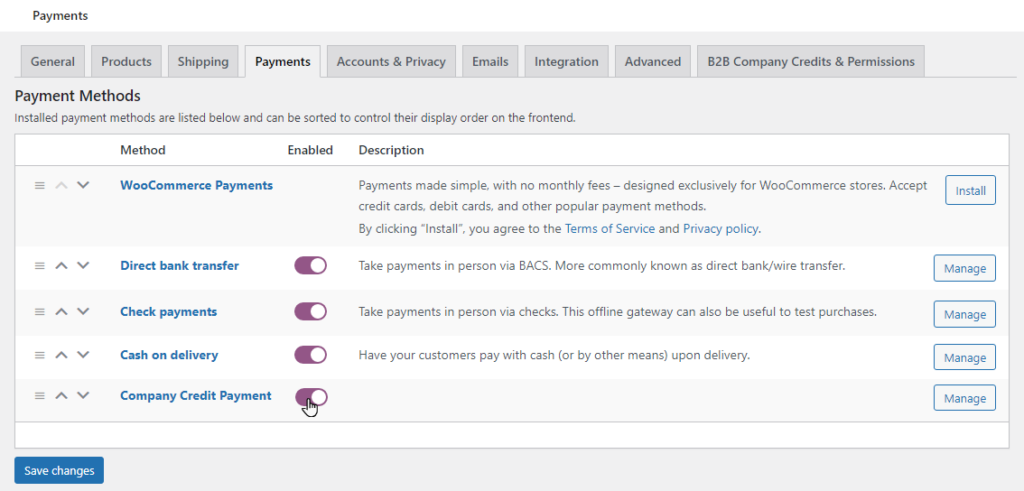
- Once the company is created, the payment method should be defined so users can use the credit from the front end.
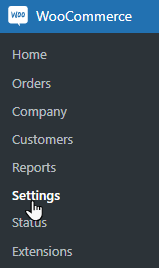
- To do that, navigate to WordPress Admin Dashboard → WooCommerce →Settings.

- A new page will appear on this page select the Payment header.

- Under the header, the admin can enable the Company Credit Payment under the Payment Method header.
- Once enabled, the user can use the payment method on
Frontend Impact
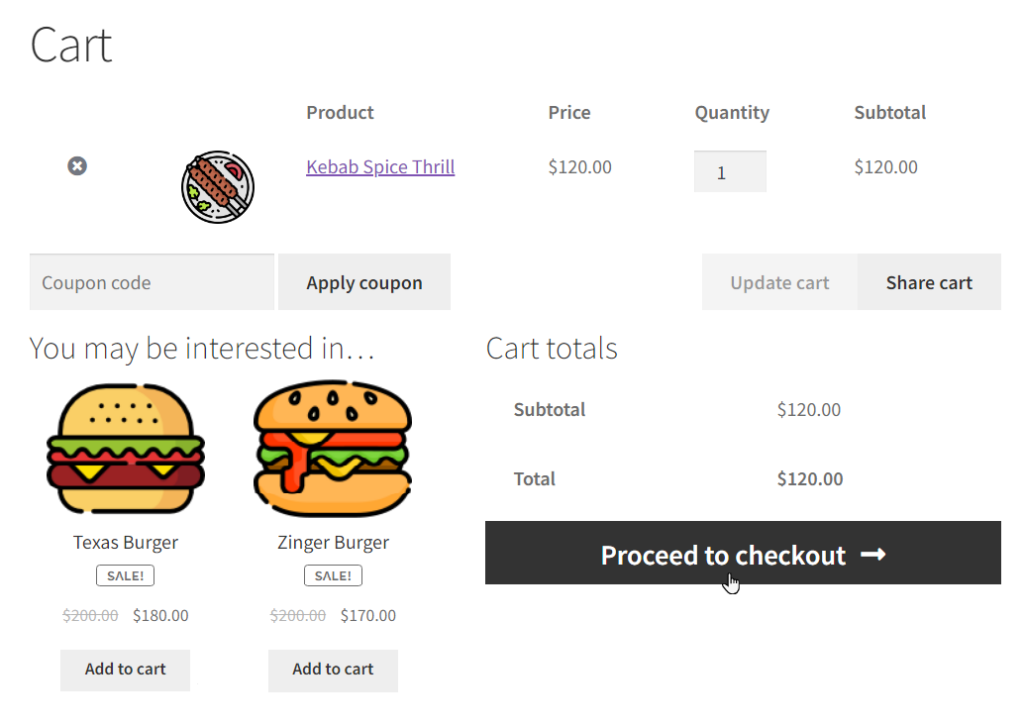
- Login as a Manager or Member on the front end.
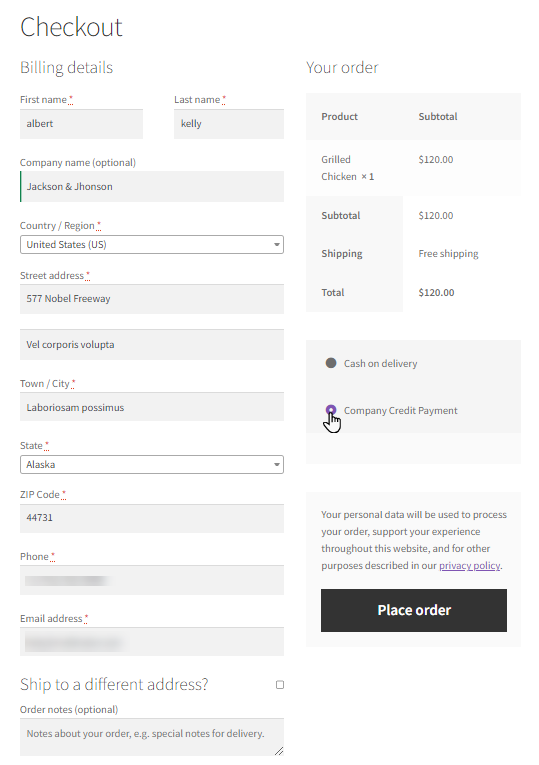
- After that Add to cart any item from the shop and click Proceed to checkout.
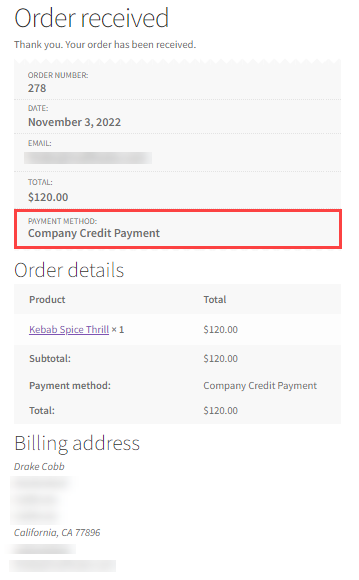
- After that, a Checkout page will appear where the user can add their personal details and select the payment method as Company Credit Payment.
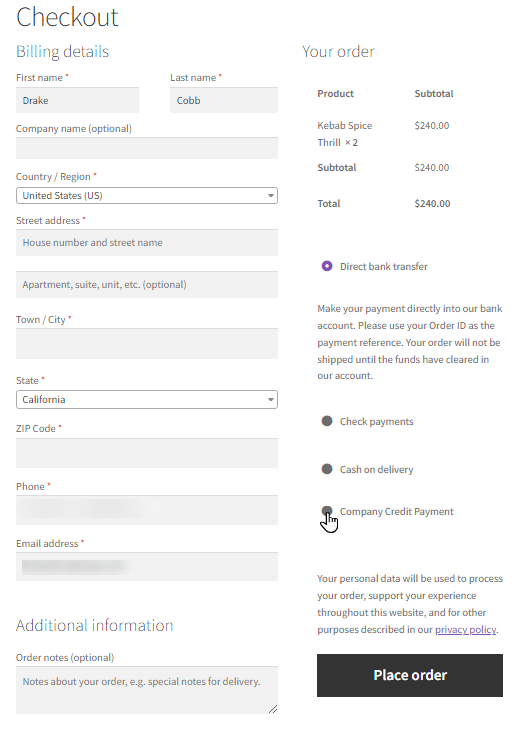
- Now click the Place order button.

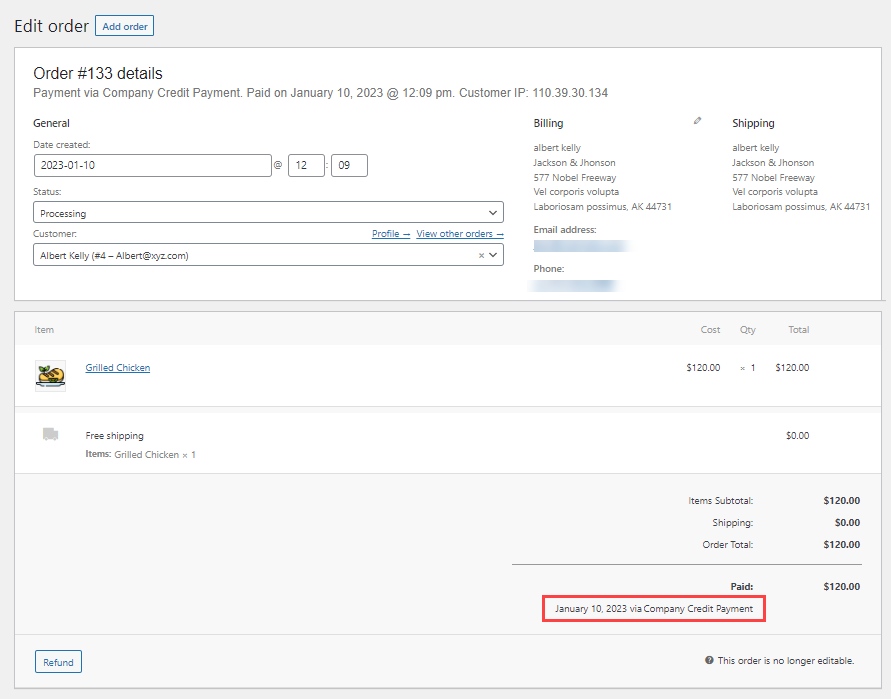
- After the order is placed, the user can view the Payment method as Company Credit Payment, and the amount will be deducted from the Company’s account.
B2B Company Credits & Permissions Settings
↑ Back to top- To give permission settings, the admin must navigate to WordPress Admin Dashboard → Woocommerce →Settings.
- A new page will appear on this page. Select the B2B Company & Permissions header.

- Under the header, the admin can set permission settings that will impact the front end of each user i.e. Owner, Manager, or Member.
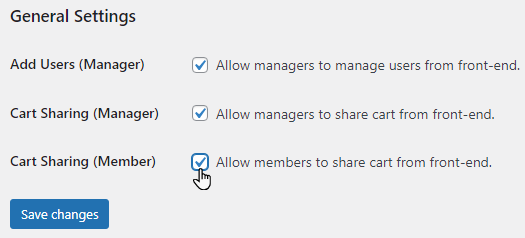
Add User (Manager)
- Add Users(Manager) can be Enabled/Disabled by using its checkbox. Which allows managers to add users from the front end. When this option is enabled, an Add user tab will be visible in the My Account 🡪 Company section.

Note: This will be implied to the managers who are associated with the respective companies.
Frontend Impact
- Login as a Manager on the front end.
- After that, select the My account from the front end of the Manager.
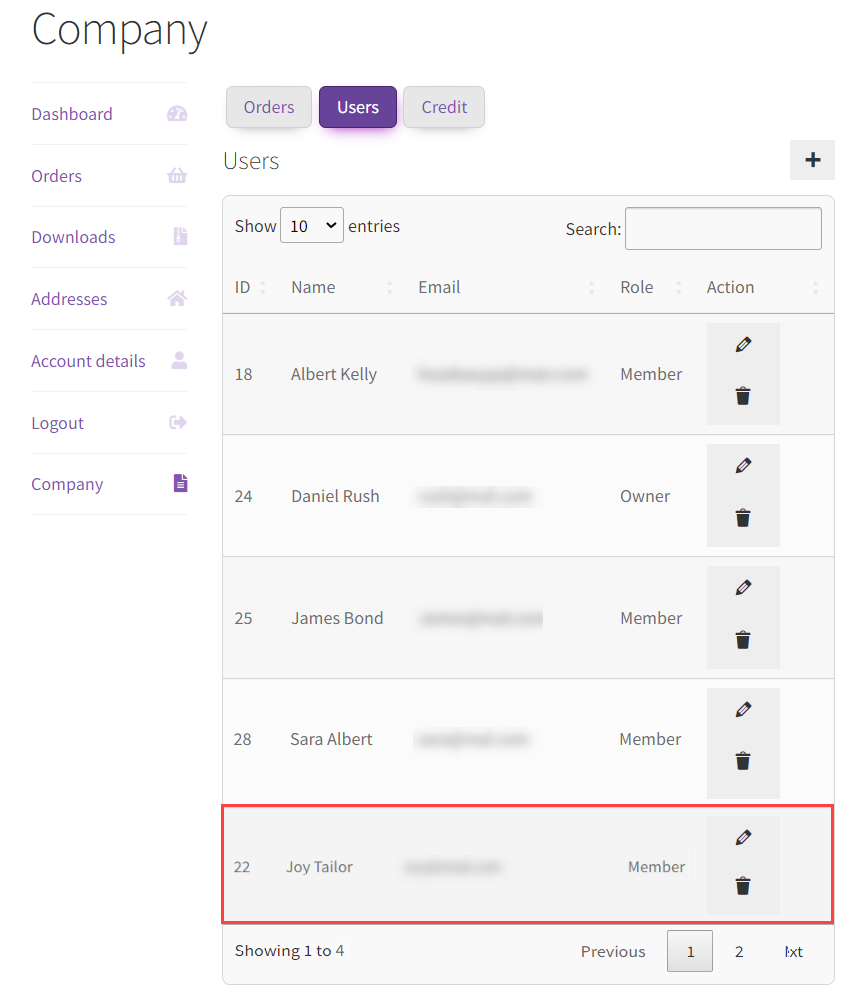
- The dashboard will appear on the My account page. Here the user needs to select the Company tab.
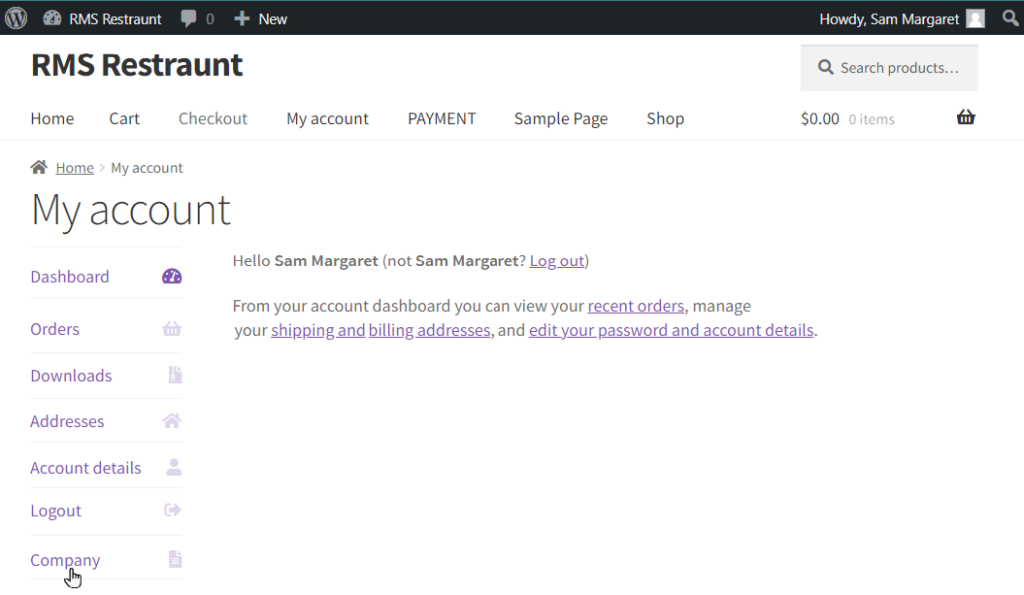
- Now under the Company header, select Users.
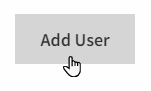
- All the users will be available under the Users tab. Select the + button to add the User
- Once the user clicks the + button a popup will appear where the user can add the user’s detail.
- Add the user details which need to be added.
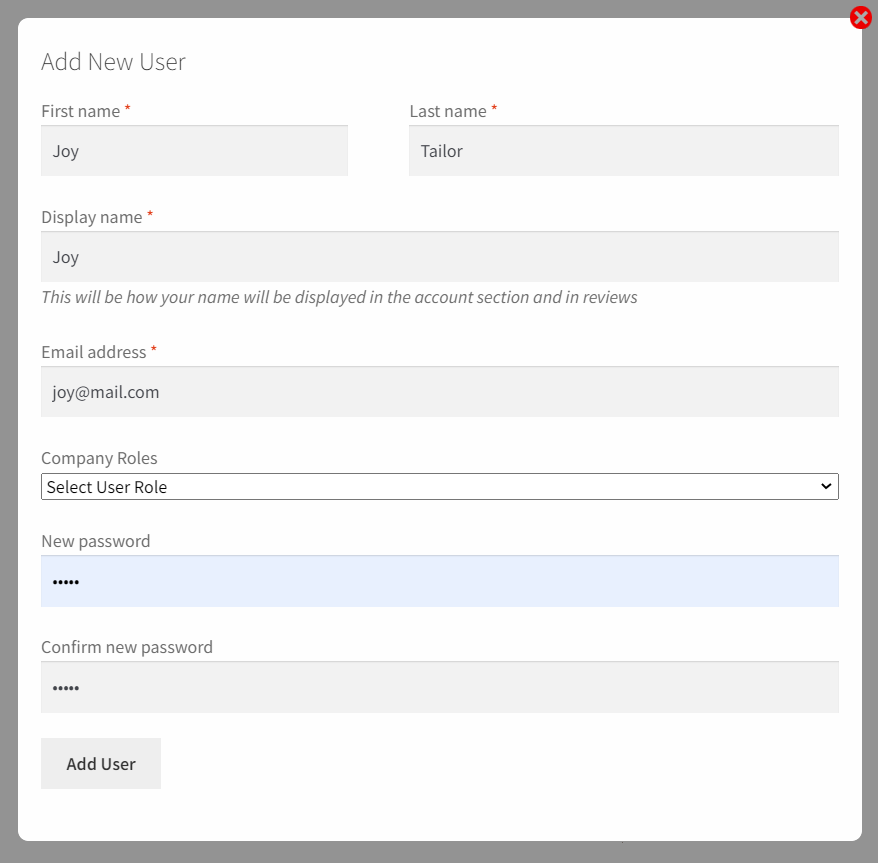
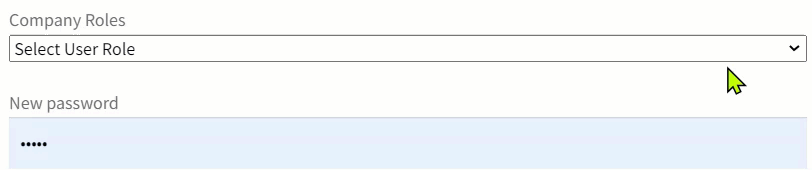
- Select the User Role that must be assigned to the specific User from the dropdown under the Company Roles header.
- After adding and assigning the details and roles click the Add User button.
- The user will be added and shown on the front end under the header User.
Cart sharing (Manager)
- Cart sharing (Manager) can be Enabled/Disabled by using its checkbox, which allows managers to share their carts with the Members and Managers of the Company from the front end.
Note: Shop and product must be available to share the selected item in the cart.
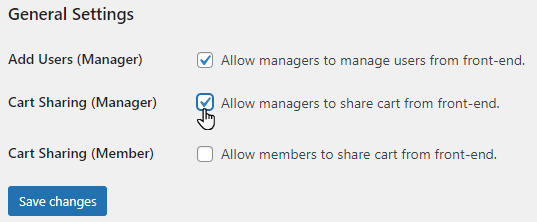
- Click the Save changes button.
Frontend Impact
- Login as Manager
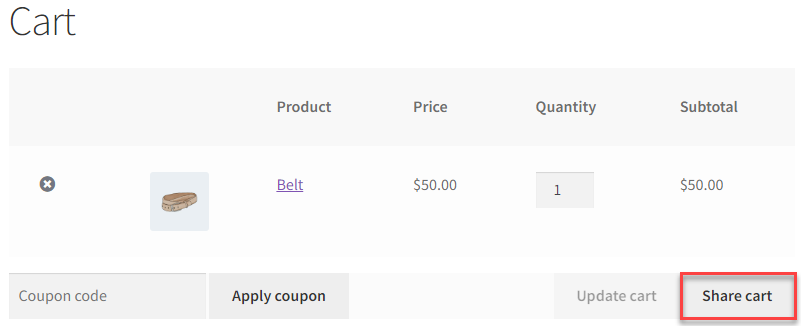
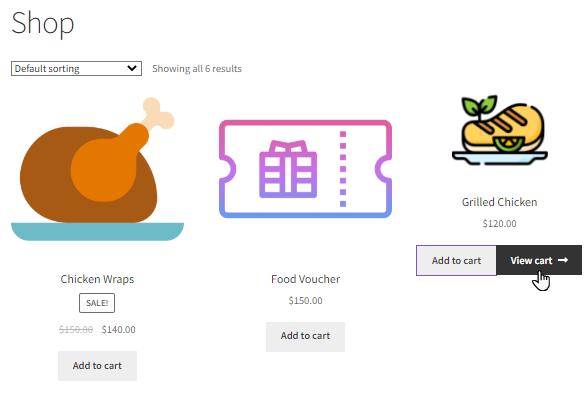
- Visit the Shop or Store and add the item to the cart by clicking the Add to cart.
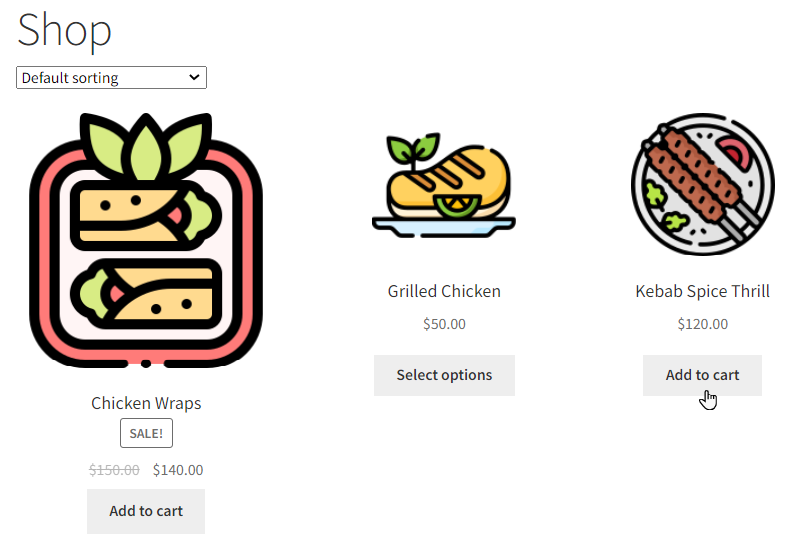
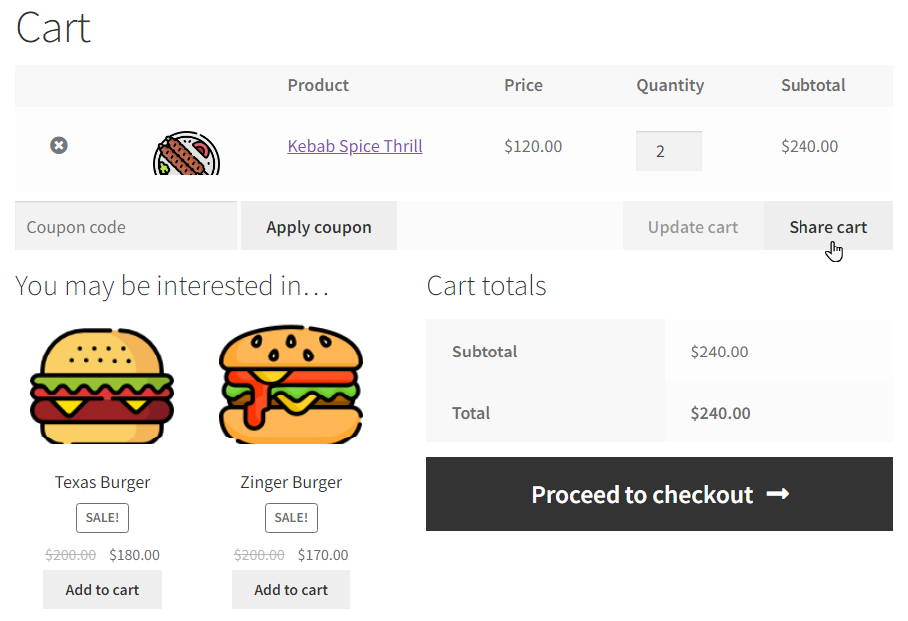
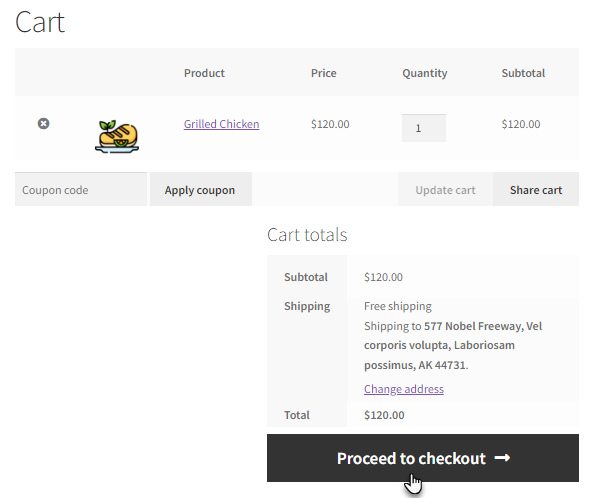
- Click the View Cart button.

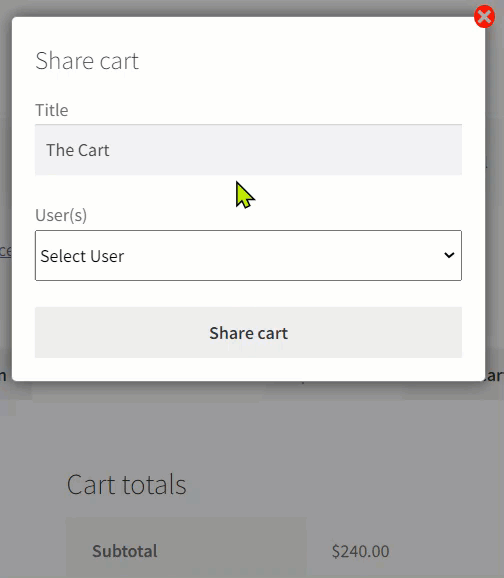
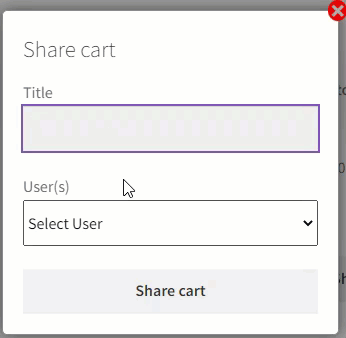
- On the cart page click the Share cart.
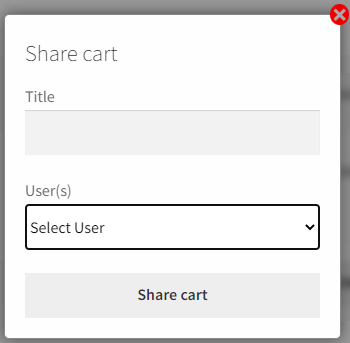
- After clicking Share cart the popup will appear here Add the Title.
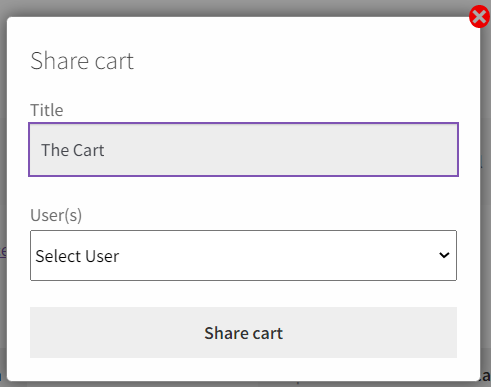
- Now select the User from the dropdown under the User(s)
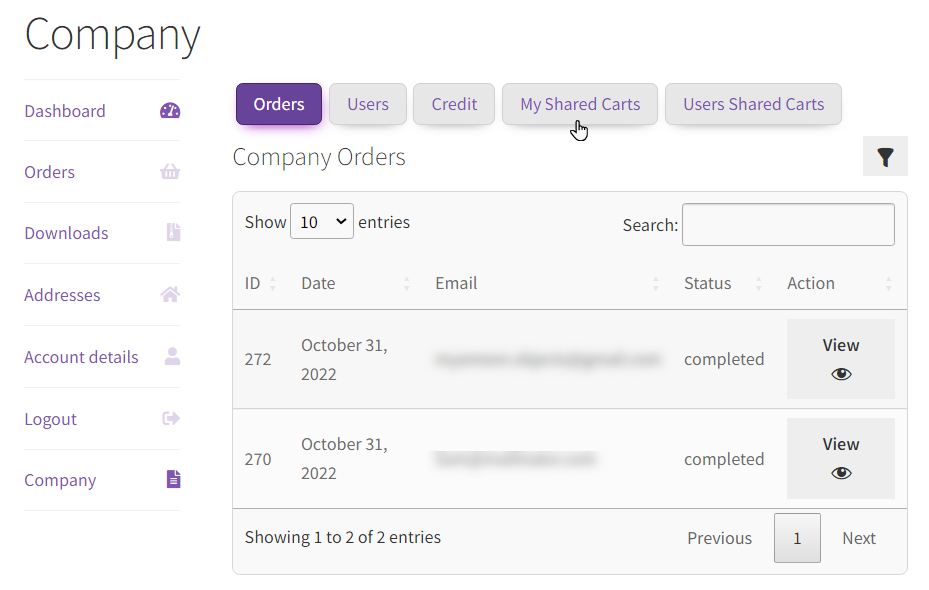
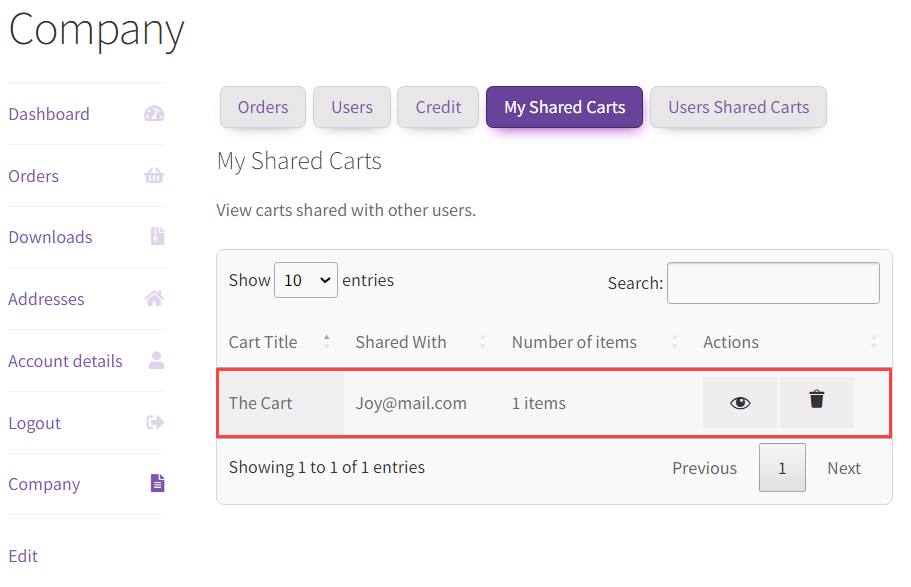
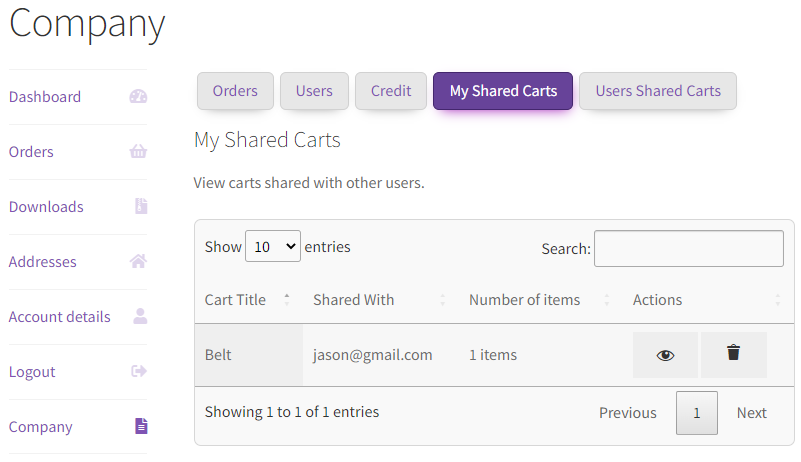
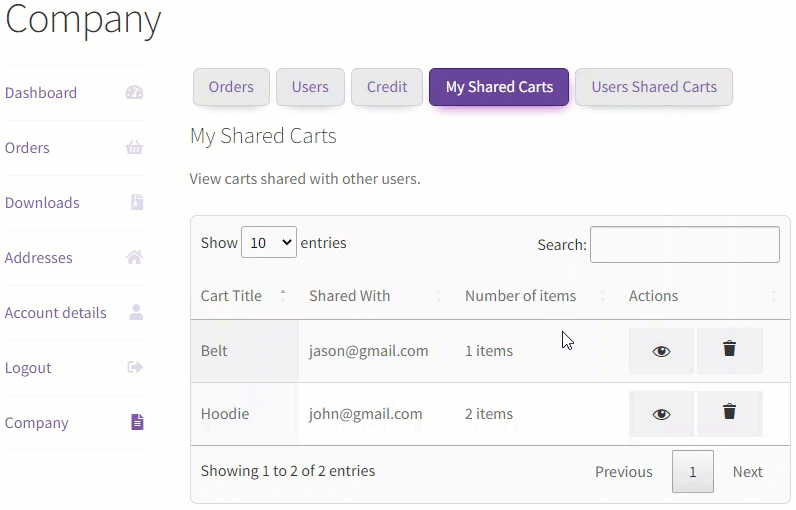
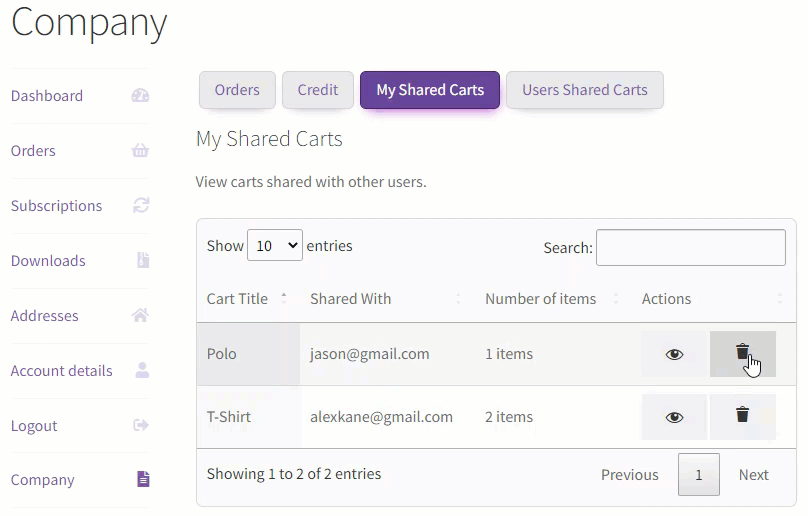
- After sharing the cart the manager can view the shared cart to do so, navigate to My account → Company → My Shared Carts.
- Now click My Shared Carts
- Here the Manager can view the shared cart he created for other users.
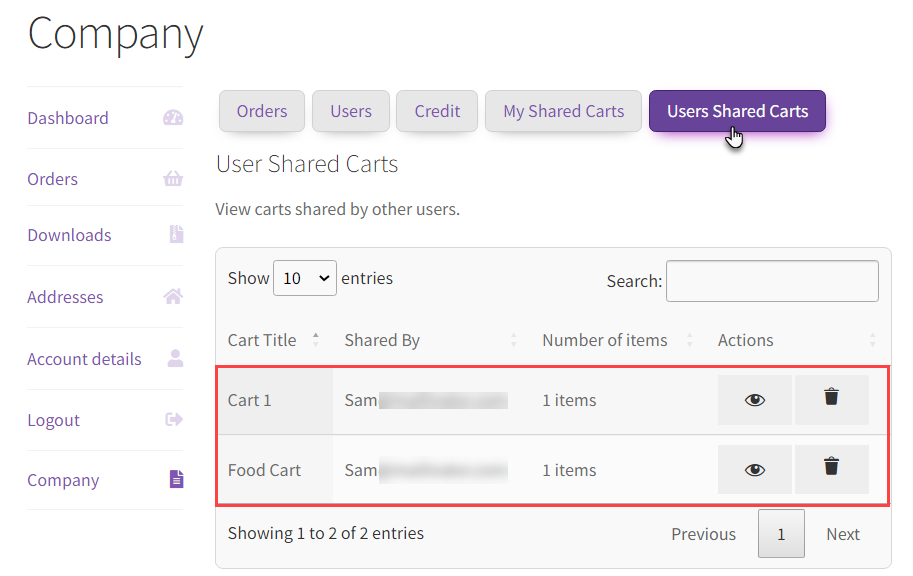
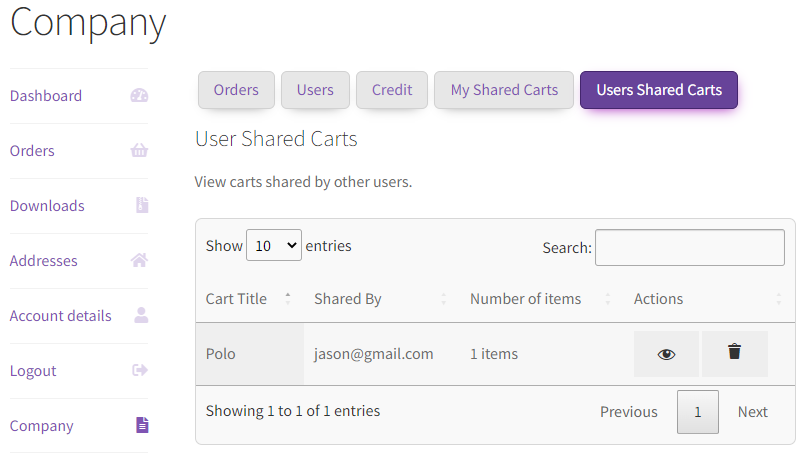
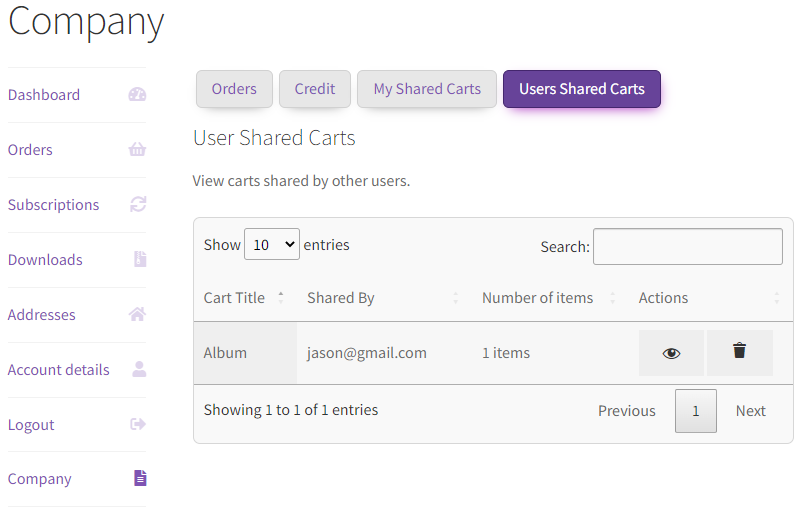
- Similarly, Users Shared Carts will display the cart shared with the manager.
- To view, click the Users Shared Carts.
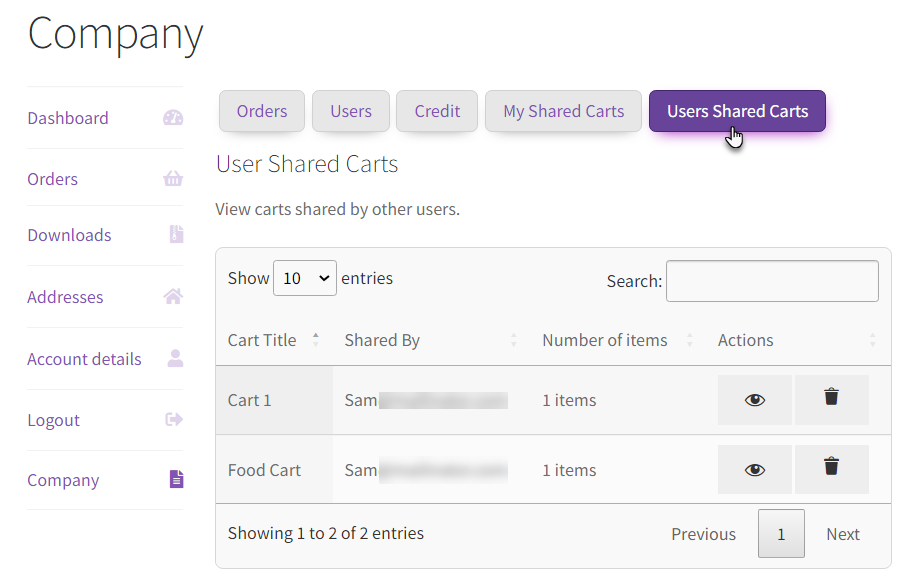
- Here the manager can view the carts shared with him by the other users.
Cart sharing (Member)
- Cart sharing (Member) can be Enabled/Disabled by using its checkbox, which allows members to share their carts with the Members and Managers of the Company from the front end.
Note: The functionality is identical to Cart Sharing (Manager), and the effects on the front end will also be similar.
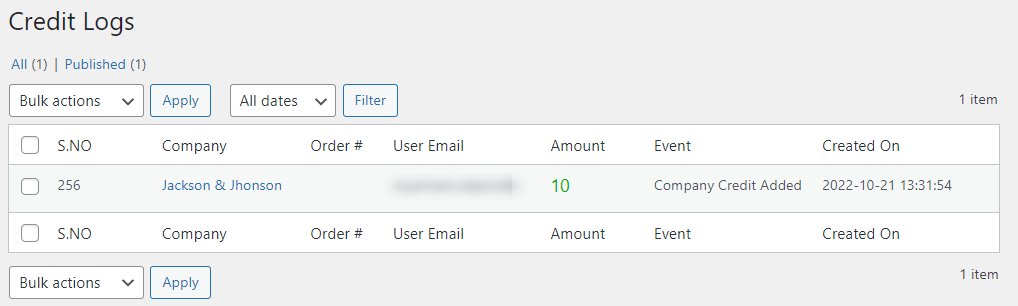
Credit Logs
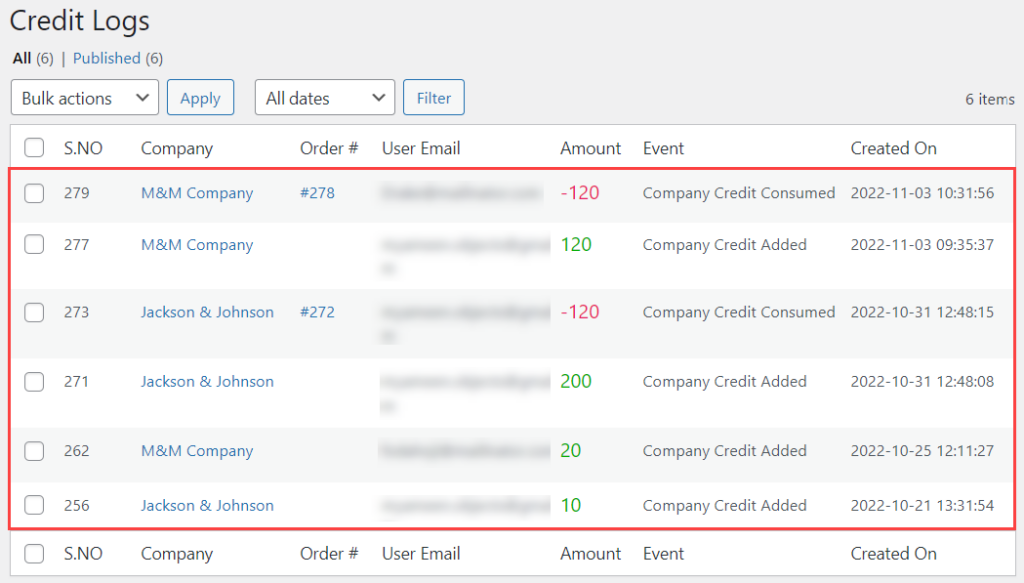
↑ Back to top- Admin can view the Credit logs, which will display all the records of the credit transaction done by all companies.
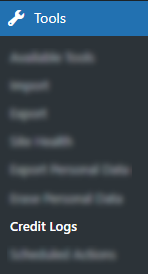
- To go to Credit Logs, Navigate to WordPress admin Dashboard →Tools → Credit Logs
- Here, a page will appear where the admin can view all the Credit Logs of every Company.
- Admin can also view the log from Company edit by clicking the View Log button.
- Click the view Logs button to view the logs.

- A new window will open where the admin can view the Credit Logs. All Companies assigned and deducted credits will be displayed in the Credit Logs.
User Permission – My Account (Front-end)
↑ Back to top- User Permissions can also be set using Front-end. To access it, Navigate to User Logged in → Company
Owner Role
NOTE: Logging in with the Owner’s Role will show the Tabs on Front-End as shown above.
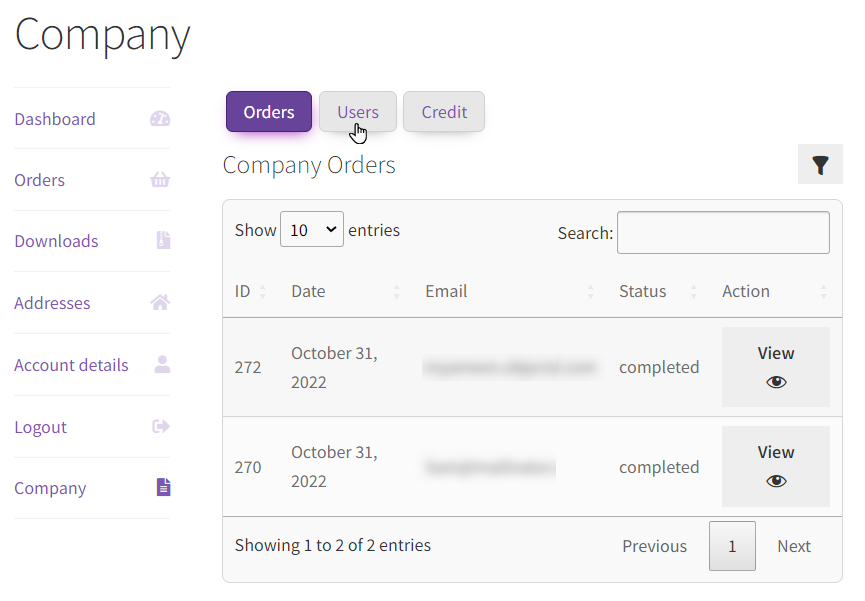
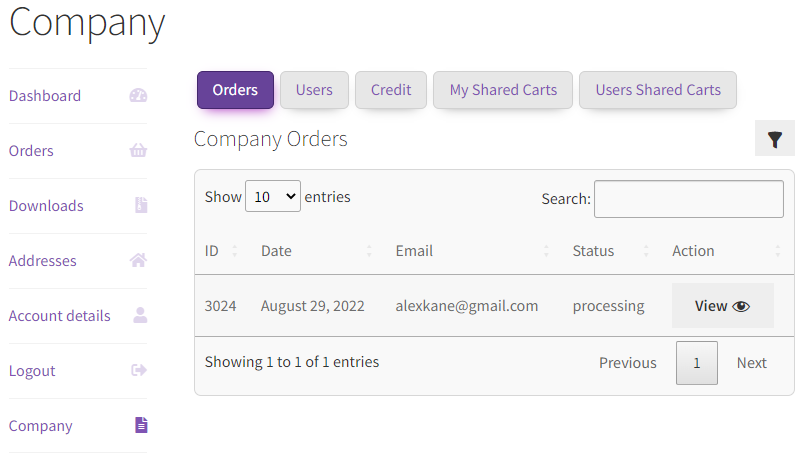
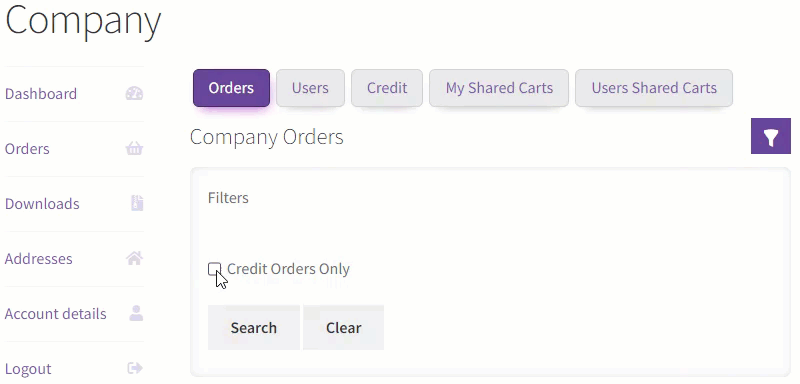
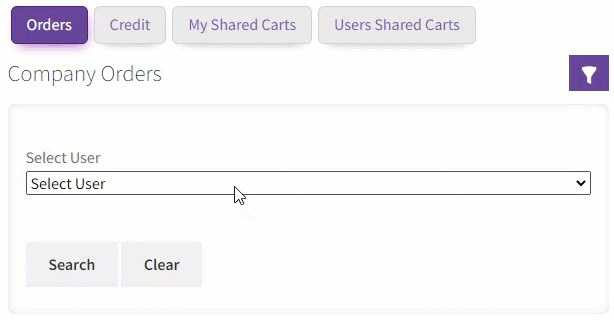
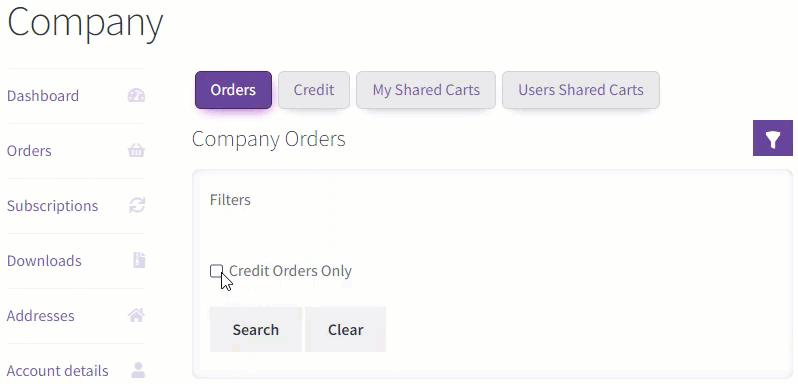
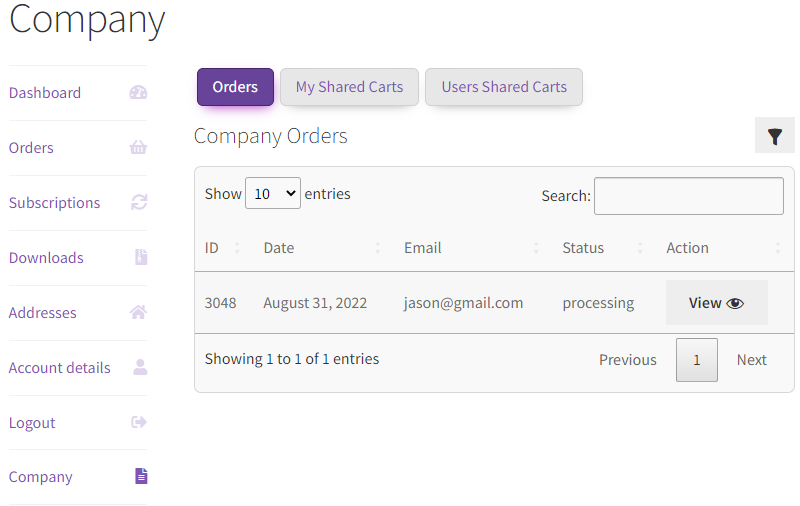
- Orders: The Orders tab will show the company’s orders to the owner. It has the following options:
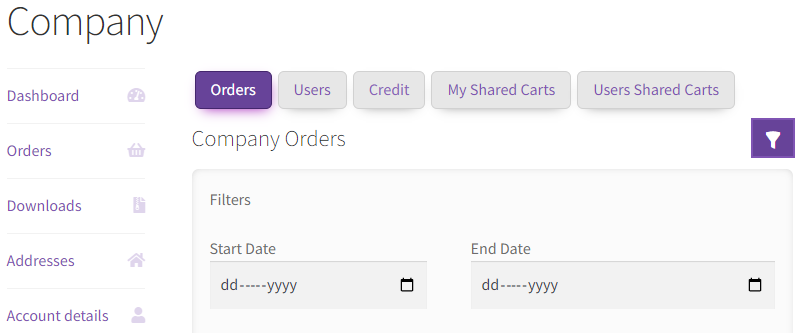
- A date filter has options to select Start Date and End Date. Orders will be shown according to the dates selected.
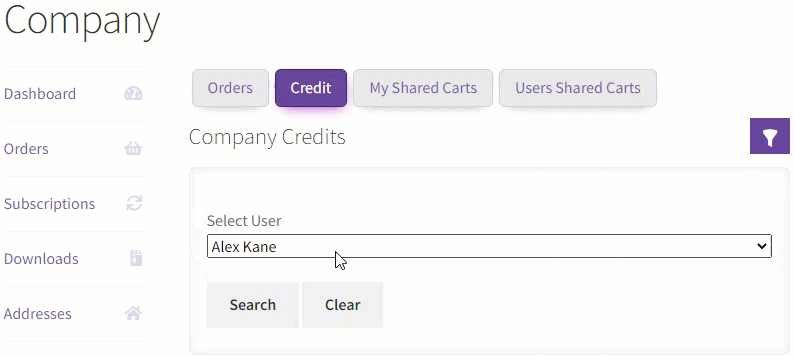
- A user selection dropdown is shown, showing all the users. Orders will be shown According to the selected User.
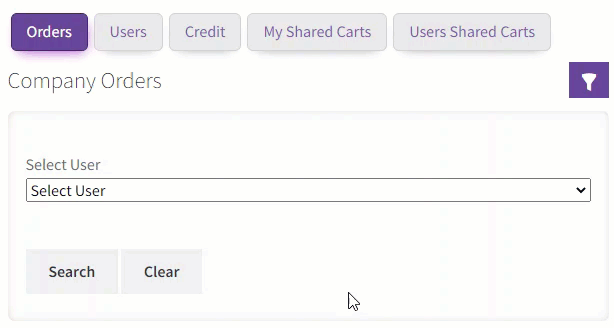
NOTE: Selecting, let’s say, Alex Kane will show all the orders placed by Alex Kane
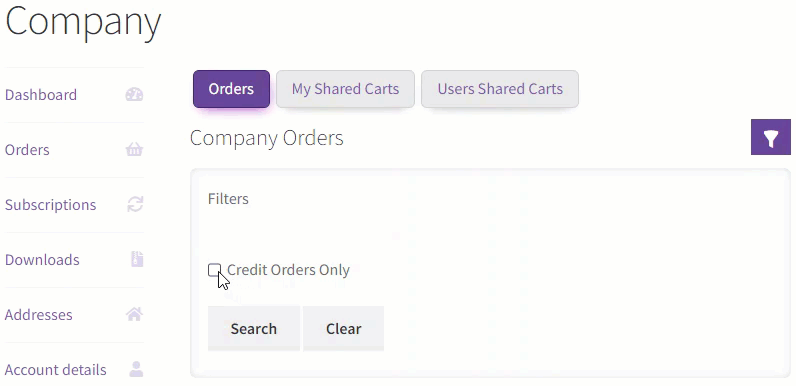
- Credit Orders Only has a checkbox that can be enabled/disabled. Enabling the checkbox will show only those orders being paid by the credits.
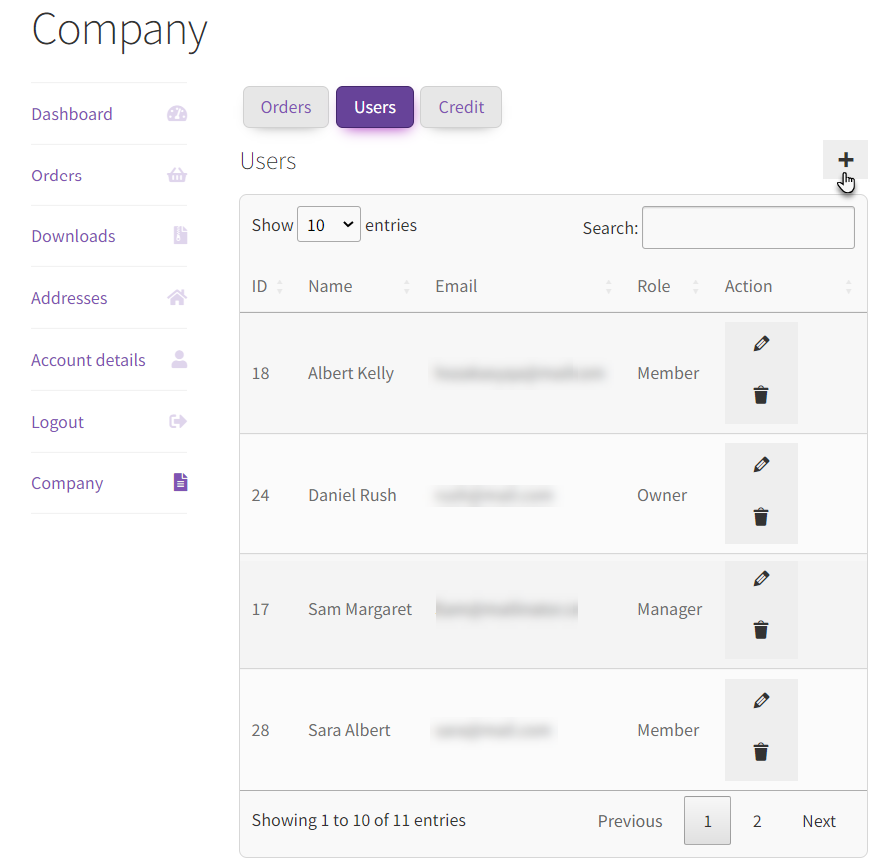
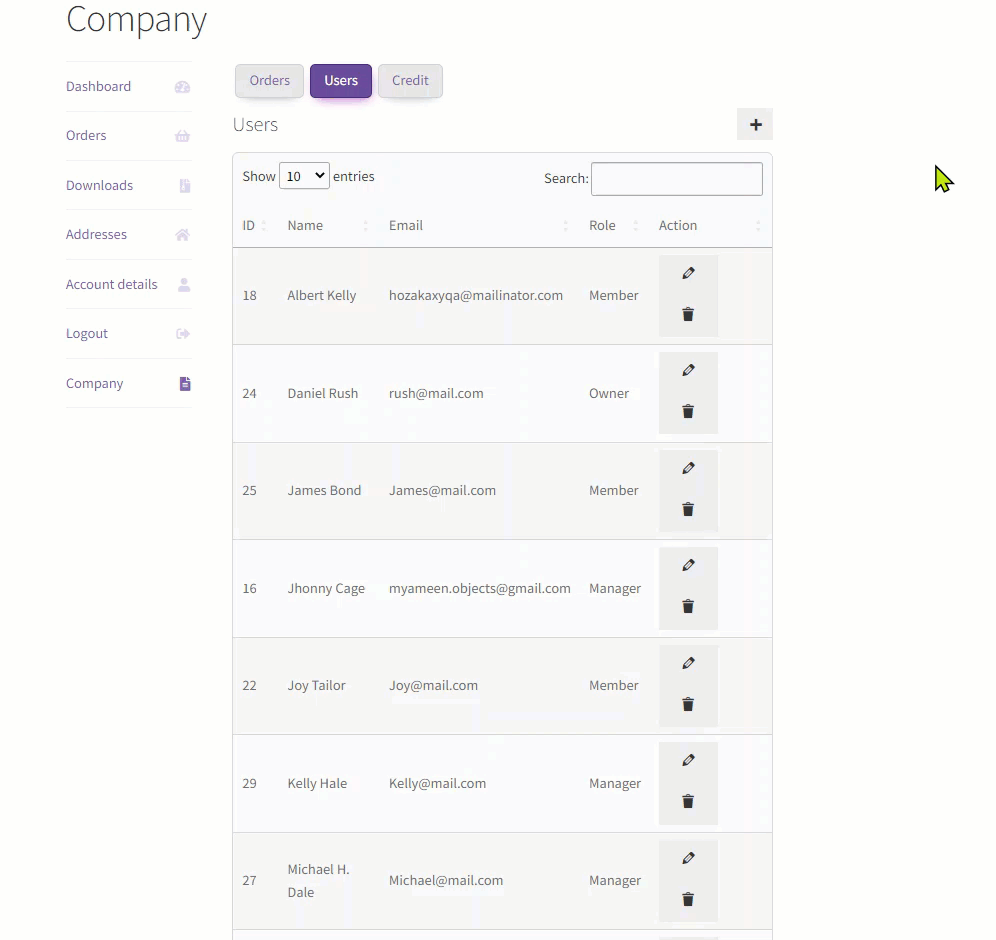
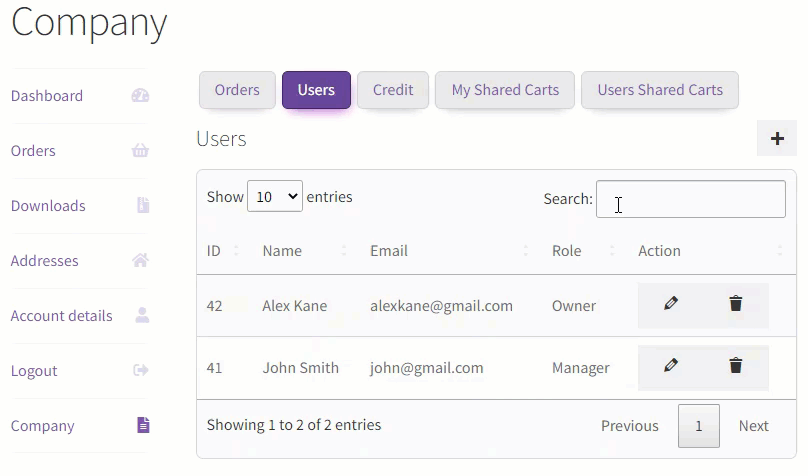
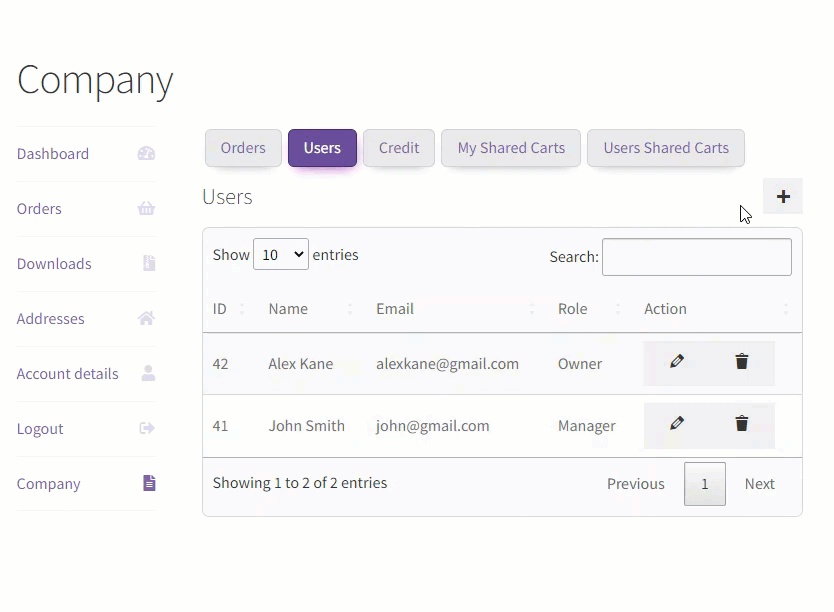
- Users: Users tab will show the users associated with the company. It has the following options:
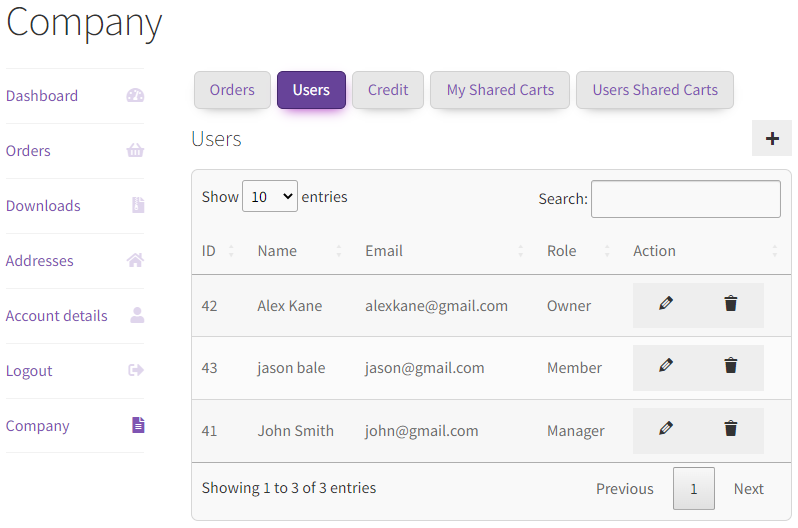
- Users Tab will show the Details of all the users. The owner can Edit/Delete any user if required.
- The Owner can also change the Company Roles of the User.
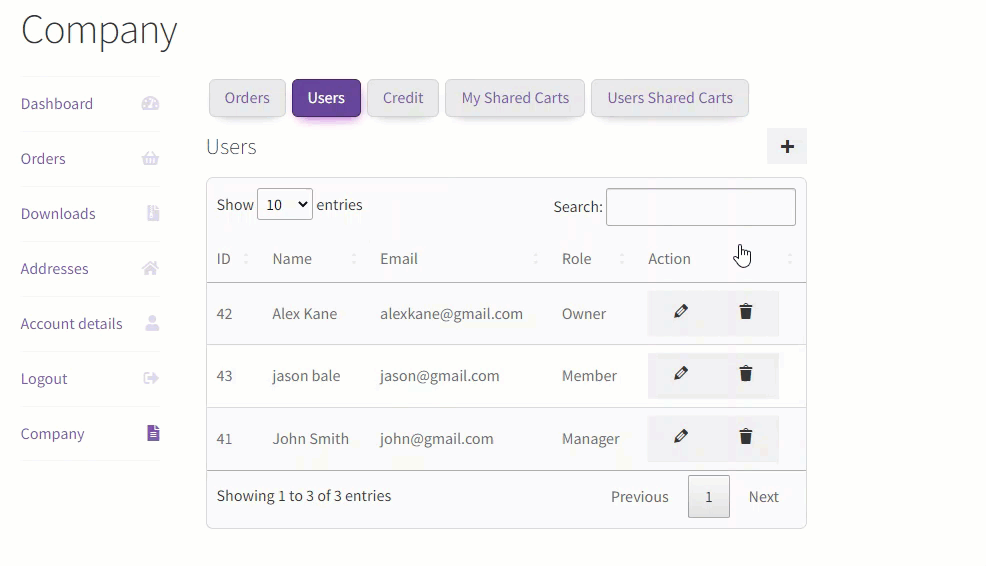
- There is Search Tab that is used to search the User based on ID, Name, Email, and Role
- Users can also be added from the front end by clicking on the “ + ” button. All the User details, including role, can be set, which will be visible in the Users Tab.
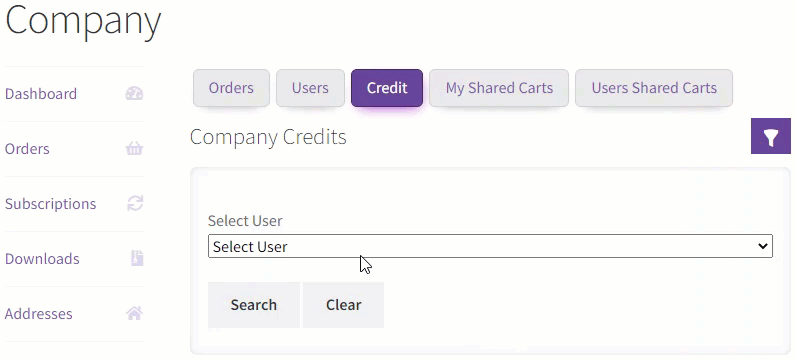
- Credit: The credit tab will show the information regarding the credits. It has the following options:
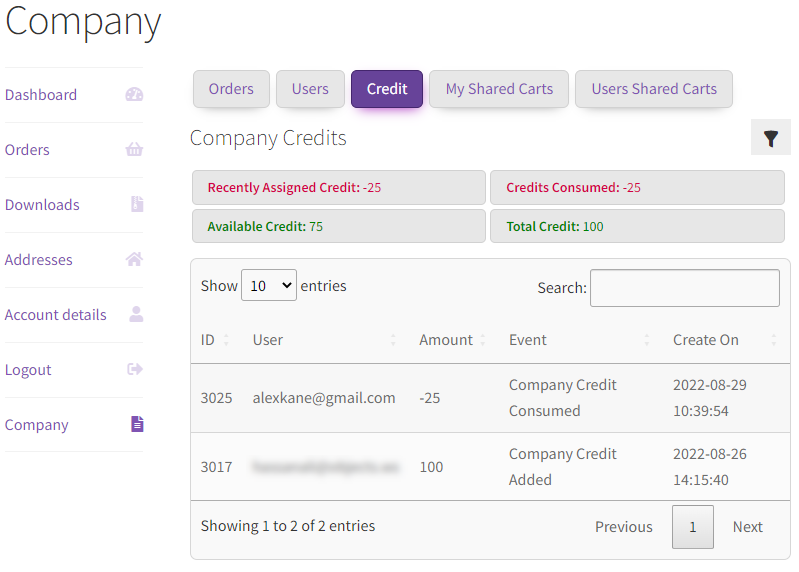
- Credits will show Recently Assigned Credit, Credit Consumed along with Available Credit and Total Credit.
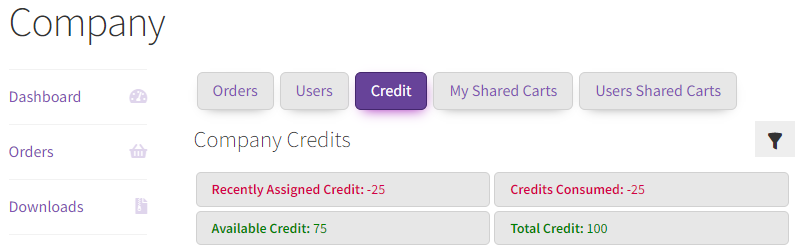
NOTE: Here Total Company Credit is 100. Credit Consumed is 25, so Available Credit will become 100-25 = 75. Since there is only one transaction, Recently Assigned Credit will be the same as Credit Consumed i.e. -25
- A date filter having options to select Start and End Date. Credits will be shown according to the dates selected.
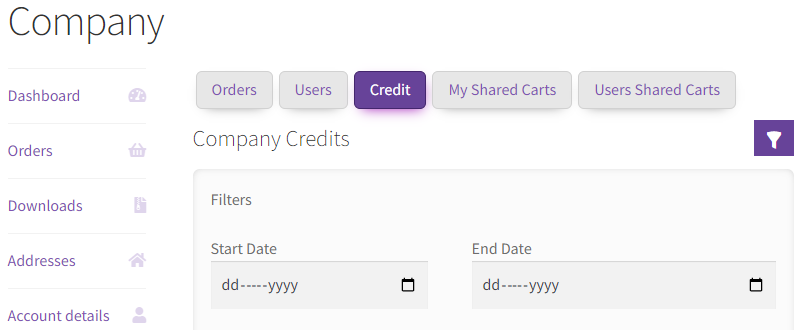
- A user selection dropdown shows all the users. Logs will be shown According to the selected User.
NOTE: Selecting, let’s say, Alex Kane will show all the Logs related to Alex Kane
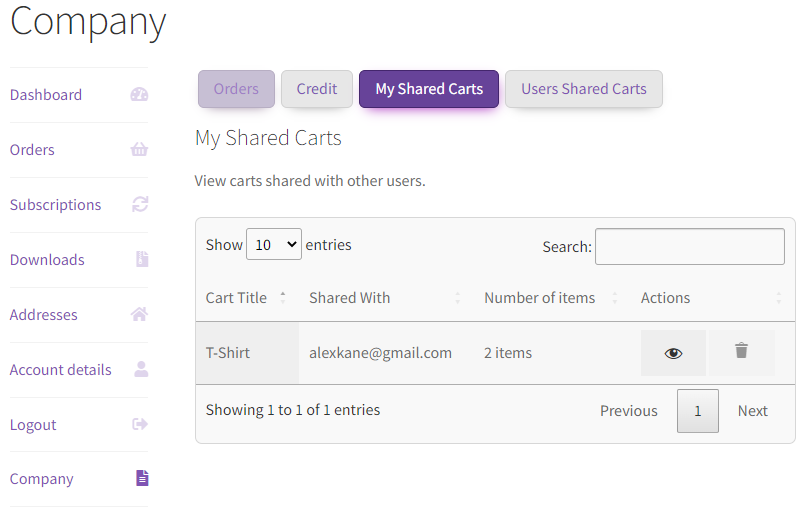
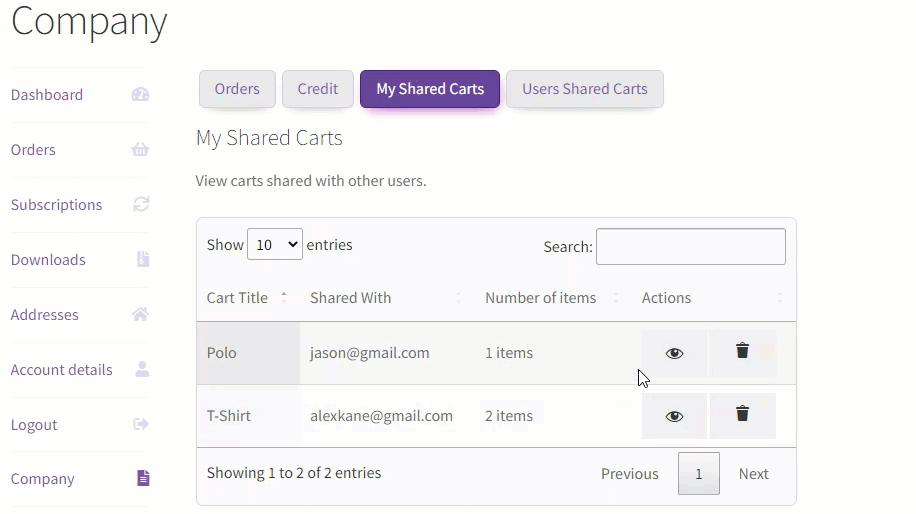
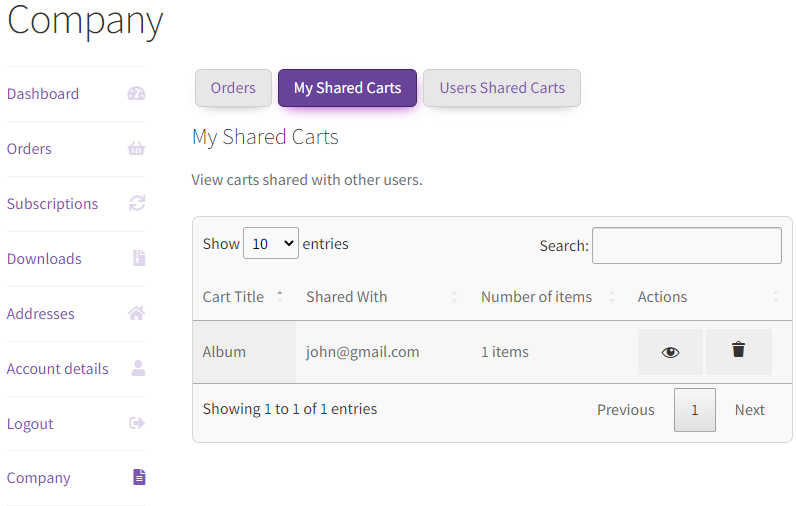
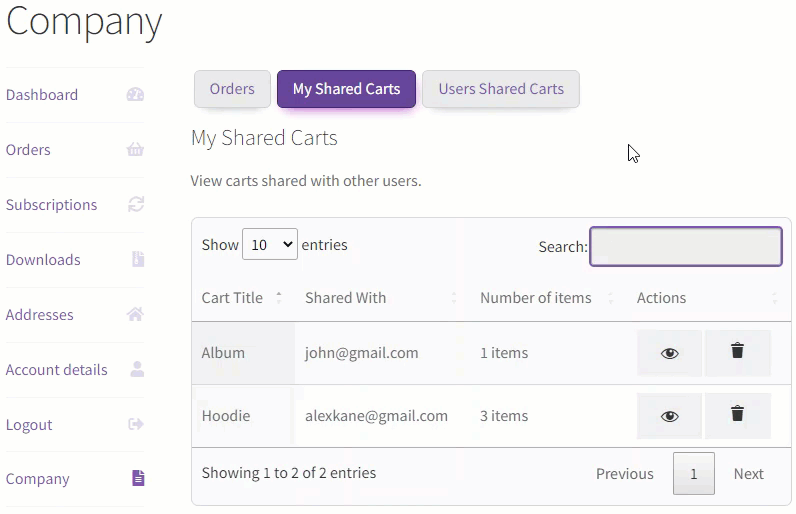
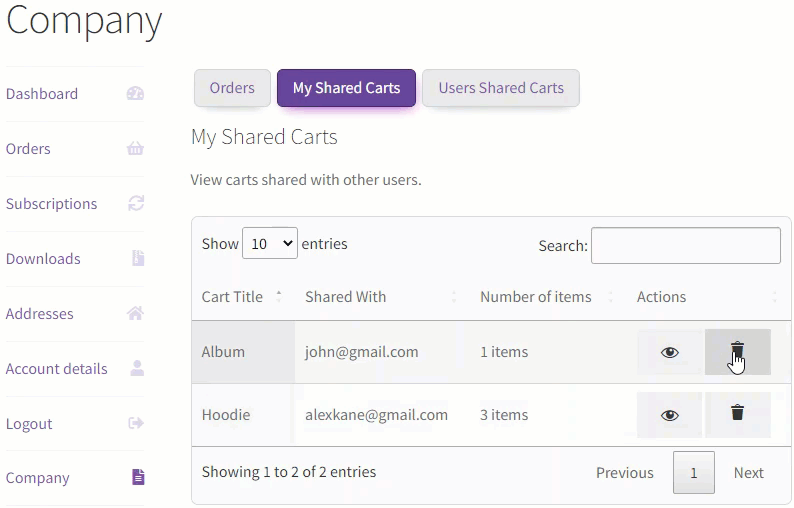
- My Shared Carts: My Shared Carts tab will display carts that are being shared with other users.
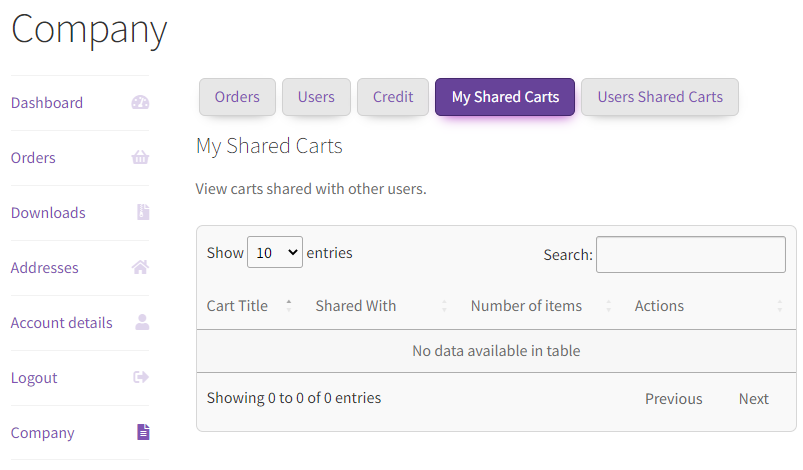
NOTE: Since no Cart is being shared, it will show No Data available in the table.
- To Share the Cart, Go to WooCommerce Cart and click on Share Cart Button.
- After Clicking on Share Cart Button, a Share Cart pop-up will appear with options to set Share Cart Title and a User Selection Dropdown
- Set the Title of the Cart as per requirement and Select User from User Dropdown to which Cart will be shared and then click on Share Cart Button.
- Now Navigate to Company→ My Shared Carts.
NOTE: The cart is appearing now with the same details as described in the above steps.
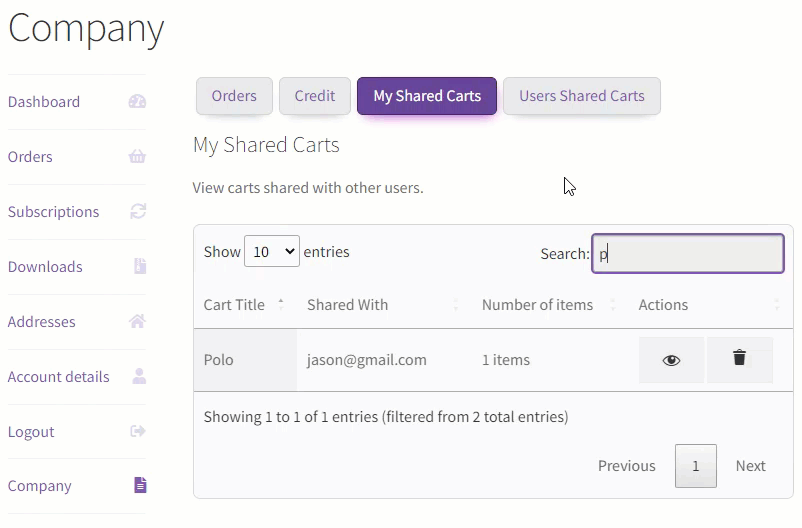
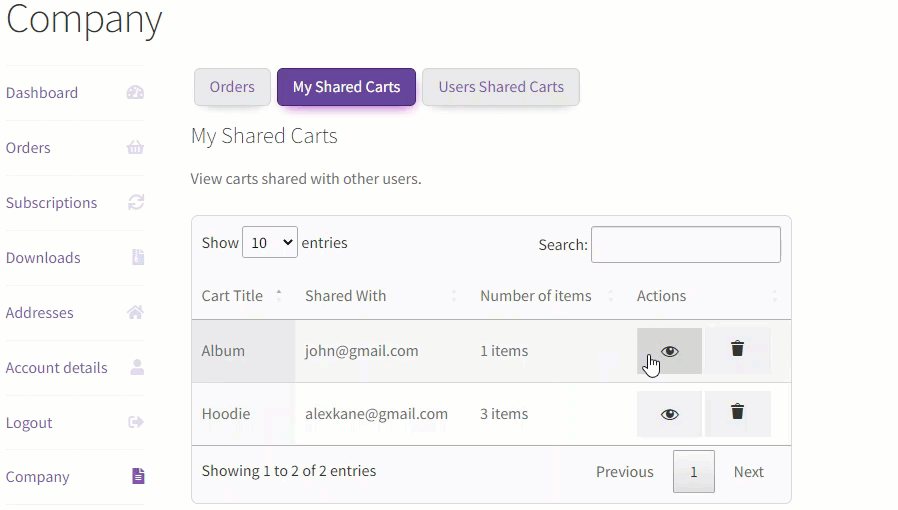
- There is a Search Tab used to search the Carts based on Cart Title, Users, and No. of Items
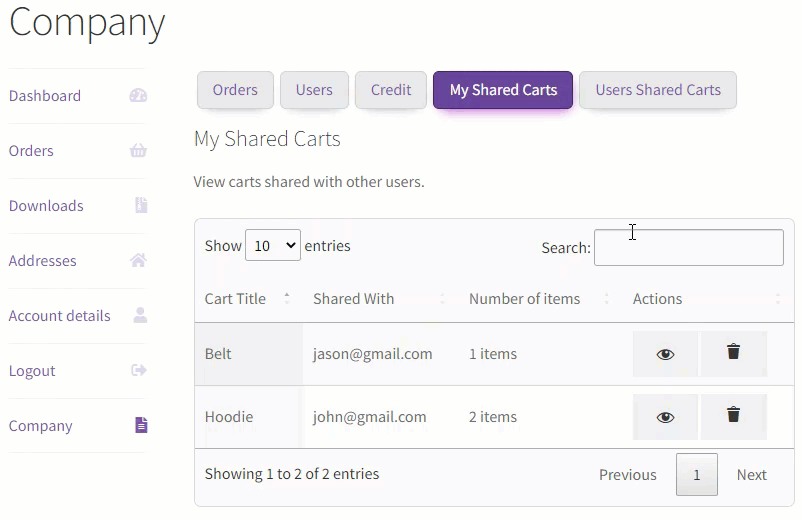
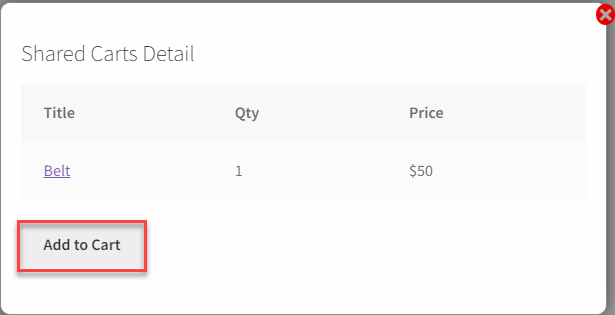
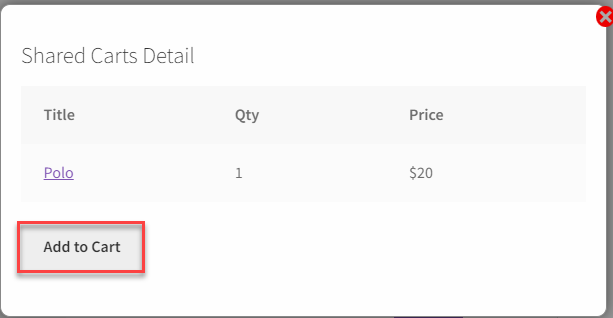
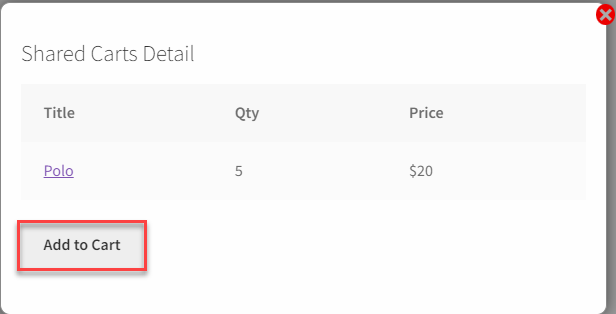
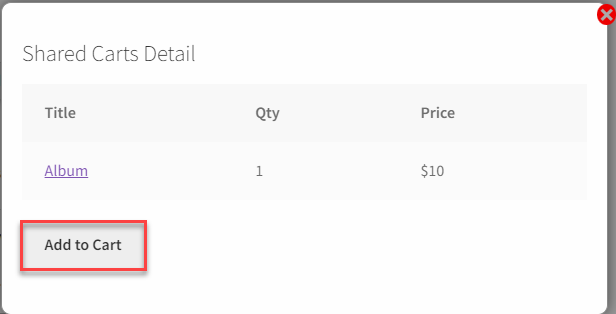
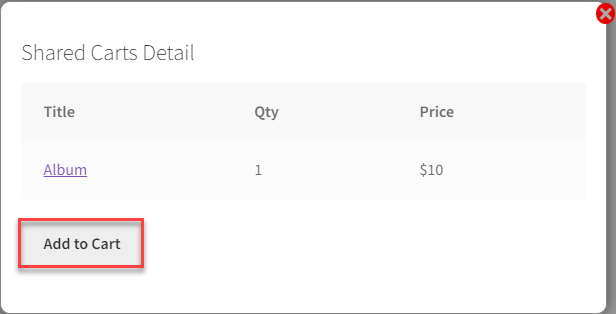
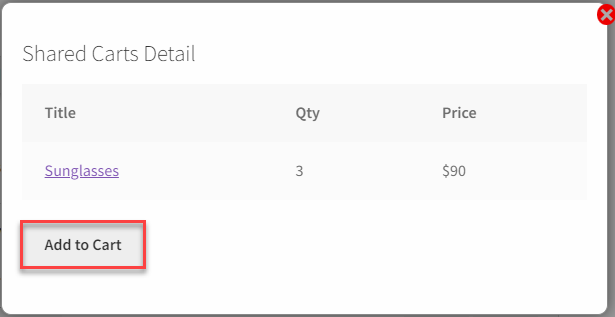
- Clicking on Eye Button will open a Pop up displaying relevant Cart Items along with the Quantity.
- Clicking on Add to Cart Button in the Pop up will Add that product in WooCommerce Cart
- Clicking on the Delete Button will Delete the Cart From the Current User which is the owner. It will not delete the user whom Cart is shared with.
NOTE: Cart will not be deleted from the user “jason@gmail.com”
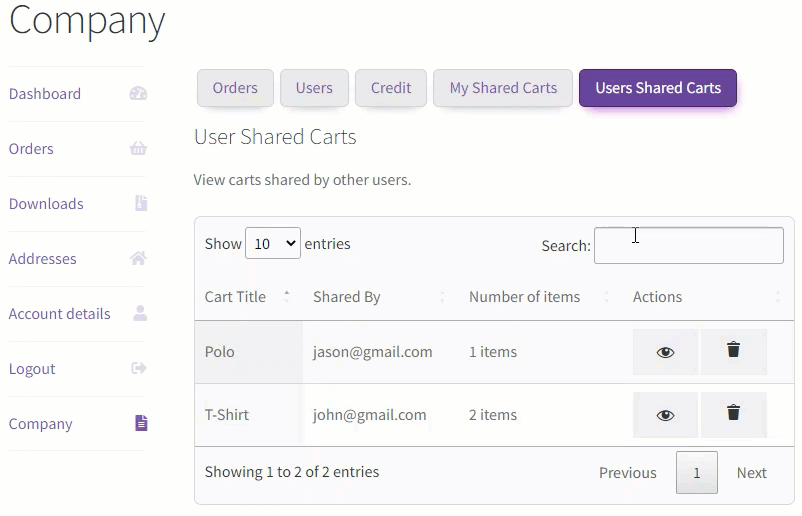
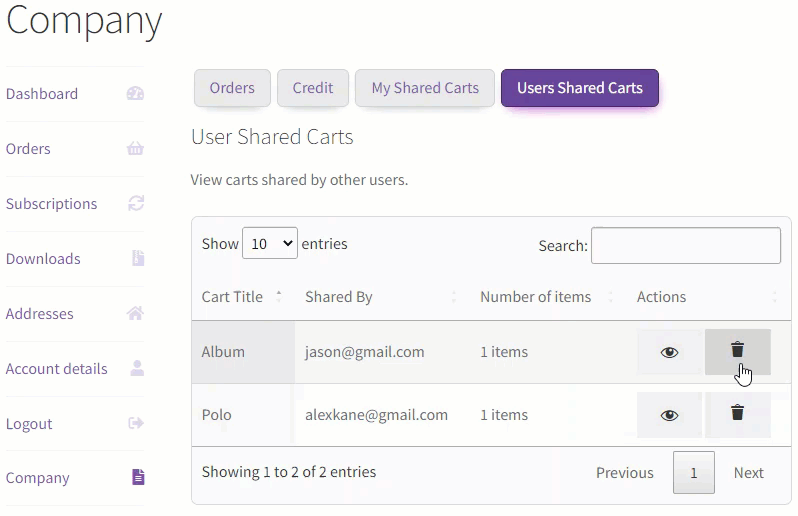
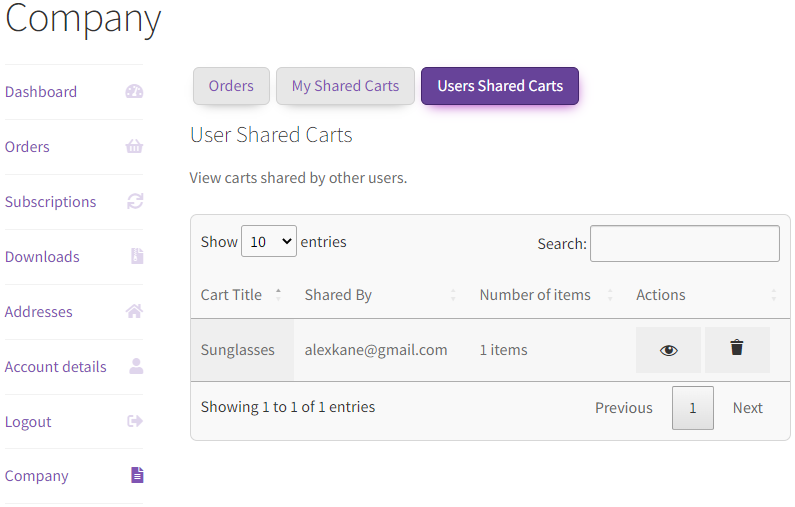
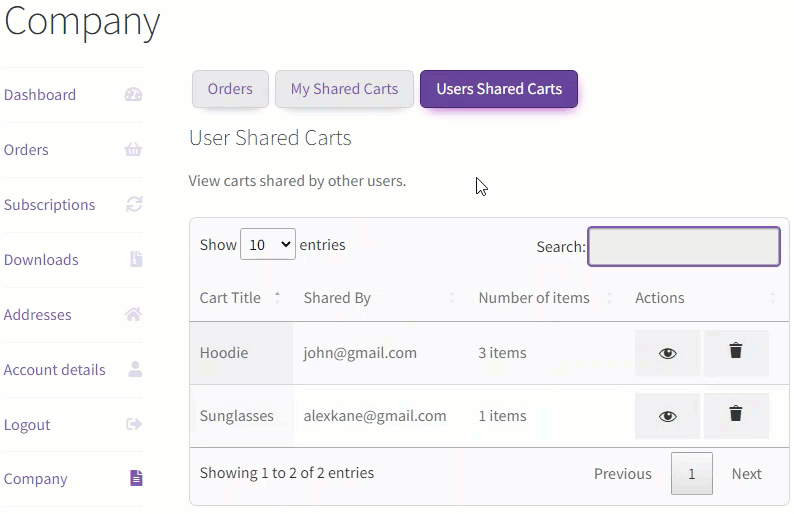
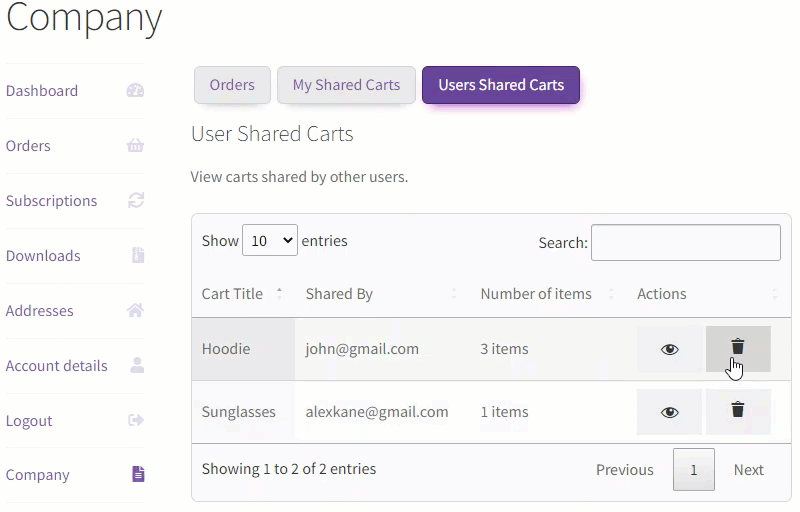
- User Shared Carts: User Shared Carts tab will display carts which are being shared by the other users.
NOTE: Cart Sharing Procedure will be the same as defined above for My Shared Cart. Here Cart is being shared by the user “jason@gmail.com” with the Owner so it will be shown in Owner’s Users Shared Carts Tab.
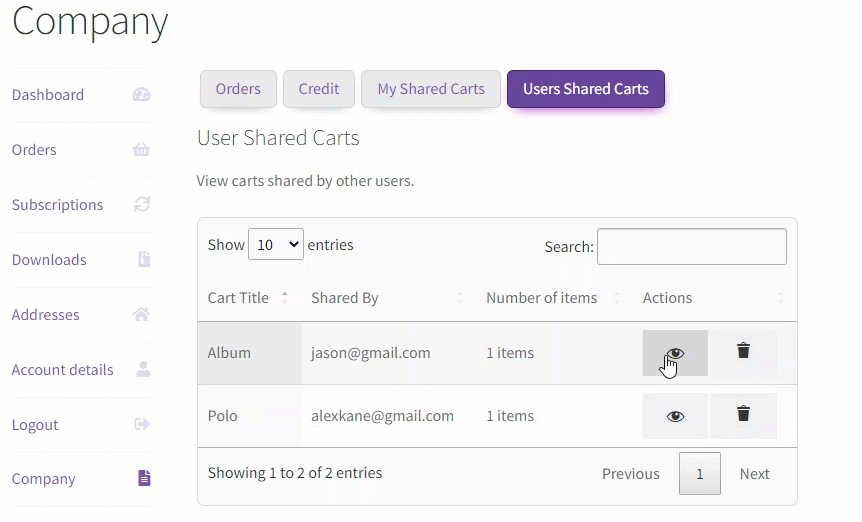
- There is Search Tab which is used to search the Carts based on Cart Title, Users and No. of Items
- Clicking on the Eye Button will open a Pop up displaying relevant Cart Items along with the Quantity.
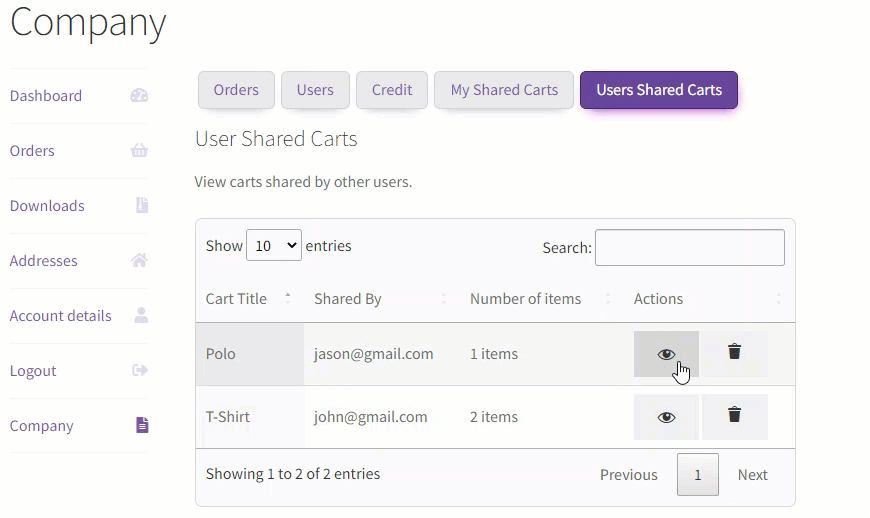
- Clicking on Add to Cart Button in the Pop up will Add that product in WooCommerce Cart
- Clicking on the Delete Button will Delete the Cart From the Current User which is the owner. It will not delete for the user whom Cart is shared with.
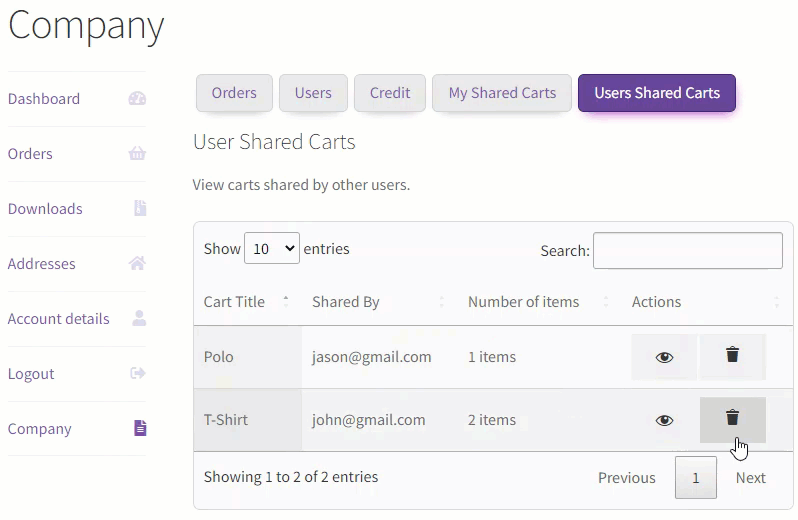
NOTE: Cart will not be deleted from the user “john@gmail.com”
Manager Role

NOTE: Logging in with Manager’s Role will show the Tabs on Front-End as shown above.
- Orders: Orders tab will show all of the company’s orders to the Manager. It has the following options:
- A date filter having options to select Start and End Date. Orders will be shown according to the dates selected.

- A user selection dropdown is shown showing all the users. Orders will be shown According to the User Selected.
NOTE: Selecting let’s say John Smith will show all the orders placed by John Smith
- Credit Orders Only has a checkbox which can be enabled/disabled. Enabling the checkbox will show only those orders which are being paid by the credits.
- Credit: Credit tab will show the information regarding the credits. It has the following options:
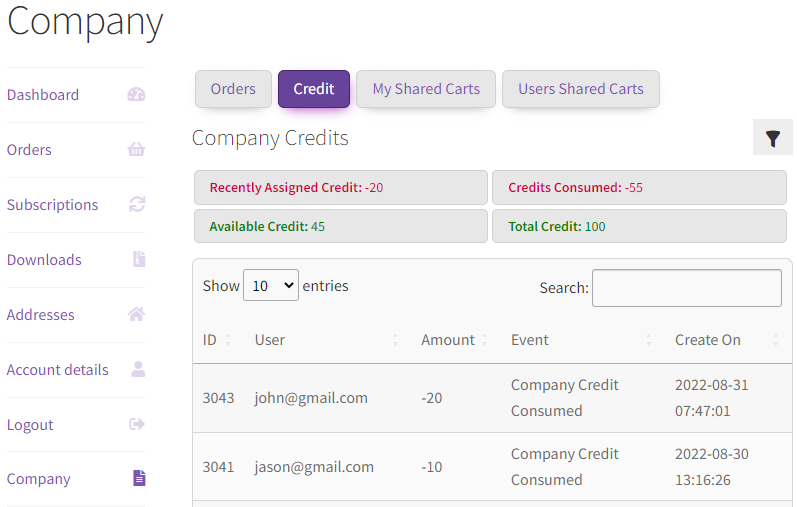
- Credits will show Recently Assigned Credit, Credit Consumed along with Available Credit and Total Credit.
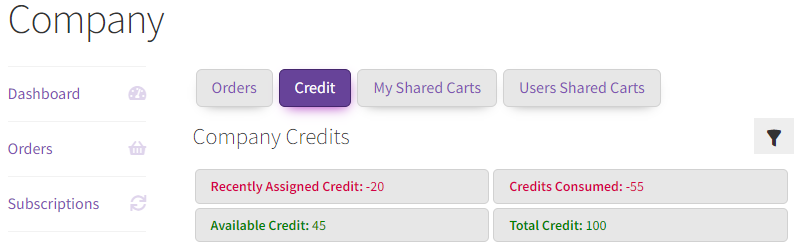
NOTE: Here Total Company Credit is 100. Credit Consumed is 55 so Available Credit will become 100-55 = 45. Recently Assigned Credit is 20 as shown above.
- A date filter having options to select Start and End Date. Credits will be shown according to the dates selected.
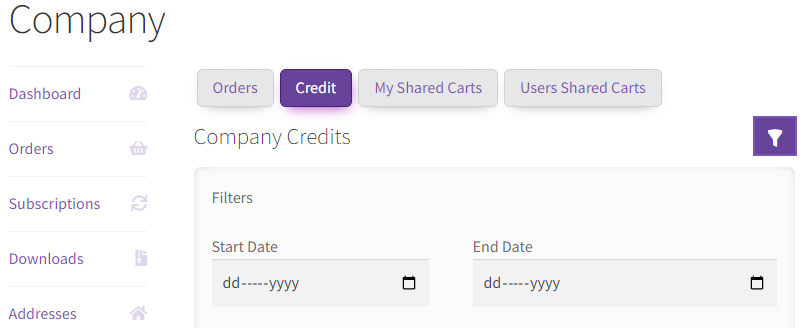
- A user selection dropdown is shown showing all the users. Logs will be shown According to the User Selected.
NOTE: Selecting let’s say John Smith will show all the Logs related to John Smith
- My Shared Carts: My Shared Carts tab will display carts which are being shared with other users.
NOTE: Cart Sharing procedure will be the same as mentioned for Owner.
- There is a Search Tab which is used to search the Carts based on Cart Title, Users and No. of Items.
- Clicking on Eye Button will open a Pop up displaying relevant Cart Items along with the Quantity.
- Clicking on Add to Cart Button in the Pop up will Add that product in WooCommerce Cart
- Clicking on the Delete Button will Delete the Cart From the Current User which is the Manager. It will not delete for the user whom Cart is shared with.
NOTE: Cart will not be deleted from the user “jason@gmail.com”
- User Shared Carts: User Shared Carts tab will display carts which are being shared by other users.
NOTE: Cart Sharing Procedure will be the same as defined above for My Shared Cart. Here Cart is being shared by the user “jason@gmail.com”” with the Manager so it will be shown in Manager’s Users Shared Carts Tab.
- There is Search Tab which is used to search the Carts based on Cart Title, Users and No. of Items

- Clicking on Eye Button will open a Pop up displaying relevant Cart Items along with the Quantity.
- Clicking on Add to Cart Button in the Pop up will Add that product in WooCommerce Cart
- Clicking on the Delete Button will Delete the Cart From the Current User which is the Manager. It will not delete for the user whom Cart is shared with.
NOTE: Cart will not be deleted from the user “jason@gmail.com”
Member Role
NOTE: Logging in with Member’s Role will show the Tabs on Front-End as shown above.
- Orders: Orders tab will show all of the company’s orders to the Member. It has the following options:
- A date filter having options to select Start and End Date. Orders will be shown according to the dates selected.

- Credit Orders Only has a checkbox which can be enabled/disabled. Enabling the checkbox will show only those orders which are being paid by the credits.
- My Shared Carts: My Shared Carts tab will display carts which are being shared with other users.
NOTE: Cart Sharing procedure will be the same as mentioned for Owner and Manager.
- There is Search Tab which is used to search the Carts based on Cart Title, Users and No. of Items
- Clicking on Eye Button will open a Pop up displaying relevant Cart Items along with the Quantity.
- Clicking on Add to Cart Button in the Pop up will Add that product in WooCommerce Cart
- Clicking on the Delete Button will Delete the Cart From the Current User which is the Member. It will not delete for the user whom Cart is shared with.
NOTE: Cart will not be deleted from the user “john@gmail.com”
- User Shared Carts: User Shared Carts tab will display carts which are being shared by the other users.
NOTE: Cart Sharing Procedure will be the same as defined above for My Shared Cart. Here Cart is being shared by the user “alexkane@gmail.com”” with the Member so it will be shown in Member’s Users Shared Carts Tab.
- There is Search Tab which is used to search the Carts based on Cart Title, Users and No. of Items
- Clicking on Eye Button will open a Pop up displaying relevant Cart Items along with the Quantity.

- Clicking on Add to Cart Button in the Pop up will Add that product in WooCommerce Cart
- Clicking on the Delete Button will Delete the Cart From the Current User which is the Member. It will not delete for the user whom Cart is shared with.
NOTE: Cart will not be deleted from the user “john@gmail.com”
- Admin can import the Company’s to import Navigate to WooCommerce →Setting.
- In the Settings select B2B Company Credits & Permissions header.

- Under the header, Admin needs to select Import /Export

- A page will appear to import or export.
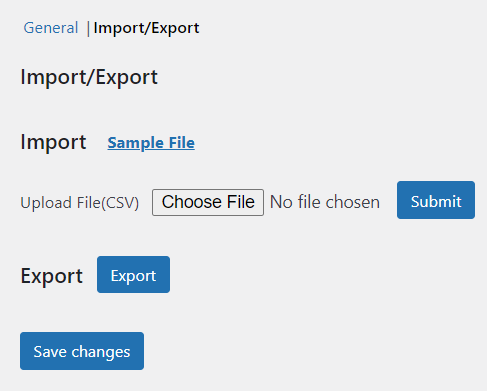
- Admin can get a sample file here, and the company’s information must be in accordance with the file’s formatting.
- To download the sample, click Sample File.
- Once downloaded admin can add desired Company details in the file according to each column

- Once done, upload the file and click Submit.
- Admin can view the uploaded companies on the company page.
- Similarly, to export the existing companies, click the Export button under the header Import/Export.
- Once clicked Exported file will be downloaded, and the admin can view the exported file.

User Flow
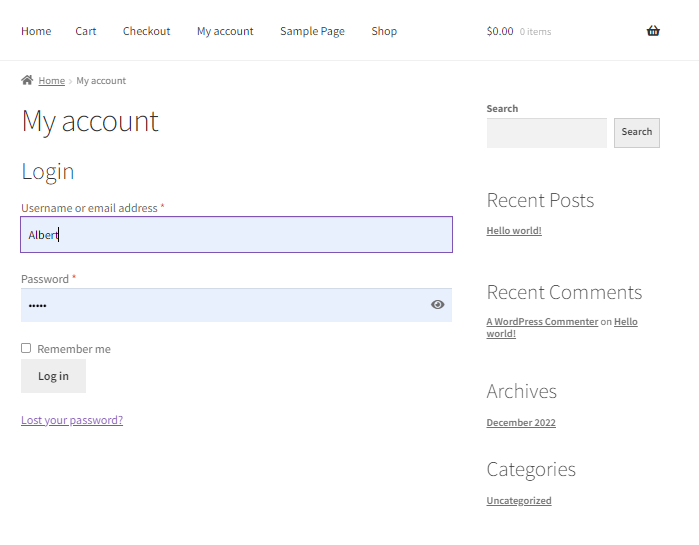
↑ Back to top- User logged in with the credentials.
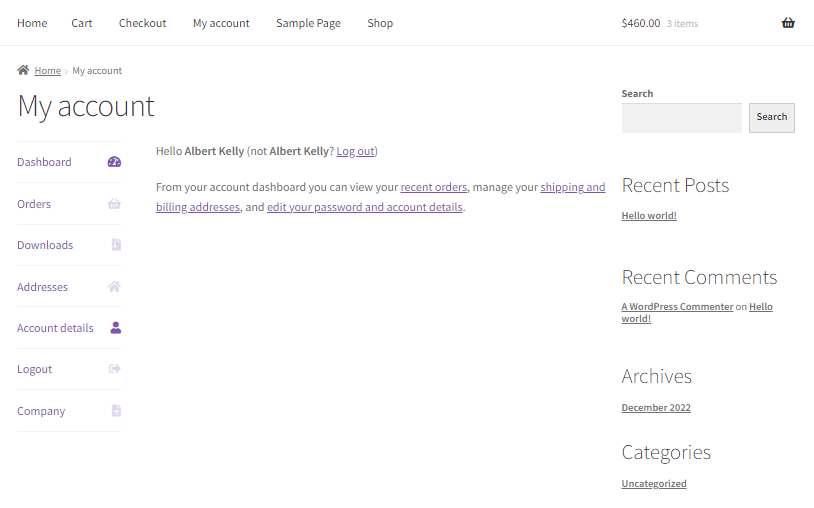
- My Account Page.
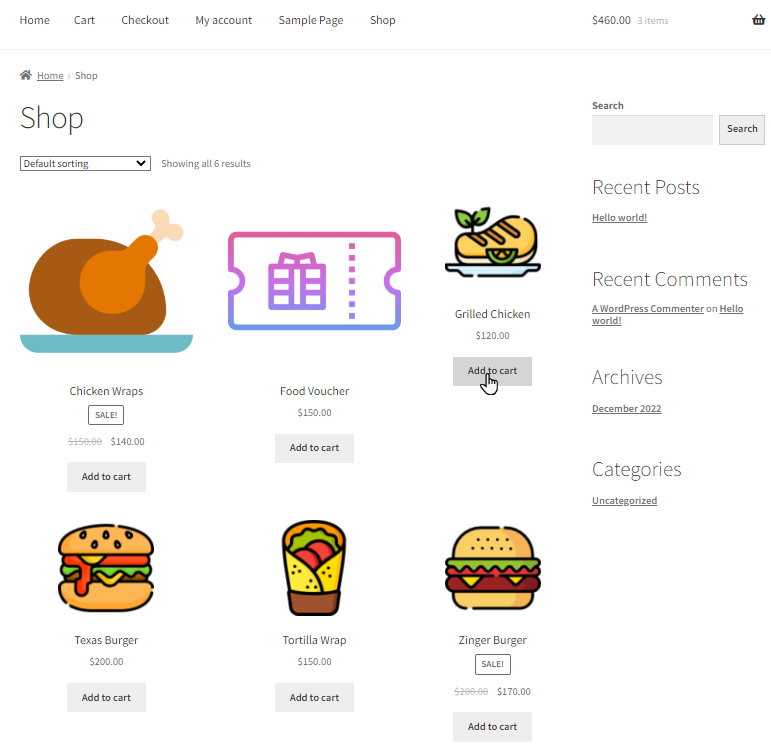
- Go to the Shop Page.

- Add the item to cart by clicking the Add to Cart button.
- Once done click the View cart button.
- The user can now either share the cart or proceed to the checkout. In our case, we are checking out by clicking the Proceed to Checkout button.
- Now, on the Checkout Page, fill in the user’s information and select the Company Credit Payment. Make sure the company has sufficient funds to buy from the company credit amount.
- And Click the Place order button.
- A page will appear with the invoice detail. Here, the user can see the Payment method is Company Credit Payment.
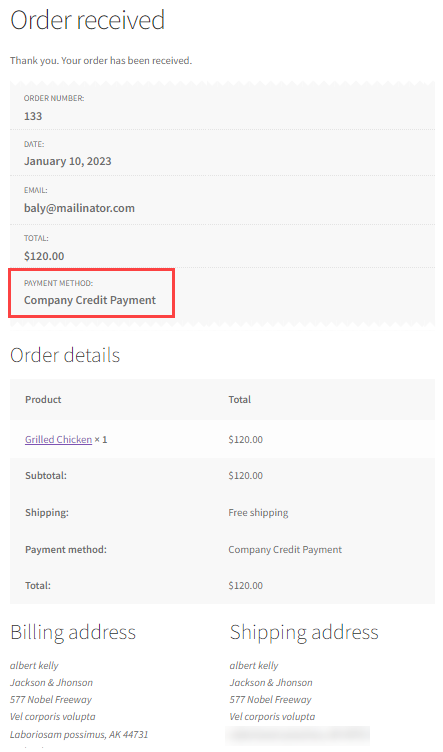
- On the backend admin can view the order placed via Company Credit Payment.