Bol Product Importer allows you to import any product from Bol.com to your WooCommerce store including product data such as product name, description, category, manufacturer, picture, price, variations, attributes, customer reviews and more all in one-click.
Installation
↑ Back to top- Download the .zip file from your WooCommerce account.
- Go to: WordPress Admin > Plugins > Add New and Upload Plugin. Choose File for the file you downloaded in step 1.
- Install Now and Activate Plugin.
Setup & Configuration
↑ Back to topInstallation
↑ Back to top- Download the .zip file from your WooCommerce account.
- Go to: WordPress Admin > Plugins > Add New and Upload Plugin. Choose File for the file you downloaded in step 1.
- Install Now and Activate Plugin.
Setup & Configuration
↑ Back to topTo begin importing products from Bol.com to your WooCommerce store, just follow these simple steps.
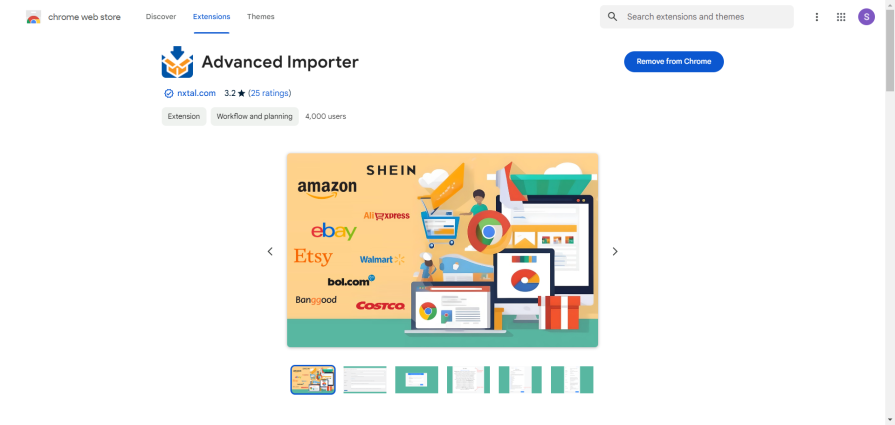
Step 1: Download and install the required Advanced Importer Chrome Extension here.
Step 2: Next, you will need to connect your WooCommerce installation of Bol Product Importer to the Advanced Importer Chrome extension.
- Go to WP Admin > Products > Importer Configuration settings and you will find the Import link and Secret key which are required to connect the Bol Product Importer with the supporting Chrome extension.
Note: You can change the Secret key (any random string) at any time if needed.

Step 3: Using the same Chrome browser in which you installed the supporting Chrome extension, go to Bol.com and navigate to the product page that you want to import into your WooCommerce store.
Step 4: Open the Chrome Advanced Importer extension popup, input the Import link and Secret key (from Bol Product Importer extension settings) and select Connect.
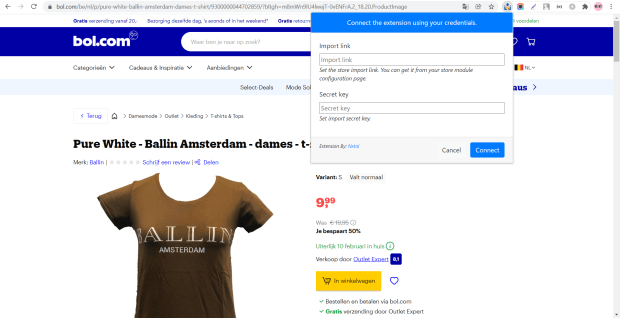
- If the Import link and Secret key is valid, you will get a success message and the Import form will appear in the Chrome extension popup.
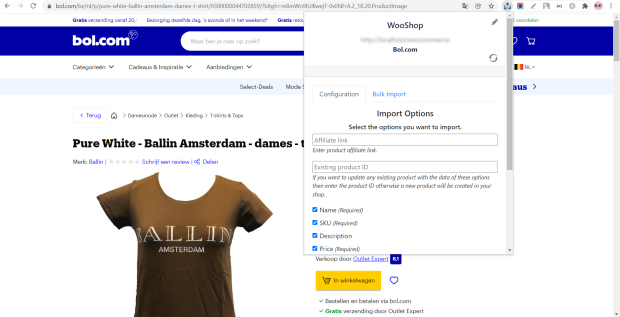
- You also have the option of using your existing WooCommerce product ID to update product information with products on Bol.com.
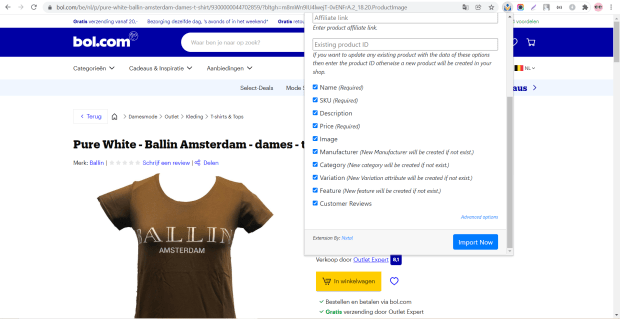
- If configured, some advanced options for assigning the imported product will be displayed.
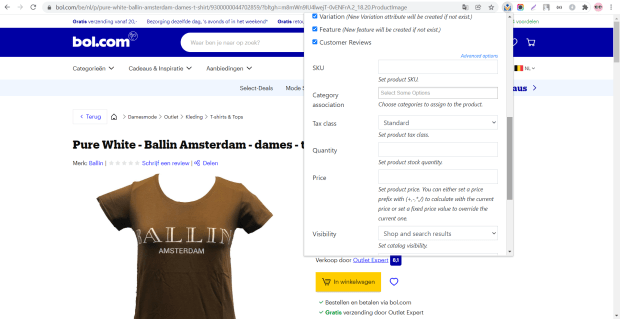
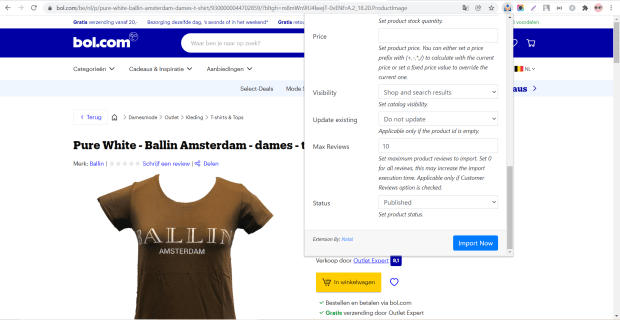
Step 5: Configure the product information you want to import and then Import Now.
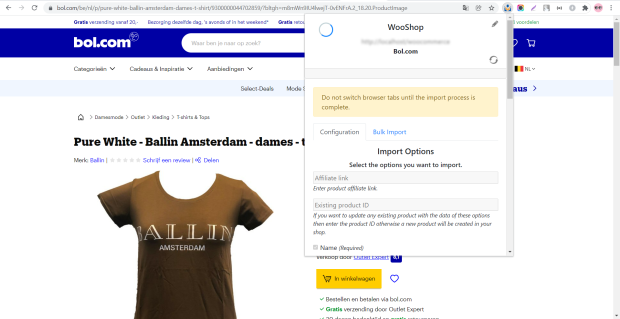
- Remain on the same browser tab until the import process is complete.
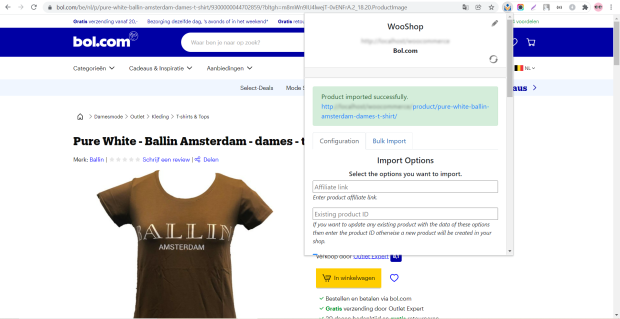
Once product(s) have been imported successfully, they will be published to your connected to your WooCommerce store.
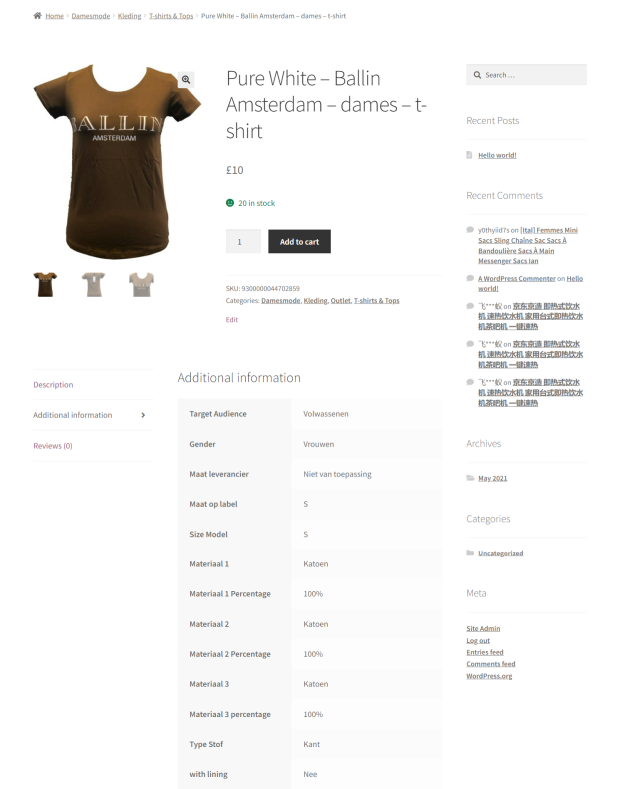
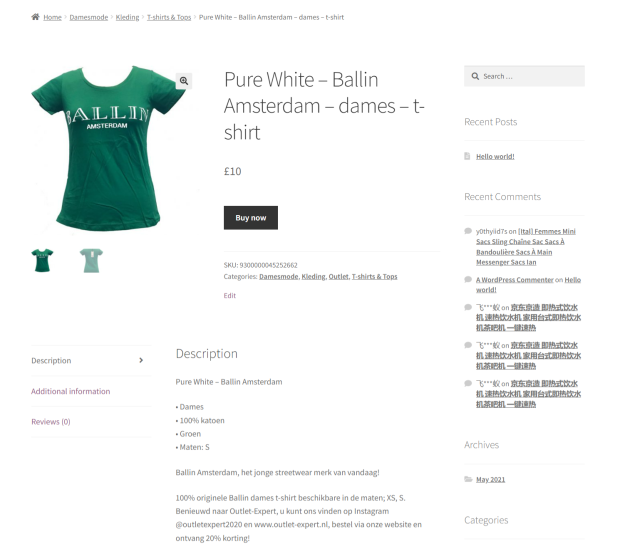
Sample imported product view in the WooCommerce product page.
To continue importing products, repeat step 5. You can also import products in bulk by navigating to the Bulk Import tab in the Chrome extension popup and inputting the respective product links.
Frequently Asked Questions
↑ Back to topQ. Will a subscription to the BOL.com website be required to import the product?
A. No account or subscription to the BOL.com website is required.
Q. Is there a limit to import products?
A. There is no limit, you can import as many as you want.
Q. Is it possible to import products in bulk with this plugin?
A. Yes, you can import products in bulk using this plugin, you just need to set comma separated all product links which you want to import in Chrome extension bulk import input box.
Q. Is it possible to update existing WooCommerce product data?
A. Yes, you can update existing product data using the existing Product ID or SKU in the Chrome extension.
Q. Will the price and stock quantity of the imported product get updated automatically when updated on the BOL.com website?
A. Sorry, currently this feature is not available in the plugin but hopefully it will be available soon.
Q. Can I only import my products that I’m already selling on the BOL.com website?
A. You can import any product from any supported website, whether the product is your’s or not.
Q. How do I import products as an affiliate?
A. You just need to set your affiliate URL parameter (Affiliate ID) in the Chrome extension when importing a product and that product will be imported into your WooCommerce as an affiliate product.
Q. Can I get the BOL.com link of the imported product after import?
A. Yes, there will be a new Origin column in the product list in your WooCommerce admin where you can find the BOL.com link of the imported product. Also, you can find the same link in product sheet custom fields section.
Q. Which product data can be imported with this plugin?
A. You can import almost every required product data like name, images, videos, price, categories, variations, description, features, brand, weight and customer reviews etc.
Q. Will technical support be provided if I encounter any problems using it on my website?
A. Of course, you will be provided with free unlimited technical support from our side all the way, you can contact us at any time for any problems with the plugin.
Q. Do any specific PHP extensions need to be installed on the server for this plugin to work?
A. Yes, this plugin uses DOMdocument, iconv, curl php extensions to work, which are usually already installed on every server.
Q. Is there a known incompatibility issue? If so, what and how can it be resolved?
A. ModSecurity or any other security setting on the server or WordPress security plugin like Wordfence should be disabled or plugin import link should be whitelisted in it.
Troubleshooting
↑ Back to topQ. I’m getting a “The data or product page is invalid.” error message while importing, what does it mean and how can i fix it?
A. This error message comes when you try to import from a page other than the product detail page that you want to import. To import products one by one you need to be on the product detail page that you want to import or else you will get this error message.
Q. I’m getting a “Connection error” error message, what does it mean and how can i fix it?
A. This error message appears for many reasons, it means that your import request could not be completed.
- It is possible that the import request was blocked by your server’s security settings like ModSecurity or by an installed security plugin like Wordfence in your WordPress with 403 “Forbidden” http code. You need to either disable this security setting/plugin or whitelist the plugin import link in it.
- Your server may have refused the import request with 413 “Request Entity Too Large” http code. This will require increasing the respective limit on your server.
- If you get this error then you can contact us, we will surely help you to fix the problem after checking.
Use Case
↑ Back to topJust follow the simple instructions below to use this plugin:
- You will need to install the plugin in your WooCommerce and open the plugin configuration page either from the Plugins page or from the WooCommerce > BOL Importer menu option in your admin panel.
- Install the Chrome extension in your browser, you will see that the login page requires Import link and Secret key to connect.
- Copy the Import link and Secret key from the plugin configuration page in your admin panel and paste it into the Chrome extension text box and proceed to connect. If everything works, the extension will connect, and you will see the Import Options in Chrome extension instead of the connection form.
- You need to go to any BOL.com product page and click on the Import button visible at the bottom right of the Chrome extension, you can change some properties if necessary. If everything works, you will get the success message and the product will be imported into your WooCommerce.
For more understanding you can also watch this tutorial video https://www.youtube.com/watch?v=d2fk-nahDx0 .
Only once you will need to follow all the steps, next time you can import products from step 4 only.
If you get any error message during steps 3 and 4 then contact us so that we can take a look and fix the problem.