Installation
↑ Back to top- Download the .zip file from your WooCommerce account.
- Go to WordPress Admin > Plugins > Add New and Upload Plugin. Choose file for the file you have downloaded.
- Install Now and Activate Plugin.
Setup & Configuration
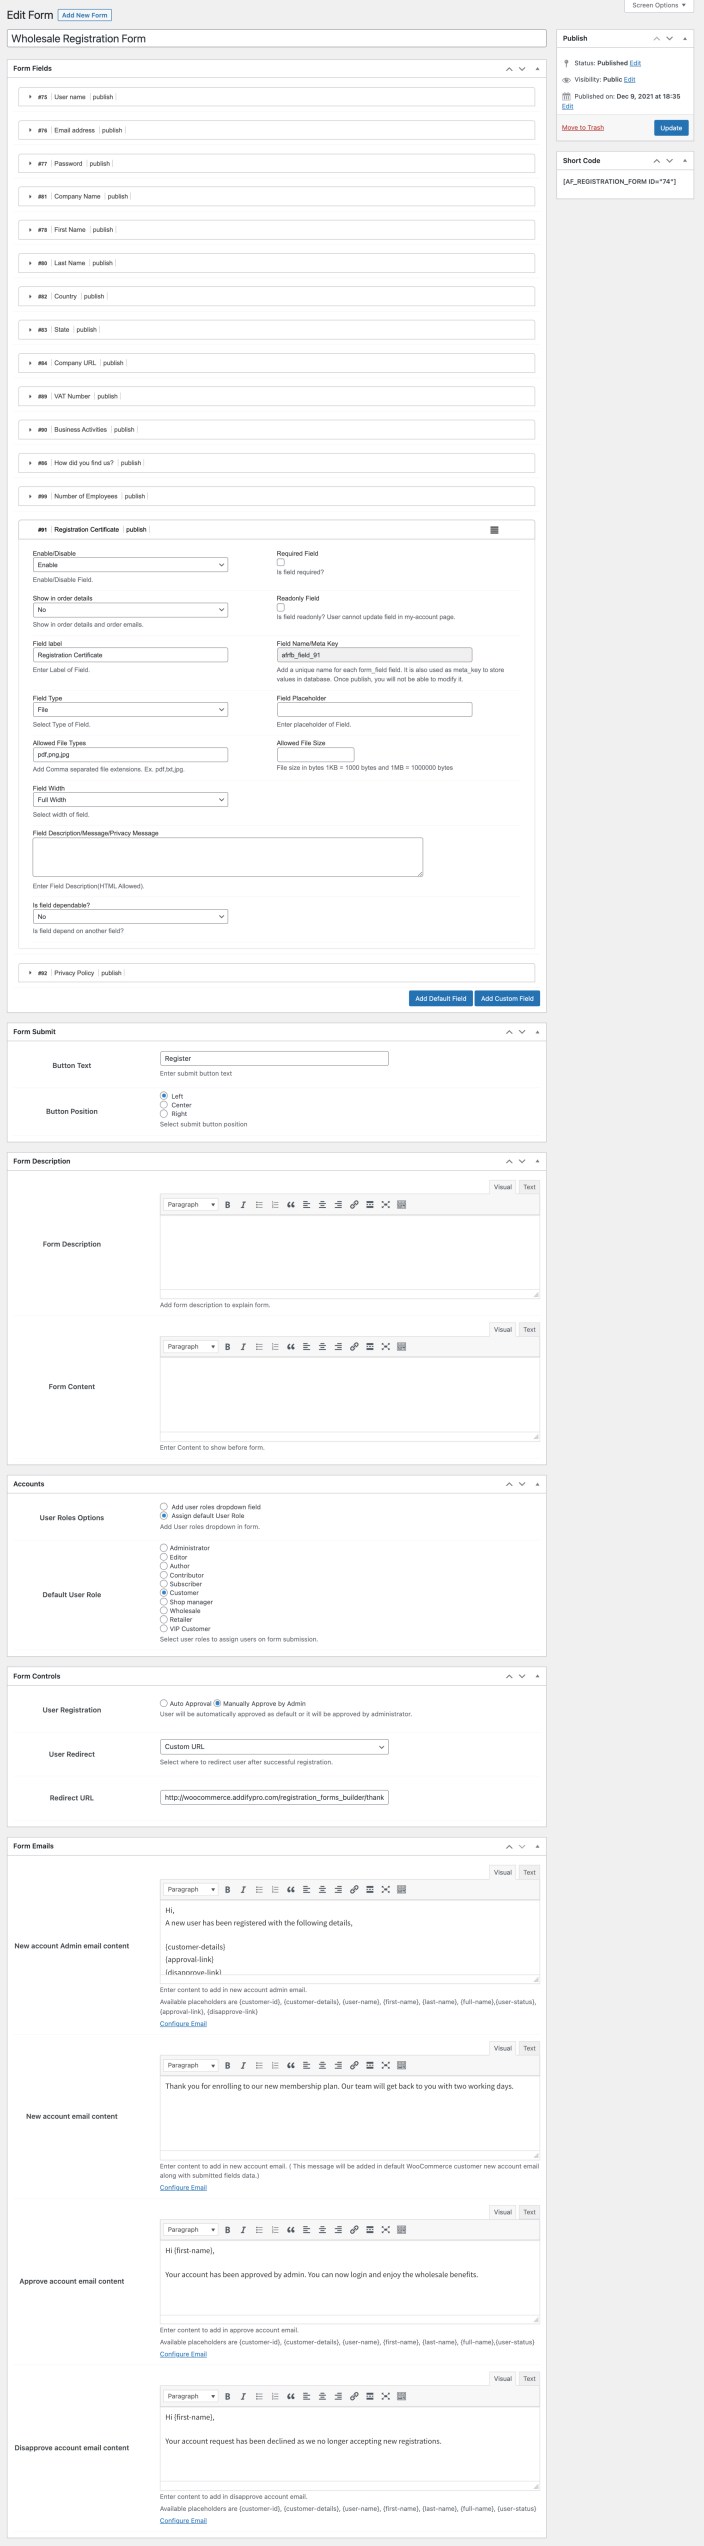
↑ Back to topAfter activating the Custom Registration Forms Builder extension, the Registration Forms menu will appear within your WordPress Admin under WooCommerce. Click to create new registration form. Creating New Registration Form To create a new registration form, go to WP Admin Panel > WooCommerce > Registration Forms > Add New Form. You can create and customize multiple registration forms with the following options:
- Add form title
- Use “Add Default Field” to display a default billing or shipping field on form
- Use “Add Custom Field” button to add a custom field
- Customize form submission button text and position
- Add form description and content
- Show user roles dropdown field on frontend or auto assign a user role on form submission
- Manually or auto-approve customers
- Redirect user to custom page or URL after registration
- Customize email content sent to admin and customers
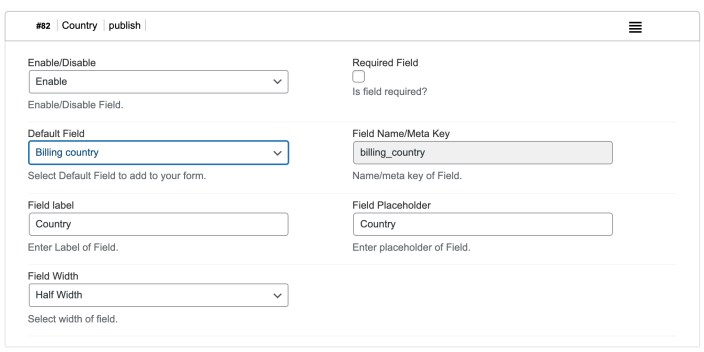
Adding Default Billing or Shipping Field:
↑ Back to top- Make field mandatory or optional
- Customize field label and place holder
- Show field on full or half-width
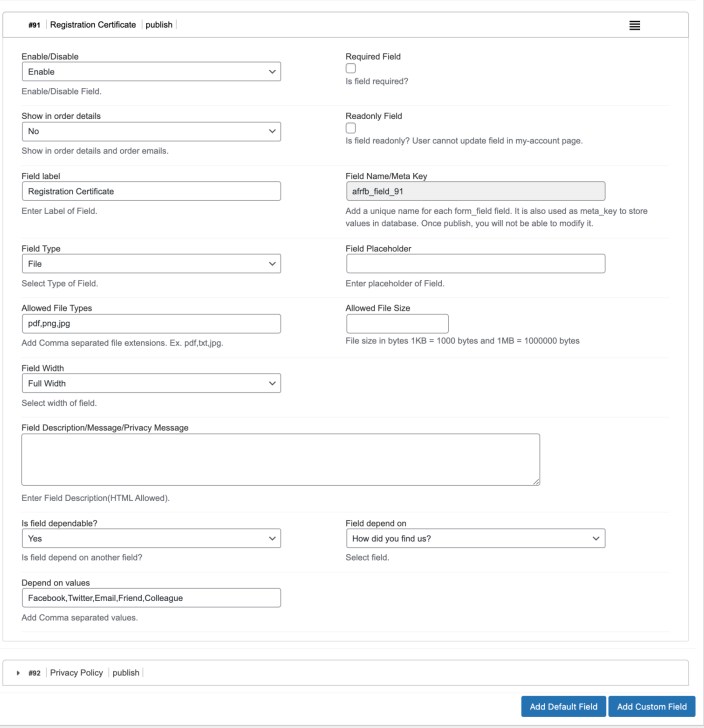
Adding Custom Field:
↑ Back to top- Show field in order email and admin order detail page
- Add field label and place holder
- Make field required and read-only
- Select from 24 field types
- Show field in full or half-width
- Choose to make field dependable to existing field (If you don’t see the previous field option to select dependable field, please save this form and the field should appear)
 Supported Field Types:

Assign User Role or Show Dropdown:
↑ Back to top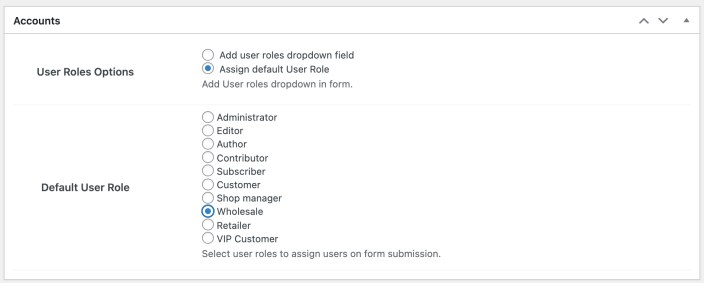
Approve new user roles:
↑ Back to top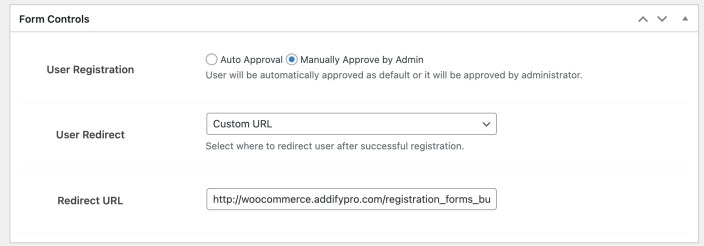
Customize email templates:
↑ Back to top- New User Registered – Admin
- Approve New User – Customer
- Declined New Account – Customer

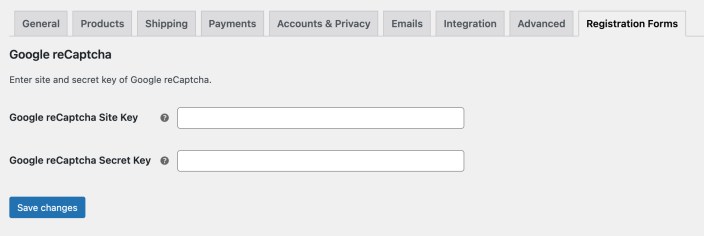
reCaptcha Settings:
↑ Back to top