Display dynamic messages on listing, products, cart, and checkout page to communicate with your customers while they shop.
Installation
↑ Back to top- Download the .zip file from your WooCommerce account.
- Go to: WordPress Admin > Plugins > Add New and Upload Plugin the file you have downloaded.
- Install Now and Activate.
Configurations & Setup
↑ Back to topAfter activating the WooCommerce Cart notices extension, you can see a new “Cart Notices” menu item in WordPress admin menu. Click to view settings and get started with,
Create multiple dynamic notices
↑ Back to top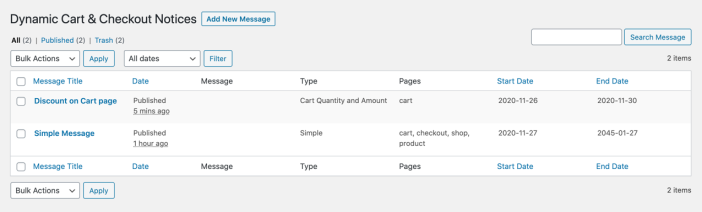
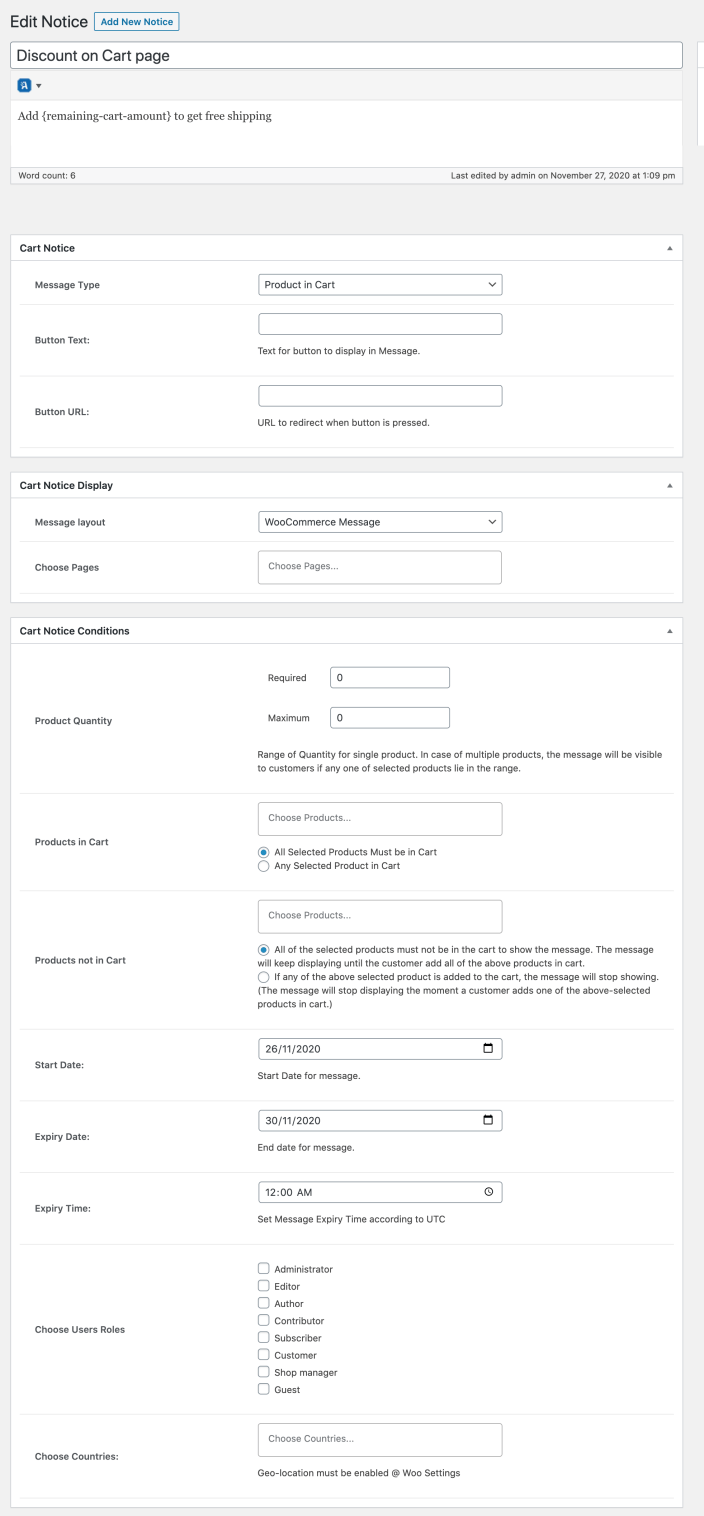
Creating a new dynamic message
↑ Back to topDrafting message
↑ Back to top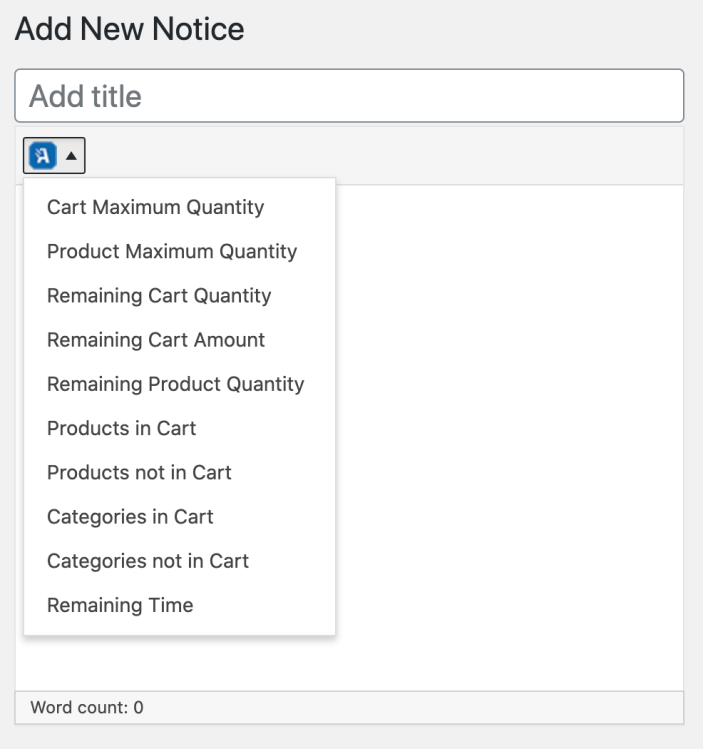 The available variables are:
- Required cart quantity – {cart-quantity}
- Required product quantity – {product-quantity}
- Remaining cart amount – {remaining-cart-amount}
- Remaining cart quantity – {remaining-cart-quantity}
- Remaining product quantity – {remaining-product-quantity}
- Product in cart – {products}
- Product not in cart – {products_not_in}
- Product from a category in cart – {categories}
- Product from a category not in the cart – {categories_not_in}
- Remaining time – {remaining-time}
Cart notice type
↑ Back to top
- Simple message:
- Product in the cart
- Product not in the cart
- Category in the cart
- Category not in the cart
- Cart quantity and amount
- Deadline
CTA button
↑ Back to topNotice display type
↑ Back to top You can use these styles:
- WooCommerce info
- WooCommerce message
- WooCommerce error
- Heading tag (H1, H2, H3, or H4)
- Simple paragraph
Notice display page and location
↑ Back to top
- Before Single Product
- Before Product Summary
- Before Add to Cart Form
- Before Add to Cart Button
- Before Add to Cart
- After Add to Cart
- After Add to Cart Button
- After Add to Cart Form
- After Product Summary
- After Single Product
- Before Main Content
- Before Shop Loop
- After Shop Loop
- After Main Content
- Before Cart
- Before Cart Table
- Before Cart Contents
- After Cart Contents
- After Cart Table
- After Cart
- Before Checkout Form
- Before Customer Details
- Before Billing Form
- After Billing Form
- Before Shipping Form
- After Shipping Form
- After Customer Details
- Before Order Review
- Before Order payment
- After Order Submit
- After Order payment
- After Order review
- After Checkout Form
Conditions
↑ Back to top- The required and maximum cart quantity
- The required and maximum cart amount
- The required and maximum product quantity
- Products in the cart
- Products not in the cart
- Products of specific categories in the cart
- Products of specific categories not in the cart
- Notice start date
- Notice end date and time
- Show to specific user roles
- Display for all or specific countries