The Estimated Delivery Date & Time extension enables you to show expected delivery time on the shop, product, cart, and checkout page. You can add cities and states to display different delivery times for them. Option to display separate delivery times for backorder and out-of-stock products.
Installation
↑ Back to top- Download .zip file from your WooCommerce account.
- At the Admin Panel, go to Plugins > Add New and Upload Plugin with the file you downloaded after purchase.
- Install and Activate the extension.
More information at: Install and Activate Plugins/Extensions.
How to Configure?
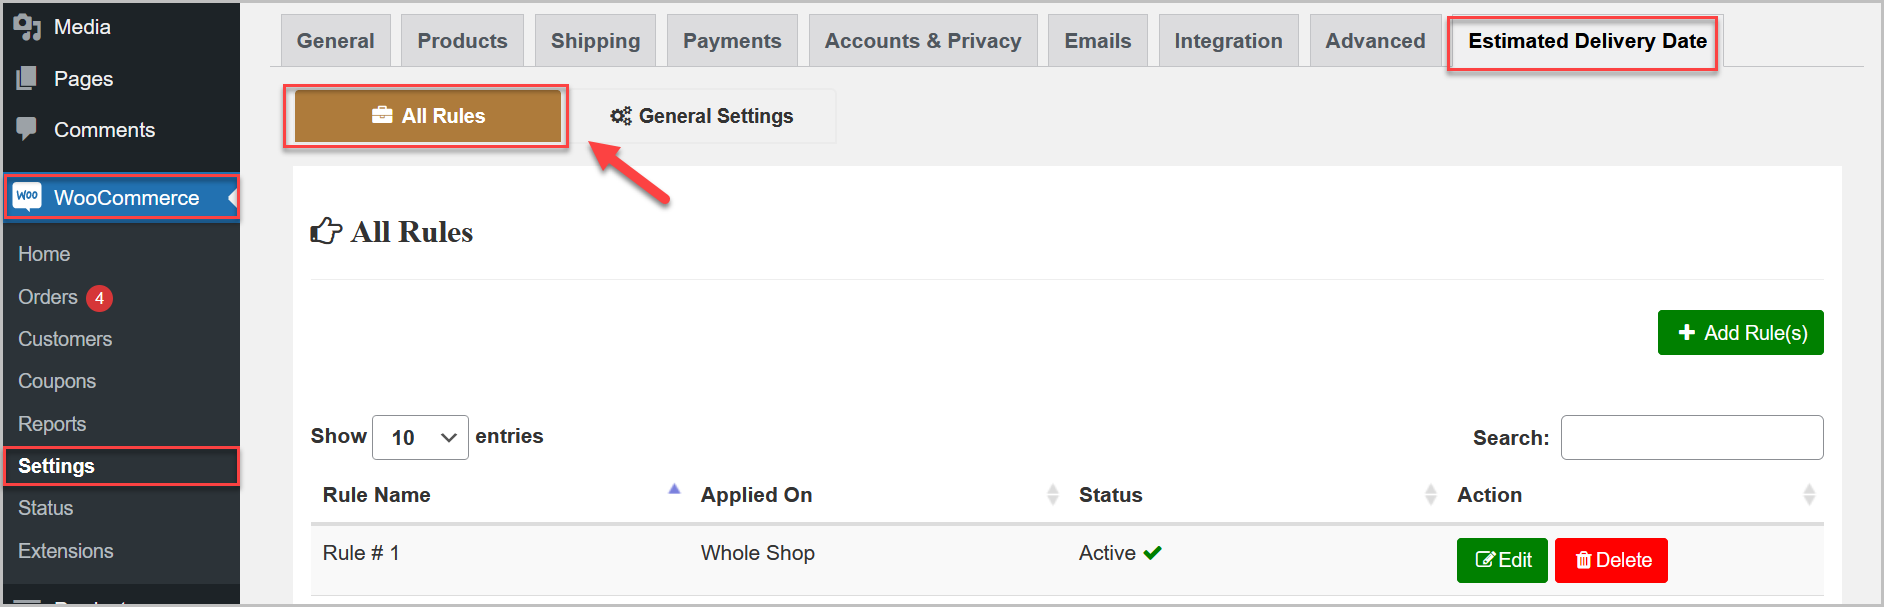
↑ Back to topTo start the configurations for this extension, go to WooCommerce > Settings > Estimated delivery time at the admin panel and click the “All Rules” tab.
All Rules
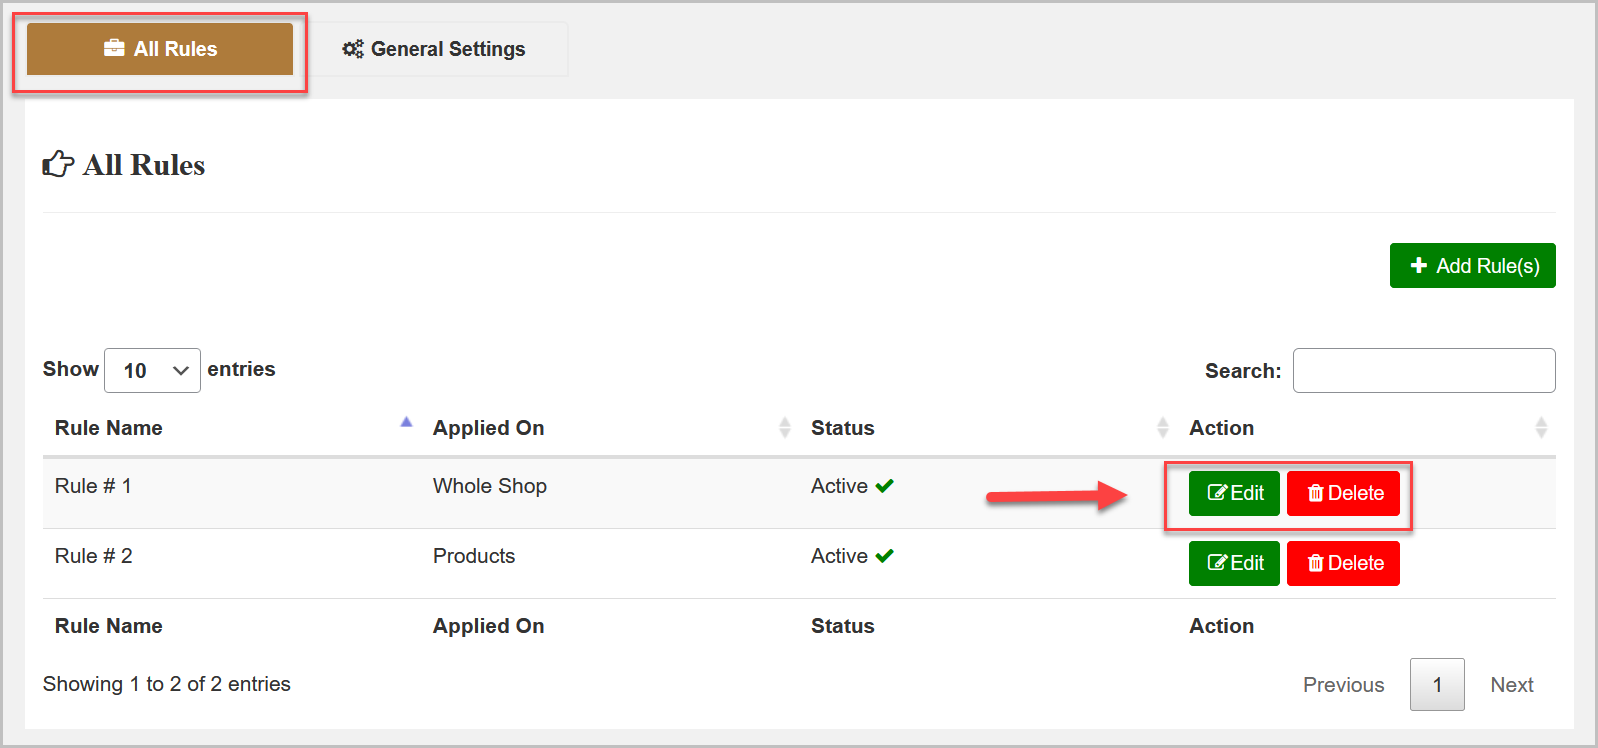
↑ Back to topIn the “All Rules” tab, you can see all the existing rules you created and you can easily edit/delete any rule from here.
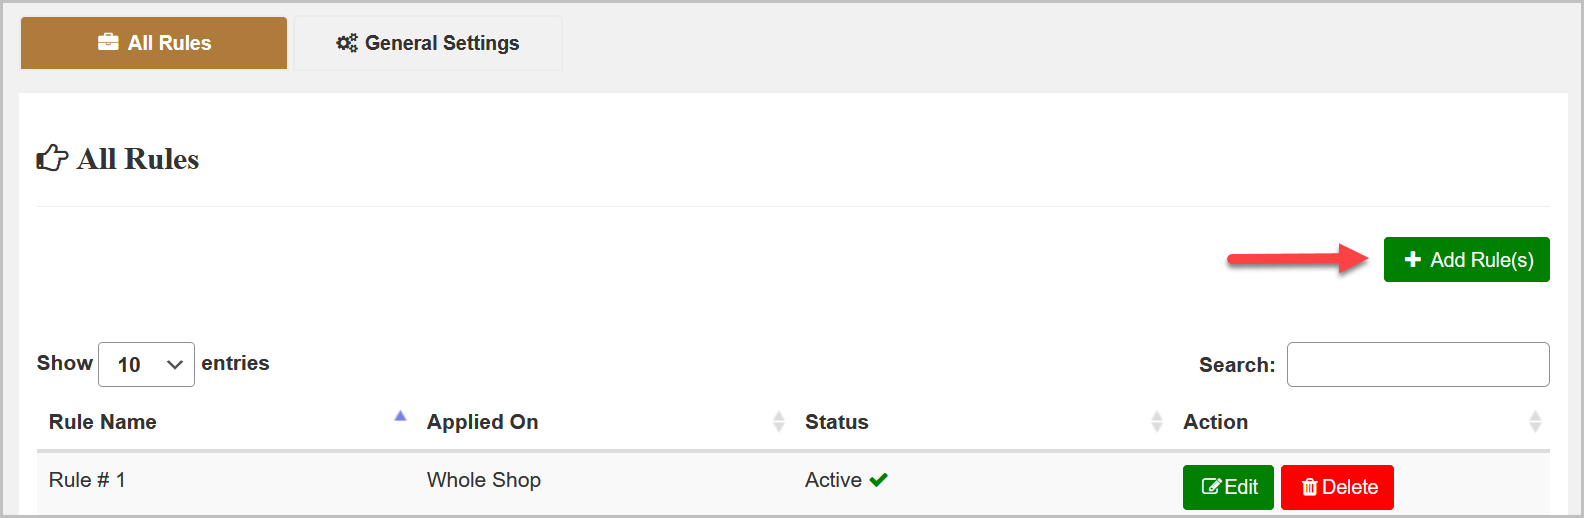
Add New Rule
Click “Add New Rule(s)” to create a new rule.
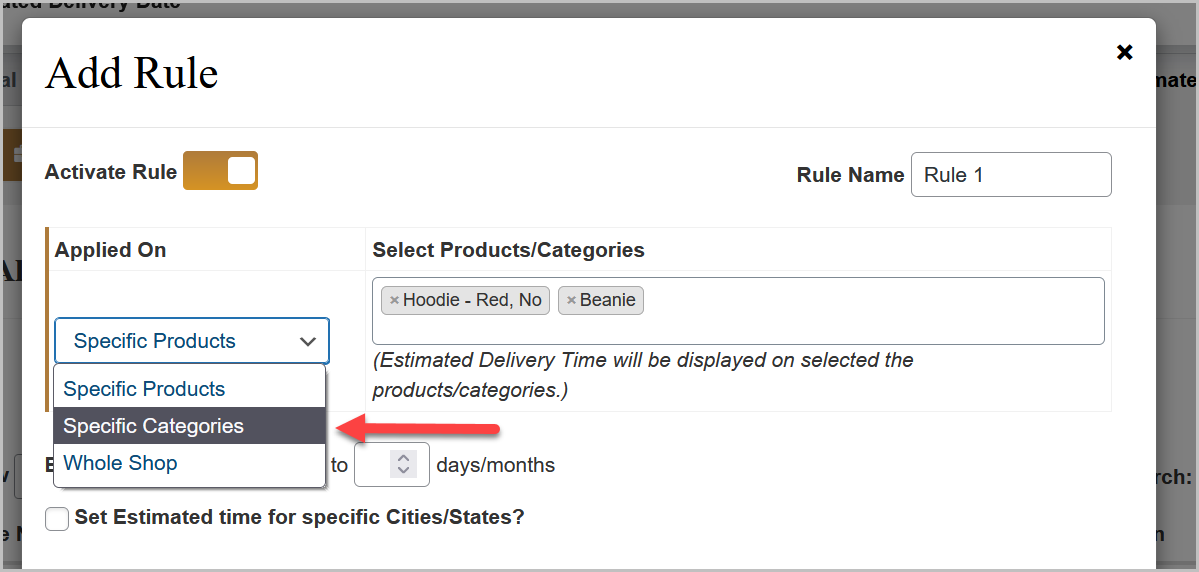
Now name this rule and select the products, variations, categories, or Whole Shop you want to apply this rule.
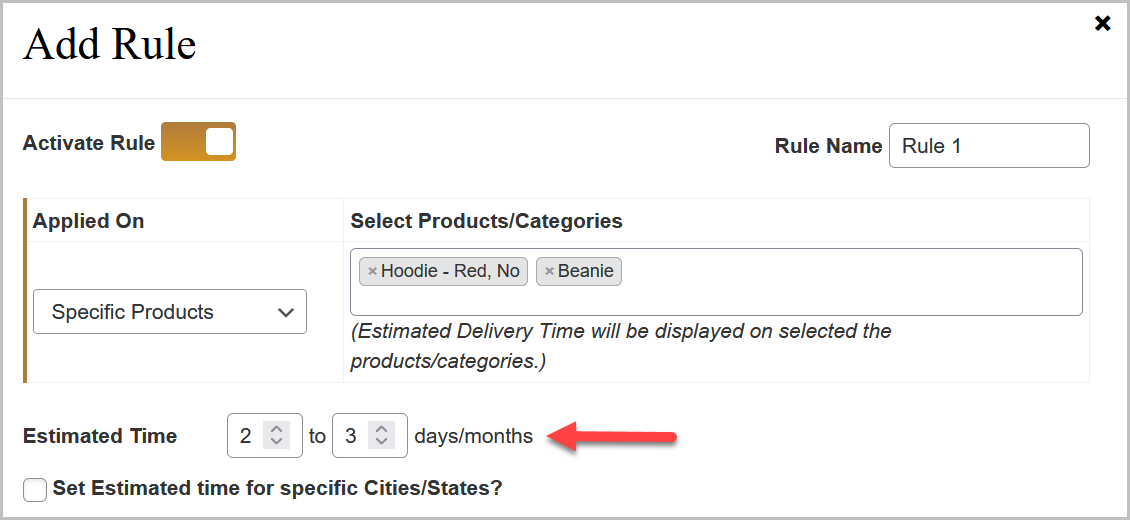
Then configure the estimated delivery time range in days/months for selected products.
You have option to add the cities/states by checking the “Set Estimated time for specific Cities/States?” option. You can add multiple cities/states by clicking “Add Cities/States & Time” button and set their estimated delivery time respectively.
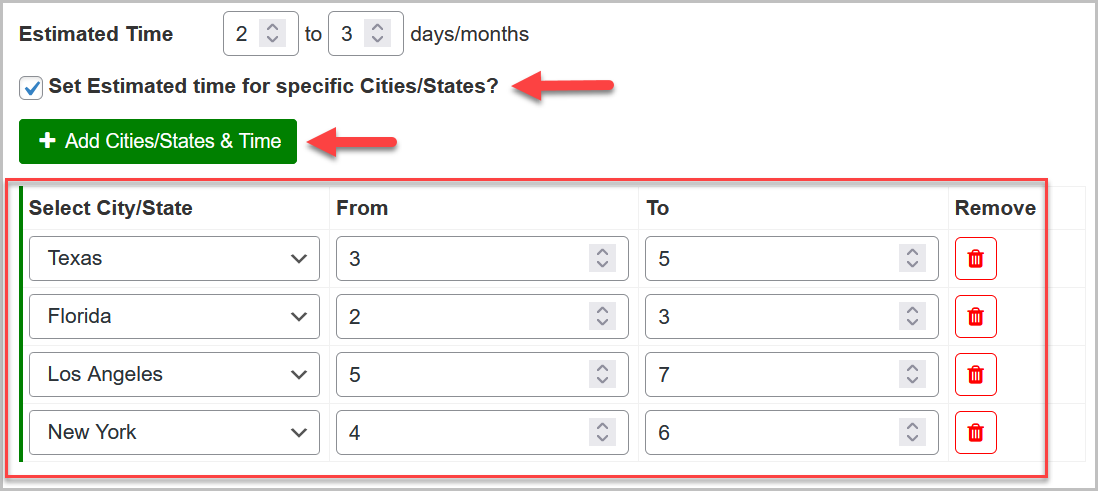
Note: You have to add the cities/states firstly from the general settings (WooCommerce>General Settings>Add Cities/States) before adding the cities/states in a rule.
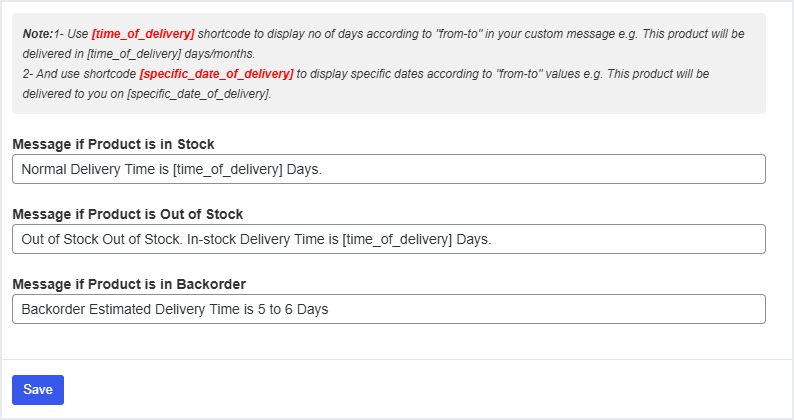
Now specify the estimated delivery time message for in-stock, out-of-stock, and back-order products. You can use the shot-code “[time_of_delivery] ” in these messages to display the delivery time set by you above and “[specific_date_of_delivery] ” to display exact dates based on the delivery time set by you.You can leave the out-of-stock message empty if you don’t want to display estimated delivery time for out-of-stock products.
General Settings
↑ Back to topClick the “General Settings” tab for general configurations. Here you will find the two sub-tabs “Display Settings” and “Add City/States“.
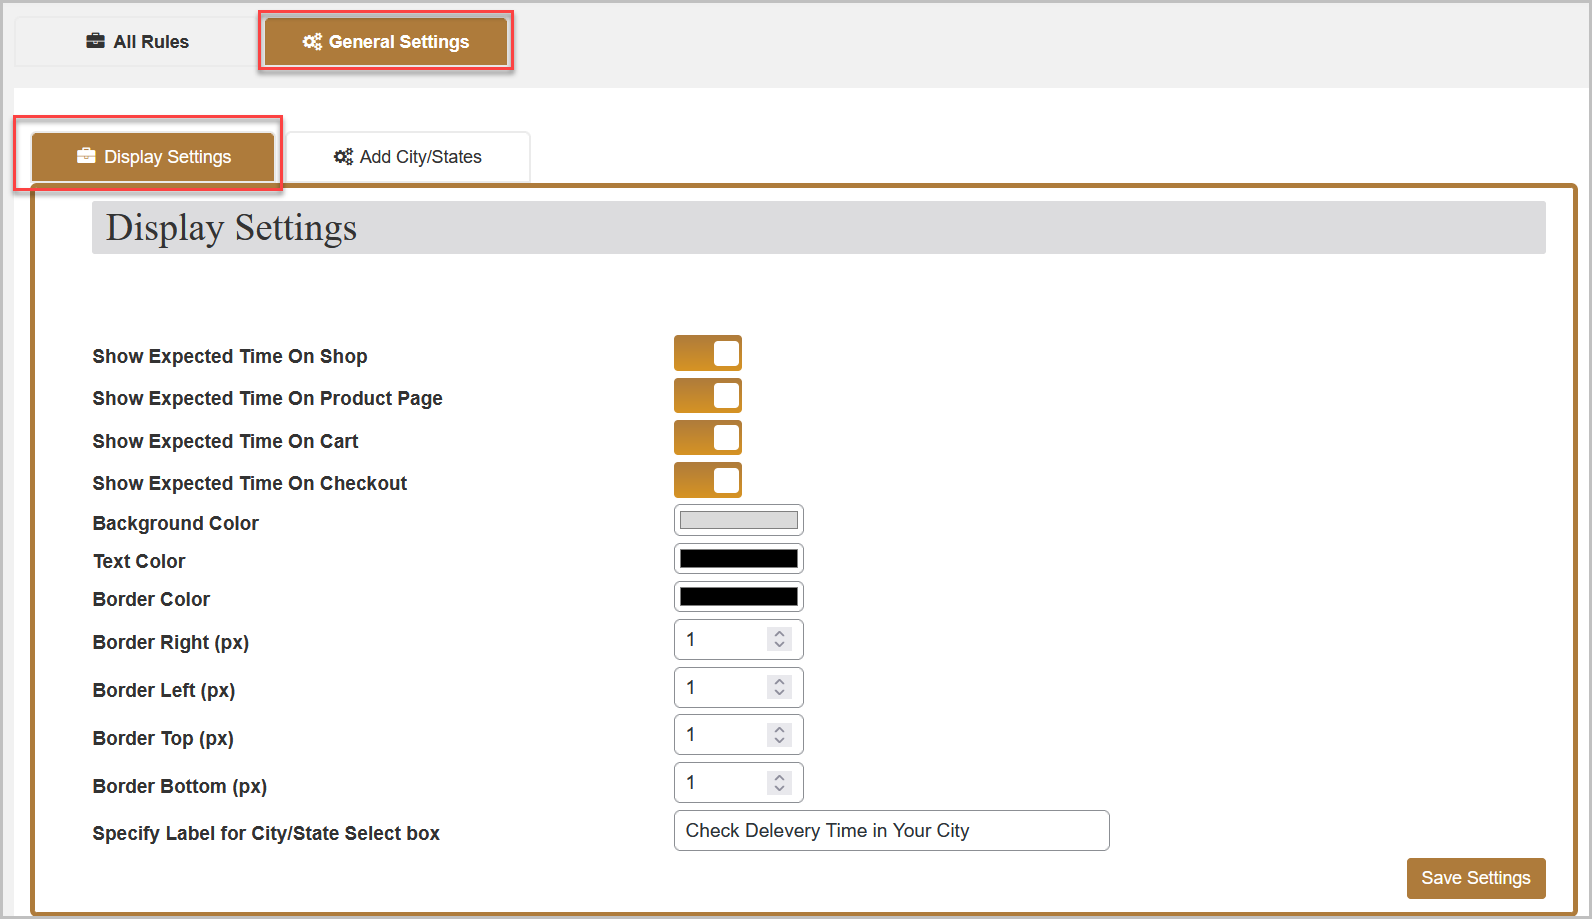
Display Settings
From this tab, you can enable/disable the display of estimated delivery time on the shop, product, cart, and checkout page and customize the message colors.You can also set the label of City/State select box for the front-end.
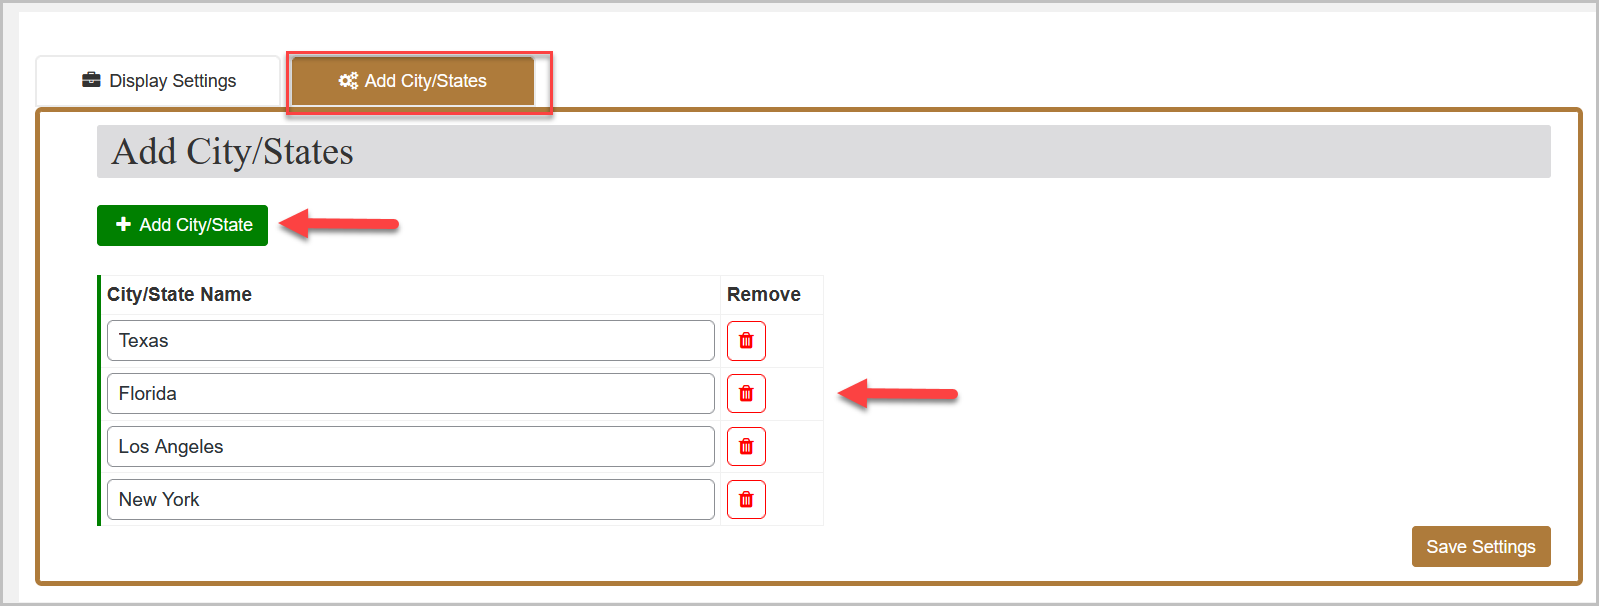
Add City/States
Click “Add City/States” button add multiple text fields and specify cities/states names you want to display estimated delivery time for them. The cities/states you will add here will be displayed in a rule.