Checkout for WooCommerce
↑ Back to top- Before you start
- Overview
- Installation
- Configuration
- Order management
- Troubleshooting
- Go live checklist
- See also
This guide describes how to install, configure, and use the Checkout webshop module for WooCommerce.
- Requires at least: WordPress 5.0, WooCommerce 5.0.0, PHP 7.3
- Tested up to: WordPress 6.4.3, WooCommerce 8.7.0, PHP 8.2
- Plugin latest version: 2.8.2
Before you start
↑ Back to topBefore you start, you need an Checkout Portal account. See the guide Create account for more information about creating a free test account.
Overview
↑ Back to topOur WooCommerce plugin is the perfect extension to enable the Checkout to its full potential for your WooCommerce store. Checkout supports most popular payment methods. You may see below all the payment methods offered by Checkout. This list refers to all markets.
Depending on your country or region, the list may vary. If you are uncertain about a specific payment method and whether it is available in your country or region, please contact Support for more information.
Apple Pay configuration for WooCommerce plugin is described on the Apple Pay payment method page.
Shop features
↑ Back to top- The fast checkout with “remember me” functionality.
- Embedded checkout for an optimized user experience.
- A smart mix of payment methods to suit all preferences.
- One-off or subscriptions (recurring payments).
- Supported currencies: EUR, DKK, SEK, NOK, CHF, USD, GBP, PLN.
- Supported languages: The Checkout is automatically displayed in the same language used on your store. Current supported locales are German, English, Danish, Swedish, Norwegian, Finnish, Italian, French, Spanish and Dutch.
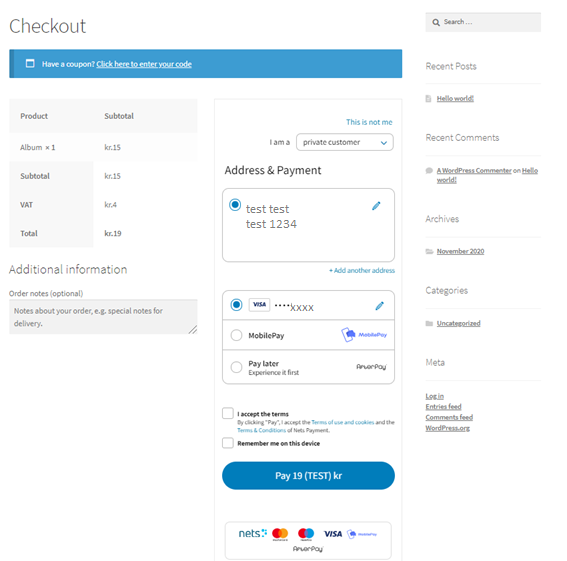
The following screenshot shows a checkout page provided by the Checkout module:
Administration portal features
↑ Back to top- Quick setup and flexible configuration.
- Intuitive order management with synchronized captures and refunds.
- Compatibility with discounts, tax (VAT), and shipping options.
- Compatibility with WooCommerce Subscriptions
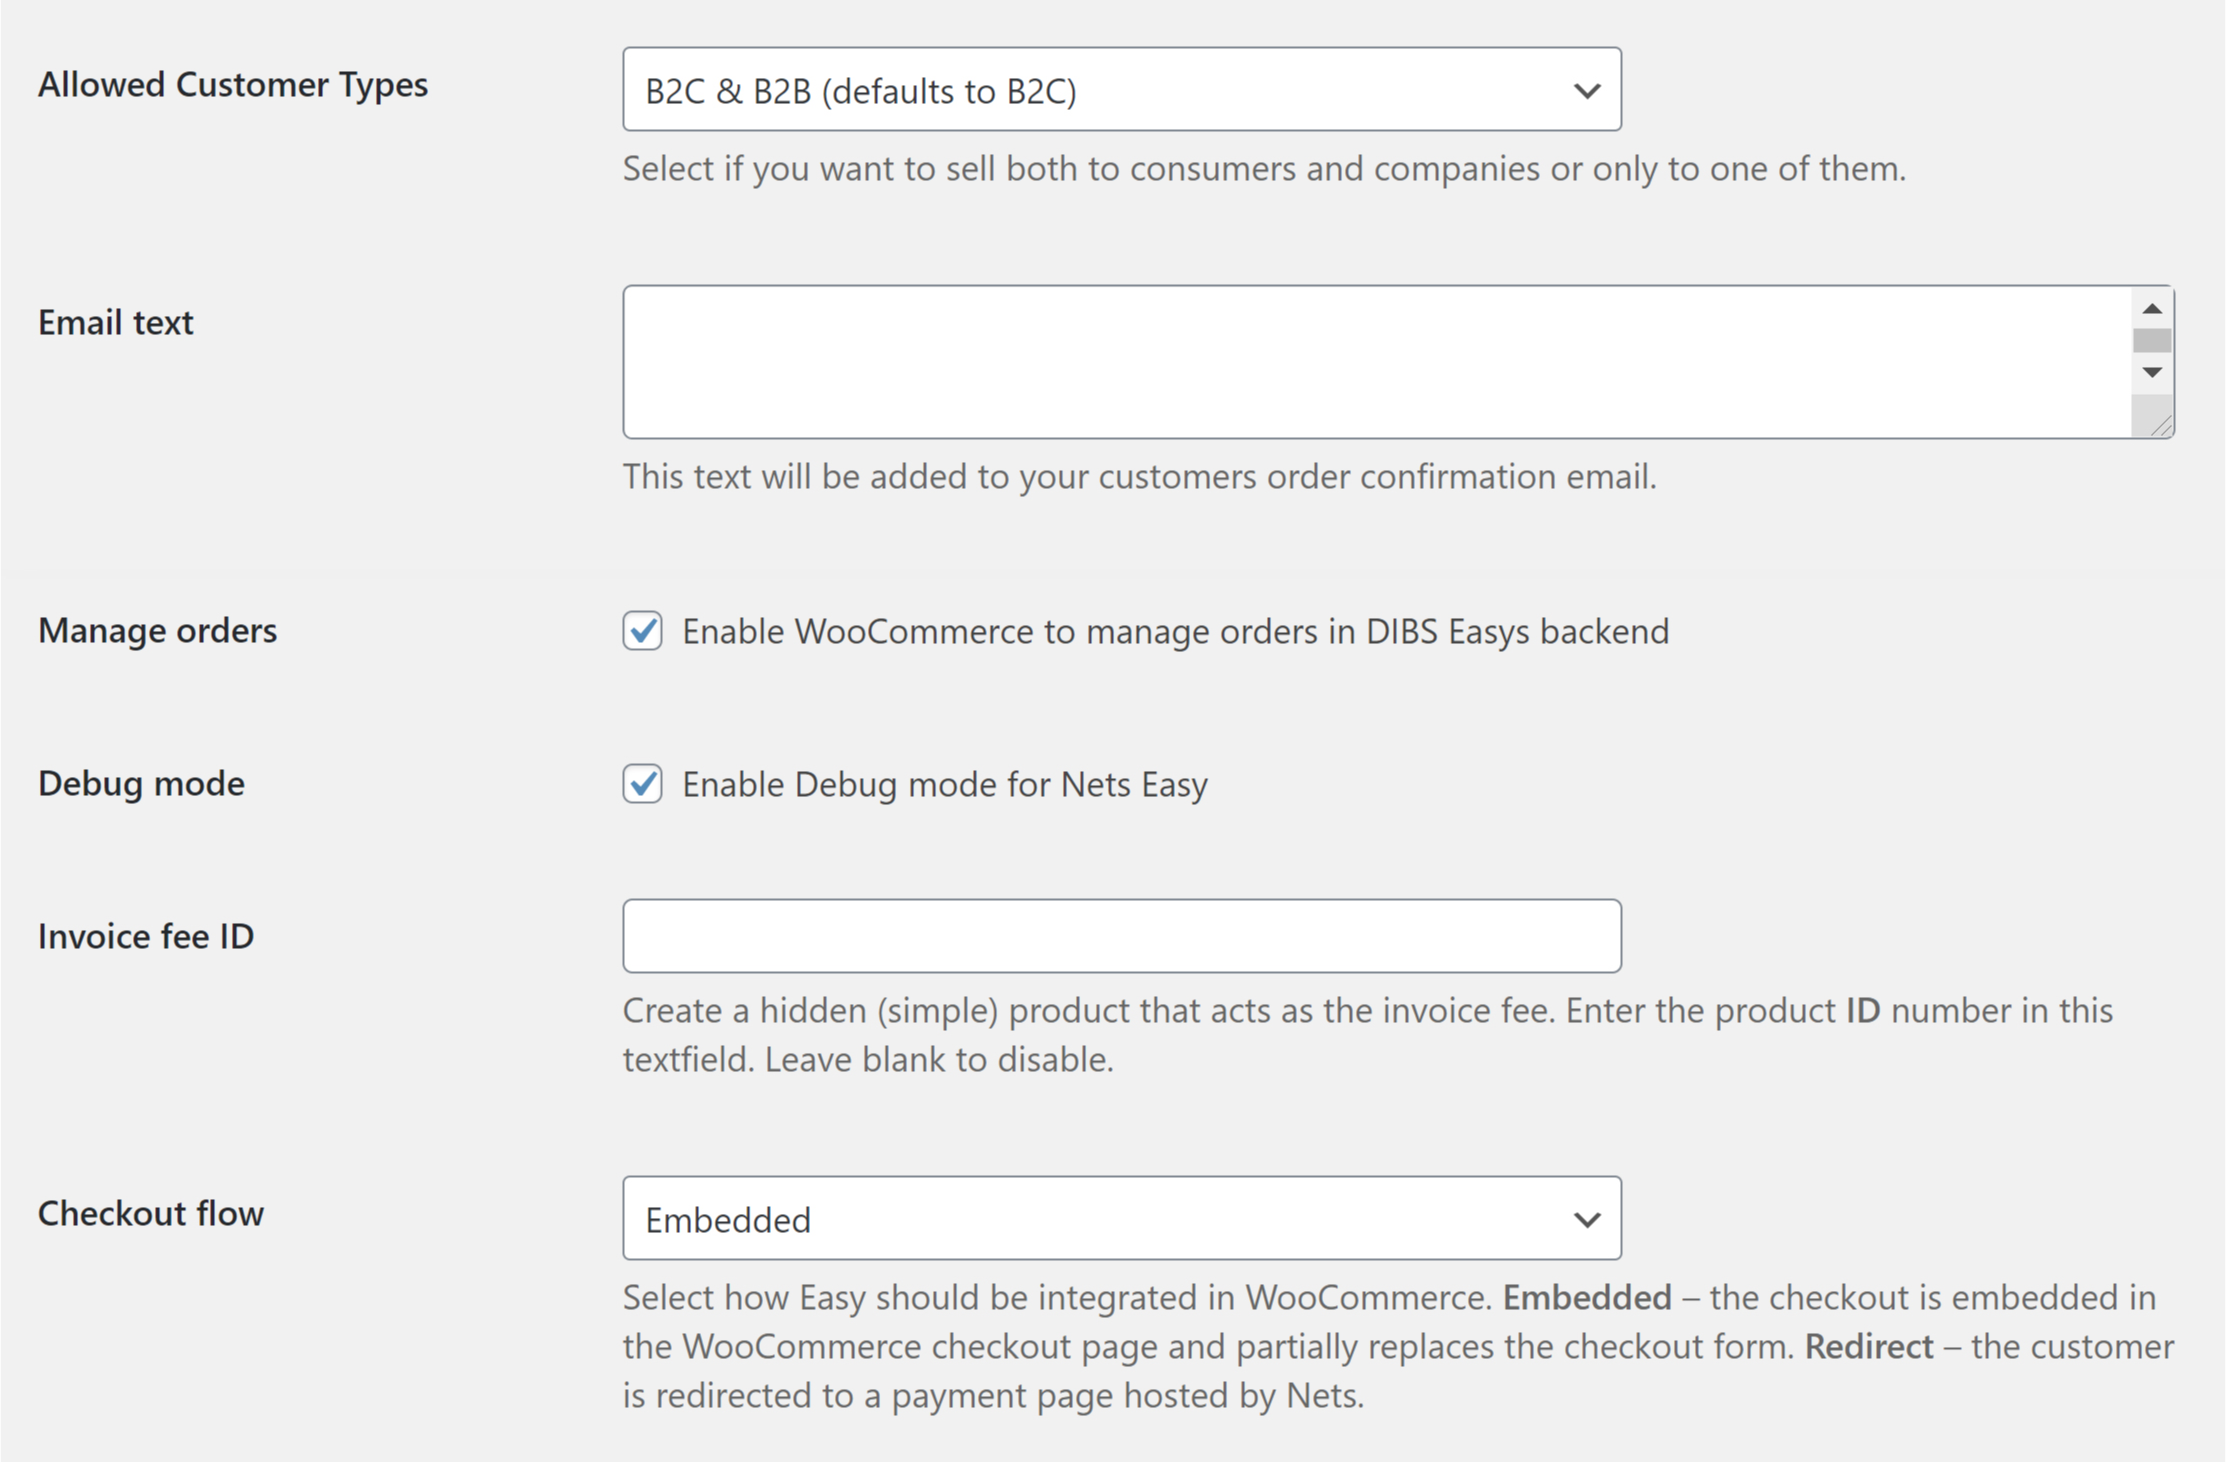
The screenshot below shows the Settings page in the WooCommerce administration portal:
Installation
↑ Back to topYou can install our Checkout module for WooCommerce in two different ways:
- Alternative 1:
- Download the ZIP file from: https://wordpress.org/plugins/dibs-easy-for-woocommerce/. (Click the blue Download button.)
- Install it manually through FTP or upload it from WordPress backend at Plugins > Add new > Upload Plugin.
- Alternative 2:
- Go to Plugins > Add new.
- Search for “Checkout” in the search form.
- You will now be presented with our module along a button saying Install now. Click the button, and it will install the module right away
- Once the button has stopped spinning, you have to click the button again (this time it’s called Activate).
The module is now installed and ready to be configured for your Checkout account. But before moving on, you should also verify that you have the correct WordPress settings.
Required WordPress settings
↑ Back to topYou need to enable HTTPS (install a SSL/TLS certificate) in your web store to get Checkout to work.
To get the order total to match between WooCommerce and Nexi Group you need to configure WooCommerce to display prices with 2 decimals. More information about displaying of prices and how it can cause rounding issues can be found in this article and within our Go-live checklist.
You need to enable Guest Checkout (or let WooCommerce generate user name and password automatically when creating an account) in your store, otherwise the order will not be finalized in WooCommerce when paying with Checkout.
It’s recommended to add/use SKU on products (even on product variants). This is needed to keep track of purchased products in orders between the two systems and to make refunds working properly.
The module is now installed and ready to be configured for your Checkout account.
Configuration
↑ Back to topAfter installing the module, you need to do some basic configuration:
- Navigate to WooCommerce > Settings > Payment.
- Click the Checkout link in the list of available payment methods.
- Fill out the required fields, such as merchant ID and integration keys (secret keys and checkout keys).
- (Optional) Modify the module according to your needs using the additional settings on the configuration page.
Both the merchant ID and the integration keys can be found in Checkout Portal. See the following pages for more help:
The screenshot below shows the configuration page for the module:
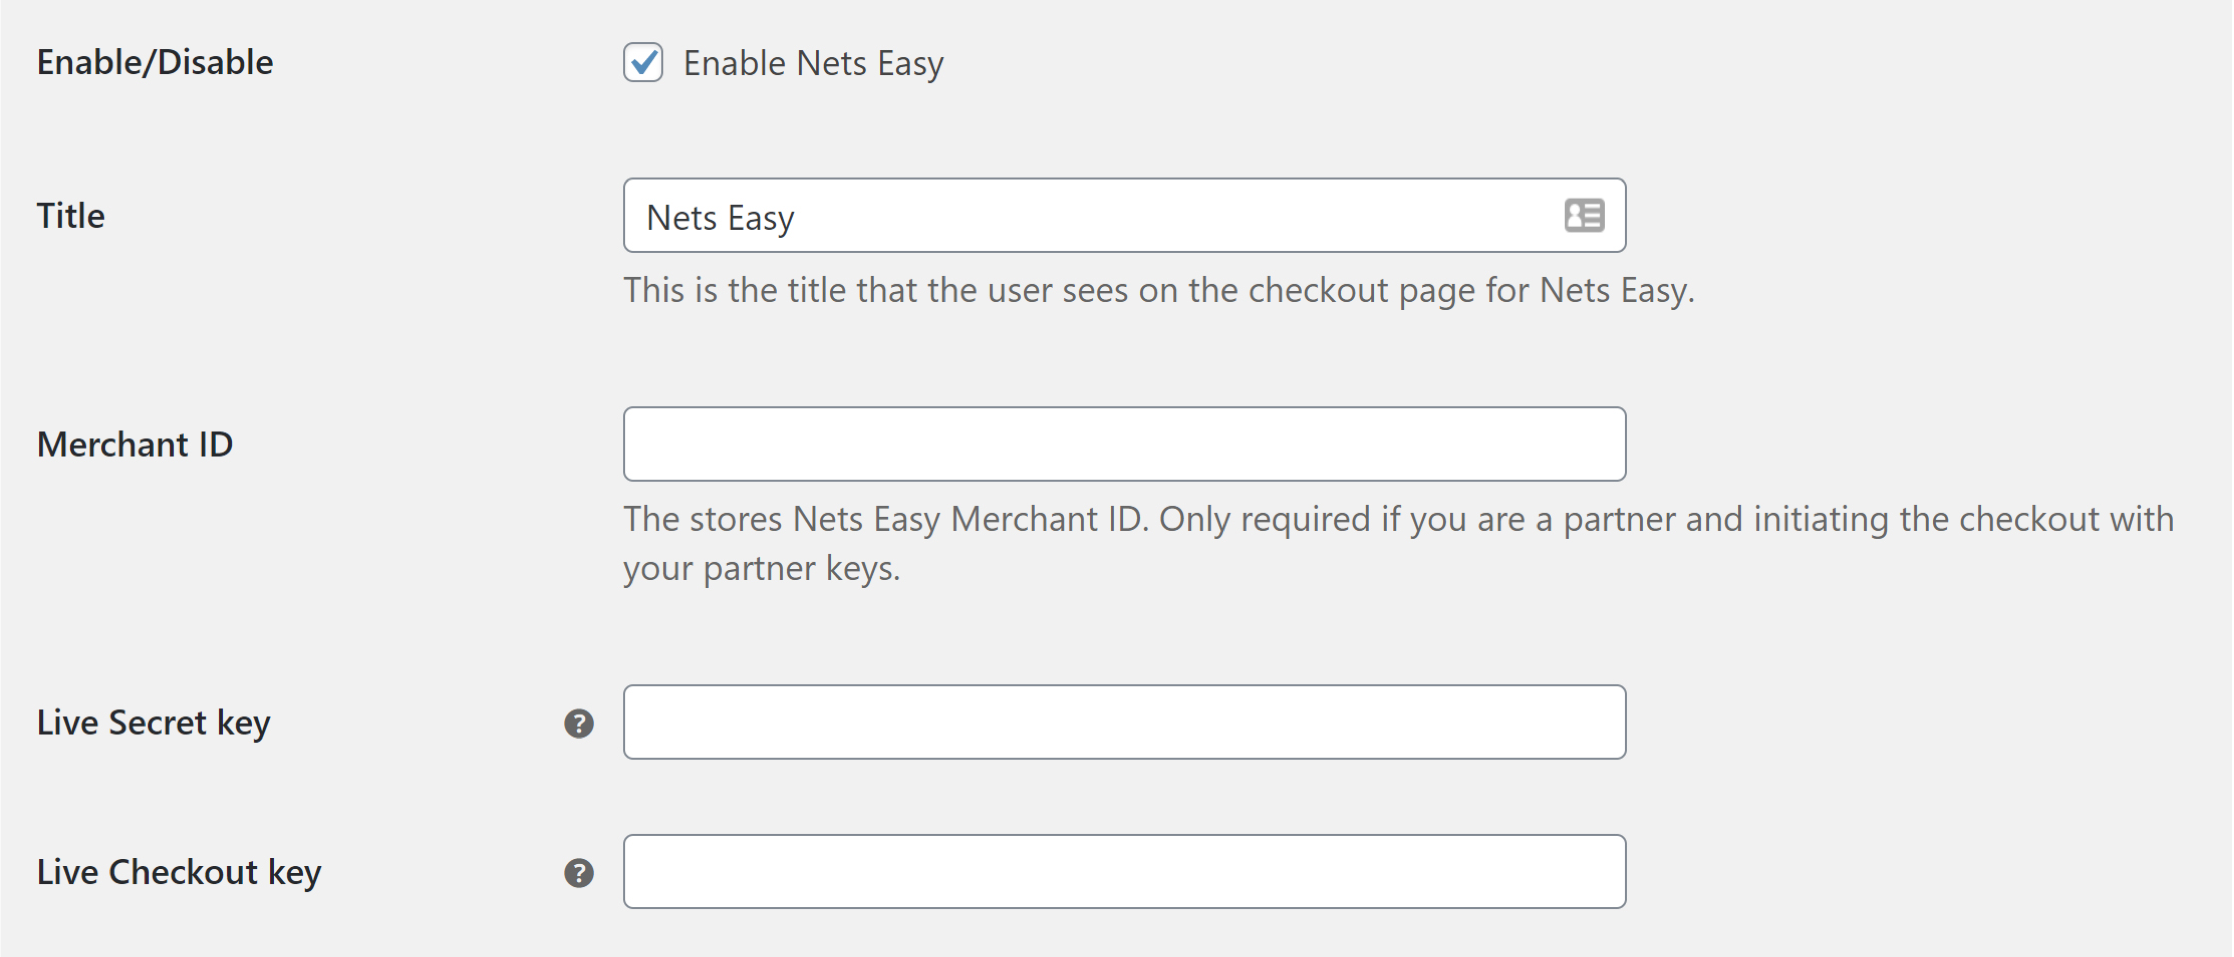
The following table lists all the settings you can configure in the administration area for the Checkout module:
| Configuration setting | Description |
|---|---|
| Enable/Disable | Tick the checkbox if you want the payment method should be available at checkout. |
| Title | The title for the payment method displayed in the checkout and order confirmation emails. |
| Merchant ID | Your merchant ID which can be found in Checkout Portal. |
| Live Secret key | Your live secret key from Checkout Portal. |
| Live Checkout key | Your live checkout key from Checkout Portal. |
| Test Secret key | Your secret key for test purchases from Checkout Portal. |
| Test Checkout key | Your checkout key for test purchases from Checkout Portal. |
| Test mode | Toggles between test mode and live mode. Choose test mode if you want to make test purchases using the test environment. There are sample card numbers and invoice addresses for testing purposes. Live mode requires an approved account. |
| Allowed Customer Types | Configures which customer types should be accepted on the checkout page. B2C means private customers (Business-to-Consumer). B2B means business customers (Business-to-Business). |
| Email text | Custom text that will be added to the order confirmation email sent to the customer. |
| Manage orders | Check this box if you want to cancel an order in Nexi Group system automatically when the order is marked as Cancelled in WooCommerce and charge an order in Nexi Group system automatically when the order is marked as Completed in WooCommerce. |
| Debug mode | Enables debug logging. Stores requests and responses between WooCommerce and Nexi Group in a log file which you can find under WooCommerce > Status > Logs. |
| Invoice fee ID | Creates a hidden (simple) product that acts as the invoice fee. Enter the product ID number in this textfield (not the SKU). Leave blank to disable. |
| Checkout flow | Determines how Checkout should be integrated in WooCommerce. Embedded means that the checkout is embedded in the WooCommerce checkout page and partially replaces the checkout form. Redirect means that the customer is redirected to a payment page hosted by Nexi Group. |
| Auto-capture | Check this box to automatically charge the customer directly when a purchase is done. This is a feature that is mainly used when selling digital goods (where there is no shipping of goods included). The order will only be set to Completed instantly in WooCommerce if it’s digital goods and no shipping is required. |
| Other payment method button text | Customizes the Select another payment method button text that is displayed in the checkout if using other payment methods than Checkout. Leave blank to use the default (and translatable) text. |
| Complete payment button text | Determines which text you want on the Complete payment button. Only applicable for subscription based payments. |
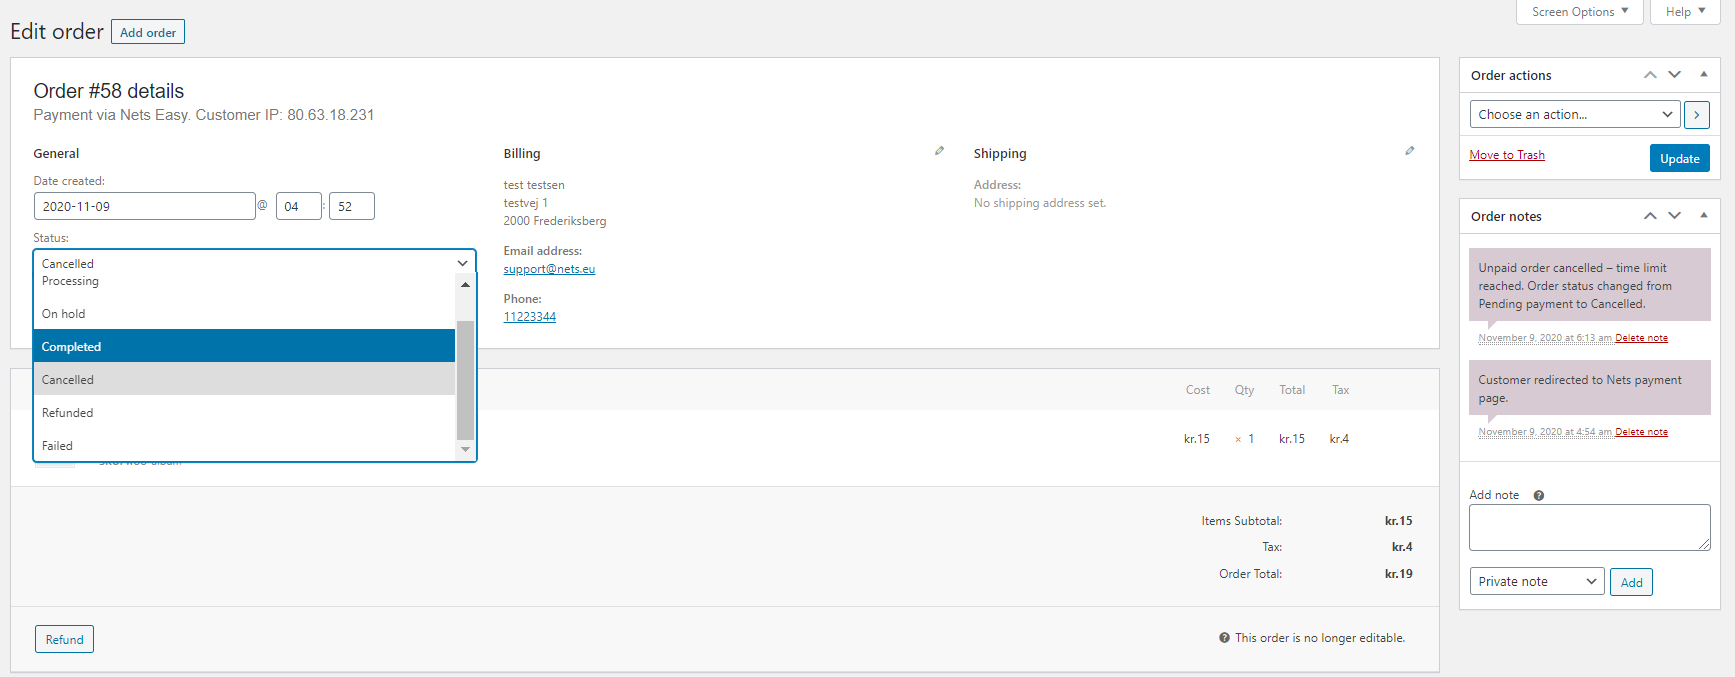
Order management
↑ Back to topIt’s possible to manage orders directly in the WooCommerce administration portal:
- Navigate to WooCommerce > Orders.
- Click on an order line to access order details.
- Choose Refund or update the order status (Cancel/Completed). The Checkout plugin will synchronize automatically. The payment status will also be updated in Checkout portal.
All transactions performed by Nexi Group are accessible in Checkout Portal.
Troubleshooting
↑ Back to topCheckout troubleshooting is managed by our expert WooCommerce partner Krokedil AB. Please check the complete documentation at either: https://docs.krokedil.com/category/200-get-started and Checkout for WooCommerce | Checkout | Nexi group developer portal.
If you still have problems and issues after you have gone through the steps in the link above, you’re welcome to get in touch with us at support@krokedil.se.
Before creating a support ticket, we recommend you to try to locate the issue yourself by trying out this How can we help you? | Checkout | Nexi group developer portal.
Nexi Group payment window is blank
↑ Back to top- Ensure your integration keys in the Nexi Group plugin settings are correct and do not contain additional blank spaces.
- Temporarily deactivate third party plugins that might affect the functionality of the plugin.
- Check if there are any temporary technical inconsistencies: https://nets.eu/Pages/operational-status.aspx
Payments in live mode don’t work
↑ Back to top- Ensure you have an approved Live Checkout account for production.
- Ensure your Live Checkout account is approved for payments with the selected currency.
- Ensure payment method data is correct and supported by your Checkout agreement.
Go live checklist
↑ Back to topFor more information, refer to the section Go-live checklist.