↑ Back to top
Olymp comes with a setup wizard that enables you to create the demo layout with a just a few clicks.
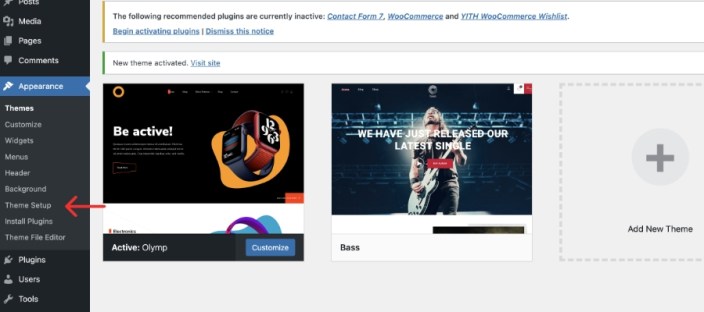
After installing the theme, in your Dashboard go to Appearance > Theme Setup.
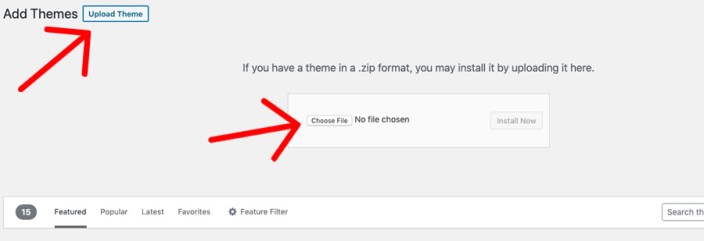
The setup wizard will ask you to install and activate necessary plugins, and import the demo content. Please be patient while WordPress imports all the content.
All you need to do is edit the content and make it your own.
↑ Back to top
This theme has three menu locations, the Primary Menu (main menu), Footer Menu and Social (the menu to display your social media profiles). Create menus and assign them to each of the available locations. Learn how to setup WordPress menus →
↑ Back to top
First add a header image. In your dashboard go to Appearance > Customize > Header Images. Add the image you want to display. You can add more than one and randomize them. Header image size is 800x968px.
You can add some text in the left side of the header achieved via a widget. In your dashboard go to Appearance > Widgets and add a text widget or any other widget type to the Top Widget location.
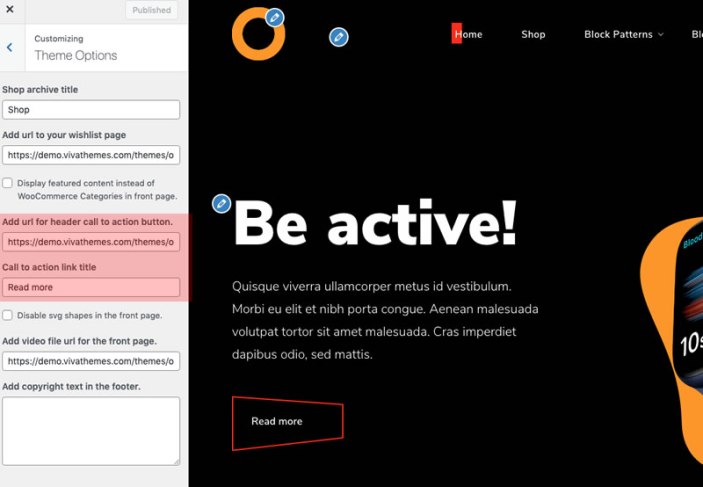
To add or change the text of the call to action button, in your dashboard go to Appearance > Customize > Theme Options and you will see two fields; one for the url of the button, and the other for text.
Take a look at the other options in the Customizer.
↑ Back to top
In the front page below the header, this theme will display the latest posts by default. You can assign a static page to display in front instead of the latest posts. Learn how to display a static page in front →
This way you can have the Home Page template, a default page, that is a page with a right sidebar, a full width page or your shop display in front, instead of the latest posts.
Note that the featured image of this page will display in the bottom section of the home page.
To have a video instead of the featured image like in our demo, upload a mp4 video in your Media Manager or somewhere else and in your dashboard go to Appearance > Customize > Theme Options. Add the url of the video in the respective field.
↑ Back to top
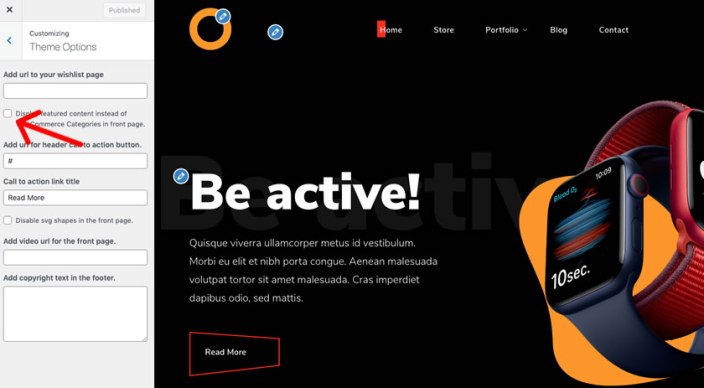
The Home Page template will display the WooCommerce product categories by default. Add an image (thumbnail) to each product category, suggested size is 535x535px. You can add a thumbnail in the bottom of the screen when you edit a WooCommerce product category. Add also a description to that category. You can arrange the order categories are displayed by dragging them from the sandwich button in the right of each category.
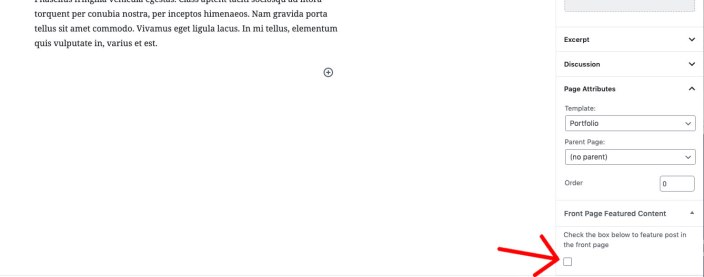
Alternatively you can have featured content instead of WooCommerce product categories. In your dashboard go to Appearance > Customize > Theme Options and check the box to Display featured content instead of WooCommerce categories.
To feature a page or post, in the bottom of the right column in the editor, check the box to Feature post in the front page. Add a featured image which will be resized at 535x535px.
↑ Back to top
Above the video in the front page there is a widget location named Video Widget. In your dashboard go to Appearance > Widgets and add a grouped block to this location. Learn how to add widgets →
Inside the block, a H2 title, paragraph and html block containing the code below to generate the button
↑ Back to top
At the bottom of the Home Page template there is a widget location named Front Page Bottom Widgets. In your dashboard go to Appearance > Widgets and add a grouped block (first) and an image block (second) type to this location.
Inside the Grouped block add an H2 title, a paragraph and html block to display the button using the code below.
To add a call to action button to the text widget like in our demo use this html code
The image you add to the image widget should be square in order to achieve the circle effect. The name and the job title are the caption of the image. Wrap the title inside span tags to give it a different style like this
↑ Back to top
WordPress has introduced the ability to create pre-designed block patterns that you can use like a block template in any page or post. This theme comes with four pre-designed blocks that you can use anywhere in your website.
What makes block patterns even more special that you can edit it freely and add additional elements to each block. Learn how to add block patterns →
↑ Back to top
This block is designed to display a three column responsive layout that you can use to display your team member. It includes an image, the person’s name and the job title. You can add more information to each column if you wish.
Note that you can use this block more than once in any page to display any number of team members.
Suggested image size is 480x560px. View team members pattern →
↑ Back to top
This block is designed to display a full width section with a background image. On top of the image it includes some text and a call to action button. Use this block in a full width page template with no sidebar. Suggested image size is 2000x600px. View cover block pattern →
↑ Back to top
You can use this block to display three columns, each of them including an image, a title, a description and a button. You can edit, or delete any element. You can use this block more than once in each page to display as much content as you want.
Suggested image size is 640x426px. View services block pattern →
↑ Back to top
This block is designed to display some content with a contact form and an address block in the right. In the demo we are using the Contact Form 7 plugin, as this theme includes styling for this, but you can use any other form. View contact block pattern →
↑ Back to top
Wishlist is not a built in feature in Olymp. You need to use a plugin to have this feature. In our demo we have used YITH Wishlist plugin. The theme includes styling for this plugin., but you can use any plugin you like.
Follow the plugin instructions and assign a page where the wishlist is displayed. After that go to Appearance > Customize > Theme Options and add the url of the wishlist page in the respective field.
↑ Back to top
In the footer you can use a text widget to display some information related to your business. In your dashboard go to Appearance > Widgets and add text widgets or any other widget type to the Footer Widgets location.
In this theme you can edit the footer copyright info from the Theme Options.
We and our partners process your personal data (such as browsing data, IP Addresses, cookie information, and other unique identifiers) based on your consent and/or our legitimate interest to optimize our website, marketing activities, and your user experience.
 Take a look at the other options in the Customizer.
 To feature a page or post, in the bottom of the right column in the editor, check the box to Feature post in the front page. Add a featured image which will be resized at 535x535px.