Google Ads & Marketing by Kliken is a streamlined, automated Google Shopping solution that is designed to help you reach customers to drive traffic to your store and grow sales.
We want to see your store succeed so we have compiled some tips and tricks below to help you along the way. You can get your products on Google in just a few minutes and there is no marketing experience required
About Google Ads & Marketing
↑ Back to topGoogle Ads & Marketing is the easiest way to promote your products across Google so you can get discovered on any budget. Our solution manages and automates everything you need to:
- Create or link a Google Merchant Center Account
- Optimize Smart Product feeds with daily inventory sync
- Access free listings on surfaces across Google and the Google Shopping Tab
- Run paid Smart Shopping campaigns to promote products across Google, Gmail, YouTube and the Display Network .
How to install Google Ads & Marketing to your Woo store
↑ Back to top- Install and activate the plugin for your WordPress website
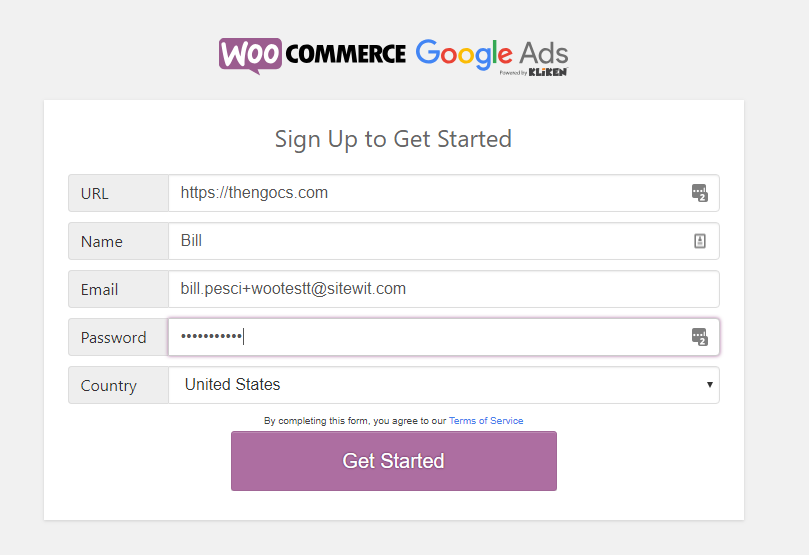
- Select ‘Get Started’
- Complete the short sign-up form to create your account and password
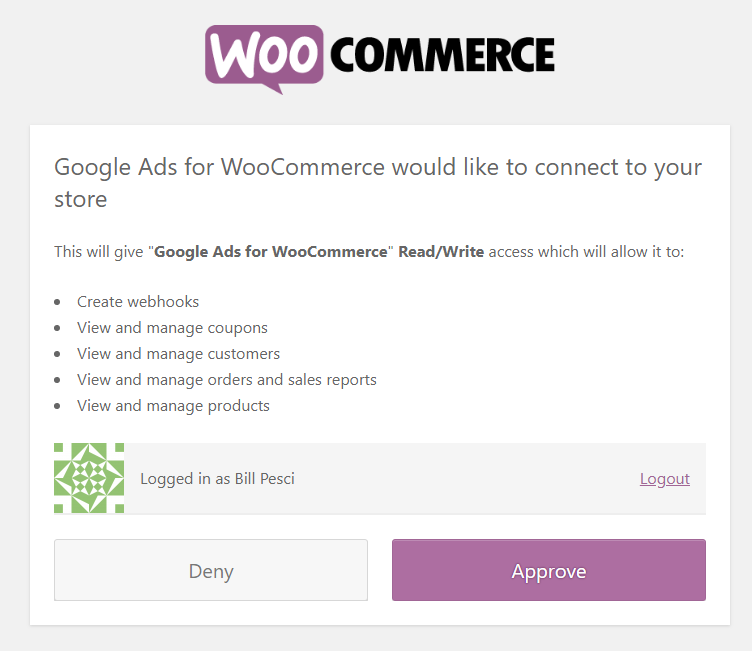
- Grant Google Ads & Marketing the necessary permissions once prompted
- Once permissions are granted, you are ready to get your products on Google
How to get your products on Google
↑ Back to topOnce Google Ads & Marketing is installed and you have set up your account, you can begin the process to optimize your store and promote your products.
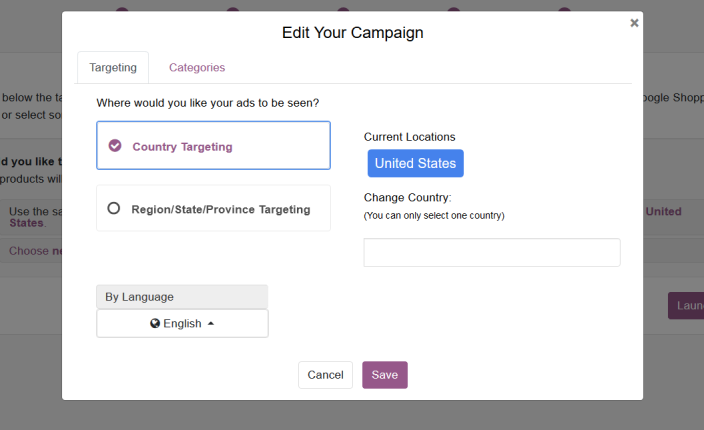
Step one: Targeting – Select where you would like to show your products.
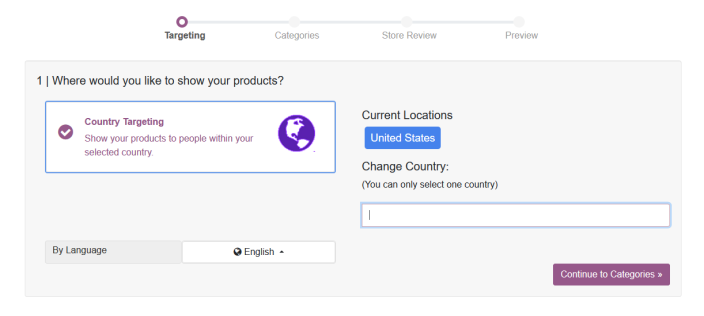
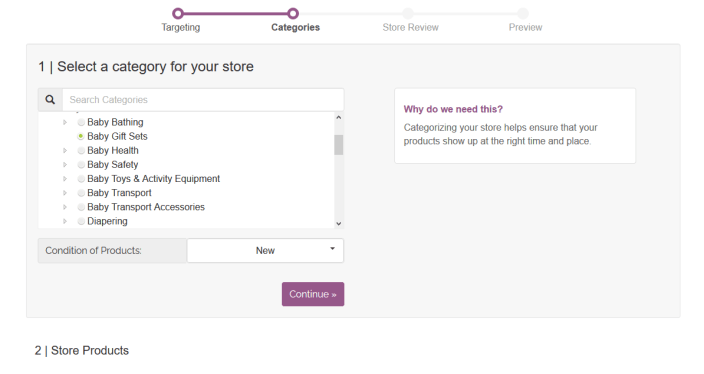
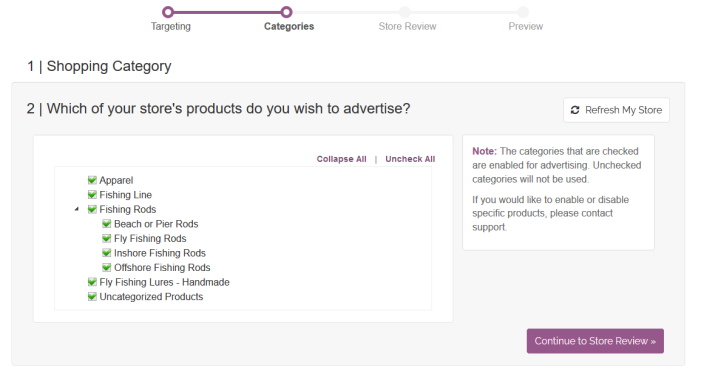
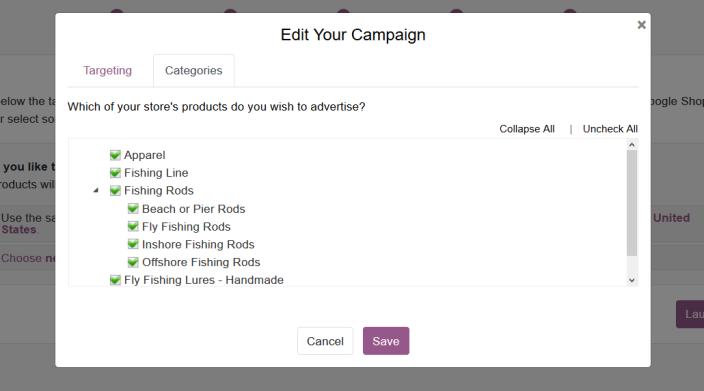
Step two: Store Setup – Select your store category and choose which products you wish to advertise. This helps ensure that your products show up at the right
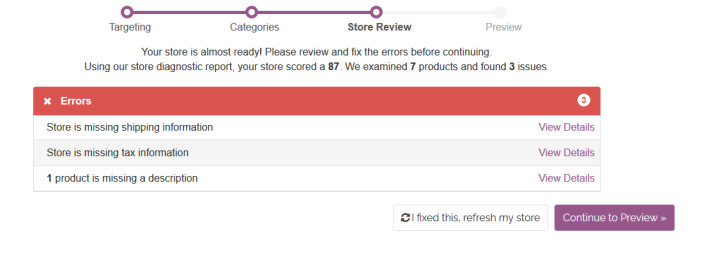
Step three: Store Review – Our campaign diagnostic tool will scan your store settings and selected categories to check for common errors or policy concerns. If there are any errors, we will provide detailed instructions on how to fix them.
For example, selling apparel requires that you provide specific item attributes such as color, size, or gender. In some cases, it could be a lack of tax and shipping settings, which are required in certain countries.
Step four: Store Preview – Preview your store selections to proceed to checkout.

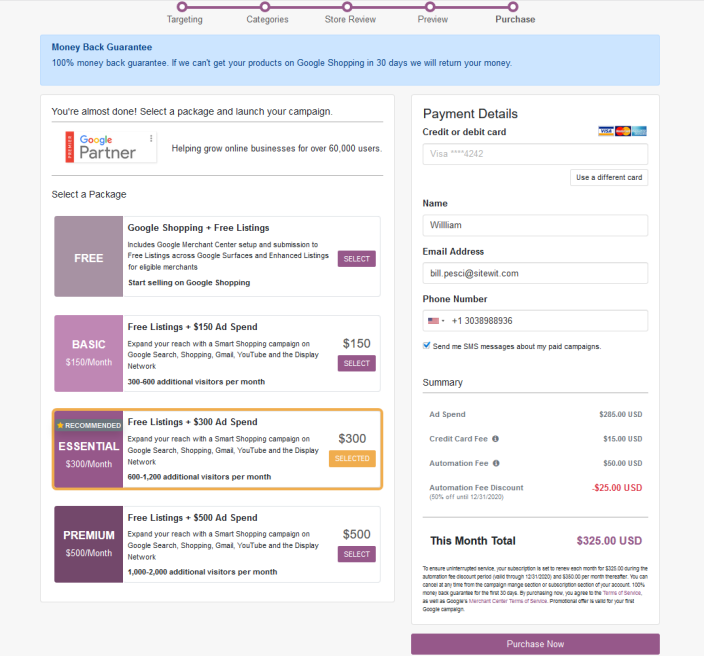
Step five: Checkout – Choose how you want to market your products and complete your purchase. The $10 Kliken automation fee covers:
- Create or link a Google Merchant Center Account
- Optimize Smart Product feeds with daily inventory sync
- Access free listings on surfaces across Google and the Google Shopping Tab
- Run paid Smart Shopping campaigns to promote products across Google, Gmail, YouTube and the Display Network
You can choose your budget for Smart Shopping Campaigns.
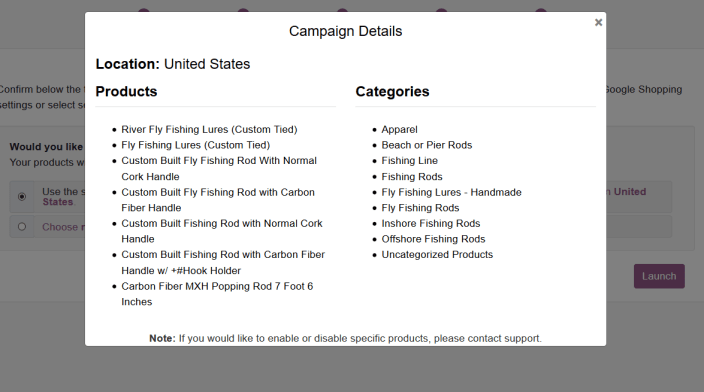
Step six: Bundled purchase (Google Shopping Free Listings + Google Shopping Ads) – Confirm your settings for your Smart Shopping campaign. You can update your campaign settings or use the same settings you selected for free listings.
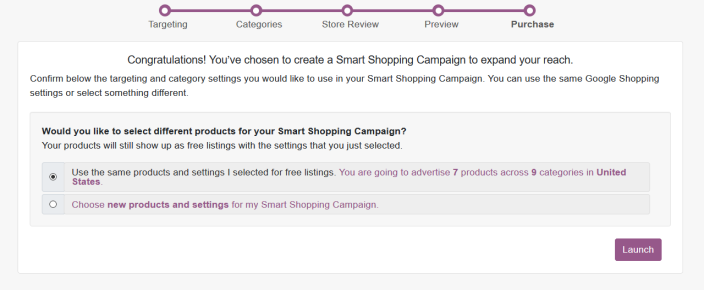
Option one: Use the same products and settings you selected for free listings
Option two: Update your campaign settings
Once your purchase is complete, we’ll automatically verify and attempt to claim your website. Lastly, Google will do a final review of the campaign’s content. Once your products are approved, they will start showing up across Google!
If we cannot get your store approved, we offer a 100% Money Back Guarantee.
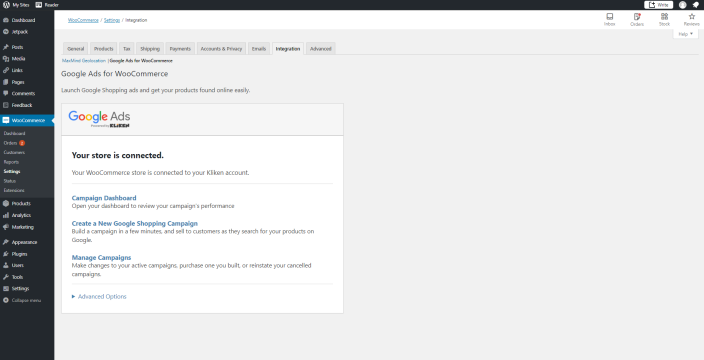
How to Manage Your Google Ads & Marketing
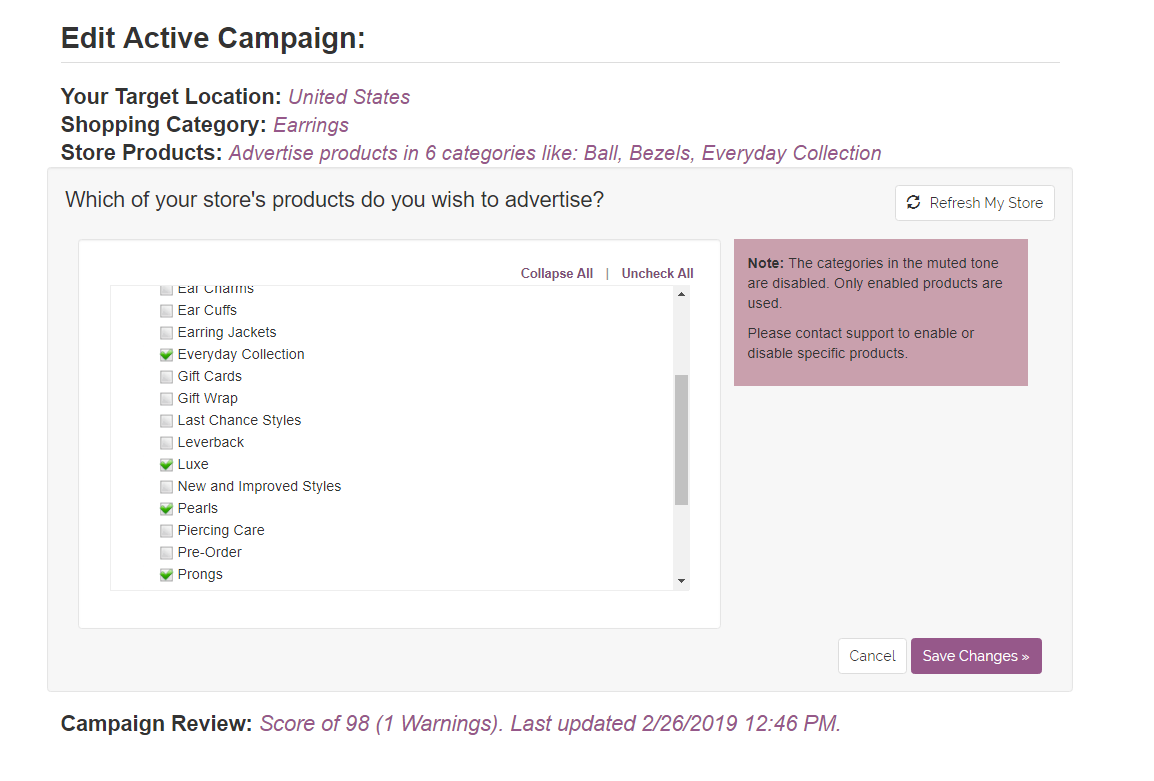
↑ Back to topSince your campaigns are automated, you do not need to manage them each day. However, if you need to update any of the following, you can do so by navigating to Google Shopping → Manage, then click the pencil button to visit the Edit Active Campaign page.
- Adjust your target location for where your product placements show
- Modify which of your store’s categories/products you’re advertising
- Add your own Google account to the Google Merchant Center for your campaign
Track Sales Performance & Campaign Results
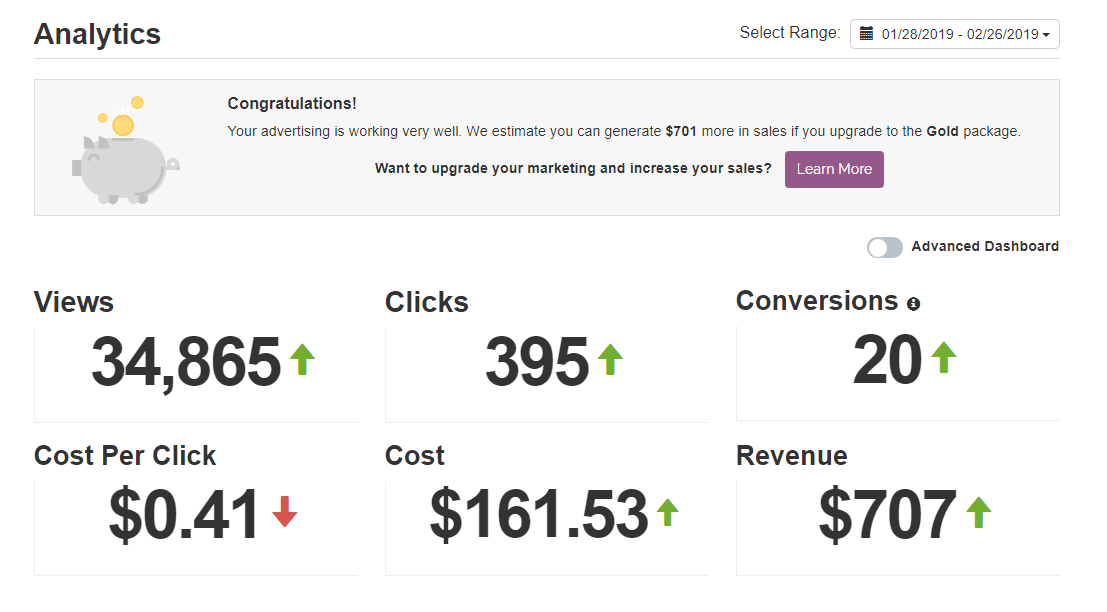
↑ Back to topCampaign statistics provide valuable insight like how much traffic you’re getting and how many sales Google Ads & Marketing has generated.
Track performance straight from your Woo Store by navigating to Google Shopping → Dashboard. Once there, you’ll be presented with your campaign analytics.
You can view stats at the campaign level, category level, or even the product level. This way you can figure out exactly what products may or may not be performing to your standards. Understanding reports can help you fine tune your campaign for the best results!
Google Ads & Marketing Advanced Settings
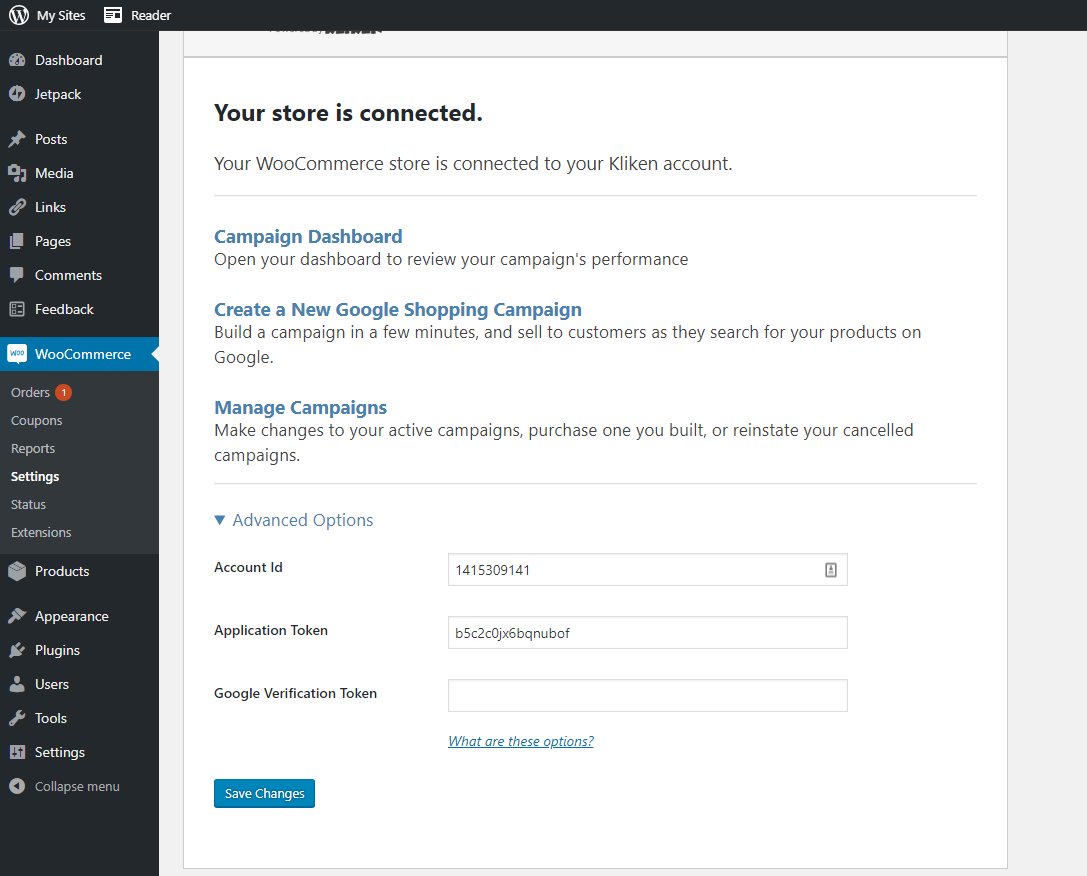
↑ Back to topAdvanced options are available if needed. Some examples where this could be useful are if you need to change which store or website is linked to your Google Ads Account.
There are 3 settings under Advanced Options, and they should not be modified unless instructed to do so:
- Account ID: This ID is created when you make an account in our system. This is used in combination with the application token to connect your store to our system, allowing us to sync your store with your campaign, track sales from your ads, and much more.
- Application Token: This is a unique token generated to connect your account and store to our system. It is used in a similar manner as the account ID and also serves as an extra layer of security for your account.
- Google Verification Token: This token is used to help verify your website for Google. The token is installed as an HTML meta tag on your website, and let’s Google know that you are an authorized owner of your website’s URL.
We will look to publish additional help center content, as well as a walkthrough video to make sure users have all you need to succeed. In the meantime, feel free to leave a comment, or reach out to us directly with any questions.
Please be aware that Automattic and our partners Sitewit/ Kliken and Google have access to business metrics for each user so that we can optimize each account. This data includes views, clicks, conversions, cost per click, cost, and revenue.