Installation
↑ Back to top- Download the Plugin the Product Info Block for WooCommerce plugin ZIP file.
- Upload the Plugin:
- Log in to your WordPress admin dashboard.
- Navigate to Plugins > Add New.
- Click on Upload Plugin at the top of the page.
- Choose the ZIP file you downloaded and click Install Now.
- Activate the Plugin:
- Once the installation is complete, click Activate.
- The plugin is now active and ready to use.
Creating a Template Block
↑ Back to top- Navigate to the Plugin Settings:
- Go to your WordPress admin dashboard.
- Go to Products > Product Info in the menu.
- Add a New Template:
- Click the Add New button to create a new template/block.
- Enter a name for your template.
- Add the content you would like displayed on the product page.
- Set Visibility Settings:
- Scroll down to the Visibility Settings section.
- Choose a Position if you are using a Classic or non-block-based theme.
- Add rules to determine when the template block should be displayed. You can set rules based on product categories, tags, attributes, prices, stock status, user roles, and more.
- Configure the rules by selecting the appropriate options and entering the required values.
- Save the Template:
- Once you have configured your template and set the visibility rules, click the Publish button to save your template.
Assigning a Template Block with the Site Editor
↑ Back to topIf you are using a Block based theme then your site will come equipped with an option to edit your Product Pages from the admin using Gutenberg blocks
A block theme is a theme with templates entirely composed of blocks. This means that not only the post or page content is made of blocks but all areas of the site are made from blocks, including headers, footers, sidebars, and other elements.
https://woocommerce.com/document/woocommerce-store-editing/#section-15
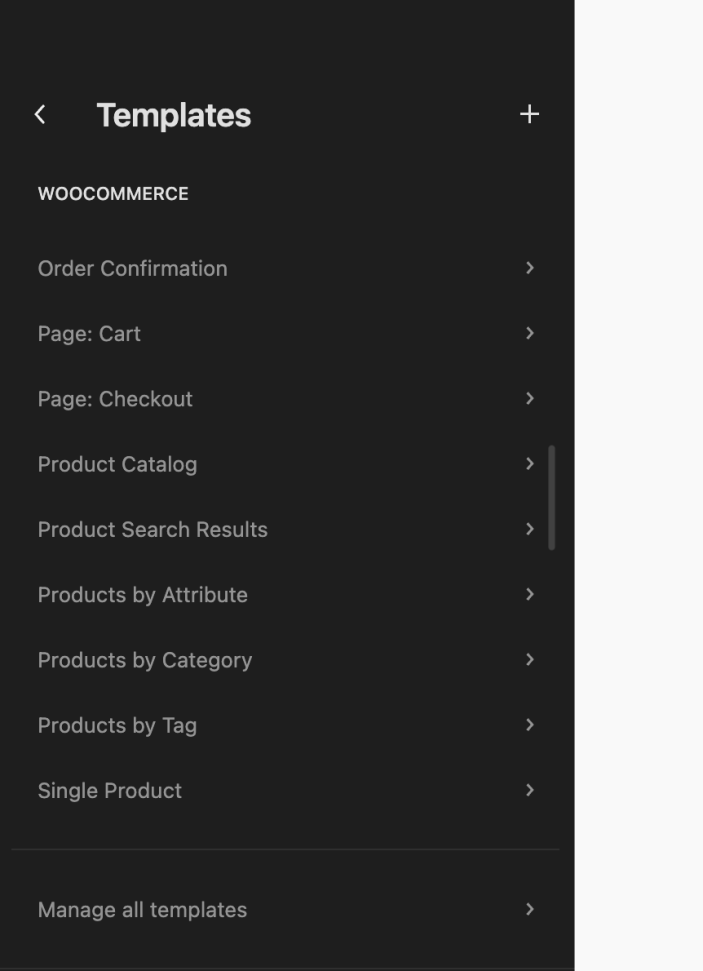
- Go to Appearance > Editor
- Navigate to Templates then select Single Product under the WooCommerce section
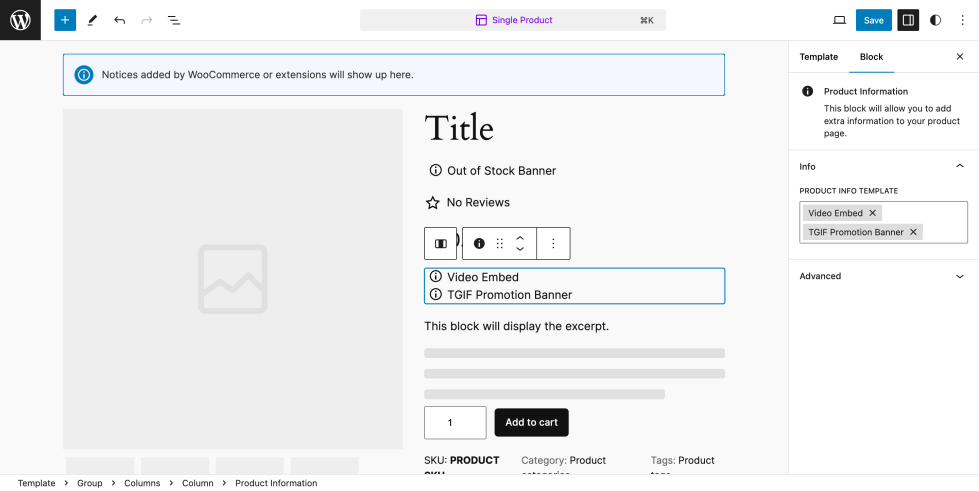
- Click on the + icon or add a block in the position that you would like your Block template to display
- As the Block lists is displayed, search for the Product Information Block
- Once the block is added to the editor, select the block and choose the Templates from the right panel
( You can multiple templates into the same position so need to create a block per template ) - Publish your changes
- Preview the product based on the current rules set.
Adding Template Tags to the template block
↑ Back to topTemplate tags allow you to dynamically insert product information into your content blocks, enhancing the personalization and relevance of your messages. This guide will help you understand how to use these tags within the editor and provide examples and use cases to get you started.
How to Use Template Tags
↑ Back to topTo use template tags, simply include the desired tag within your content block. When the page is rendered, these tags will be replaced with the corresponding product information. Here’s a list of available template tags and what they represent:
{product:product_id}: Product ID{product:product_title}: Product Title{product:product_price}: Product Price{product:product_sku}: Product SKU{product:product_description}: Product Description{product:product_short_description}: Product Short Description{product:product_categories}: Product Categories{product:product_tags}: Product Tags{product:product_url}: Product URL
Example and Use Cases
Example 1: Basic Product Information
Suppose you want to display basic product information on a product detail page. You can add the following template tags to your content block:
<h2>{product:product_title}</h2>
<p>{product:product_description}</p>
<p>Price: {product:product_price}</p>
Output:
- Product Title: The title of the product.
- Product Description: The full description of the product.
- Price: The current price of the product.
Example 2: Highlighting Special Offers
You can use template tags to create a special offers section that dynamically updates based on the product being viewed:
<div class="special-offer">
    <h3>Special Offer on {product:product_title}</h3>
    <p>Get this amazing product for only {product:product_price}!</p>
    <p>Available while stocks last.</p>
</div>
Output:
- Special Offer on [Product Title]: A header highlighting the product.
- Price Information: The current price of the product.