You can display product quantity as a dropdown on shop and category pages using the Quantity Dropdown WooCommerce plugin.
Installation
↑ Back to top- Download Product Quantity Dropdown for WooCommerce and have your .zip file
- Log in to your WordPress admin panel, navigate the Plugins section, and click ‘Add New’ to upload and install the plugin.
- Upload the .zip file to proceed with the installation.
- Wait until the plugin installs. After successful installation, activate the plugin, and move on to configuration settings.
Configurations
↑ Back to topIn the admin section, go to WooCommerce > Settings >Product Quantity Dropdown configuration section and observe the following steps:
General Level Settings:
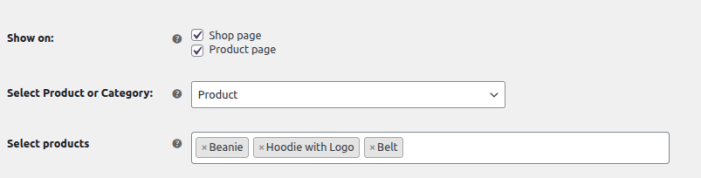
↑ Back to topShow on: Option to show on shop and Product Page
Choose specific products or categories you want to apply dropdown.
Set Minimum & Maximum Order Quantity
↑ Back to topDefine minimum and maximum order quantity to sell for your products.

Set Series and Intervals for Order Quantity
↑ Back to topSet series for order quantity like 2, 4, 6, 8…. to offer custom product quantity in each order. Use step interval option to set a difference in a specific quantity range. For example, you can display initial product quantity difference as 5 and then the routine series by entering 0:20,5. This will show 1, 6, 11, 16, 21, 22, 23, 24, etc.

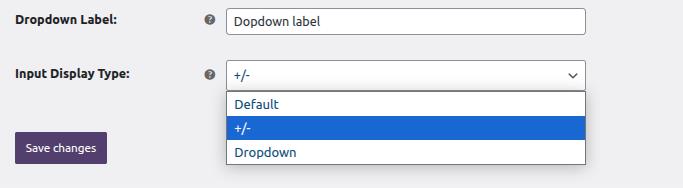
Set Dropdown Label & Select Input Type
↑ Back to topYou can set the label for dropdown that will be displayed on fronted.
Choose the layout for product quantity input either dropdown or incremental.
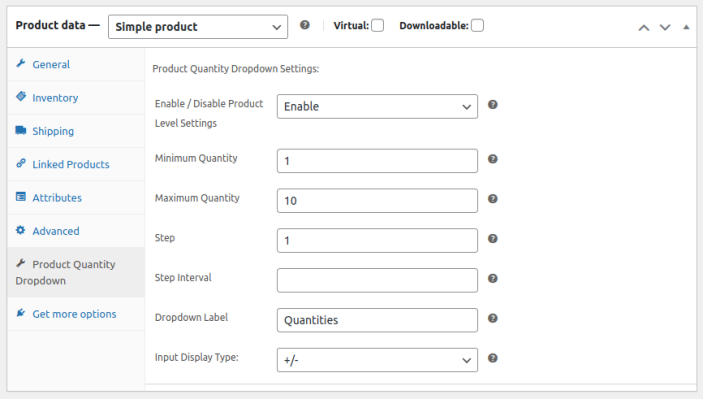
Product Level Settings:
↑ Back to topfor product level settings go to the Products tab in WordPress dashboard and edit any product here after that scroll down and click on a Product Quantity dropdown tab in product data section and apply settings for edited product, Same options as general level.