NOTE
This product is no longer available on WooCommerce.com. This document has been left available for existing users, but will no longer be updated.
Streamline your eCommerce operations with Shopee Integration for WooCommerce, a powerful tool that makes selling on one of Southeast Asia’s largest online platforms a breeze. This solution enables you to sell your products on Shopee effortlessly and facilitates the import of Shopee products directly into your WooCommerce store. With this seamless two-way connection, you can efficiently manage your product listings, pricing, inventory, and orders, all within the familiar WooCommerce dashboard.
With Shopee Integration for WooCommerce, you’ll experience:
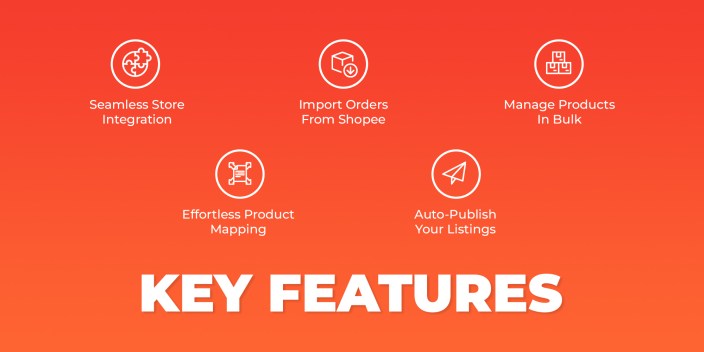
- Streamlined Selling: Say goodbye to manual product uploads and updates. List your products on Shopee easily, reaching millions of potential customers effortlessly.
- Effortless Synchronization: Keep your product information, pricing, inventory, and orders in perfect harmony between your WooCommerce store and Shopee. No more tedious data entry or inventory management.
- Time and Cost Savings: Automate repetitive tasks, freeing up your time to focus on what matters most – growing your business. Plus, it reduces the risk of costly errors in your listings.
- Expanded Reach: Tap into the vast customer base of Shopee and boost your sales. Expand your market presence and enjoy increased brand visibility.
- User-Friendly Interface: Our user-friendly interface ensures that even beginners can navigate the integration effortlessly, making your eCommerce journey enjoyable and efficient.
How to get started with your Shopee seller account?
↑ Back to topTo kickstart your journey as a Shopee seller, follow these simple steps:
- Visit Shopee Marketplace:
- Start by visiting Shopee’s official marketplace by clicking the link: https://shopee.com/
- Clicking this link will redirect you to the Shopee platform.
- Choose Your Target Market: Shopee operates in seven vibrant Southeast Asian countries. Take a moment to decide which market aligns with your selling goals.
You get to sell in:
- Indonesia
- Taiwan
- Vietnam
- Thailand
- The Philippines
- Malaysia
- Singapore

Initiate the Sign-Up Process: Once you’ve selected your desired country, look for the “Signup” tab. It’s conveniently located at the upper right-hand corner of the page, as shown in the screenshot below:
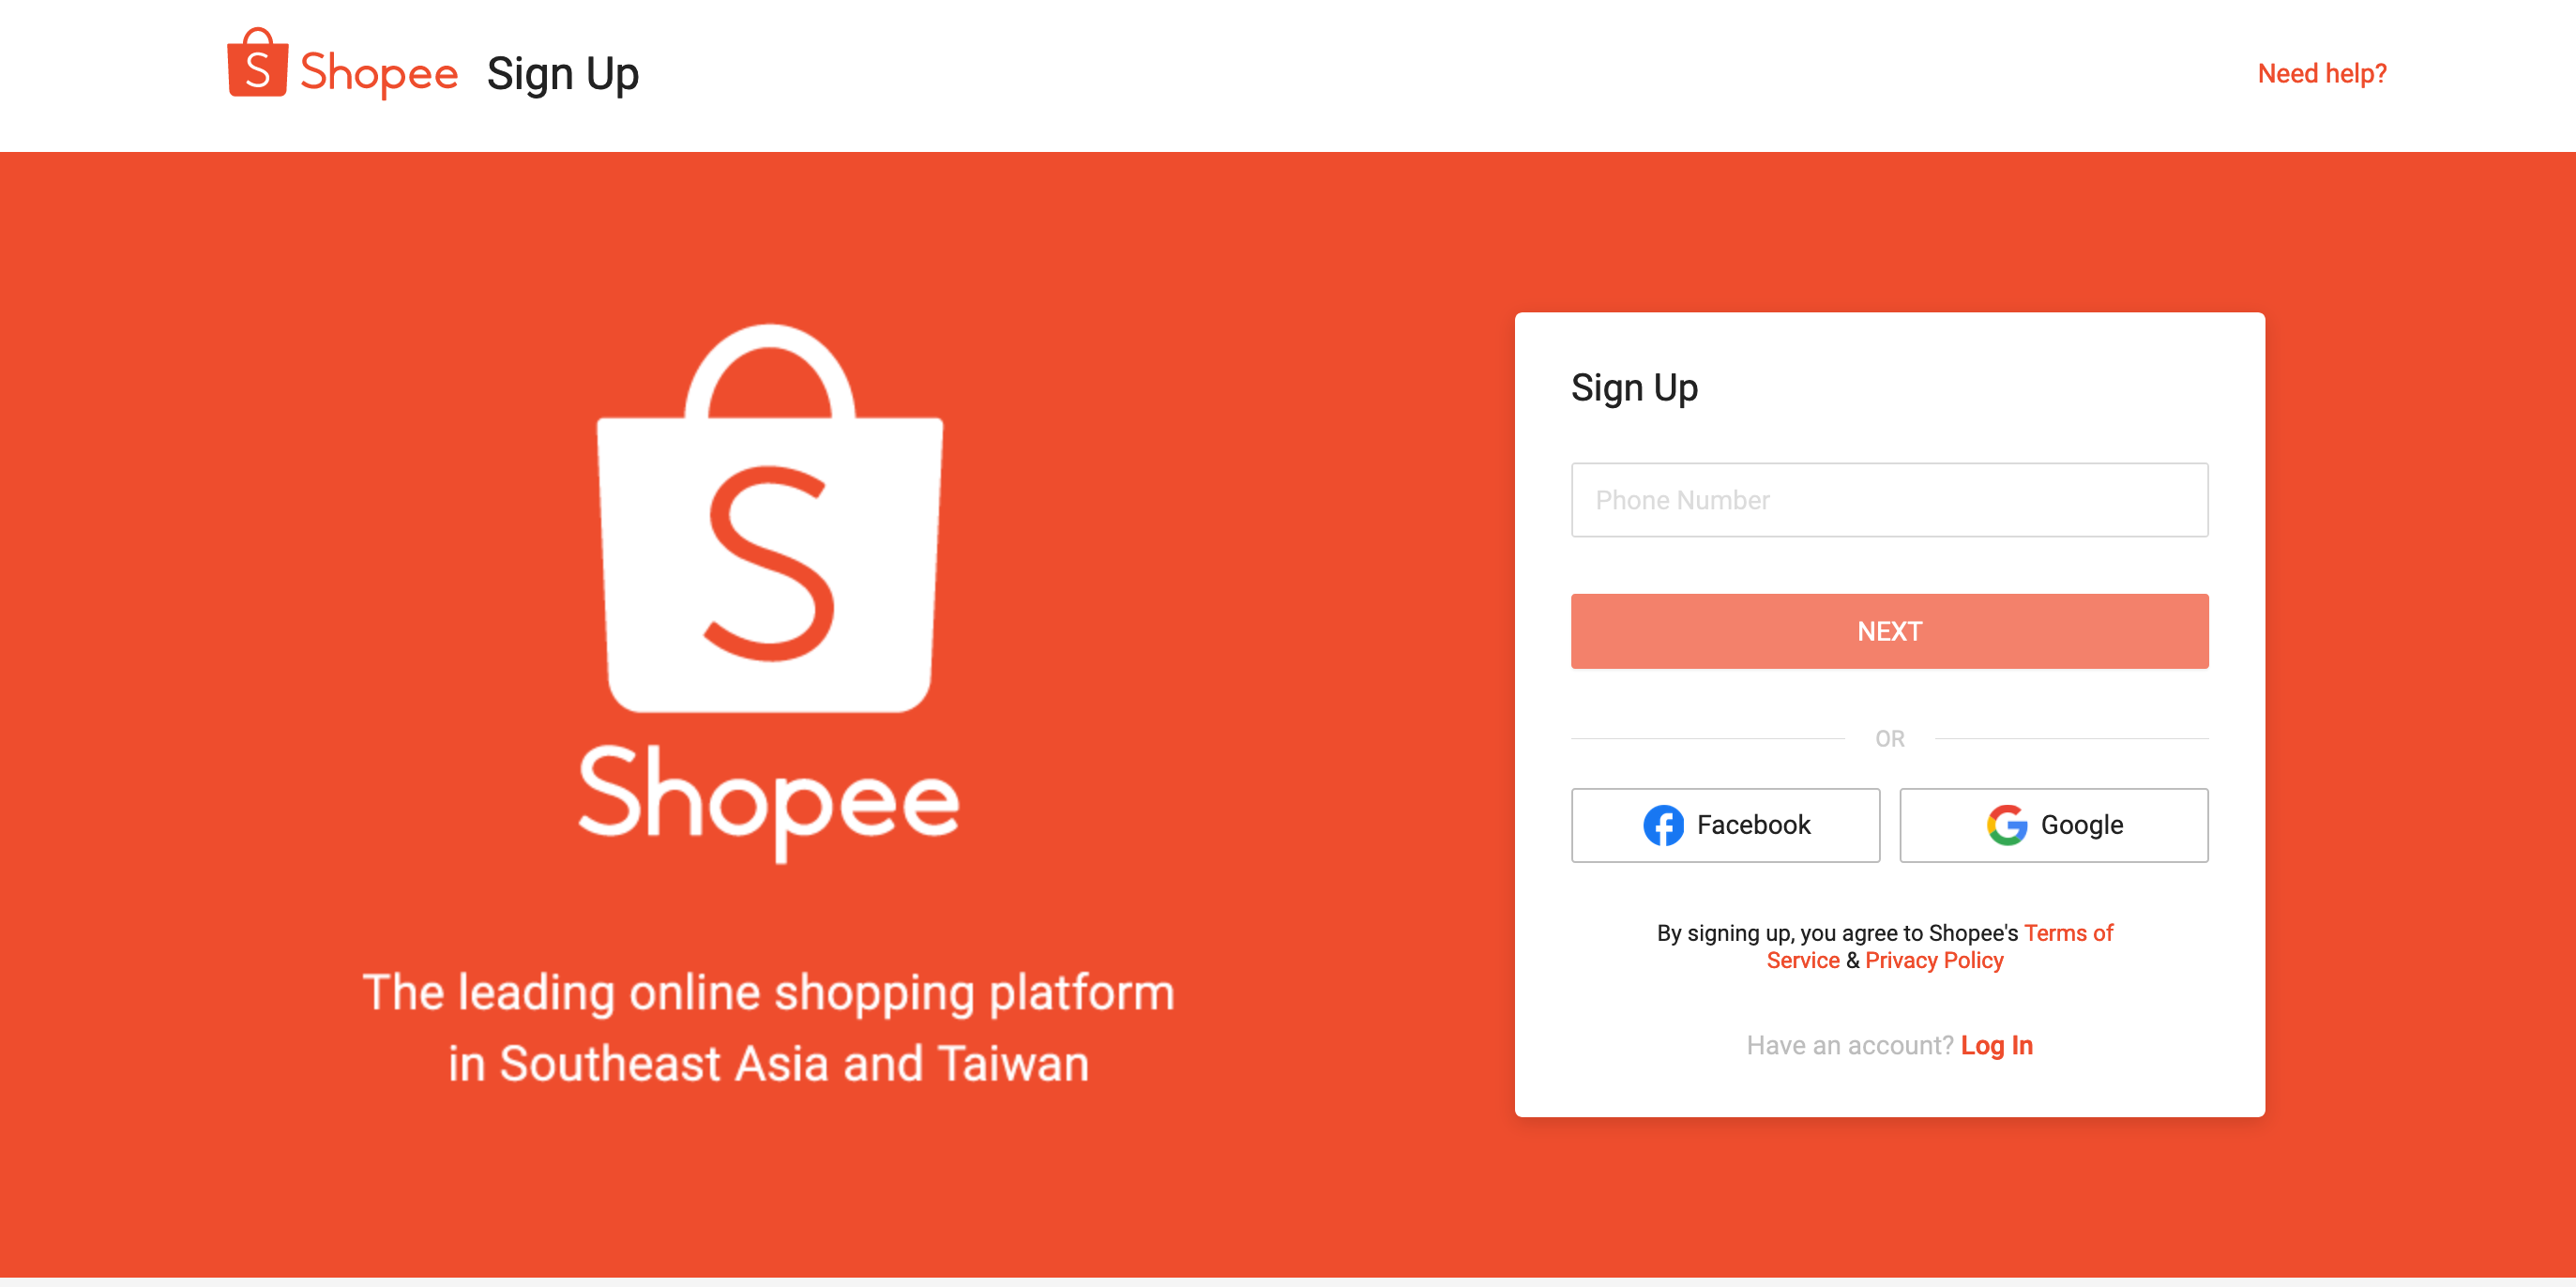
The registration form will appear, prompting you to enter the necessary details, as displayed in the image below:
After completing all the required information, click the “Sign Up” button.
Alternatively, you can log in using your Gmail account or connect through Facebook for added convenience.
Get your Shopee store ID
↑ Back to topTo obtain your Shopee Store ID, follow these steps:
- Open your web browser and search for “Shopee Seller.”
- Click on the following domain link, tailored to your chosen region: https://seller.shopee.com.my/account/signin
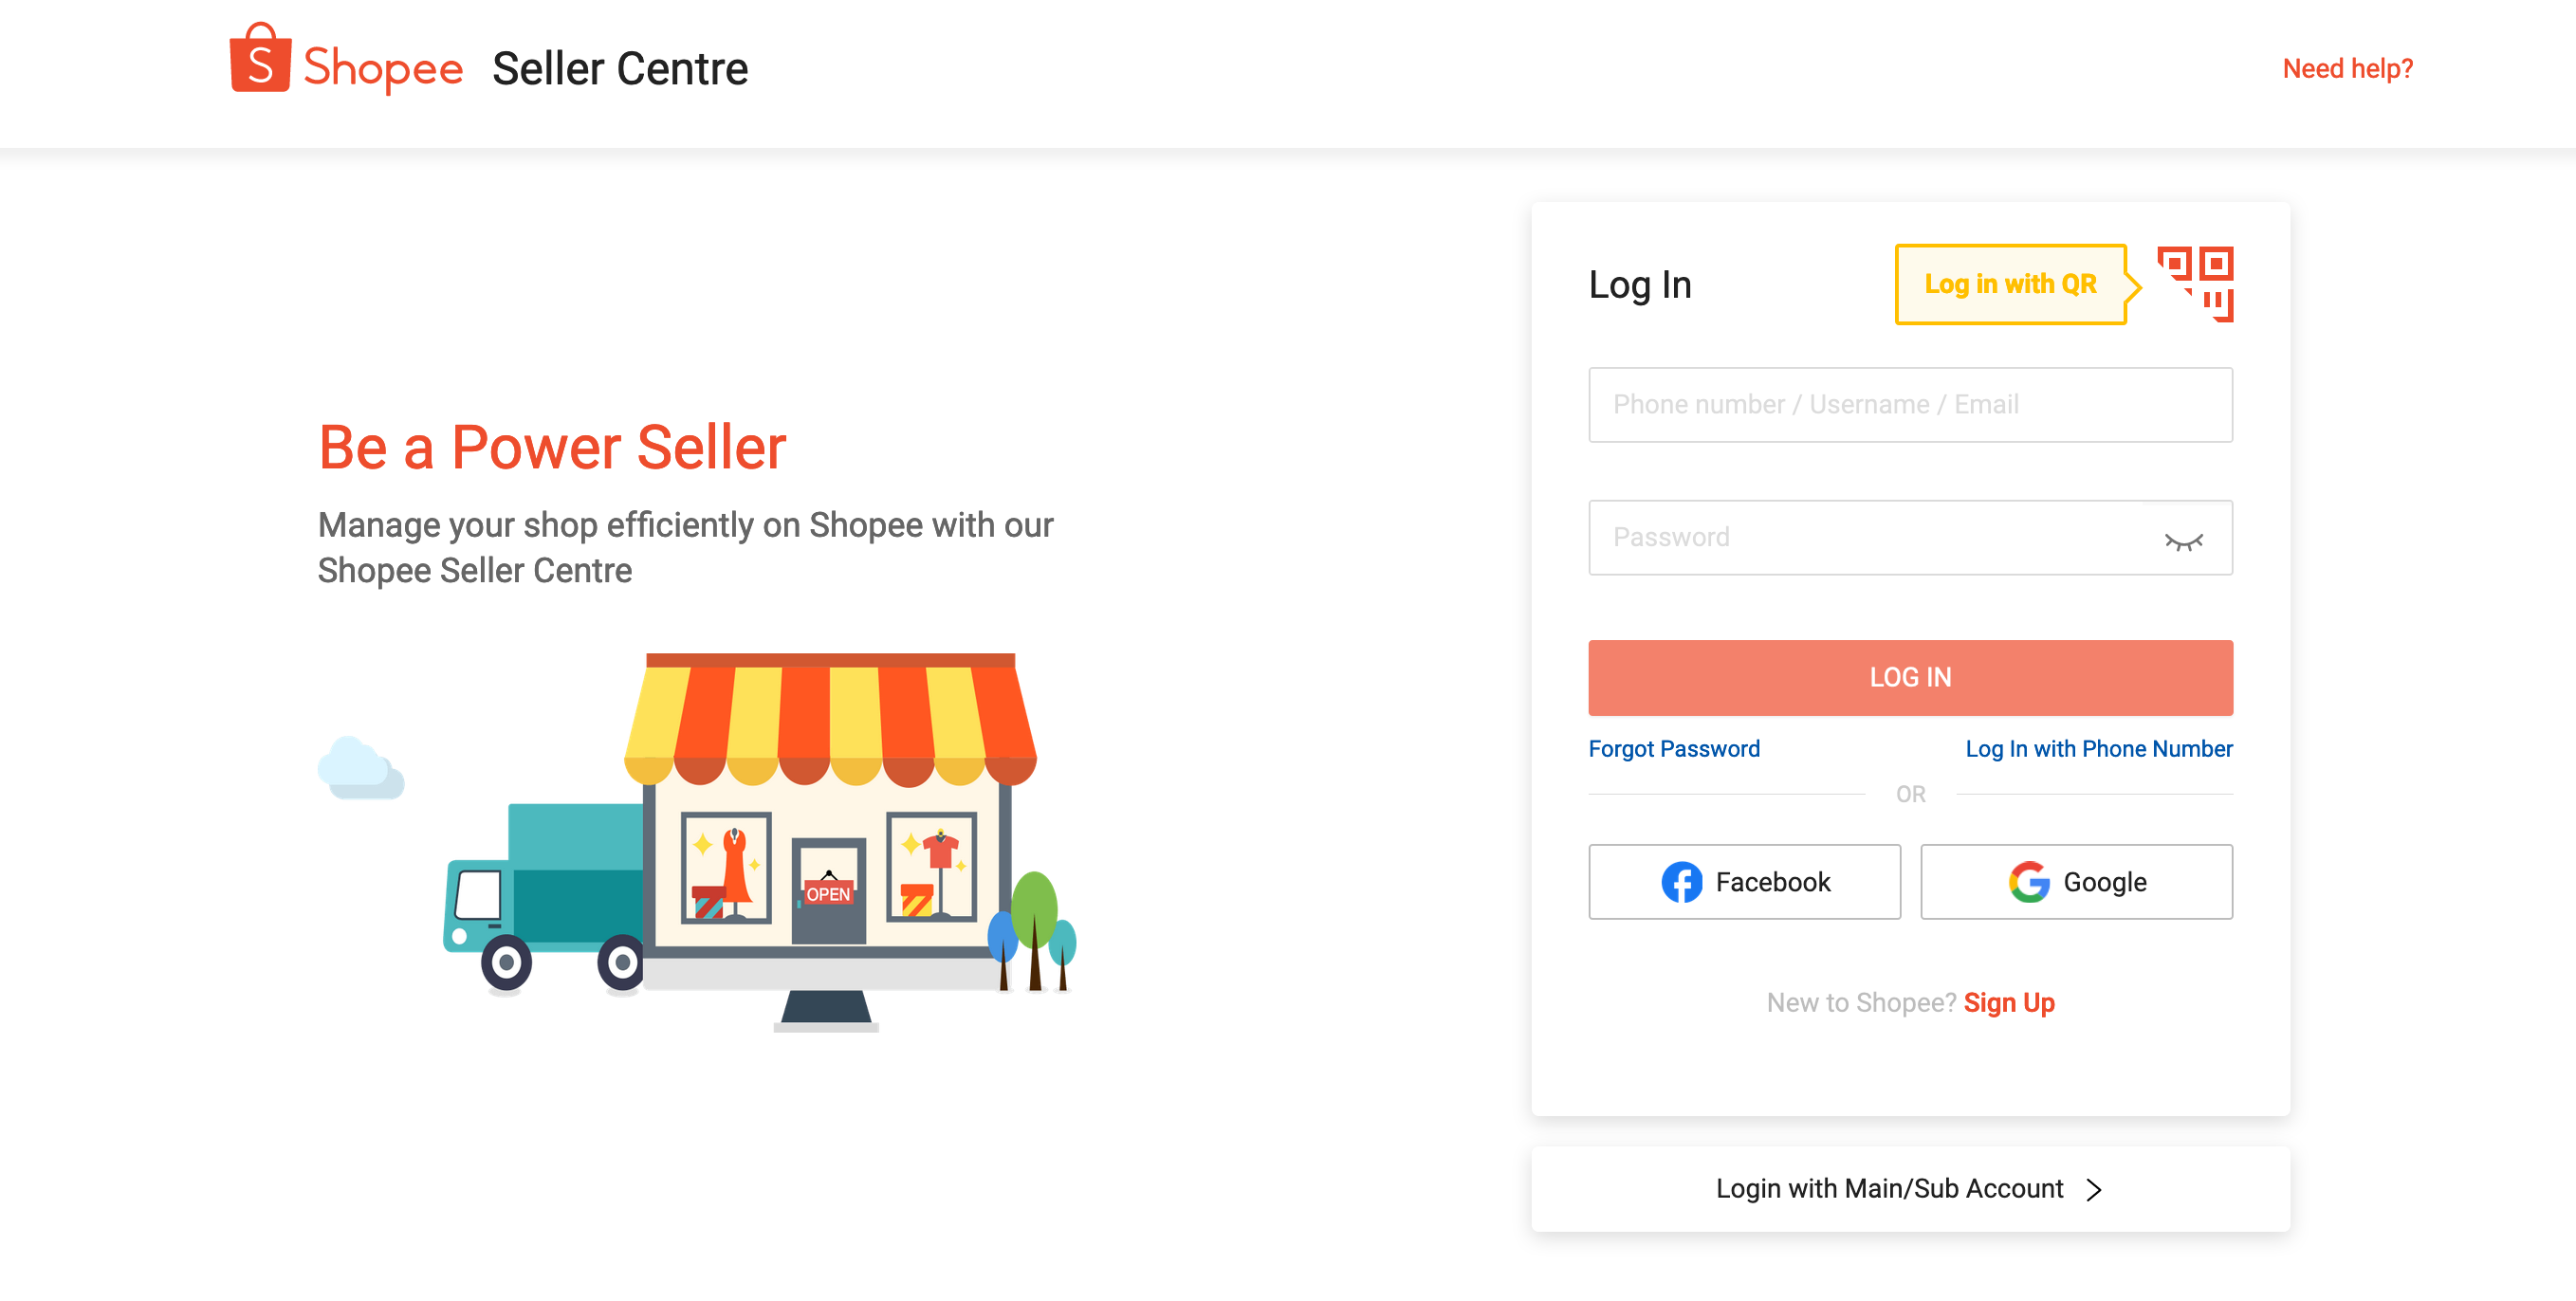
- Log in by providing your:
– Email Address
– Password
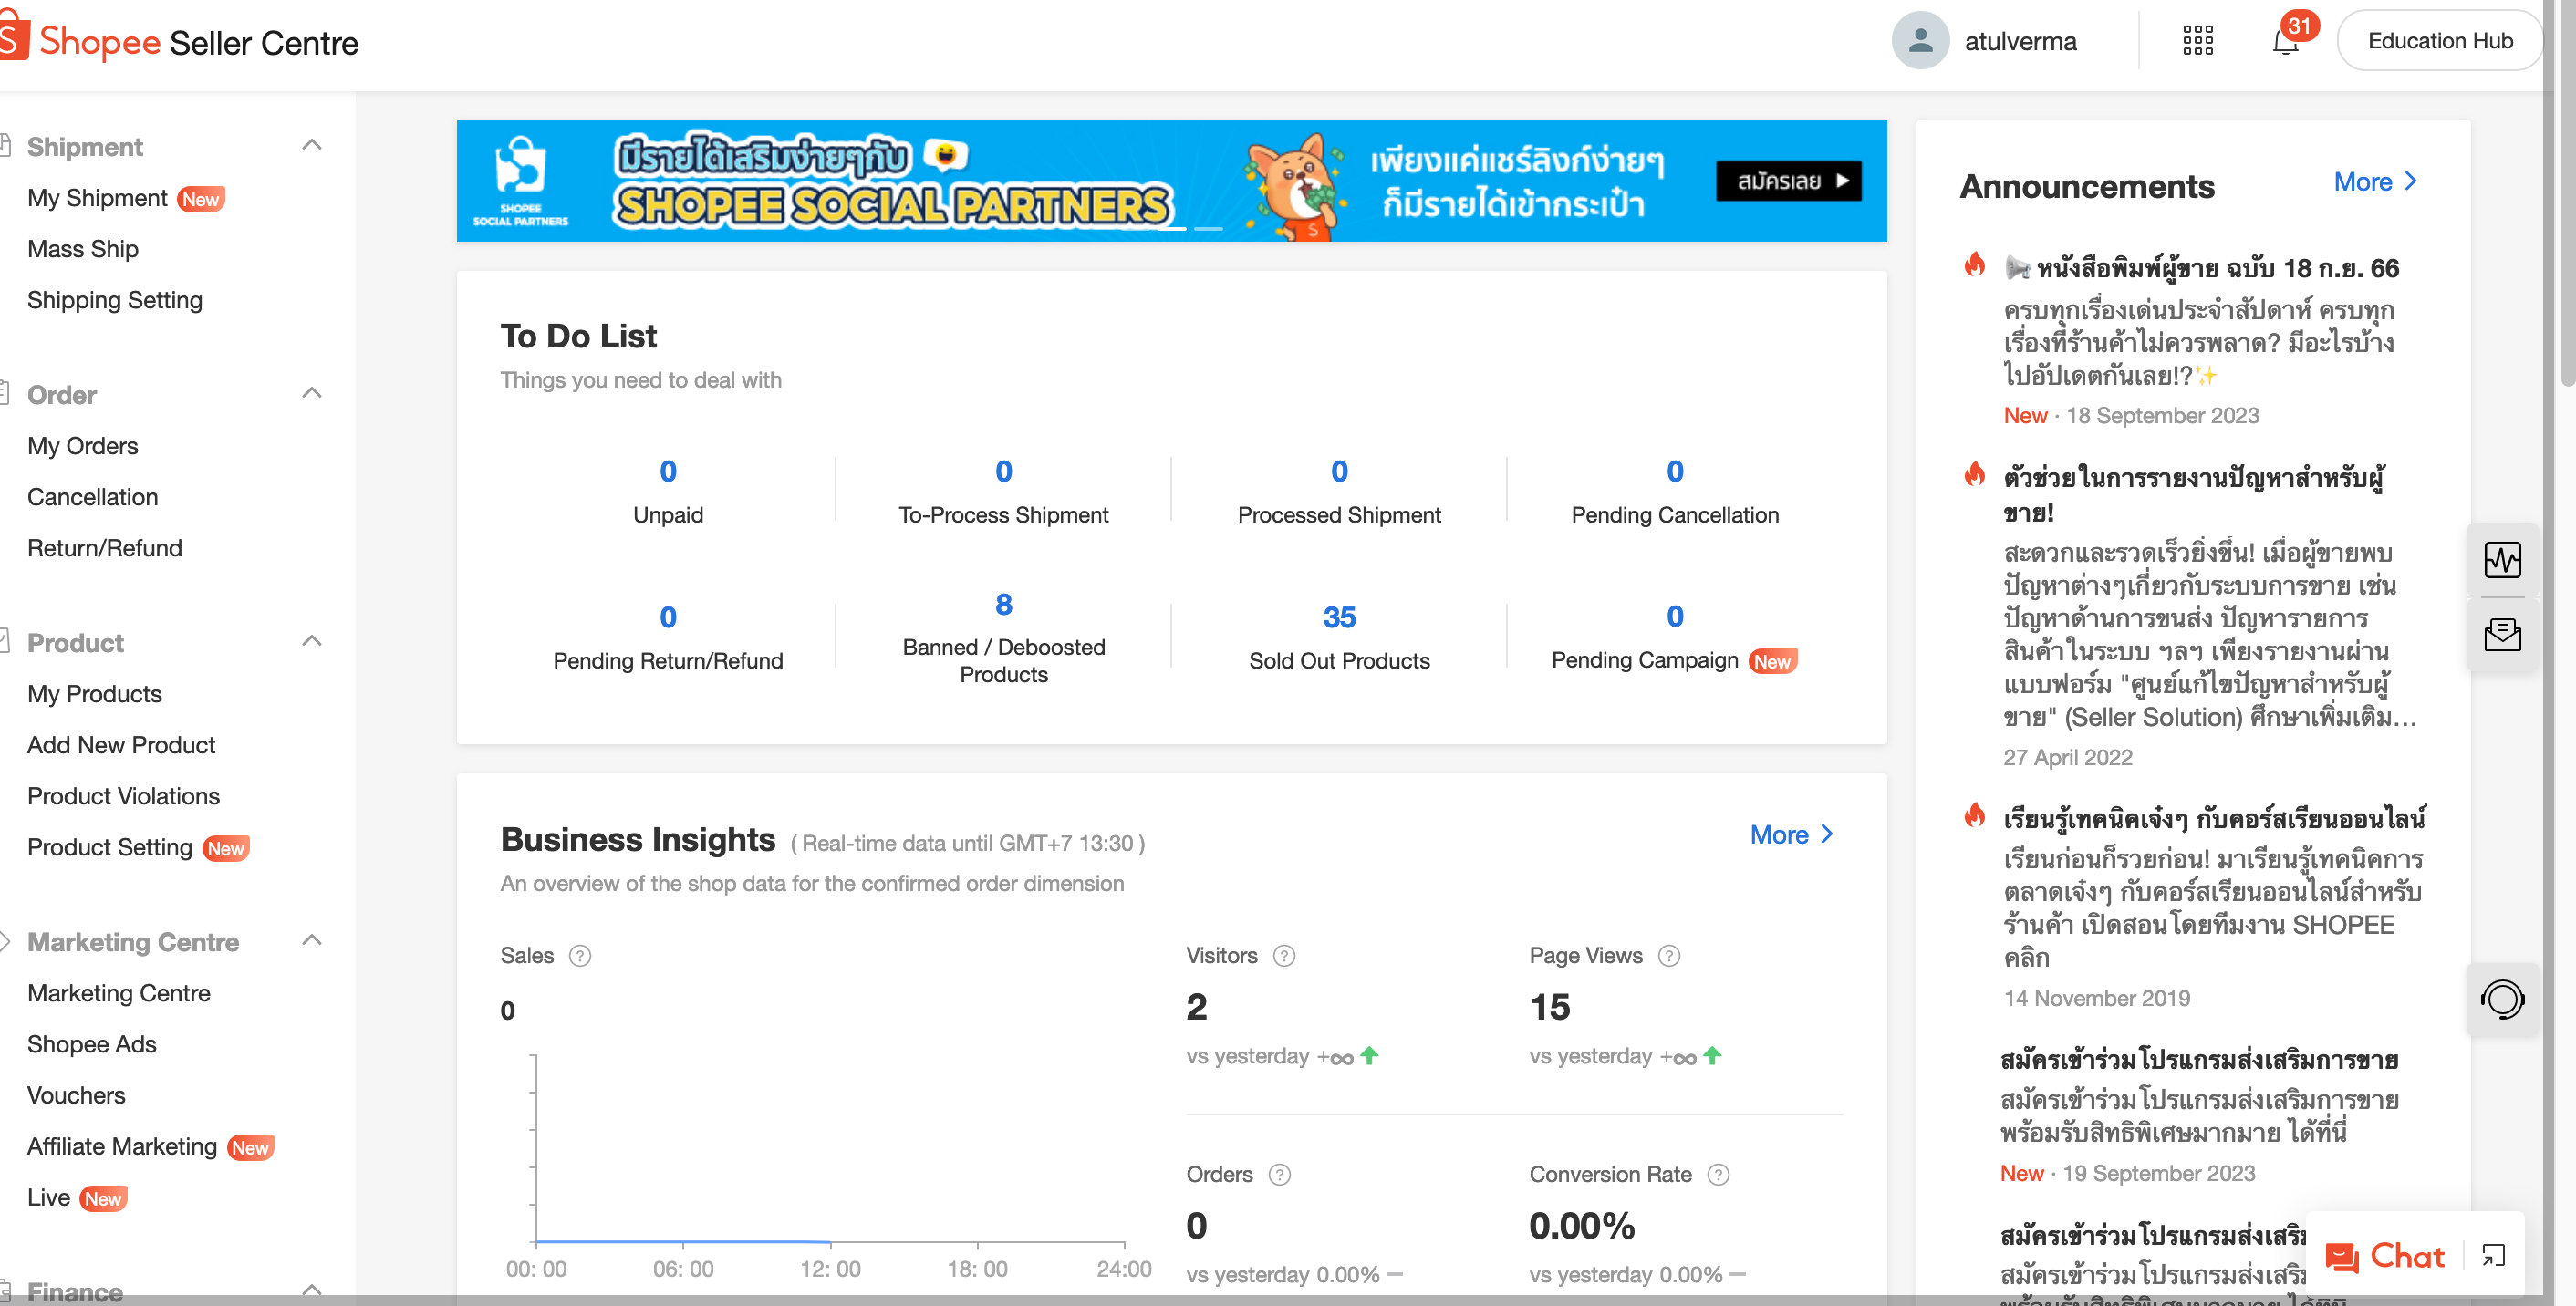
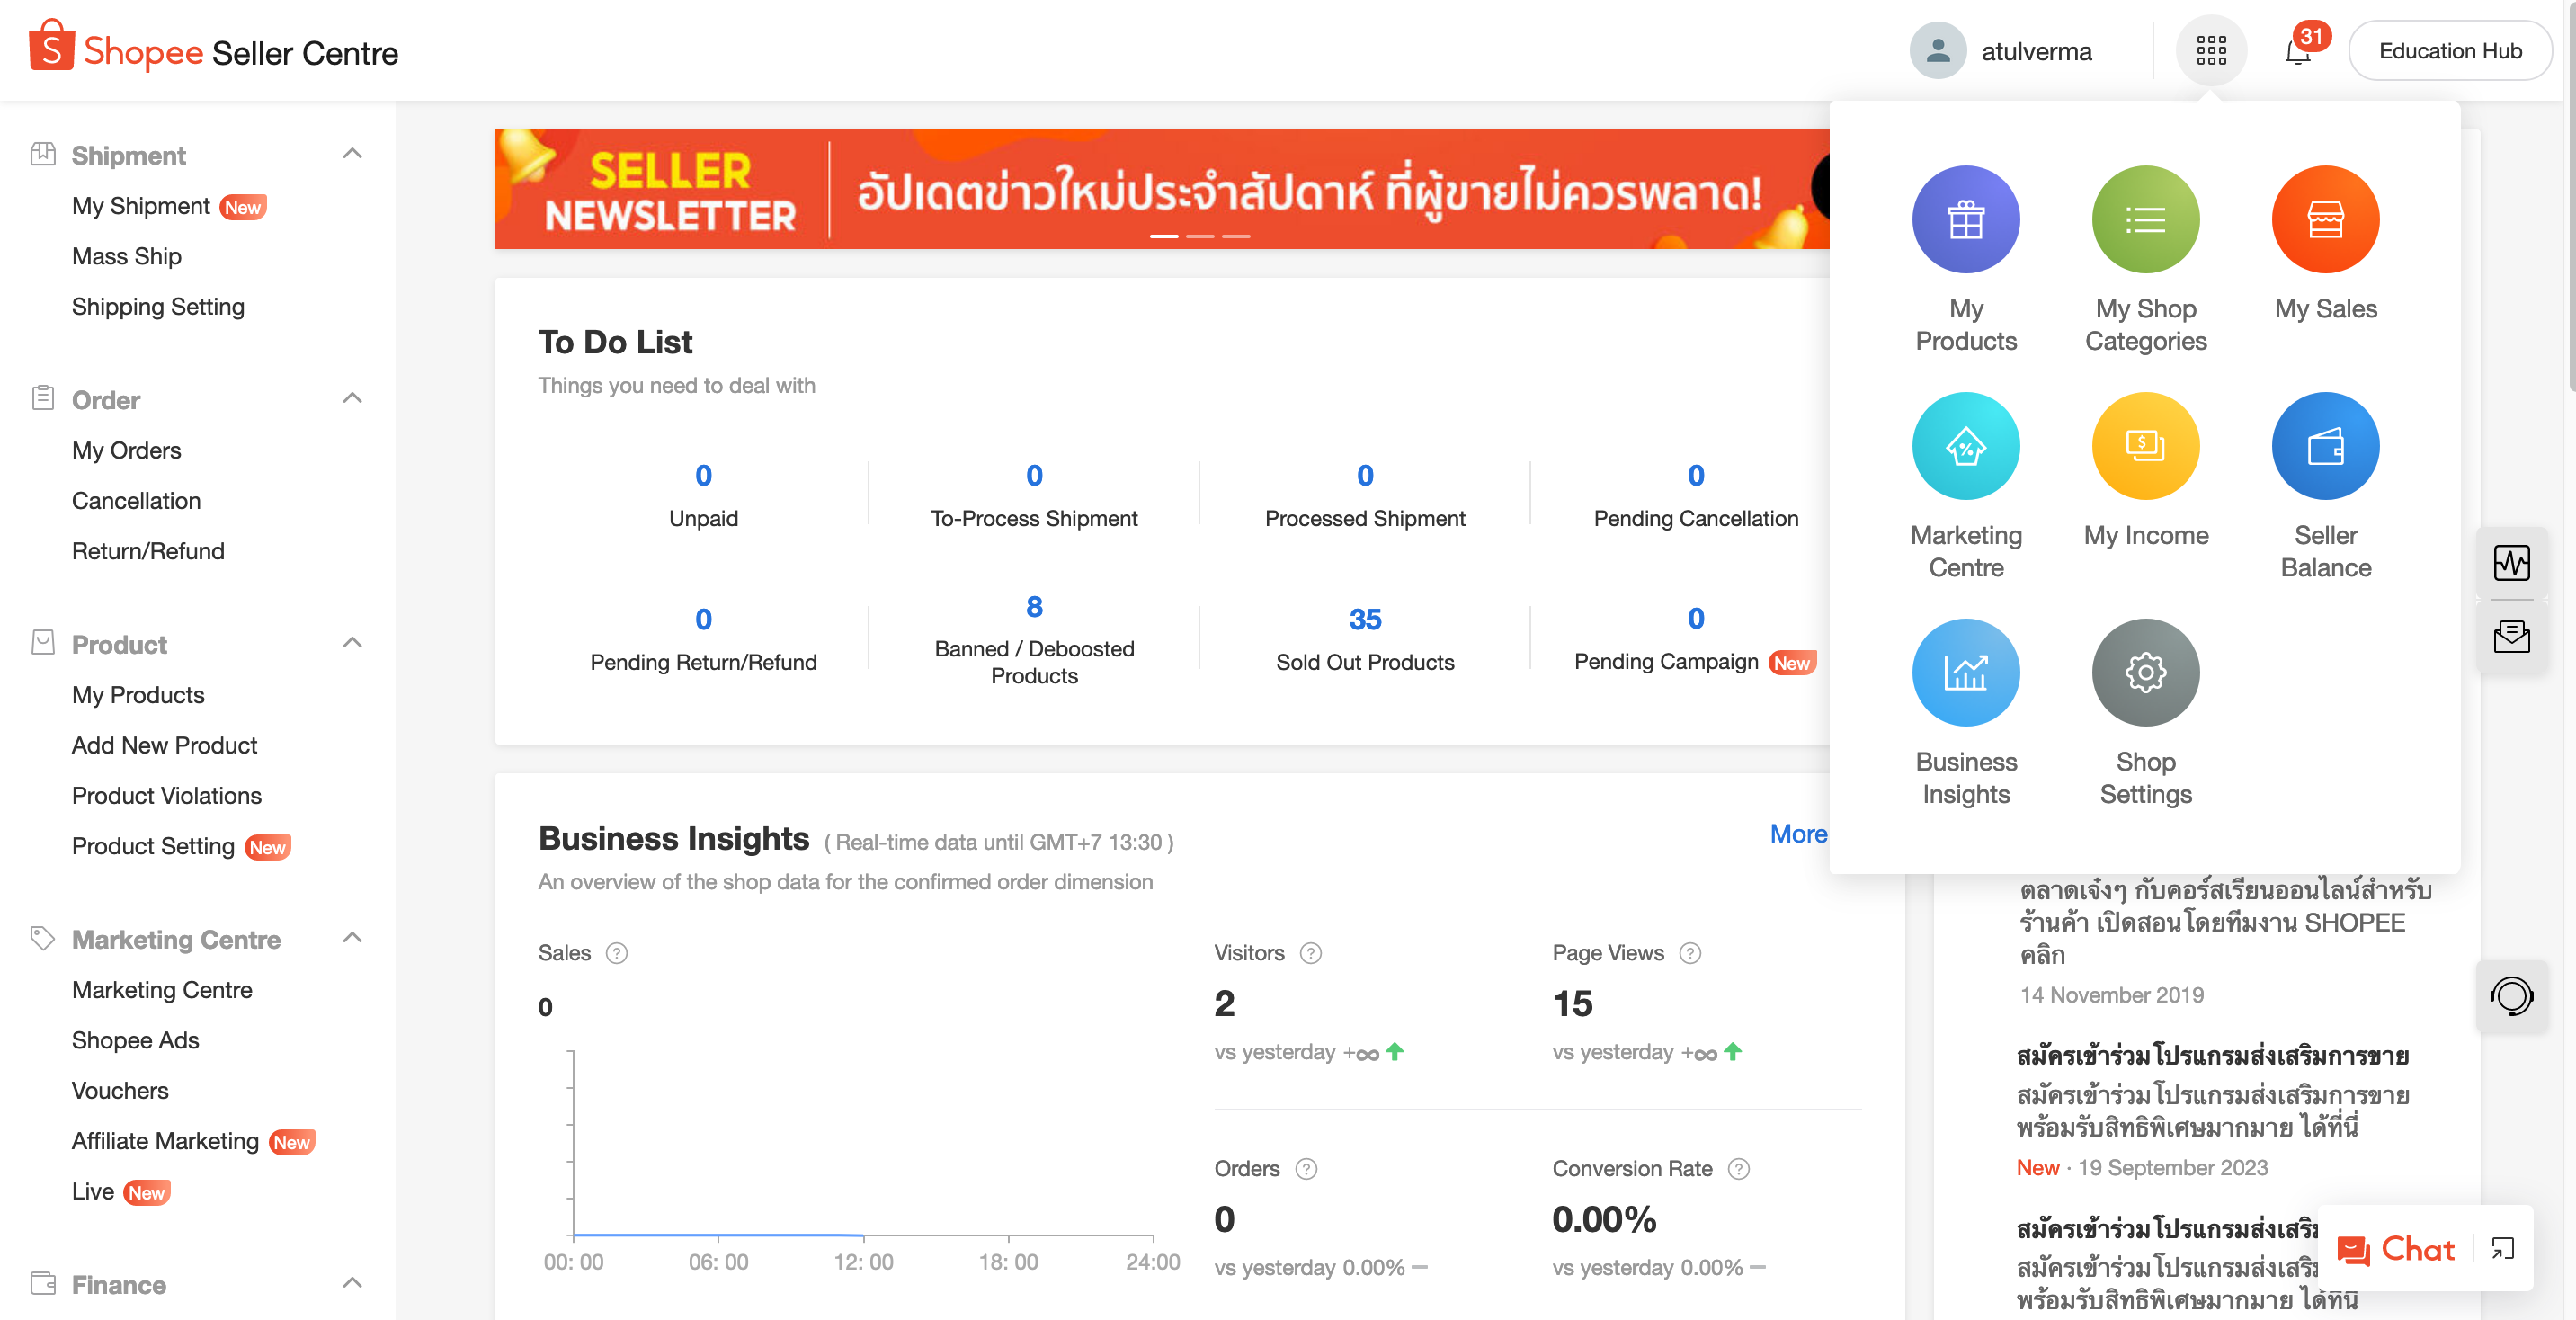
After successfully logging in, locate and click on “Shop Profile”. You’ll find it below your username, as illustrated in the image above.
You will be redirected to your Shopee profile page.
On this page, click the icon to the right of “View Shop,” highlighted within a red square box. This action will take you to a new page where you can find your Shopee Store ID within the URL, as displayed in the image screenshot:
WooCommerce Shopee Configuration
↑ Back to topTo integrate your WooCommerce store with your Shopee store, follow these steps:
- On your WooCommerce admin panel, locate the Marketplaces menu and click on Shopee.

- You will be redirected to the Shopee Account page.
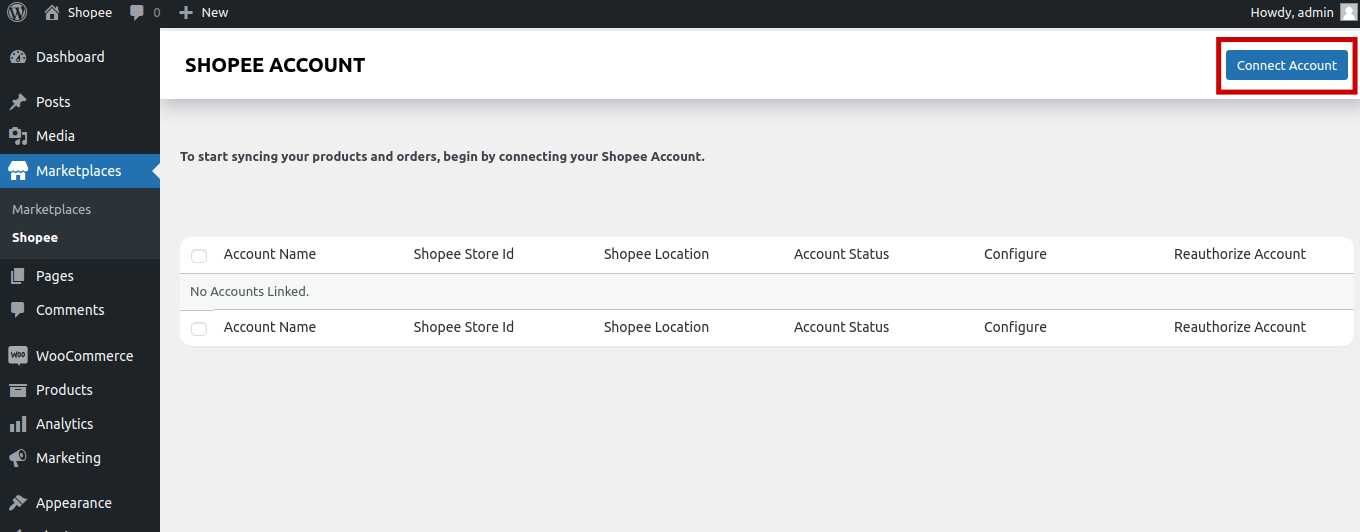
- Click on the ‘Connect Account’ button in the upper right corner of the page.
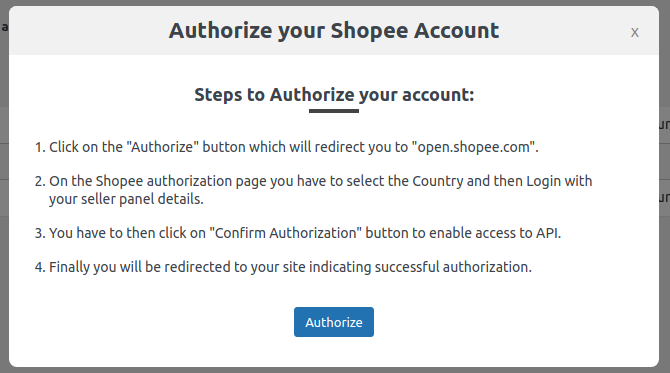
- A pop-up will appear for authorization. Click on Authorize to move ahead.
- Upon clicking, you will be redirected to the authorization page of Shopee. This page asks for some details, as shown below in the image:
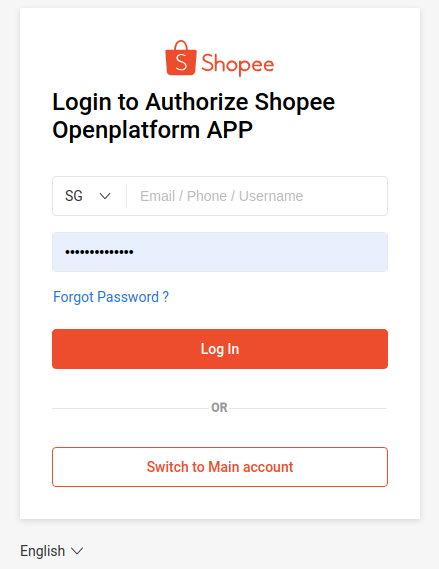
Provide the required details:
- Select the region.
- Enter the login details.
- Enter the password.
Once done, hit Log In and Confirm Authorization button on the next page.
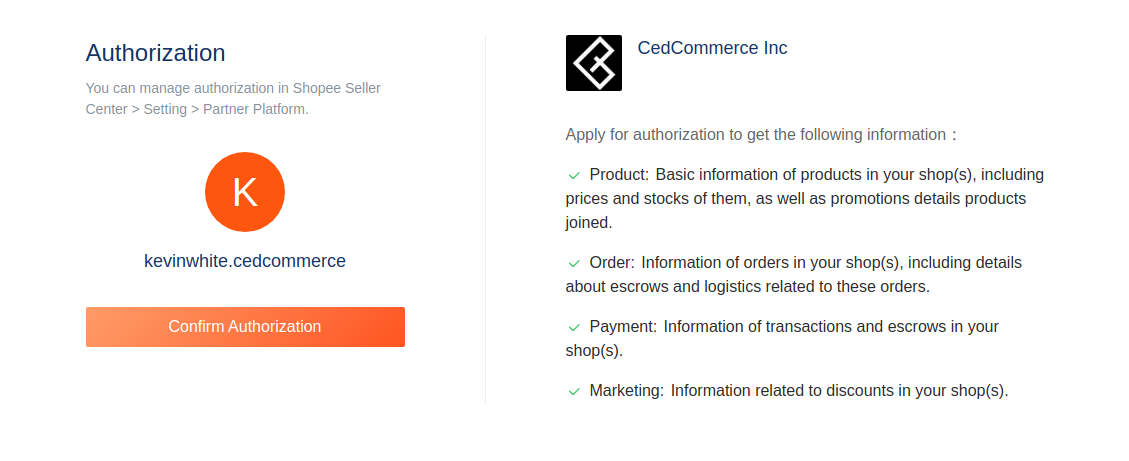
After the successful authorization, you will be redirected back to the app, as shown below:

Further, explore the solution and click on Configuration.
Global Settings
↑ Back to topGlobal settings synchronize your products and orders to your fingertips. Whether it’s automating your inventory or configuring schedulers, these settings handle all the essentials for a smooth and efficient Shopee selling experience.
Search Product Custom Fields and Attributes
↑ Back to top
You can use the Search product custom fields and attributes search box to pick the right metakey or the attribute holding your product data. The data is essential for the ‘Product Export Settings,’ which help list your WooCommerce products on Shopee.
To fine-tune the settings between your WooCommerce and Shopee store, follow these:
Product Export Setting
↑ Back to topRequired Attributes
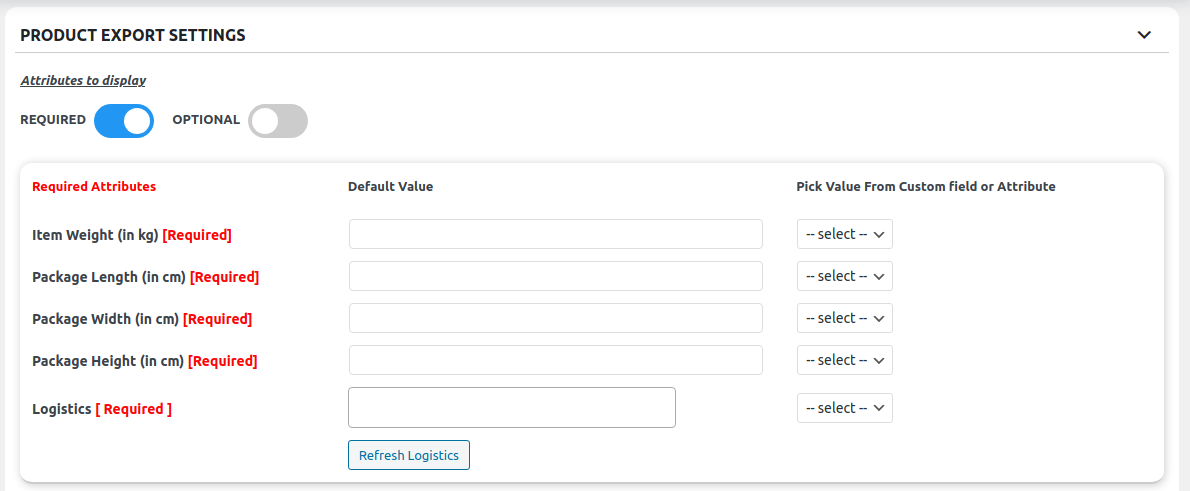
These product details are necessary to list your WooCommerce products on Shopee accurately. Set the default values for:
– Item Weight (in kg)
– Package Length (in cm)
– Package Width (in cm)
– Package Height (in cm)
– Logistics Required
You can manually put the values for each of the above attributes.
Additionally, you can pick a value from the custom field or attribute from the drop-down menu and select from stock, sale price, or price for your products.
Hit the Refresh logistic button to update the product export setting.
Optional Attributes
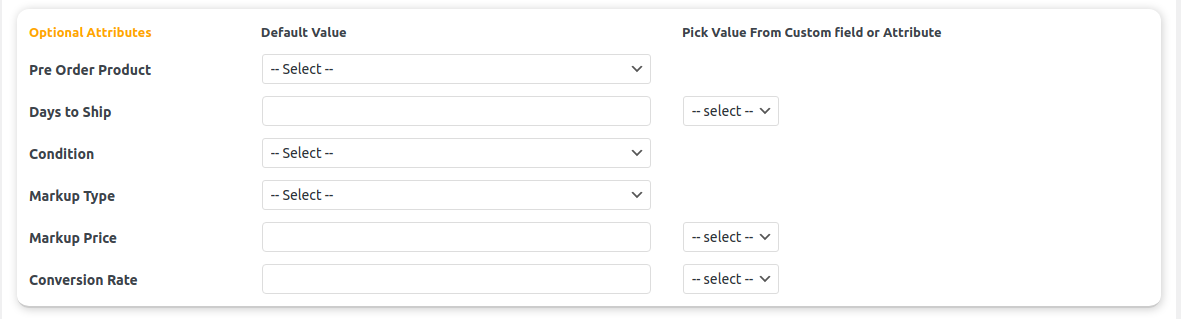
The optional attributes are additional product details and information you can provide for your WooCommerce products when listing them on the Shopee marketplace.
Unlike required attributes, which are necessary for a successful listing, optional attributes are not mandatory. These additional details can enhance your product listings, make them more informative, and attract more customers.
Set the values along with the value from the custom field or attribute (from the drop-down menu) for the following:
– Pre-order product: Select yes or no based on the order status of the product.
– Days to ship: Enter the number of days to ship the order. Select the appropriate value for the custom field drop-down.
– Condition: Select whether the product is ‘new’ or ‘used.’ Click on the drop-down and choose the condition of the product.
– Markup Type: The markup allows you to set profit margins and offer competitive pricing of your WooCommerce products on the Shoppe marketplace.
You can choose the markup type from the following:
- Fixed increase: With this option, you can add a specific fixed amount to your product’s base price. For example, if your product costs $10 and you set a fixed increase of $5, the listing price on Shopee will be $15.
- Fixed decrease: This option subtracts a fixed amount from your product’s base price. If your product costs $20 and you set a fixed decrease of $3, the listing price on Shopee will be $17.
- Percentage increase: With a percentage increase, you can add a certain percentage to your product’s base price. For instance, if your product costs $50 and you set a percentage increase of 10%, the listing price on Shopee will be $55
- Percentage decrease: This option lets you reduce your product’s base price by a specific percentage. If your product is priced at $30 and you set a percentage decrease of 15%, the listing price on Shopee will be $25.50.
Choose the one that works best with your business objectives.
Markup Price: Based on the markup type you have opted for, provide value for the markup. Further, select an appropriate value from the custom field drop-down menu
Conversion Rate: With Shopee Integration for WooCommerce, you can price your products in various currencies, catering to a global audience. This feature allows you to adapt to different markets and enhance conversion rates by offering prices that resonate with customers in their preferred currency.
Order Import Settings
↑ Back to top
The order import setting lets you import orders from Shopee onto your WooCommerce store.
The default WooCommerce order status setting allows you to specify the order status within your WooCommerce store that should trigger the creation of corresponding orders on the Shopee marketplace.
By default, this setting is configured to “processing,” you can further change it from the following options:
– Pending Payments.
– Processing (default setting)
– On Hold
– Completed
– Canceled.
– Refund
– Failed
– Draft
This feature simplifies the order management process by ensuring that the orders (chosen from the list above) from your WooCommerce store are accurately and automatically reflected on the Shopee platform, reducing the risk of errors and improving efficiency in handling your eCommerce operations.
Schedulers
↑ Back to top
These schedulers enable you to automate essential operations, reducing manual efforts and ensuring data accuracy across your WooCommerce and Shopee stores.
Auto Import Products
Click on the check box to enable the scheduler to auto-import the products from Shopee to WooCommerce.
Scheduler
Click the check box to enable the scheduler events for importing products from Shopee.
Before moving on to the app’s next section, click the save settings button.
Category Mapping
↑ Back to topIn the category mapping section, you can establish a connection between the product types in your WooCommerce store and the corresponding categories on the Shopee marketplace. This step is essential to ensure that your products are accurately listed in the appropriate category on Shopee.
Simply select the matching Shopee product category from the provided list, as demonstrated in the screenshot below:
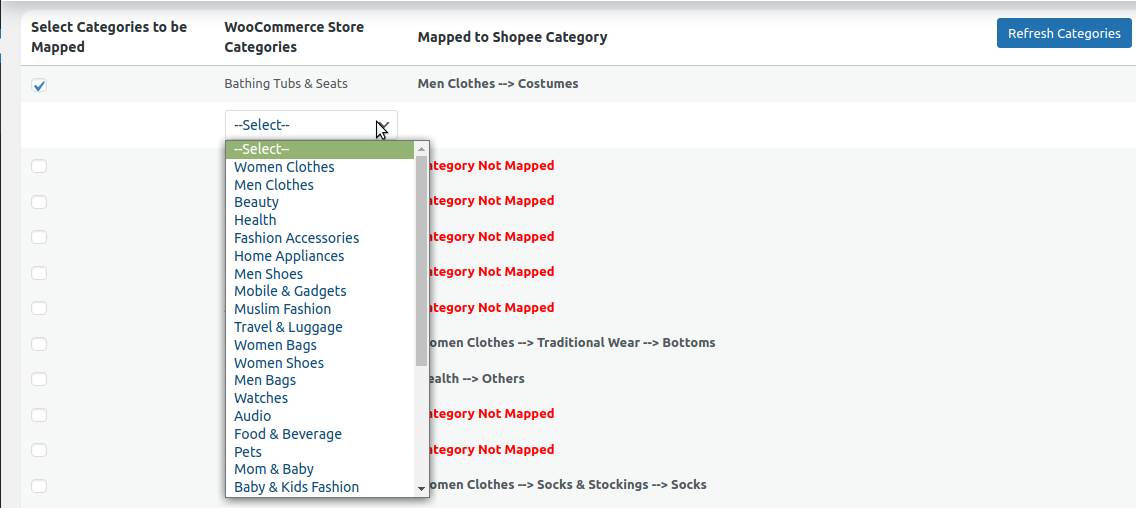
For example, you select the home and living as the WooCommerce store category for the bedsheet product.
Next, you will have to map it to the Shopee product category. Select ‘bedding,’ followed by ‘bedsheet, pillowcase & bolster cases’.
Keep on mapping the product till the last drop-down. You can take reference from the image below for mapping:
Map your products and hit the save button.
Profile
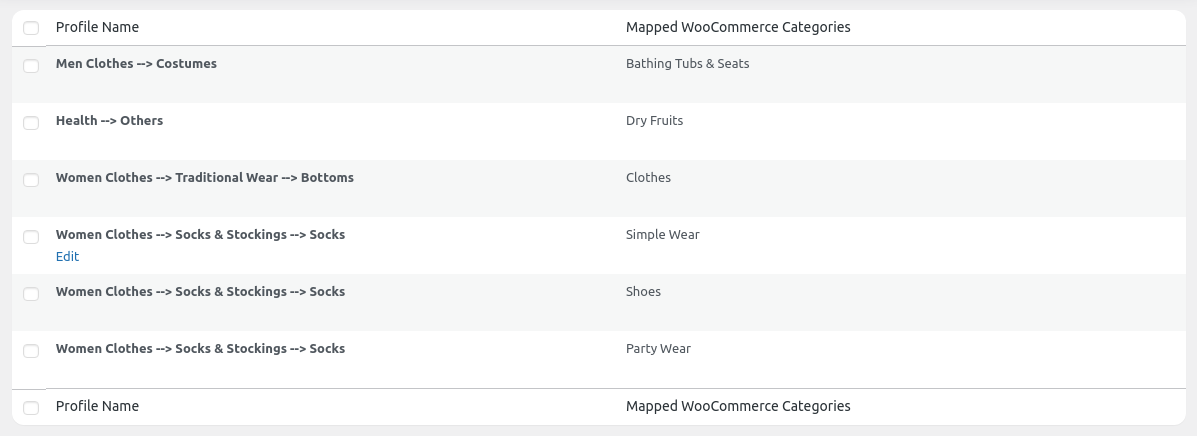
↑ Back to topUnder the profile section, the admin can create a new profile and map it to a group of products, streamlining the process of uploading profiles to Shopee.
This efficient approach eliminates the need to adjust common meta-keys for each product manually. Instead, the admin selects the product and its associated meta-keys when creating or editing a profile. These meta-keys are then applied uniformly to all products linked to the profile.
You can:
Edit an existing profile
↑ Back to topSelect ‘edit’ below your profile’s name to make edits.

This will take you to a page, as indicated in the screenshot:
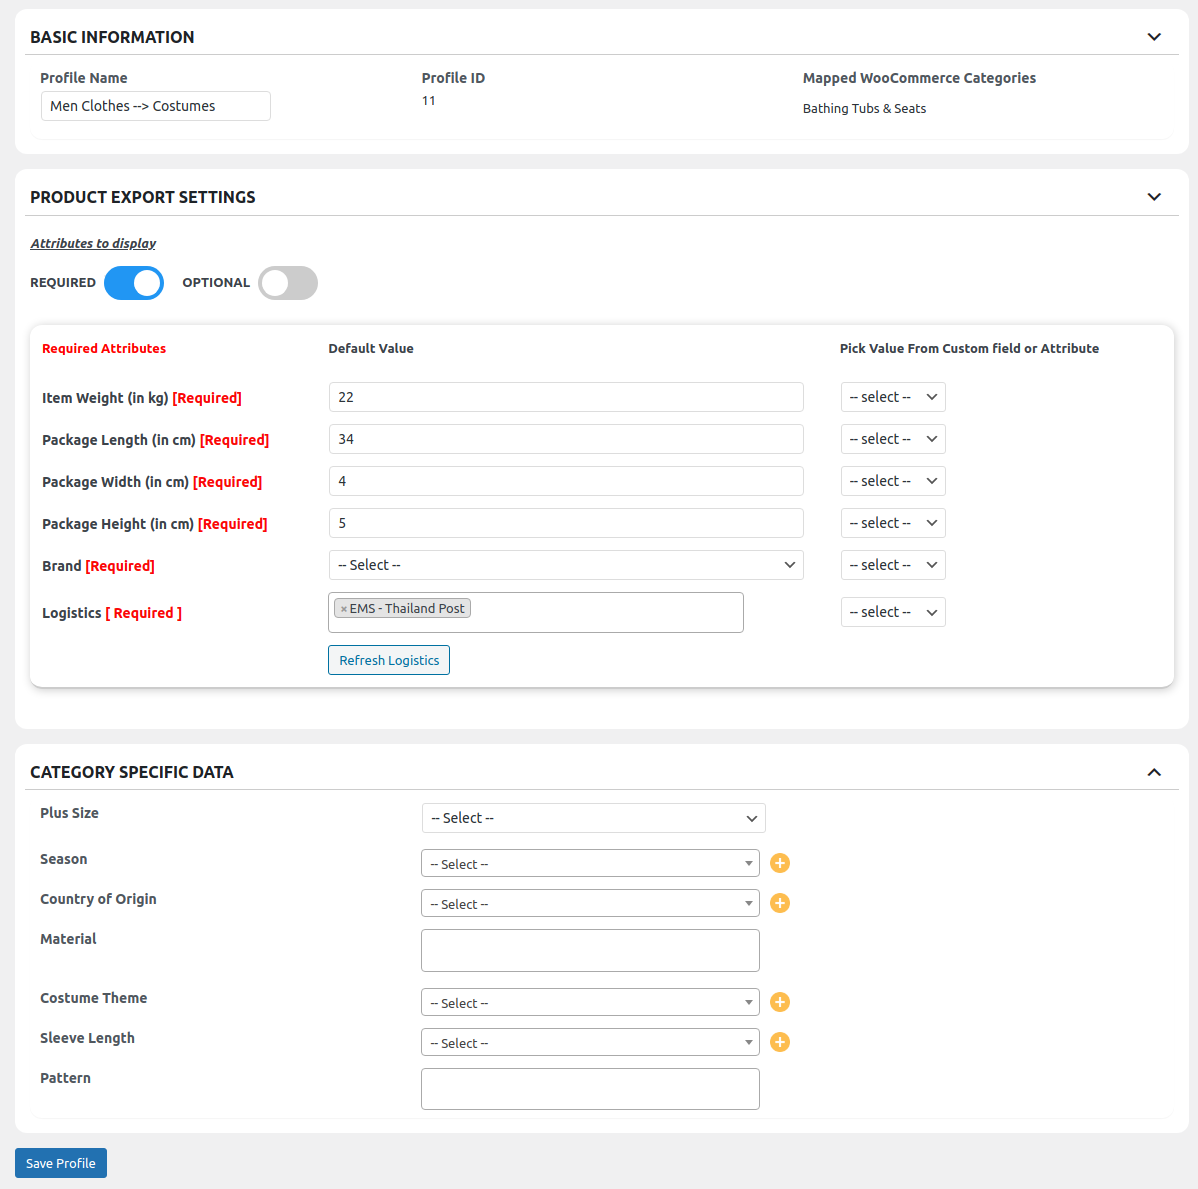
Once you have entered the details, click on the save profile button.
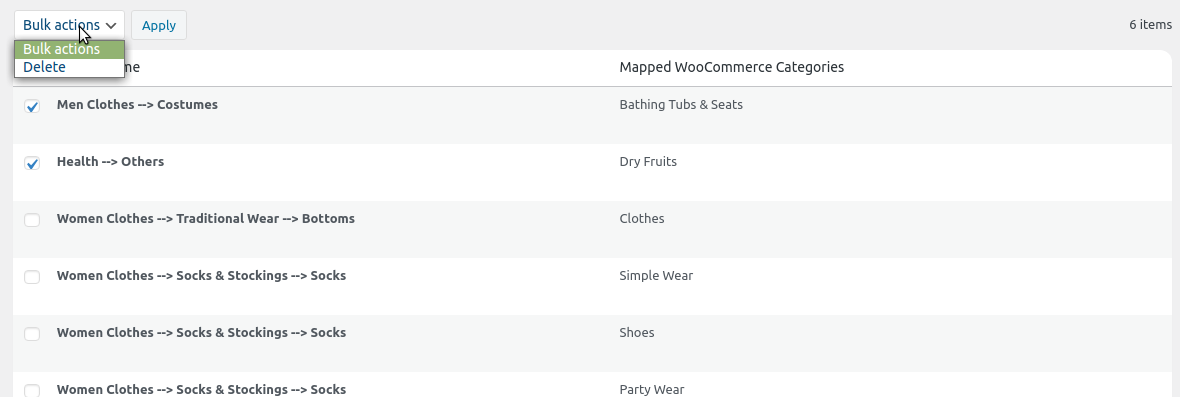
Delete profiles in bulk
↑ Back to topTo delete profiles, simply select the profiles and choose the delete option under the bulk action menu.
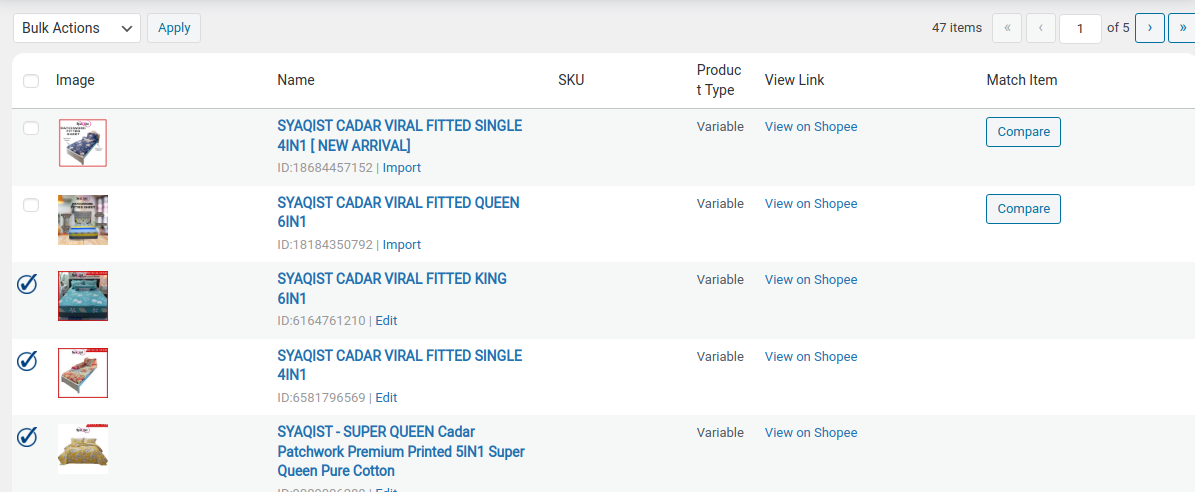
Product
↑ Back to topThe product section offers product management of your WooCommerce products on Shopee. With various operations, including product uploads/updates from WooCommerce to Shopee.
You can easily filter products by category, type, stock, and Shopee status. The ‘search product’ option also lets you locate products by name.
Here are the actionable features of the product section:
Filter Products
↑ Back to topYou can filter out your products with this feature based on:
- Filter products based on their Shopee status- ‘On Shopee’ or ‘Not on Shopee.’
Category of the products - Product Type: You can filter the simple or variable products.
- Stock status: Filter the product based on stock, i.e., in stock or out of stock.
After selecting from the drop-down menu, hit the filter button to get the products.
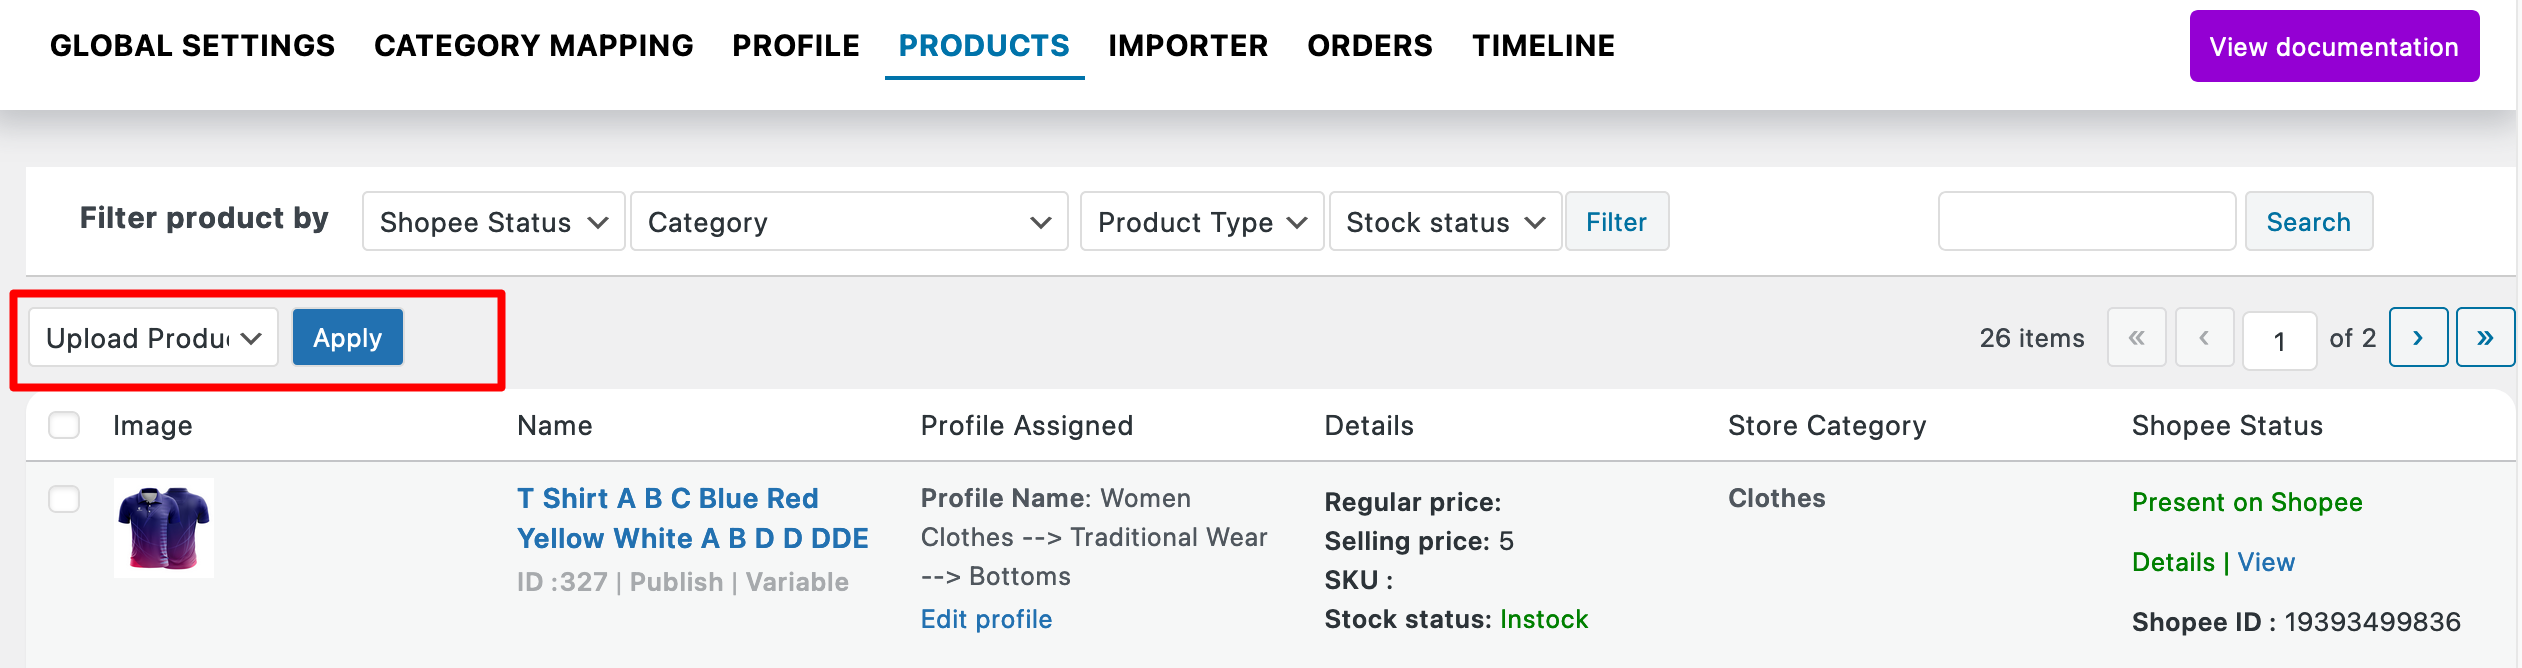
Bulk Actions
↑ Back to topThe bulk action feature lets you carry out the same operation on multiple products simultaneously or in bulk. The bulk action includes:
- Upload Products: To upload the products in bulk, simply check the boxes next to the products you want to upload. Then, go to the menu that says ‘Bulk Actions,’ choose ‘Upload Products,’ and click the Apply button.
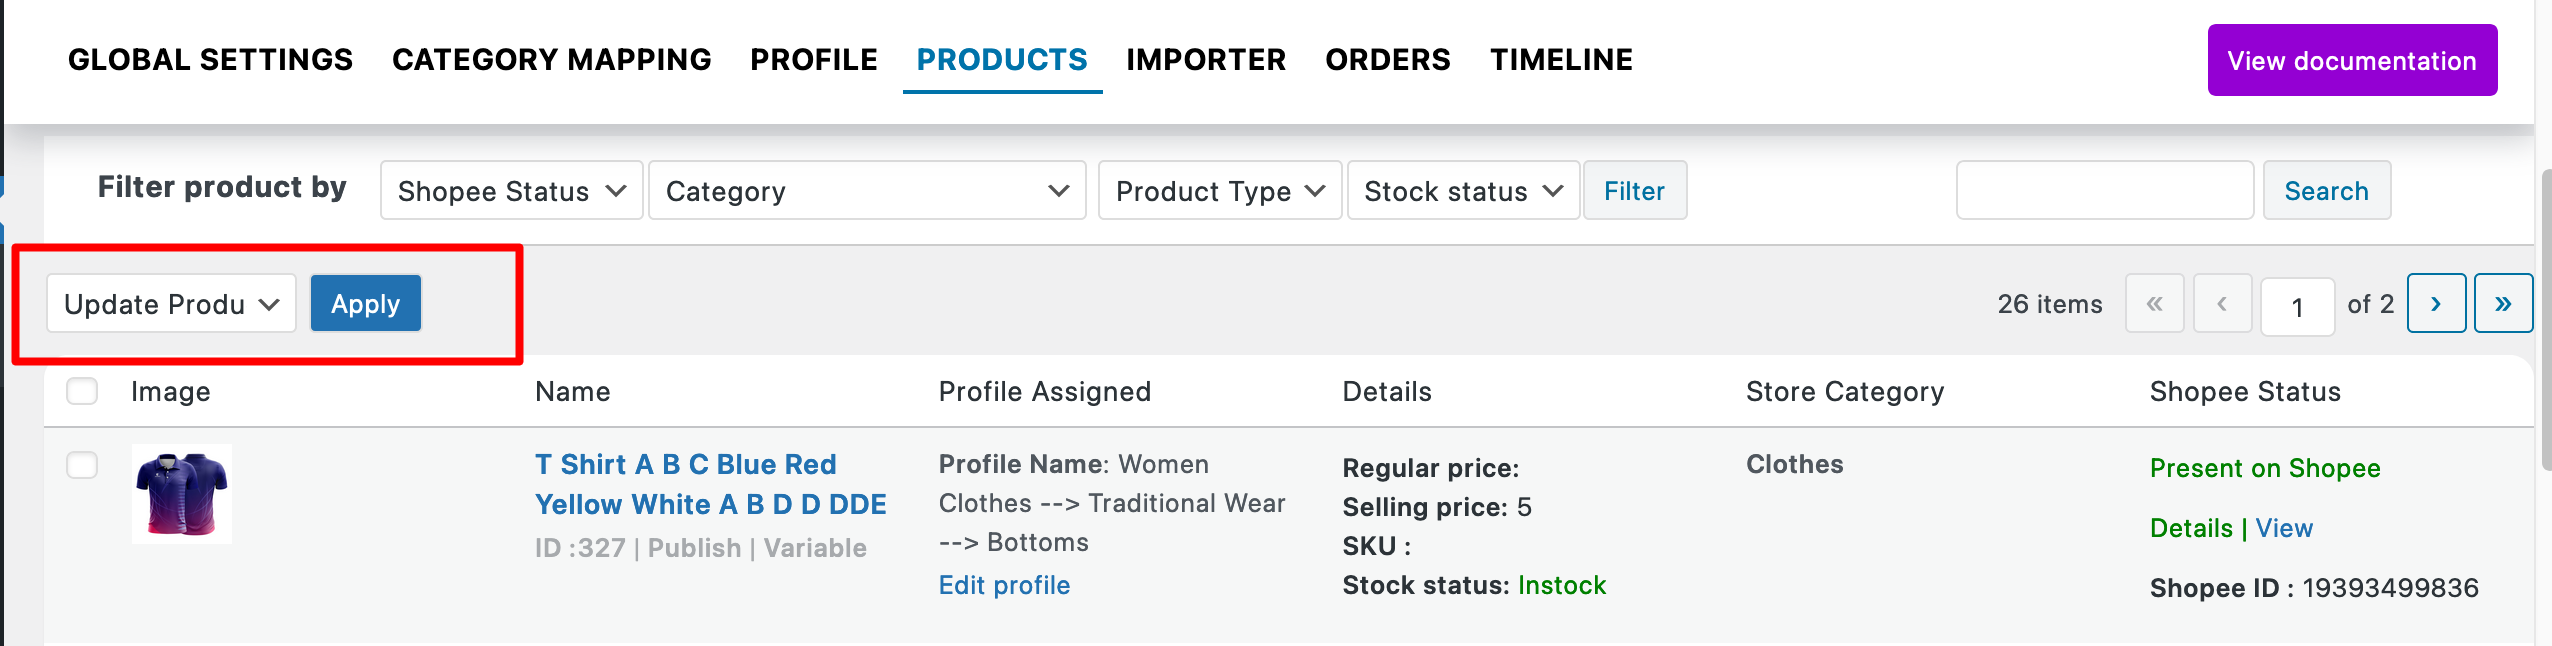
- Update Products: Select the products you want to update by clicking on the check boxes, clicking on ‘Update Products,’ and clicking Apply.
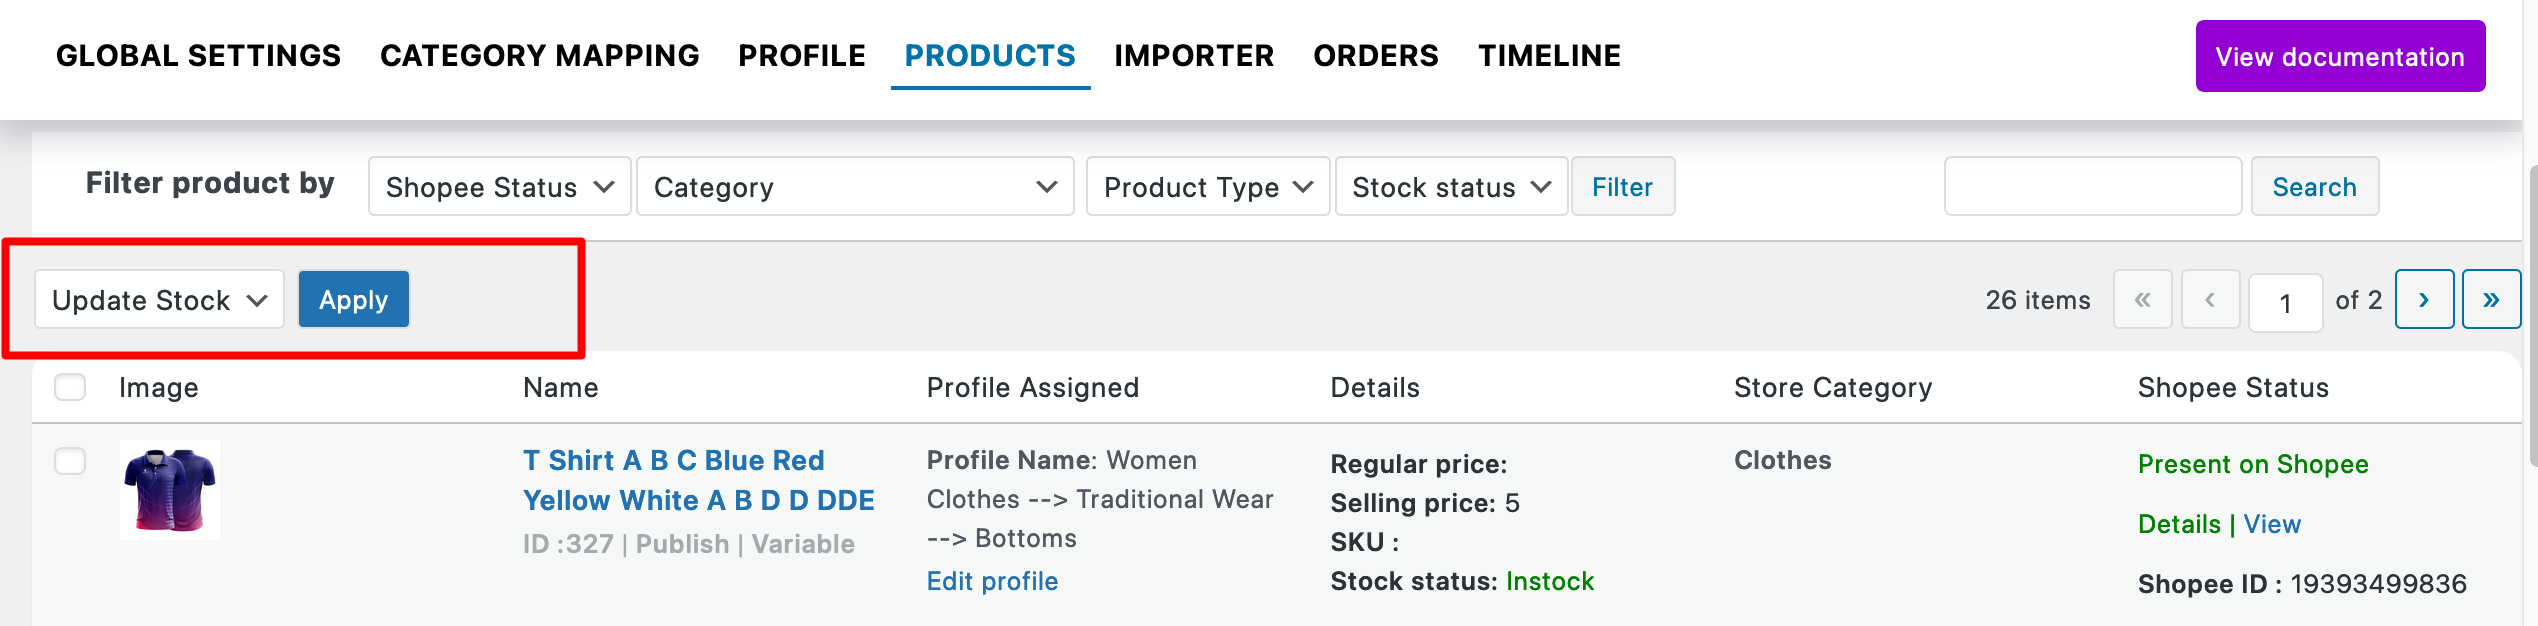
- Update Stock: In order to update stock in bulk, simply select the products you want to update on Shopee, hit the ‘Update Stock,’ and hit the Apply button.
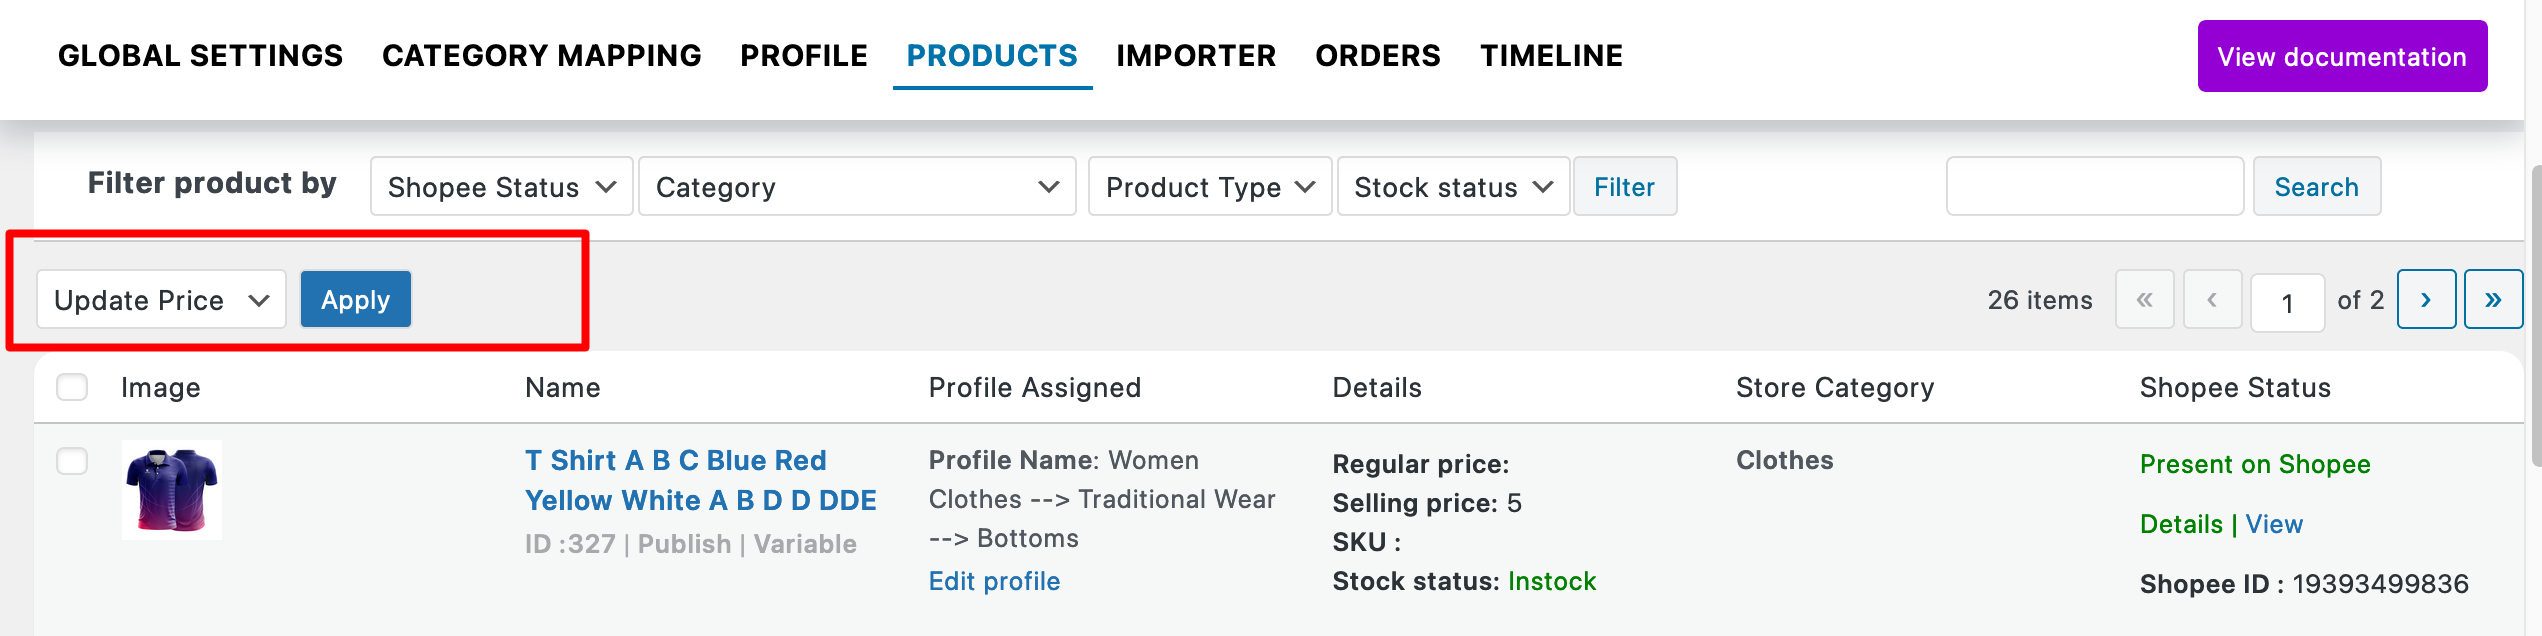
- Update Price: You can update the product price in bulk. Similar to the above actions, select the products you want to update the price for, click on ‘Update Price,’ and click on the Apply button.
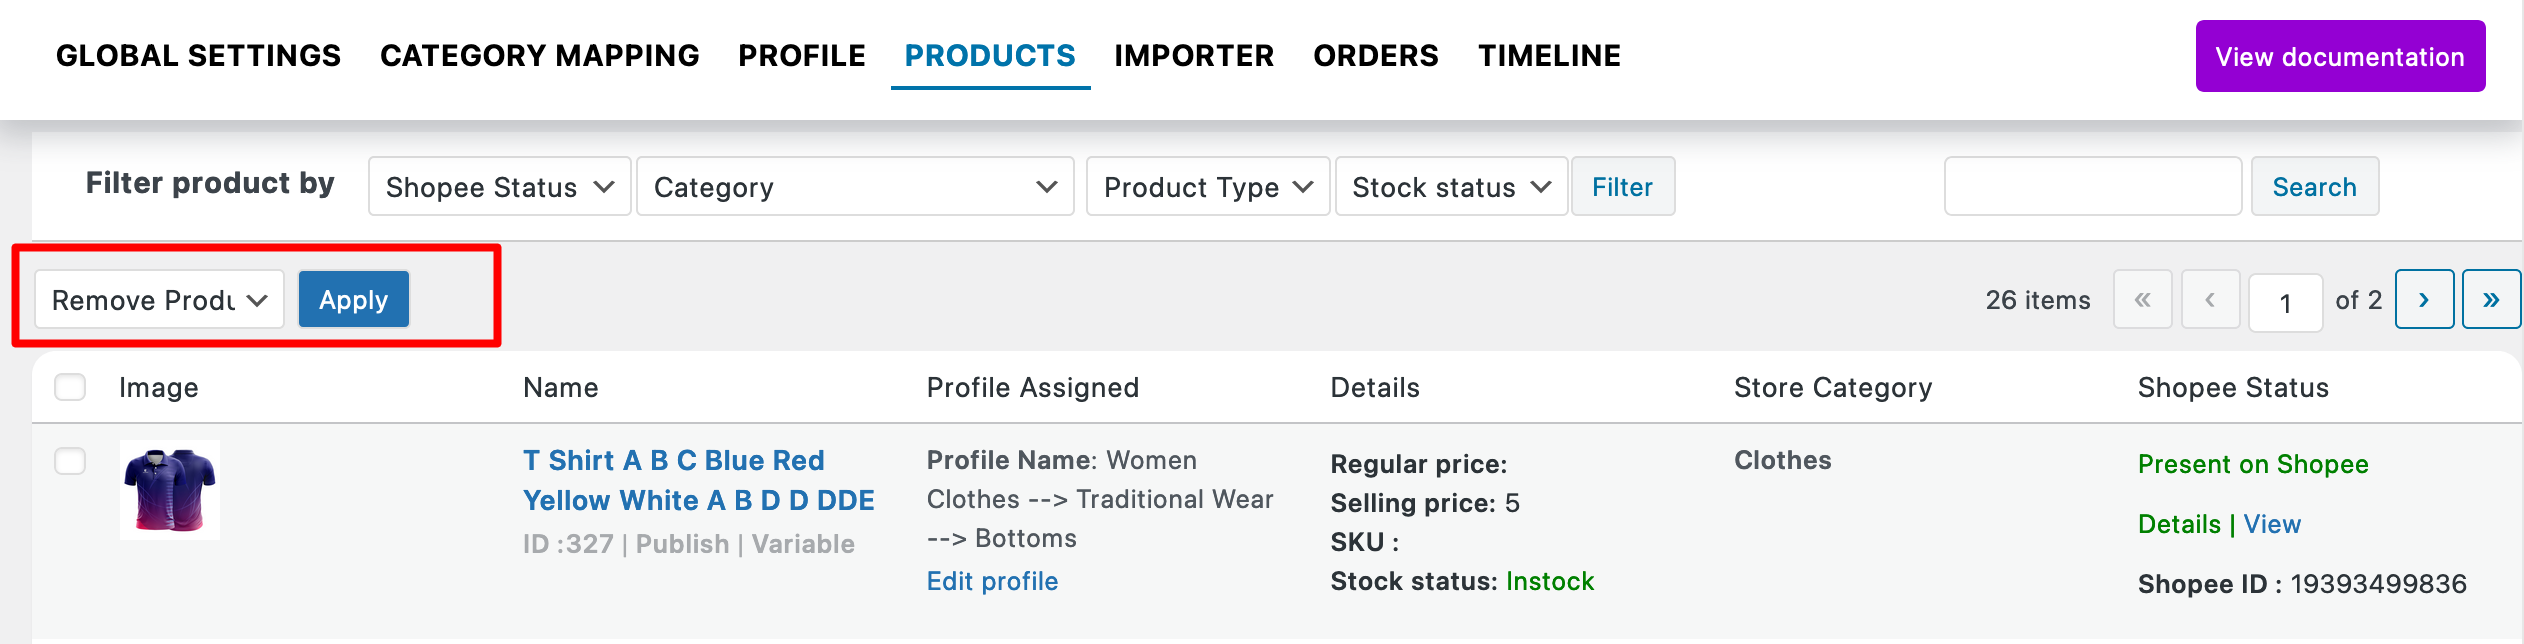
- Remove Product: In order to remove products in bulk, select the products, click on the ‘Remove Product’ option, and click on Apply.
Importer
↑ Back to topThe importer feature lets you fetch your Shopee orders on your WooCommerce store. There are two ways to carry out this operation:
Import Manually
↑ Back to top- Select the products that you wish to import.
- Initiate the import by clicking on ‘Import Product’ under ‘Bulk Action’.
Automate Import
↑ Back to top- You can enable the auto product import feature in the Crons section for a more automated approach.
- Click on the cron section to be redirected to the Product Export Setting in Global Settings.
- Set your required and optional product attributes and hit the save setting button.
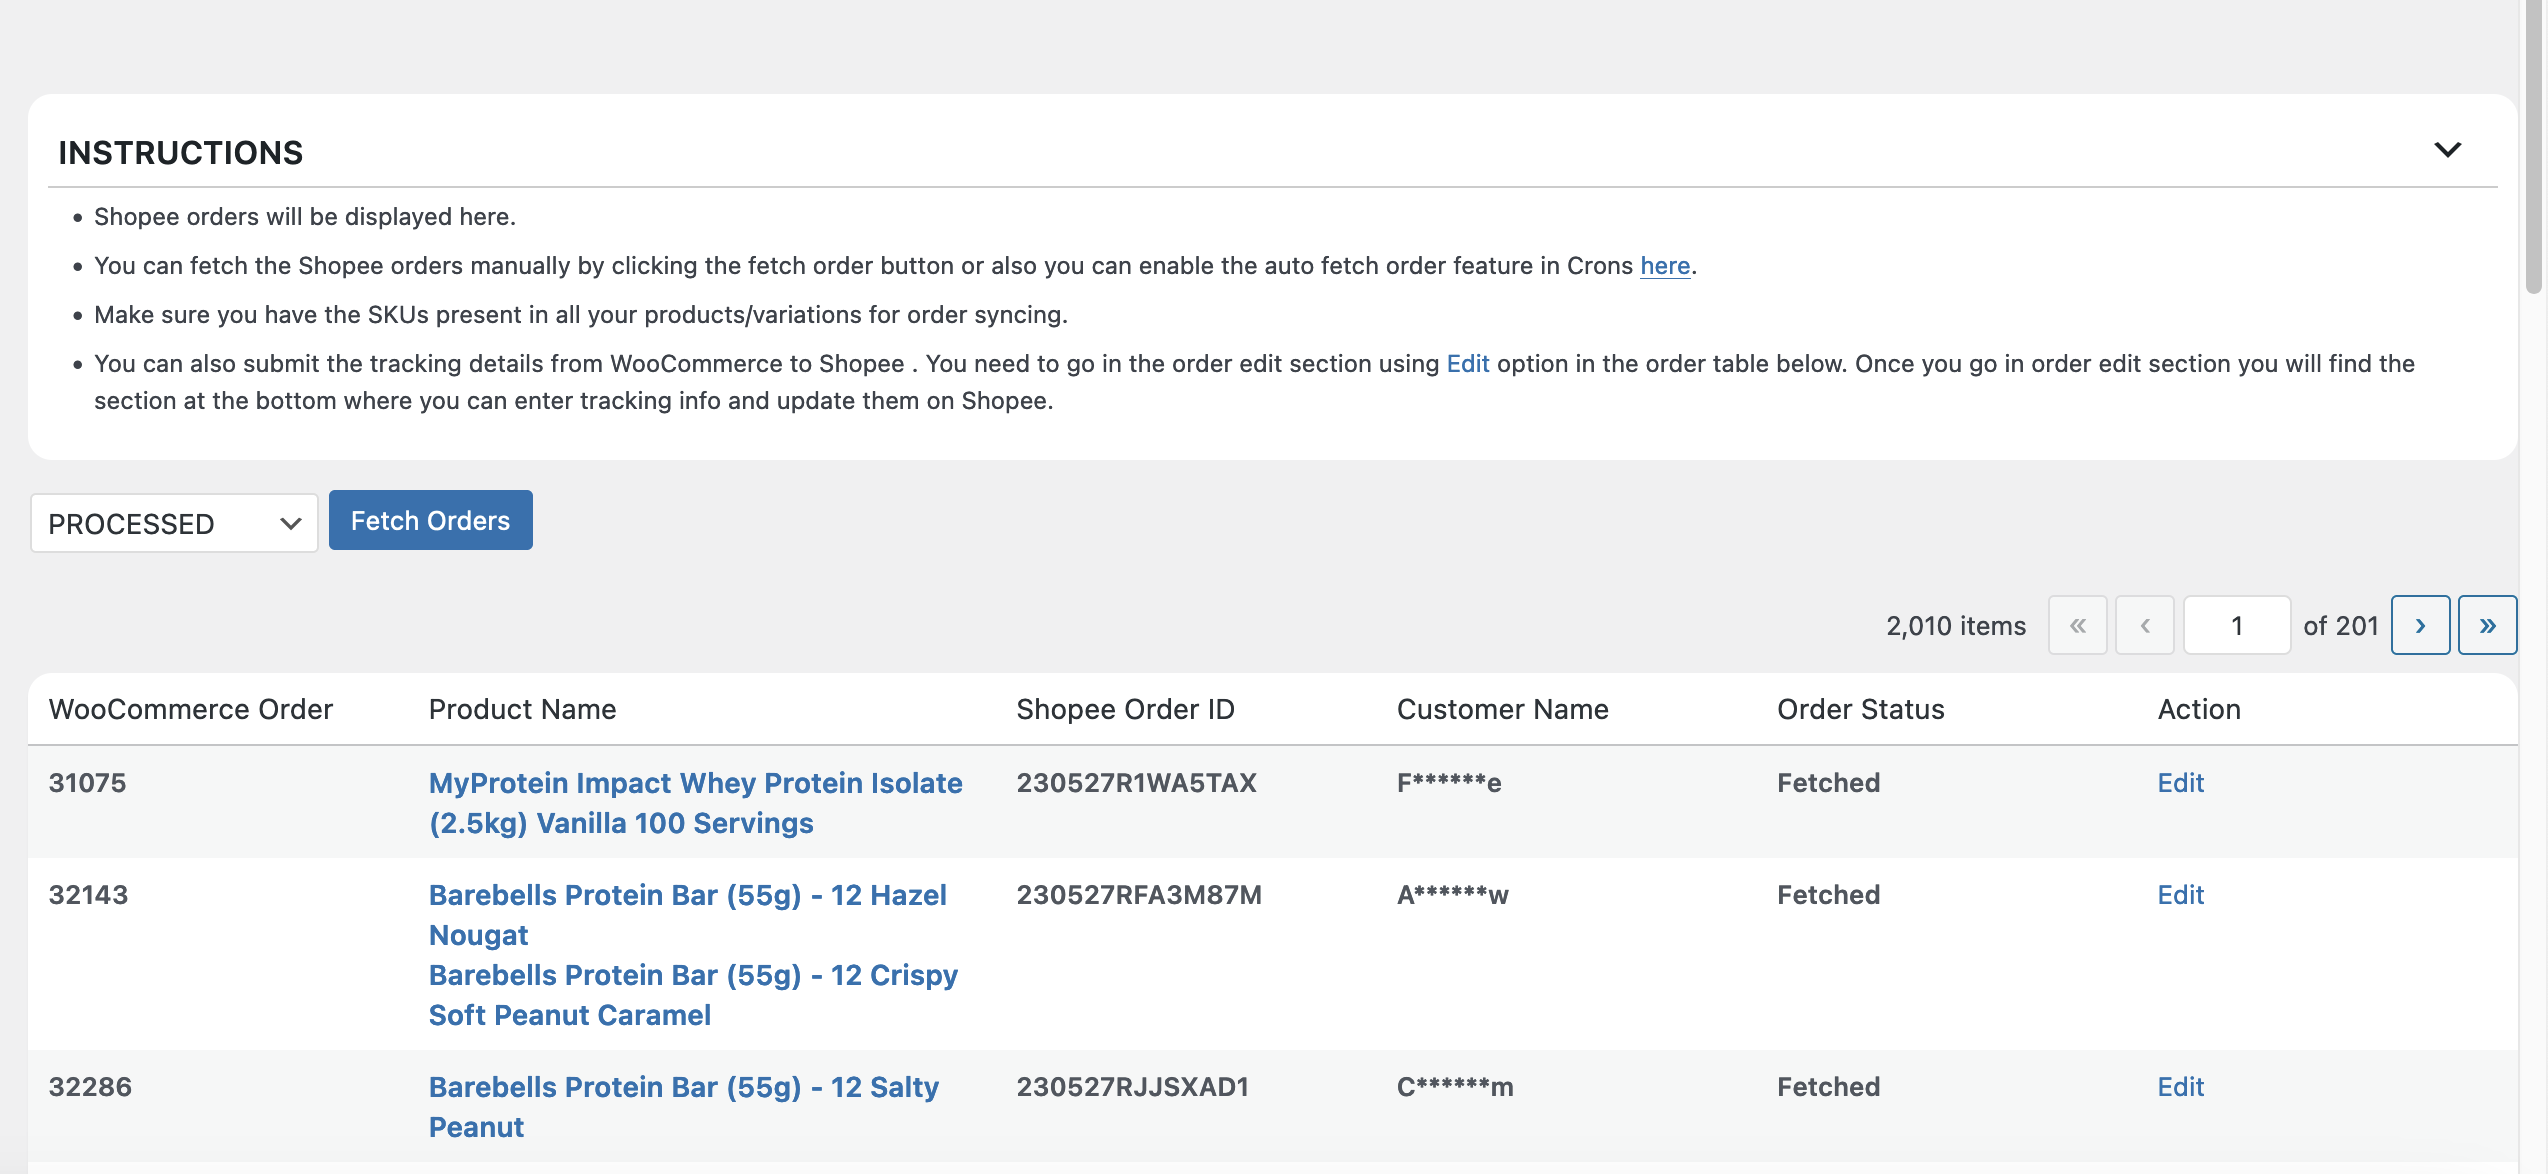
Orders
↑ Back to topAll your orders are displayed under the order section. To fetch the orders, you have two options:
Fetch Orders Manually
↑ Back to topYou can manually fetch Shopee orders, which are:
- Ready to ship
- Processed
- Completed
- Shipped
Select the order from the drop-down menu and click on the fetch order button.
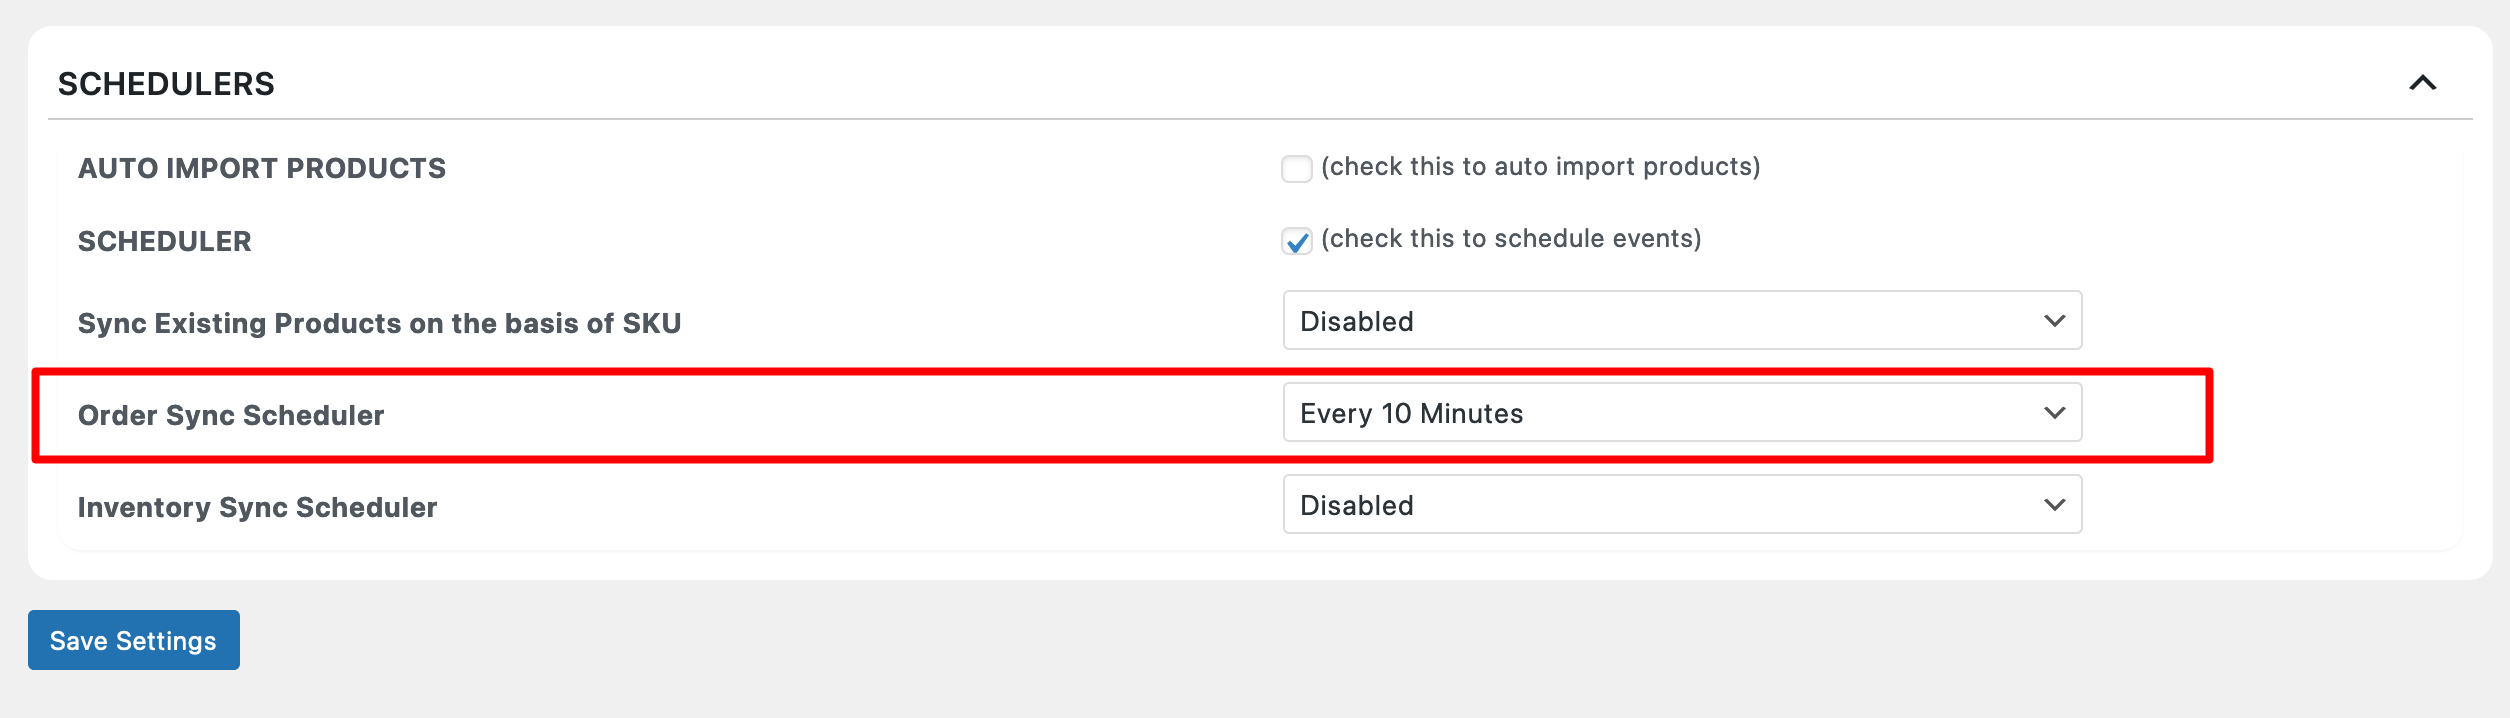
Fetch orders automatically
↑ Back to topAlternatively, you can enable the auto fetch order feature in the Crons section (in the global setting), as shown in the image below:
Timeline
↑ Back to topThe Timeline log serves as a comprehensive record of various activities within the system:
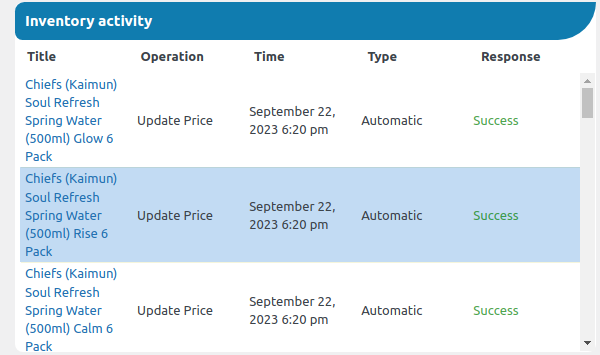
Inventory Activity
↑ Back to top- Title: This reflects the product’s name for processing inventory updates
- Operation: The specific inventory operation (e.g., Update) is detailed under this section.
- Time: This indicates the precise date and time when the inventory update occurred.
- Type: Activities are categorized as either manual or automatic.
- Response: The ultimate outcome, success or failure, is recorded under the response column.
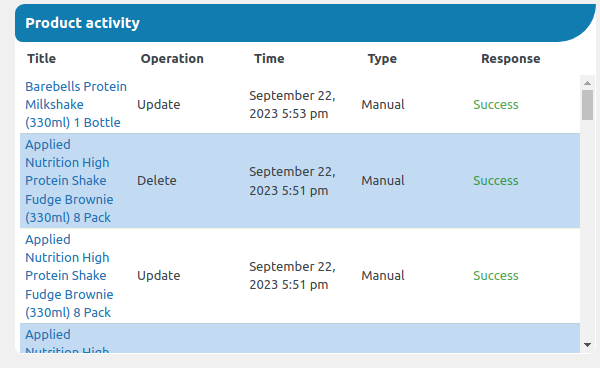
Product Activity
↑ Back to top- Title: Reflects the product’s name that was processed.
- Operation: In the product section, activities like upload, update, or removal are specified.
- Time: Shows the exact date and time for the product synchronization.
- Response: The final result, whether it was successful or not, is logged in the response column.
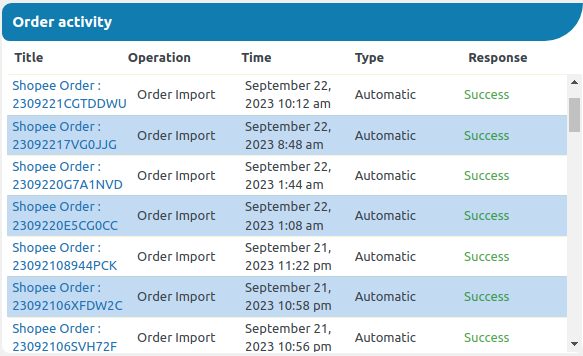
Order Activity
↑ Back to top- Title: This column contains the Shopee Order number.
- Operation: Specifically, this indicates the order-fetching operation.
- Time: The date, day, and time of the order-fetching execution are displayed.
- Response: The final response status for orders is stored here.
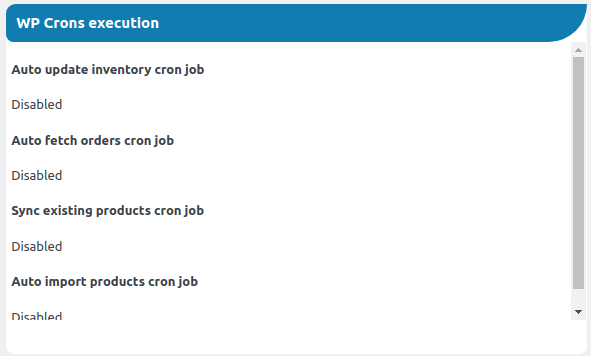
WP-Cron Executions
↑ Back to topThis section provides information about various cron events within the plugin.
It displays the last executed time and the next scheduled execution time for cron events related to:
- Auto-updated inventory.
- Auto-fetching orders.
- Synchronization of existing products.
- Automatic product uploads.
If you still have questions or require further assistance, please don’t hesitate to reach out. Our dedicated account managers are available around the clock to support you during the onboarding process.