Empower your customers to upload files for products, cart & checkout before placing an order for WooCommerce. Upload File By WebMeteors can be especially useful for stores that sell customizable products, such as personalized gifts or print-on-demand items.
Installation
↑ Back to topAfter downloading the plugin from WooCommerce, follow the below instructions to install & activate the plugin.
- Login to your WooCommerce.com account dashboard.
- Navigate to Plugins > Add New.
- Click the Upload Plugin button at the top of the screen.
- Upload the upload-files-webmeteors.zip file you’ve downloaded from WooCommerce.com dashboard.
- Install and Activate Plugin.
Setup & Configuration
↑ Back to topHow To Setup Upload Files By WebMeteors
↑ Back to topAfter installing & activating the Upload Files By WebMeteors extension, then edit/add a product & enable file upload.
Upload Files For WooCommerce Products
↑ Back to topEdit/Add a product in your WooCommerce store & enable file upload under “Upload Files” tab.
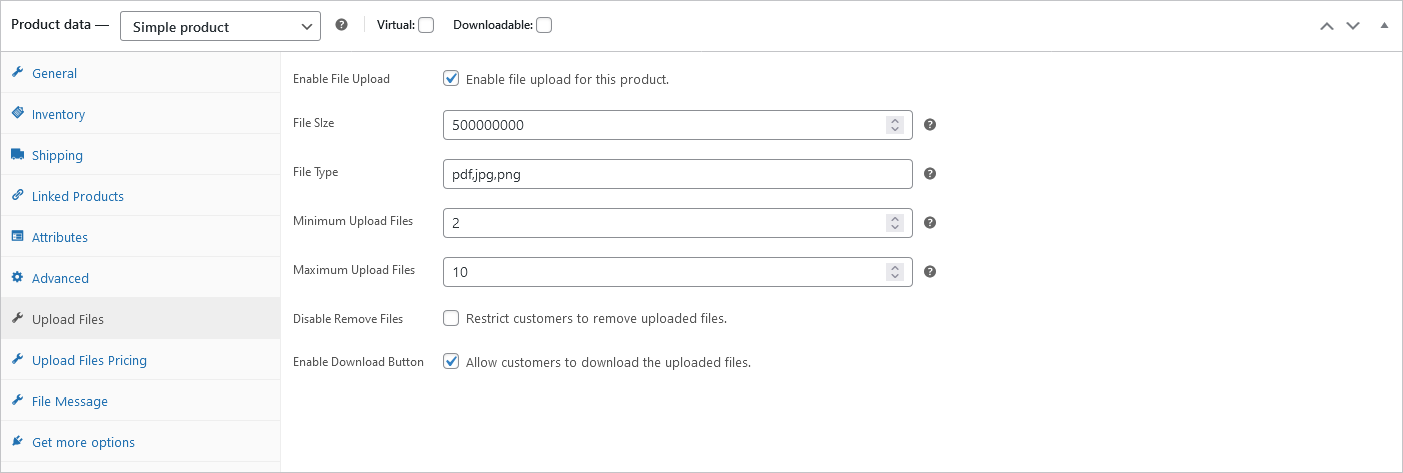
Enable File Upload: Tick the checkbox to allow customers to upload files for this product.
File Size: Restrict the file uploads by file size here, enter the file size in Kilo Bytes. Leave empty if no restriction is required.
File Type: Apply file upload restriction based on the file type i.e. file extension, enter the comma separated file extensions to allow only files. Leave empty for any file type.
Minimum Upload Files: Set the minimum number of file uploads for the product, leave empty for no restriction.
Maximum Upload Files: Set the maximum number of file uploads, leave empty for no restriction.
Disable Remove Files: Enable this option to hide the remove button from file uploader. This will not allow customers to remove their uploaded file.
Enable Download button: Enable the download button for the upload files box allowing customers to easily download their uploaded files.
Upload Files Pricing
↑ Back to topThe extension allows you to easily set up a fee or discounted pricing per uploaded file.
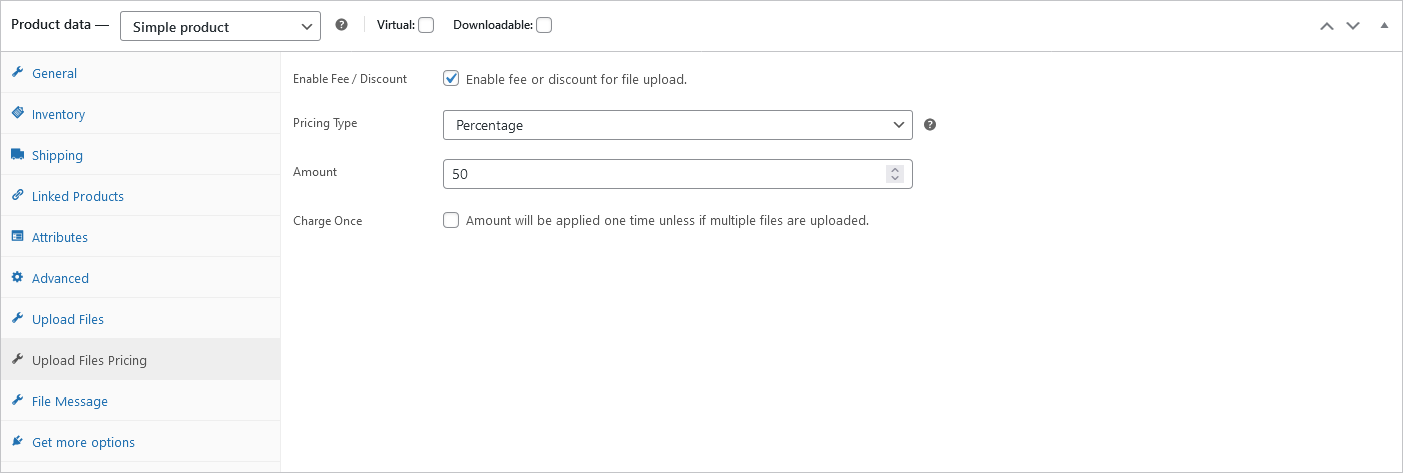
Enable Fee/Discount: Enable pricing for the uploaded files.
Pricing Type: Choose the pricing type i.e. Percentage of product price or Fixed amount.
Amount: Enter the amount that needs to be charged or discounted.
Charge Once: Enable this option to charge pricing one time for the same file uploads.
Upload Files Message Field
↑ Back to topAdmins can enable a message field for file uploads on the product page allowing customers to write a message before adding the product to cart along with files.
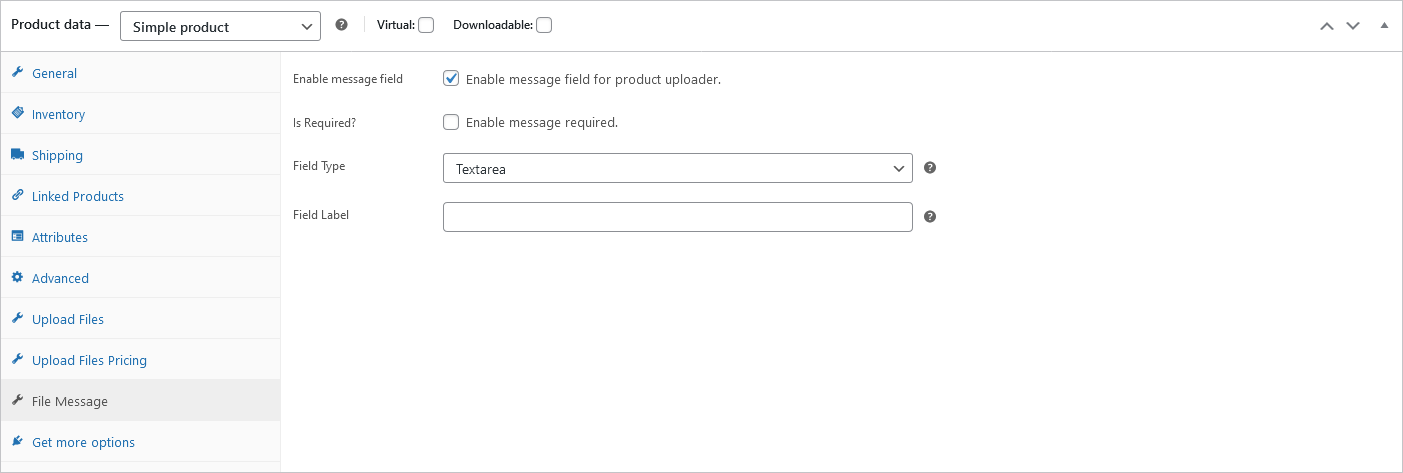
Enable Message Field: Enable this option to show message field on the product page.
Is Required: Tick this option to make the message field required before adding to cart.
Field Type: Choose the field type i.e. text field or textarea field.
Field Label: Enter the message field label.
Enable File Uploads For Variable Products
↑ Back to topShop owners can enable file uploads for variable products. When the customers selects a product variation, the file upload field displays allowing customers to upload files.

Upload Files – General settings
↑ Back to topAfter installing & activating the Upload Files By WebMeteors extension, navigate to WooCommerce > Settings > Upload Files to view the general settings.

Move Files To Media Library: Enable this option to move the uploaded files to media library after checkout a successful order. Otherwise the files will be safely saved to uploads folder & can be revealed in the order.
Delete Files: If this option is enabled the files will be deleted from the uploads folder once the files are moved to media library after a successful checkout. Make sure the previous option is enable to make this work.
Upload Files – Cart Settings
↑ Back to topWooCommerce store owners can enable file uploads for the cart page irrespective of any product in the cart. This helps collect attachments for the order.
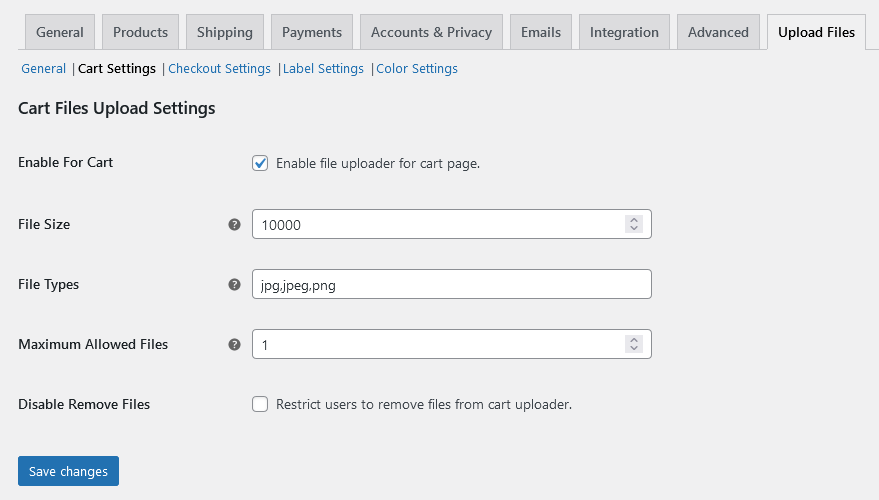
Enable For Cart: Tick this option to enable the file uploads for the cart page.
File Size: Restrict the file uploads by file size here, enter the file size in Kilo Bytes. Leave empty if no restriction is required.
File Type: Apply file upload restriction based on the file type i.e. file extension, enter the comma separated file extensions to allow only files. Leave empty for any file type.
Maximum Upload Files: Set the maximum number of file uploads, leave empty for no restriction.
Disable Remove Files: Enable this option to hide the remove button from file uploader. This will not allow customers to remove their uploaded file.
Upload Files – Checkout Settings
↑ Back to topSimilar to cart file uploads, admins can enable file uploads for the checkout page allowing customers to upload files on the checkout page just before placing an order. This file upload box can be shown in the checkout form.
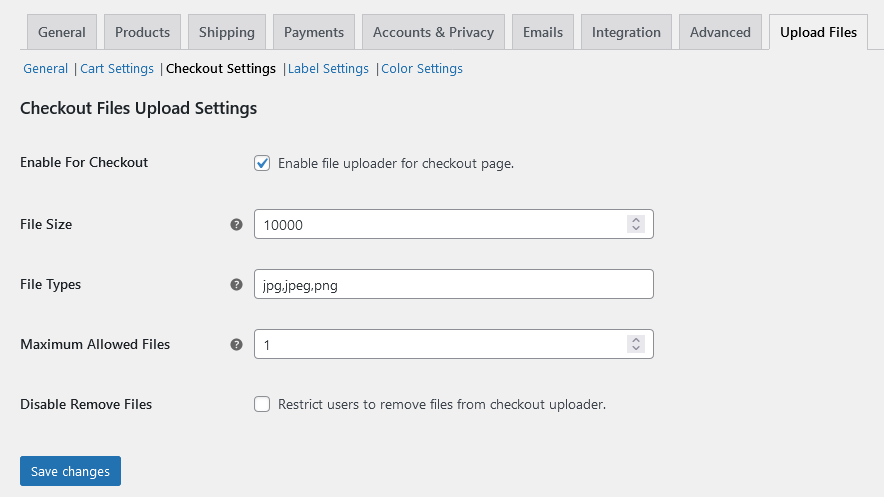
Enable For Checkout: Tick this option to enable the file uploads for the checkout page.
File Size: Restrict the file uploads by file size here, enter the file size in Kilo Bytes. Leave empty if no restriction is required.
File Type: Apply file upload restriction based on the file type i.e. file extension, enter the comma separated file extensions to allow only files. Leave empty for any file type.
Maximum Upload Files: Set the maximum number of file uploads, leave empty for no restriction.
Disable Remove Files: Enable this option to hide the remove button from file uploader. This will not let the customers to remove their uploaded file.
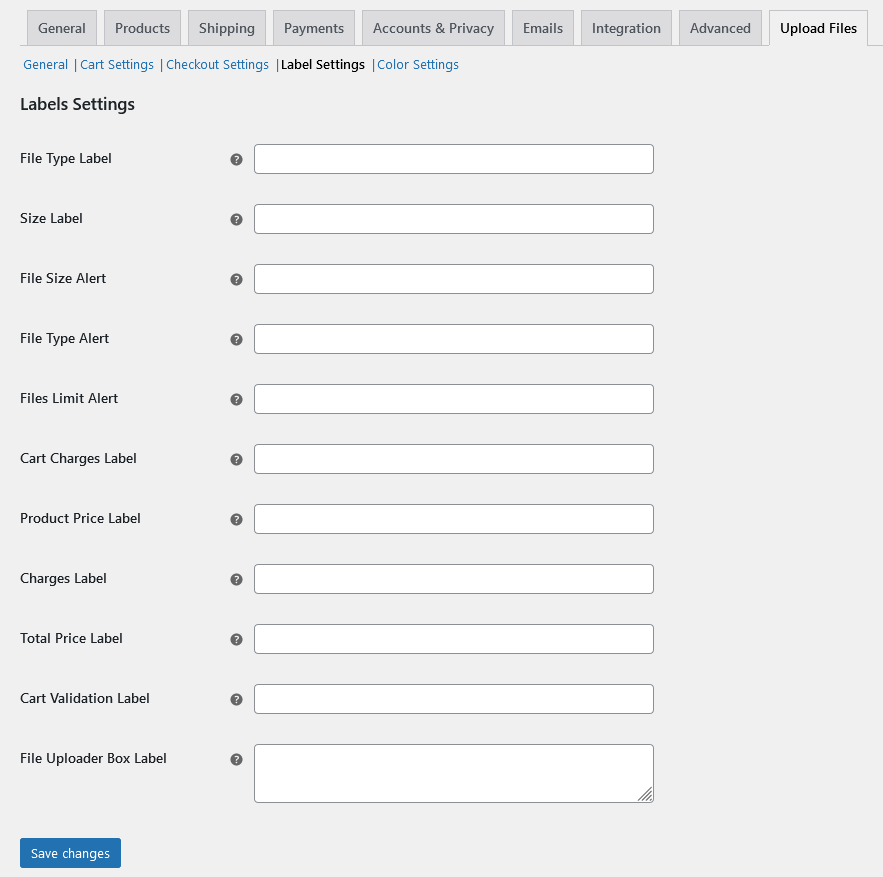
Upload Files – Label Settings
↑ Back to topHere, you can set the labels used anywhere in the extension making it more customizable. The store owners can personalize the labels used on the frontend.
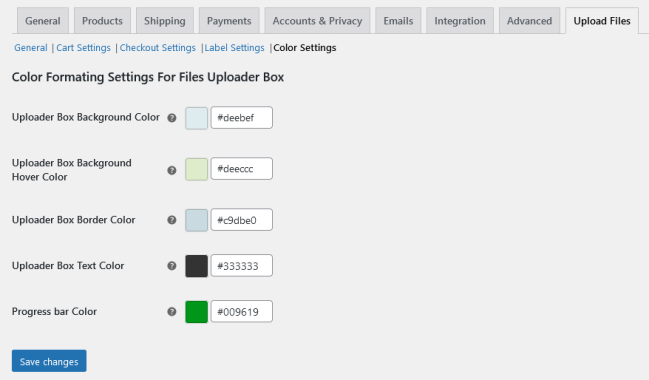
Upload Files – Color Settings
↑ Back to topHere, you can personalize the drag & drop file uploads box, change the text color, background color & progress bar color etc. It can be easily personalized to ones store color scheme without applying CSS code.