NOTE
This product is no longer available on WooCommerce.com. This document has been left available for existing users, but will no longer be updated.
1. Install Verisart WooCommerce app
↑ Back to top- After you have installed the app, to access the Verisart App, simply navigate to your “WooCommerce” menu and select “Verisart”.
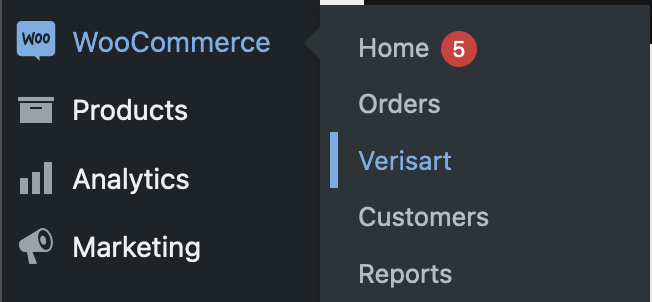
If your store is on WordPress.com, your navigation may look like this:

2. Set up your account
↑ Back to topVerisart and the Verisart WooCommerce app plans are designed to work together. Verisart subscribers can automatically access paid features on the WooCommerce app and vice-versa. You can view all your certificates issued through your WooCommerce store in your Verisart dashboard with a single sign-on.
New to Verisart?
↑ Back to topYou can create an account through WooCommerce.
Have a Verisart account?
↑ Back to top- Choose the “I already have a Verisart account” option when setting up
- You will be redirected to Verisart.com
- Once you’ve logged in with your existing details, your existing account will be linked to your WooCommerce Store.
- Certificates that are created from your Store will appear on your Verisart dashboard.
- You can also share customizations across Verisart and your WooCommerce Store.
Log in to Verisart from WooCommerce
↑ Back to topAll Verisart plans include access to both the Verisart WooCo App and Verisart. If you created your account directly through the WooCommerce App, you will always need to access Verisart via the WooCommerce app.

3. Add a Verified Creator
↑ Back to topNFT minting requires a verified creator or brand linked to your account. This protects against fraud and builds trust.
- Go to the Settings tab in the App

- Click ‘manage’ under ‘Manage Creators’

- You’ll be redirected to Verisart.com where you can become verified or add your creator
If you’re a business and represent creators, you can mint on behalf of multiple creators on our Pro plan. You will need to get permission from creators through Verisart before creating NFTs on their behalf.If you are a business creating NFTs for yourself or an individual creator, we recommend setting a default creator, this will automatically assign a creator to NFTs you add to your drops.
4. Set up products
↑ Back to top- Add NFT products to your Shopify store as you usually would
- Create your own custom contract
- Configure the NFT information through the Verisart app
- Set the product live
All your products should be added to your store as you would any other WooCommerce product.
- If this is a digital product, simply tick ‘Virtual’ in the Product data

5. NFTs on WooCommerce
↑ Back to topAll NFTs minted on the Verisart app automatically generate a Certificate of Authenticity. Before you mint:
- Verisart creates a merchant minting wallet for you. This is the wallet used to create custom contracts and mint NFTs on your WooCommerce store.
- The Verisart WooCommerce App uses lazy minting so NFTs are only minted after they have been purchased.
- Merchants can choose whether to cover minting costs or have their customer pay. Merchants using Ethereum or Base must have sufficient ETH in their wallet. Merchants using Polygon are not required to have MATIC.
Selling NFTs
- Customer buys your NFT.
- Receives an email inviting them to claim their NFT.
- Follows a link from the email to view the NFT on their personalized dashboard on your store.
- Claim the NFT, which gets minted and transferred to their own wallet. They will continue to see their NFTs in the dashboard.
Set up drops
↑ Back to topThe Verisart App lets you easily transform your products into NFTs for sale. If you want to sell existing NFTs you can also import NFTs into your store.🚨 Please note: Drops are tied to your contracts.
You can only deploy one contract per Drop1. Go to the ‘NFTs’ tab and click ‘Create drop’

2. Give your drop a name and select a blockchain
The name is just to help you distinguish internally between different drops, it won’t appear on your NFT. If you are creating a custom contract, gas fees are also required to add the contract to the blockchain.
- Polygon: Verisart covers the transaction fees for NFTs minted on Polygon.
- Ethereum & Base: You will need ETH in your wallet to cover the transaction fees for minting on Ethereum and Base.

Here’s an overview of the blockchains you can choose:
| Polygon | Verisart covers the gas fees for you |
| Polgyon Mumbai Testnet | A test version of the Polygon blockchain |
| Ethereum | Generally used for higher-value NFTs, you or your customer will need to pay for the minting costs |
| Ethereum Sepolia Testnet | A test version of the Ethereum Testnet |
| Base | Layer two solution on Ethereum, you or your customer will need to pay for the minting costs |
Create a custom contract
↑ Back to topBefore you set up your NFTs, you need to select or create a custom contract. You can also import a Manifold contract. What is a custom contract?
- A custom contract is a smart contract for minting your NFTs. The contract provides clear provenance from you to your collector and groups your NFTs together.
How should I use the custom contract?
- It’s up to you! If you work with multiple creators you might want to create a contract for each creator. If you are an individual creator, you could create a contract for each NFT collection.
1. To start, click ‘Create new contact’

2. To create a contract you need a Contract Name and Token Symbol🚨 Please note: Once your contract is created these cannot be changed

What is a contract name, token symbol and description?
| Description | Requirement |
| Contract Name | This is the name of your contract that appears on Etherscan/ Polygonscan and marketplaces. | Maximum 21 characters |
| Token Symbol | This is your token identifier metadata to help you identify your NFT in Etherscan/Polygonscan. | Maximum 6 characters |
| Description | A short description to help you distinguish between different contracts – this does not appear on the blockchain |
See also:
3. Choose who pays the gas fees Verisart covers the transaction fees for NFTs minted on Polygon. However, you or your customer will need to cover the costs if minting on Ethereum – choose who pays.

Add products to your drop
↑ Back to topSelect the products you want to include in your drop. All these products will be minted on the same contract, you can think of them being part of the same collection. 1. Select ‘Browse’ to view the full list of all the products in your store.

These products should be added to your store as you would any other Shopify product 2. Select the products you want to add to your drop and click ‘Add product’ and click save.

3. You will immediately see an ‘Action required’ message, this means you need to finish setting up your NFT. Click ‘Edit’

4. Review information
- By default, the Verisart App will pull in information included on your product such as title, media file and description
- You can change all these fields as you like
- Edits you make to the NFT metadata will not affect or change the product

5. Make NFT Editions, add Unlockable Rewards and edit Traits – See below for detailed instructions
Make your NFT an edition
↑ Back to topWe strongly recommend using the Editions option for NFT drops where you want to show the NFT is part of an edition.
- You can set editions when you are reviewing your NFT
- When you select the edition module, it changes how the NFT appears on-chain in terms of the traits, description and title
- If you do not choose to add NFT edition information, you can still sell multiple NFTs but you will not have the benefit and visibility of the additional on-chain metadata
1. To make your NFT, simply select ‘Yes’ under Edition

2. Choose how to display your NFT edition information:
- Multiple (unnumbered)
- Multiple (auto numbered)

Multiple (unnumbered) with fixed volume
- NFT editions display as unnumbered
- Adding an edition volume displays ‘Edition of xx’ both in the NFT description metadata and the NFT trait
- Optional edition note can be used to add information at the certificate level and does not appear on-chain. The edition note information cannot be changed.
- See example below for ‘Edition of 100’


Multiple (unnumbered) with open edition
- NFT editions display as unnumbered
- Leave edition volume blank
- The term ‘Edition’ is added to the NFT description metadata
- No information is added to the NFT traits
- See example below for ‘Open Edition’


Multiple (auto numbered) with fixed volumeThe edition number is defined at the point of sale and not the point of claiming the NFT. It does not correspond to the token ID. NFTs can be minted on chain out of order depending on when a customer claims them or how the contract has been shared with other products. Customers can see their edition number only after claiming their NFT and the number is configured based on the time of purchase.
- Numbering Starts fromto the first number to use (e.g. 1)
- Set Edition volume (if left blank it will be considered an open edition)
- Adding an edition number displays in the NFT Title, description metadata and trait.
- Optional edition note can be used to add information at the certificate level and does not appear on-chain. The edition note information cannot be changed.
- See example below for ‘Edition 2/100’


Multiple (auto numbered) with open edition
- Numbering Starts fromto the first number to use (e.g. 1)
- Adding an edition number displays in the NFT Title, description metadata and trait.
- Optional edition note can be used to add information at the certificate level and does not appear on-chain. The edition note information cannot be changed. You can optionally add an Edition note which appears in off-chain information about the NFT.
- See example below for ‘Edition 2/Open Edition’


Unlockable rewards
↑ Back to topYou can add unlockable rewards to an entire drop or specifically to one NFT. To do this:
- Drag and drop a file to include it as a unlockable reward with each of the NFTs in your drop
- Set unlockable rewards for individual NFTs by editing the product in the Verisart app

Add Traits
↑ Back to top- You can add traits to describe your NFT and give it rarity levels
- Each trait needs the following information
| Trait Type | What is the trait? ex. Eyes, Background, Clothes etc. |
| Value | Value of the trait. ex. Black, Purple, Tanktop |
- The rarity percentage is calculated automatically based on the number of NFTs in a contract that have a specific value. For example, if you mint 100 NFTs and 10 of them have blue eyes, the rarity percentage will automatically be calculated as 10%
- To add traits to your NFT, scroll down to the end of the NFT form to the ‘Traits’ section. You will need to enter the traits in JSON format.
- Verisart supports all the attributes included on OpenSea, to learn more about how to add traits and attributes please refer to the OpenSea docs

You should structure the data in the following format:[
{
“trait_type”: “Background”,
“value”: “Purple”
},
{
“trait_type”: “Clothes”,
“value”: “Tanktop”
}
] Below is an example of how traits for a BAYC NFT are displayed on OpenSea.

Secondary Sales on Opensea
↑ Back to topAfter your first NFT is minted, you should configure your royalties on OpenSea to receive royalties from secondary sales on that marketplace.See also:
6. Certificates
↑ Back to topAll NFTs minted on the Verisart app automatically generate a Certificate of Authenticity once the NFT has been purchase. You only need to set up a certificate for products that are not NFTs1. Go to the Certificate tab and select ‘Choose’ to select the product you want to certify

2. Select the products you want to certify and click ‘Add product’

3. If your product has an identified creator or if you want to include or edit certificate details, simply edit/add the certificate.

4. Add a creator (Only for Pro plan)If your products have an identified creator or maker, you must assign their name to your products so it will appear on the certificates.

5. Add more detailsThe Verisart WooCommerce App creates basic certificates by automatically populating the certificate with the product information such as product title, image and description. To give your customers full confidence in the accuracy and authenticity of the certificate and their purchase, we recommend you provide additional details including:
- Production year
- Dimensions
- Edition information (if relevant)
- Production location
- Current location
- Inventory number

6. Add any additional files and information you want to share with your collectors:

7. Set up Customization
↑ Back to topCustomize Certificates
↑ Back to topAvailable on Growth and Pro plans (compare plans)Certificate customization enables you to add your own branding to the URL and certificate (view examples of customized certificates). 1. Go to the the ‘Customizations’ tab

2. Start by selecting ‘Add new template’ in default template, there you must:
- Name your certificate template
- Choose your logo, background image and subheading
- Click ‘Save’

Email Customizations
↑ Back to top1. Go to the Verisart app ‘Settings’ tab

2. To add email customizations, scroll down until you see ‘Email customizations’ and click ‘Manage’

3. To set global customization settings for all your emails, click ‘Customize emails’

There, you can add:
- Your Logo
- Sender address
- Button color
- Button text color

4. You can also customize each specific emails by adding your own text or a custom HTML. Simply click the email you want to edit


5. Try out your customizations and send yourself a test email

For all other queries, please see our Help Center.