Features
↑ Back to top- 3D Viewer by Arty is the ultimate solution for live 3D model preview in the browser
- Our 3D Viewer is super fast and realistic, guaranteeing smooth performance
- Supported formats: .amf, .dae,. fbx, .gcod, .glb, .gltf, .kmz, .md2, .obj, .ply, .stl, .tds, .vtk, .wrl, .xyz, .USD
Get Started
↑ Back to topGet started with Arty 3D Viewer in a few simple steps:
- Install the extension in your WooCommerce shop.
- Create an account on the Arty platform and subscribe.
- Upload your 3D models and link them to your products.
Installation
↑ Back to top- Download the .zip file from your WooCommerce account.
- Go to WordPress Admin > Plugins > Add New > Upload and select the ZIP file you downloaded.
- Install Now and Activate the extension.
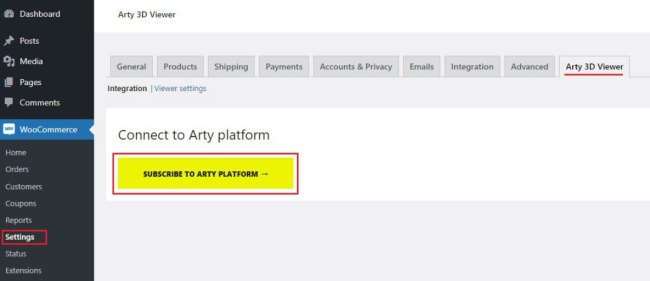
- Once installed, navigate to WooCommerce > Settings and click on Arty 3D Viewer tab.
- Click on the Subscribe to Arty platform button, create your Arty account, and subscribe
Subscription
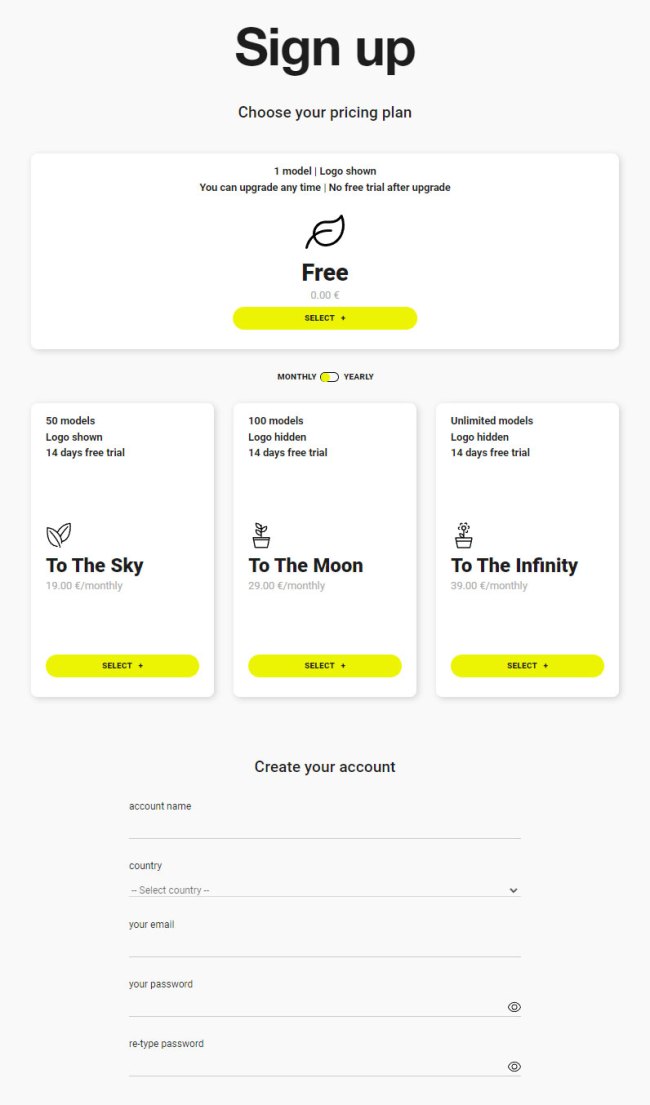
↑ Back to top- On the Arty platform, choose your subscription plan and create an account
- In order to activate the Arty account, you need to approve the subscription from your WooCommerce account.

Arty platform
↑ Back to topDomain setup
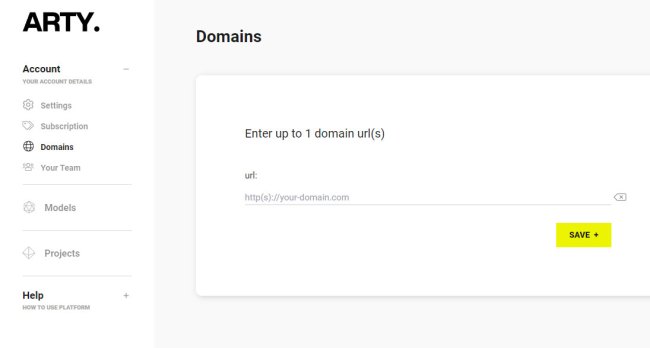
↑ Back to topOnce logged in to your Arty account, you must set your shop’s domain URL. Note that you can connect only one shop to your Arty account.
Upload 3D models
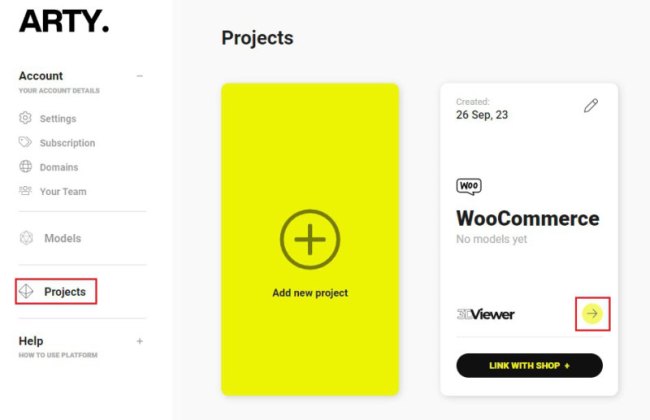
↑ Back to top- Navigate to Projects on the Arty platform.
- Your WooCommerce project has already been created.
- Click on the 3D Viewer button and upload your 3D models.
Link models to products
↑ Back to top- From the Project page, click the Link with shop button inside your WooCommerce project.
- You need to approve the connection between the Arty platform and your shop.

- After approval, a list of all your products will appear on the Sync page.
- Choose the Link model button beside the product in the list and choose the uploaded 3D model of your product.
- Once you have linked your models, click the Sync page button (the list of your models will be paginated, 10 per page).

- You are done!
- Later, you can unlink 3D models by clicking the Delete link button or replace model of your product(s)
Model appearance customization
↑ Back to topTo learn how to customize your 3D models, viewer, and UI settings, visit the Help section in your Arty account.
Settings
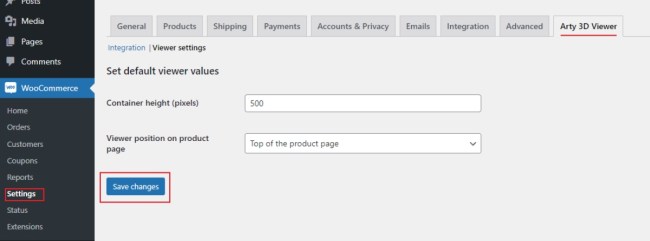
↑ Back to top- Navigate to WooCommerce > Settings, click the Arty 3D Viewer tab, and Viewer settings link.
- Choose the position of 3D Viewer on your product page.
- Choose the height of 3D Viewer on your product page.
- Save changes.