Thank you for choosing Bass theme to build your WooCommerce website.
Installation
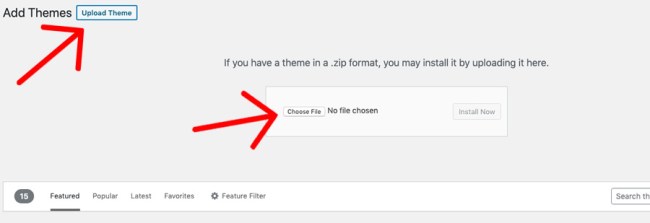
↑ Back to top- In your Dashboard go to Appearance > Themes.
- Click on the Add New button on top.
- Click Upload New button on top.
- In the new interface click Choose File and browse your computer to locate bass.zip file you downloaded.
- Click Install Now.
- After installation Activate the theme.
Suggested plugins
↑ Back to top- Cue: This plugin helps display a playlist as a block anywhere in your website.
- Contact Form 7: Create a contact form.
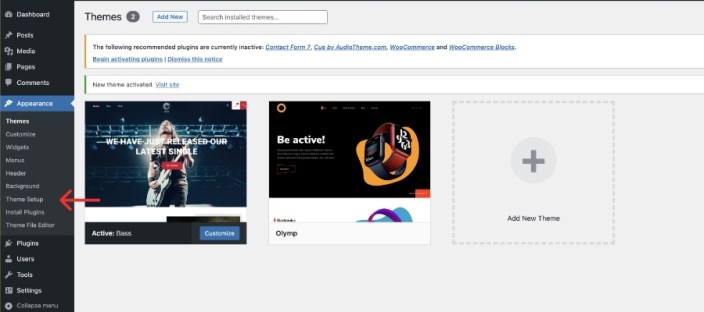
Theme setup wizard
↑ Back to topBass comes with a setup wizard that enables you to create the demo layout with a just a few clicks.
- After installing the theme, in your Dashboard go to Appearance > Theme Setup.
- The setup wizard will ask you to install and activate necessary plugins, and import the demo content. Please be patient while WordPress imports all the content.
All you need to do is edit the content and make it your own.
Adding a logo image
↑ Back to topGo to Appearance > Customize > Site Identity to add a logo image or edit your site title.
Setting up the menus
↑ Back to topThis theme has five menu locations.
- Primary Menu: This is the main menu of your website.
- Right Panel Menu: This menu is the menu hidden in the right side of the screen, toggled with the sandwich menu button.
- Mobile Menu: When your website is viewed on mobile devices, both the Primary and the Right Panel Menu will become invisible. Create a new menu to be displayed to mobile visitors that contains items from both menus.
- Social Menu: This is the Social Media icons menu toggled with the sandwich menu button.
- Footer Menu: The menu in the bottom of the website.
Create menus and assign them to each of the available locations.
Social Menu
↑ Back to top- In your Dashboard go to Appearance > Menus.
- Create a menu and click Save.
- In the bottom of the right side, check the box to display the menu in the Social location and click Save.
- Add the address for each social profile to your menu as a custom link.
- For example, https://twitter.com/WooCommerce is the Twitter link of WooCommerce. See screenshots below for more details.

Configuring the front page
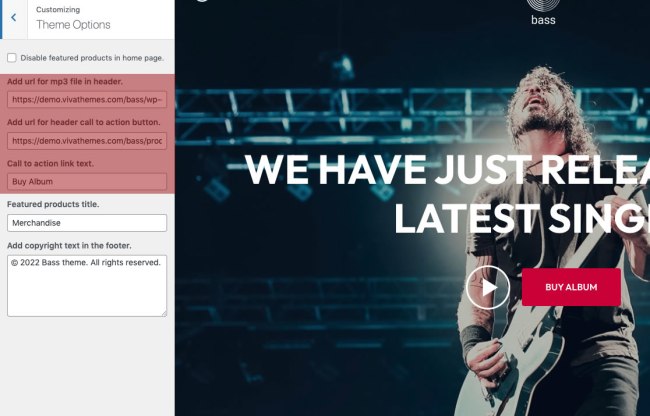
↑ Back to top- In your Dashboard go to Settings > Reading and assign a page to display in front instead of the latest posts.
- The Featured image of the page will display in the top part, and the page title on top of it.
- Upload an mp3 file and paste the url in the theme options Appearance > Customize > Theme Options.
- In the theme options you will see other fields to add a link for the Call to action button, or change the button text.
Blocks and patterns
↑ Back to topBass comes with some pre-designed patterns that you can include in any page or post.
In the home page we have used these patterns and blocks:
- About Us: A pattern with content in the left and image in the right that you can use to display some info about you.
- Album Playlist: This pattern uses the Cue plugin to display a playlist in the left and some content in the right, on top of a full width background image.
- Post loop query block: Configured to display your latest posts in three columns.
- Featured products: You can feature products by highlighting the ‘★‘ icon in the right of each product when viewed as list, by going to Products > All Products in your Dashboard.
Check all available patterns here →
WooCommerce product filters
↑ Back to topIn your dashboard go to Appearance > Widgets and add any filter block WooCommerce Filters location.
Footer section
↑ Back to topIn the footer you can use blocks to display some information related to your business. In your dashboard go to Appearance > Widgets and add blocks to the Footer Widgets location.
In this theme you can edit the footer copyright info from the Theme Options.