Theme Installation and Setup
↑ Back to top- Go to your WooCommerce.com account Downloads page. Click the download icon to get a compressed basti.zip file on your computer.
- On your website, go to Appearance > Themes and click the Add New button.
- Click Upload to upload the basti.zip file you downloaded in step 1.
- Go to Appearance > Themes to Activate.
You can find more here.
How to start working with the theme?
↑ Back to topImportant: to be able to effectively use this theme, with all its features, it is required to have the latest WordPress version installed and the default block editor enabled.
There are two ways to start building your site with this WordPress theme.
1. Replicating the demo website and then starting from there.
This method is very practical if you have a fresh new website, a clean WordPress install or you’re new to WordPress.
Navigate to the “Appearance > Demo Content” or click on the “Get Started” button and there you’ll find available theme demos to choose from.
2. Starting from scratch with your own content
This method might be more practical in case you already have a live website with lots of content and you’re simply switching from a previous theme. Also if you’re already experienced with WordPress and want to build your website page by page. With this method, you won’t be importing demo pages and posts.
Check the “Pages” section of the documentation for guidance on how to create page layouts using block and page patterns.
The Next Steps
↑ Back to topThere are, of course, many different ways one can approach building a website. However, the most common is to start with the Homepage. There are 2 types of Homepages in WordPress: static and dynamic.
The static homepage displays the content you added to one specific page while the dynamic automatically lists all your blog posts chronologically.
Static Homepage: the demo website of the “Basti” theme features a static homepage.
To start creating your front page navigate to the Pages, create a new page and name it (in the demo we named it “Home”).
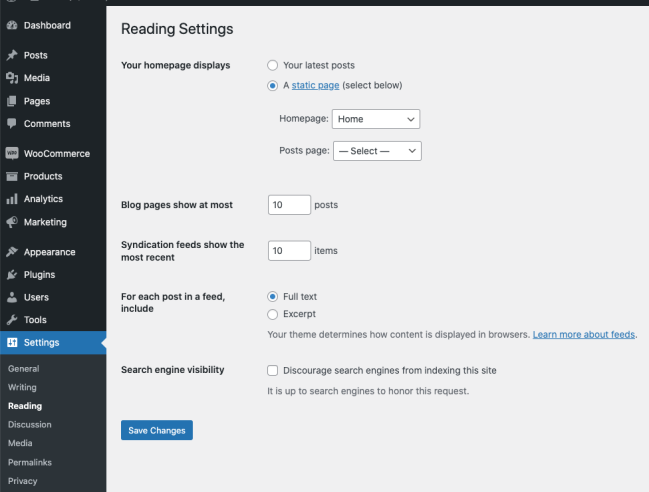
By default, on the Homepage, WordPress displays your latest posts. If you want to set the page you created as your homepage just navigate to Settings>Reading and instead of the default “Your Homepage Displays: – Your latest posts” select “A static page” and from the drop-down choose the page you created.
Pages
↑ Back to topLayout Patterns Intro
↑ Back to topMaking things simple is what we love to do. All the elements you see in the theme demos are included as block & page patterns within the block editor. With a simple drag and drop, you can arrange them in any way you want and adjust them to perfectly fit your project.
All available block and page patterns are sorted in different categories: Header, Footer, Hero, About, Team, Features, Testimonials, Pricing Table, Contact, E-Commerce, Pages, Blog Layout .
You can also easily mix patterns from different categories. No restrictions there.
Once you have added a block pattern to your page, you can start replacing its sample text and images with your own. Every block pattern is very flexible. You can style, delete or duplicate sections of every pattern to suit your needs.
Intro to the WordPress Editor and Block Patterns
↑ Back to topWith the version 5.9 WordPress entered the new era and introduced from the ground up built and improved editor. There are many new exciting features and block patterns are one of them. Therefore, I would encourage you to learn as much as possible about new WordPress editor and blocks. The following videos are a great place to get started:
Creating Home Page
↑ Back to topNavigate to “Pages > Add New” and add the title of the page, in this case let’s name it “Home”. Click on the Toogle Block Inserter (blue “+” sign) and click the “Patterns > Explore”. Here you’ll find all available page and block patterns you can use for creating pages.
In the example below we recreate the home page of the Travel Demo by inserting the whole page block:
Of course, you can create your home page by adding and customizing various block patterns as demonstrated below:
The same way you can create any other page, by adding complete page blocks or adding block patterns one by one. I’d recommend creating a couple of pages and adding some content first before setting up the Header/Menu and Footer part.
Header & Menu
↑ Back to topTo set up your header part & menu, please navigate to Edit Site.
Selecting a header layout
↑ Back to topBasti comes with a few pre-set header layouts you can choose from. For an easier understanding of how to switch between header, layouts check the video below.
Adjust and design your headers
↑ Back to topHeaders are created with blocks which means you can easily rearrange them, add more blocks, remove blocks you don’t need, change colors etc., as shown in the example below.
Footer
↑ Back to topTo set up your footer, please navigate to Edit Site.
Select a footer layout
↑ Back to topBasti comes with a few pre-set footer layouts that you can choose from. For easier understanding of how to switch between footer layouts check the video below.
News
↑ Back to topThe first step in creating your blog page is to create a couple of posts.
Creating a post
↑ Back to topTo create your first post navigate to “Posts” and click the “Add New”.
Now in the post editor you can add a title, content and create layouts using blocks just like you would on a page. You can upload the featured image from the “Featured Image” section in the right sidebar of the editor.
You can now categorize your posts using the “Category” feature and, if you want, choose to disable comments for that particular post.
Read more about writing a posts here: https://wordpress.org/support/article/writing-posts/
Create a News Page and choose the layout
↑ Back to topNavigate to “Pages > Add New” and add the title of the page, in this case let’s name it “News”. Click on the Toogle Block Inserter (blue “+” sign) and then click “Patterns > Explore > Blog Layout“. Here you’ll find a selection of blog layout patterns. Select the one you want to use for your Blog/News Page.
Once you selected the layout click “Publish” and the posts you created will automatically be displayed on this page.
Example one:
Example Two:
Shop
↑ Back to topTo start creating your shop follow the steps below.
** If you used the demo import wizard then your demo shop has already been set up and now you have to set up your business details in “WooCommerce->Settings” and your products in “Products”.
For more information about WooCommerce options, setting up payment gateways and more please check the plugin documentation.
Settings and Options
Navigate to the https://woocommerce.com/documentation/plugins/woocommerce/getting-started/settings/ for more info.
Set up Products
Go to “Products > Add New” to add your first product. Enter the name of your product and then a detailed description.
Navigate to the https://woocommerce.com/documentation/plugins/woocommerce/getting-started/setup-products/ for more info.
Sell Products
Navigate to the https://woocommerce.com/documentation/plugins/woocommerce/getting-started/sell-products/ for more info.
Create a default Shop Page
This page will automatically display all your products using a predefined layout. To set it up you need to create a page and then assign it to be the shop page in “WooCommerce > Settings > Products“.
The URL of this page will be set automatically as www.yoursite.com/shop
Create a Shop page using WooCommerce Blocks
You can also easily create a shop page using dedicated WooCommerce blocks.
Navigate to “Pages > Add New” and add the title of the page, in this case let’s name it “Home”. Click on the Toogle Block Inserter (blue “+” sign) and click the “Patterns > Explore“. Here you’ll find all available page and block patterns you can use for creating pages.
**If you imported demo content then you’ll already have a couple of demo products created and the shop page ready.
Built-in CSS classes
↑ Back to topBasti theme comes with several built-in CSS classes for the animations.
- On the page, click on the desired block you want to add animation.
- Expand Advanced panel ,on the right-hand side.
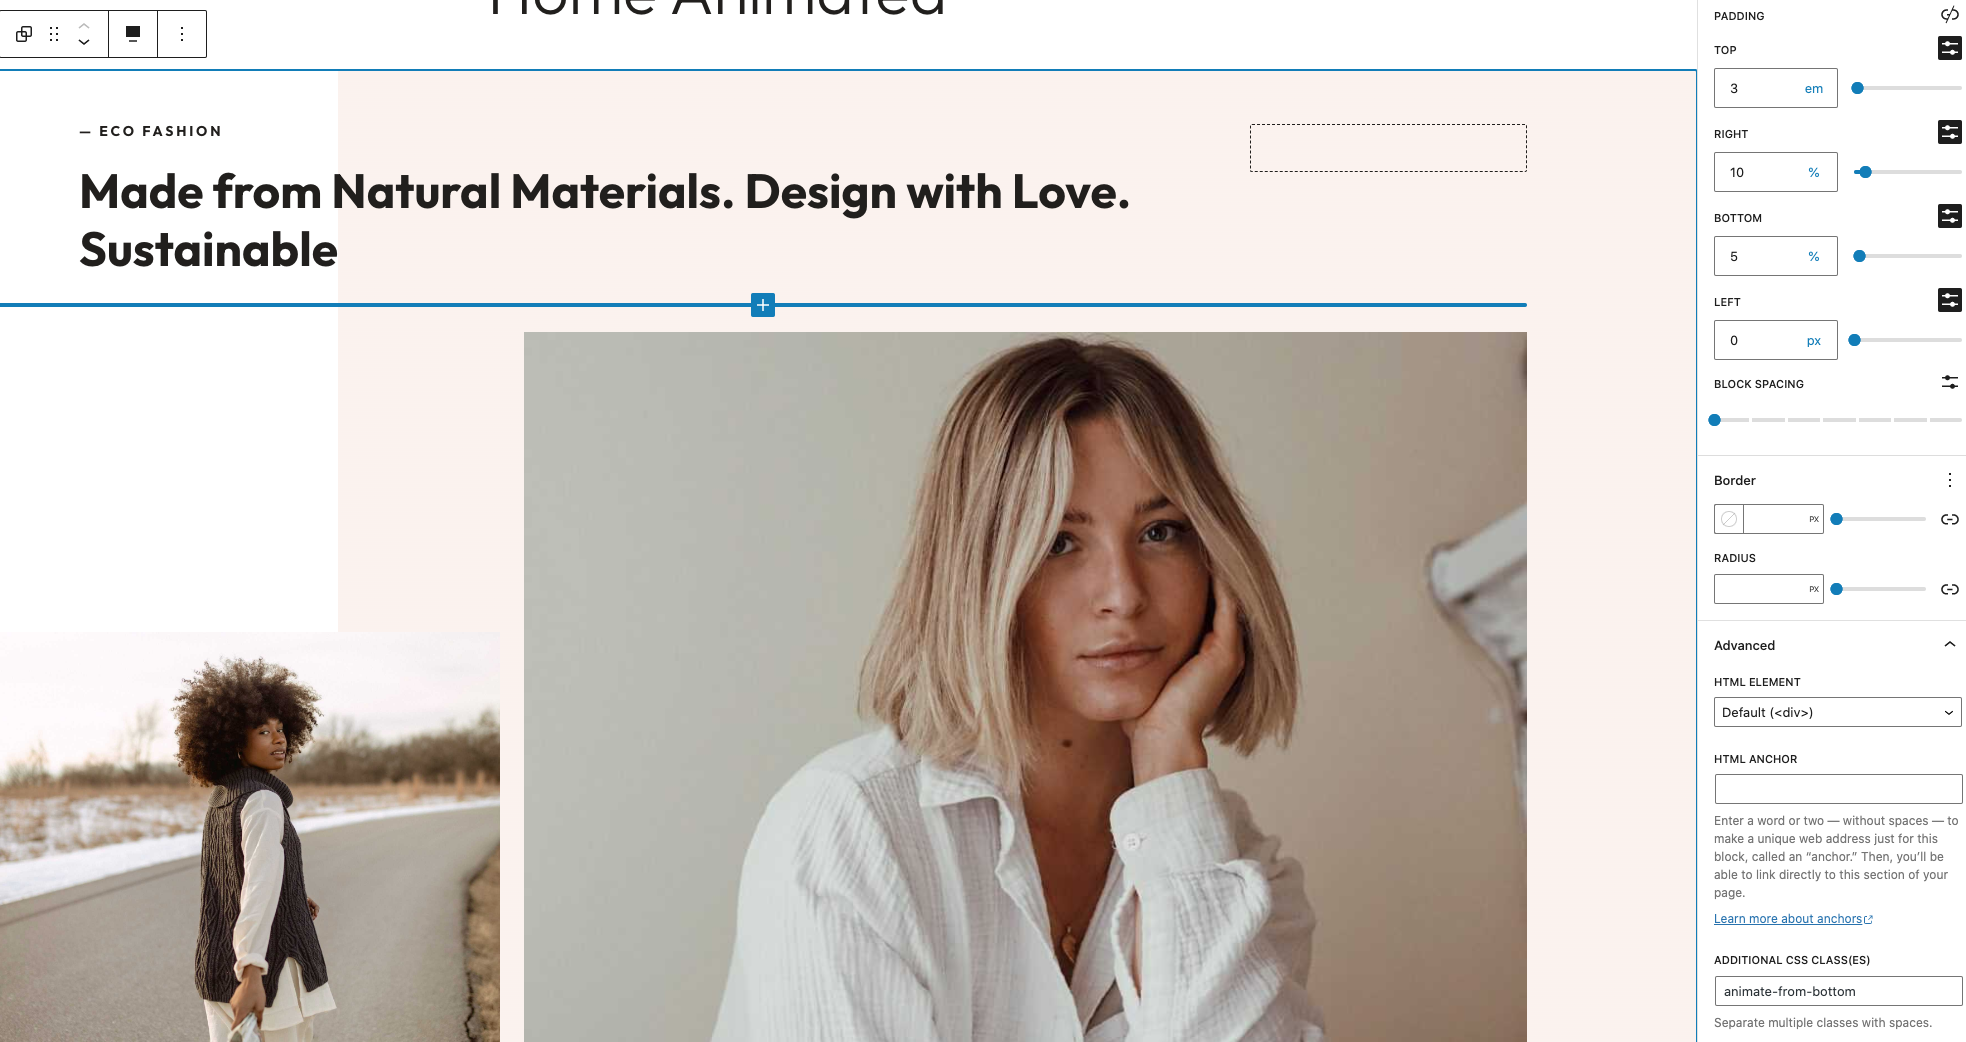
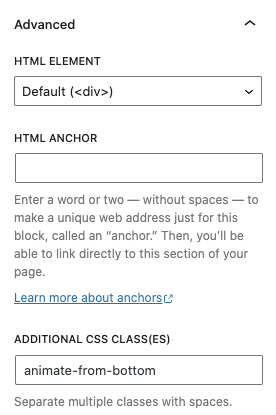
- Paste the name of the class there. You can add multiple classes, separated by space.
Animation classes that can be used:
↑ Back to top- slide-in – element with this class will have slide-in effect from right
- scale – element with this class will have scale effect
- shadow – element with this class will have shadow effect
- fade – element with this class will have fade effect
- bounce – element with this class will have bounce effect
- text-animation-1 – text with this class will opening letters from the left
- text-animation-2 – text with this class has shadow
- background – element with this class will have animated color changes background
- image-animation-from-bottom – images with this class will animate when they enter the viewport. Animation is reveal, from the bottom.
- image-animation-from-top – images with this class will animate when they enter the viewport. Animation is reveal, from the top.
- image-animation-from-left – images with this class will animate when they enter the viewport. Animation is reveal, from the left.
- image-animation-from-right – images with this class will animate when they enter the viewport. Animation is reveal, from the right.
- animate-from-top – element with this class will animate from the top, when it comes into the viewport.
- animate-from-bottom – element with this class will animate from the bottom, when it comes into the viewport.
- animate-from-left – element with this class will animate from the left, when it comes into the viewport.
- animate-from-right – element with this class will animate from the right, when it comes into the viewport.
Fonts
↑ Back to topBasti theme uses Outfit font which is shown in the demo.
Of course, you might want to use a different font for your website. In that case theme offers 12 different fonts to choose from from the new Editor. Navigate to the Edit Site and click on the Styles. There you can choose different font options.
If you need more font options we recommend installing the Google Fonts Typography plugin.
Once the plugin is installed, in the customizer you’ll find the new Google Fonts section. Within that section you’ll be able to select font family, font weight and font style for different elements of your website.