This support page is divided into three sections:
WordPress Plugin: https://wordpress.org/plugins/bolt-checkout-woocommerce/
Installation Example: https://www.youtube.com/watch?v=LhxCJACBLbI
Installation and Integration
This sections covers the installation and activation of the Bolt Checkout plugin as well as merchant configuration for the Bolt Merchant dashboard.Plugin Installation
↑ Back to top
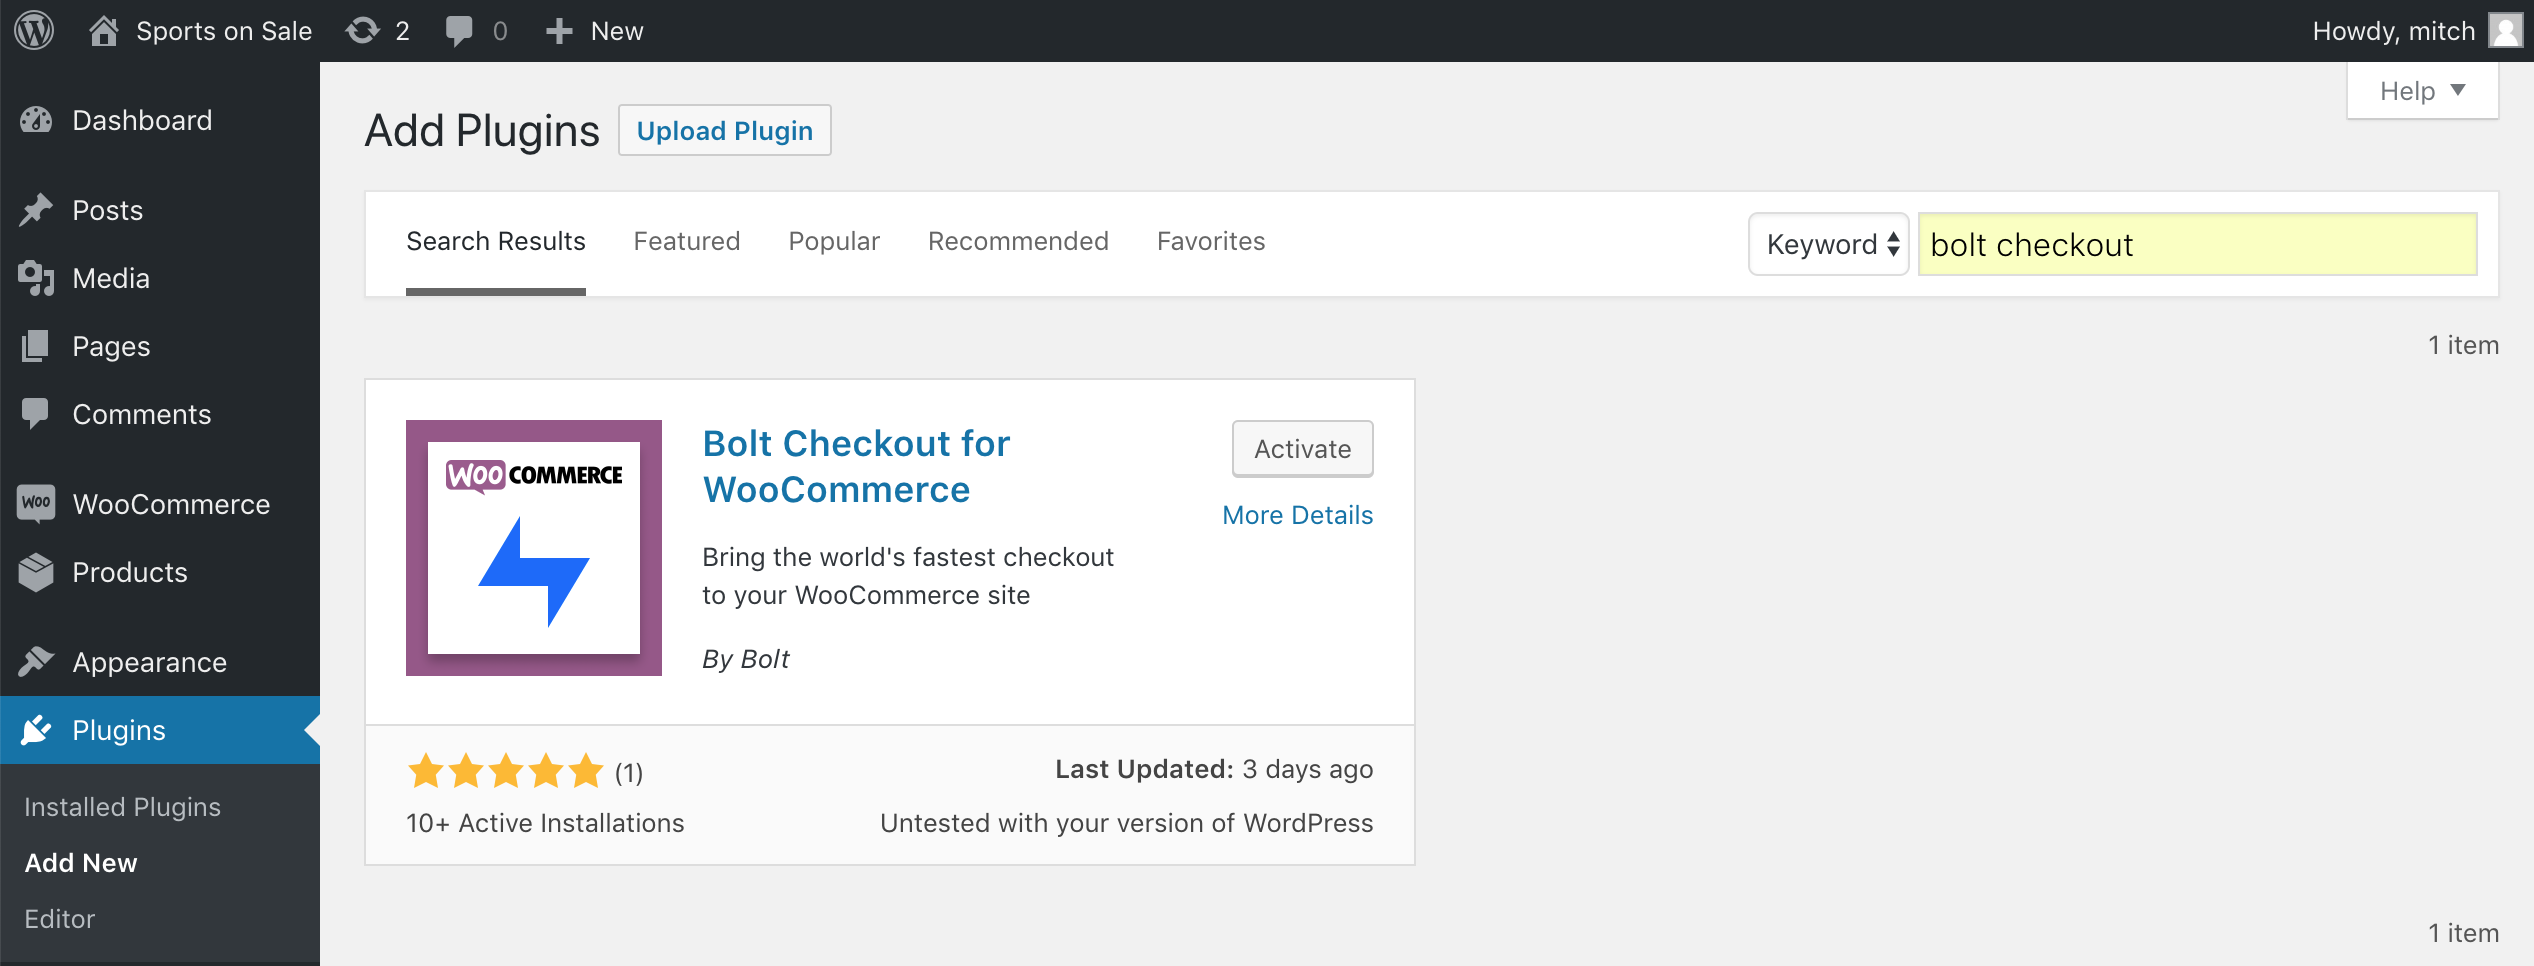
In the WordPress Admin Dashboard, navigate to Plugins and select Add New.
- Search for “bolt checkout” and find the plugin named Bolt Checkout for WooCommerce.
- Click the Install Now button. Once installation is complete, click Activate.
- A Bolt merchant account is required for activation. Please follow instructions here set up your account.
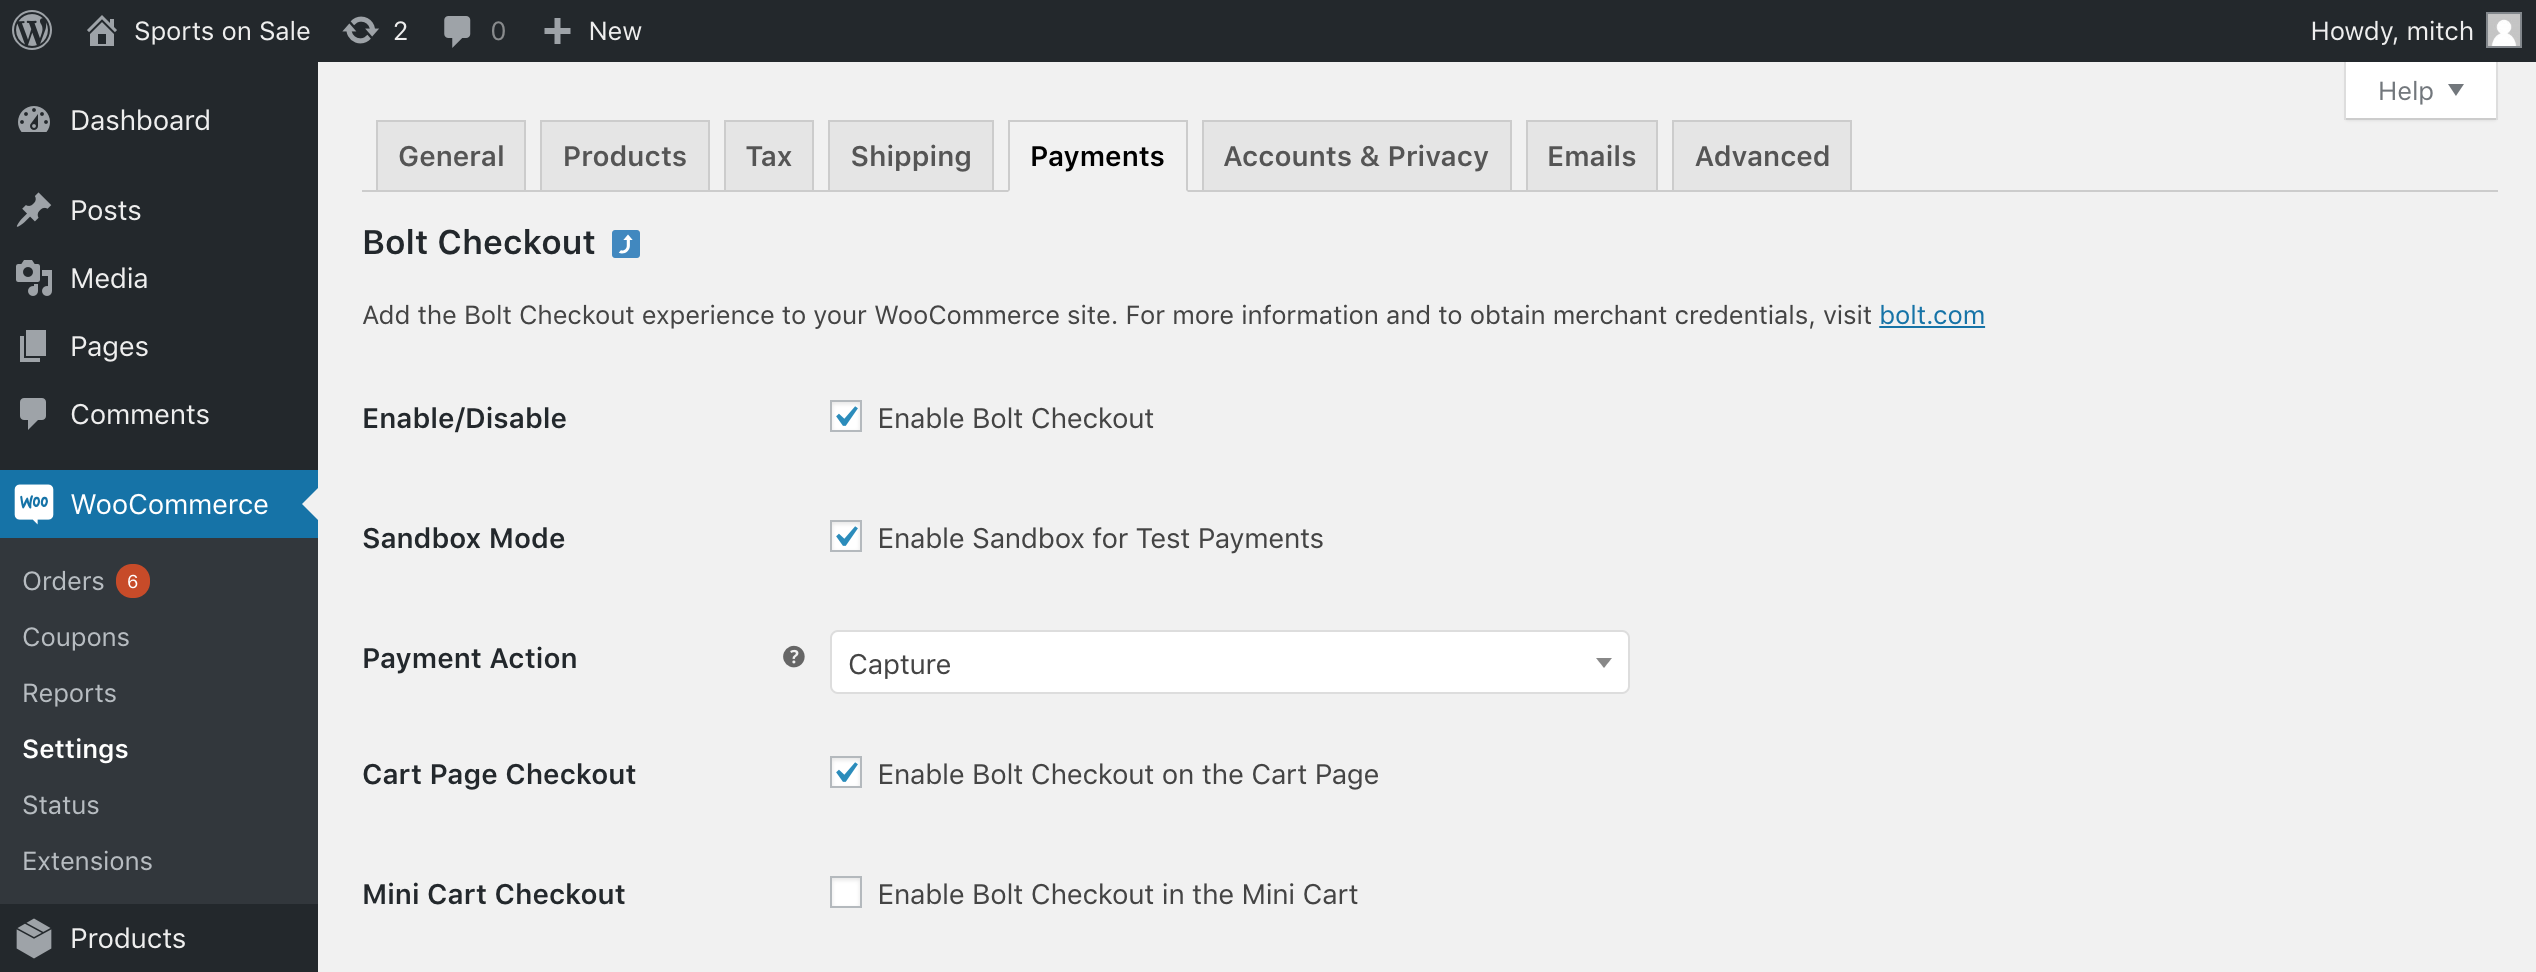
Under Plugins, find WooCommerce Bolt Checkout and select Settings.
- Ensure Enable Bolt Gateway is checked.
- Ensure Bolt Sandbox Mode is checked for testing, or unchecked for production.
Bolt Merchant Configuration
↑ Back to topProduction: https://merchant.bolt.com
Sandbox: https://merchant-sandbox.bolt.com
In the Bolt Merchant Dashboard, navigate to Settings and select Keys and URLs.
- Copy the API Key, Signing Secret, and Publishable Key from the Bolt Merchant Dashboard into the Bolt Plugin Settings in WordPress.
- Copy the Webhook and Shipping and Tax URLs from the Bolt Plugin Settings in WordPress into the Bolt Merchant Dashboard.
Note — If you see the Create Order configuration available in your URL configuration, it means that pre-order creation is enabled for you. Configure the URL to be the same as response webhook, but replace “response” with “create-order”

Whitelist Bolt IPs
Ensure the IPs provided by Bolt are whitelisted to allow access to the endpoints above.
Check for the Extension Plugin
If you are upgrading your version of the Bolt Plugin and have the Bolt Extension plugin installed as well, be sure to update both plugins. Failing to upgrade Bolt Extension could break some functionality of the primary Bolt plugin.
Success!
You have completed the Bolt Checkout for WooCommerce integration.
Extensions
The Bolt Checkout for WooCommerce plugin contains the necessary logic to support using Bolt on WooCommerce. Most customizations should be made in the plugin settings page, but there are circumstances in which additional code is needed to support a specific use case. For these cases, the Bolt Integrations team will provide a custom zip file to the merchant. This section details how to install the merchant-specific Bolt Checkout for WooCommerce Extensions plugin.
In the WordPress Admin Dashboard, navigate to Plugins, then:
- Select Add New and then Upload Plugin.
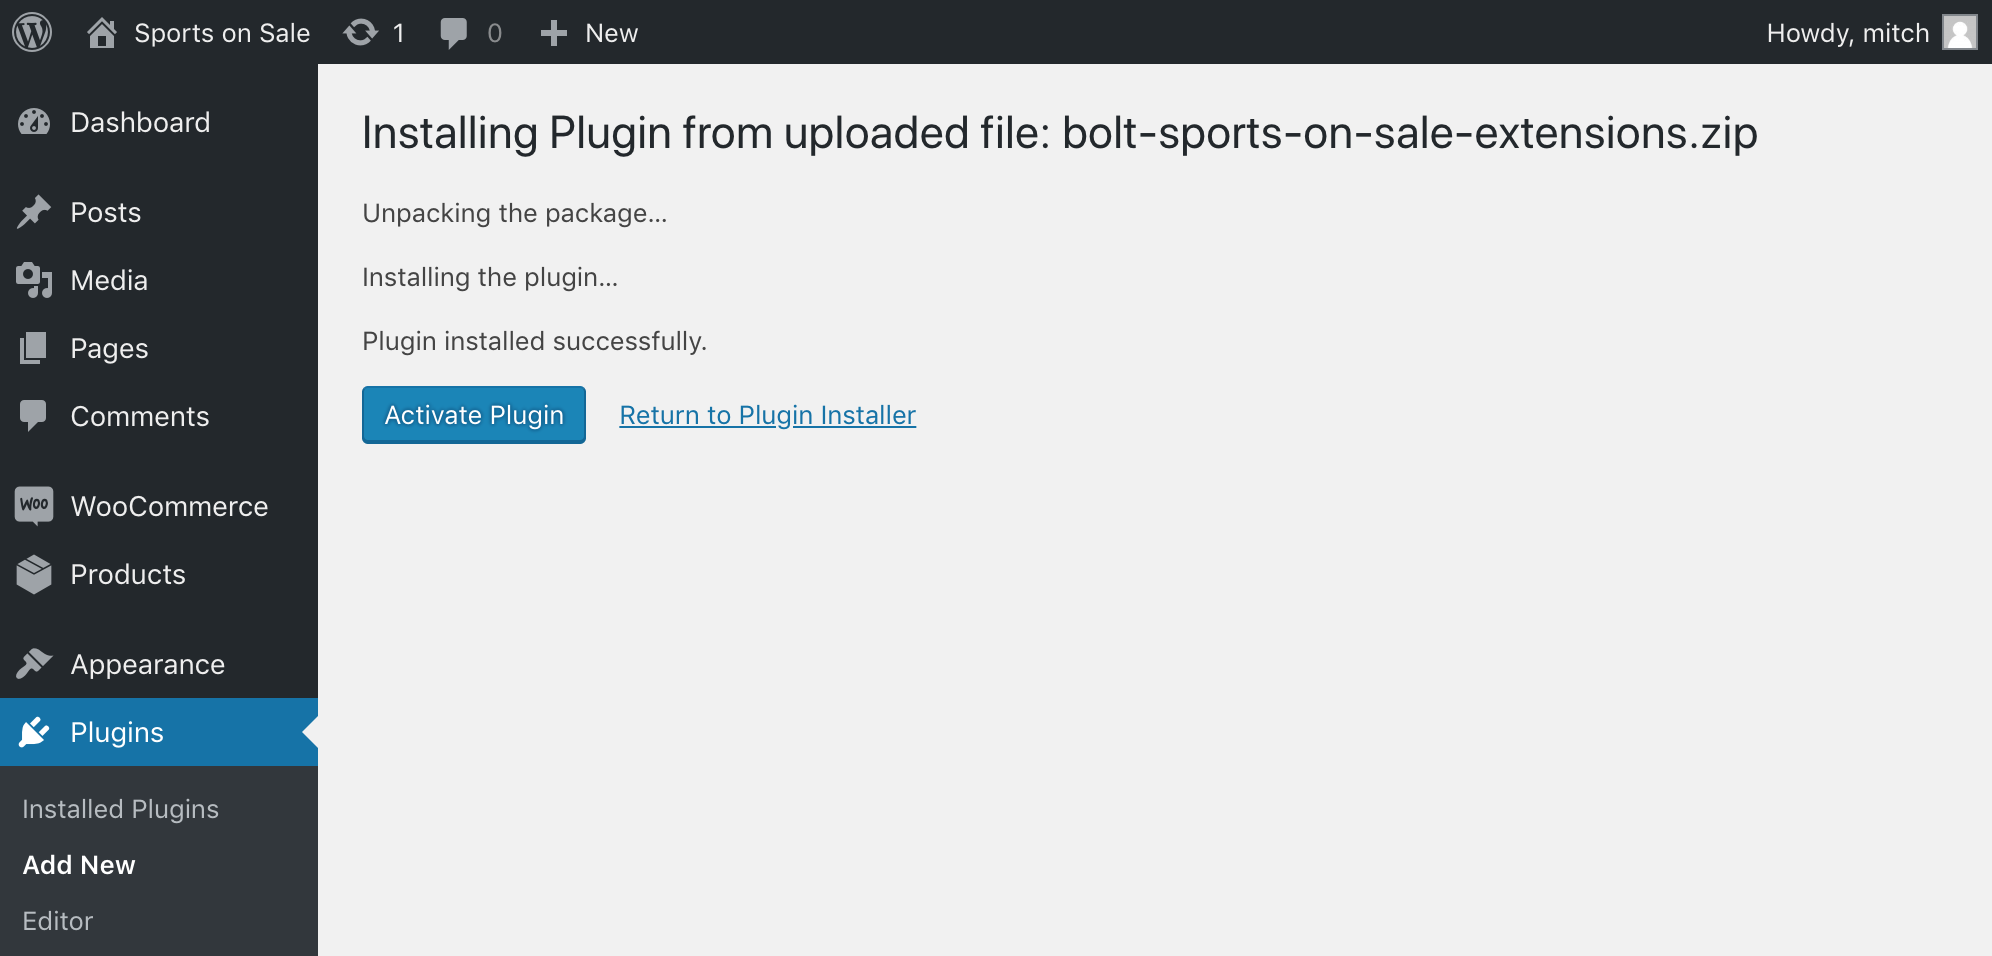
- Click on the Choose File button and select the zip file provided by the Bolt Team.
- Click the Install Now button.

After the installation is complete, click Activate Plugin.
Verify Extensions Plugin
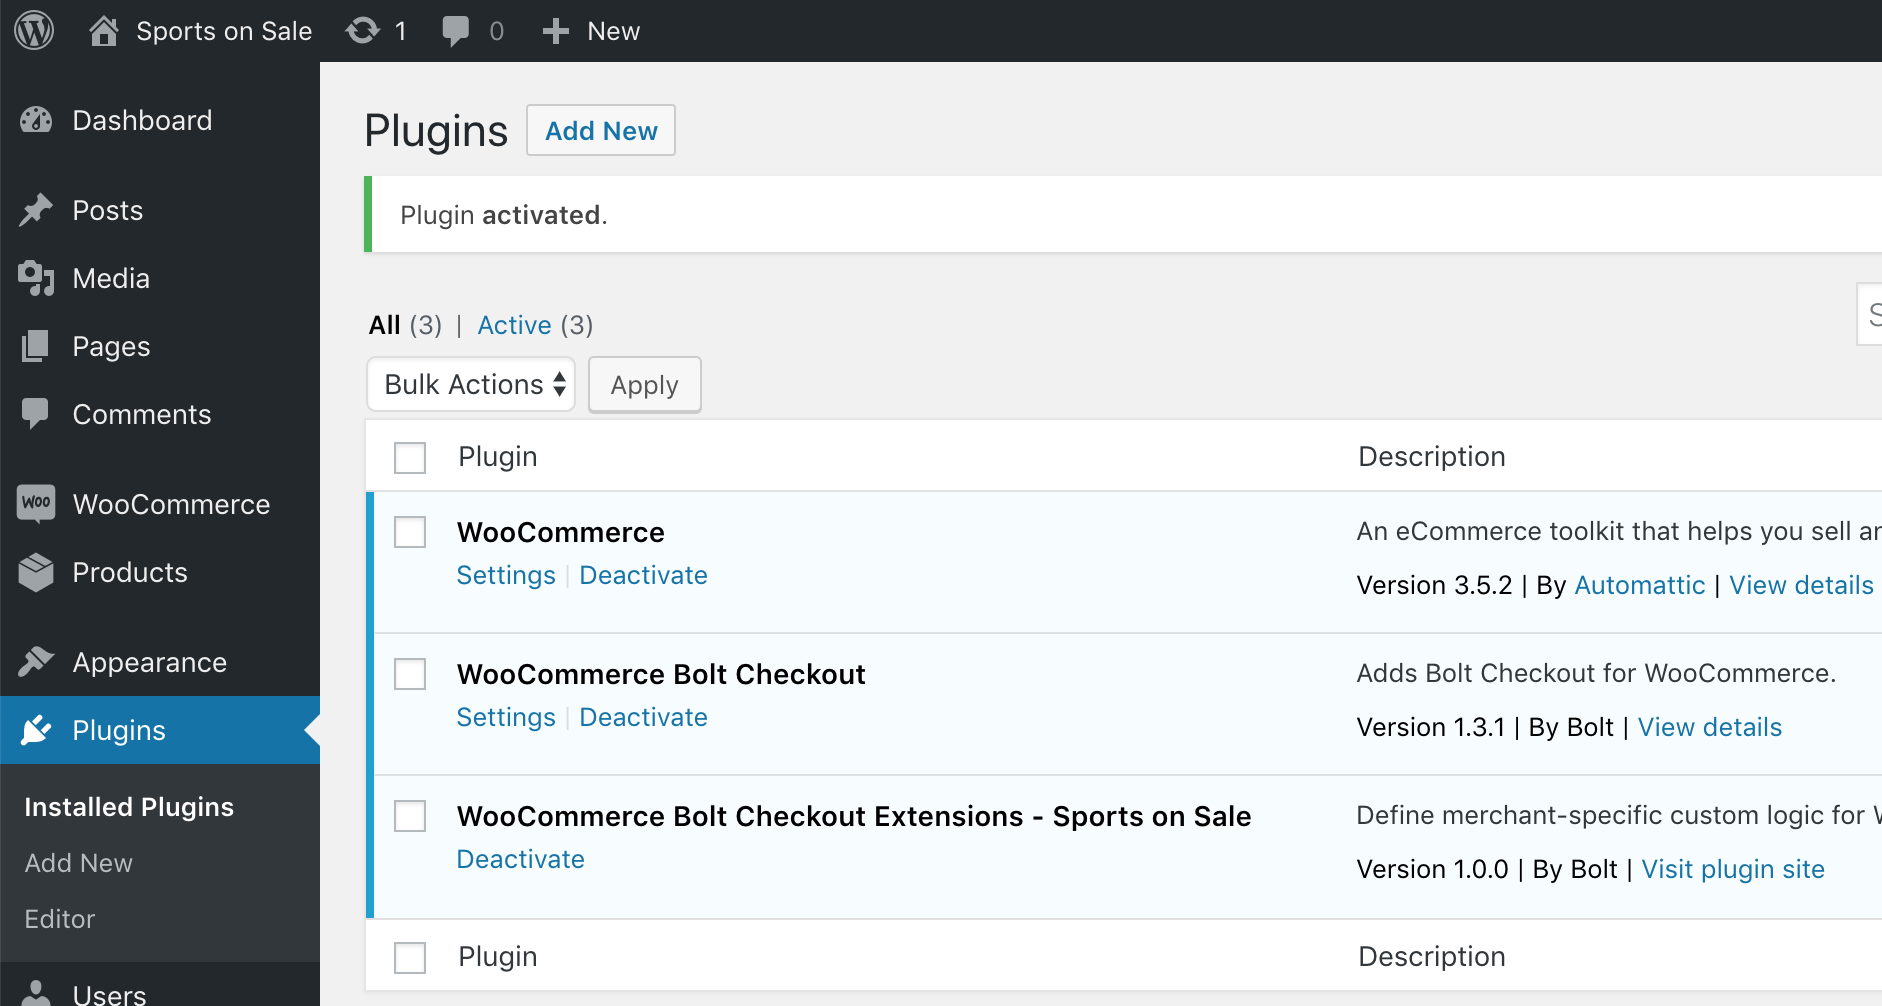
↑ Back to top- In the WordPress Admin Dashboard, navigate to Plugins.
- Verify that the additional plugin appears and is activated.
Success
You have completed the Bolt Checkout for WooCommerce Extensions integration.
Upgrading the Bolt Plugin
If you are upgrading your version of the Bolt Plugin and have the Bolt Extension plugin installed as well, be sure to update both plugins. Failing to upgrade Bolt Extension could break some functionality of the primary Bolt plugin.
Operations
This section covers common operations used with Bolt Checkout.Order Review and Statuses
↑ Back to top
When a user places an order, its initial order status will be Pending payment, which indicates Bolt is reviewing the order. There are four potential statuses the order may take after review:
Bolt Rejected — When Bolt suspects the transaction is likely a fraud, Bolt rejects the transaction. In this case, the status will be updated “Bolt Rejected.” You may either “force approve” or “confirm rejection” in the Bolt Merchant Dashboard.
Failed — When Bolt is confident an order is fraud, Bolt irreversibly rejects the transaction. In this case, the status will be updated to “Failed.”
Processing — When Bolt approves the order, the status will be updated to “Processing.” If “auto capture” is enabled, payment is captured at this point. Otherwise, the payment will be captured when the invoice is issued.
On Hold — If Auth&Capture is set for the merchant (funds are captured separately from the authorization), then an order will be placed “On Hold” once it has been authorized. This indicates the merchant can fulfill the order, and once updated to “Processing” in WooCommerce Bolt will capture the funds.
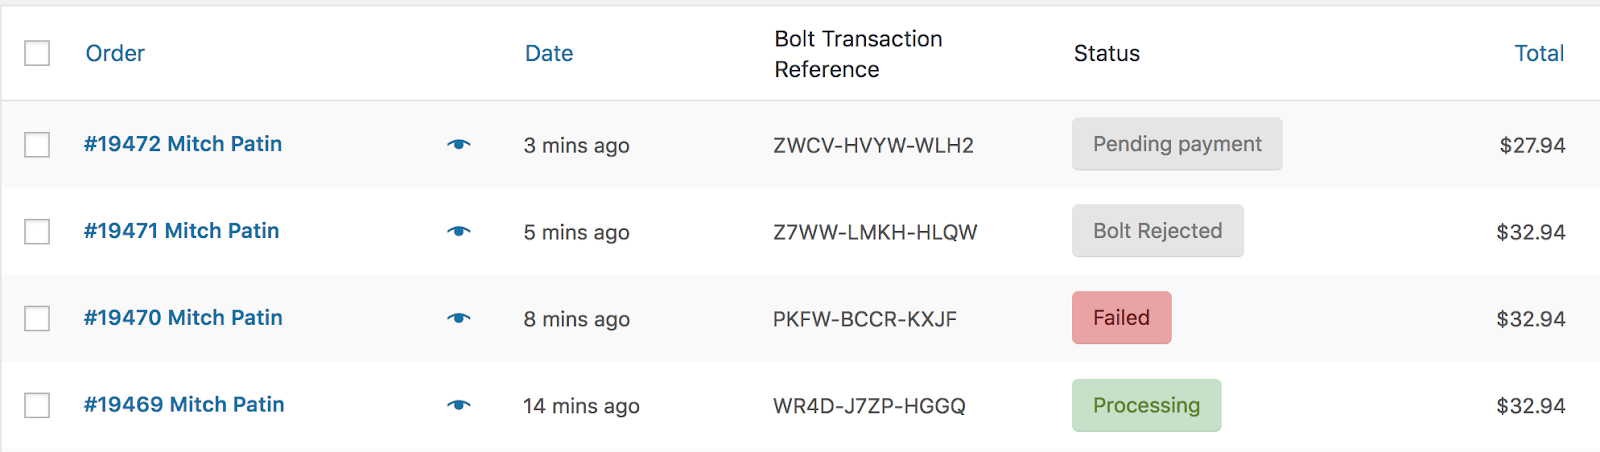
WooCommerce Admin Dashboard
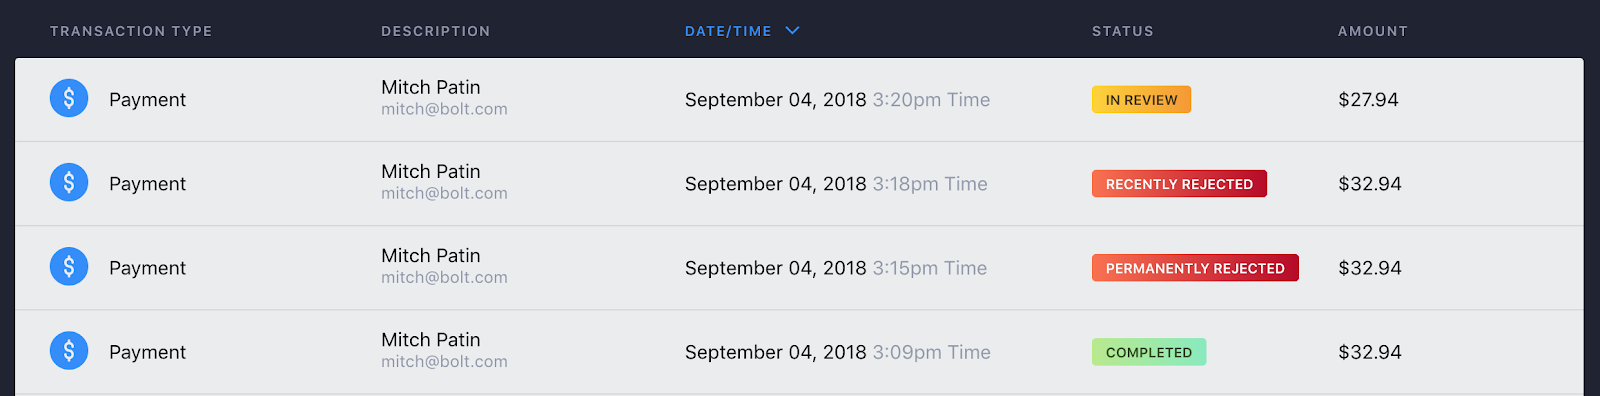
Bolt Merchant Dashboard
Taking Phone Orders
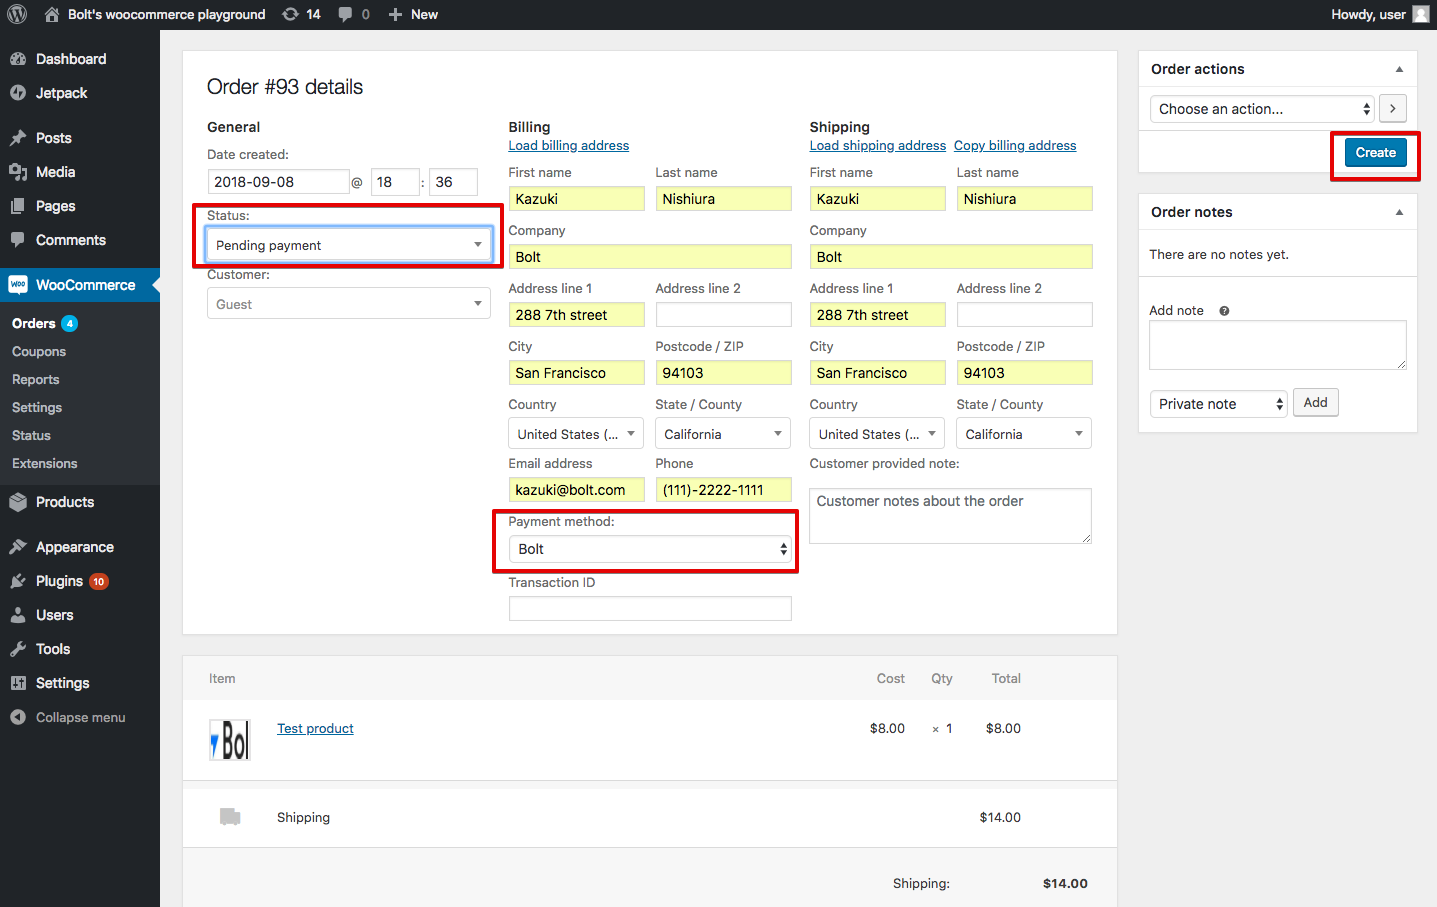
↑ Back to topCreating an Order
↑ Back to top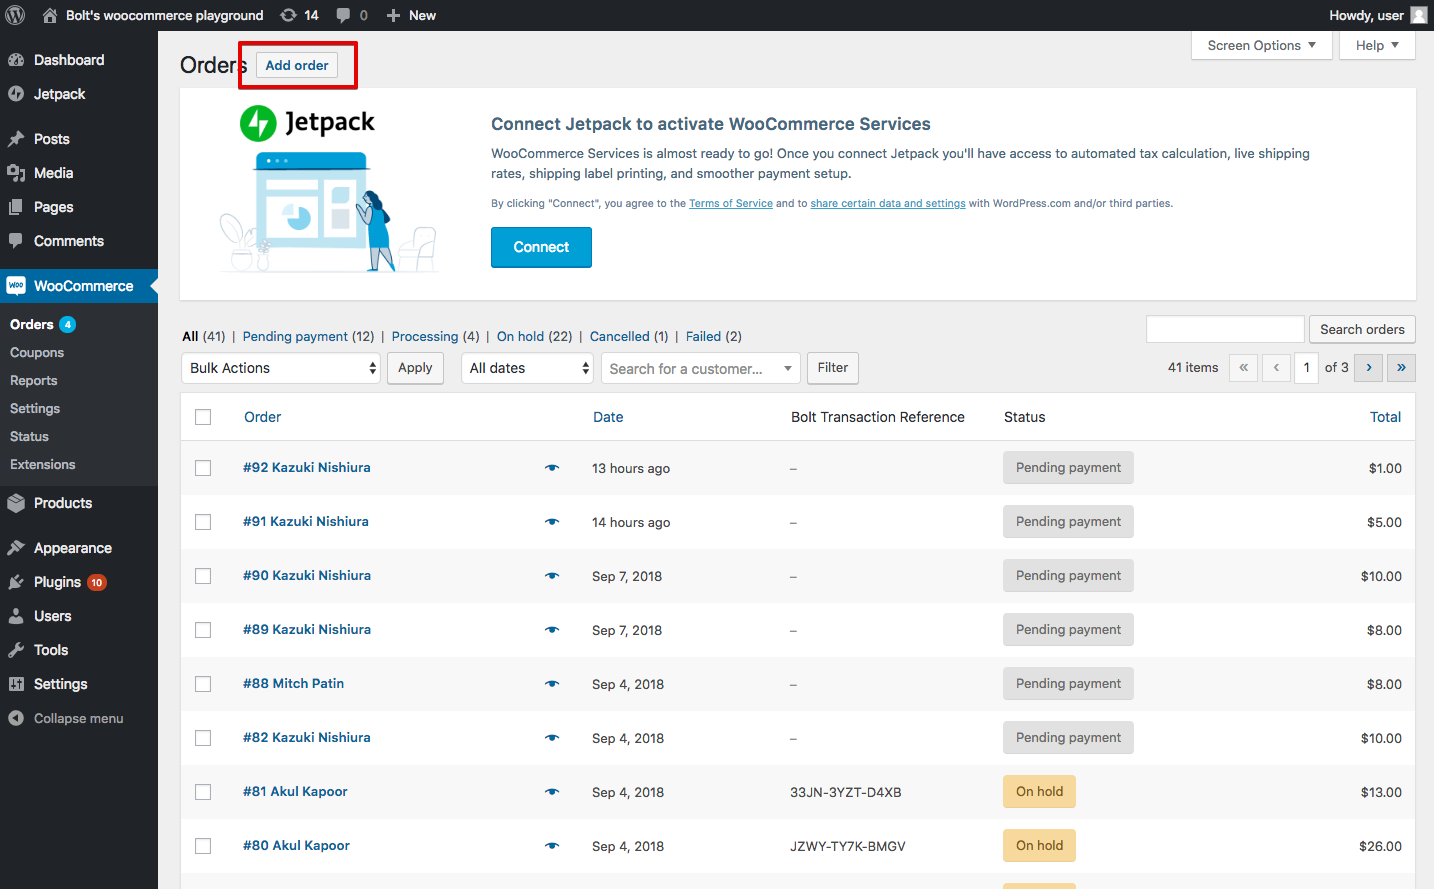
- Enter the address, items, and shipping information.
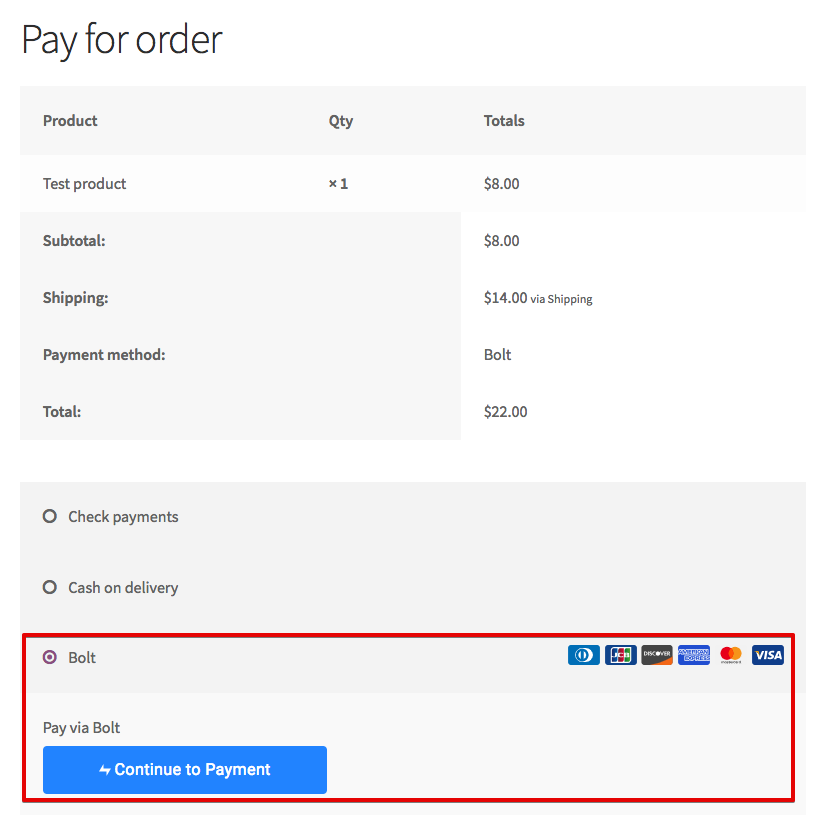
- Select Bolt as the payment method.
- Keep the status as Pending payment.
- Click Create to save the order.
Email invoice
↑ Back to top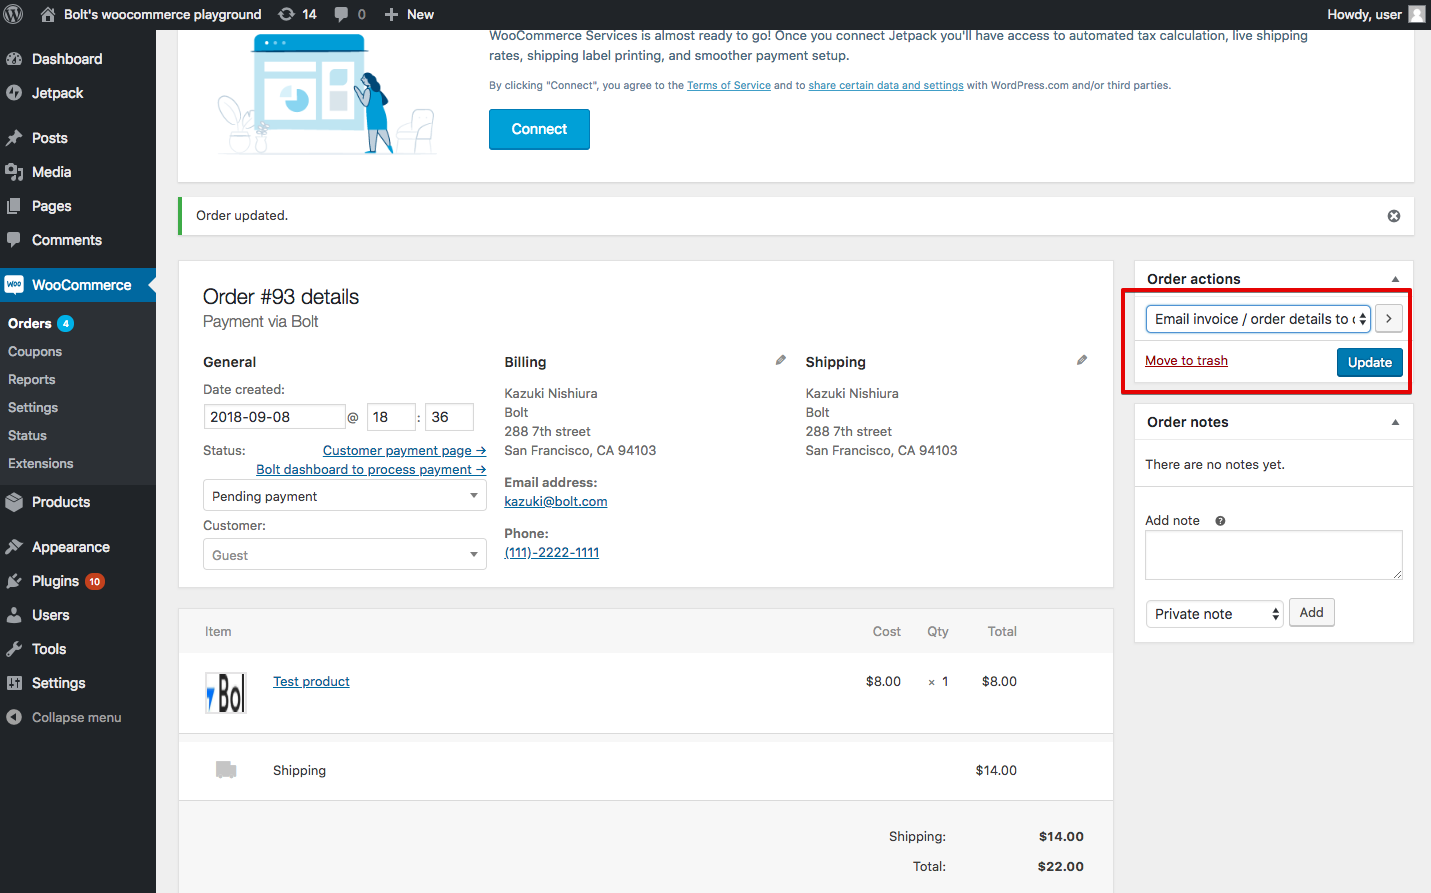
The customer will receive a link that they can use to complete the payment with Bolt.
Pay using Bolt Dashboard
↑ Back to top
Refunds
Refunds are best processed through WooCommerce, as the Bolt Merchant Dashboard will not automatically sync with your order management system.
However, If you’d like to issue a full or partial refund to your customer, you can do so by using the Bolt Merchant Dashboard.
Use the following steps to issue a refund:
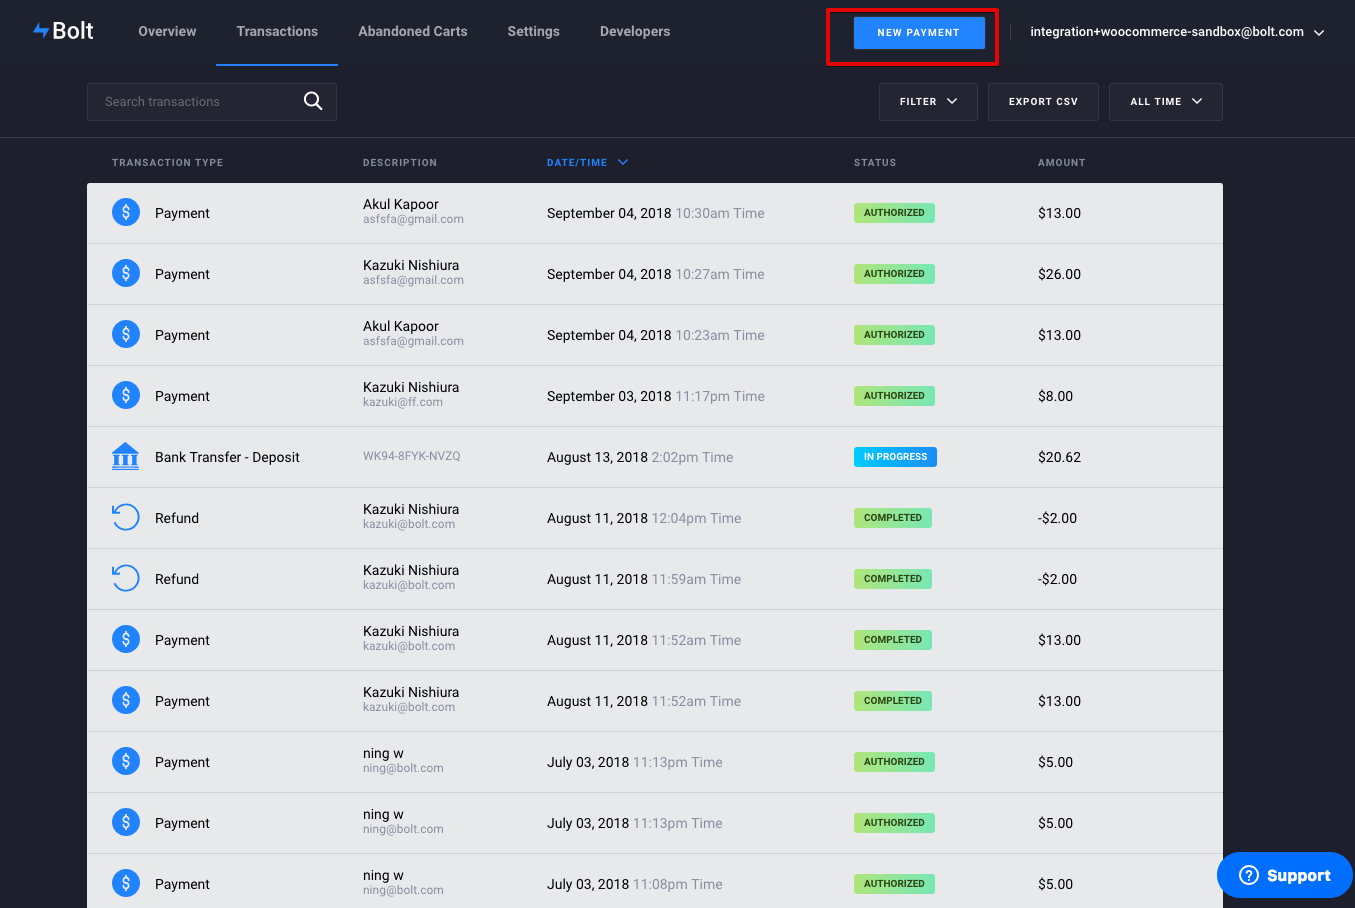
- Log into your Bolt Merchant Dashboard at https://merchant.bolt.com/.
- Click Transactions at the top of the page.
- Use the search bar to locate the transaction that you are looking to refund. You can search on: customer name, order number, Bolt transaction ID, or customer email.
- Once you have found the transaction in the list, click on the transaction to open the transaction details. Note that only transactions with a status of Completed can be refunded.
- Click the Issue Refund button at the top of the page.
- Choose whether to issue a full refund or a partial refund. If you issue a partial refund, enter the amount (see screenshot below).
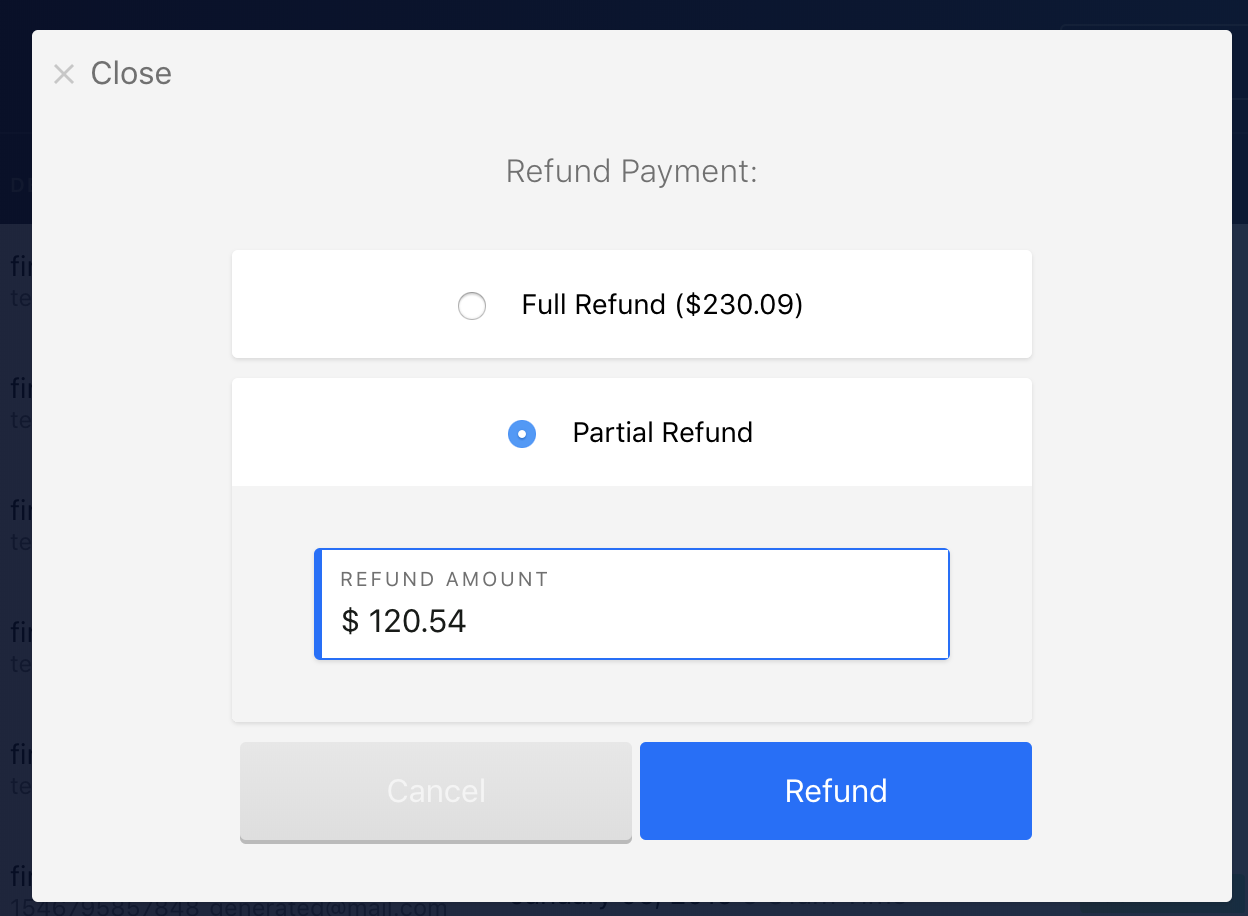
- Click Refund.
- Once Refund, is clicked:
-
- The refund will be processed. Depending on the issuing bank, it might take up to 7 days for the refund to show up on the customer’s bank or card statements.
- Your customer will be notified via email of the refund.
- The refund will be sync’ed to your shopping cart platform (i.e. BigCommerce, Magento, WooCommerce, Shopify).
- The refund will be added as a note at the bottom of the transaction details panel. This note will contain a link to the refund transaction.
Note — Bolt will retain both the processing fee and Bolt fee on refunded transactions.
Note — A refund cannot be issued if there is an active chargeback dispute, fraudulent or non-fraudulent, open on the transaction.
For details on WooCommerce refunds go here.