Catalog Visibility for WooCommerce lets you create custom catalogs and tailor your customer’s experience by displaying products that are more relevant for them.
The plugin gives you advanced visibility controls that allow you to serve relevant content based on customer’s data like geo-location, the price-tier in which their orders fall in, and their user roles.
With a powerful user role module, you can create custom user roles and customer groups to truly personalize the browsing experience for your valuable customers.
Catalog Visibility Documentation Menu
- Requirements
- Installation
- Configuration
- Plugin Support
Catalog Visibility for WooCommerce requires:
The first step is to purchase the plugin. For that, visit the product page for Catalog Visibility plugin for WooCommerce. On the right hand, you will see purchase options.

Once purchased, you will get a zip file.
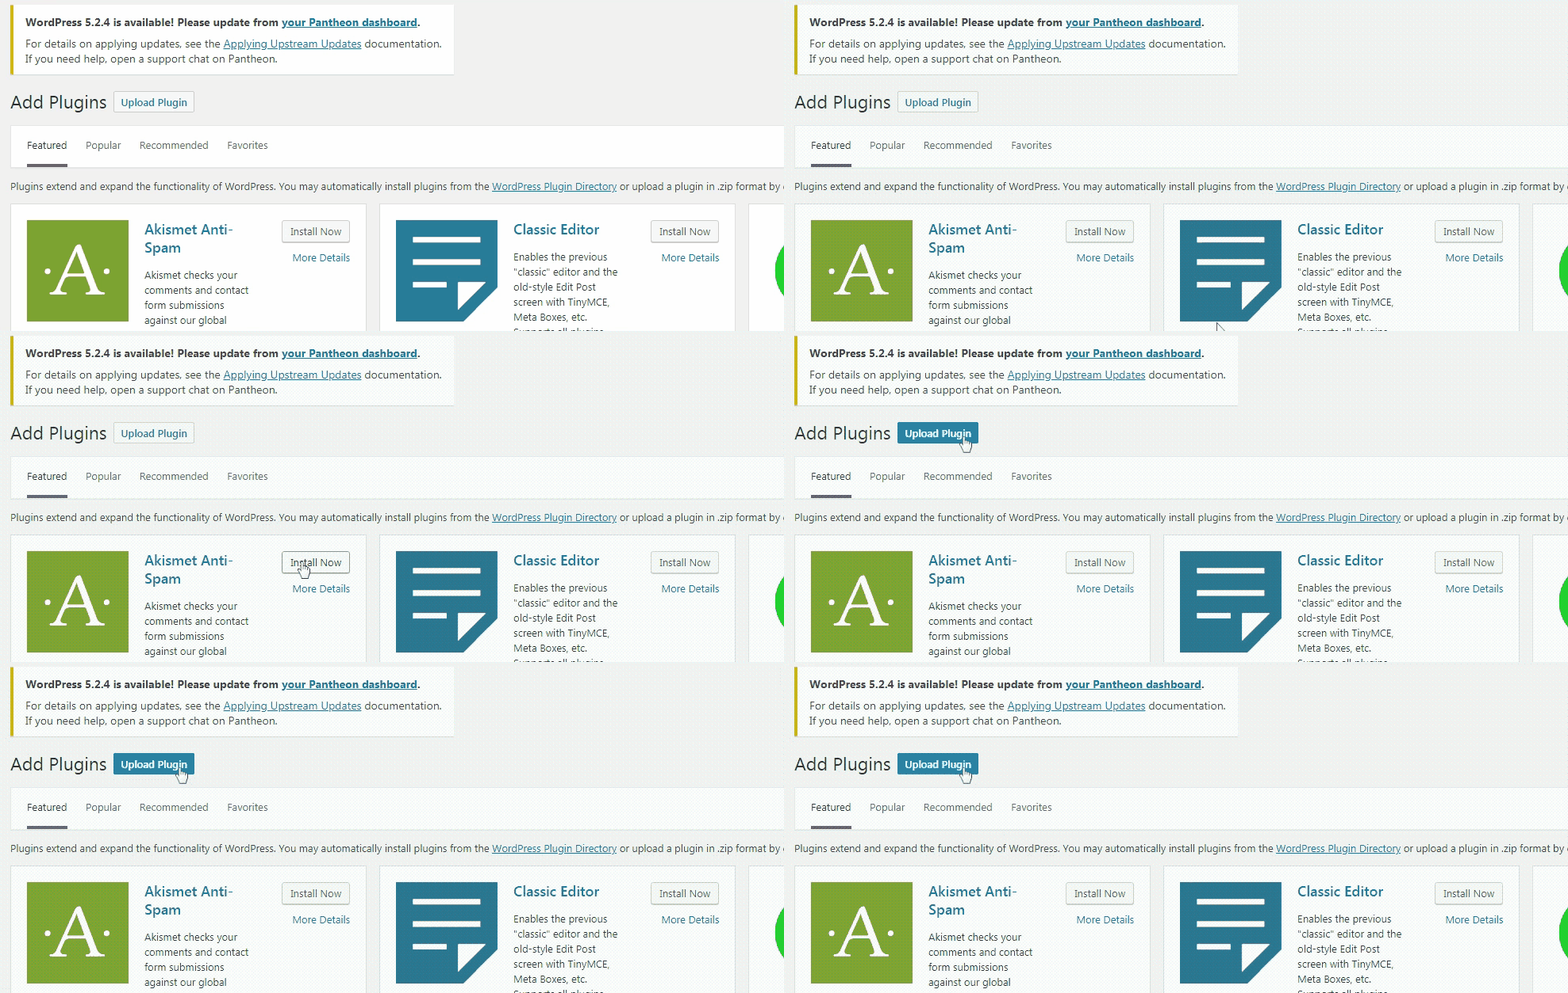
To install the plugin, go to your WordPress dashboard and navigate to Plugins > Add New > Upload Plugin.

Upload the zip file that you have purchased. That will install the plugin.
From the sidebar, click on Plugins > Installed Plugins.
The Installed Plugins page displays a list of all the plugins that have been installed on your WP site. Navigate to, or search for: “Catalog Visibility for WooCommerce”.
Note: Below the plugin name, if it shows an “Activate | Delete” option, click on “Activate”. If it’s showing a “Deactivate” option, it means that the plugin is already activated and you don’t have to do anything. However, in most cases after installation, you’ll be presented with the first option – i.e “Activate”.
Once the plugin is successfully activated, go back to your WordPress dashboard and navigate to WooCommerce > Settings.
Once the plugin is successfully activated, go back to your WordPress dashboard and navigate to WooCommerce > Settings.
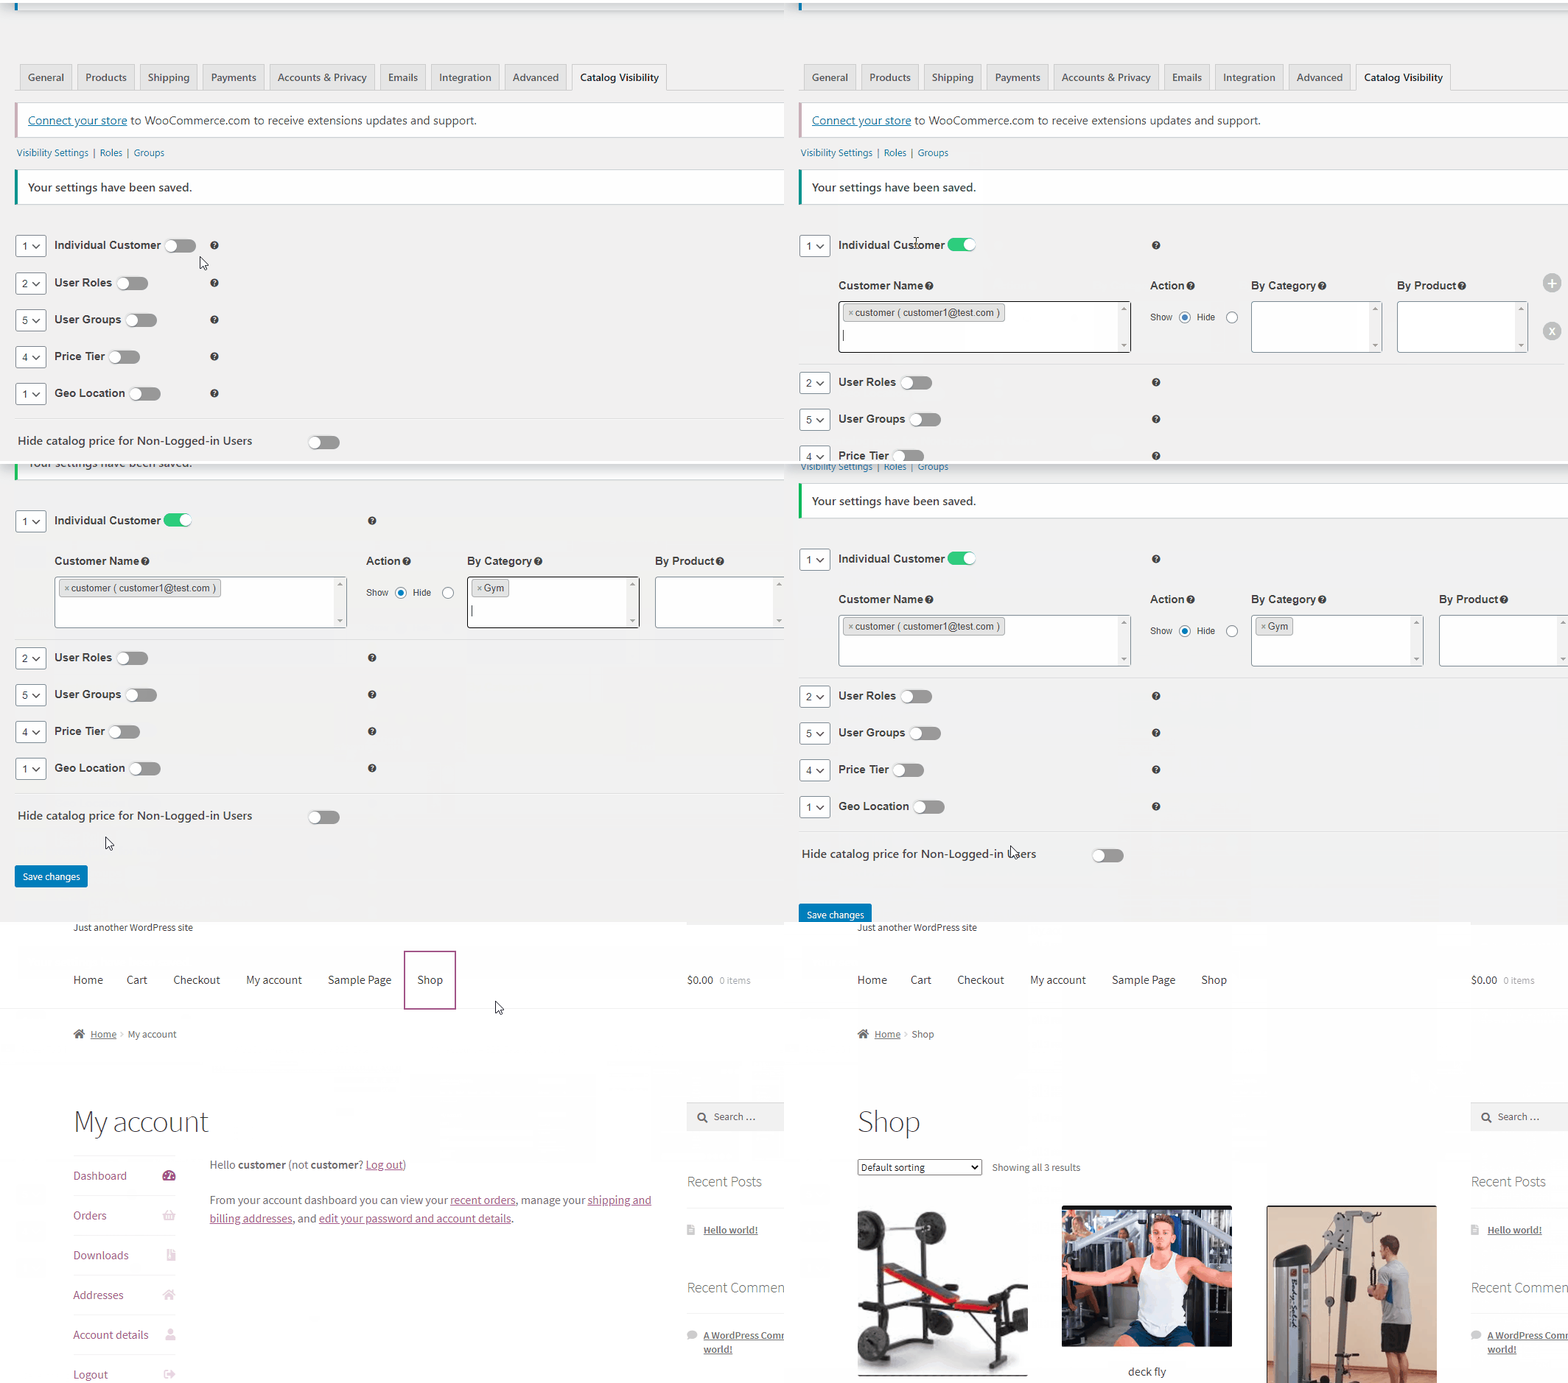
On the settings page, you will notice multiple tabs like General, Products, Tax, and Shipping. As illustrated below, you will see the Catalog Visibility tab. Click on it to open up the settings page.
On the top left of the settings screen, a menu will appear. Click on Visibility Settings to create rules for catalog visibility.
Visibility Settings let you create rules based on five attributes:
-
Individual Customer

A dropdown menu lets you set priorities for this rule. In case of conflicting condition, code will be executed based on this priority – the rule with higher priority will be executed.
A simple toggle lets you activate or deactivate this rule. If you turn it on, some options to create the rule will appear underneath.
Create specific rules for individual customers. The customer name field lets you select customers’ names from a dropdown menu. The interactive menu fetches customers’ data dynamically and auto-suggests to easily find the customer from your list. You can also select multiple names in one rule.
Choose whether you want to hide or show the products or categories you’ll define.
Choose which categories and/or products to hide/show.
-
User Role

Similar options appear under this attribute when it is toggled on. Store admins can create custom user roles from the user role module by selecting Roles from the menu on the top. The roles created there will appear here in the dropdown list.
-
User Group

Similar options appear under this attribute when it is toggled on. Store admins can create custom user groups from the user role module by selecting Groups from the menu on the top. The roles created there will appear here in the dropdown list.
-
Price Tier

Similar options appear under this attribute when it is toggled on. Admins can create price tier for customers. This price tier checks if the past order amount of the customers fall under this tier.
-
Geo-Location

Similar options appear under this attribute when it is toggled on. A dropdown list displays all the countries of the world and lets users select countries and define rules based on that.
Hide Prices for Non-Logged-in Audience

The plugin lets the admin hide catalog prices for non-logged-in users. Admin can hide prices of selected categories/ products or the whole catalog.
The plugin allows admin to hide catalog products from non-logged-in users. Admin can certain products/categories or the whole catalog from non-logged-in users.

User Roles

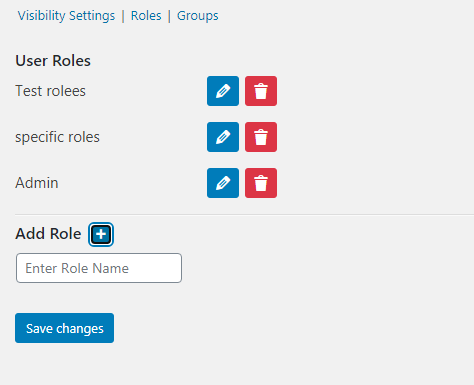
By selecting the Roles options in the menu above, you can create your own custom roles and give it any name of your choice.
How to Assign User Roles to Individual Customers
Go to WooCommerce => Customers and click on the customer you want to assign the role. Scroll down to the option of Catalogue Visibility User Roles. Click on the selection field and select the user role from the dropdown menu.
Scroll all the way to the bottom and click on Update Changes. The User Role is assigned to your customer.
User Groups

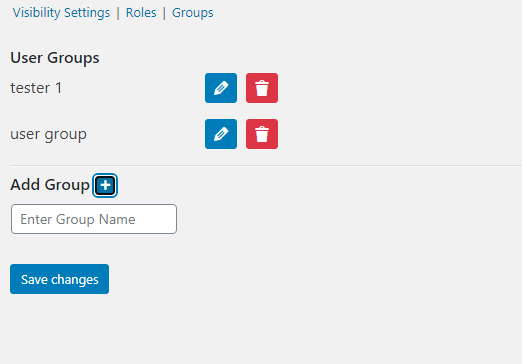
By selecting the Groups options in the menu above, you can create customer groups and give it any name of your choice. You can assign these groups to customers on the Edit User page. This will create customer groups that can be used to create custom catalogs.
How to Assign User Groups to Individual Customers
Go to WooCommerce => Customers and click on the customer you want to assign the role. Scroll down to the option of Catalogue Visibility User Groups. Click on the selection field and select the user group from the dropdown menu.
Scroll all the way to the bottom and click on Update Changes. The User Group is assigned to your customer.
Plugin Support
Should you need any further assistance regarding this plugin, feel free to contact us at
woosupport@codup.io and have our support team look into the issue for you. Thank you!
 Once purchased, you will get a zip file.
To install the plugin, go to your WordPress dashboard and navigate to Plugins > Add New > Upload Plugin.
 Upload the zip file that you have purchased. That will install the plugin.
From the sidebar, click on Plugins > Installed Plugins.
The Installed Plugins page displays a list of all the plugins that have been installed on your WP site. Navigate to, or search for: “Catalog Visibility for WooCommerce”.
Note: Below the plugin name, if it shows an “Activate | Delete” option, click on “Activate”. If it’s showing a “Deactivate” option, it means that the plugin is already activated and you don’t have to do anything. However, in most cases after installation, you’ll be presented with the first option – i.e “Activate”.


