Overview
↑ Back to topAccept payments by all major credit cards directly on your site with Clover for WooCommerce by Kestrel (using Clover’s iframe integration), with a full suite of features:
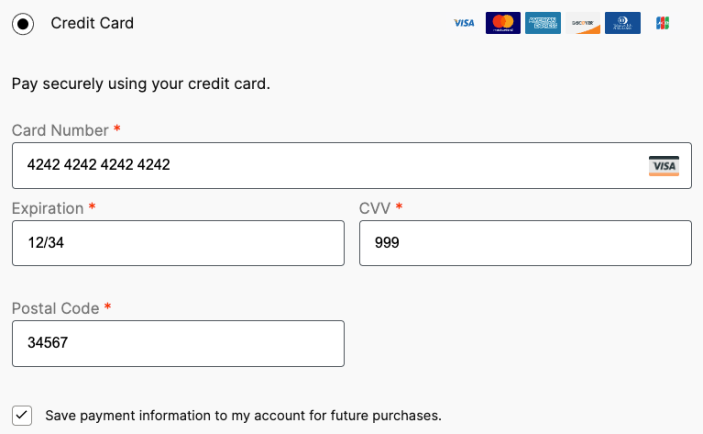
- Securely process payments directly on the checkout
- Allow your customers to securely save their payment method to their account (using client-side tokenization for enhanced security and reduced PCI compliance requirements)
- Supports pre-authorization and capturing pre-authorized charges directly within your WooCommerce admin
- Supports refunding charges and voiding pre-authorized charges directly within your WooCommerce admin
- Supports WooCommerce Subscriptions and WooCommerce Pre-Orders
Installing Clover for WooCommerce
↑ Back to top- Download the Clover for WooCommerce extension from your WooCommerce dashboard
- Go to Plugins > Add New > Upload and select the ZIP file you just downloaded
- Click Install Now, and then Activate
- Go to WooCommerce > Settings > Payments and read the next section to learn how to setup and configure the plugin.
Setup and Configuration
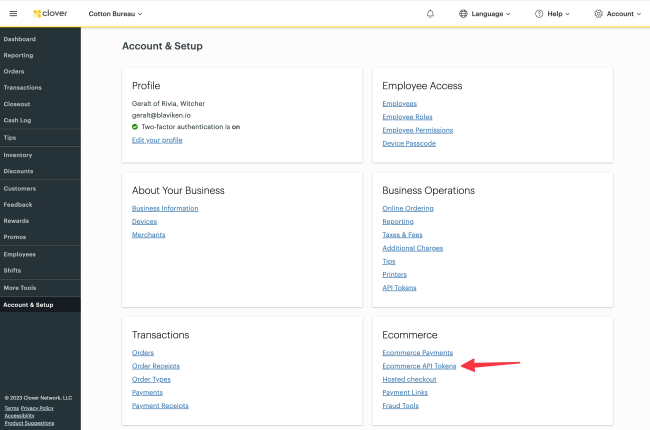
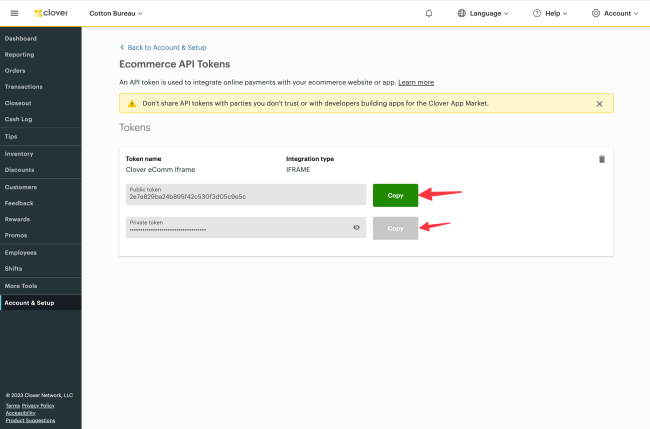
↑ Back to top1. To set up the plugin, you’ll need credentials from Clover. First, log into your Clover account. On the left side, click “Account & Setup” and then “Ecommerce API Tokens”:
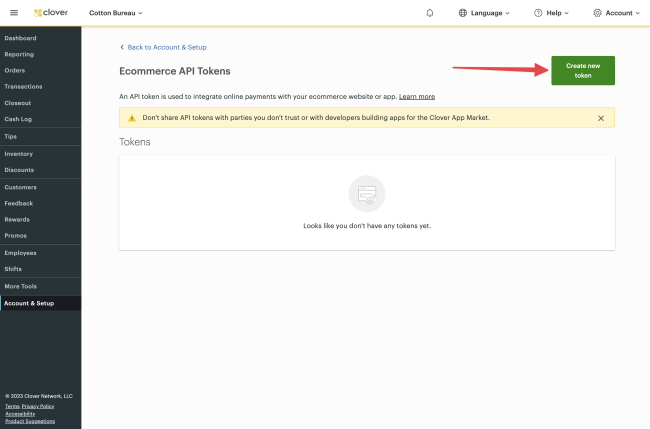
2. On the top right, click “Create new token”:
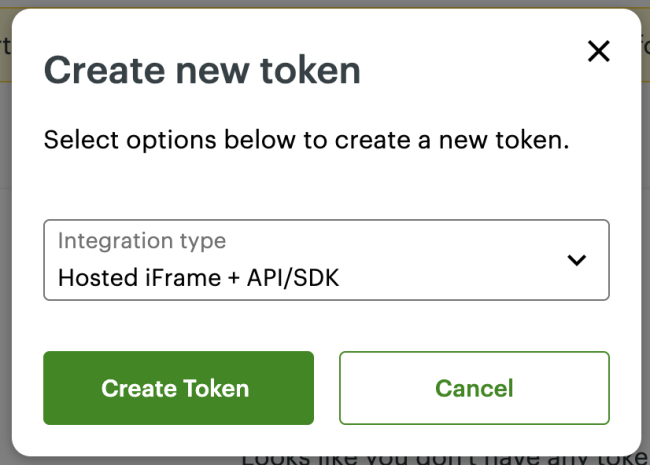
3. Leave the integration type as “Hosted iFrame + API/SDK” and click “create token”:
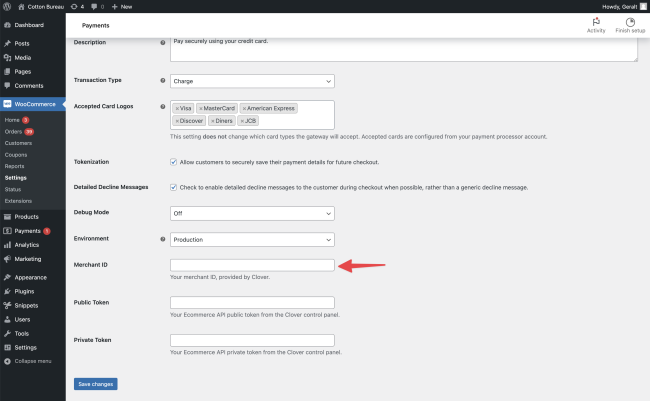
4. Log into your WooCommerce admin and go to WooCommerce > Settings > Payments > Clover Credit Card. You should see two fields, “Public Token” and “Private Token”:
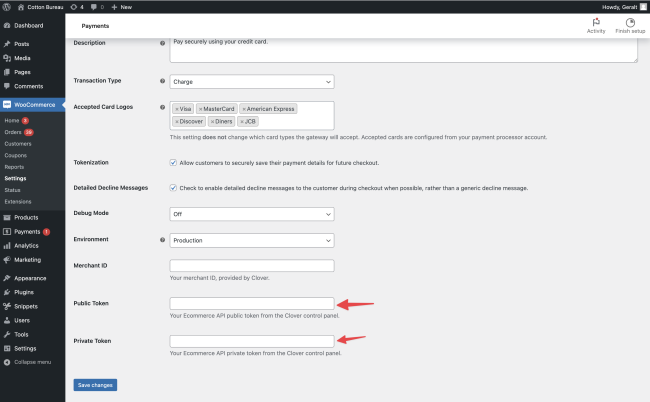
5. Now, back on the Clover admin, click the “copy” button next to the “Public token” field and paste it into the “Public Token” field in your WooCommerce admin. Do the same for the “Private token” field:
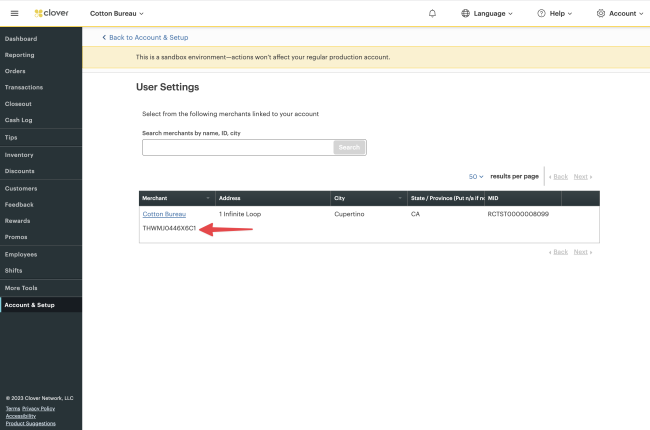
6. Finally, in your Clover admin, go back to “Account & Setup” on the left side, and click “Merchants”. Copy the text below your store name and paste it into the “Merchant ID” field in your WooCommerce admin, and click “Save changes”:
You can configure the other Clover settings in your WooCommerce admin however you would like. With that, you’re all ready to accept payments via Clover in your store.
Merchant Usage
↑ Back to topThere are several features available to assist merchants in managing transactions.
Capture Charges with Clover for WooCommerce
↑ Back to topYou can capture pre-authorized credit card transactions from directly within the WooCommerce admin — no logging into your Clover account to capture transactions needed.
You can read about how to capture charges in WooCommerce here.
Refund Transactions in WooCommerce
↑ Back to topYou can refund transactions from directly within the WooCommerce admin, which means that refunds can be processed directly in WooCommerce without the logging into your Clover account to save time on store management. Only full refunds are supported, partial refunds are not supported (see known limitations below).
You can read more about managing refunds here.
Void Transactions in WooCommerce
↑ Back to topYou can void pre-authorized transactions from directly within the WooCommerce admin — this will cancel the order as funds have not been captured yet, and will void the charge within Clover without the need to log into the Clover admin.
Voided transactions must be voided in full; partial voids are not accepted by Clover. You can read more about voiding transactions here.
Managing Credit Card Tokens with Clover for WooCommerce
↑ Back to topSaved card tokens for a customer can be managed by an admin. Card tokens are saved in the customer’s account (no sensitive information is stored in your store’s database). Shop admins can create or delete credit card tokens from the “edit WP User” page when tokenization is enabled.
When using the Clover gateway, your customers are able to save one payment method at a time. The plugin has additional handling to assist with moving subscriptions to a new token if a customer needs to change their payment method.
You can read more about managing saved card tokens here.
Customer experience
↑ Back to top
Detailed Decline Messages
↑ Back to topWhen detailed decline messages are enabled, they will provide informative error messages to the customer at checkout when Clover returns a useful response.
You can read more about detailed decline messages here.
My Payment Methods
↑ Back to topLogged-in customers can save cards to their accounts during the checkout process, and view or manage these cards in the account section.
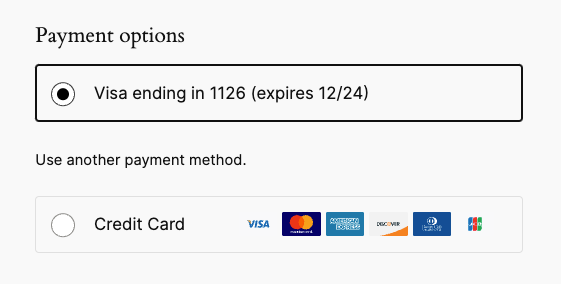
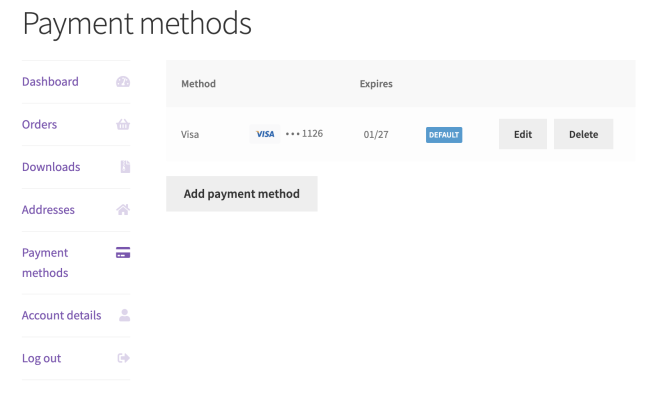
Clover also supports adding new methods from the account. You can read more about adding methods from the account here.

Other Info & Clover for WooCommerce Features
↑ Back to topStoring Credit Cards
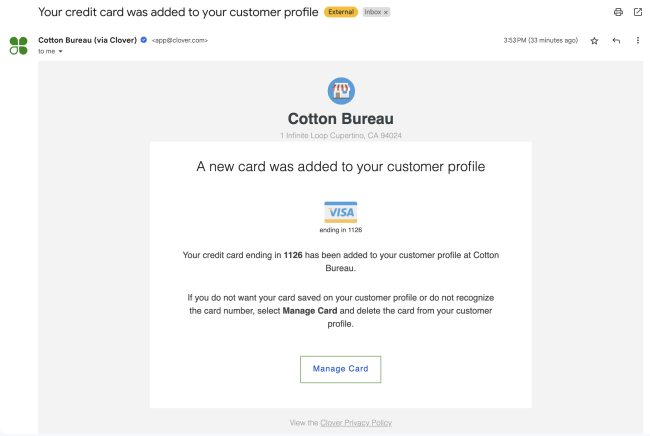
↑ Back to topCredit card information is not stored on your server, rather it is tokenized and stored on Clover’s secure servers, which reduces your PCI compliance burden. Clover has a limitation that requires each customer have a maximum of one card stored on their account. If they save a new card, their existing saved payment method will be replaced. There is additional handling in place to support transitioning payment methods when Subscriptions are active on the user’s account.
When a customer opts to save their card, they will receive a notification email from Clover:
WooCommerce Subscriptions / Pre-Orders Support
↑ Back to topClover fully supports all features of WooCommerce Subscriptions and WooCommerce Pre-Orders.
When Subscriptions is used, the enhanced “My Payment Methods” table is also active to prevent deleting cards associated with a subscription. You can read about subscription saved methods here.
Troubleshooting Clover for WooCommerce
↑ Back to topDebug Mode
↑ Back to topIf you see errors when testing your gateway integration, the first step to diagnosing the issue will often likely be to enable the Debug Mode setting in the gateway plugin configuration. Enabling debug mode will give you access to the transaction request/response messages and can be extremely helpful to provide to WooCommerce and Clover support staff for resolving payment issues.
Setting Debug Mode to “Show on Checkout Page” will display the additional debug information and requests/responses (stripped of any sensitive information) directly on the checkout page. This is most useful when you are initially configuring and testing your plugin in demo mode.
Setting Debug Mode to “Save to log” will save the debug information and requests/responses (stripped of any sensitive information) to the WooCommerce Error Log (found under WooCommerce > System Status > Logs). This can be useful when diagnosing an intermittent issue with your production account that is difficult to replicate, to provide a record of the transactions for review by support staff.
Setting Debug Mode to “Both” will cause logging both to the checkout page as well as WooCommerce logs.
As a best practice, be sure to enable Debug Mode only when necessary, and set to “Off” once your issue has been resolved.
Known Limitations
↑ Back to top- Customers, Orders, and Products/Inventory are not synced to Clover.
- Detailed line items and inventory are not supported due to limitations with Clover’s API.
- Partial refunds are not supported as they require detailed line items.
- If a customer has an account or creates an account as part of checkout, they will be added to Clover (along with any saved cards), but they will not be linked to their transaction or order.
Questions & Support
↑ Back to topNeed some assistance? Get in touch via the help desk.