Documentation of Country Based Website Switcher for WooCommerce.
Installation
↑ Back to topTo start using a product from WooCommerce.com, you can use the “Add to store” functionality on the order confirmation page or the My subscriptions section in your account.
- Navigate to My subscriptions.
- Find the Add to store button next to the product you’re planning to install.
- Follow the instructions on the screen, and the product will be automatically added to your store.
Alternative options and more information at:
Managing WooCommerce.com subscriptions.

Setup and Configuration
↑ Back to topOnce the extension is installed, you can see ” Country Selector” under WordPress Admin > WooCommerce. Click to access the settings.
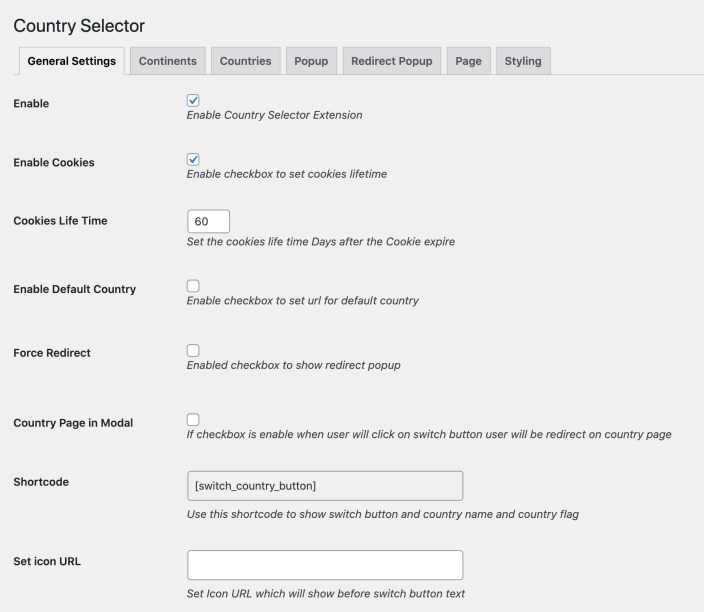
General Settings:
↑ Back to topFrom general settings tab you can control following options
- Enable/disable Country selector extension
- Enable/disable the option to set cookie lifetime
- Use textbox to define cookie lifetime in days after which it will expire.
- Add default website URL to display on popup for redirection
- Enable Force Redirect pop-up.
- Set the timer from 0-60 seconds for the Force Redirect pop-up. Set the timer to 1 seconds if you want to redirect users to relevant country based website without showing a popup.
- Exclude redirect for logged in users
- Enable switcher popup.
- Use the shortcode {country_name} to display a switch button anywhere on your website. The switch button will load the countries list on click for which you have specialized websites.
- Add an icon to display along with website switcher button.
Continents:
↑ Back to topFrom the continents tab, you can enable continents to display countries of the same continent in countries tab. For example if you have a personalized country based website for european region only, you can choose to enable european countries only in the “Country” Tab.

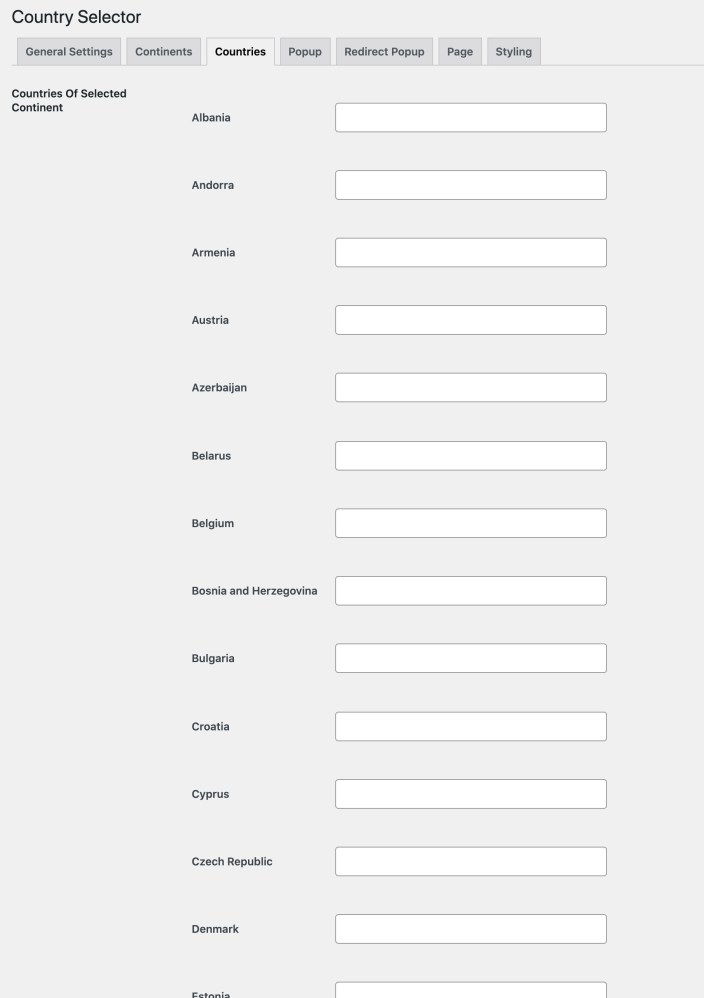
Countries:
↑ Back to topYou can add URLs for each country to redirect user based on their location. Once the user lands on your website, based on its location, the extension will redirect or show a popup to send the user to his country specific website.
Popup:
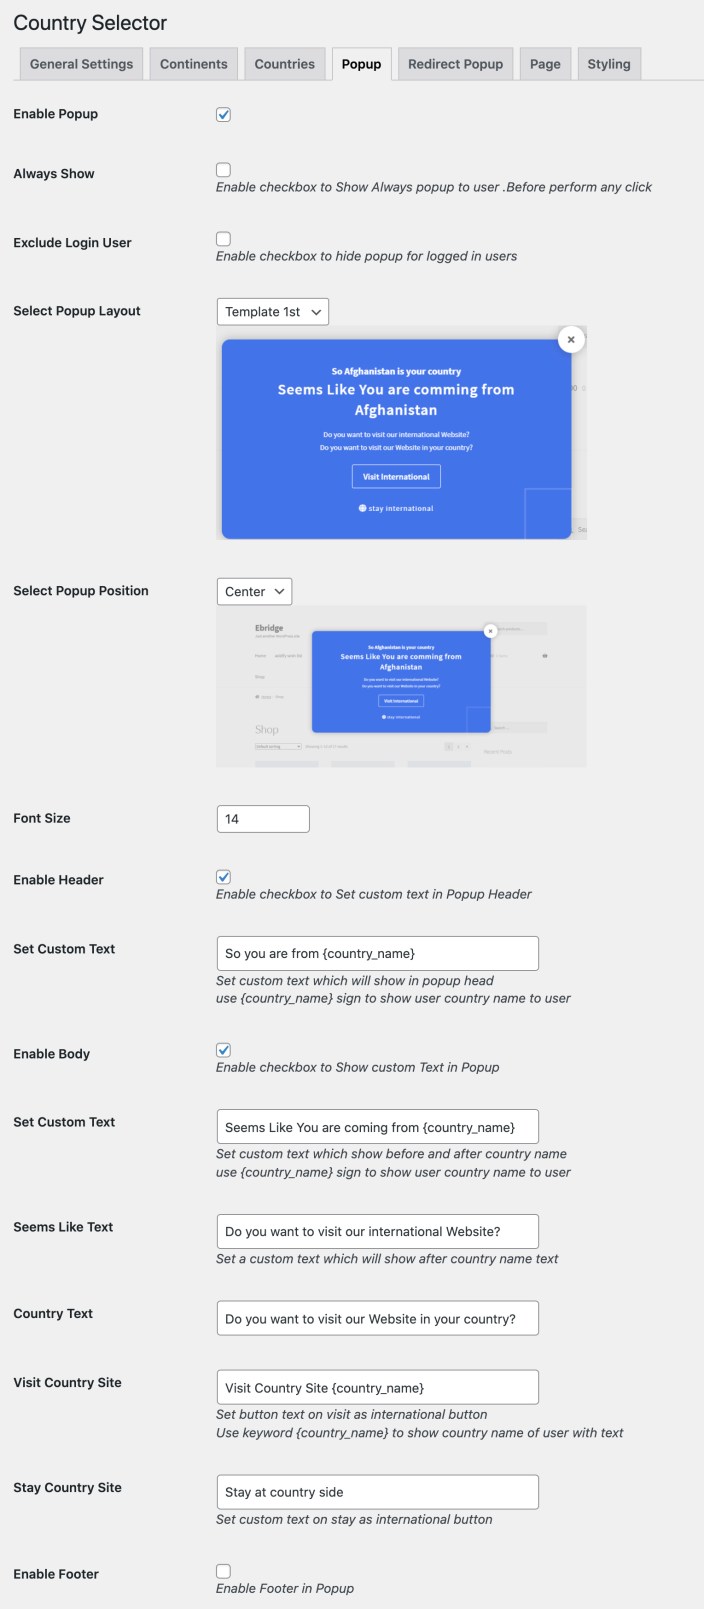
↑ Back to topIn order to access the popup settings navigate the “popup” tab.
- Enable/disable Popup
- Enable checkbox to always Show for popup unless the user selects an option to close the popup, stay on the current website or navigate to a country website.
- Select checkbox to hide Popup from logged-in users.
- Select Layout for the Popup from pulldown showing 2 options:
- Template 1st: Redirect popup
- Template 2nd: List of countries from each Continent
- Select position of the Popup window from the pull-down tab:
- Center
- Top
- Bottom
- Set Font Size for text in the Popup
- Enable header text and enter the custom title
- Customize popup body text elements
- Customize the text to be shown before and after the country name in the popup.
- Use the keyword {country_name} to show the user his or her country name.
- Customize Seems Like/Looks Like text to be shown in the popup after the country name
- Customize Country Text redirecting the user to the specific Country website
- Customize text shown on the Visit Country Site or Visit International Use the keyword {country_name} to show the user’s country name on the button.
- Customize text show on Stay International or Stay Country Site
- Enable/Disable footer in Popup.
- Set customized text for Popup footer.
Redirect Popup:
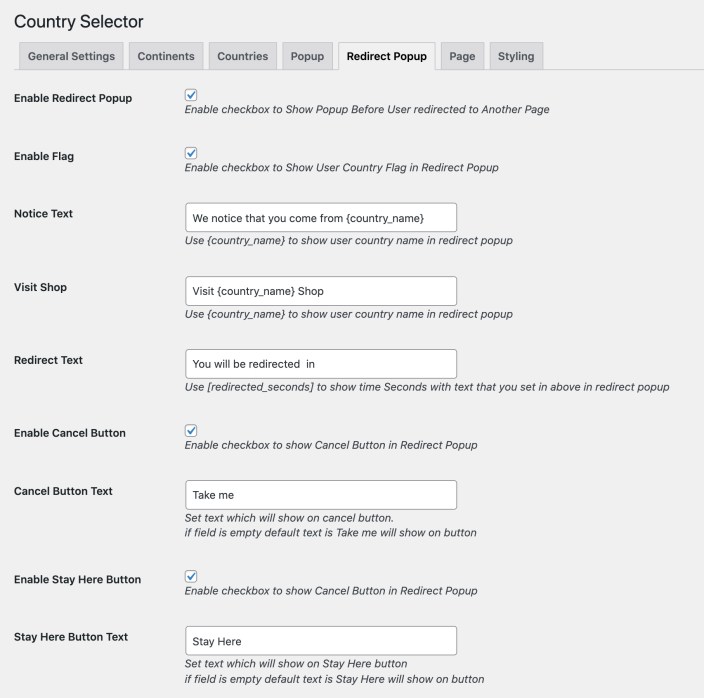
↑ Back to topThe extension offers a separate popup to automatically redirect users to country based websites. You can customize following redirect popup settings,
- Enable redirect popup to be display when redirect option is configured in general settings
- Enable checkbox to show country flag
- Customize redirect Notice Text: Alert the user that you have detected their country and use the keyword {country_name} to show the user their Country name.
- Add a custom label for the Visit Shop button to redirect users to their specific country page.
- Add custom Redirect Text and use variables to show redirect time [redirected_seconds]. The redirect counter time is used from your general settings.
- Customize cancel and go to buttons
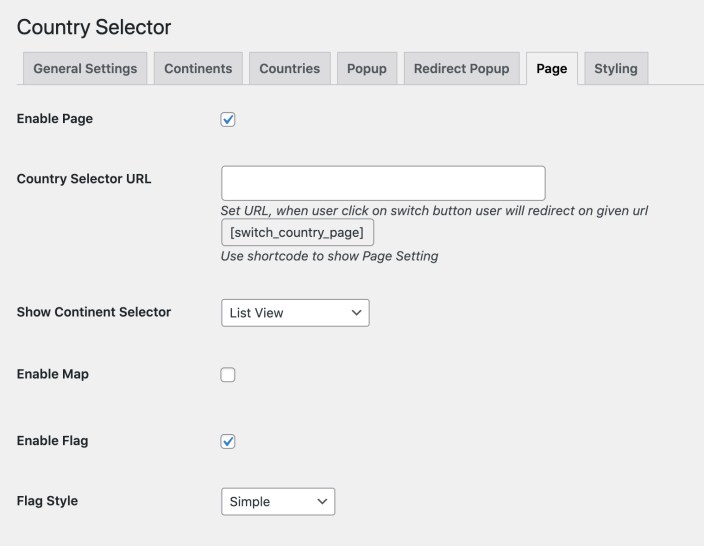
Page:
↑ Back to topWith our extension you can create a country listing page where all your websites developed for different countries will be displayed.
- Use shortcode to display a country list on any page.
- Customize the view of Continent Selector
- List View
- Drop Down
- Next to Each Other
- Enable continent map images on page
- Add custom continent map images by copying the image URL
- Enable country maps to be displayed along with each country name and choose they layout – Circle, Square, Default.
Styling:
↑ Back to topThe styling tab allows you to customize the default popup and redirect popup colors and opacity.
Default Popup Style
↑ Back to top- Enable/Disable Custom Color checkbox to allow or disallow custom styling
- Enable custom Background Color.
- Set Background Color
- Set Overlay Color
- Set Background Color Opacity
- Set Close Button Color
- Set popup Button Text Color
- Set color of the text on Switch Button.
Redirect Popup Styling
↑ Back to top- Enable Redirect Popup Styling
- Set Redirect Popup Background color
- Enable/Disable Notice Text custom color styling
- Set Notice Text, text color
- Set Notice Text, background-color
- Enable/Disable Visit Shop Text custom color styling
- Set Visit Shop Text, text color
- Set Visit Shop Text, background-color
- Enable/Disable Redirect Text custom color styling
- Set Redirect Text, text color
- Set Redirect Text, background-color
