The Data Layer is an object that makes available in real time the information that is executed by users while browsing the WooCommerce Store.
Feature Overview
↑ Back to topWith Datalayer for WooCommerce enabled, you will have all actions available in an easily readable javascript object via Google Tag Manager or code and thus evaluate the following advanced eCommerce activities:
- Product Impressions
- Product Clicks
- Product Detail Impressions
- Add / Remove from Cart
- Checkout
- Purchases
- Refunds
- Promotions
- Add Wishlist
- User logins
- Consent mode
- Post Data
- Server to Server
- Direct Product Reports
- Intelligent Insights
We follow the Google Tag Manager standard and the following events will be triggered:
add_payment_info, add_shipping_info, add_to_cart, add_to_wishlist, begin_checkout, login, purchase, refund, remove_from_cart, search, select_item, select_promotion, view_cart, view_item, view_item_list, view_promotion
Video Tutorials
↑ Back to topIf you want to see tutorials on how to configure the tools: Google Tag Manager, Google Analytics, Meta, Pinterest and TikTok using the Datalayer plugin for WooCommerce, go to the Video Tutorials documentation
Installation
↑ Back to topSee the steps to install the plugin:
- Download the extension from your WooCommerce dashboard.
- Go to Plugins > Add New > Upload and select the ZIP file you just downloaded.
- Click Install Now and then Activate.
Activation
↑ Back to topGo to menu WooCommerce > Datalayer for WooCommerce:
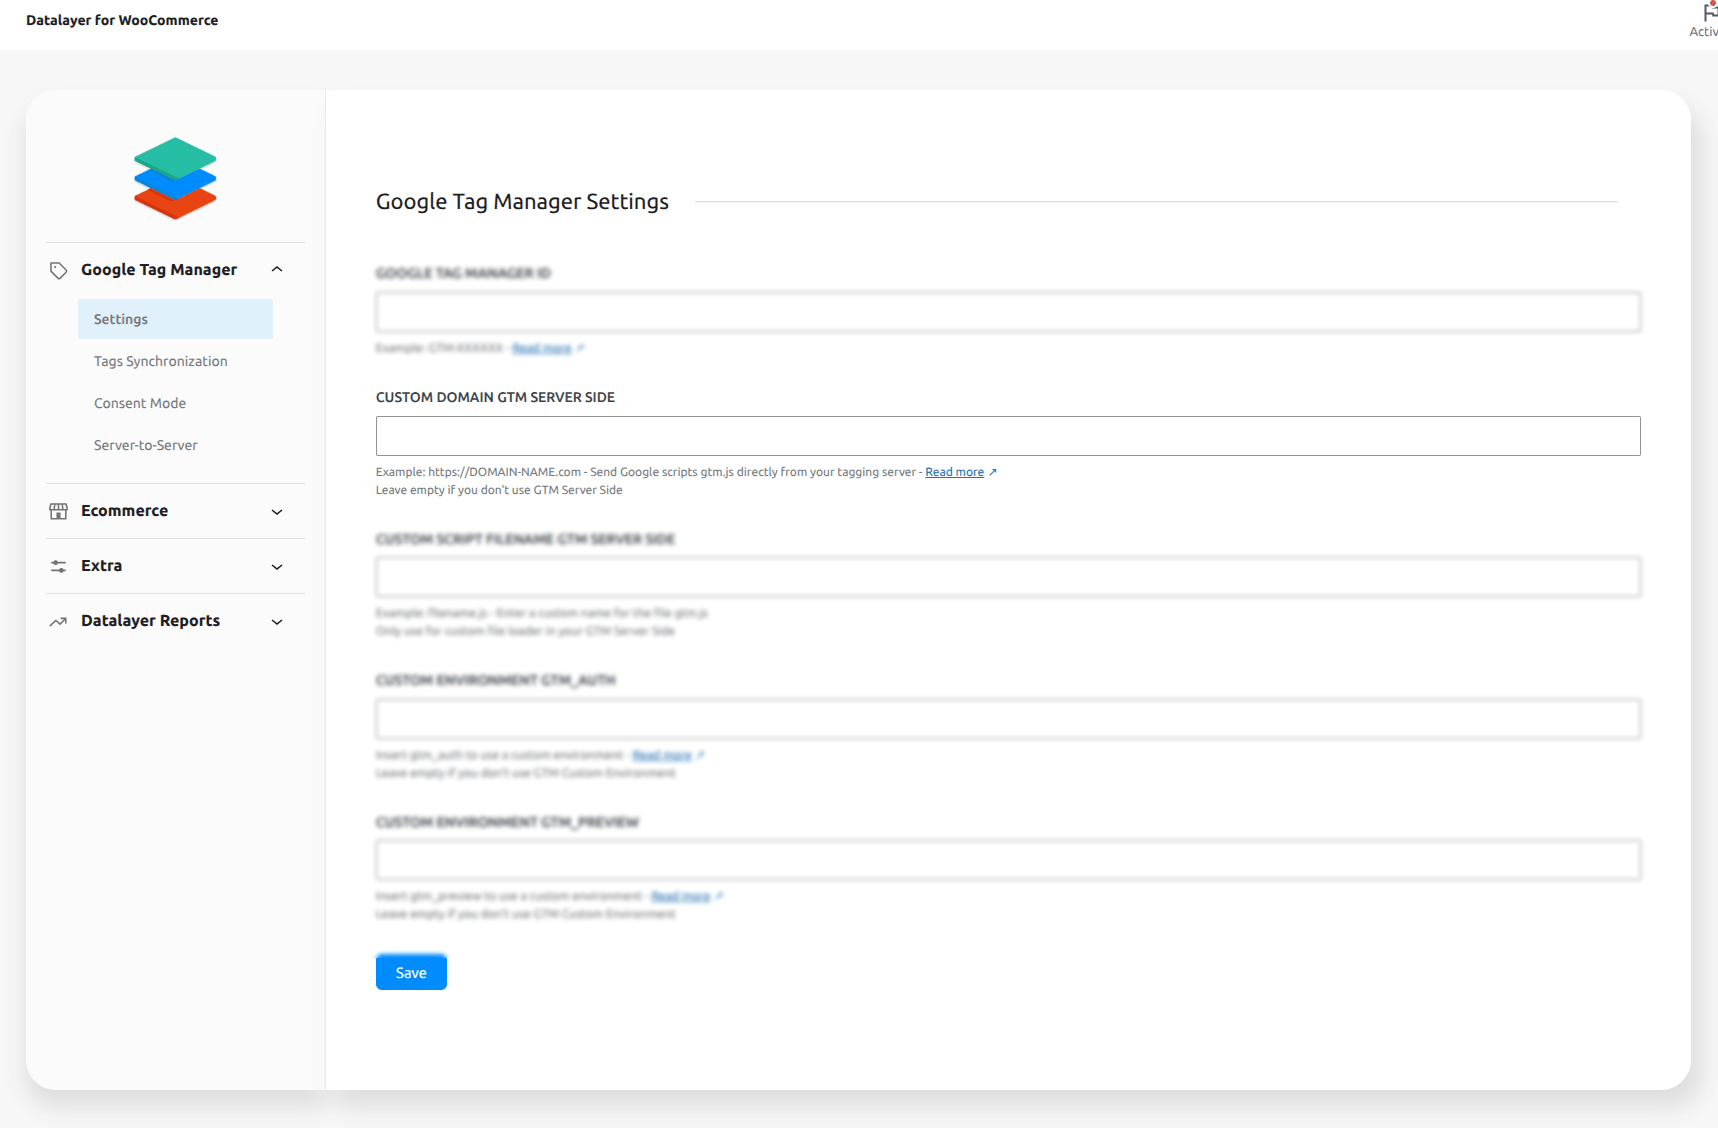
Google Tag Manager Settings
↑ Back to top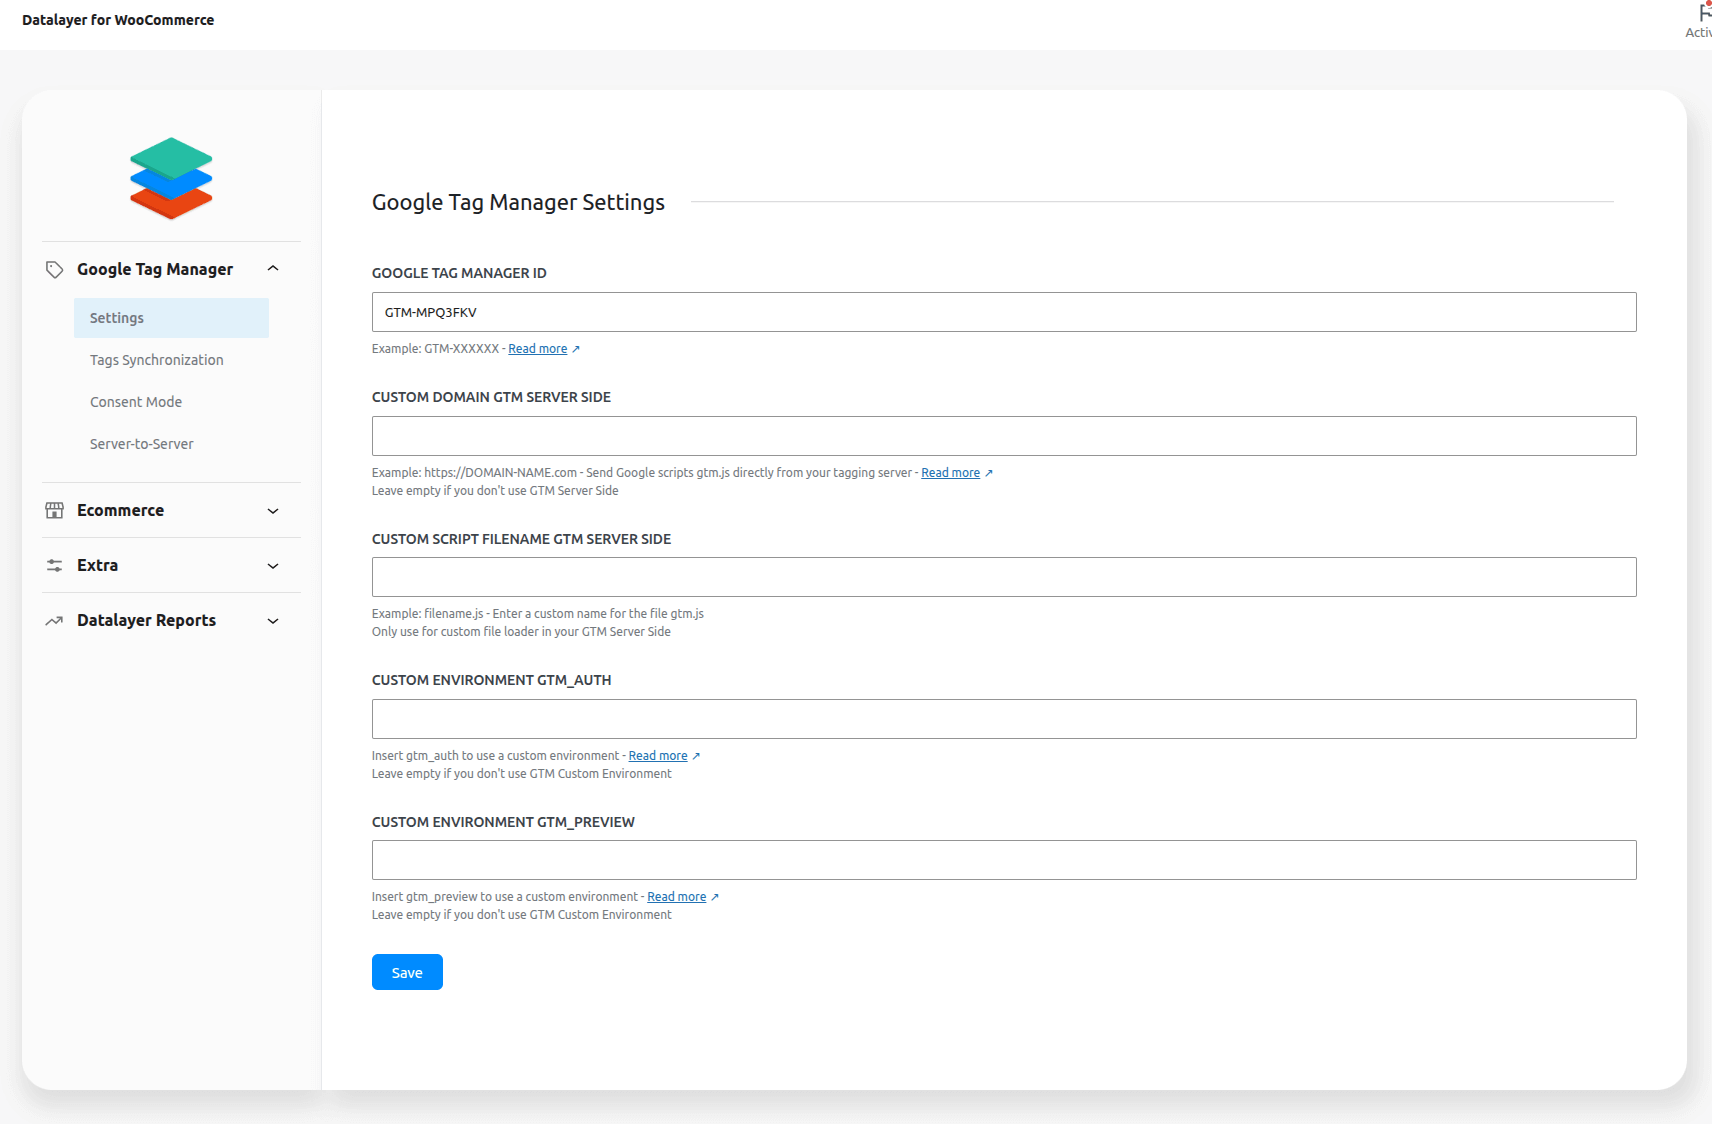
Google Tag Manager ID -> Enter the GTM-XXXXXX ID to activate the Google Tag Manager code snippet
Custom domain GTM Server Side -> Send Google scripts gtm.js directly from your tagging server – Leave empty if you don’t use GTM Server Side
Custom script filename GTM Server Side -> Enter a custom name for the file gtm.js Only use for custom file loader in your GTM Server Side
Custom environment gtm_auth -> Insert gtm_auth to use a custom environment
Custom environment gtm_preview -> Insert gtm_preview to use a custom environment
Google Tag Manager Tags Sync
↑ Back to top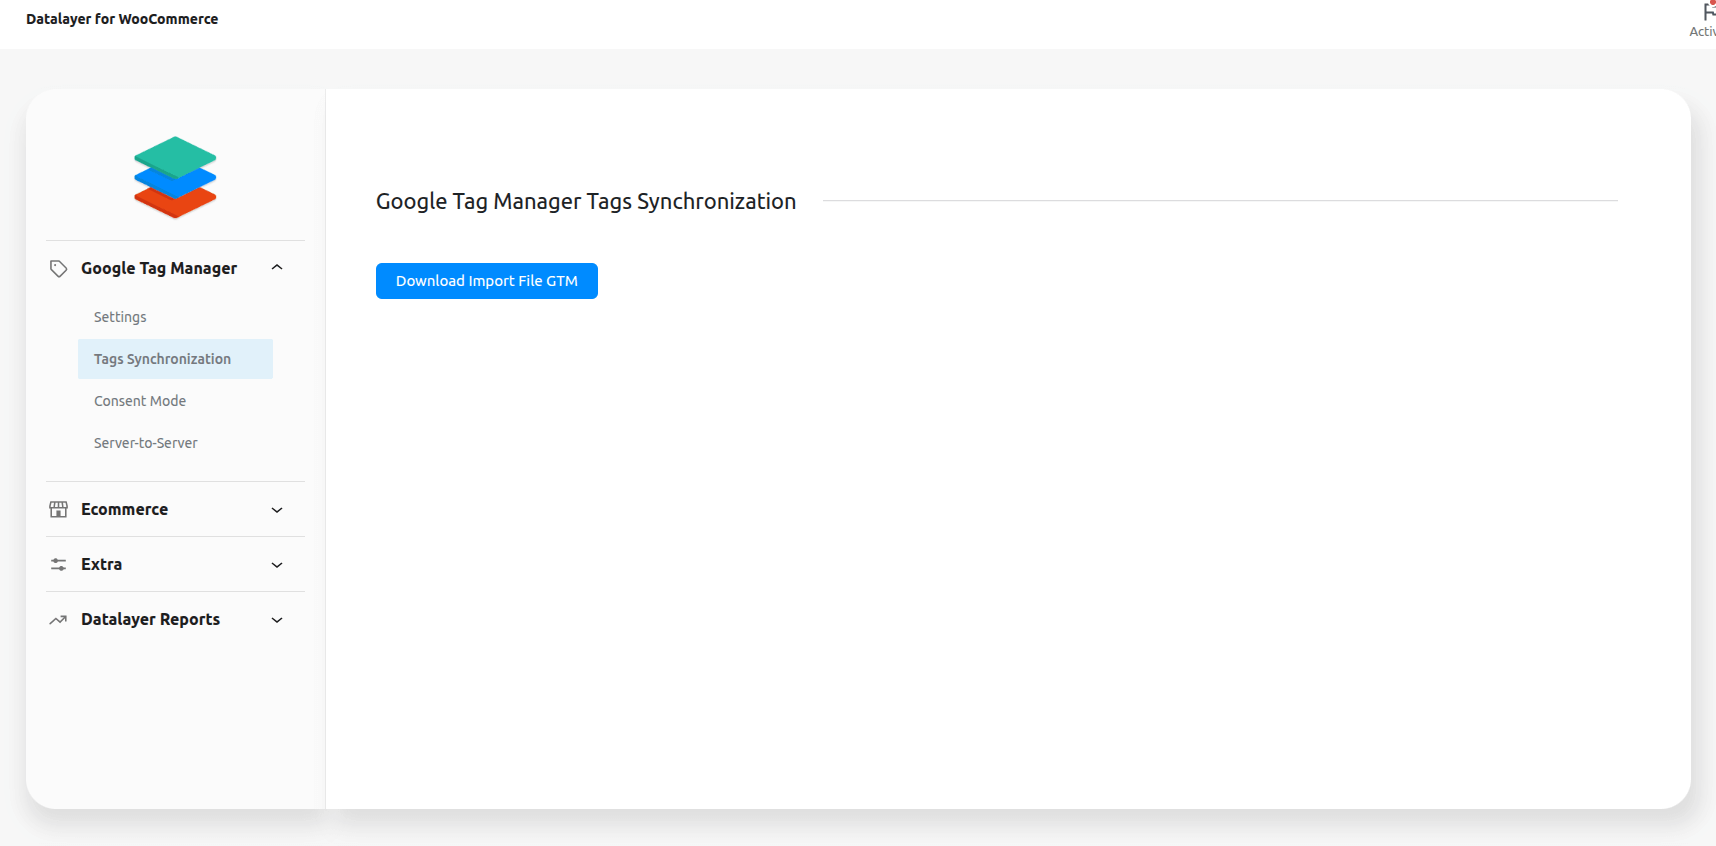
Download import File GTM -> Download gtm import file
Google Tag Manager Consent Mode
↑ Back to top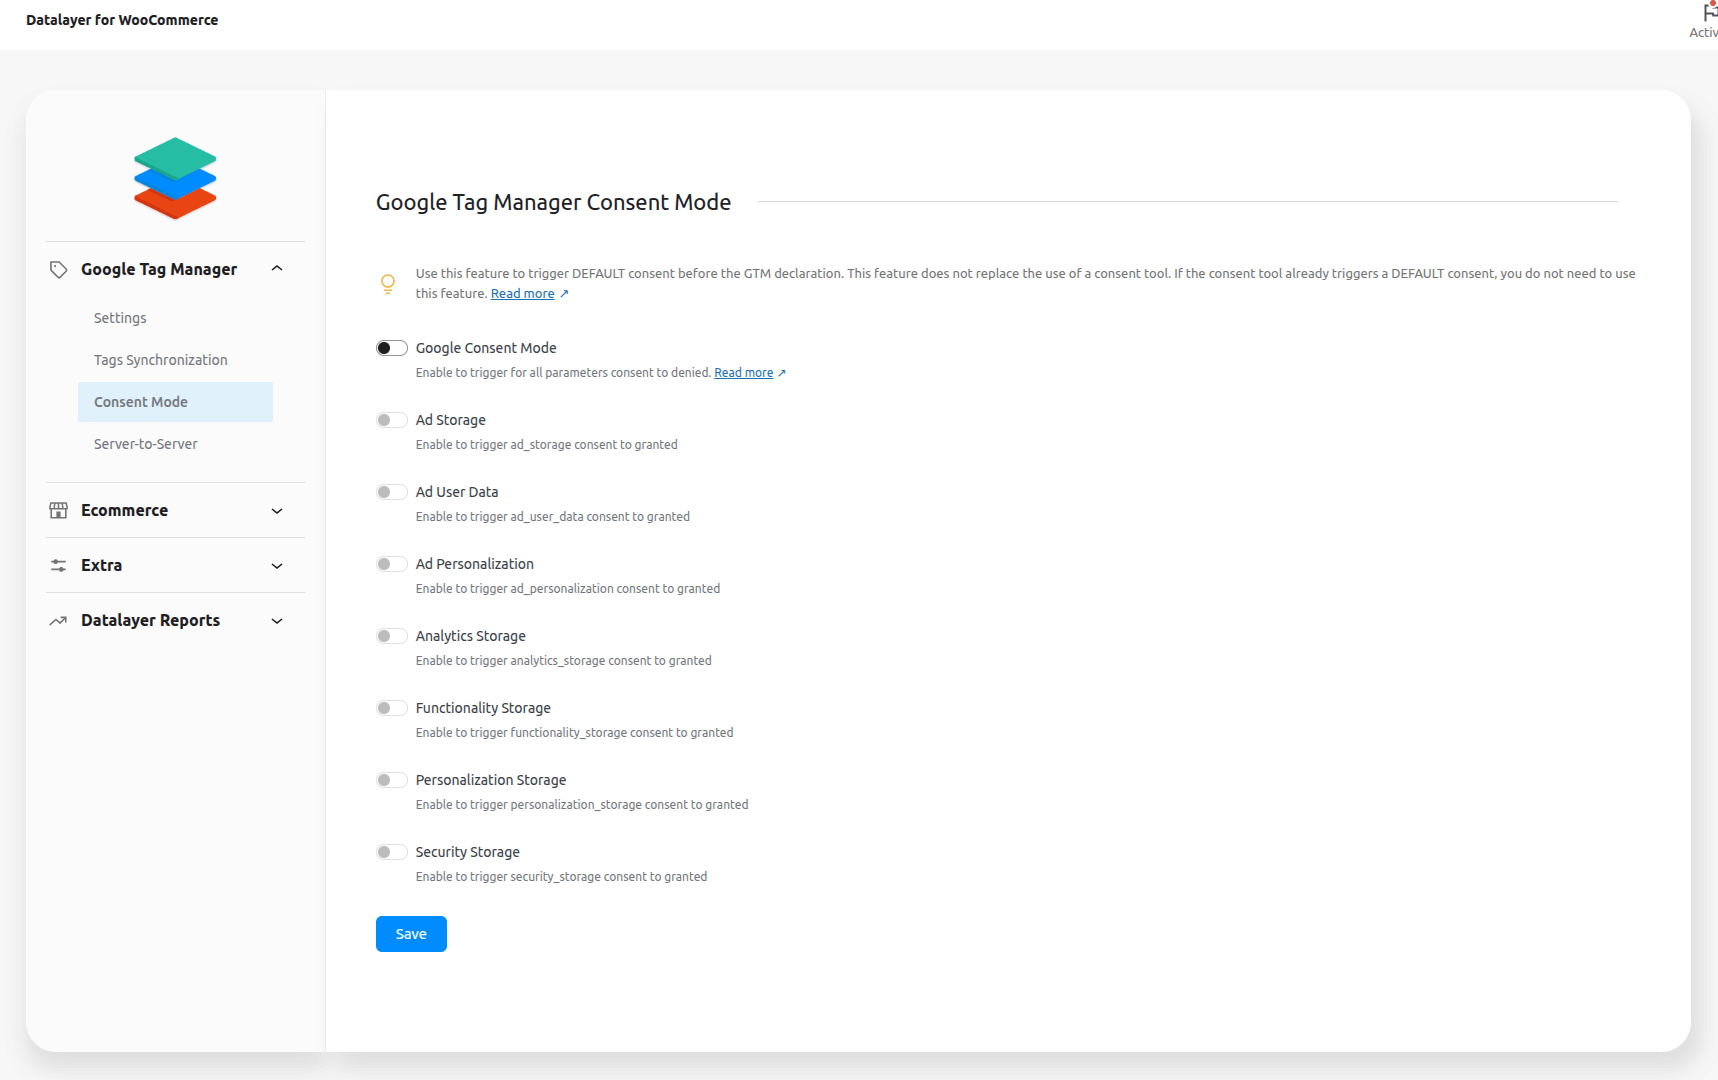
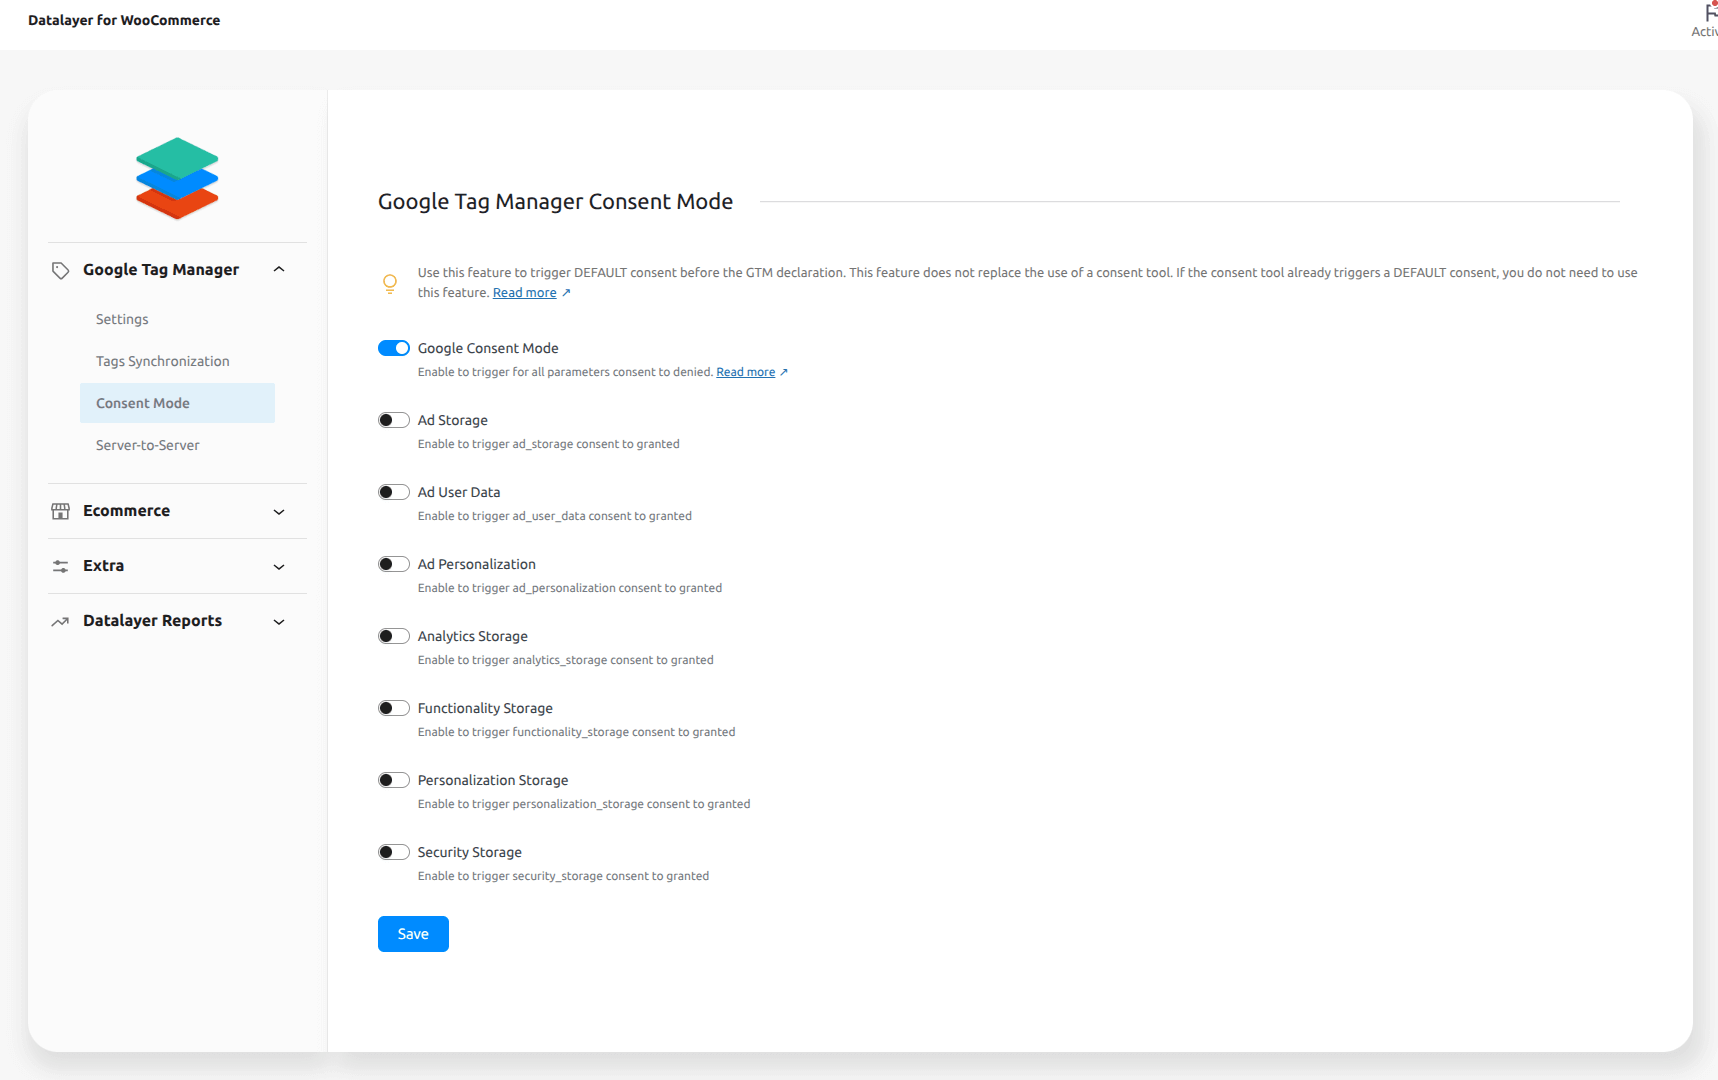
Google Consent Mode -> Enable to trigger for all parameters consent to denied.
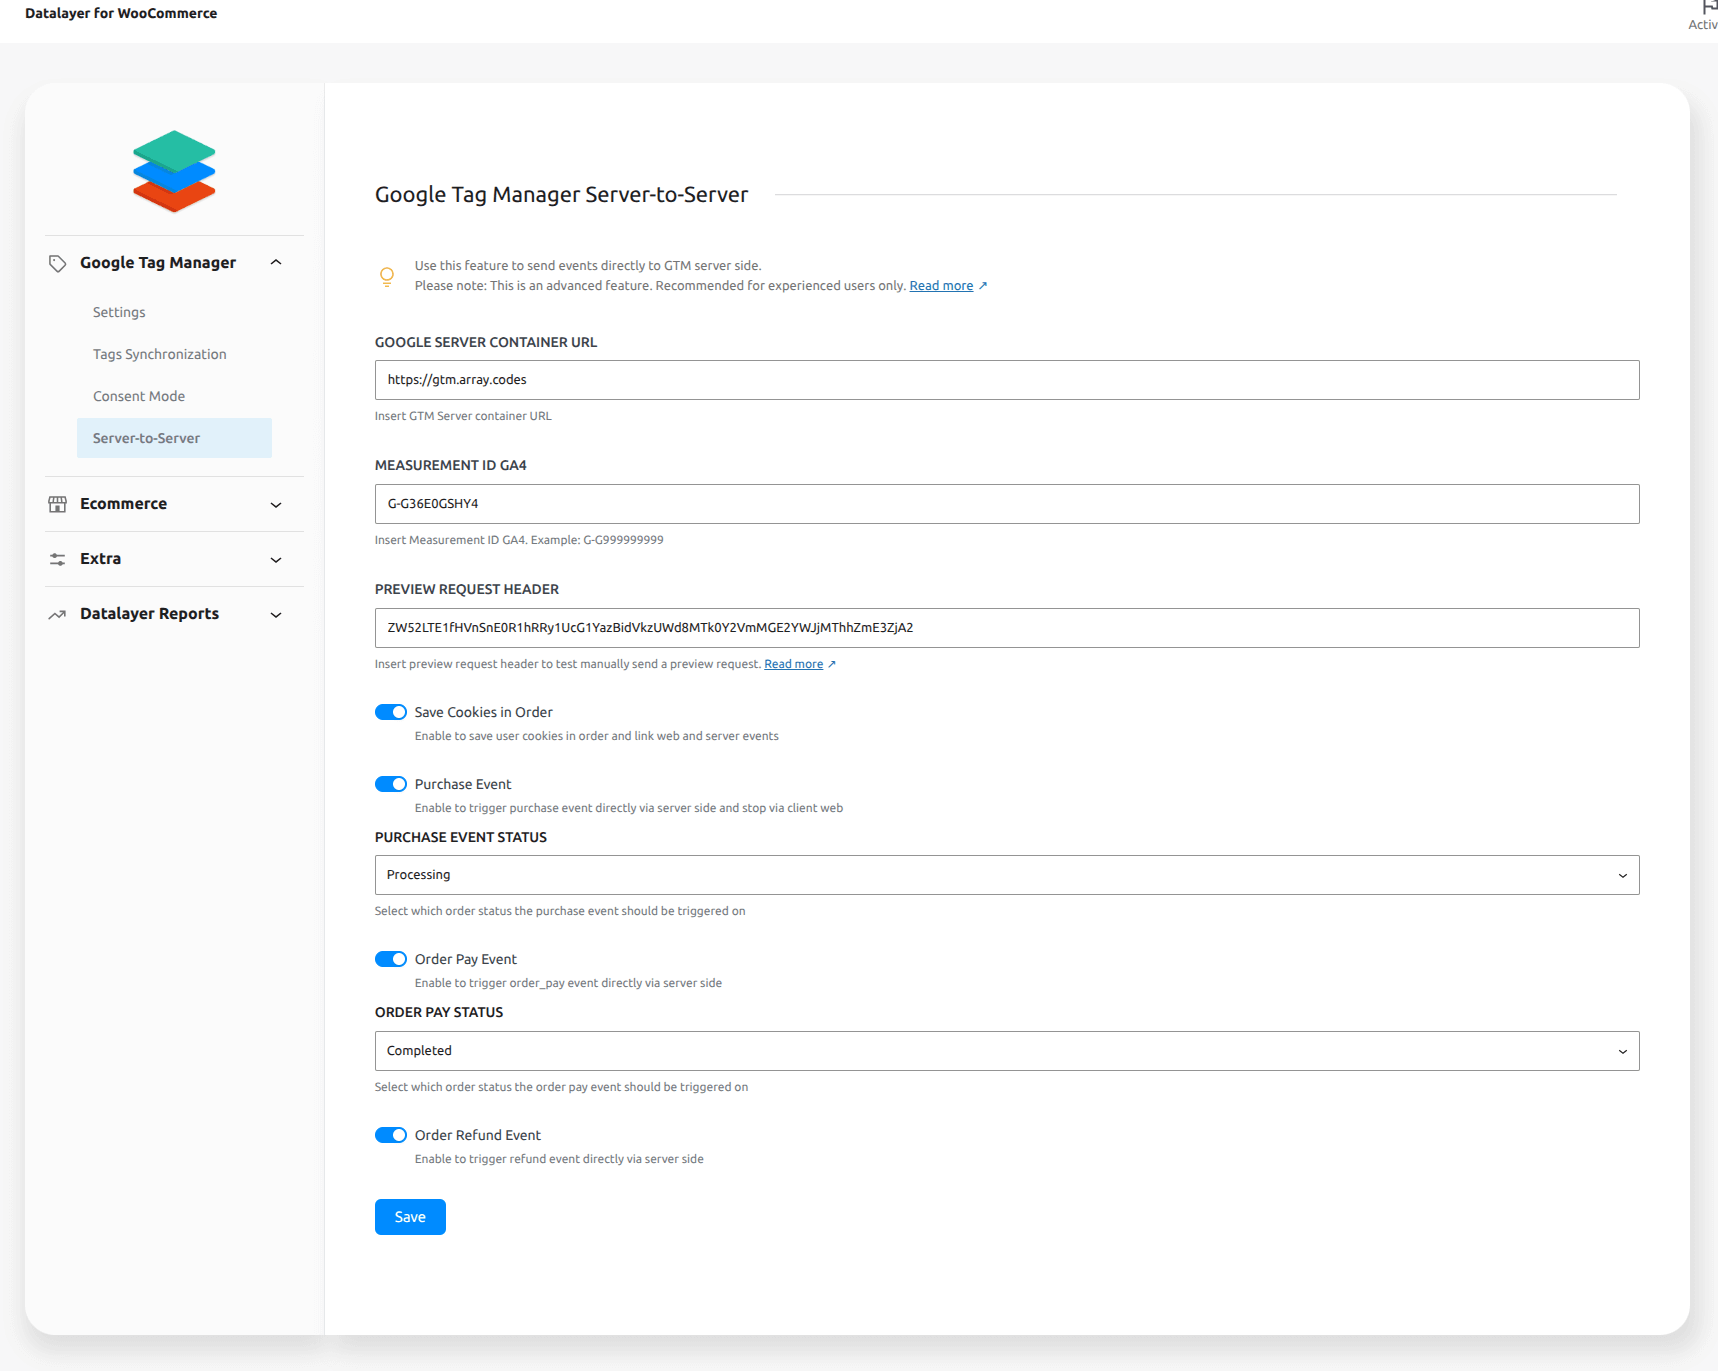
Google Tag Manager Server to Server
↑ Back to top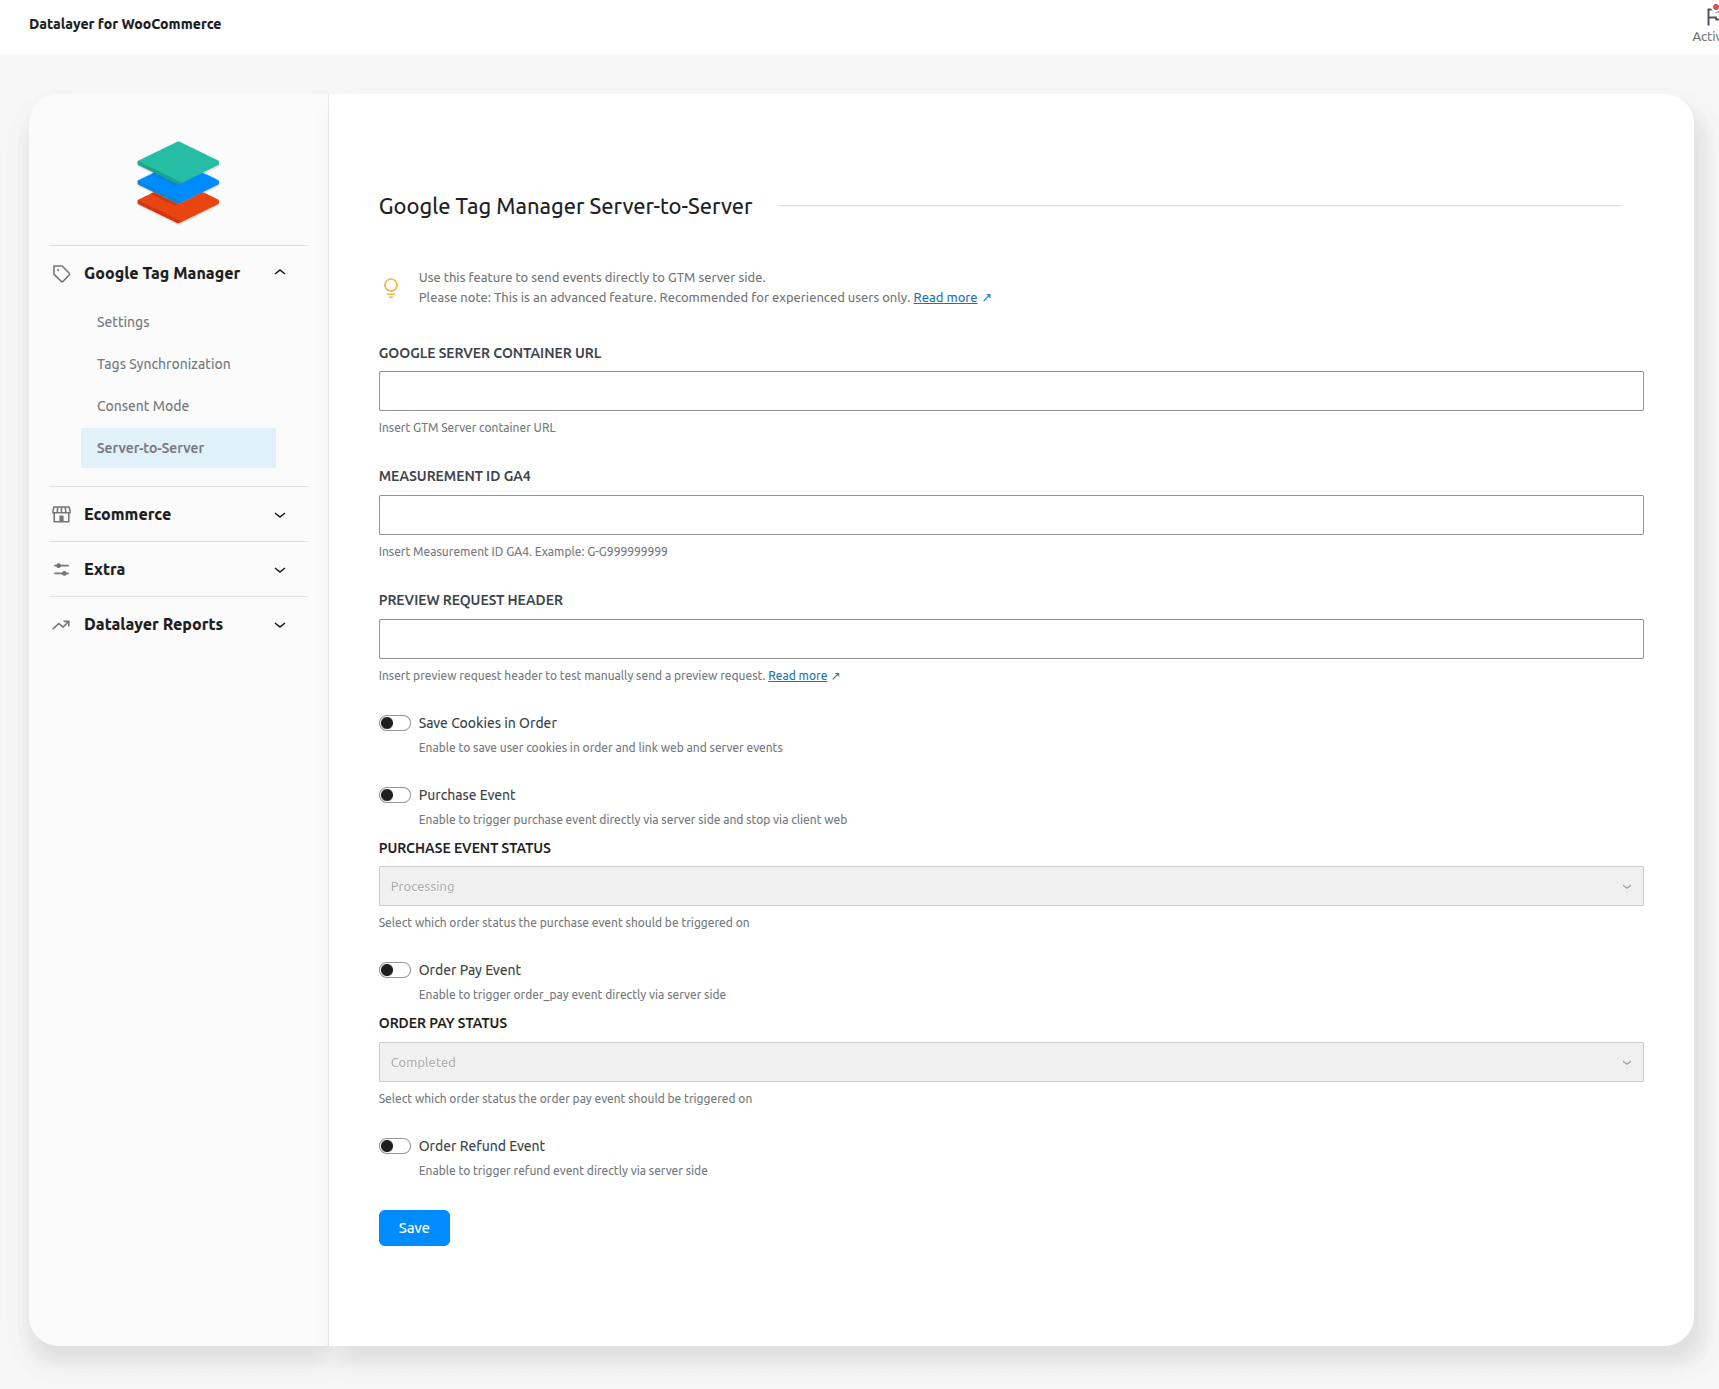
Google Server Container Url -> Insert GTM Server container URL
Measurement ID GA4 -> Insert Measurement ID GA4. Example: G-G999999999
Preview Request Header -> Insert preview request header to test manually send a preview request
Save Cookies in Order -> Enable to save user cookies in order and link web and server events
Purchase Event -> Enable to trigger purchase event directly via server side and stop via client web
Purchase Event Status -> Select which order status the purchase event should be triggered on
Order Pay Event -> Enable to trigger order_pay event directly via server side
Order Pay Status -> Select which order status the order pay event should be triggered on
Order Refund Event -> Enable to trigger refund event directly via server side
Ecommerce Settings
↑ Back to top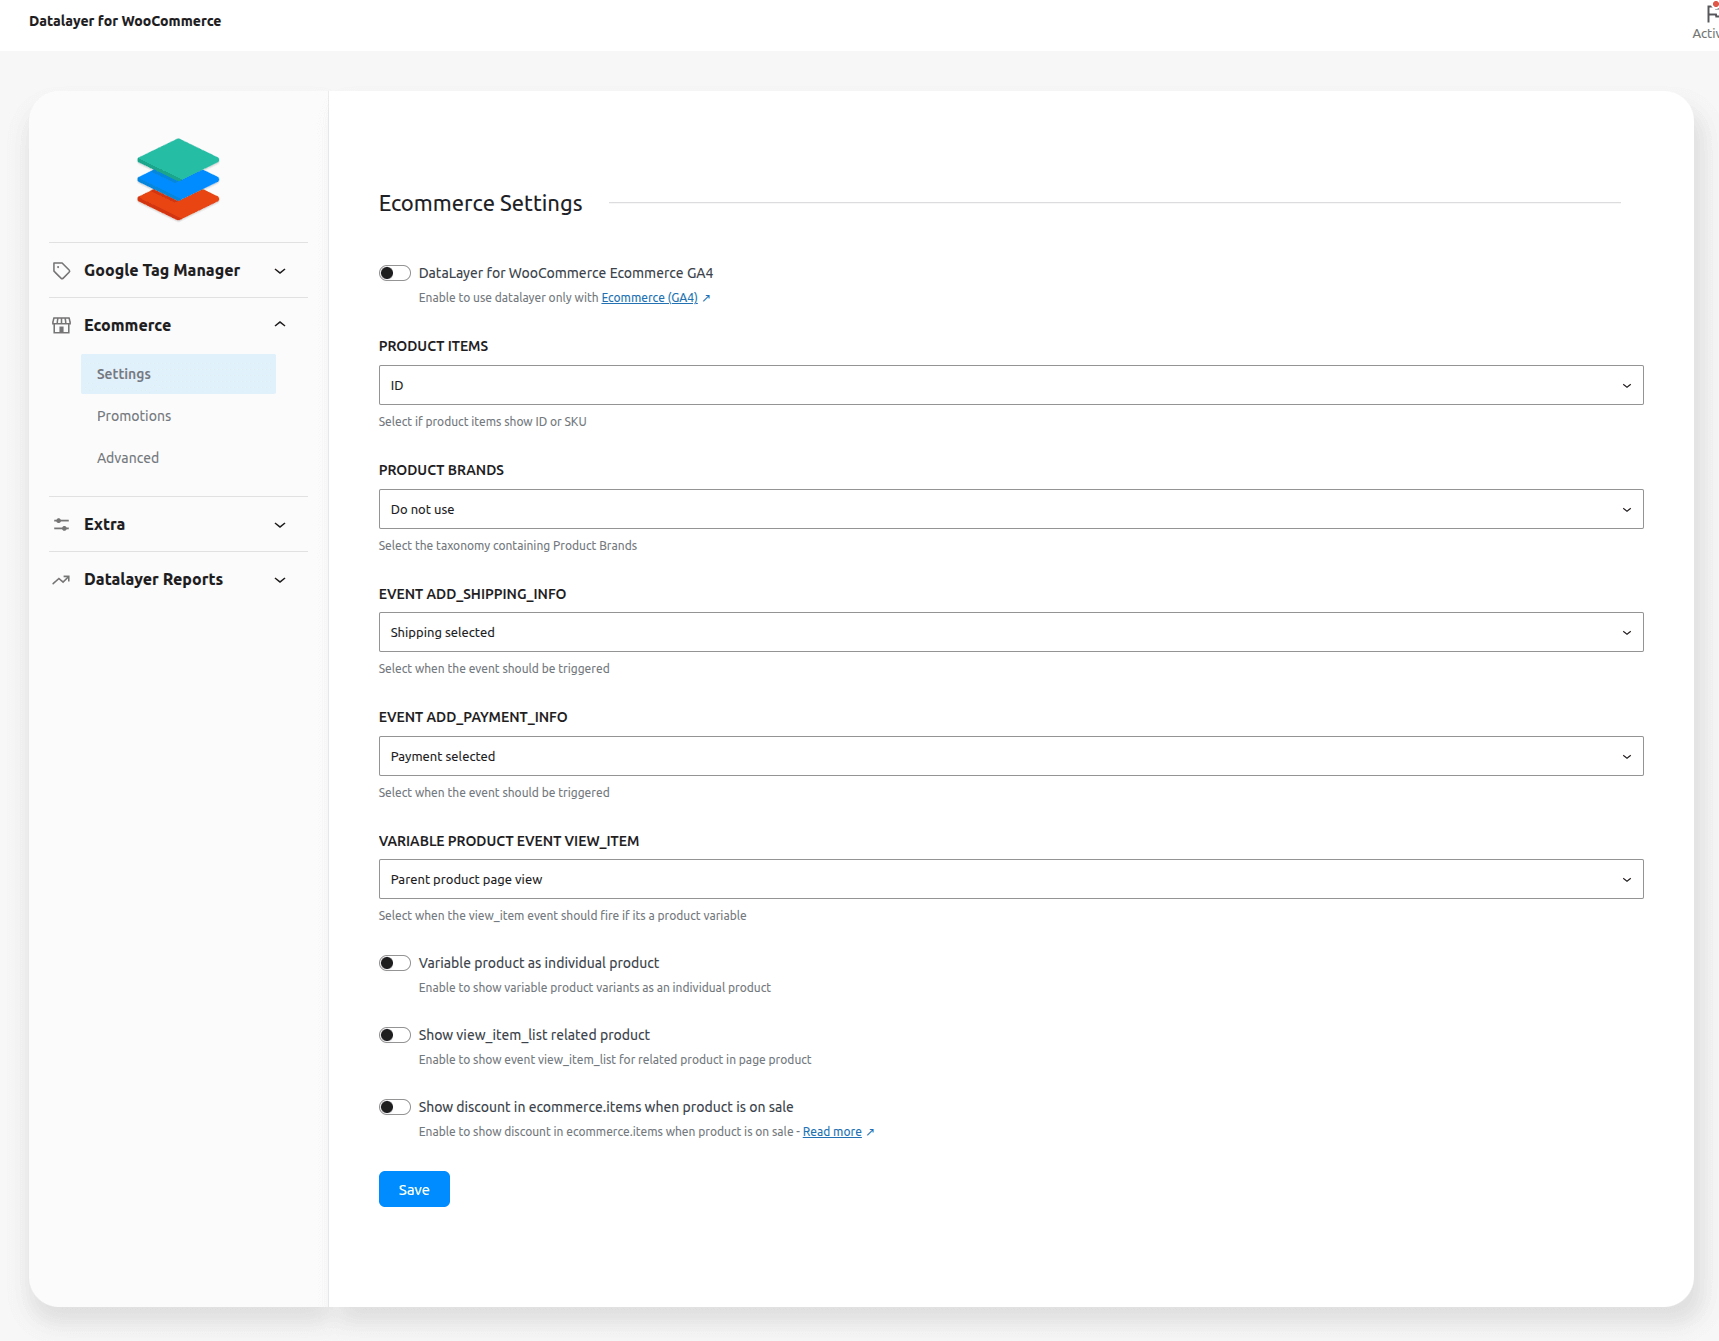
DataLayer for WooCommerce Ecommerce GA4 -> Enable this option to use Google Analytics 4 (GA4)
Product Items -> Select if product items show ID or SKU
Product Brands -> Select the taxonomy containing Product Brands
Event add_shipping_info -> Select when the event should be triggered. (Shipping selected/Place order button)
Event add_payment_info -> Select when the event should be triggered. (Payment selected/Place order button)
Variable product event view_item -> Select when the view_item event should fire if its a product variable (Parent product page view/When selecting a variation/Parent product page view and When selecting a variation)
Variable product as individual product -> Enable to show variable product variants as an individual product
Show view_item_list related product -> Enable to show event view_item_list for related product in page product
Show discount in ecommerce.items when product is on sale -> Enable to show discount in ecommerce.items when product is on sale – Read more
Ecommerce Promotions
↑ Back to top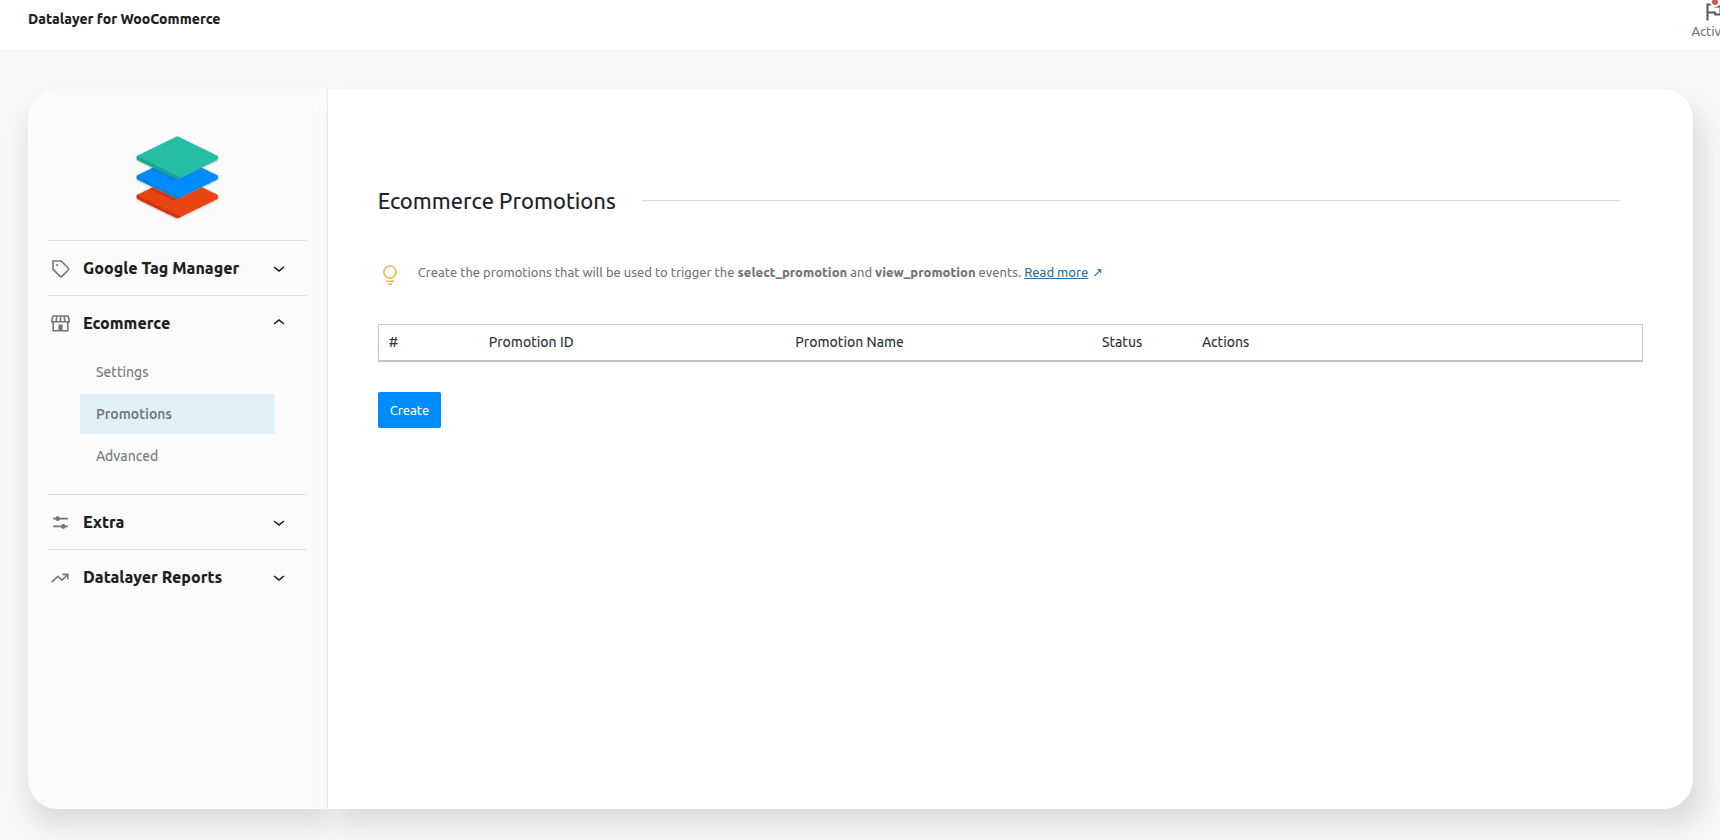
Create the promotions that will be used to trigger the select_promotion and view_promotion events
Ecommerce Advanced
↑ Back to top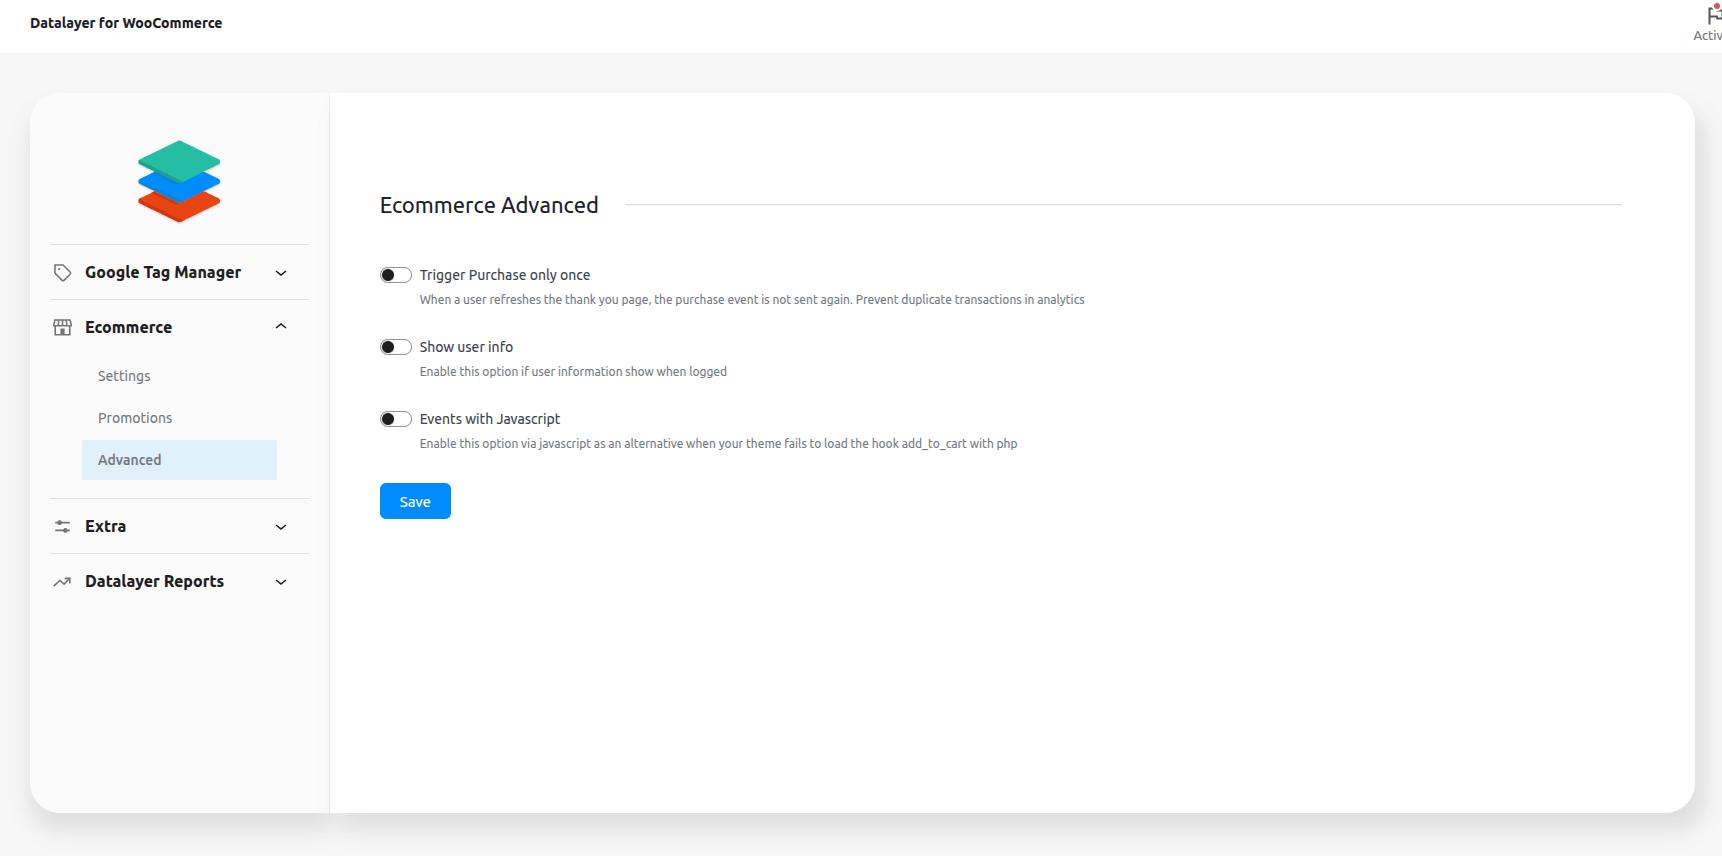
Trigger Purchase only once -> When a user refreshes the thank you page, the purchase event is not sent again. Prevent duplicate transactions in analytics
Show user info -> Select if user information show or not when logged
Events with Javascript -> Enable this option via javascript as an alternative when your theme fails to load the hook add_to_cart with php.
Health
↑ Back to topUse the Tracking Health tab to audit orders event by event, and Setup Diagnostic to validate your tracking configuration.
Monitor whether your purchase events are reaching the DataLayer.
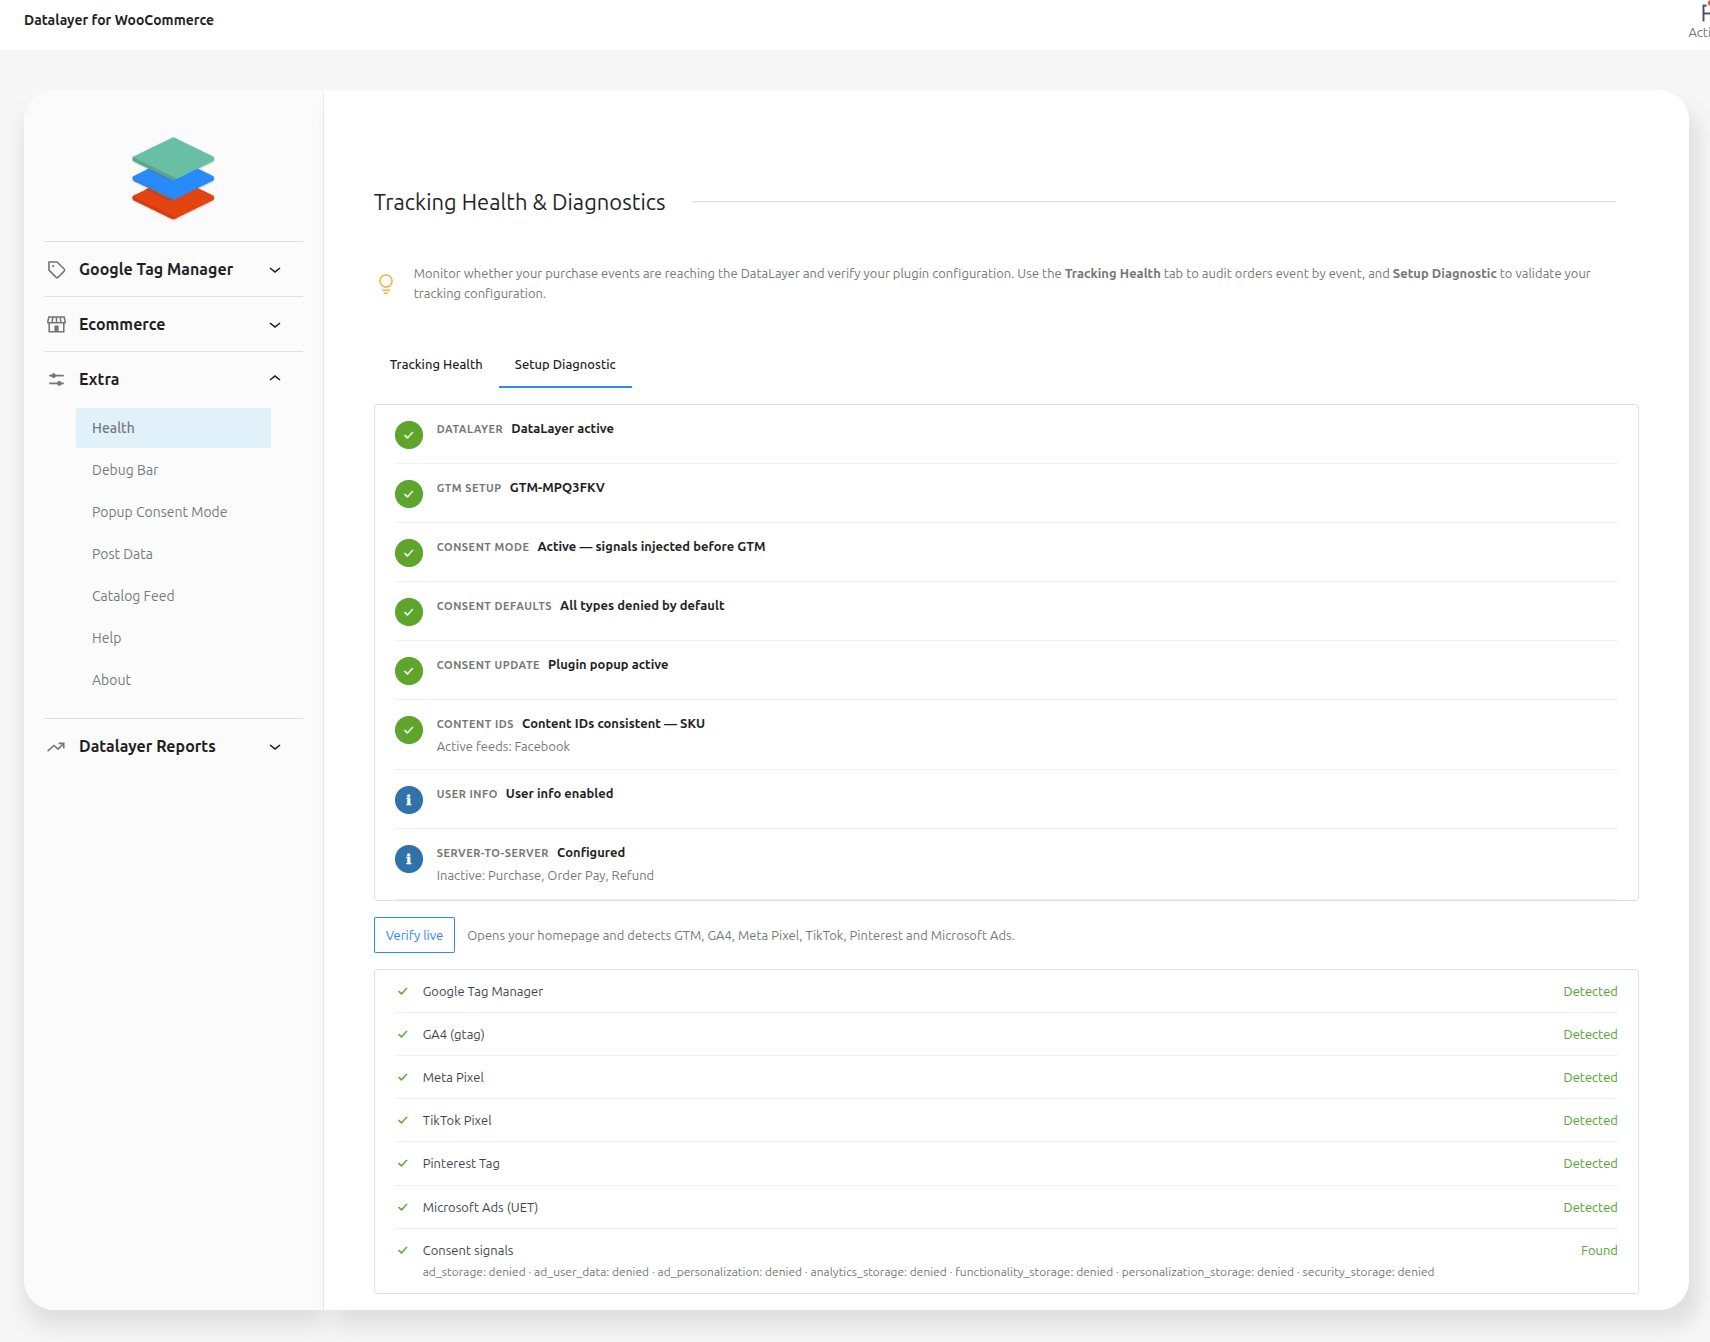
Verify your plugin configuration
Extra Debug Bar
↑ Back to top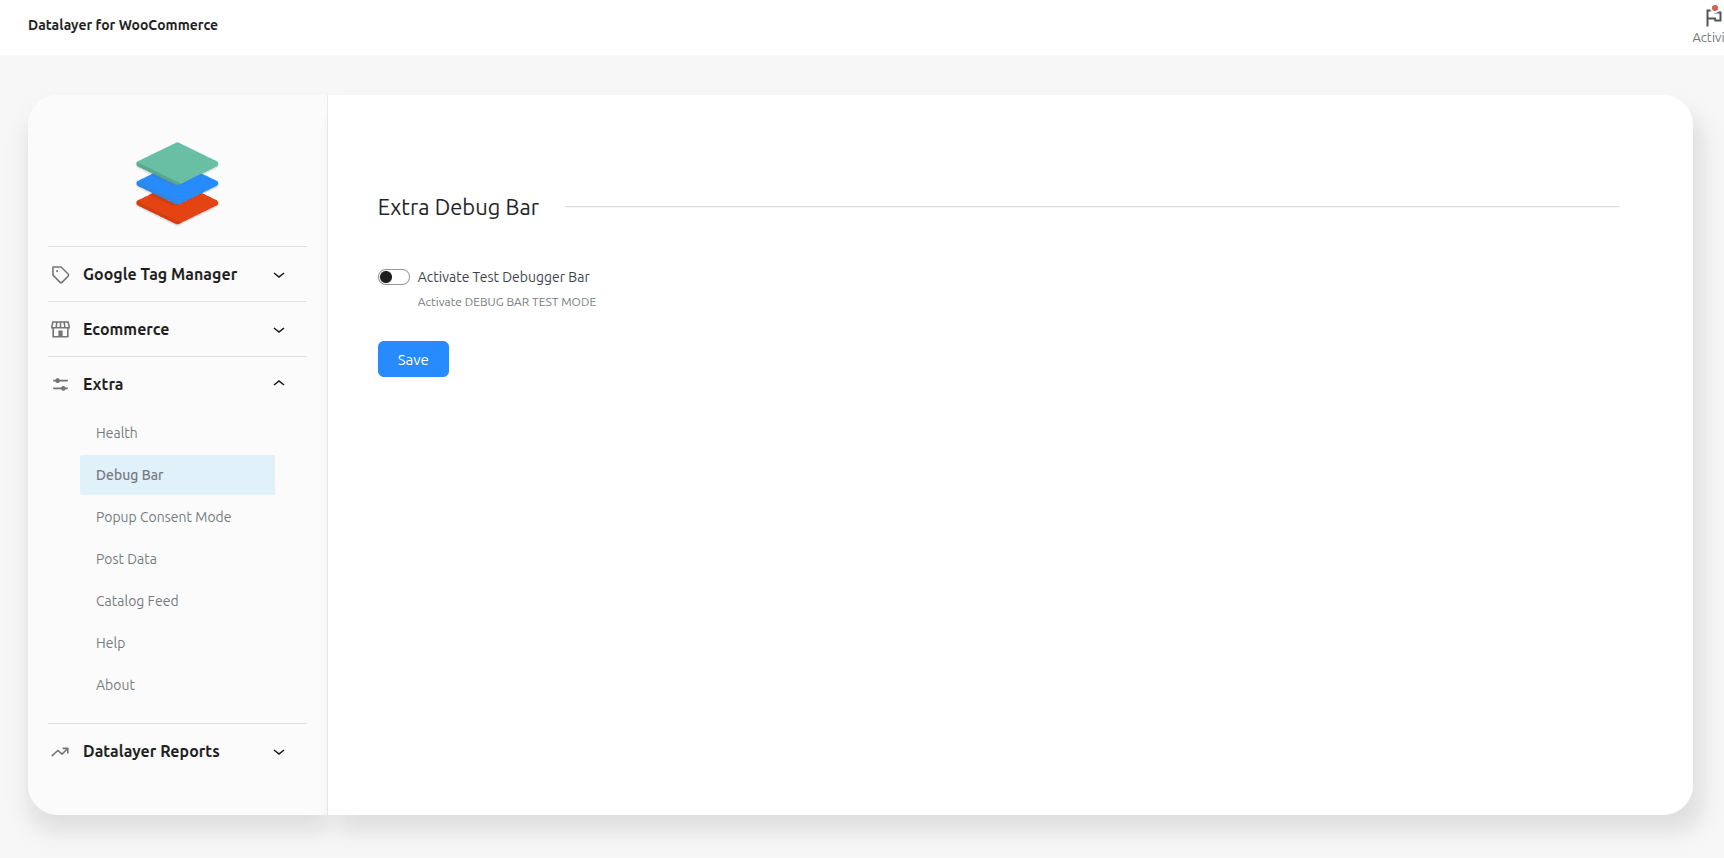
Activate Test Debugger Bar -> Enable this option to test Datalayer events on your site with the debug bar, by default, turned off
Popup Consent Mode
↑ Back to top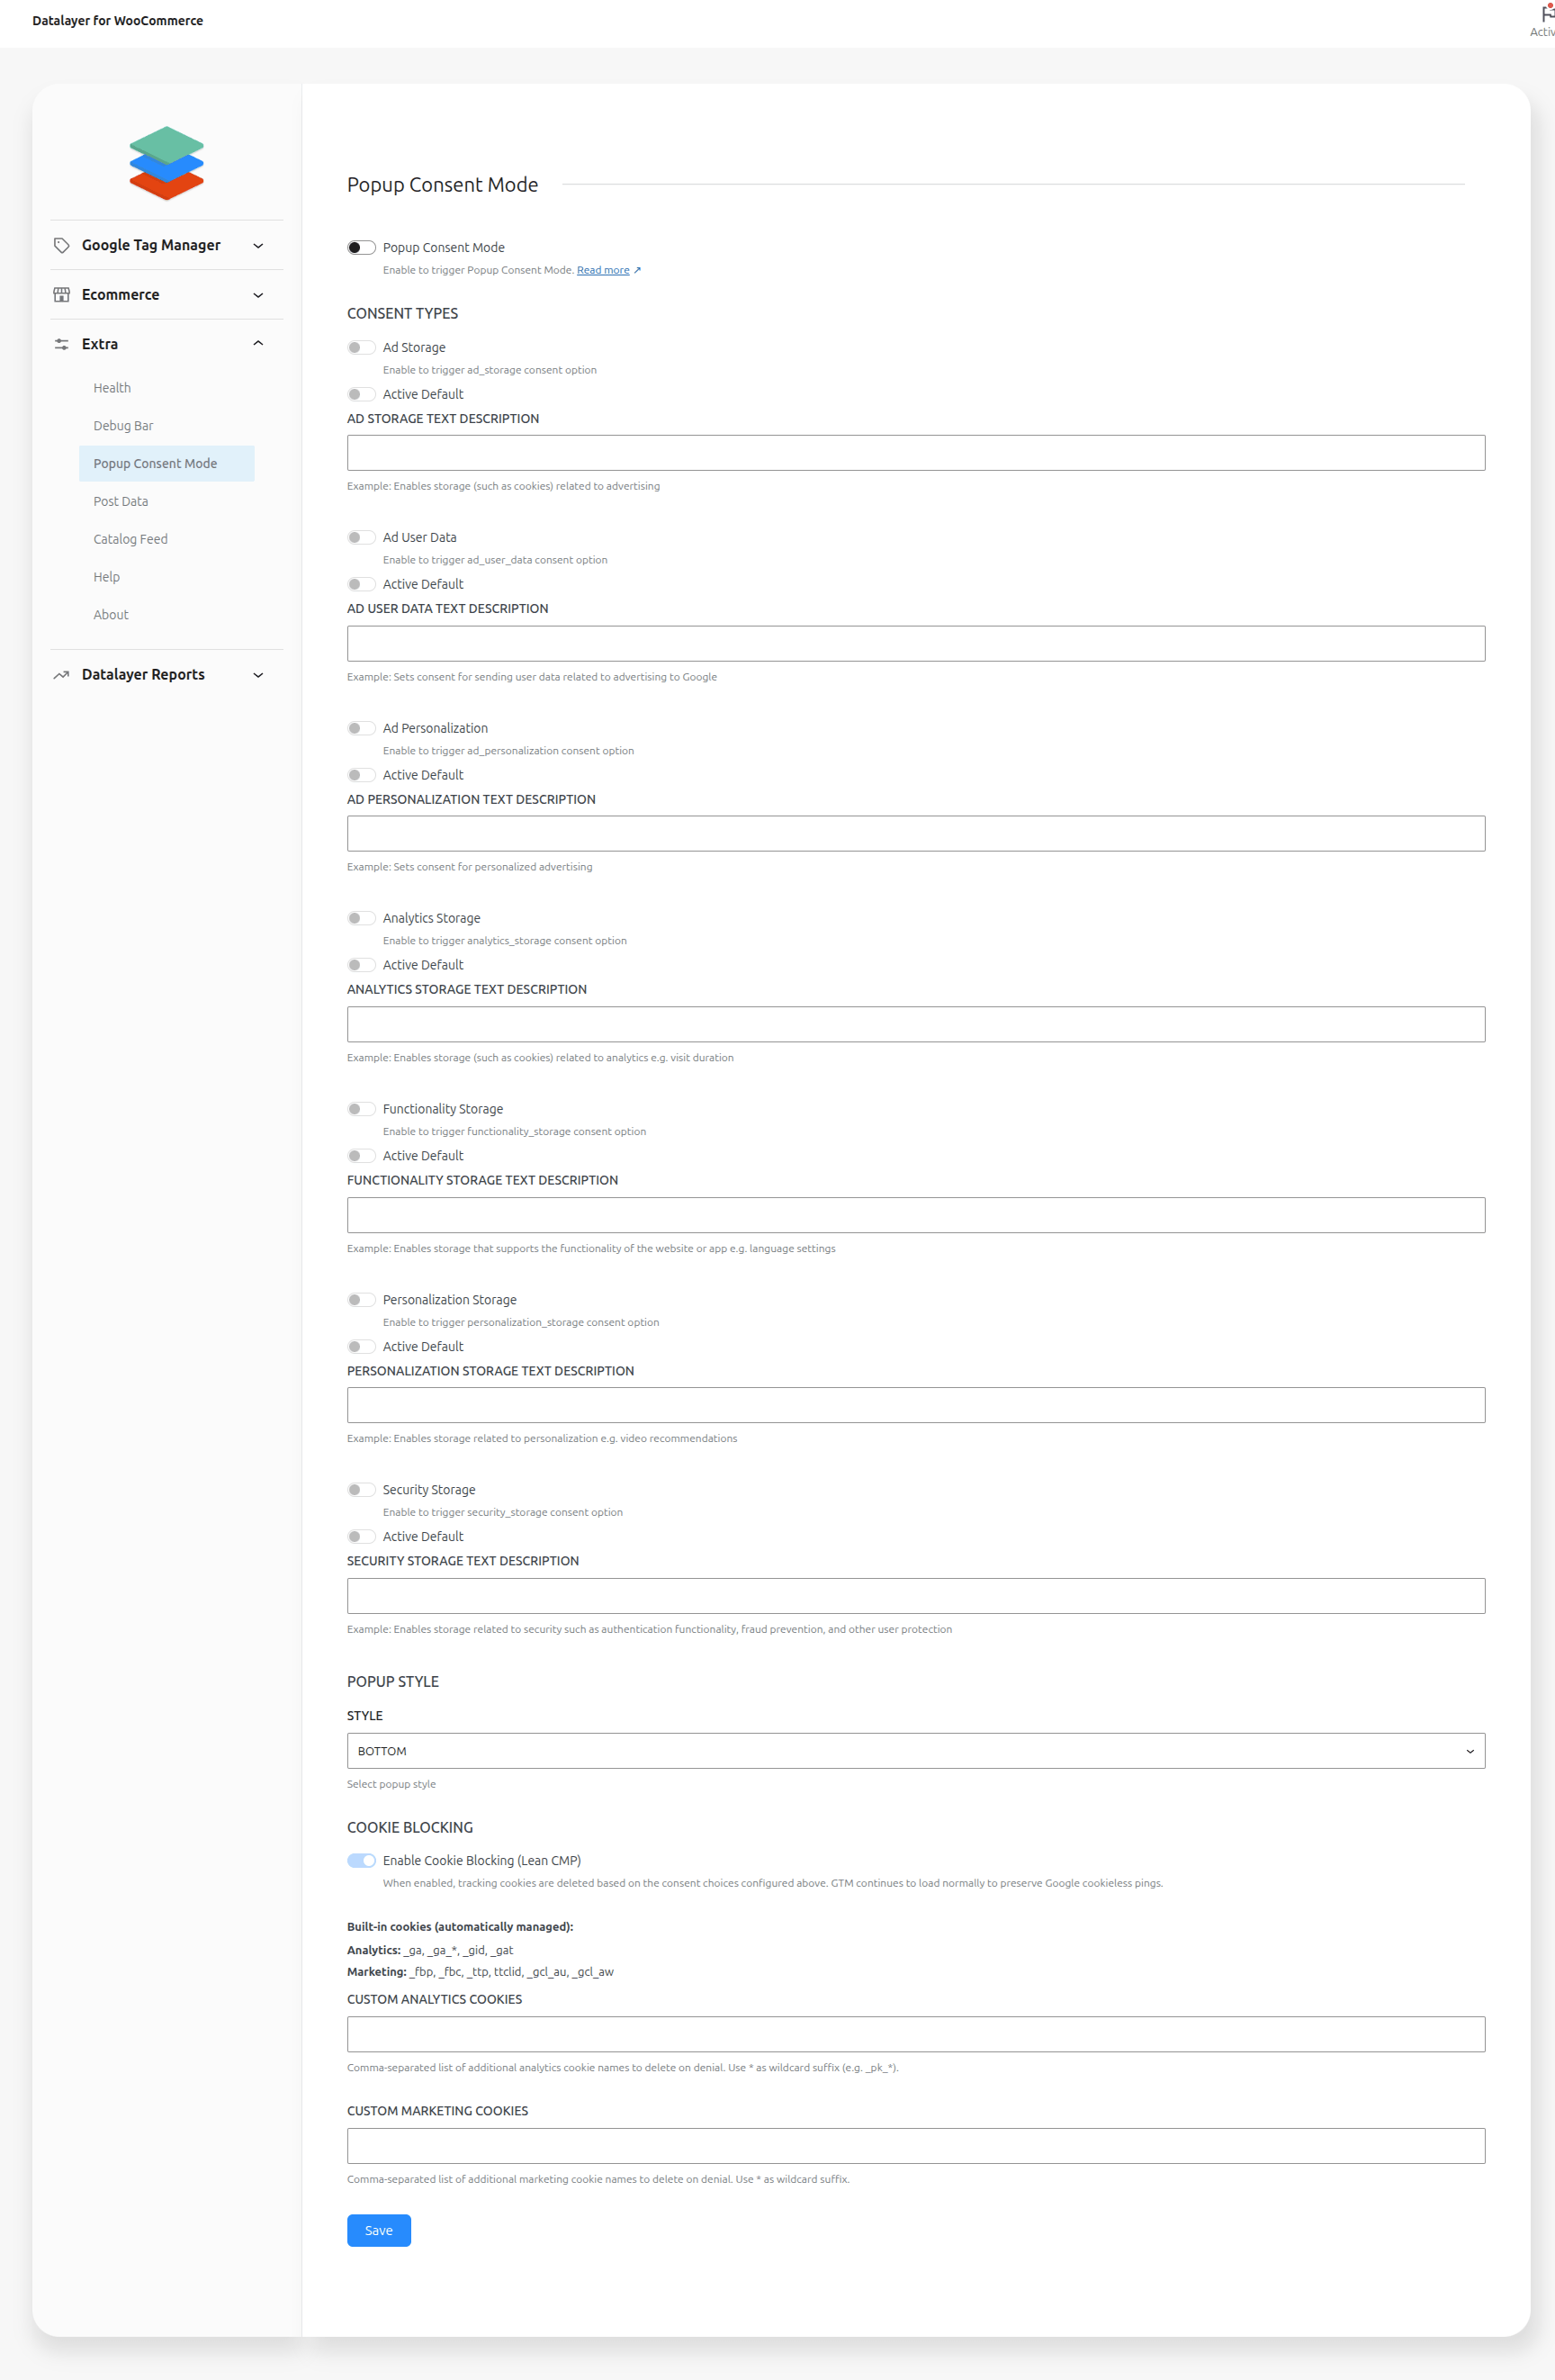
Popup Consent Mode -> Enable to trigger Popup Consent Mode. Read more
Consent Types -> Choose which consent will be active
Popup Style -> Select popup style
Cookie Blocking -> Enable Cookie Blocking (Lean CMP)
Post Data
↑ Back to top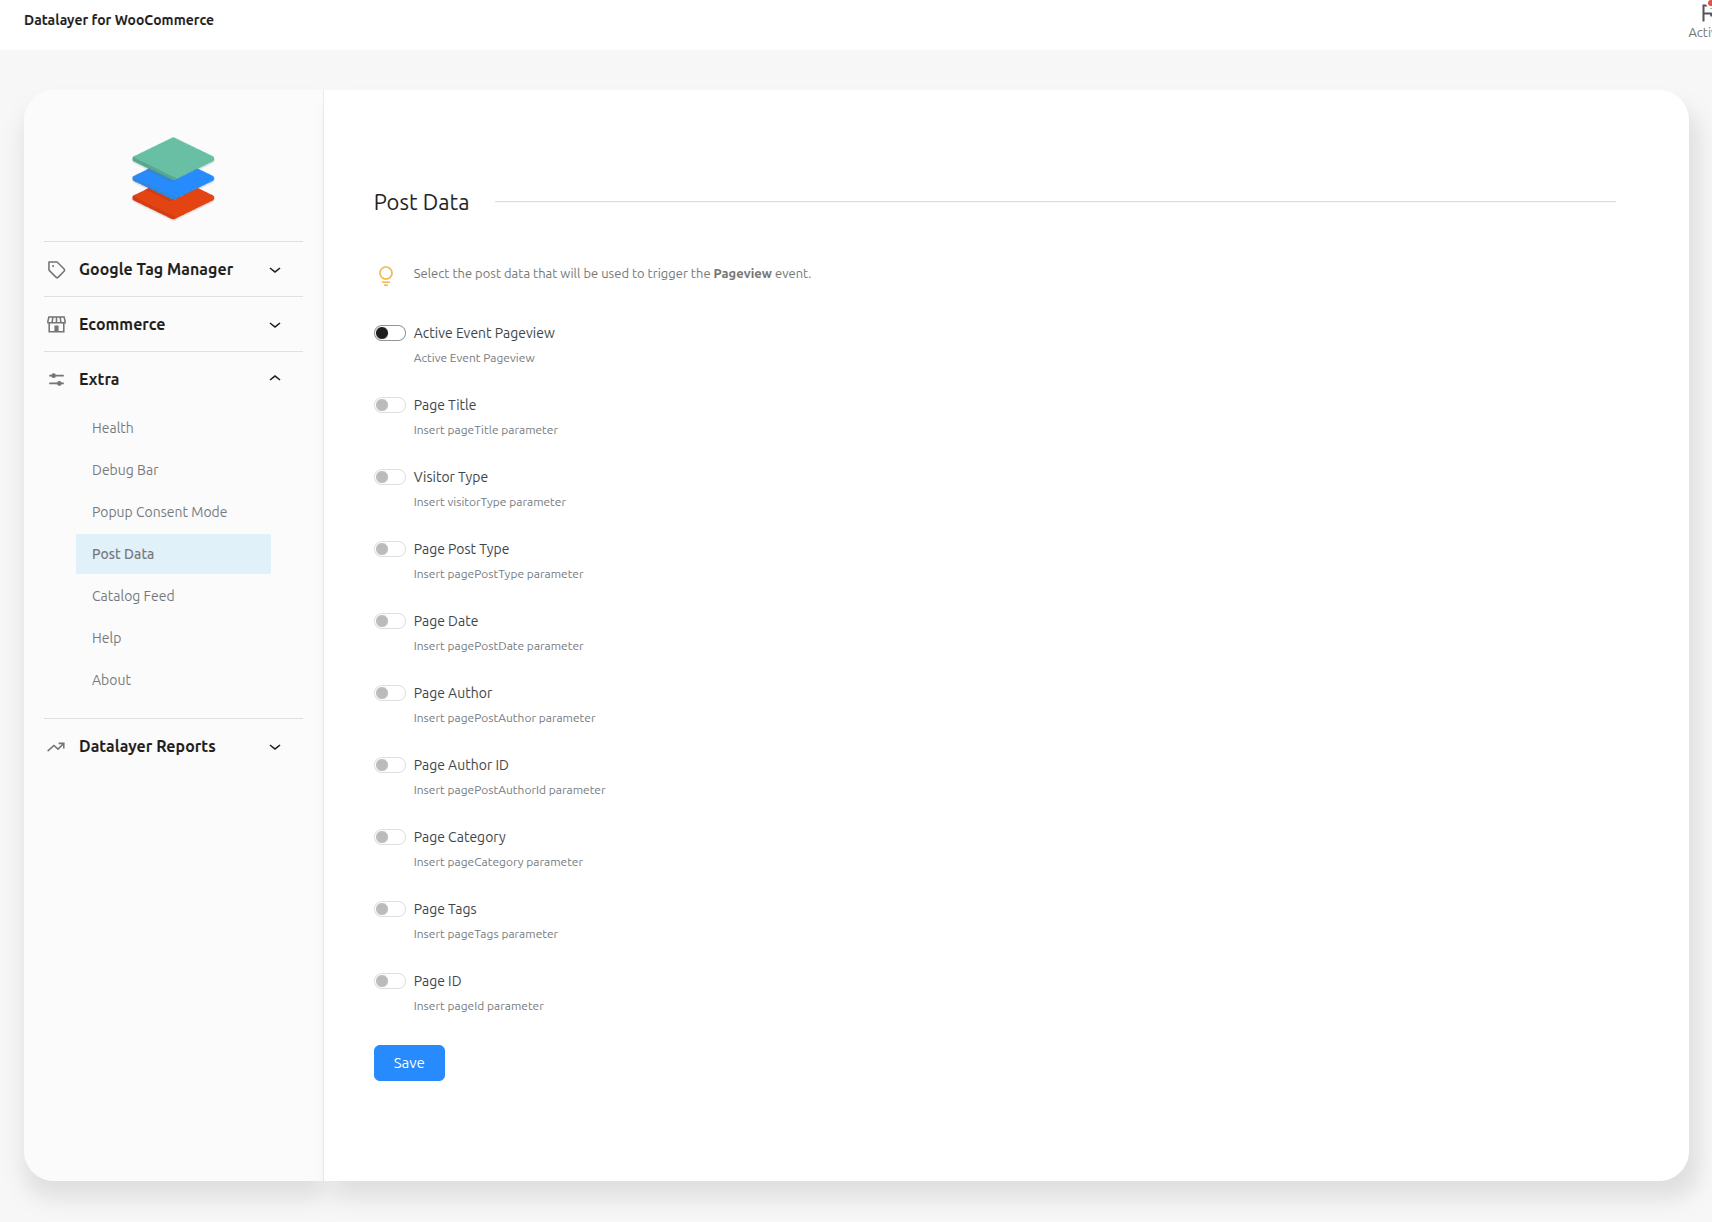
Select the post data that will be used to trigger the Pageview event.
Active Event Pageview -> Active Event Pageview
Page Title -> Insert pageTitle parameter
Visitor Type -> Insert visitorType parameter
Page Post Type -> Insert pagePostType parameter
Page Date -> Insert pagePostDate parameter
Page Author -> Insert pagePostAuthor parameter
Page Author ID -> Insert pagePostAuthorId parameter
Page Category -> Insert pageCategory parameter
Page Tags -> Insert pageTags parameter
Page ID -> Insert pageId parameter
Catalog Feed
↑ Back to top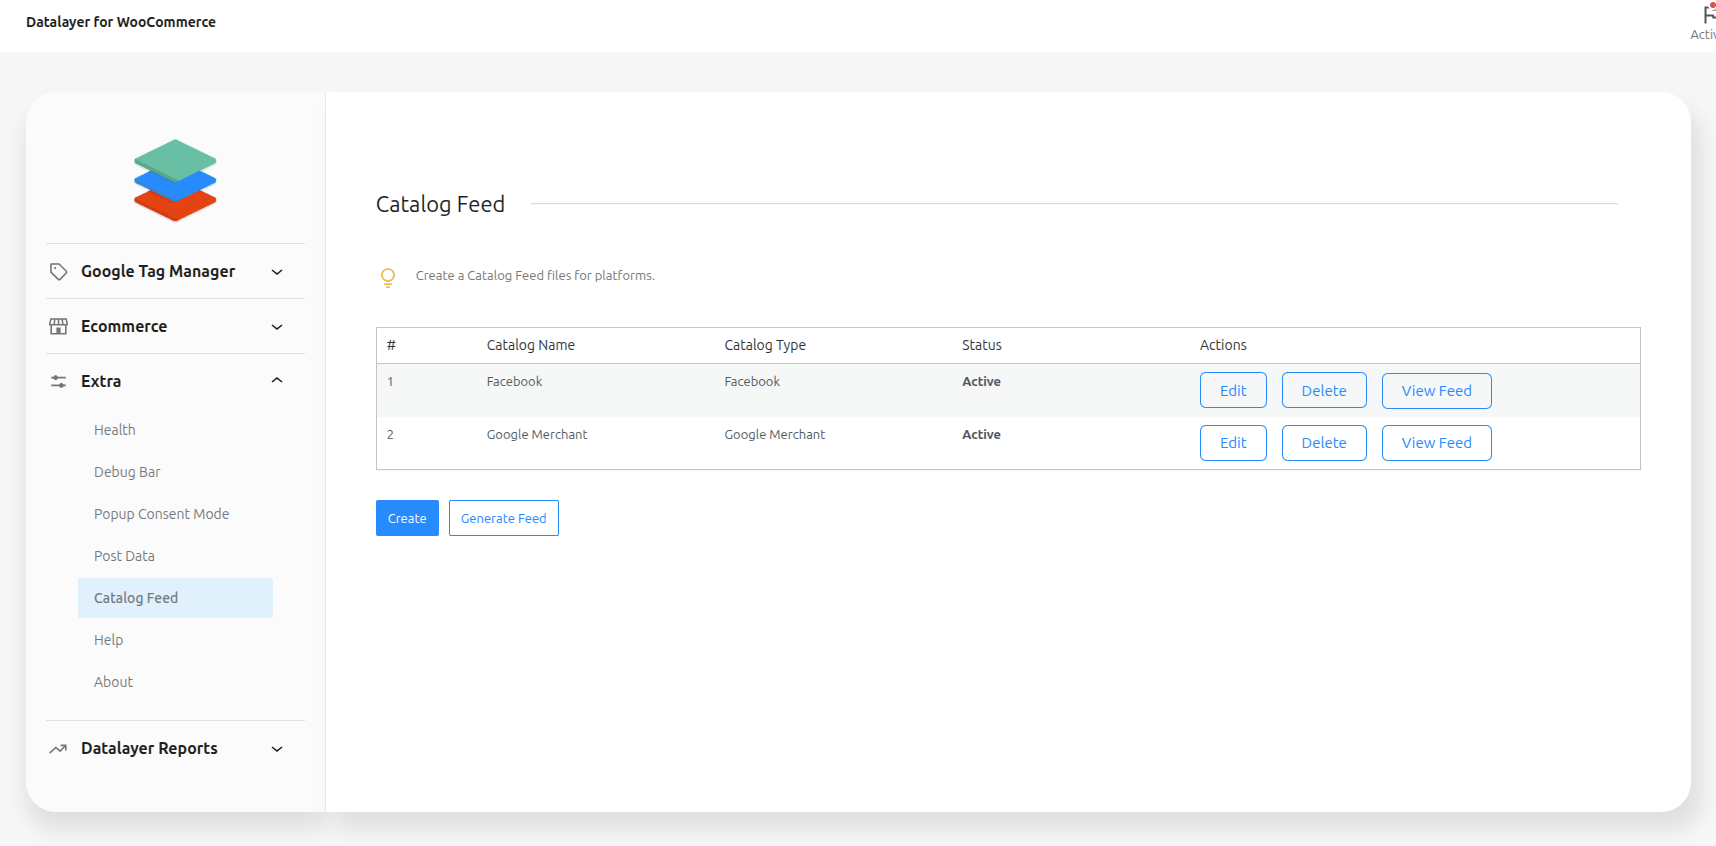
Create multiple Catalog Feed files for platforms: Google Merchant Center (Read more) and Facebook Catalog -> (Read more)
Reports Settings
↑ Back to topEnable this option to save DataLayer events locally and generate reports directly on your website.
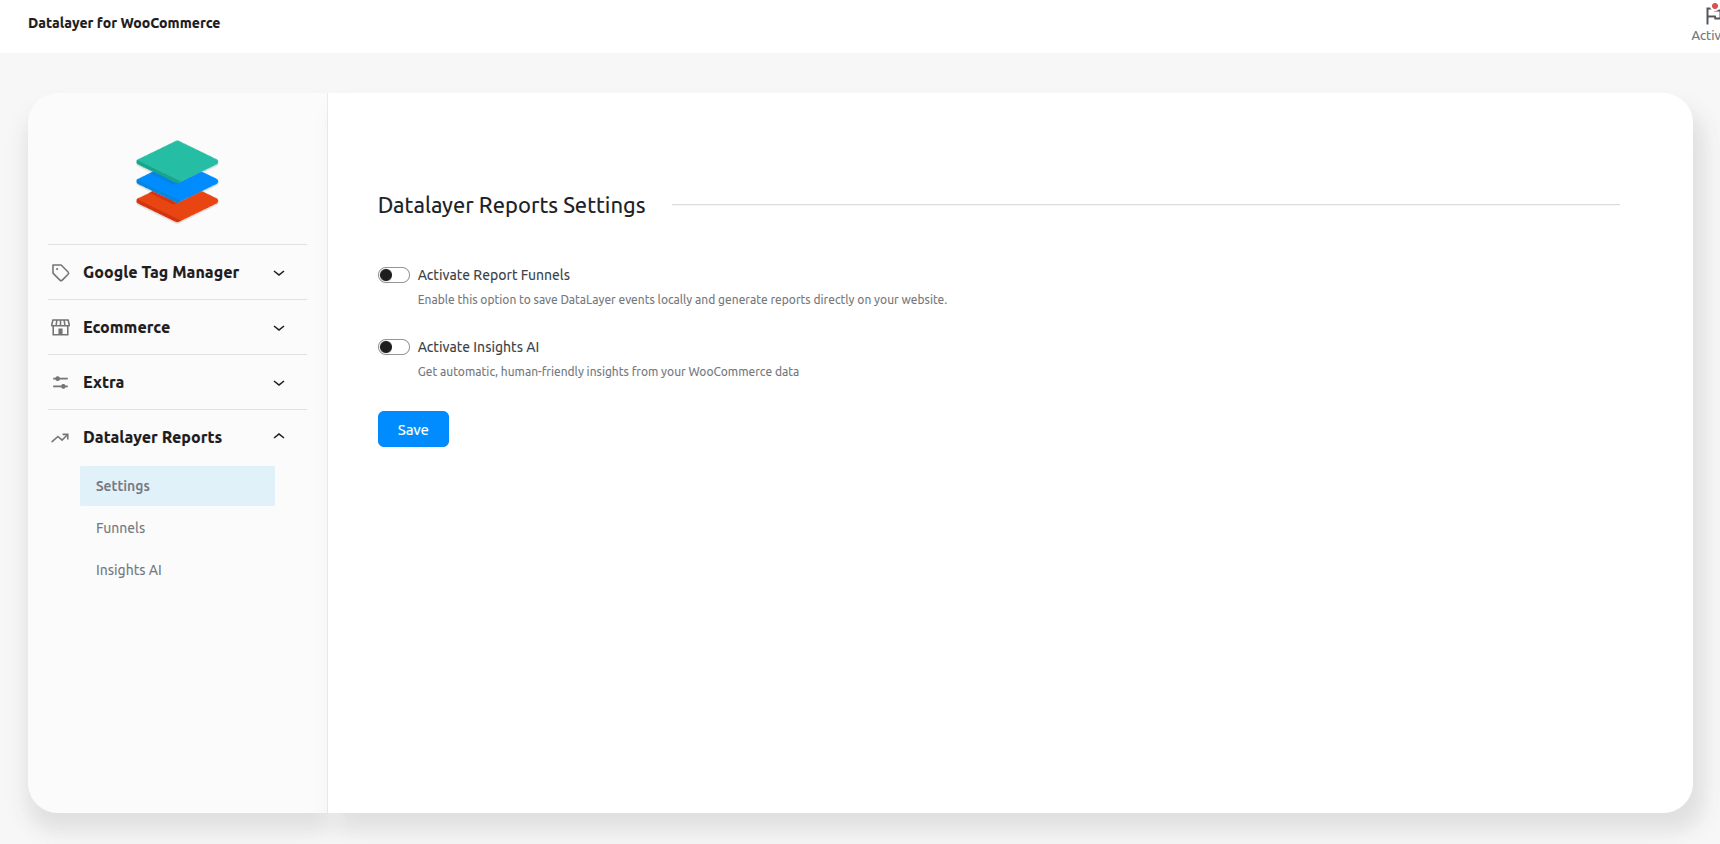
Activate Report Funnels -> Enable this option to save DataLayer events locally and generate reports directly on your website
Activate Insights AI -> Get automatic, human-friendly insights from your WooCommerce data
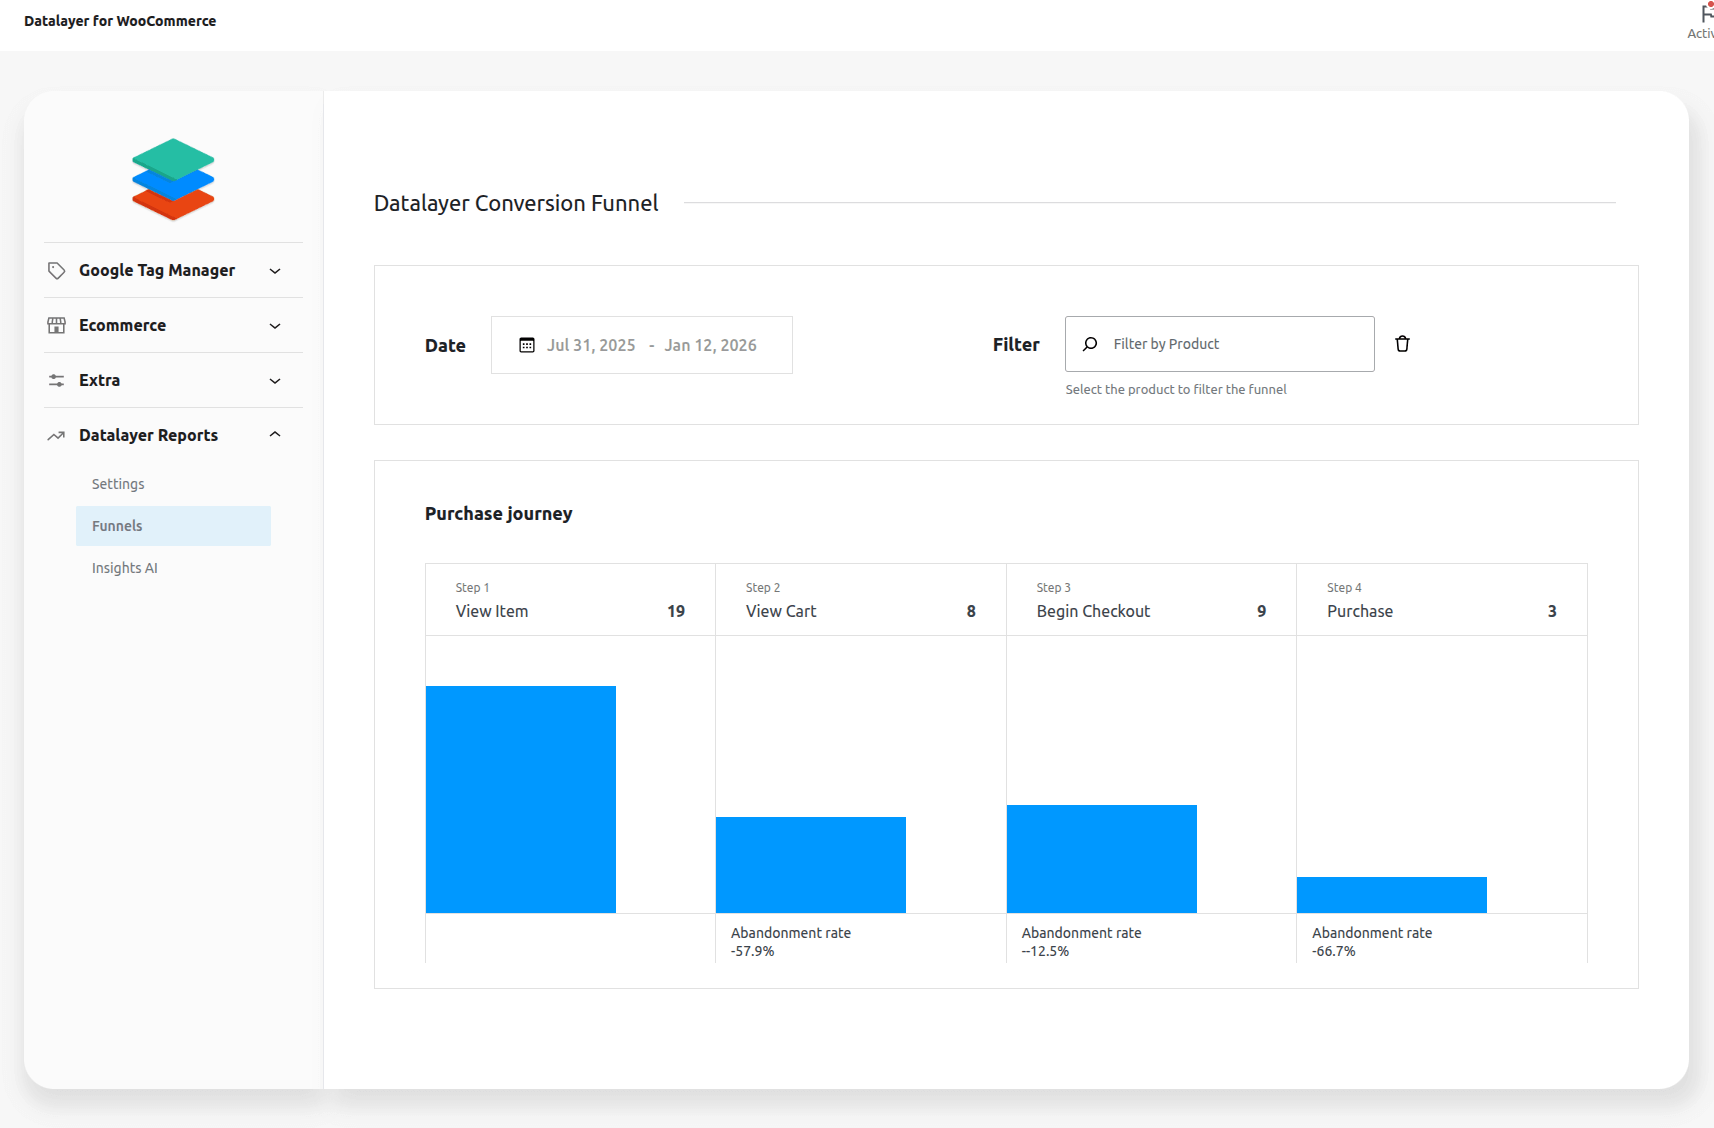
Reports Conversion Funnel
↑ Back to topVisualizing the conversion funnel for your event-based products
Reports Insights AI
↑ Back to topGet automatic, human-friendly insights from your WooCommerce data
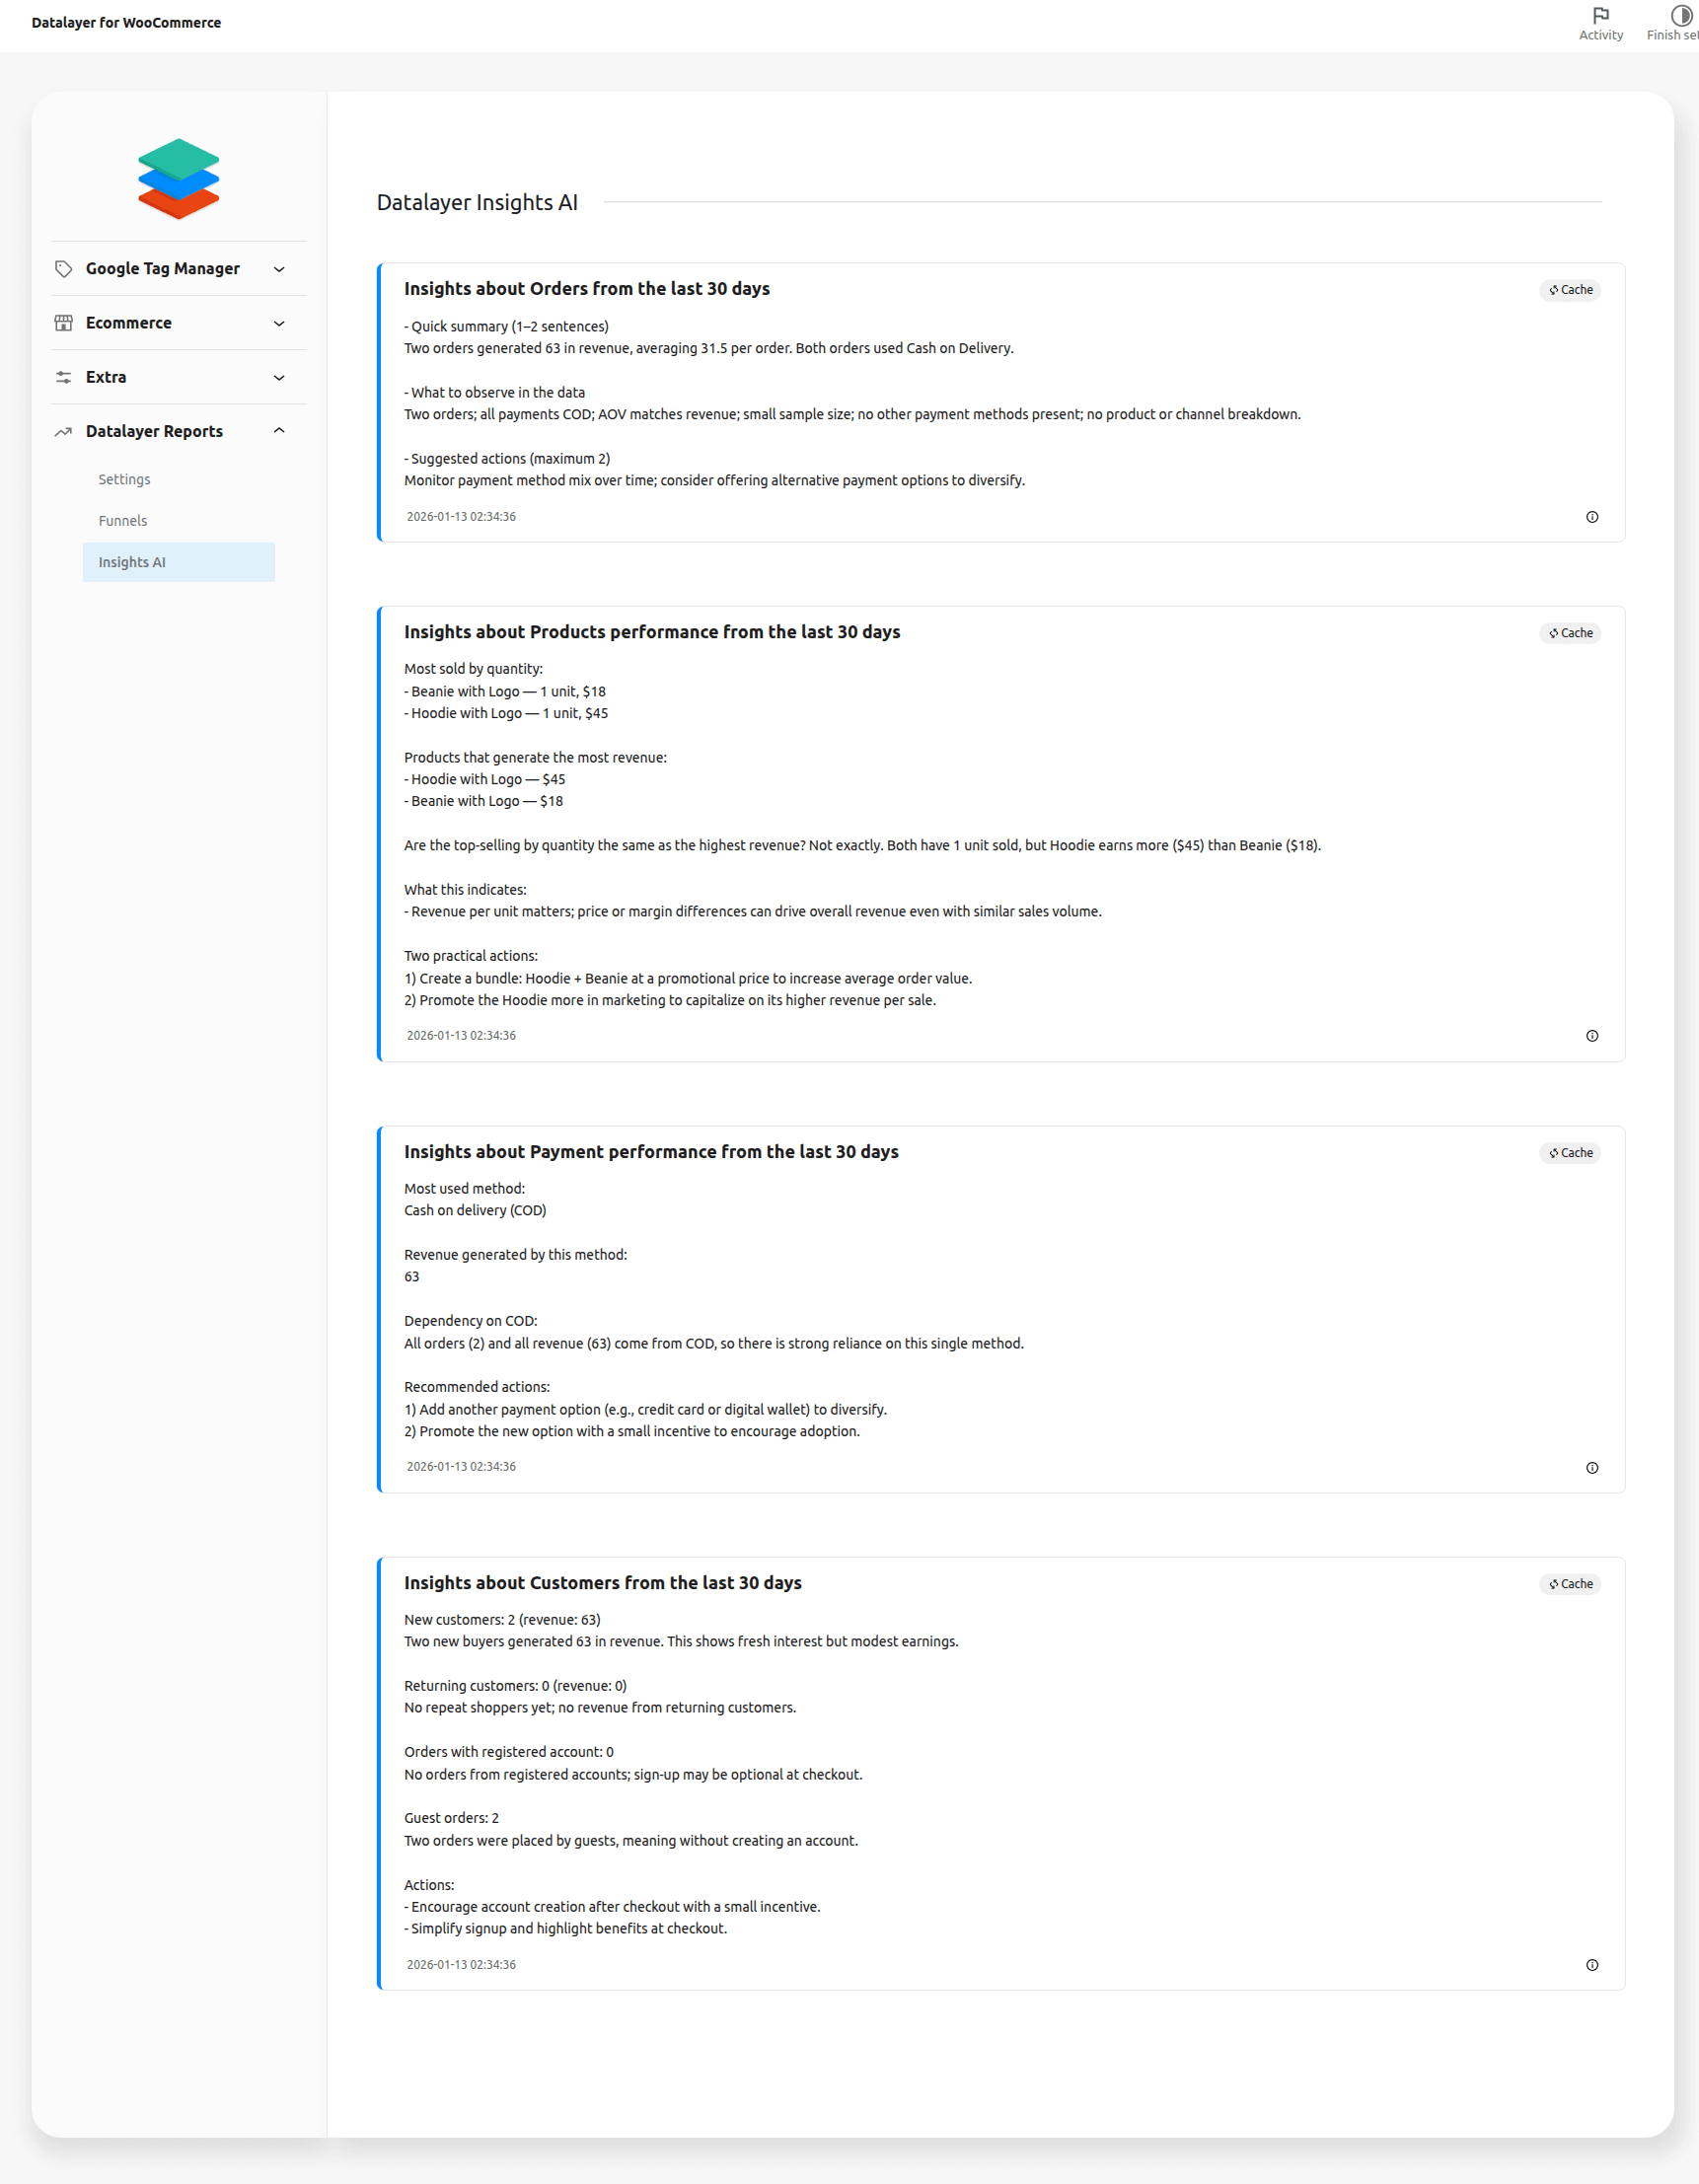
Insights uses artificial intelligence to interpret your store’s data. You connect your own API key.
Settings Client Side
↑ Back to topIf you use Google Tag Manager, we will help you configure all available options mapped with our Datalayer.
Import Google Tag Manager
↑ Back to topDownload the workspace.zip file in WooCommerce > Datalayer for WooCommerce > Google Tag Manager > Tags Sync > Download import File GTM.

GTM-GA4.json -> Tags for ClientSide
Go to Google Tag Manager > Admin > Import Container:
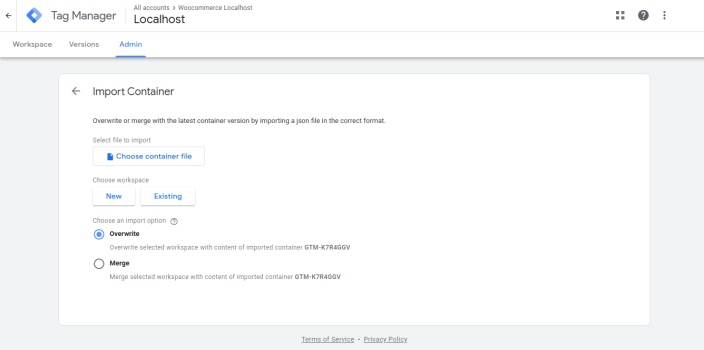
Select the file GTM-GA4.json to import.
After selecting the file, import the tags:
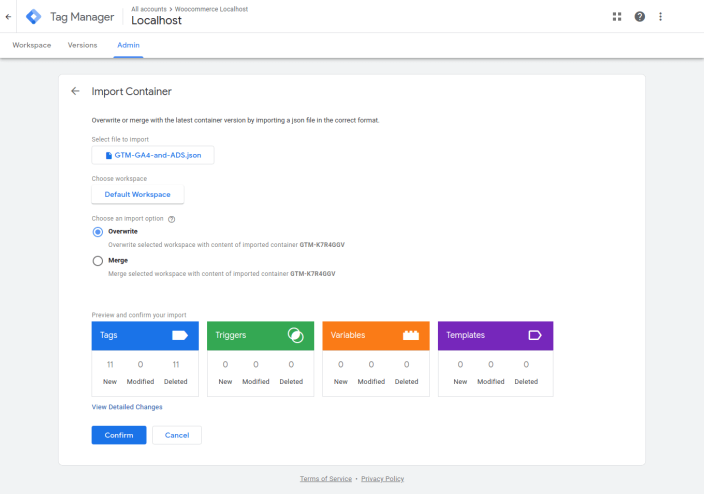
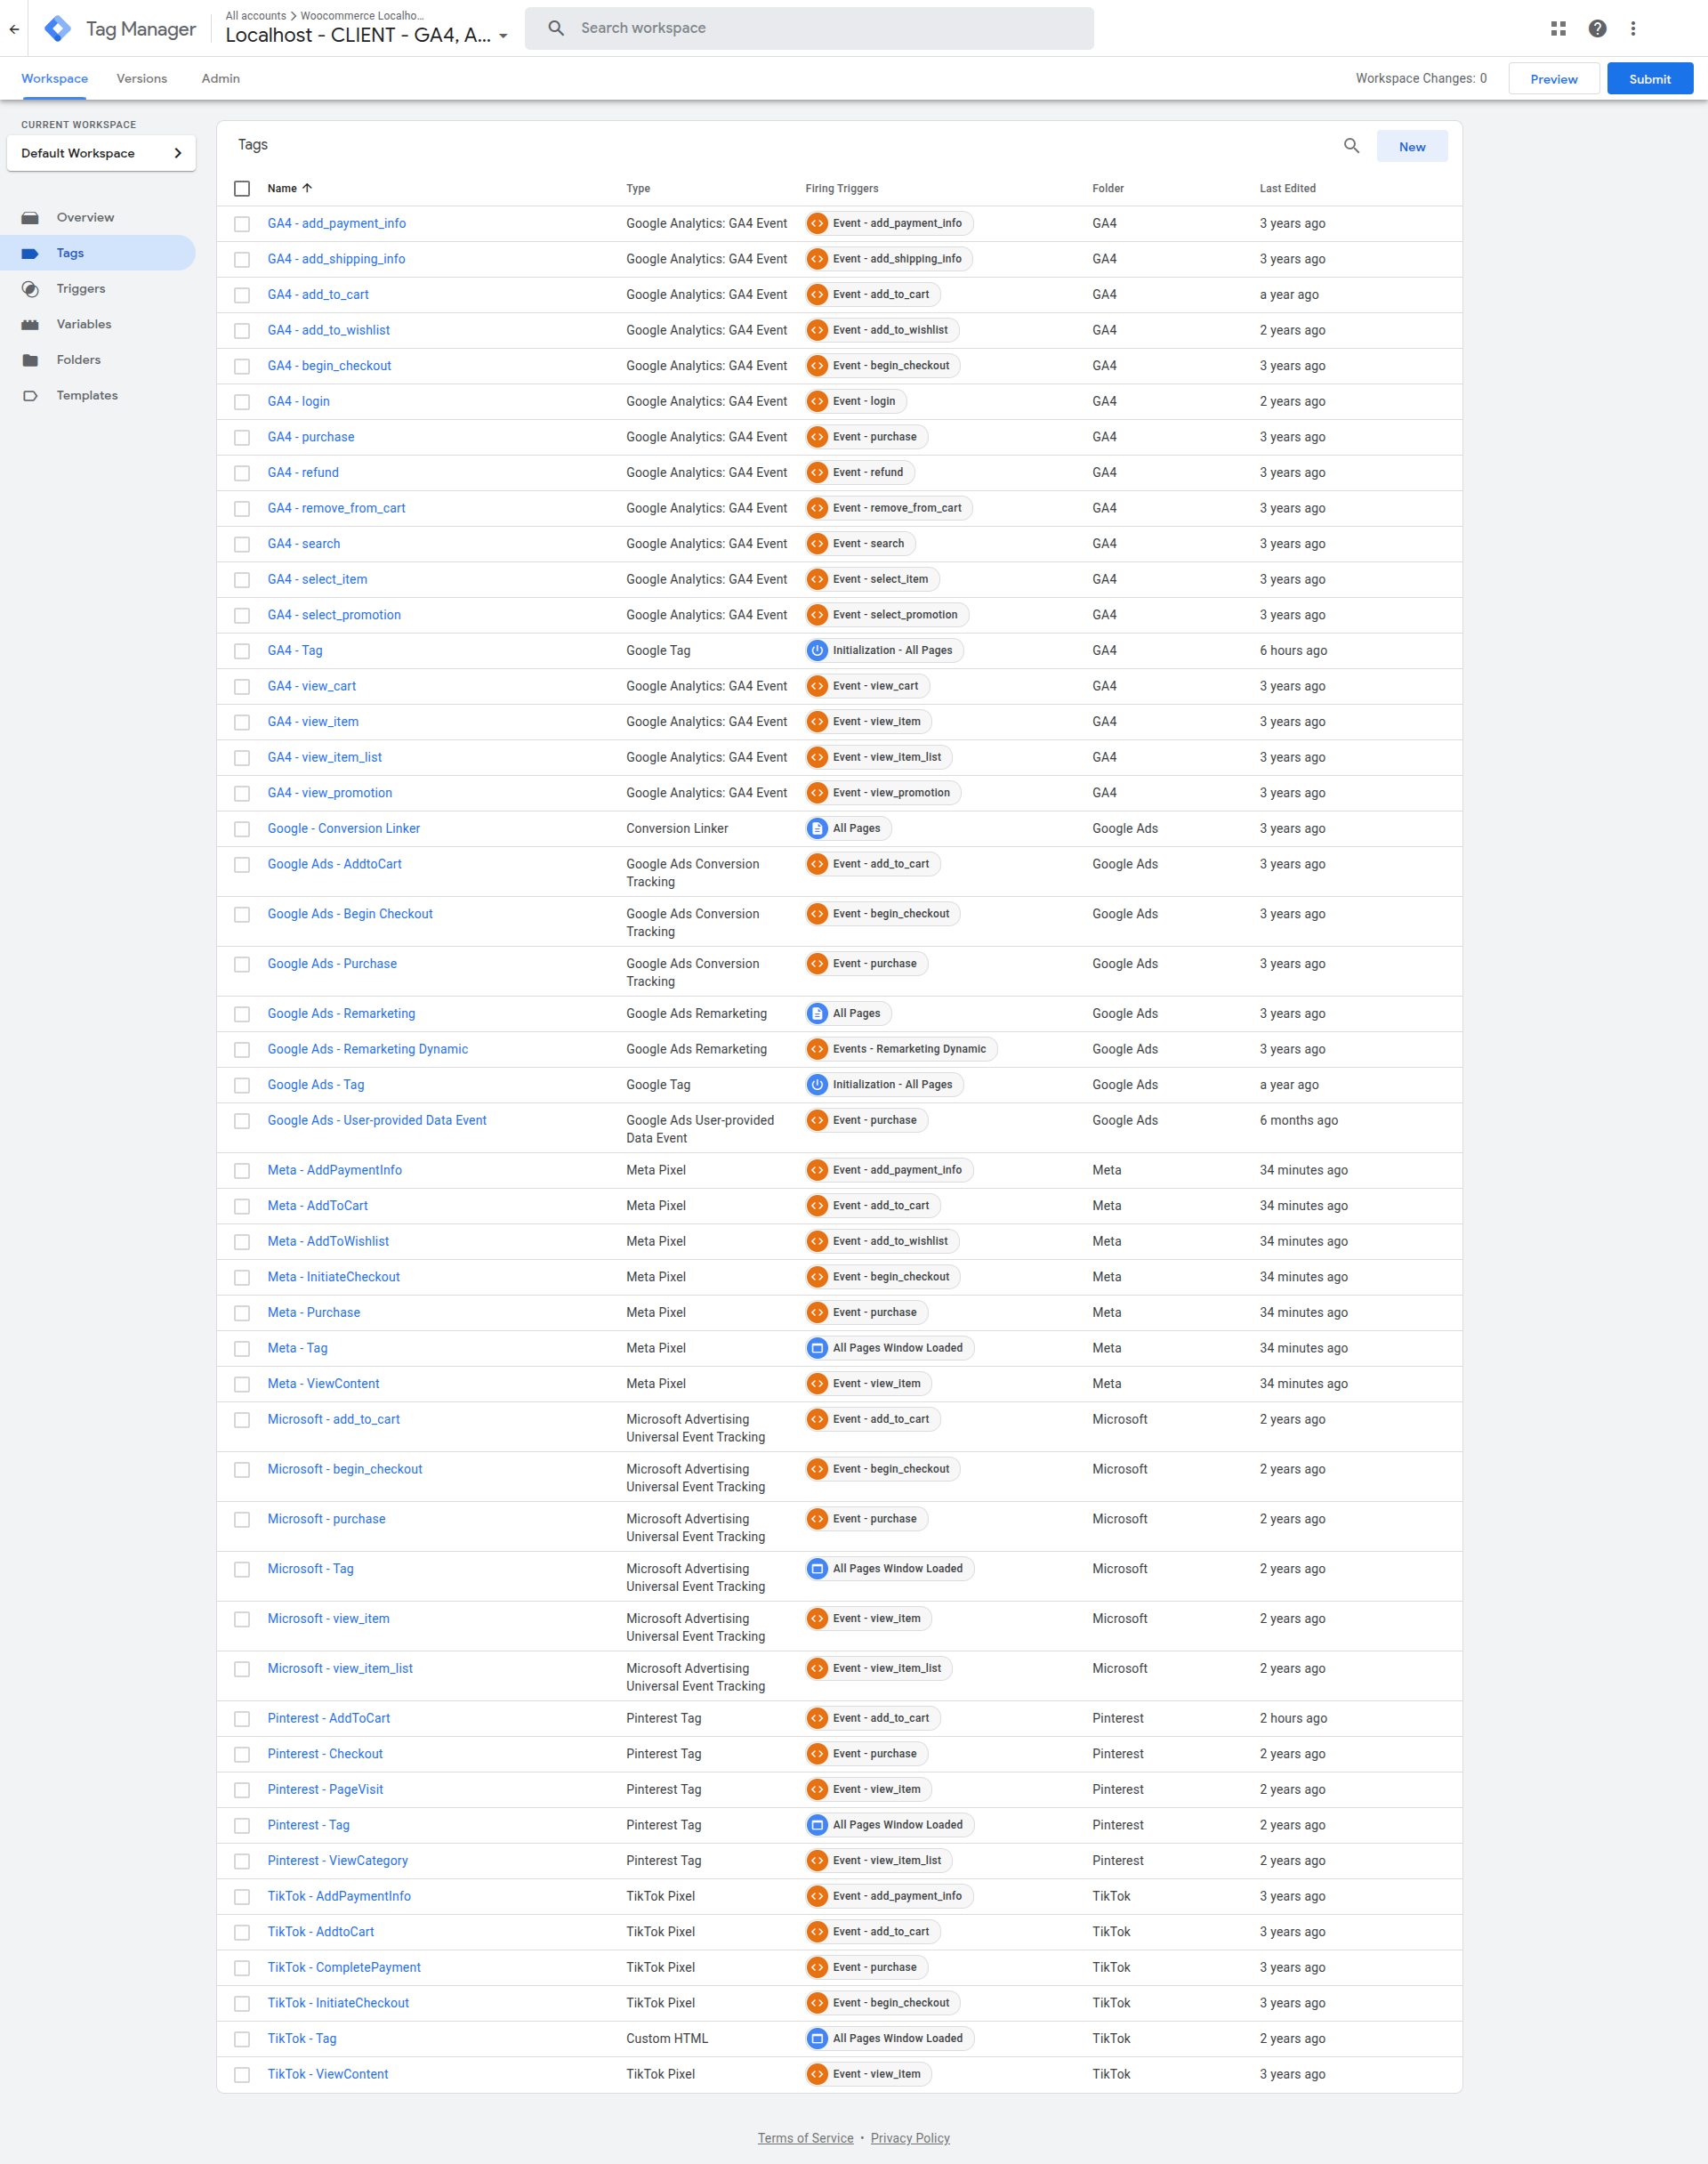
After import, it will look like this:
Settings Google Analytics 4
↑ Back to topIf you will be using Google Analytics 4, follow the steps below:
In Analytics 4 > Dataflow > Web Stream Details you will see the measurement id:
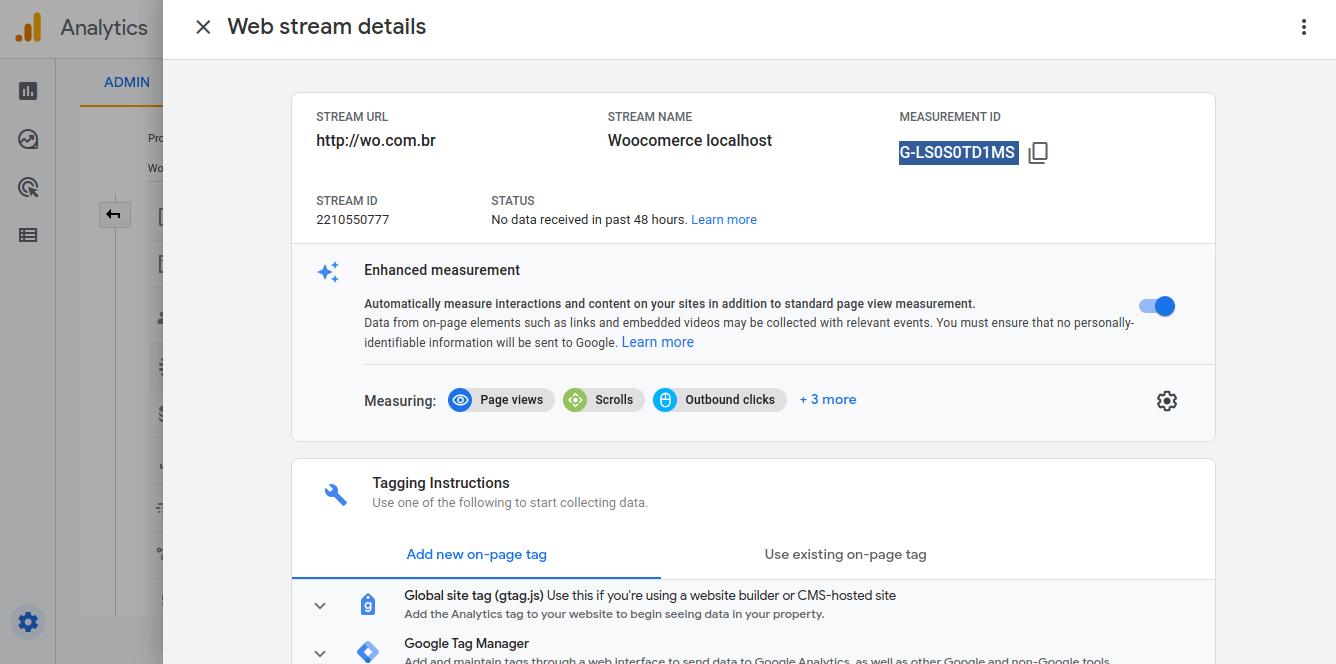
In GTM, go to the Variables menu and select the variable GA4 – Measurement ID, enter the id of your GA4 and click on save:

Settings Google ADS
↑ Back to topIf you will be using Google Ads, follow the steps below:
In Google Ads > Tools > Data Manager you will see the AW-99999999 code:
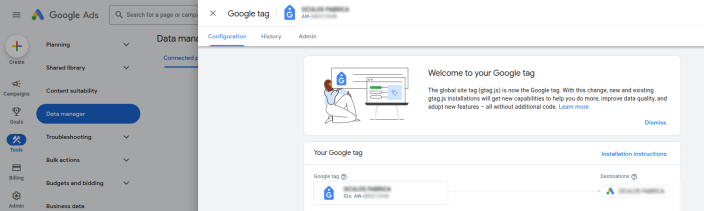
In GTM, go to the tag Google Ads – Tag, enter the id of your GADS and click on save:

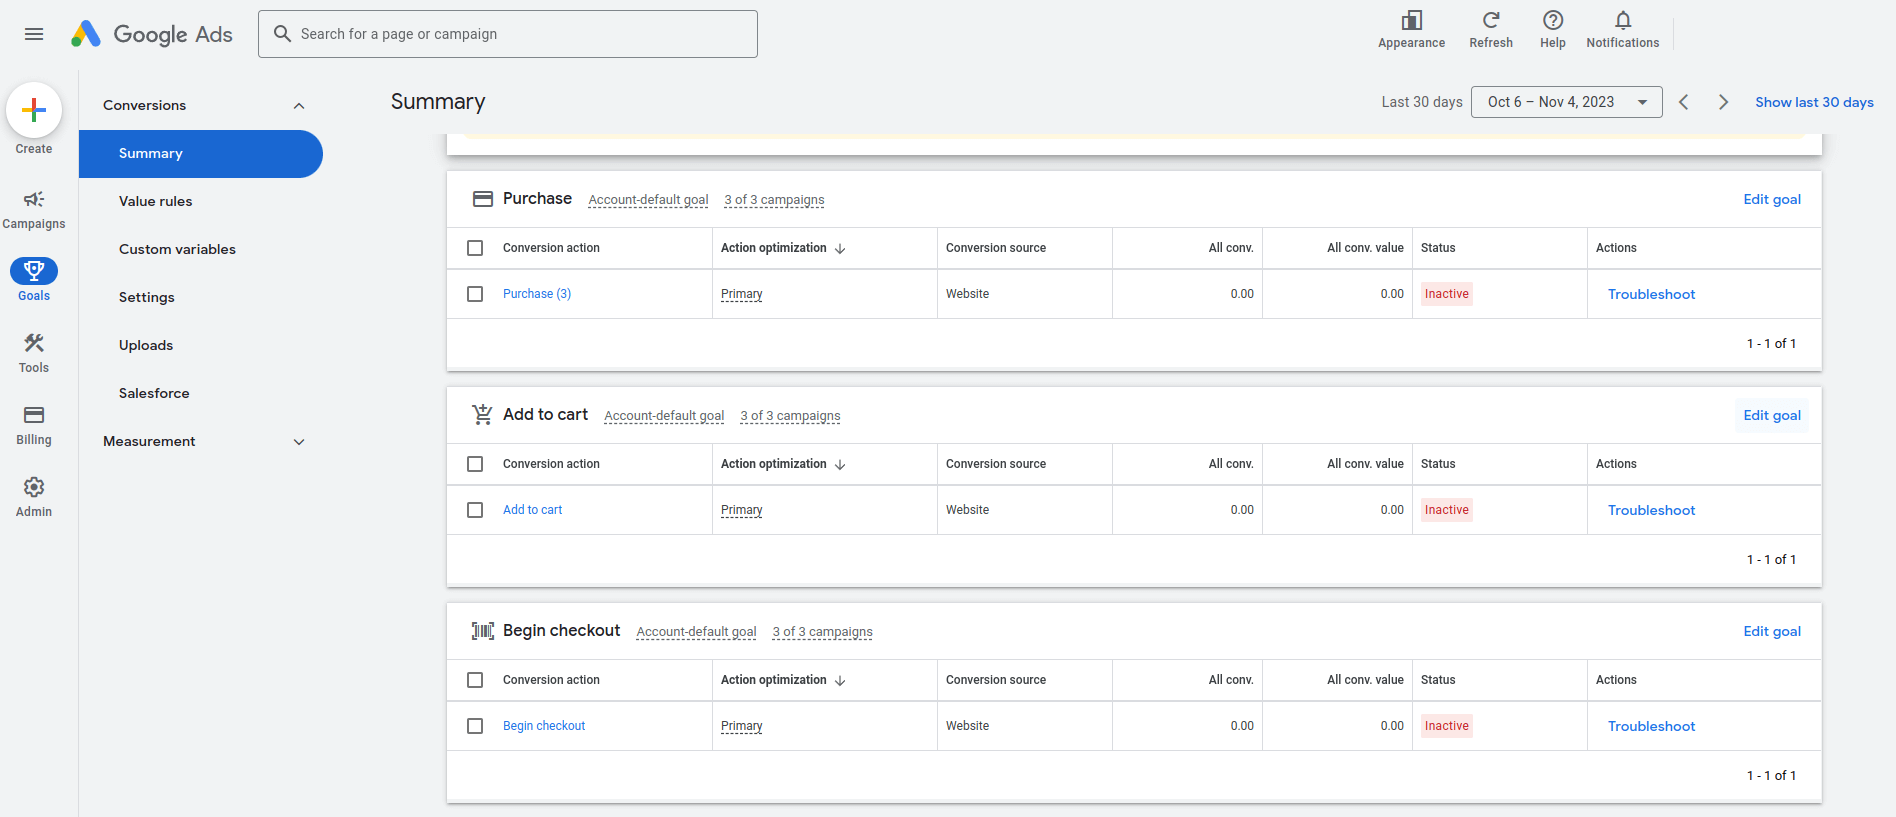
Conversions
In Google ADS > Goals > Summary – Create three conversions for e-commerce: Purchase, Add to cart and Begin Checkout:
In Conversion, copy the Conversion ID and Conversion label:
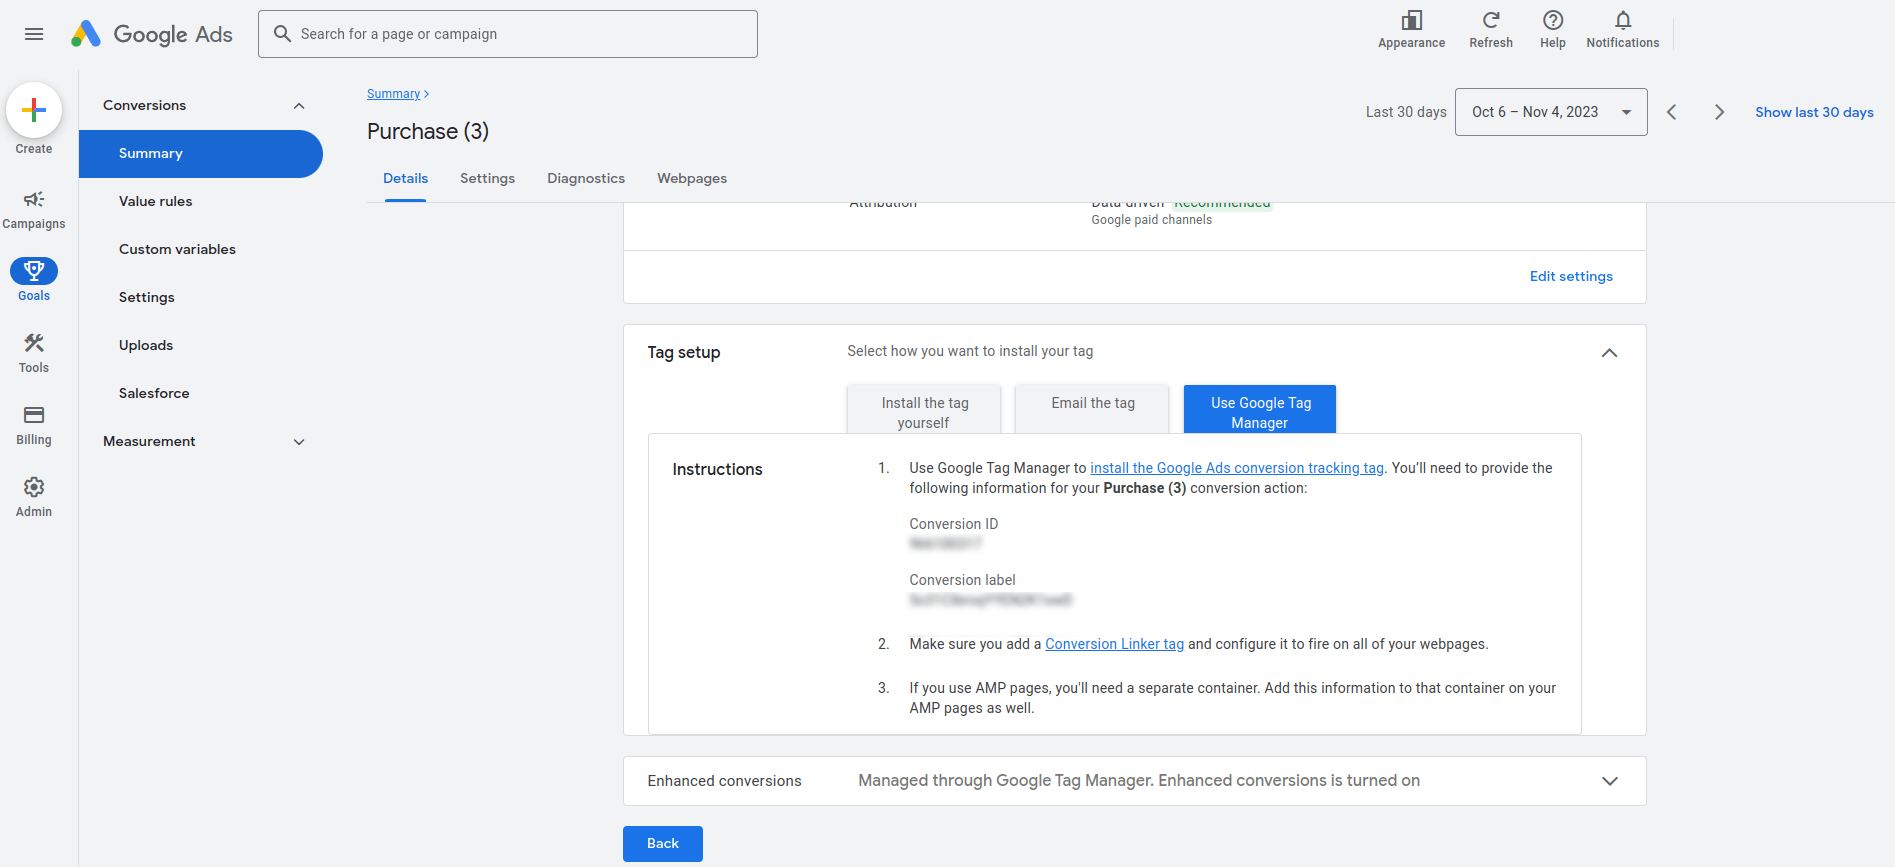
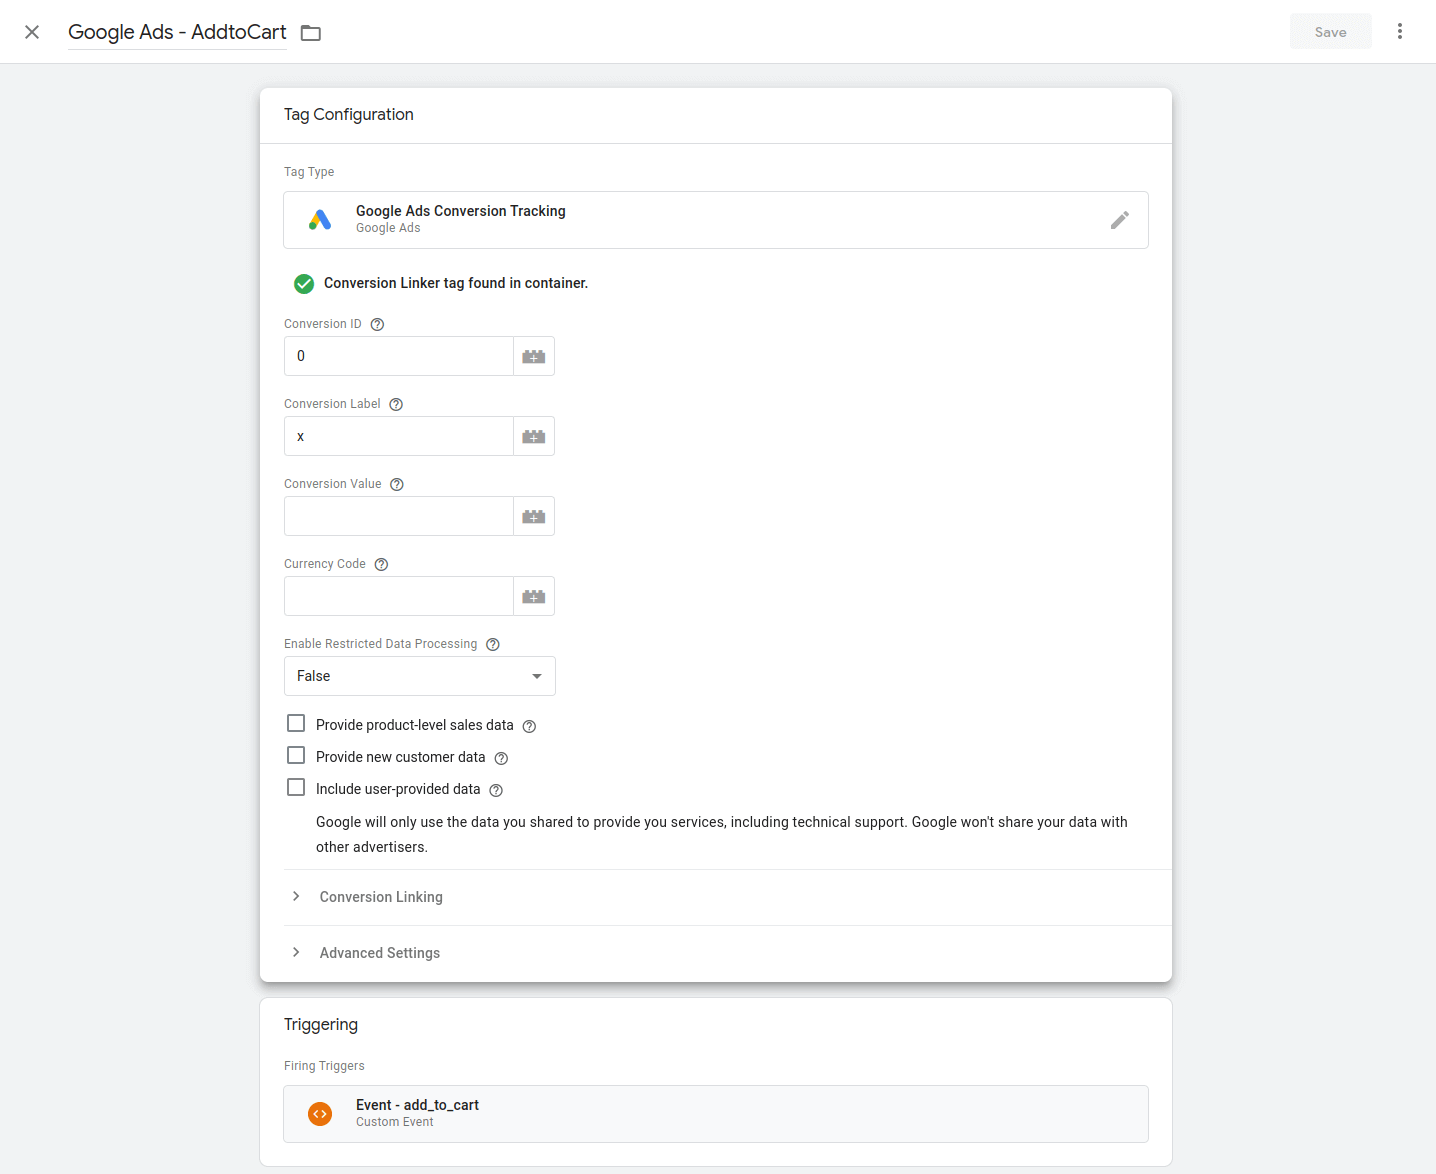
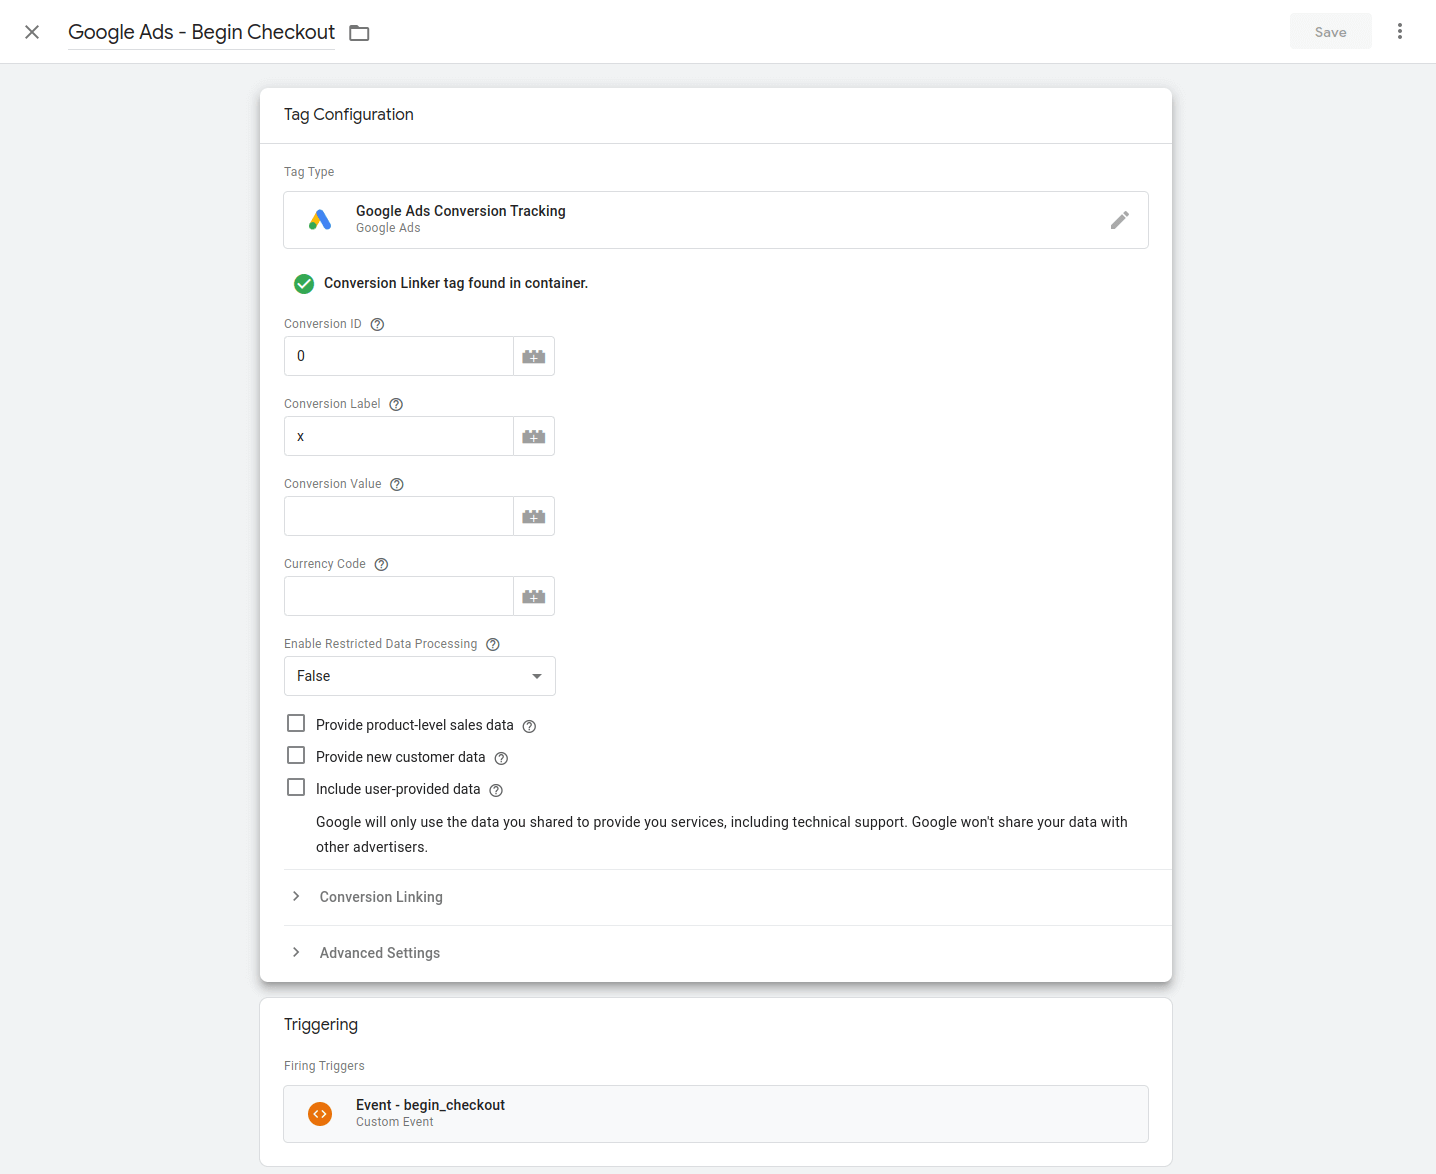
In GTM > Tags > Select the Google Ads Purchase, Add to cart and Begin Checkout – Paste in each the Conversion ID e Conversion label :

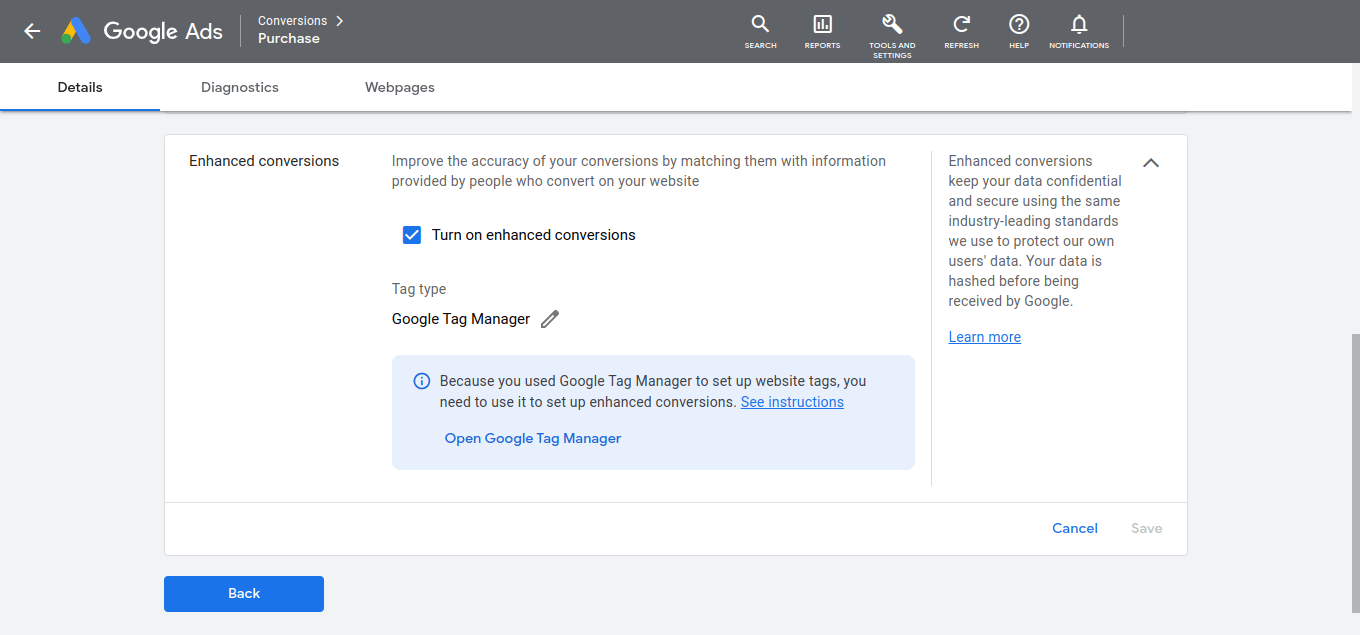
Enhanced Conversions
If you want to enable Google Ads Enhanced conversions:
In Google Ads, go to the Tools > Conversions menu, select the Purchase conversion, and in the “Enhanced Conversions” section at the bottom and click Turn on enhanced conversions:
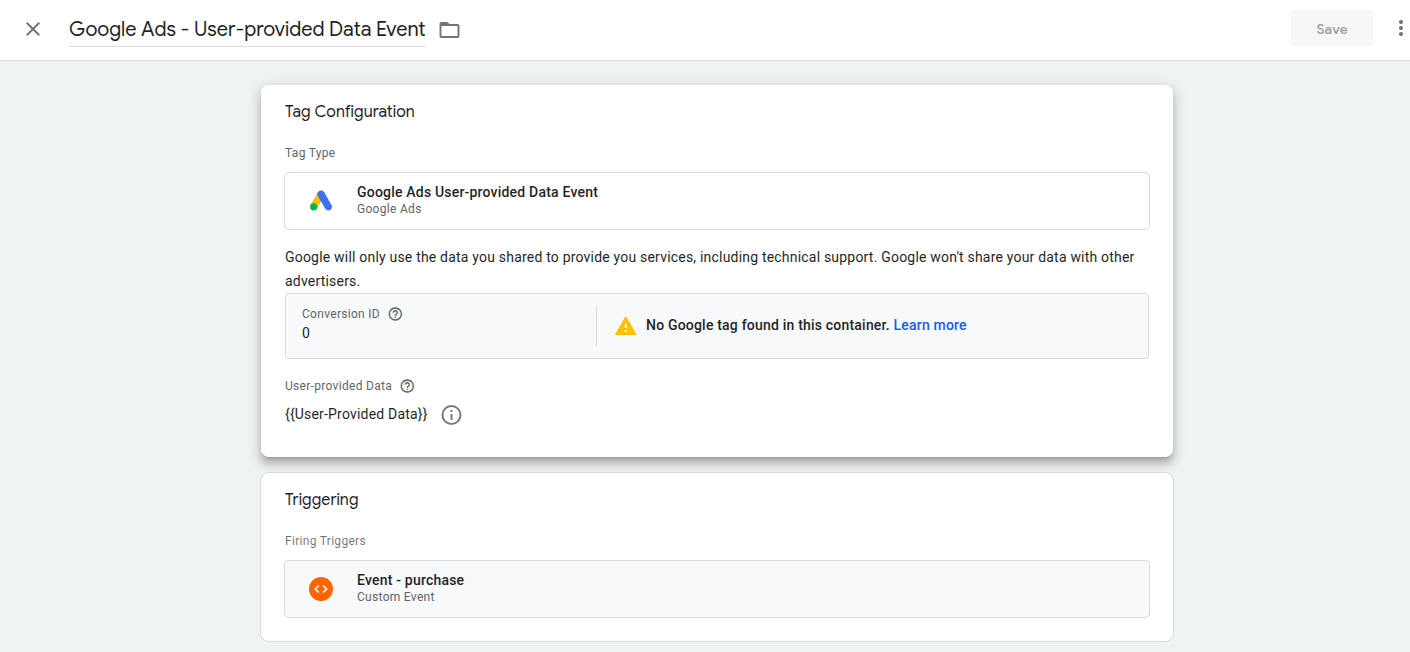
In GTM > Tags > Google Ads – User-provided Data Event tag, add the conversion id and save the tag:
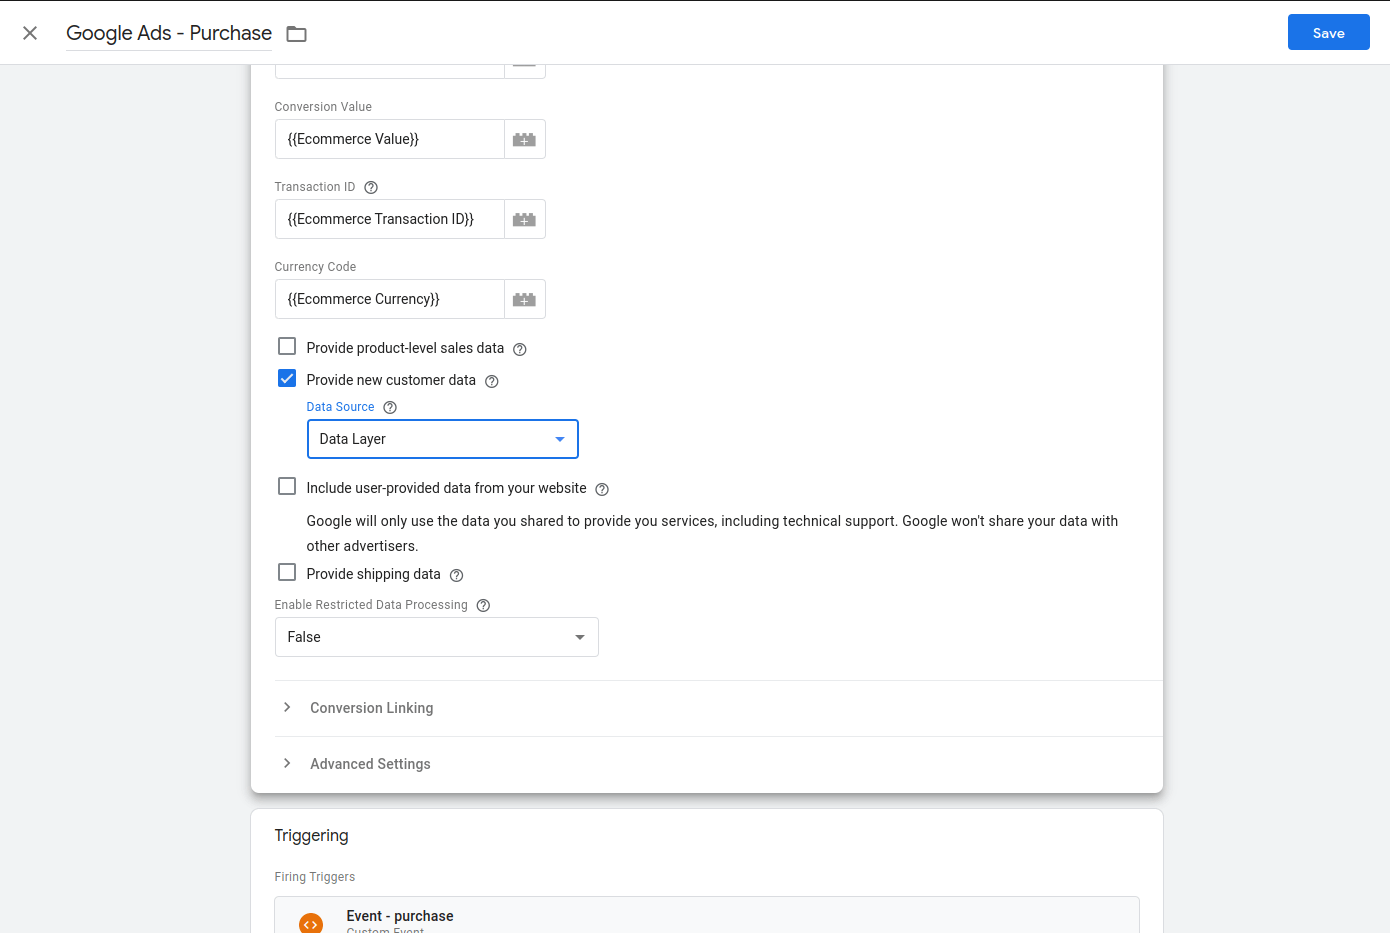
New Customer Acquisition
If you want to enable Google Ads New Customer Acquisition:
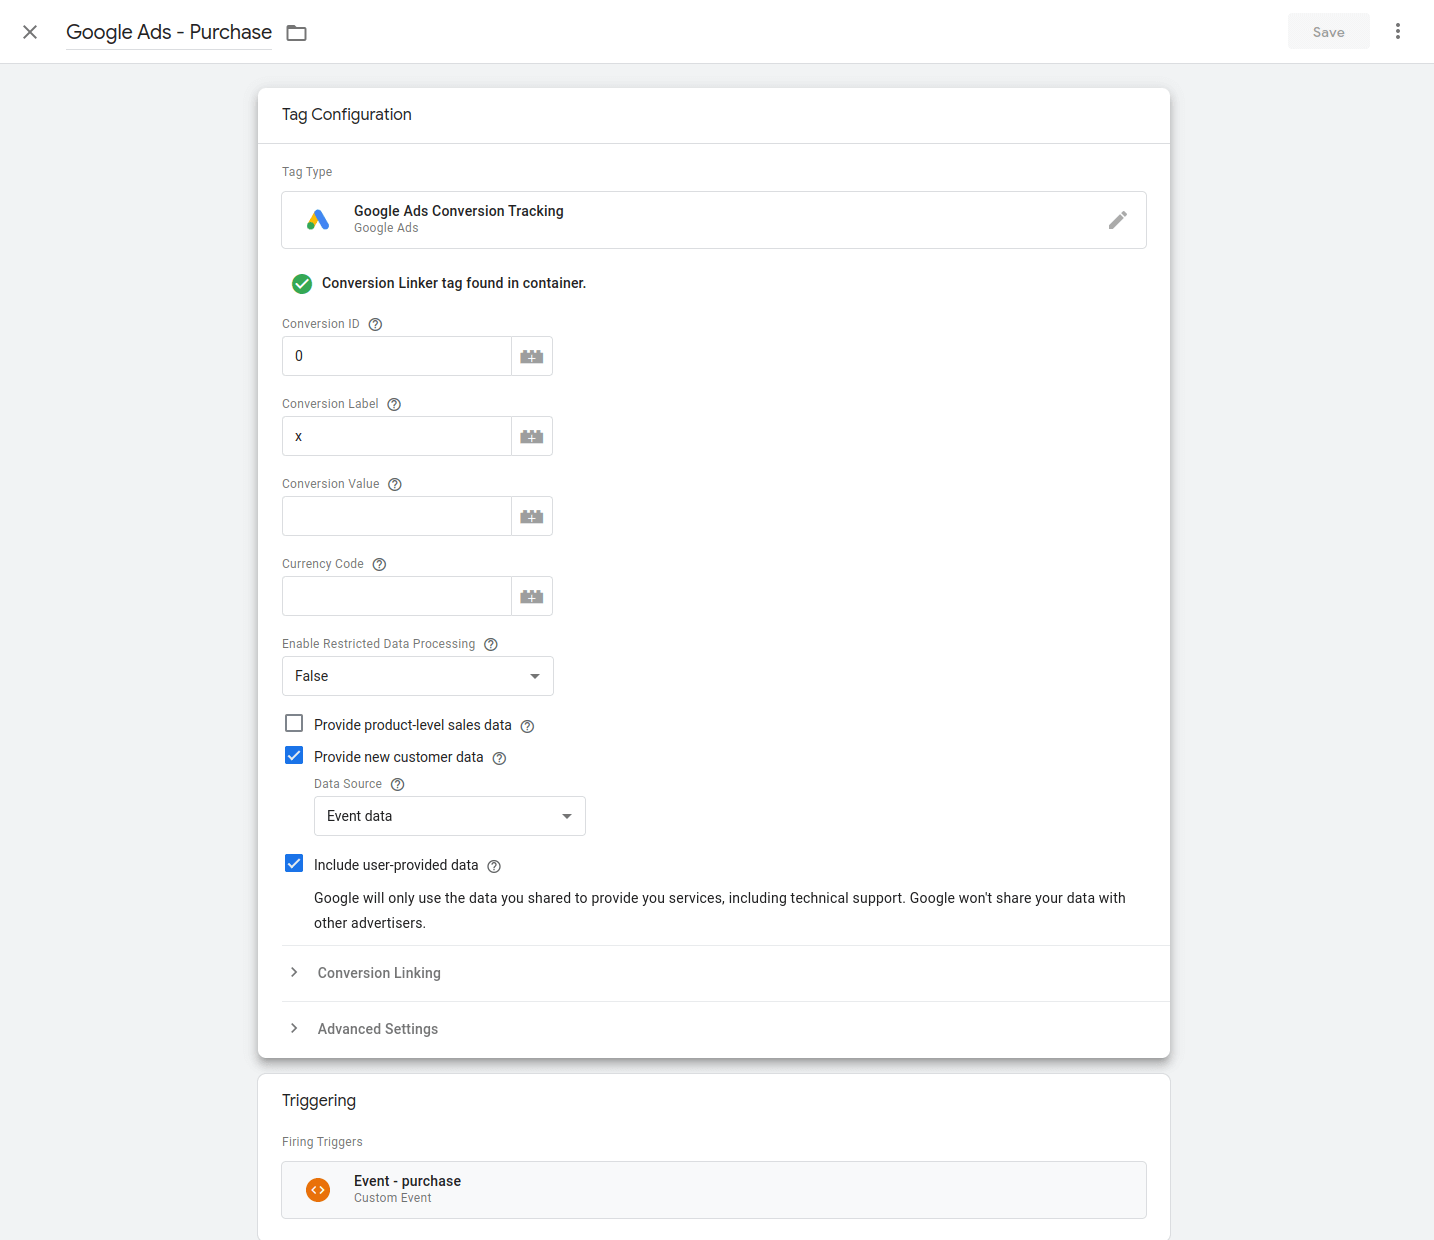
In GTM > Tags > Select the Google Ads – Purchase tag, enable the option Provide new customer data and select data source Data Layer:
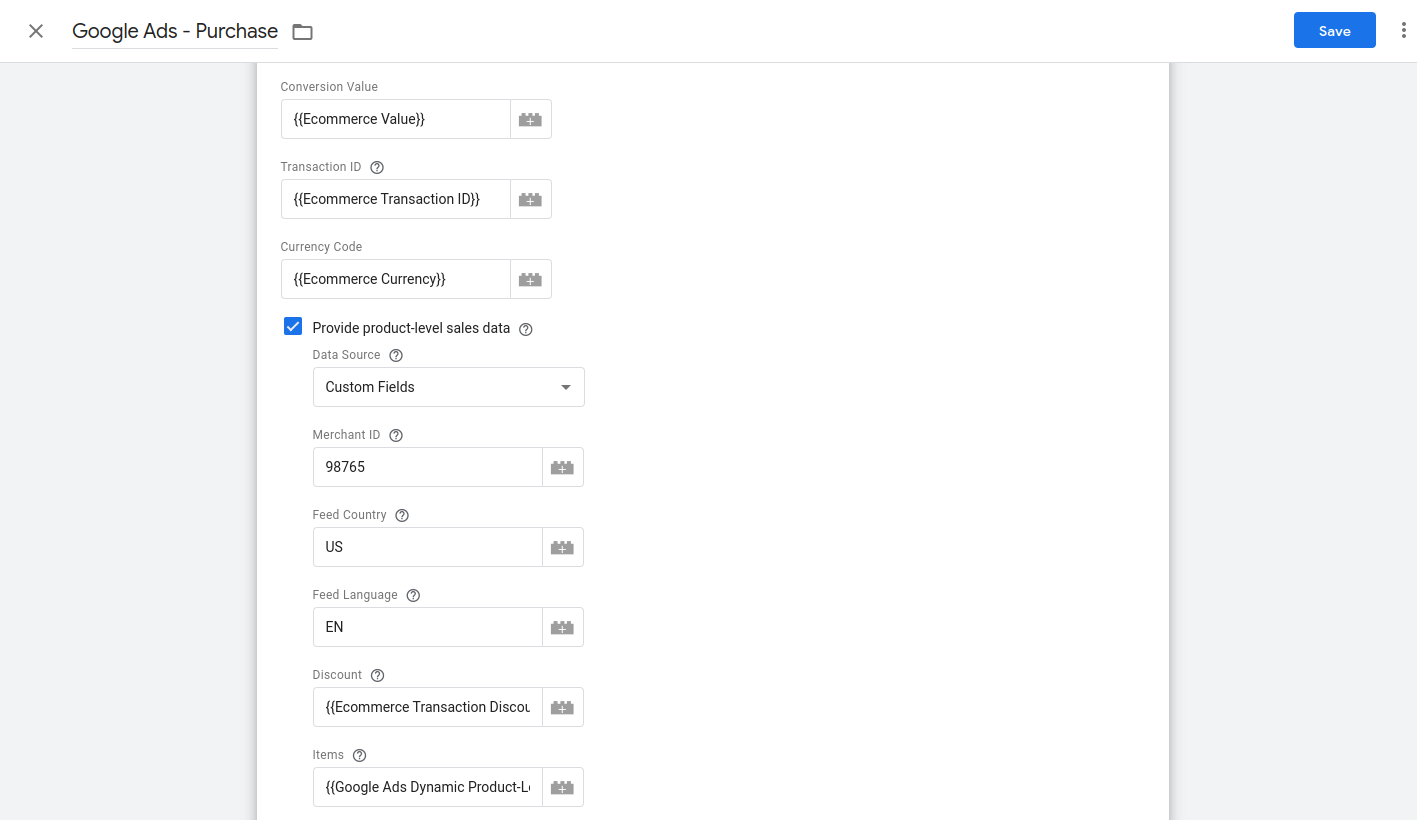
Conversions with Cart Data
If you want to enable conversions with cart data:
In GTM > Tags > Select the Google Ads – Purchase tag, enable the option Provide product-level sales data and insert information based on the image below:
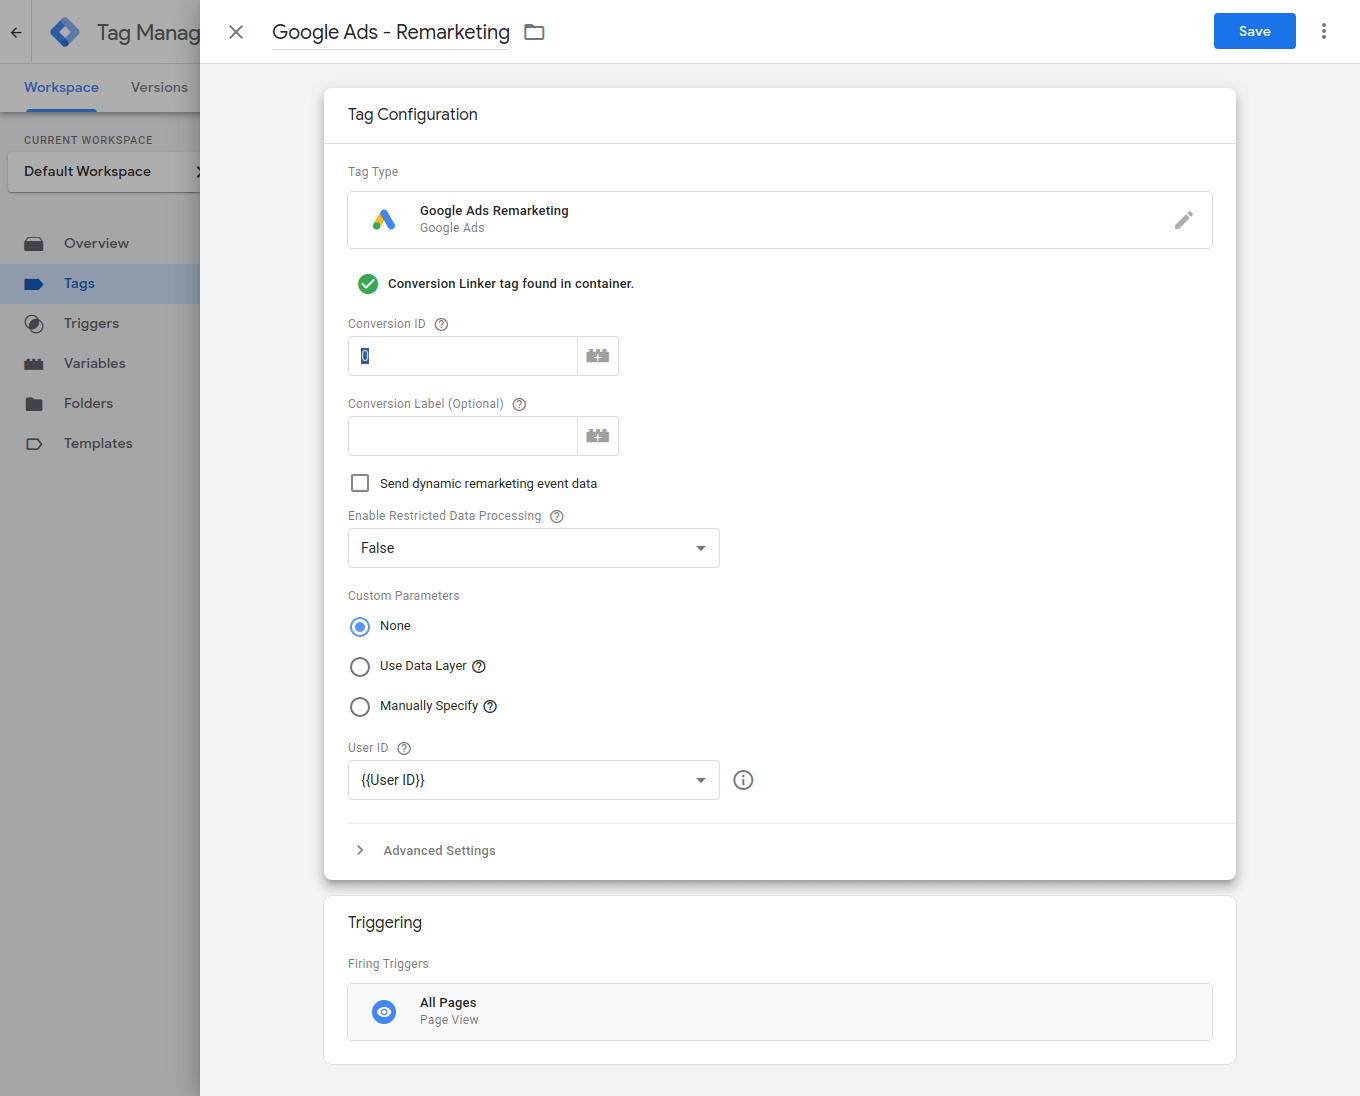
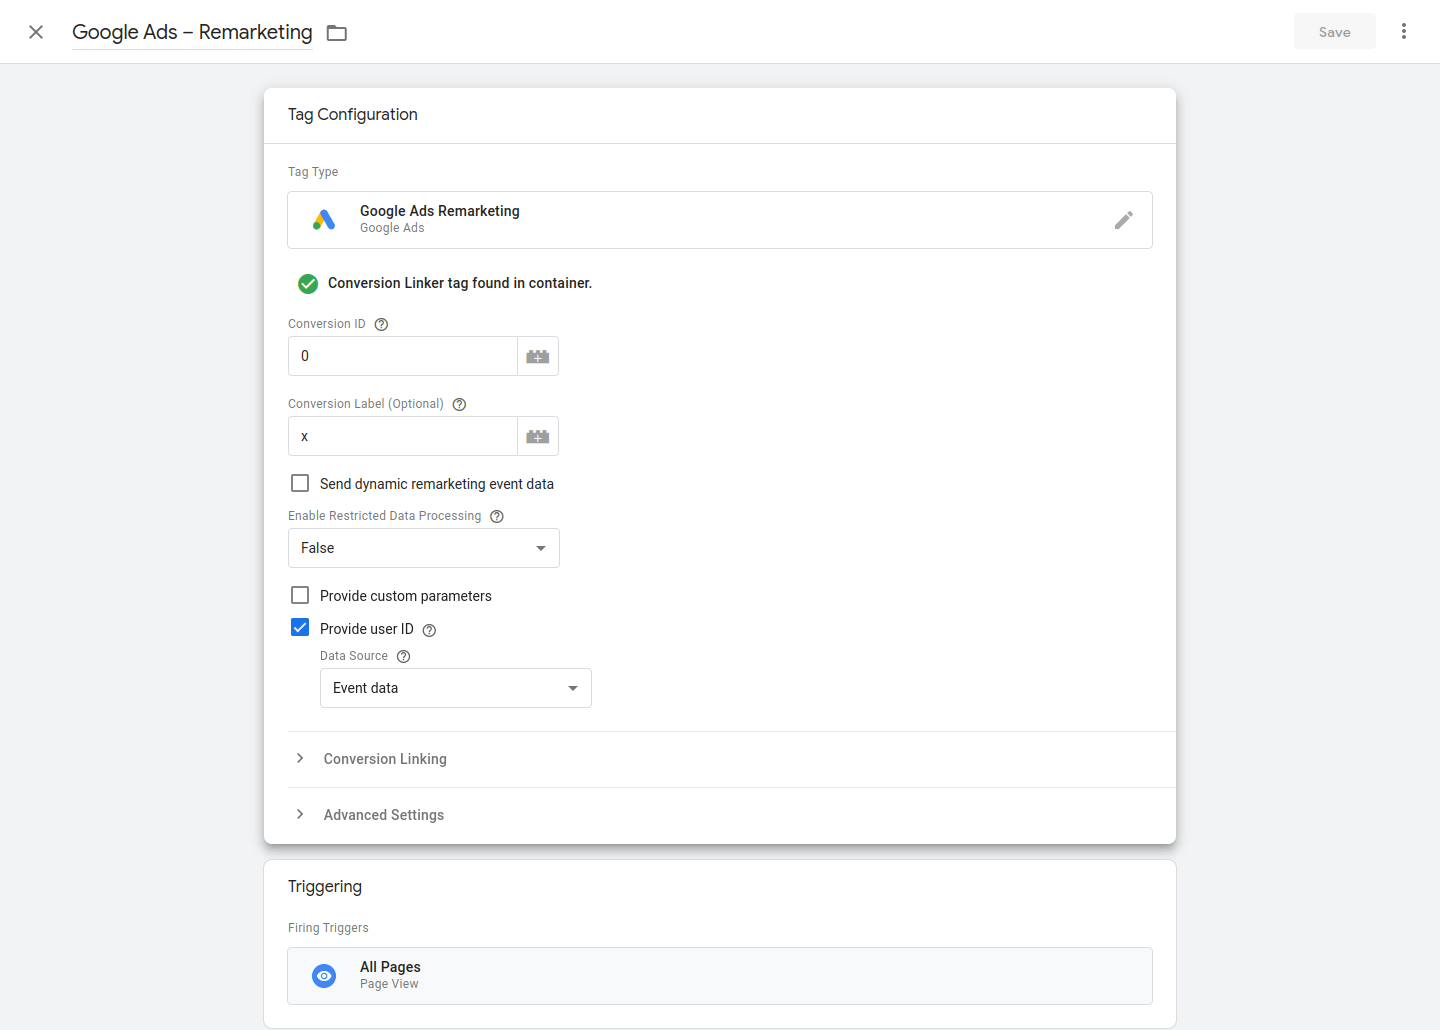
Remarketing
In GTM > Tags > Select the Google Ads – Remarketing tag and add the conversion code generated in the ADS:
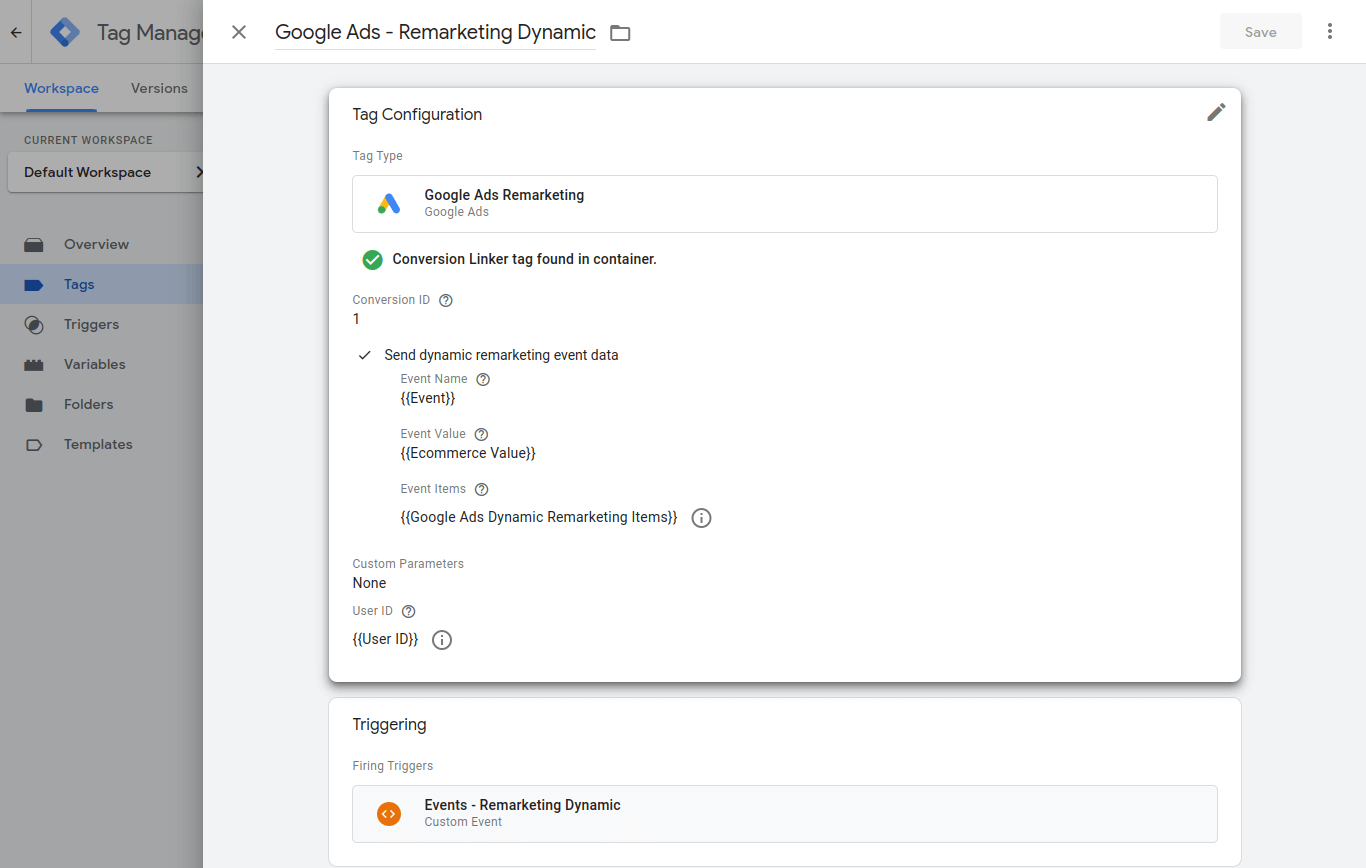
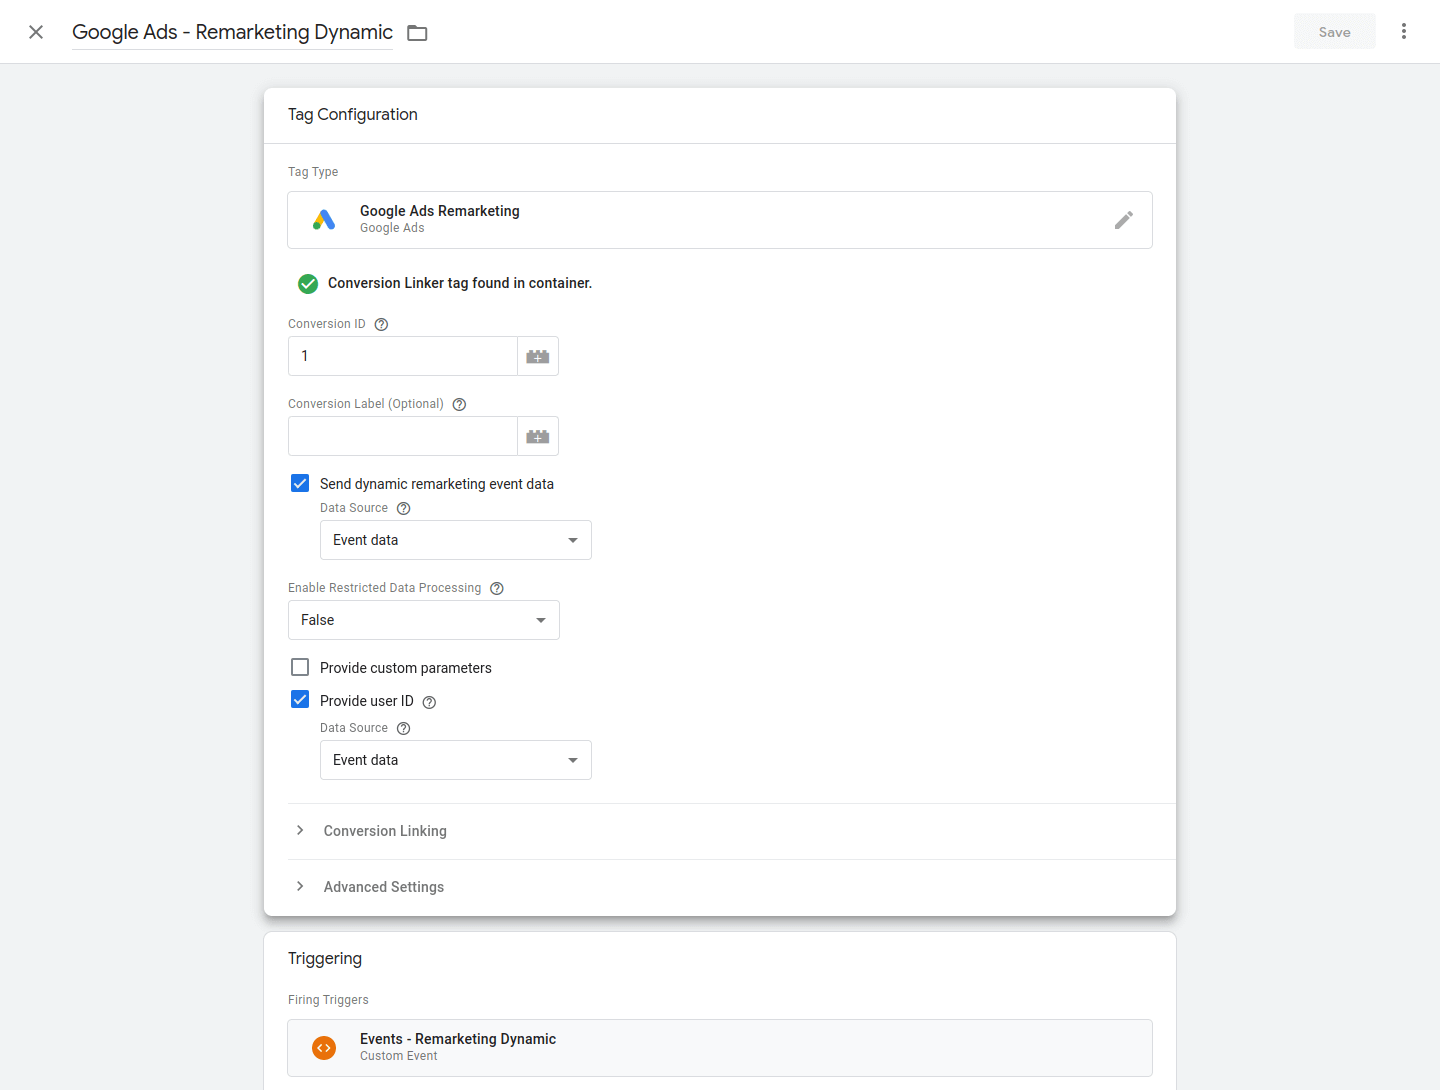
Remarketing Dynamic
If you want to enable Google Ads Dynamic Remarketing:
In GTM > Tags > Select the Google Ads – Remarketing Dynamic tag and add the conversion code generated in the ADS:
Settings Meta Pixel Code
↑ Back to topMeta Pixel Events
In GTM > Variables > Select the Meta Pixel Code variable and change it to your pixel code value:
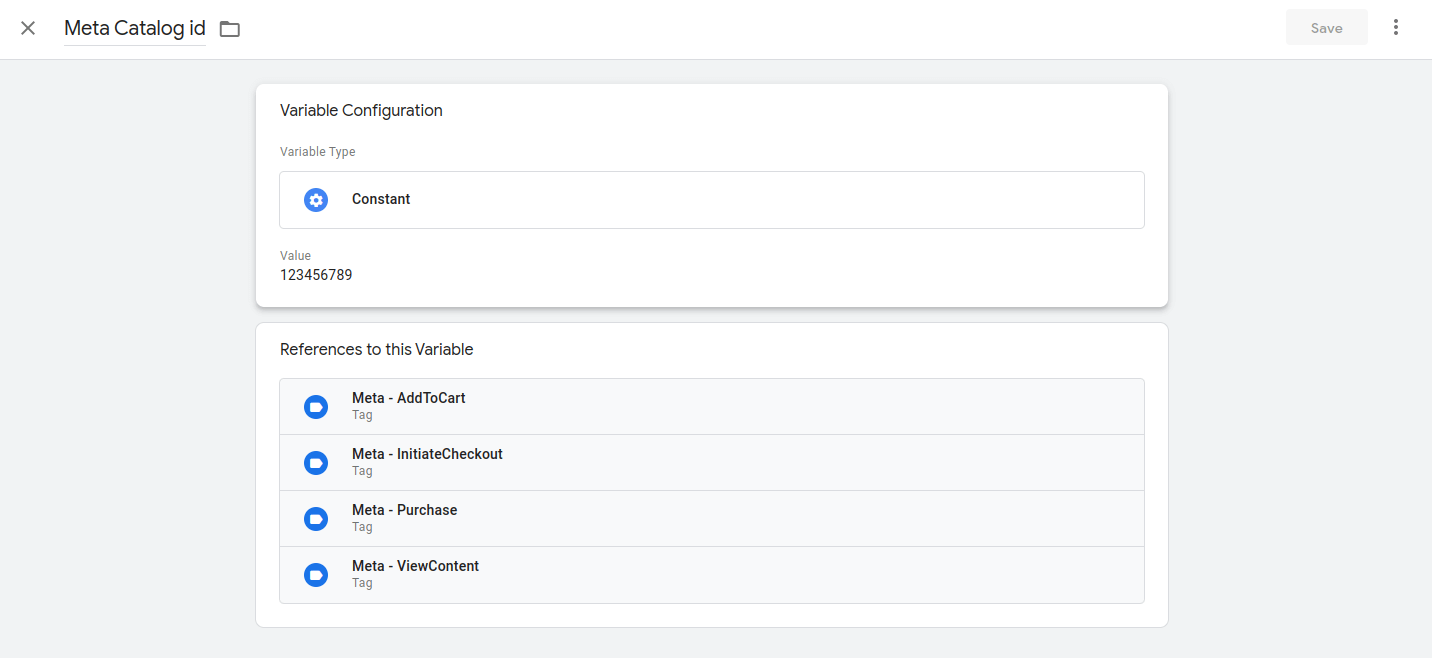
Meta catalog
In GTM > Variables > Select the Meta Catalog id variable and change it to the value of the catalog you created on Meta:
Settings Pinterest Ads
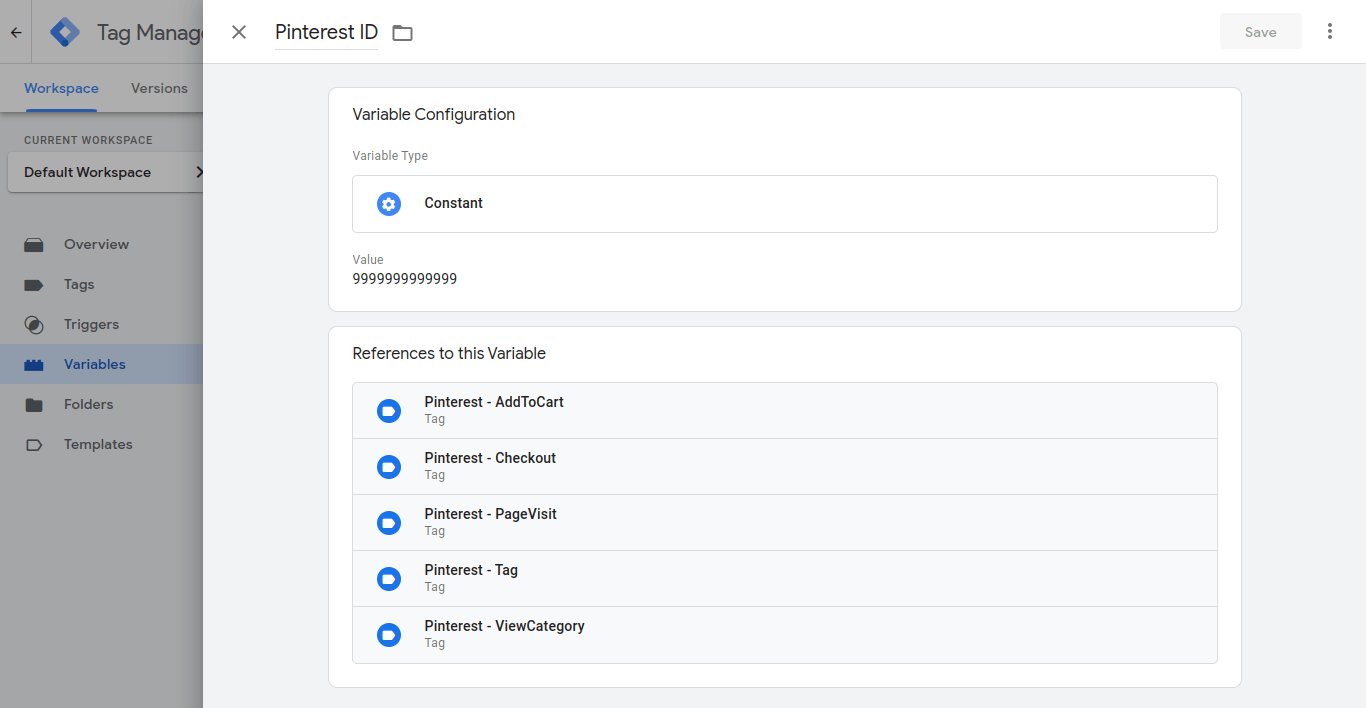
↑ Back to topPinterest ID
In GTM > Variables > Select a Pinterest ID variable and change it to the value of your ID:
Settings TikTok Ads
↑ Back to topPixel Code
In GTM > Variables > Select a TikTok Pixel Code variable and change it to the value of your ID:
Settings Microsoft Ads
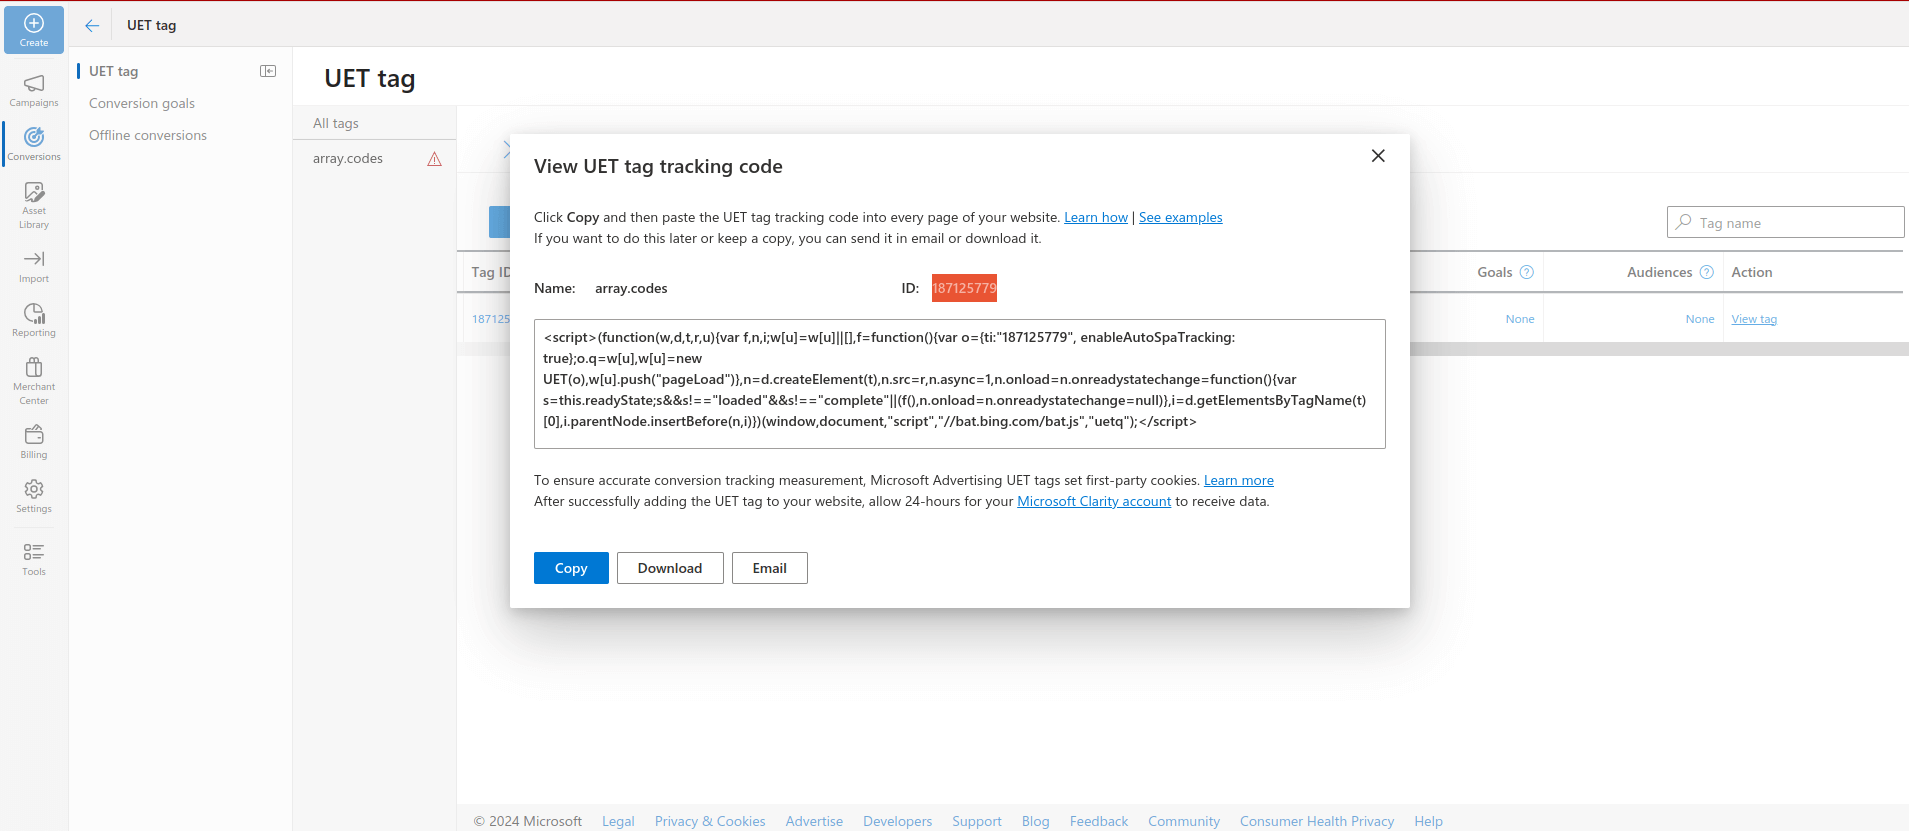
↑ Back to topUET Tag
In Microsoft Ads > Get the number UET ID:
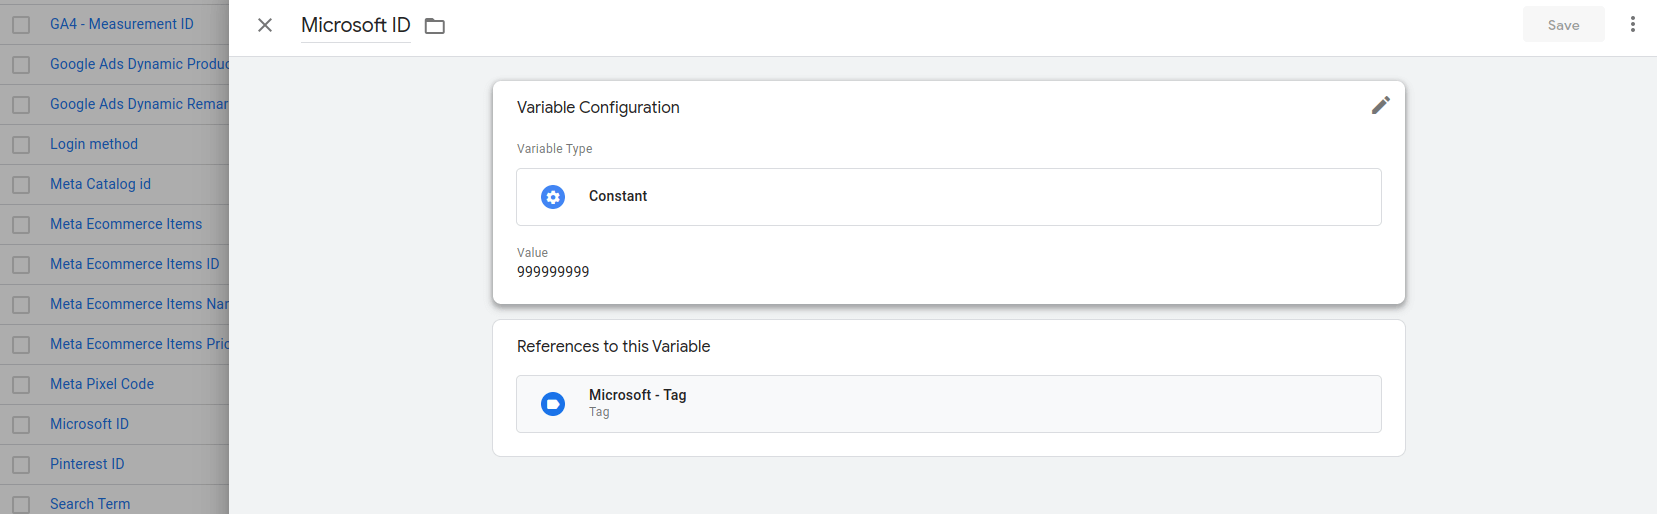
In GTM > Variables > Select a Microsoft ID variable and change it to the value of your UET ID:
Goals
In Microsoft Ads > Create the Goals: View item list, View item, Add to cart, Begin checkout and Purchase:
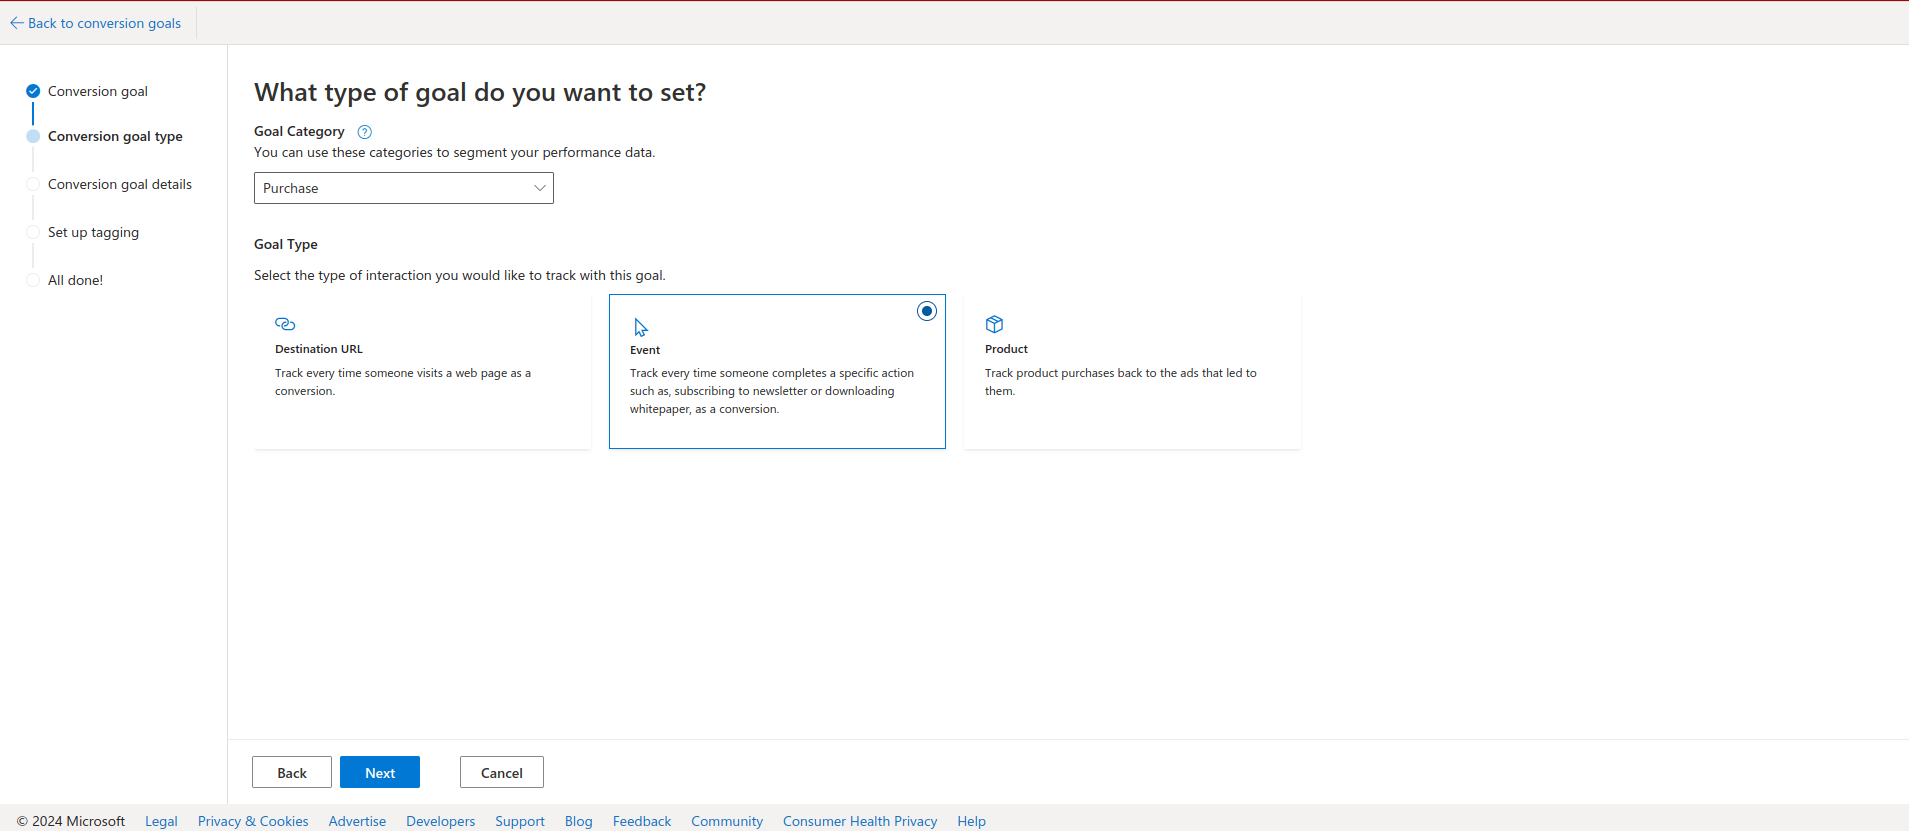
In Set up Enhanced conversions > Select Turn on Enhanced conversions :
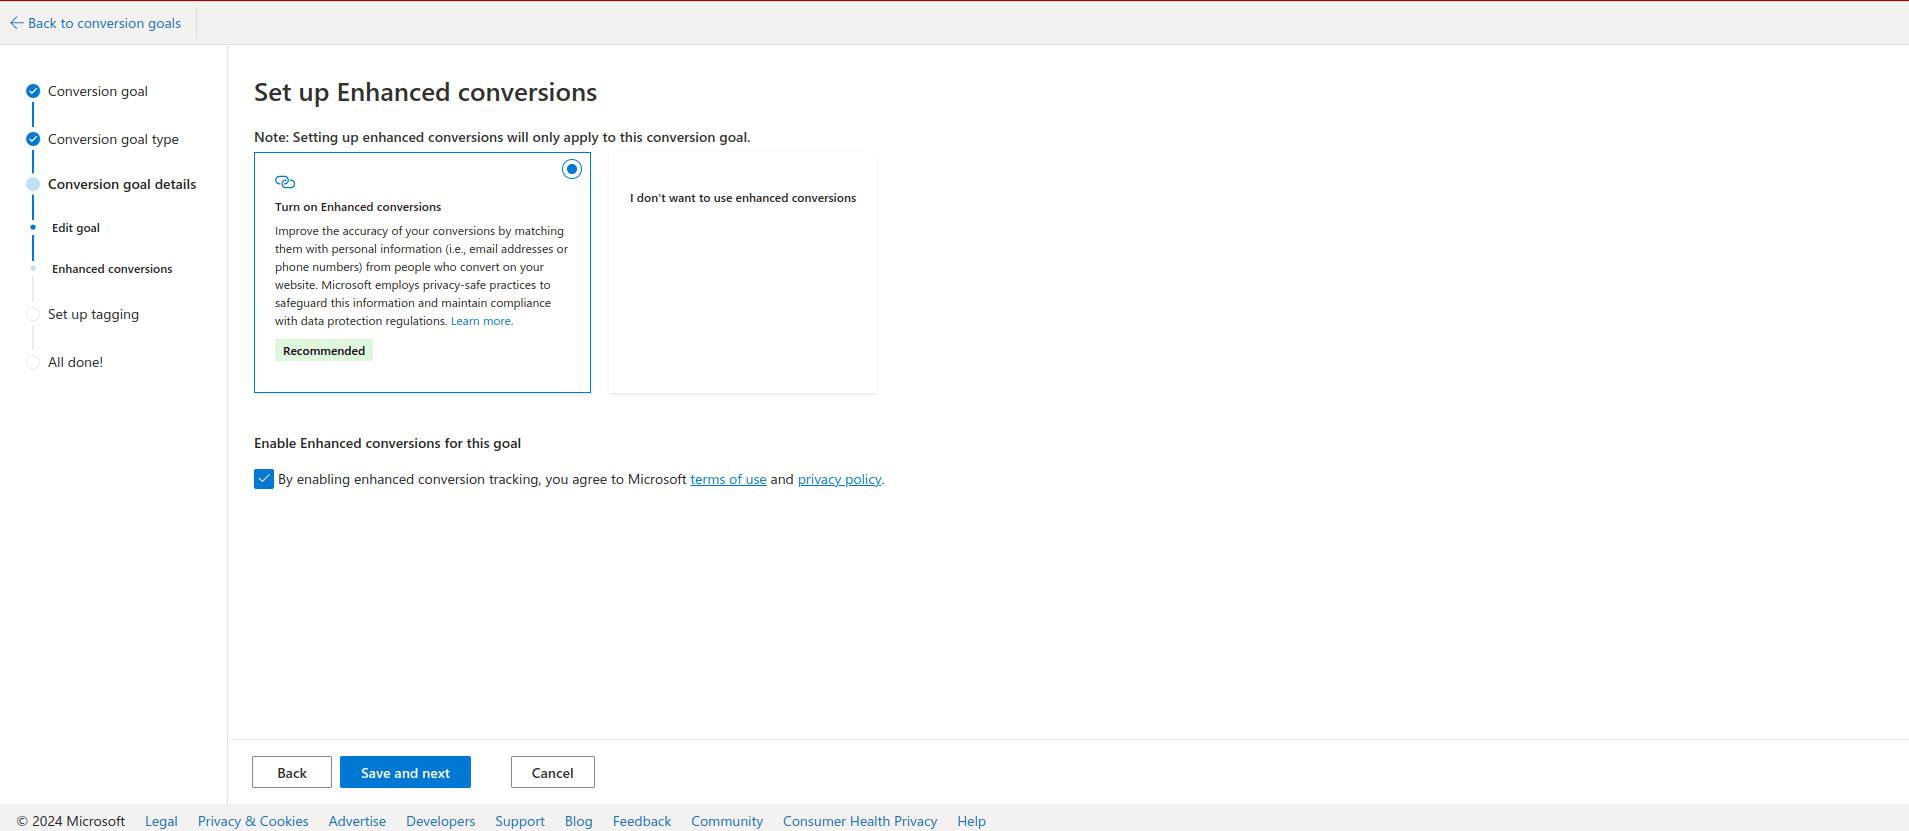
In Install event tag > Select Manual installation and finish:

Notes
↑ Back to top- In google tag manager activate only the tags you are going to use, pause all other unused tags.
Settings Server Side
↑ Back to topGoogle Tag Manager Server Side
↑ Back to topIf you want to start sending events through a server, follow the steps below:
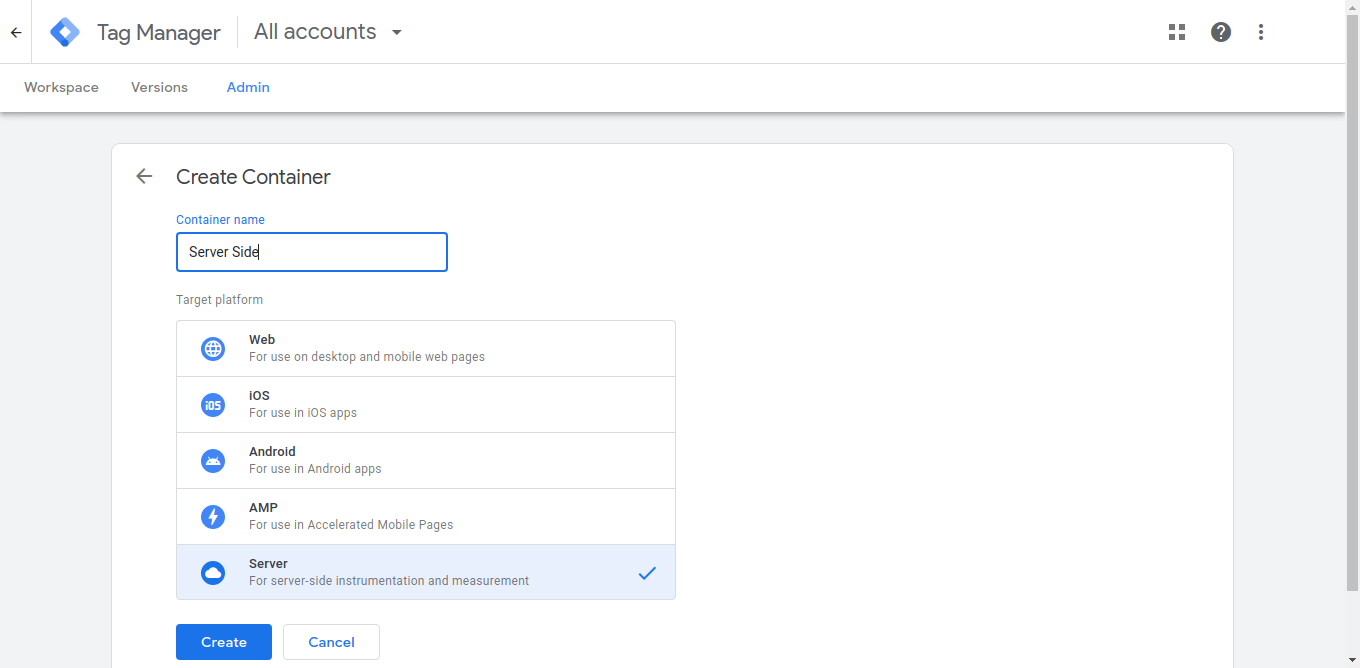
1 – Create Container GTM Server
Create a New Container in GTM:
2 – Import Google Tag Manager Server Side
Download the workspace.zip file in WooCommerce > Datalayer for WooCommerce > Google Tag Manager > Tags Sync > Download import File GTM or to the main of the plugin folder.
GTM-SERVER-SIDE.json -> Tags for ServerSide
Go to Google Tag Manager > Admin > Import Container:
Select the file GTM-SERVER-SIDE.json to import.
After selecting the file, import the tags:
After import, it will look like this:

3 – GTM Web Client
a – On the GA4 TAG, add the parameter server_container_url and add the URL of the created server.
b – Add the Parameteres user_data and User Properties user_data as shown in the image:
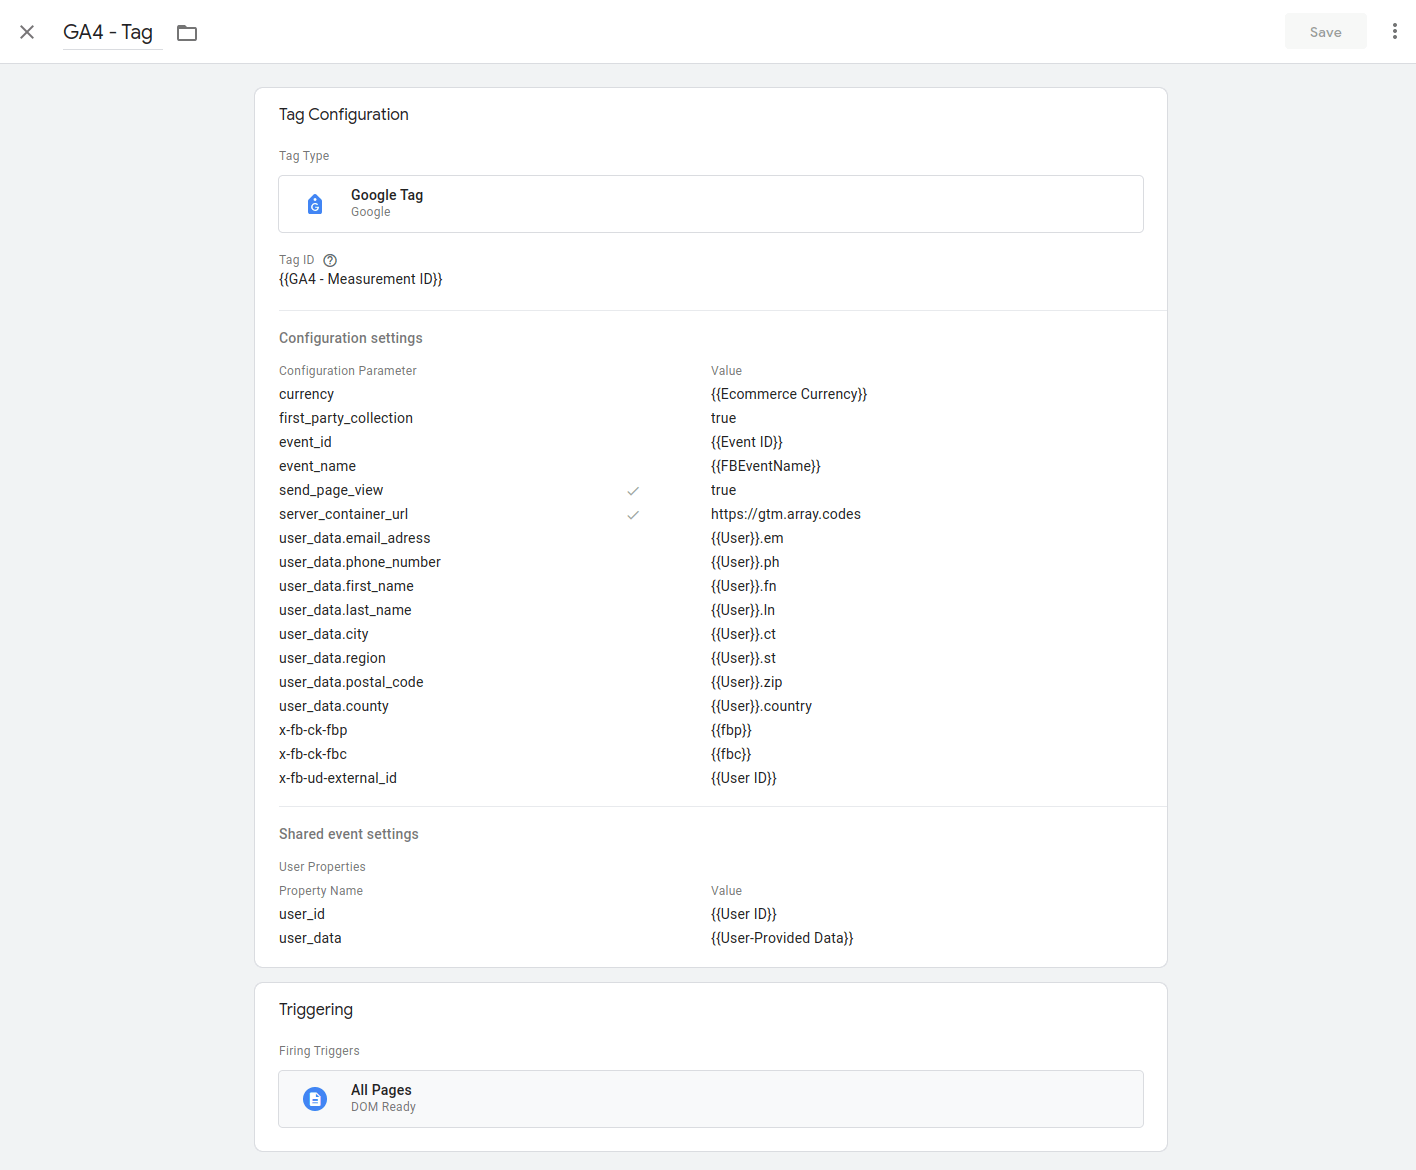
| user_data.email_address | {{User}}.em |
| user_data.phone_number | {{User}}.ph |
| user_data.first_name | {{User}}.fn |
| user_data.last_name | {{User}}.ln |
| user_data.city | {{User}}.ct |
| user_data.region | {{User}}.st |
| user_data.postal_code | {{User}}.zip |
| user_data.county | {{User}}.country |
| x-fb-ck-fbp | {{fbp}} |
| x-fb-ck-fbc | {{fbc}} |
| x-fb-ud-external_id | {{User ID}} |
| x-tt-ck-ttp | {{ttp}} |
| x-tt-ck-ttclid | {{TikTok ClickID}} |
| user_data | {{User-Provided Data}} |
4 – GTM Server Send data to GA4
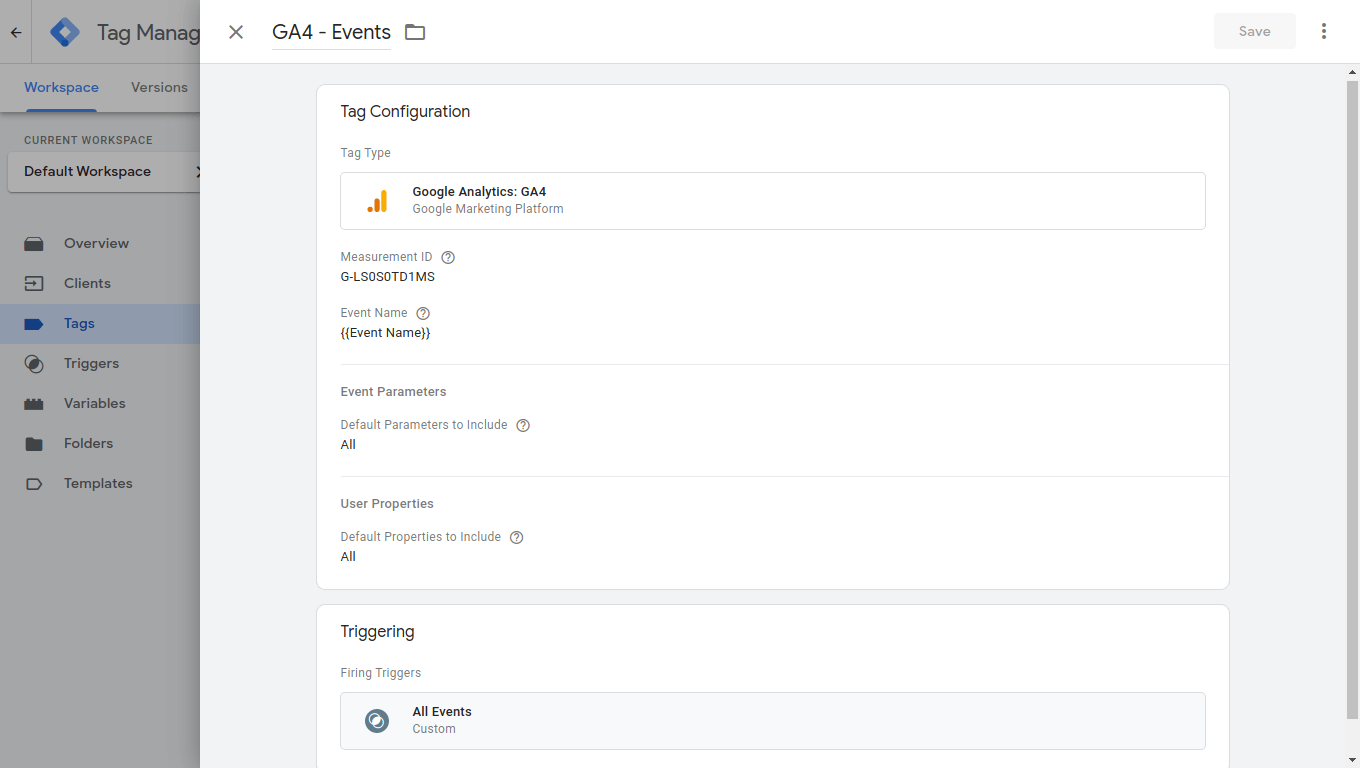
For the GA4 to start receiving events from the server, create the tag for the GA4 on the GTM Server and add the Measurement ID and {{Event Name}}:
Server Send Google Ads
↑ Back to topConversions
If you want to use Google Ads conversions Server Side:
In Google ADS > Goals > Summary – Create three conversions for e-commerce: Purchase, Add to cart and Begin Checkout:

In Conversion, copy the Conversion ID and Conversion label:

In GTM Server > Tags > Create the Google Ads Purchase, Add to cart and Begin Checkout and Paste in each the Conversion ID e Conversion label :
Purchase
Add to cart
Begin Checkout
Remarketing
If you want to use Google Ads remarketing Server Side:
In GTM Server > Tags > Crete the Google Ads – Remarketing tag and add the conversion code generated in the ADS:
Remarketing Dynamic
In GTM Server > Tags > Create the Google Ads – Remarketing Dynamic tag and add the conversion code generated in the ADS:
After testing Google Ads events on GTM Server, disable all Google Ads tags from your GTM Web.
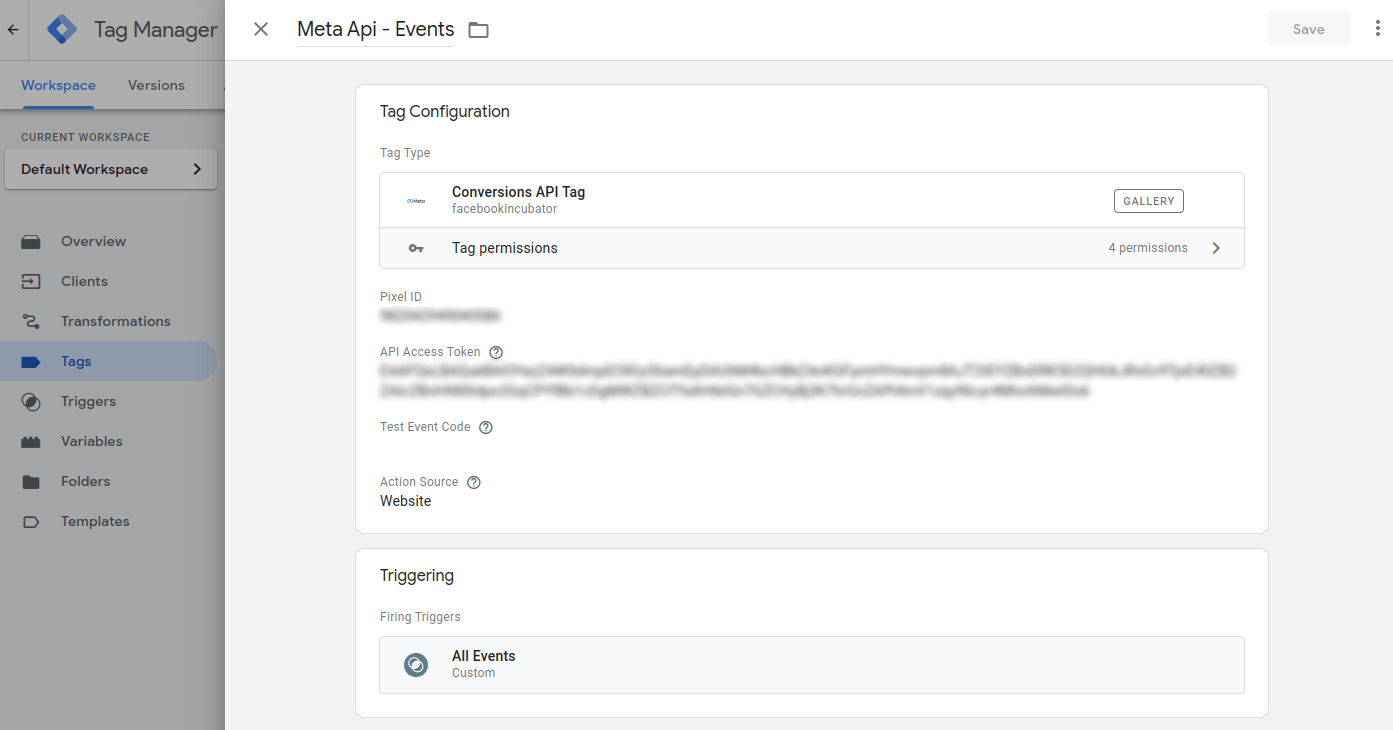
Server Send Meta API
↑ Back to topFor the Meta API to start receiving the data, create the Meta tag on the GTM Server and add the Pixel ID and API Access Token:
Server Send Pinterest API
↑ Back to topFor the Pinterest API to start receiving the data, create the Pinterest tag on the GTM Server and add the option Event Name Setup Method: Inherit from client, API Access Token, and Advertiser ID.

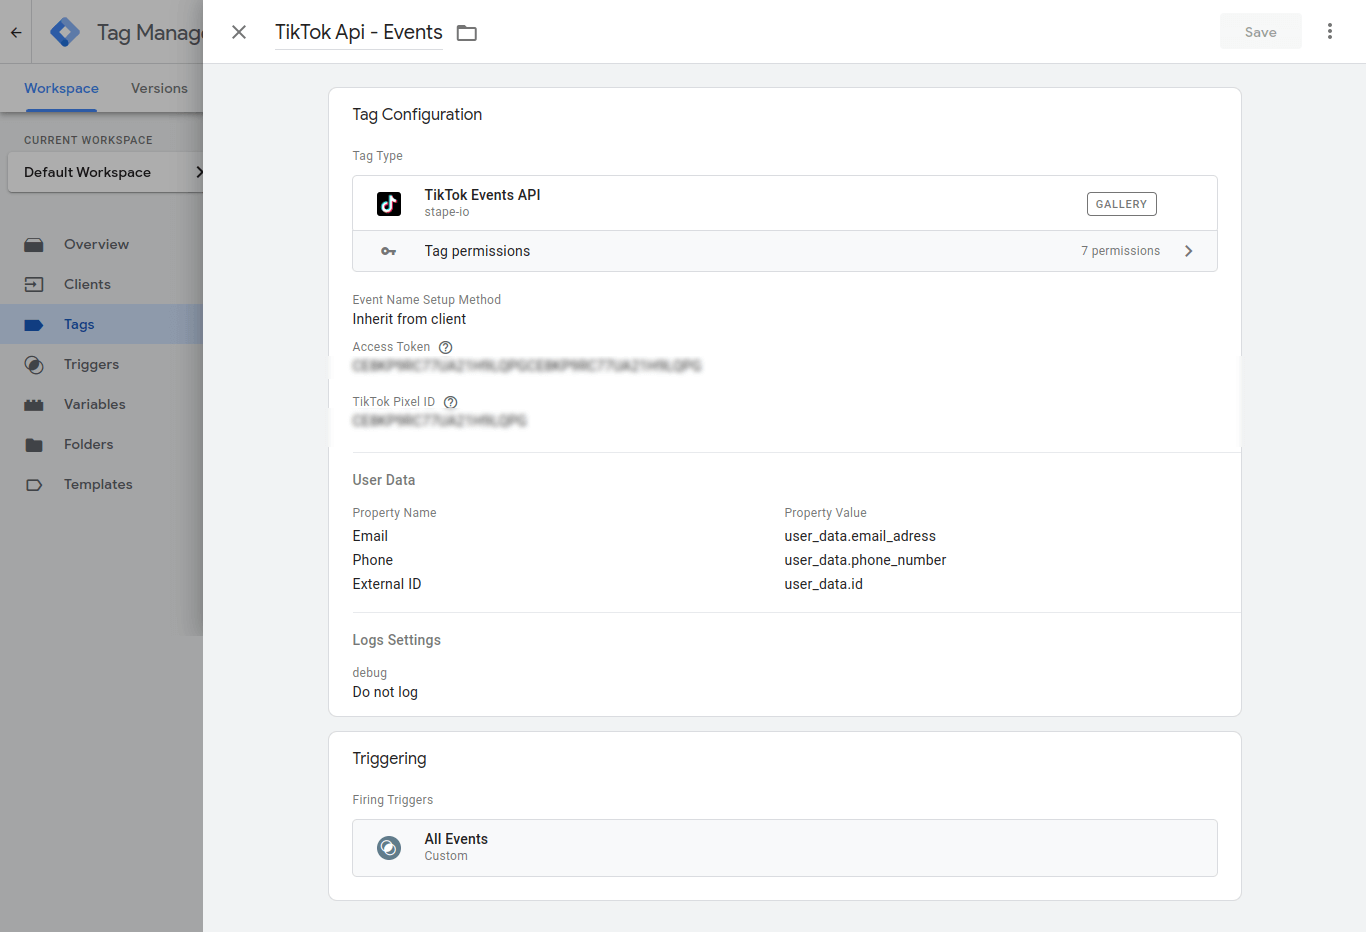
Server Send TikTok API
↑ Back to topFor the TikTok API to start receiving the data, create the TikTok tag on the GTM Server and add the option Event Name Setup Method: Inherit from client, Access Token, TikTok Pixel ID and the User Data.
GTM Server Client Container Web
↑ Back to topUse this option when you want to deploy a Tag Manager web container to send data to your tagging server.
a – Create a new Client Google Tag Manager: Web Container and add your GTM Web Container id

b – In WooCommerce > Datalayer for WooCommerce > Google Tag Manager > Settings > Custom Domain GTM Server Side and add your server domain
Notes
↑ Back to top- In google tag manager activate only the tags you are going to use, pause all other unused tags.
Settings Server to Server
↑ Back to topUse this feature to send events directly to GTM server side. Please note: This is an advanced feature. Recommended for experienced users only. Read more
Configure
↑ Back to topTo send the events: purchase, order_pay and refund directly to the server, configure the fields:
Google Server Container Url -> Enter the URL of the GTM server container where the data will be sent
Measurement ID GA4 -> Enter GA4 Measurement ID that will collect the data
Preview Request Header -> This field is empty by default, fill it in only for debug testing.
Purchase Event -> Enable to trigger purchase event directly from the server side and stop via client web, you can activate this event so that only paid purchases will be recorded in GA4
Order Pay Event -> Enable to trigger the order_pay event directly on the server side, you can use this event as an alternative event to purchase and thus keep the original purchase event triggered on the web client side, and have an order_pay event only with paid purchases
Test Events Server
↑ Back to topTo test whether events are being fired directly to the server, follow these steps:
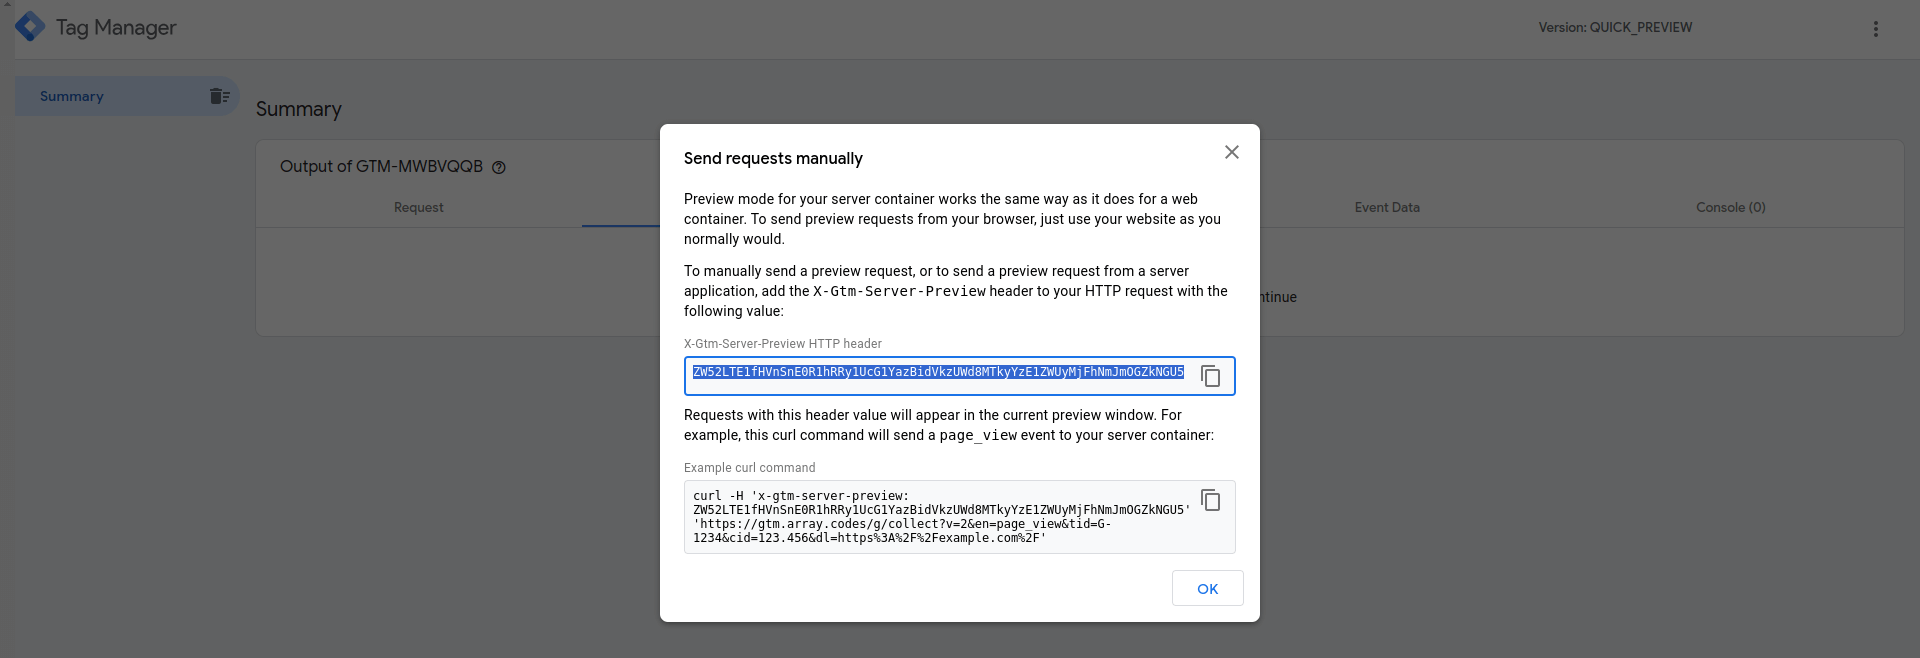
1 – Preview Request Header
In Debug GTM Server Side > Click on the option: Send requests manually
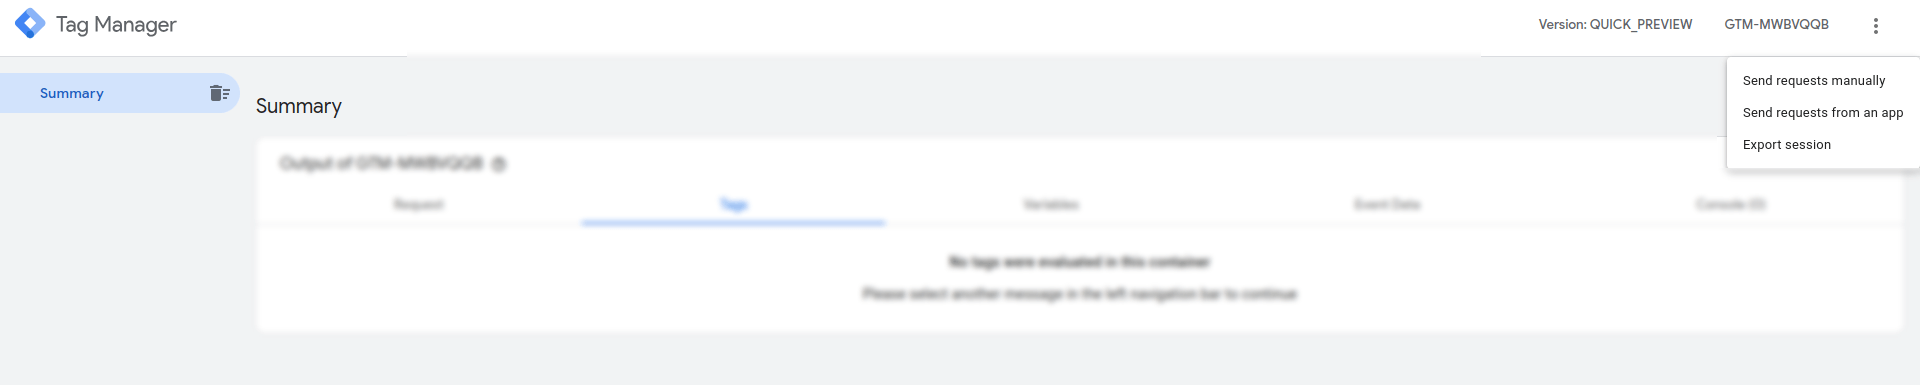
Copy preview http header and in Datalayer for WooCommerce > Google Tag Manager > Server to Server paste in field Preview Request Header
2 – Send Events
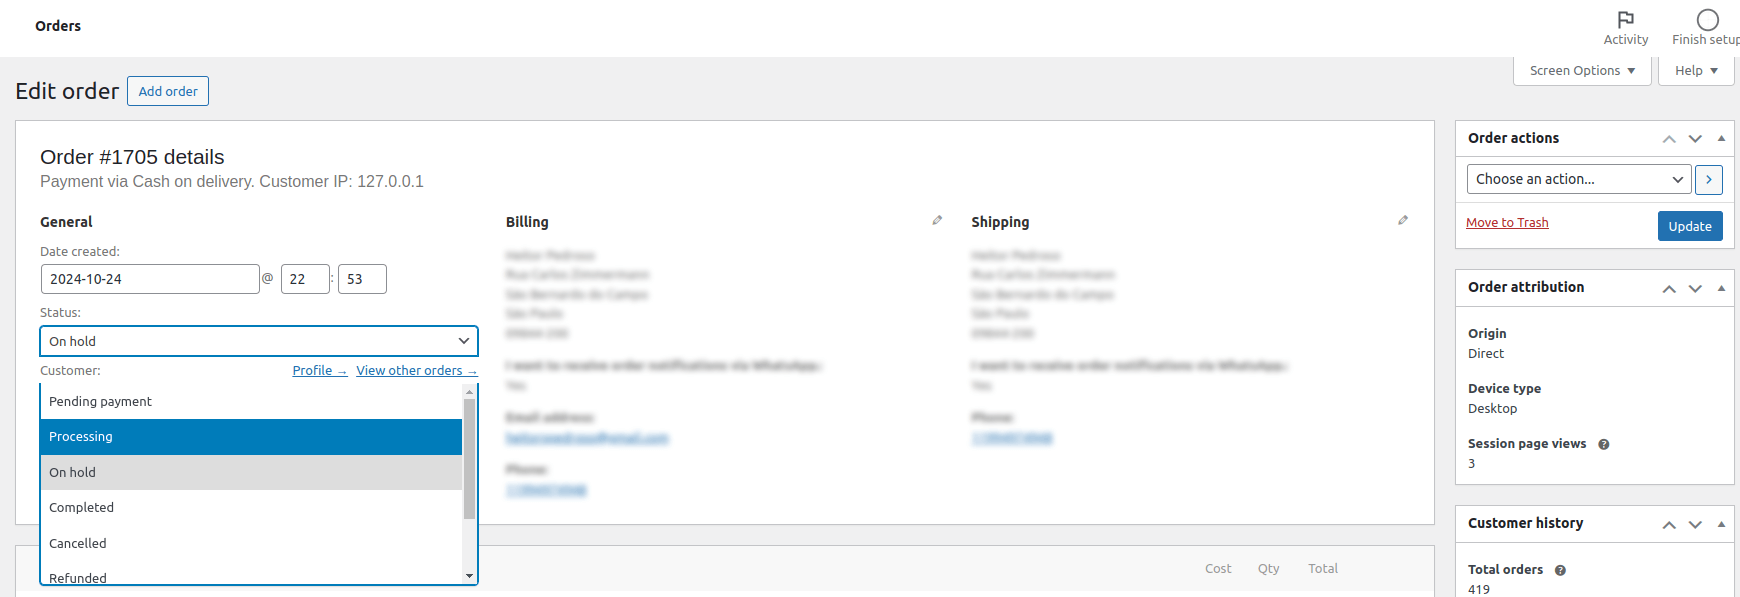
Purchase Event
Enable the purchase event and change the status of an order to the chosen status, in this test we use the processing status
Update Status
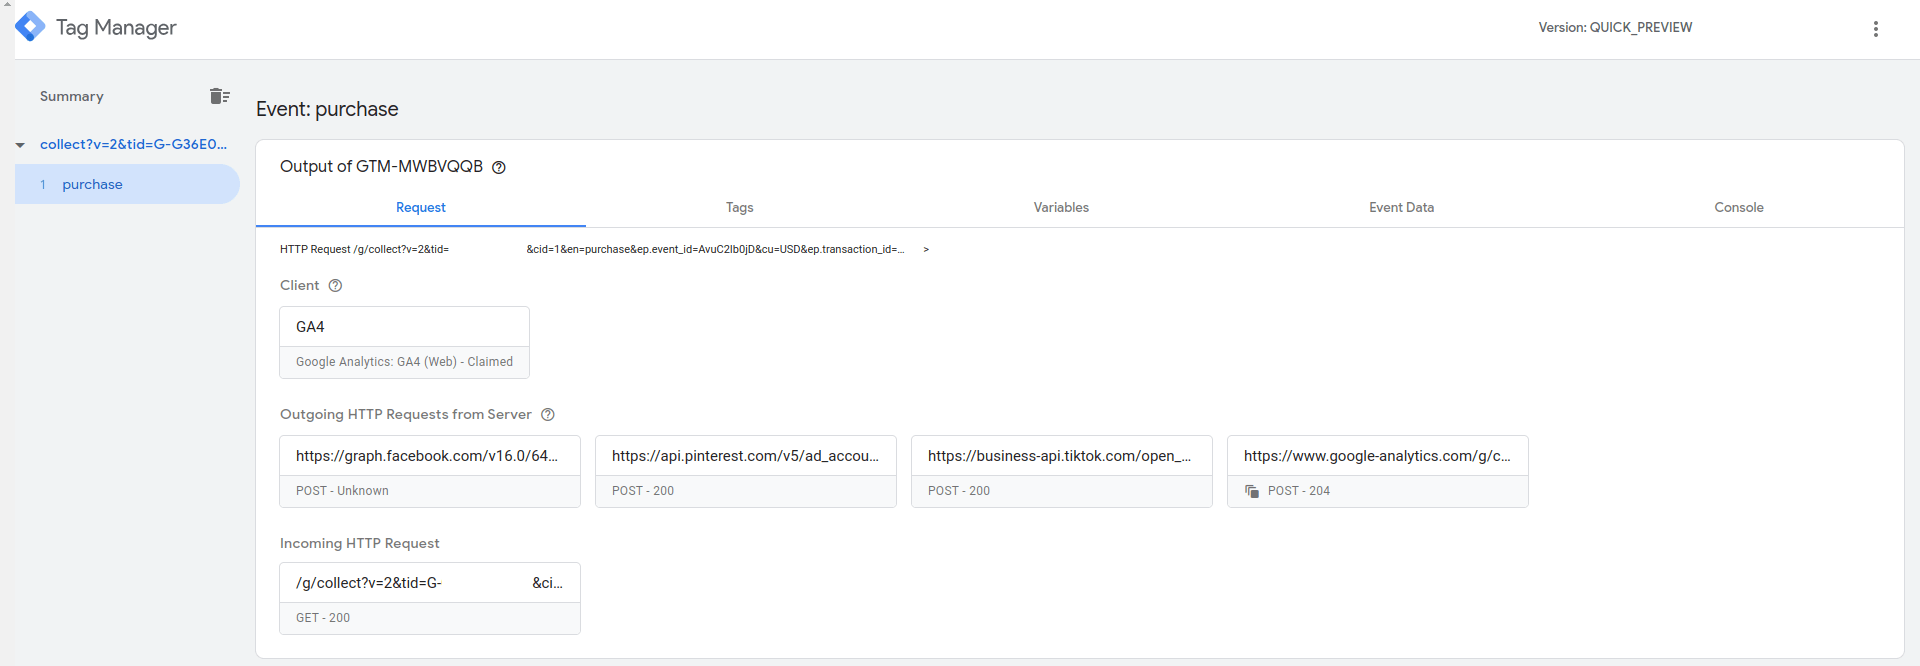
Receive Event
Order_Pay Event
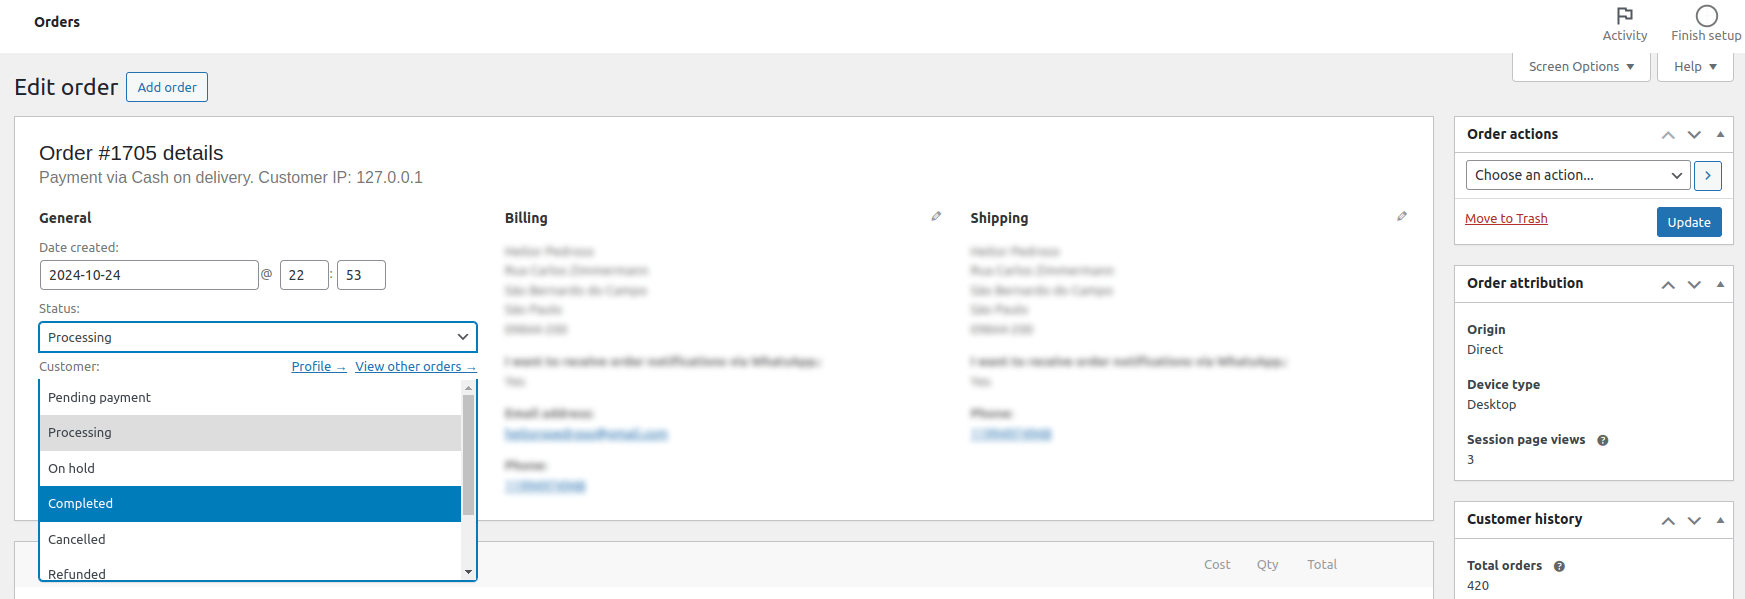
Enable the order_pay event and change the status of an order to the chosen status, in this test we use the complete status
Update Status
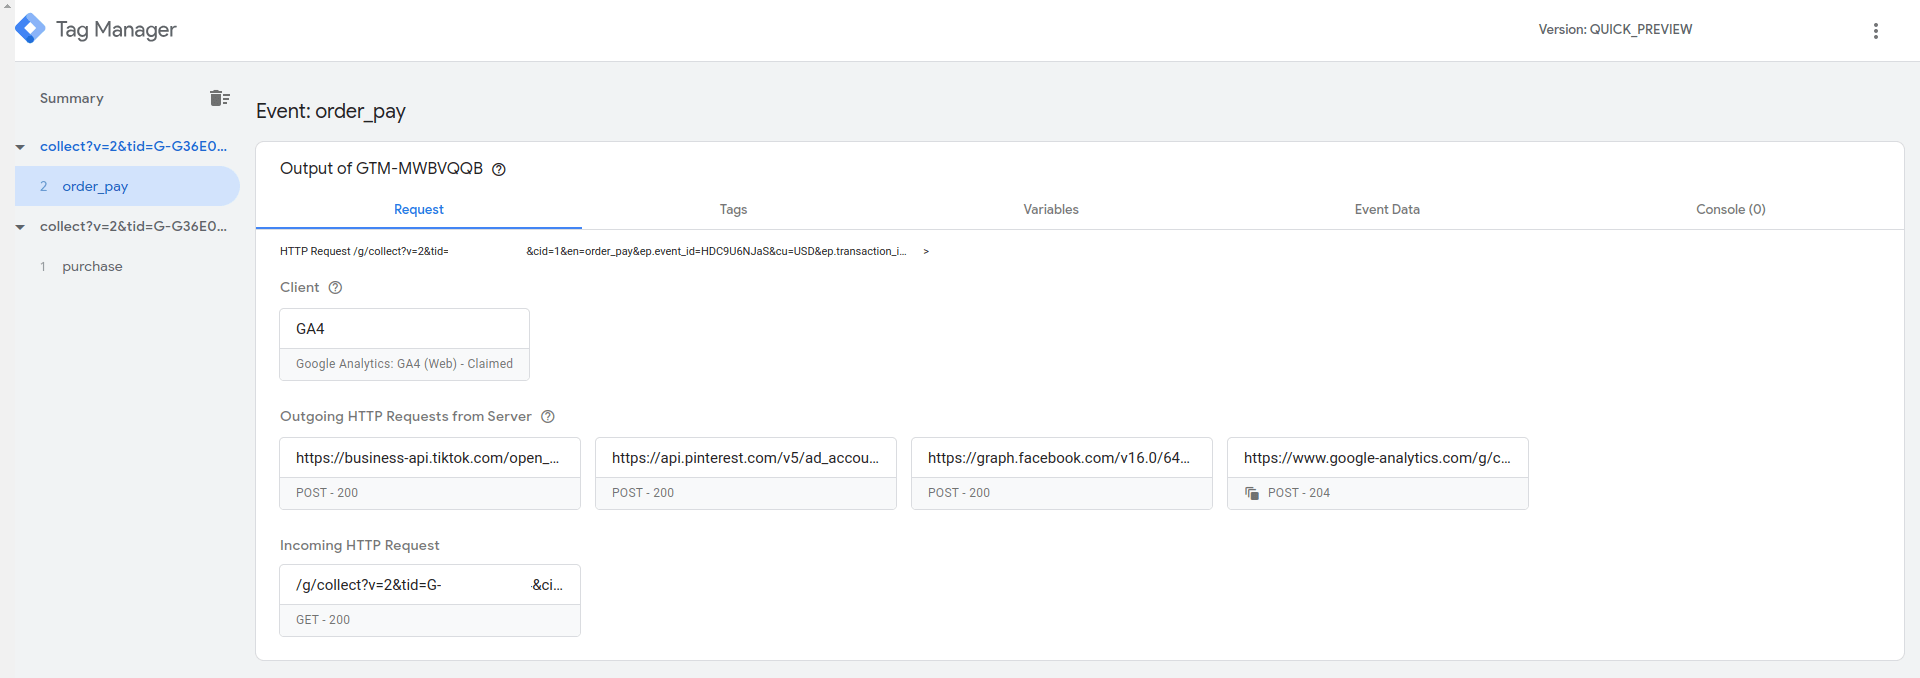
Receive Event
Refund Event
Enable the refund event and change the status of an order to the chosen status refunded
Update Status
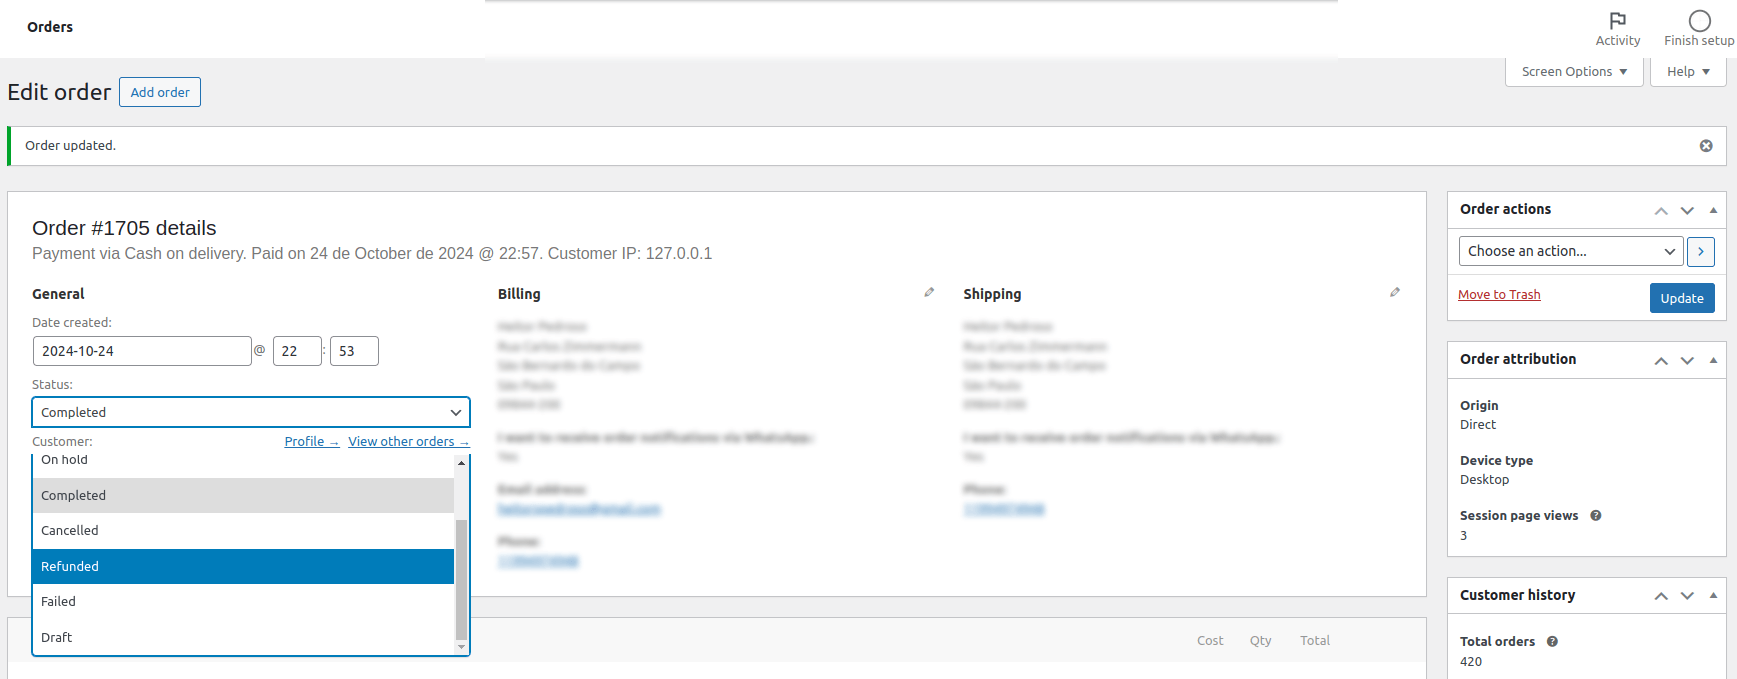
Receive Event

Catalog Feed
↑ Back to topTo generate a catalog feed, click the Create button and then choose the options:
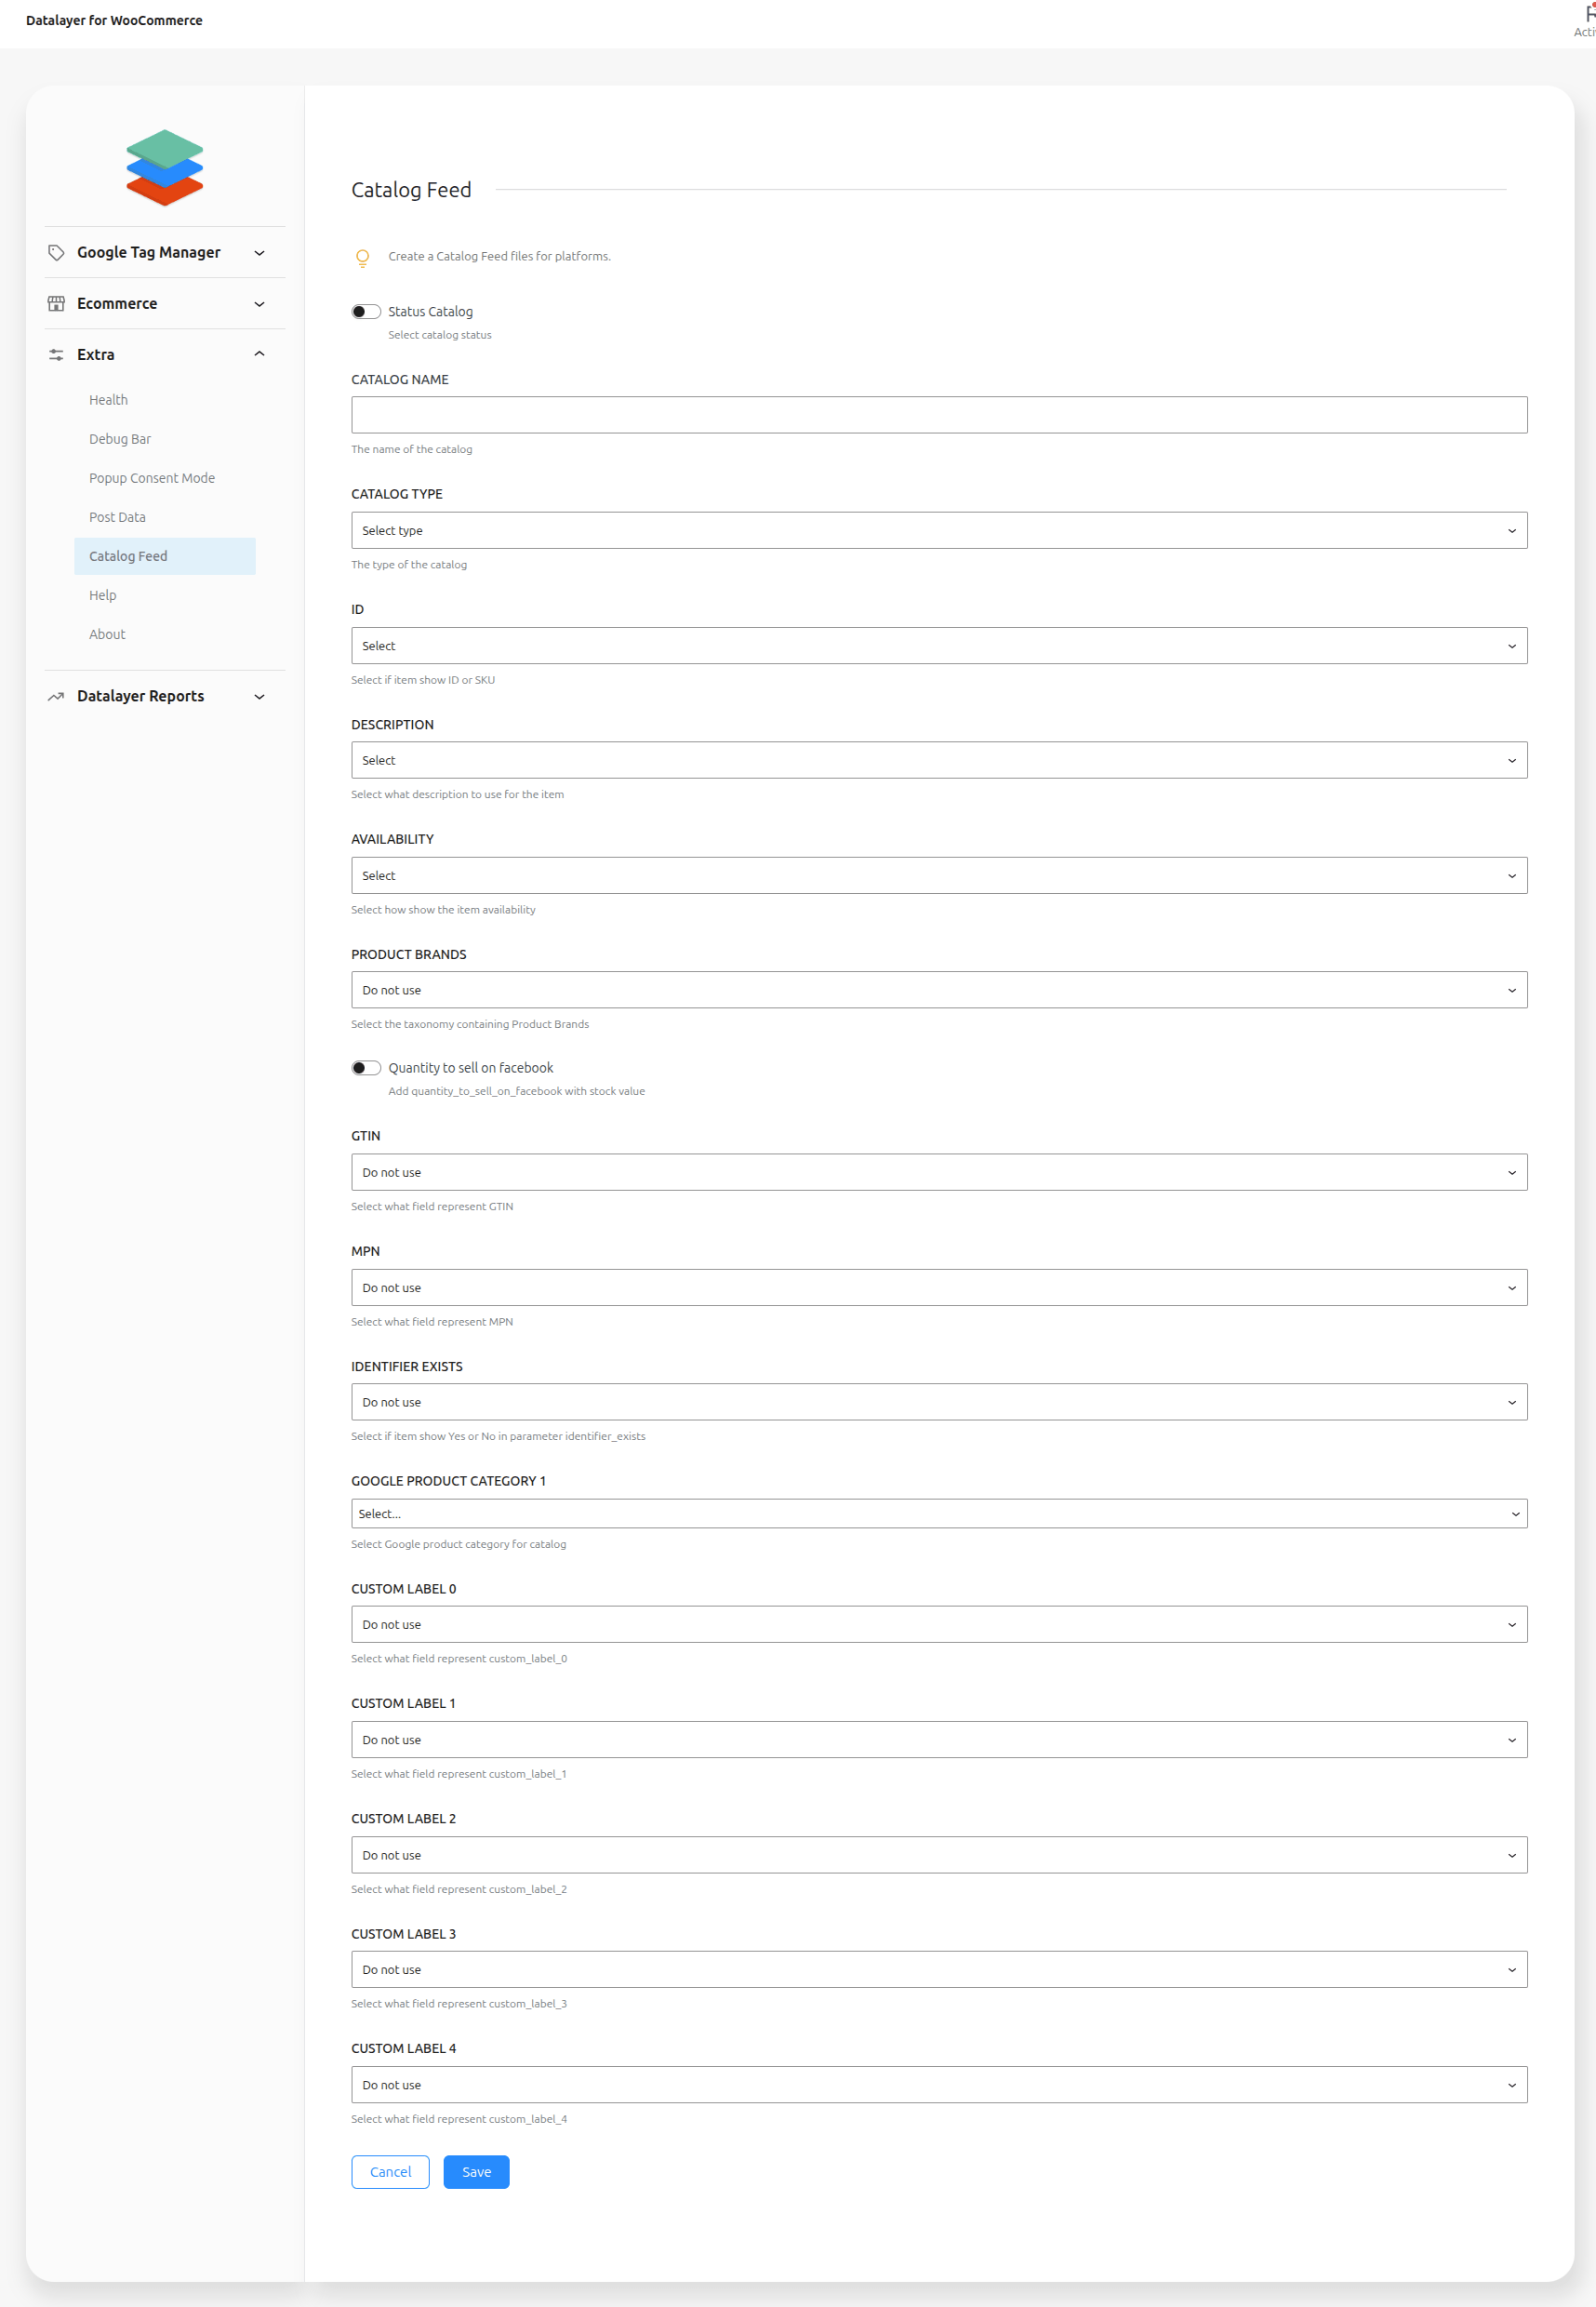
After creating, click on Generate Feed and then View Feed to view the catalog:
Issue a refund event
↑ Back to topTo send a refund event follow steps bellow:
1. In WooCommerce > Orders, select the order and create the manual refund.
2. In the order, where the refund was registered, to issue the Refund event, click on Send refund to Datalayer
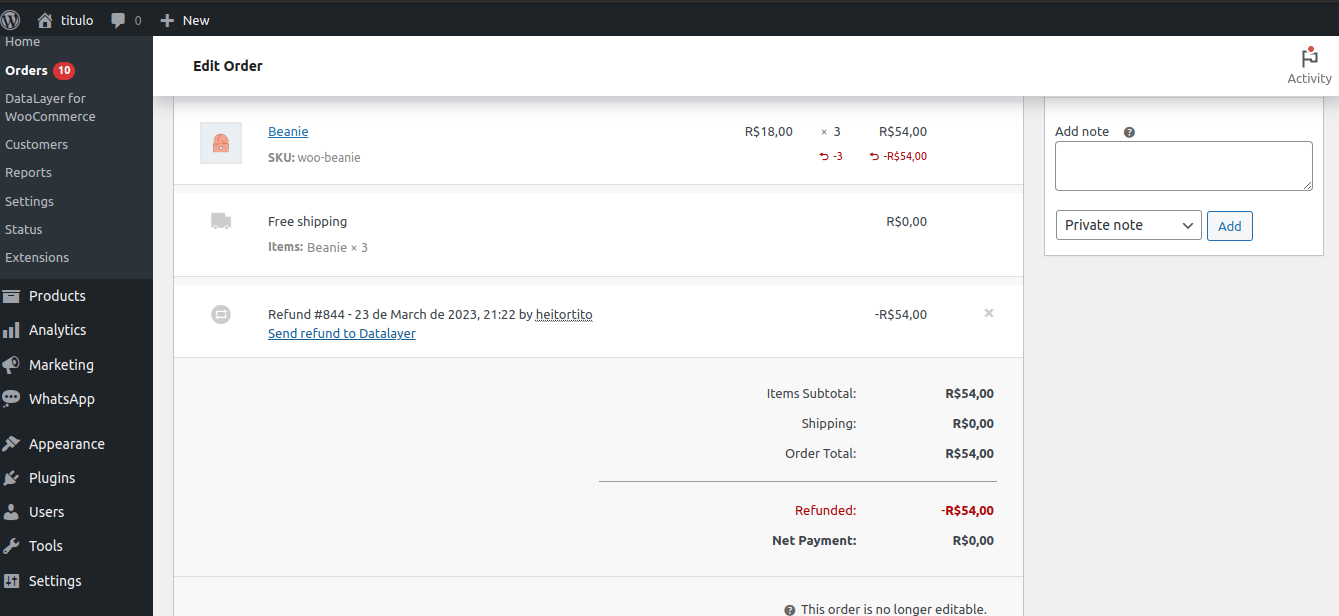
3. The link will open the homepage of the site and the event will be triggered
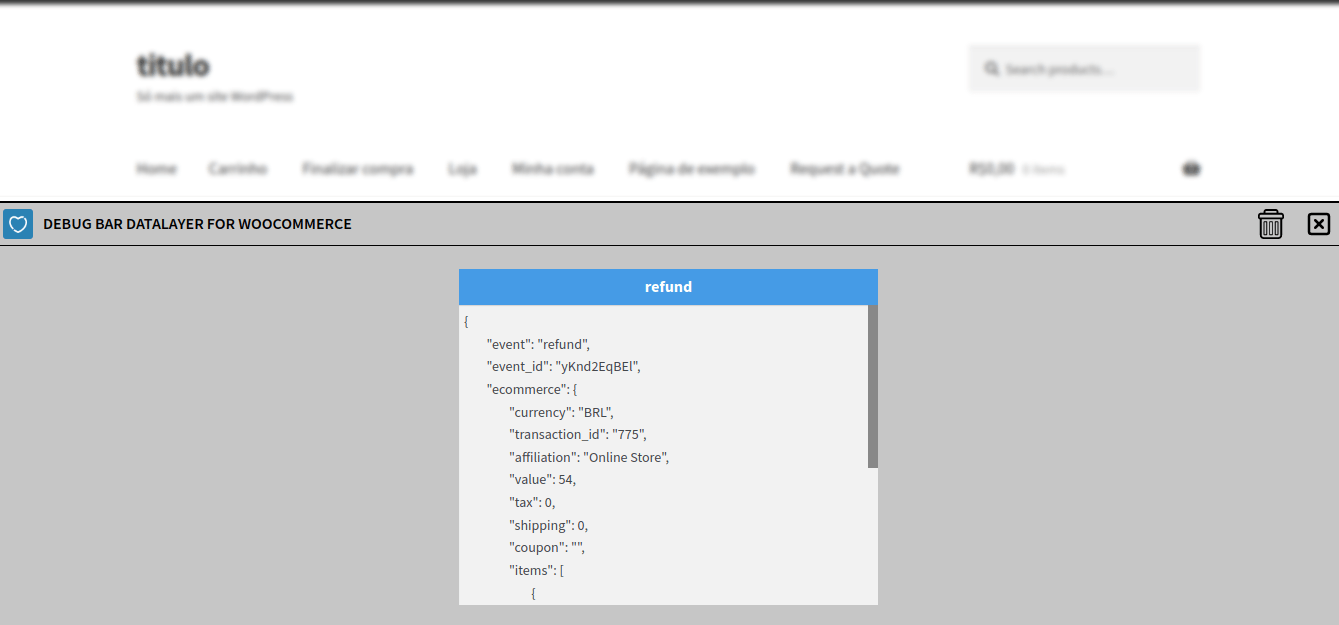
Debug
↑ Back to topTest Datalayer events on your site with the debug bar, by default, turned off.
In WooCommerce > Datalayer for WooCommerce > Extra > Activate Test Debugger Bar – Activate and reload your store:
Debug bar working:

Consent Mode
↑ Back to topIf you want to use the GTM consent mode, it is important to know that Datalayer for WooCommerce works normally with this option, without any extra configuration in the plugin, what needs to be changed are the Google Tag Manager tags.
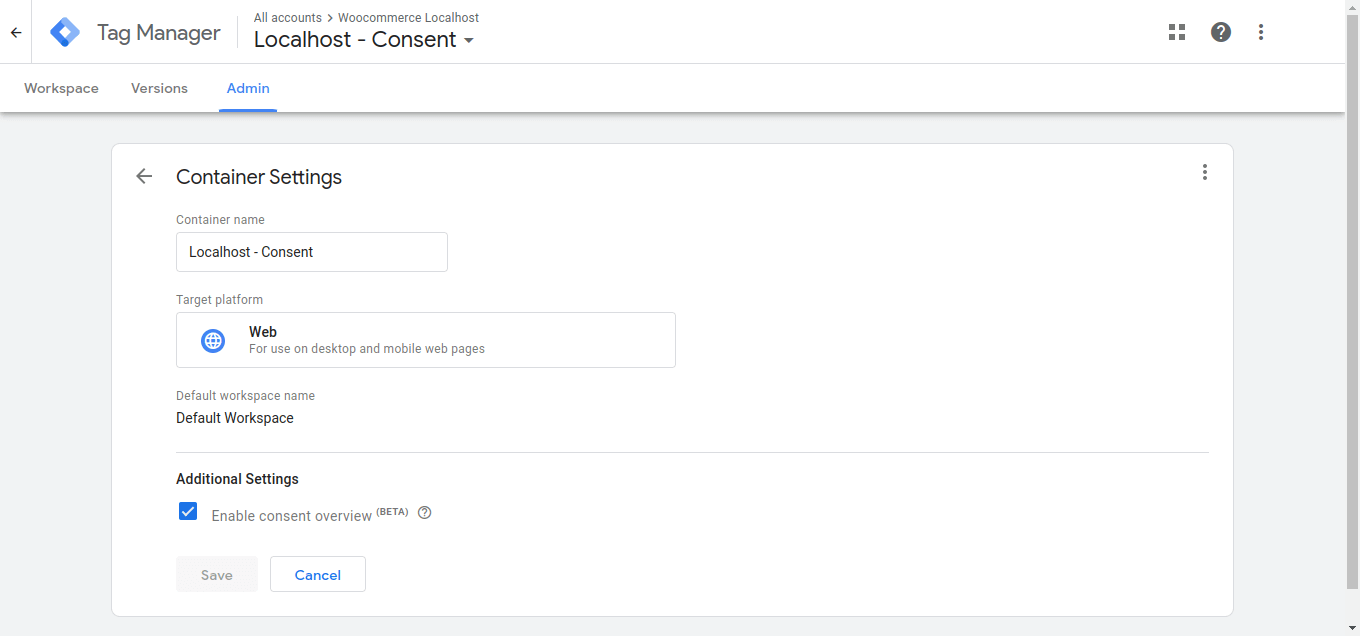
In GTM > Admin > Additional Settings > Enable consent overview:
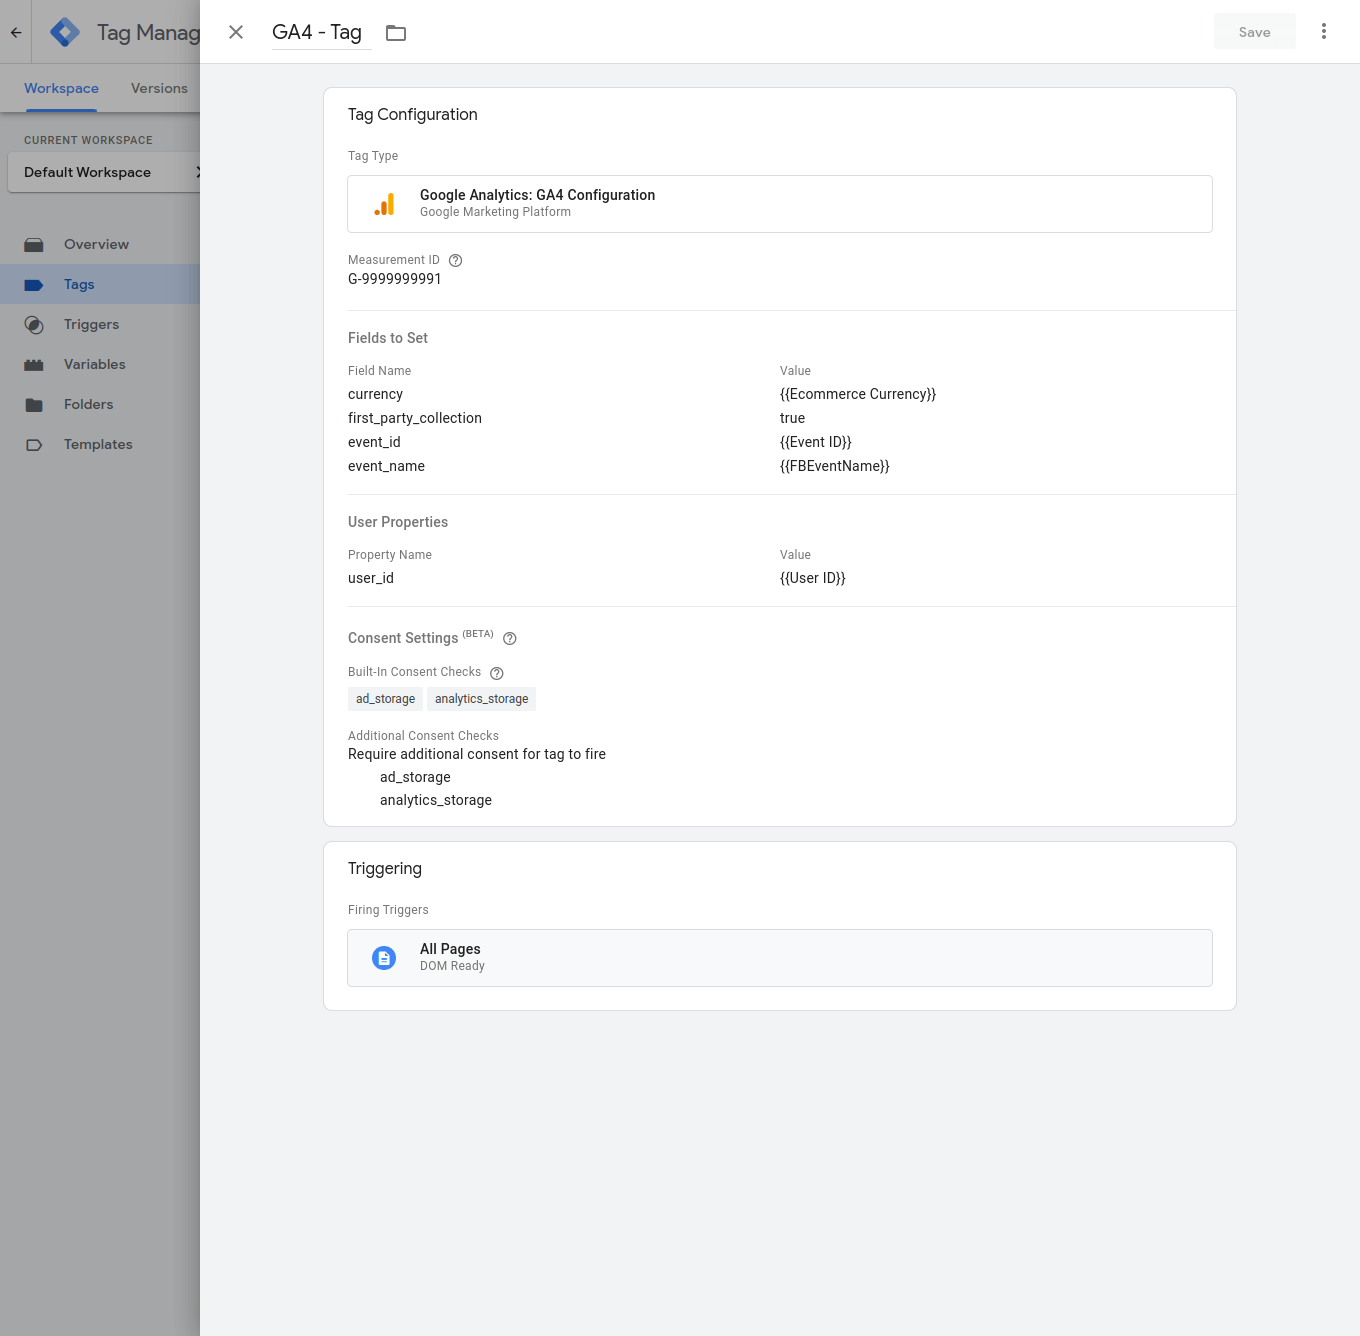
Activate the Additional Consent Checks option on all Tags that you want to include consent:
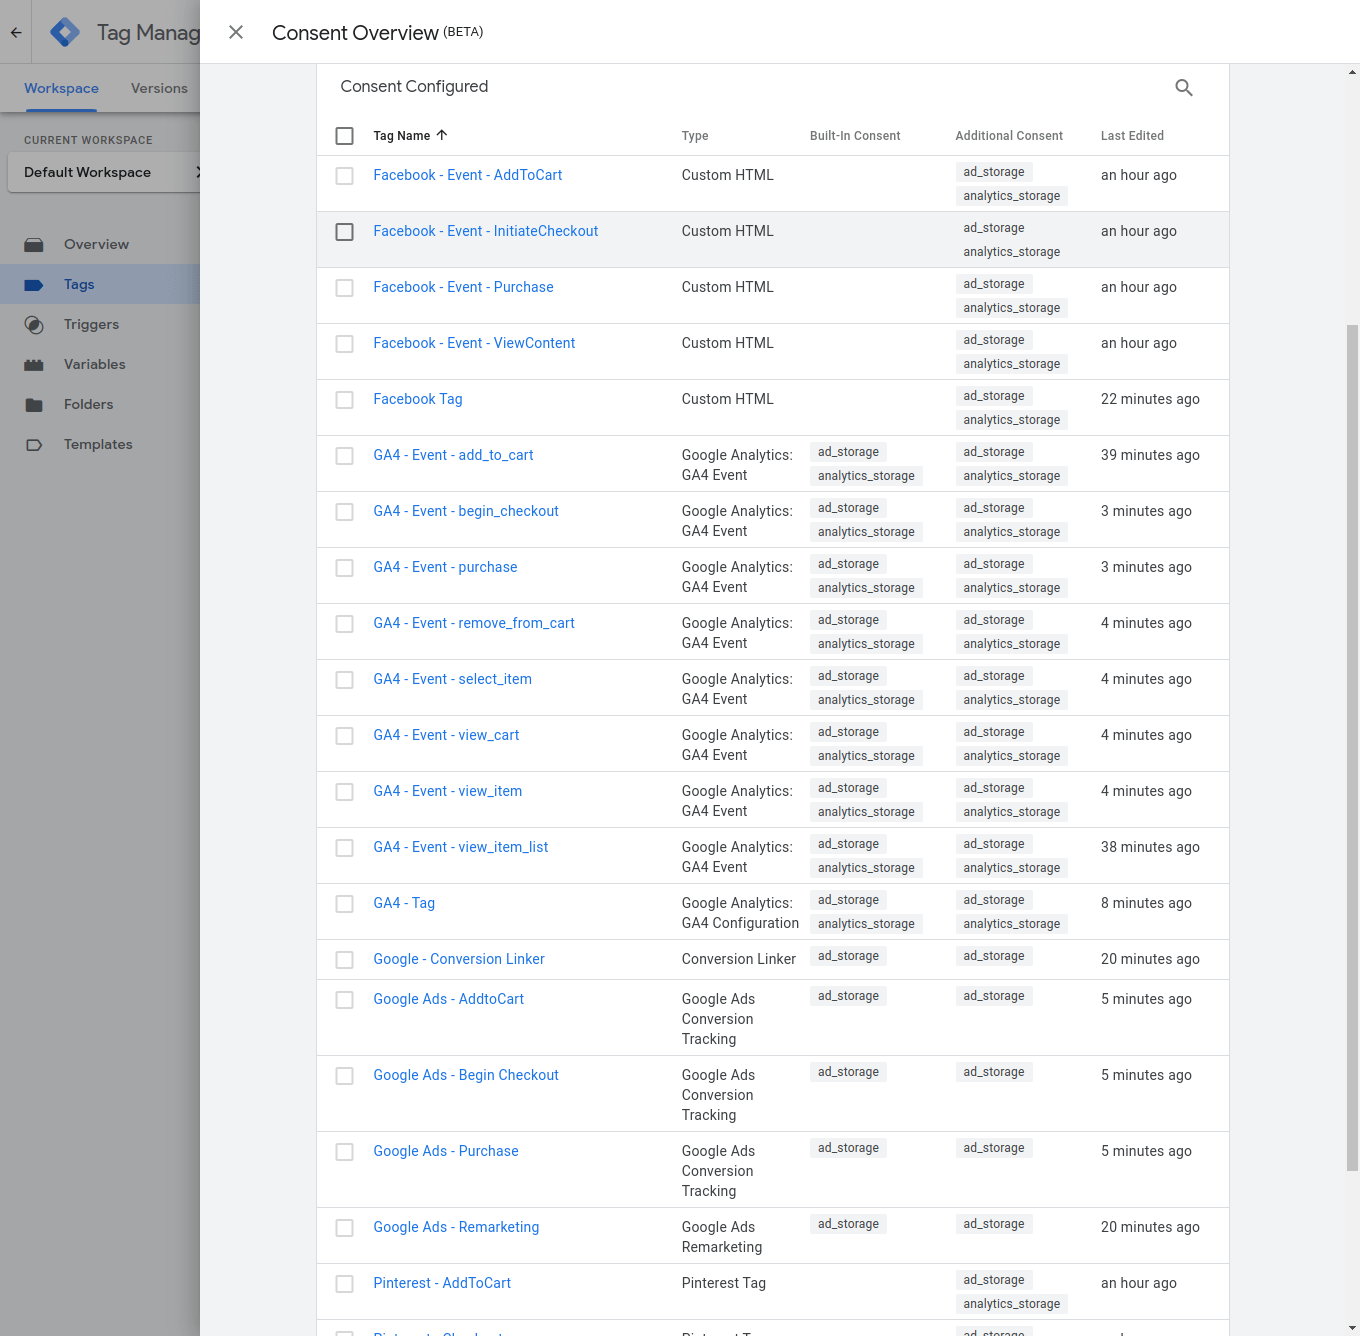
In GTM > Tags > Clicking on the consent icon > See how all tags configured with consent will look like according to the options (ad_storage , analytics_storage):
After configuring the tags, you must choose how to trigger the Tracking Consent State:
1 – If you want to use a Popup Consent plugin that already does this automatically, this plugin will already handle all the GTM tracking code, so it is important that in our plugin you leave the Google Tag Manager ID option empty, so that the plugin takes care of the GTM code and triggers consent or not and everything else will work automatically.
2 – If you want to use our Popup Consent Mode, see below an example of how you can use it:
In WooCommerce > Datalayer for WooCommerce > Google Tag Manager > Consent Mode > Enable the option: Google Consent Mode
In WooCommerce > Datalayer for WooCommerce > Extra > Popup Consent Mode > Enable the option: Popup Consent Mode and configure the options
Developer Resources
↑ Back to topIf you want to customize Datalayer for WooCommerce using hooks go to Developer Resources documentation.
FAQ
↑ Back to top1 – The purchase event is not being fired on the thank you page, what should I do?
This happens when you use a custom thank you page and don’t add the woocommerce_thankyou hook.
a – Check the woocommerce_thankyou hook in your template as shown:
https://woocommerce.github.io/code-reference/files/woocommerce-templates-checkout-thankyou.html#source-view.80
2 – Can I use the GTM code snippet from another plugin or directly in the theme?
Yes, you can leave the Google Tag Manager ID field empty.
3 – Some transactions do not appear in Google Analytics?
It is possible that some transactions are not read by Analytics, see the main reasons:
a – Your payment gateway is external and after purchase it does not return the user to the thank you page.
b – The user is using an ad blocker or some extension that does not allow the GTM to run.
4 – What should I do when I activate the plugin and I get an error on the store page?
This happens when you use a visual page builder and you didn’t configure it correctly and then our plugin can’t understand that this page has products.
a – If you use Elementor Builder, review the settings using the links:
https://elementor.com/help/creating-a-woocommerce-archive-template
https://elementor.com/blog/customize-woocommerce-product-page
b – If you use DIVI Builder, review the settings using the link:
https://www.wppagebuilders.com/custom-woocommerce-shop-page-divi-builder