Installation
↑ Back to top- Download the .zip file from your WooCommerce account.
- Go to: WordPress Admin > Plugins > Add New and Upload Plugin. With the file you downloaded in step 1, Choose File.
- Install Now and Activate Plugin.
More information at Install and Activate Plugins/Extensions.
Setup and Configuration
↑ Back to topAfter activating Image Watermark for WooCommerce, the “Watermark” settings will appear under the WordPress Admin > WooCommerce menu. Click to access the extension settings.
Steps to apply watermark:
↑ Back to top1) Add Watermark Rule
↑ Back to topGo to WooCommerce > Watermark > Watermark Rules to create a new watermark rule. You can add multiple rules to apply different watermarks to different products, categories and image sizes. 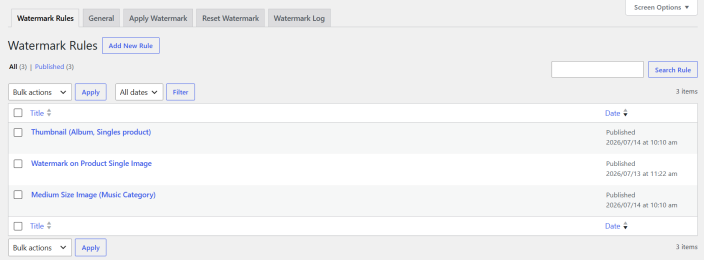 When creating a new rule, you can customize the rule with the following options. Select watermark type: Choose from 2 different watermark types, Text or Image.
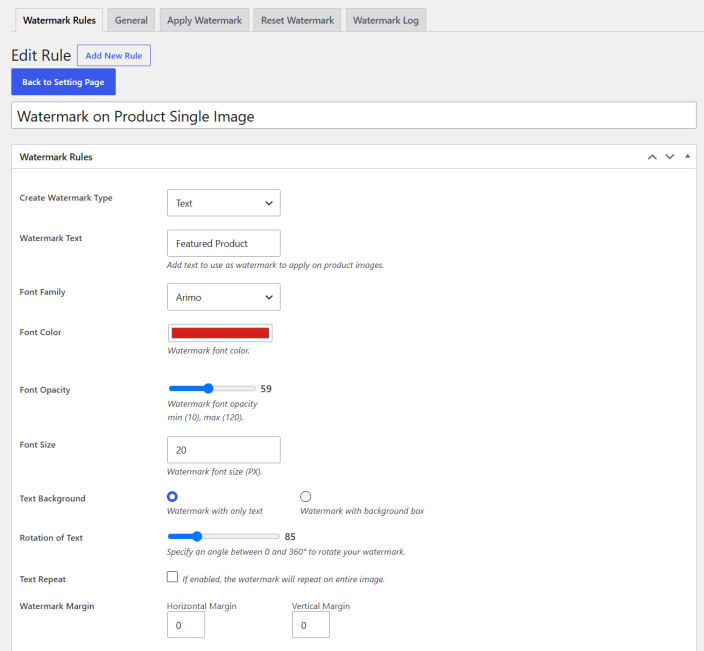
- Text watermark
- Watermark text
- Customize font, color, opacity and size
- Add text background
- Rotate watermark
- Repeat watermark on entire image
- Add horizontal and vertical margin
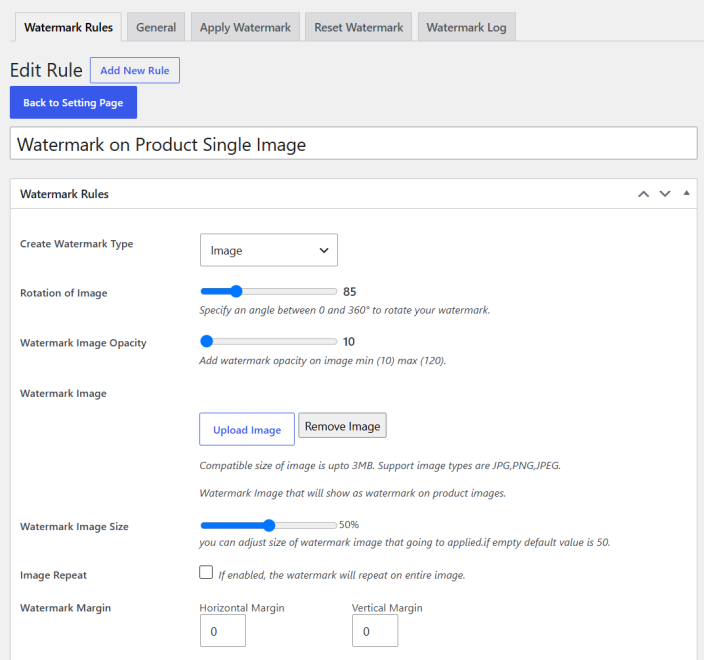
- Image watermark
- Upload custom watermark image
- Rotate image and configure opacity
- Repeat watermark on entire image
- Add horizontal and vertical margin
Select image type: When a product image is initially uploaded, by default, WooCommerce creates 7 different sizes of the same image. The extension has combined these 7 images into the following 3 groups:
- Full Images
- WooCommerce Full (Actual image)
- Medium Large (768×768)
- Medium Images
- WooCommerce Medium (300×300)
- WooCommerce Catalog (324×324)
- WooCommerce Single (416×416)
- Thumbnails
- WooCommerce Shop Thumbnail (100×100)
- WooCommerce Thumbnail (150×150)
Please note: Depending on the theme being used, Medium images will not always appear on listing pages. For example, the theme may use WooCommerce Full or Medium Large images on listing pages depending on uploaded image size, viewing screen size and more. Apply by category or products: You can apply watermark to specific products or categories. This feature helps when you want to add different watermarks to different products and categories. Watermark position: Select the watermark position and preview to see the how watermark will display on your product images. Please note: the extension does not use your exact product images, instead it uses a sample image to show how the watermark would appear on selected image sizes. 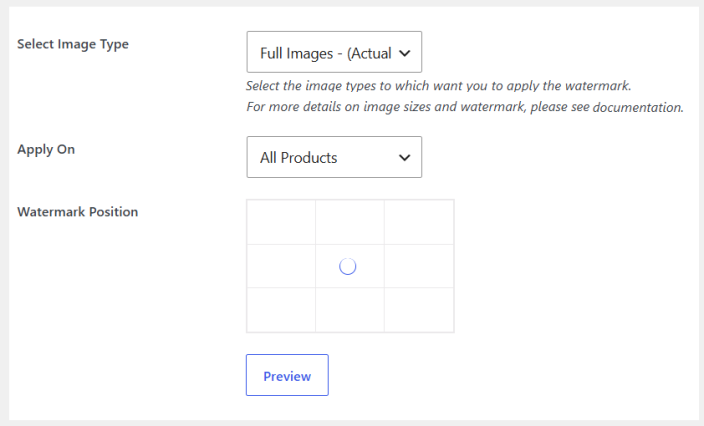
2) Apply Created Watermark Rule:
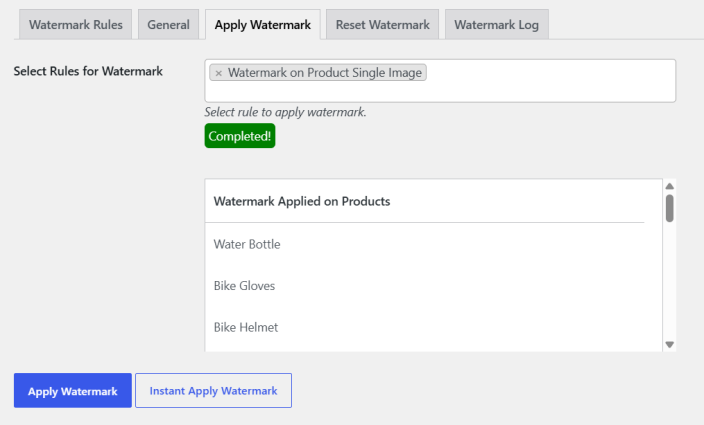
↑ Back to topOnce the watermark rule has been created, apply the rule by going to the “Apply Watermark” tab under WooCommerce > Watermark. This extra step helps in reducing the server load instead of executing watermark whenever the rule is updated.
You can also view the Watermark Applied on Products log to see which products have been processed using the selected watermark rule.
Steps to update existing watermark:
↑ Back to topOnce the watermark has been created, you can update it using the following steps.
1) Reset watermark rule
↑ Back to topIn the “Reset Watermark” tab (under WooCommerce > Watermark), reset the existing watermark rule that you are wanting to update. This will remove the existing watermark that is applied to any active rules. Its important to reset the rule before re-applying the rule in order for any changes to go into effect. 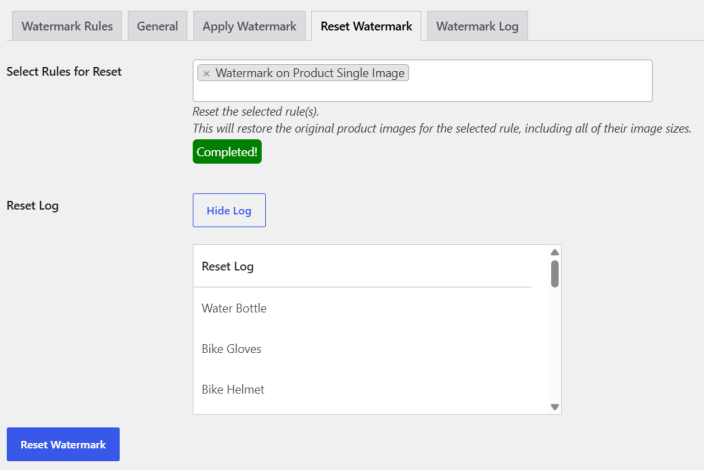
2) Update watermark rule
↑ Back to topOnce the rule has been reset, the existing watermark will be removed and you can update the rule as needed.
3) Apply watermark rule
↑ Back to topOnce the rule has been updated, you can re-apply the watermark using the “Apply Watermark” tab under WooCommerce > Watermark. Please note: We understand the process is not optimal but it helps in managing your server resources and avoids any incorrect watermark implementations.
Resetting all watermark images:
↑ Back to topIf you plan to uninstall the extension or want to start fresh, you can remove all watermarks created with a single click. Go to WooCommerce > Watermark > General Settings and select Restore Backup. This will remove watermarked images and restore the original product images without watermarks. You can also set the limits on the products to apply watermark instantly. 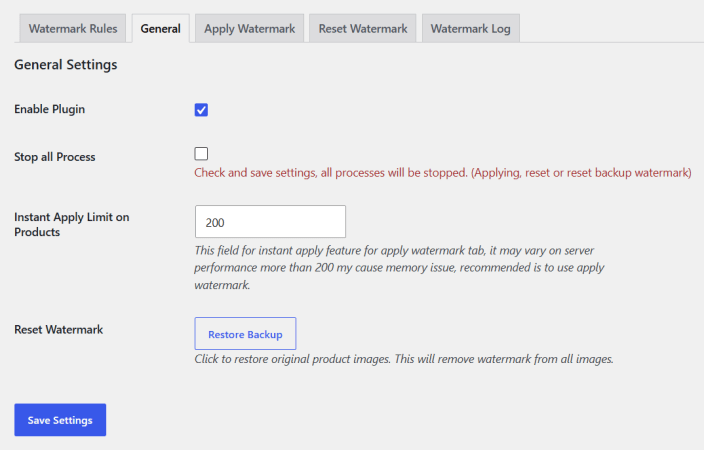
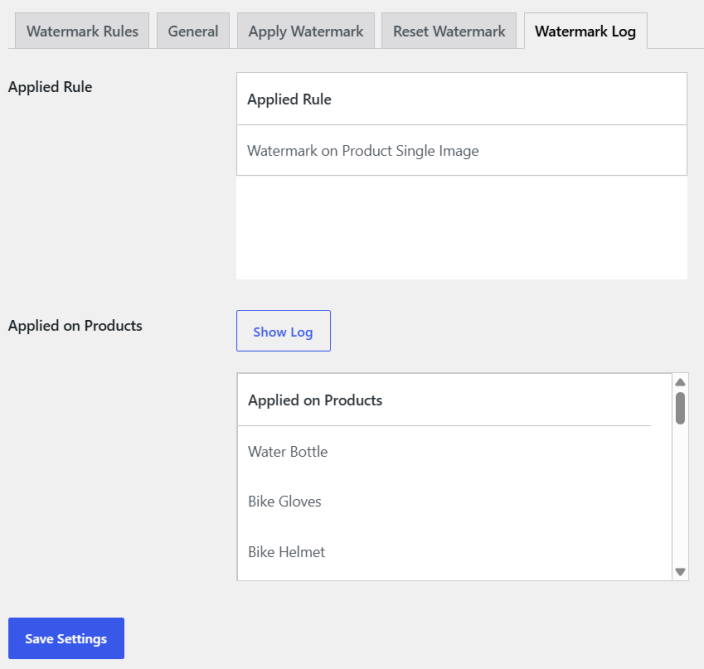
Watermark Log
↑ Back to topThe watermark log tracks the implementation of watermarks and which products the watermark has been applied to.