Install the theme
↑ Back to topThe easiest way to install your new theme is via the WordPress Dashboard. To do that follow the steps outlined below.
- Go to your WooCommerce.com account Downloads page. Click the download icon to get a compressed .zip file on your computer.
- On your website, go to Appearance > Themes and click the Add New button.
- Click Upload to upload the .zip file you downloaded in step 1.
- Go to Appearance > Themes to Activate.
If for some reason you are having trouble installing via the Dashboard you can try installing the theme manually. Here’s how to do it.
- Decompress the zip file you got on step #1 above on your computer.
- Upload the resulting theme folder via FTP to your WordPress installation themes folder (wp-content/themes).
- Go to Appearance > Themes to Activate.
For more info check WooCommerce’s documentation on theme installation.
Get started with Olsen FSE
↑ Back to topOnce the theme is activated you will see a notice with a link to the onboarding page.
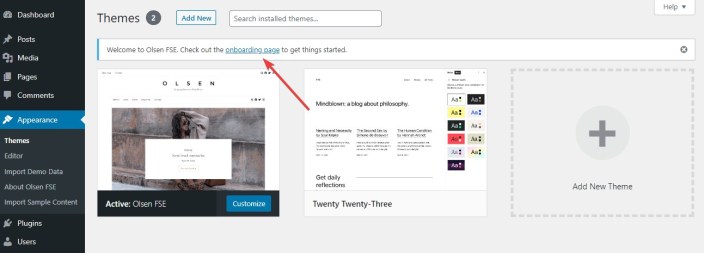
In the onboarding page you can choose to either import the sample content, or get more help regarding Olsen FSE by reading its documentation or submitting a support ticket.
Import the sample content
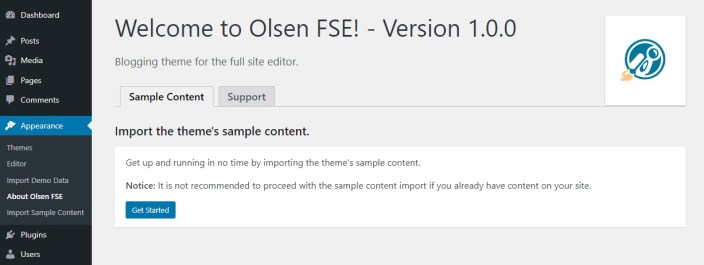
↑ Back to topTo help you get started with Olsen FSE you can install the theme’s sample content to create an almost identical installation of the theme’s demo.
Importing the sample content is only recommended on fresh installations. If your site already has content it is advised to skip this step.
Start by clicking the Get Started button in the onboarding page found under Appearance > About Olsen FSE.
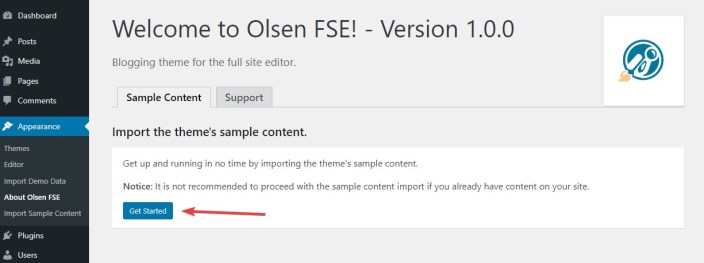
You will be redirected to the sample content import screen which can also be found under Appearance > Import Sample Content.
Press Start to begin the procedure and then Import to start importing content. Once everything is done you can click Visit your website to see the final result.
Start from scratch
↑ Back to topImporting the sample content is completely optional. If your site already has content or you prefer a more hands on approach when it comes you content creation you can start adding your posts under Posts > Add new in the WordPress Dashboard.
Customize the theme
↑ Back to topOlsen FSE is a block theme, every part of the theme is made of blocks. This means that the theme’s layout, including the header, footer and all available templates can be modified using the Site Editor by adding, removing, customizing and rearranging blocks.
Change the logo
↑ Back to topTo change the theme’s logo navigate to the Site Editor under Appearance > Editor.
In the Site Editor select Template Parts from the sidebar and then Header. Click the Site Logo block, select or upload your logo and click Save and again Save in the next prompt.
Change the site title and tagline
↑ Back to topIn the Site Editor select Template Parts from the sidebar and then Header. Click the existing site title, modify it to your preferred one and click Save and again Save in the next prompt.
To change the tagline follow the same procedure, selecting the Site Tagline block this time.
Modify colors and fonts
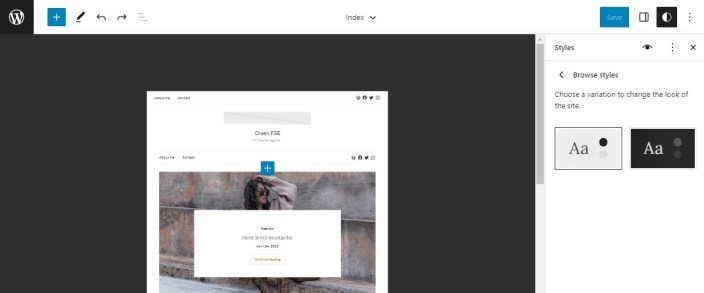
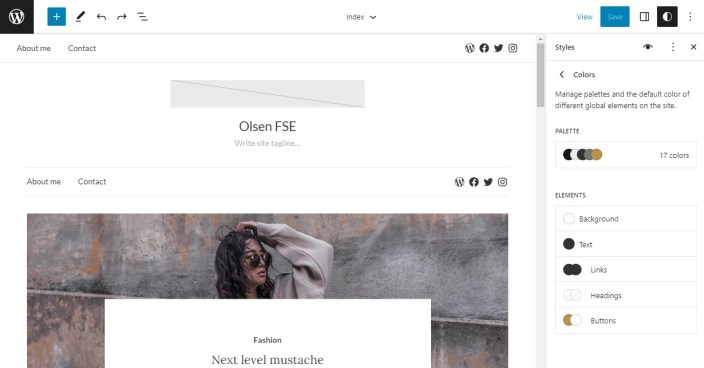
↑ Back to topYou can modify the site’s styles globally using the Site Editor’s Styles feature.
To access the Styles, select any template in the Editor, for example the Index template and click the half-shaded circle icon at the top right-hand corner of the screen.
Here you have the option to switch between the theme’s built in color variations, the Default and the Dark one at the time of writing, by clicking the Browse styles link. Select the variation you want to use and click Save.
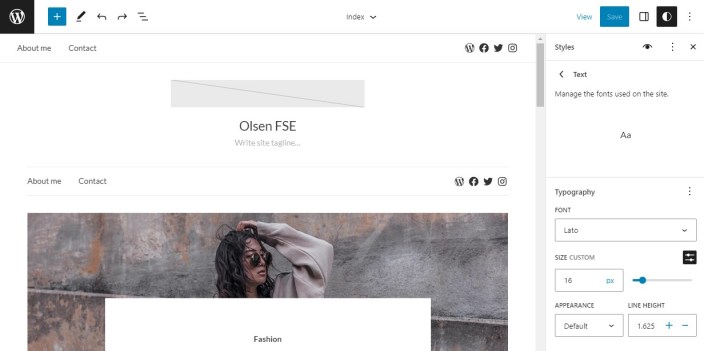
You can also customize the typography for various site elements, such as the body text, links, headings, and buttons by clicking the Typography link and then the item you wish to edit. You can select a font from the 10 bundled font families, set the font size, font weight and line height. Once done don’t forget to click Save to apply the changes.
In a similar way you can modify the colors for various theme elements by selecting the Colors option. Choose the item you wish to edit and either pick one of the pre-set colors or use the color-picker to set a custom one. Once done Save your changes.
Set your menus
↑ Back to topTo setup your site’s navigation edit the Header template part and select the Navigation block. Here you can either create a menu from scratch or select an already existing one as your theme’s navigation.

There are three instances of the Navigation block by default on Olsen FSE. The top menu and the main menu can be accessed and customized via the Header template part while the footer menu can be found in the Footer template part.
Change the featured post
↑ Back to topTo feature a post at the top of the blog listing you need to tag it as featured. Go to Posts in your Dashboard, hover over the post you want to make featured and click Quick Edit. Add the featured tag in the Tags box and Update the post.
Alternatively you can edit the post and set the tag from the Tags menu in the Document sidebar.

Only one post can be featured at any time, please make sure that the featured tag is only attached to the post you wish to feature. If multiple posts have the featured tag the newest post, by publish date, will be displayed.
To exclude the featured post from the post listing below we will first need to get its ID. To do that go to Posts in your Dashboard and edit the featured post. Check the address bar in your browser and notice the post=## bit where ## will be a number. This is the post ID, note it down.
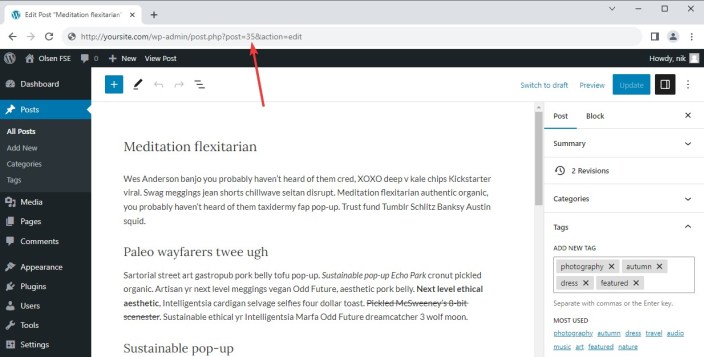
Next edit the Index template in the Site Editor under Appearance > Editor. Click the Options button, the three vertical dots at the top right of the screen and select Code Editor. Locate “exclude”:[] in the code and insert the ID in the brackets like so “exclude”:[35] click the exit code editor link and then the Save button.
Edit theme templates
↑ Back to topOlsen FSE comes with 10 built in templates and six template parts listed below.
Tempates
- 404: Page template displayed when a user tries to navigate to a non-existing URL.
- Archive: Generates the post archive.
- Index: The default post listing page.
- Index without sidebar: Alternative post listing without the sidebar.
- Page: The default page template.
- Page full width: Alternative template for the page with content spanning the entire available space.
- Search: Page template displayed when a user executes a search, for example via the search block.
- Single: The default post template.
- Single full width: Alternative template for the post without a sidebar with the content spanning the entire available space.
- Single narrow: Alternative template for the post without a sidebar, the content width remains the same and is centered.
Tempate parts
- Comments: The post comments’ template part.
- Footer: The site’s footer template part.
- Header: The site’s header template part.
- Hero post: The hero post template part, displayed at the top of the index template.
- Sidebar: The site’s sidebar template part.
- Theme query: The theme’s query template part.
Any of these templates and template parts can be edited via the Template editor. This allows you to easily customize parts of the theme to match your site’s needs. For example you can customize the appearance of the sidebar by editing the Sidebar template part and modifying its contents.
If at any time you want to restore a template or template part you can do that via the site editor. Select either the Templates or Template parts menu and click the last link Manage all templates/template parts. You will notice that all edited templates and template parts have a Customized designation. Click the three vertical dots next to them and select Clear customizations.
Setup a store
↑ Back to topOlsen FSE theme is compatible with WooCommerce, allowing you to integrate e-commerce functionality into your website.
To take advantage of this you will need to install and activate the WooCommerce plugin.
For detailed instructions on utilizing Olsen FSE with WooCommerce, please refer to the store editing documentation.
If any issues arise during the integration process, don’t hesitate to contact WooCommerce support for further assistance.