Installation
↑ Back to top- Download the .zip file from your WooCommerce account.
- Go to: WordPress Admin > Plugins > Add New and Upload Plugin for the file you have downloaded.
- Click Install Now and Activate.
UnInstallation
↑ Back to top- Go to Order Approval > Settings > Plugin Deactivation Settings.
- Select “Revert to Default Order Status.”
- Select the new order status for others that have the following custom statuses created by the extension:
- Pending for approval
- Approved
- Rejected
- You can select any default status for these orders.
- Please note this is action is irreversible. If you are not permanently uninstalling our extension, please keep this “Revert to Default Order Status” unchecked.
Setup and Configuration
↑ Back to topAfter activation of the Order Approval for WooCommerce extension, you can find the “Order Approval” section in your WordPress admin menu. Click to view settings and create rules for order approval.
Creating new order approvals:
↑ Back to topSelect approval type:
↑ Back to topEnable approval based on user roles:
↑ Back to topValidate orders of specific or all products:
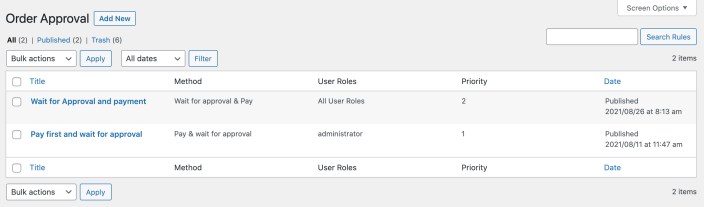
↑ Back to top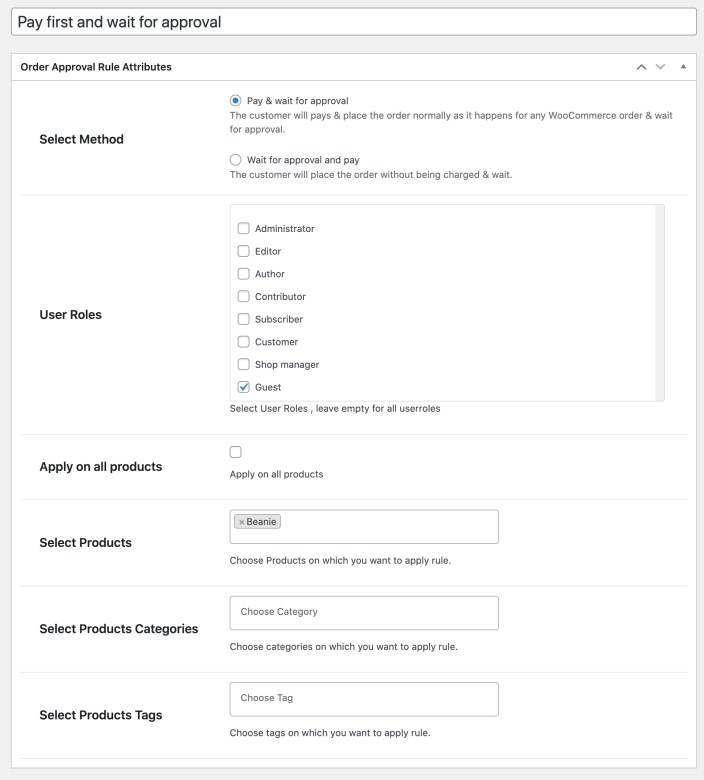 Manage order approval rules:
You can create multiple rules to apply different types of validation based on product and user rules.
Manage order approval rules:
You can create multiple rules to apply different types of validation based on product and user rules.
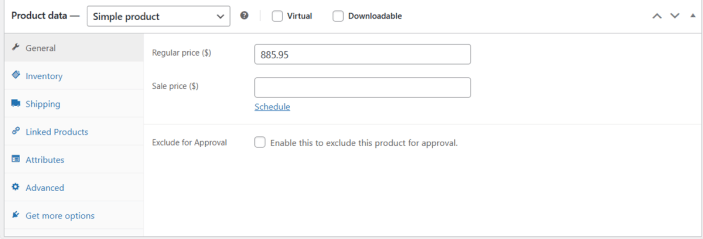
Exclude individual products from Approval
↑ Back to top- Exclude for approval: Enable this option to exclude this specific product from approval.
Configuration Options:
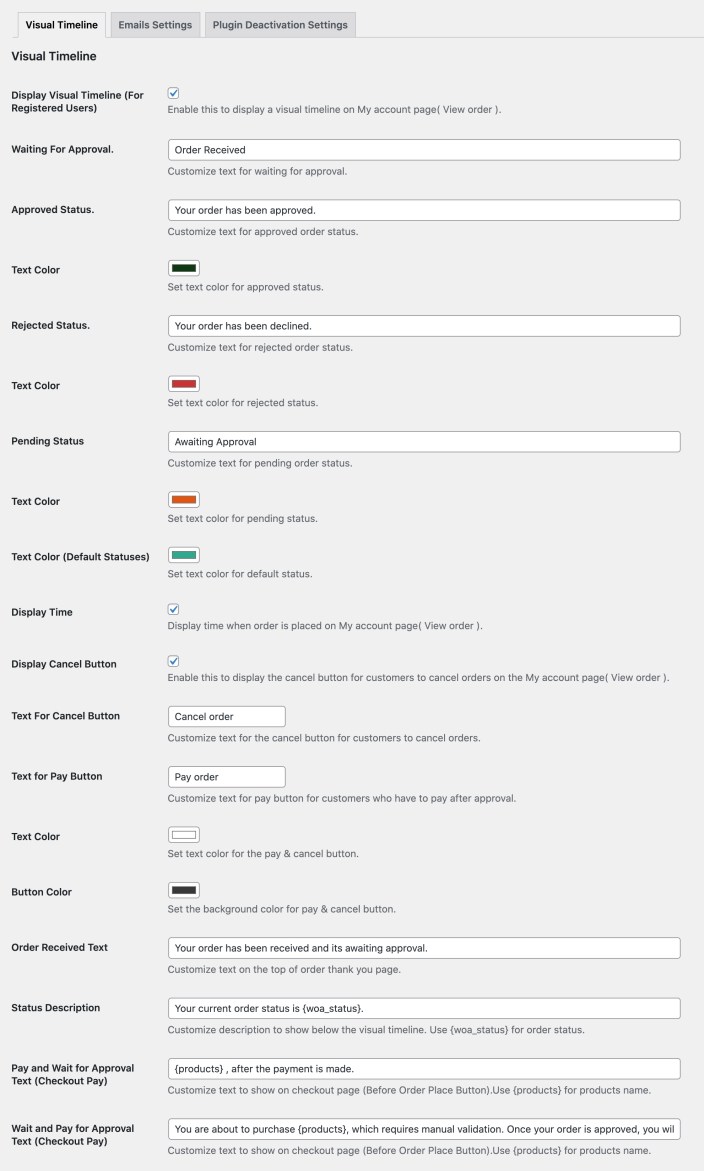
↑ Back to topVisual timeline and custom messages:
↑ Back to top- Enable/Disable visual status update
- Customize the “waiting for approval” (first order status on timeline)
- Approved Status (appears below the timeline when order is approved)
- Text Color (for above approved message)
- Rejected Status (appears below the timeline when order is rejected)
- Text Color (for above rejected message)
- Pending Status (status displayed in timeline when order is awaiting validation)
- Text Color (for above pending message)
- Add text color for default order status (processing, on-hold, completed)
- Enable/Disable cancel button
- Customize button label and colors (button text and background)
- Order received (displayed on thank you page)
- Status description (displayed under order timeline)
- Separate checkout messages for
- Pay and wait for approval
- Wait for approval and pay
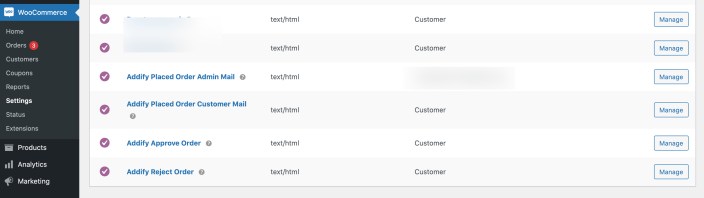
Emails Settings:
↑ Back to top- Email notification for admin when new order is placed and requires approval
- Email notification for customer about new order and requires manual approval
- Email notifications for customer when order is approved
- Email notifications for customer when order is rejected
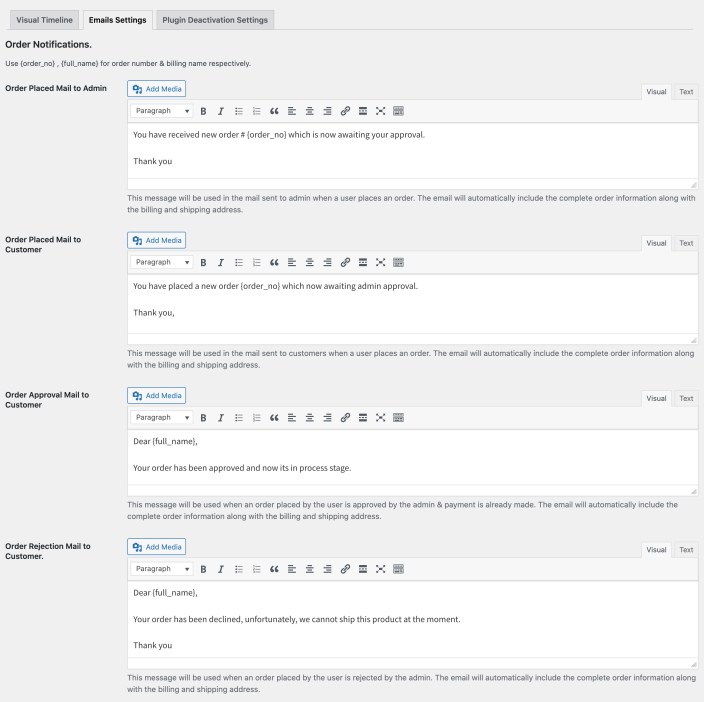 All email notifications will automatically include the standard order details with the billing and shipping address. You can customize the email subject and headings from WooCommerce > Settings > Emails. The extension emails starts with “Addify.”
Admin approval management:
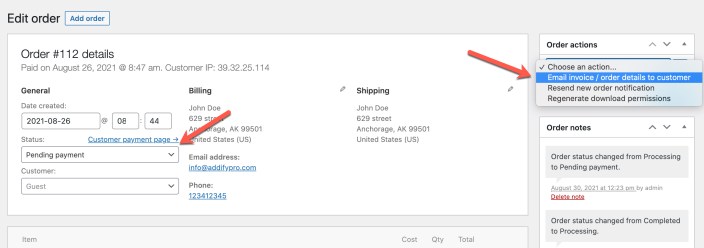
↑ Back to top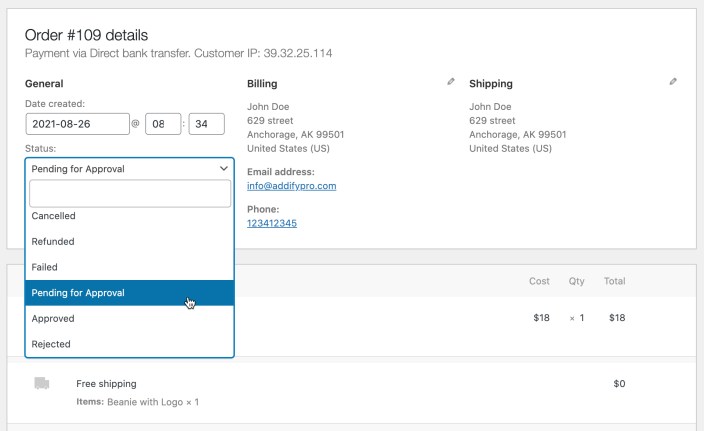 If the payment is yet to be made, the admin would need to manually move the order to pending payment status. Once the order is moved to pending payment, the “Pay” button will appear in My Account page to allow customers pay for the order. You can use the default order action “email invoice/order details to customer” and update the order to send a payment link to customers.