Installation
↑ Back to top- Navigate to Plugins > Add New.
- Click the Upload Plugin button at the top of the screen.
- Upload the ‘order-messenger-for-woocommerce.zip’ file you’ve downloaded from WooCommerce.com
- Click the Install Now button.
- When the installation is complete, you’ll see “Plugin installed successfully.” Click the Activate Plugin button at the bottom of the page.
Setup and Configuration
↑ Back to topFrontend
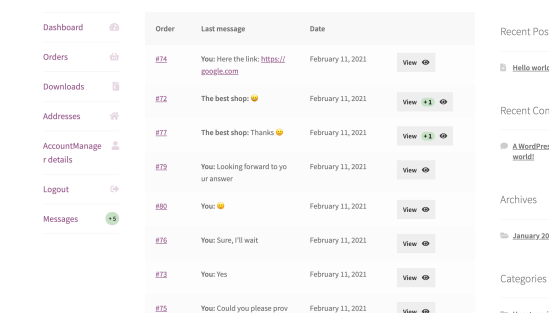
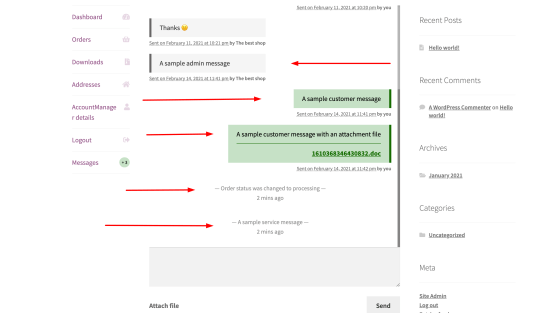
↑ Back to topMy account
↑ Back to top- Order – link to tied order
- Last message – the last letter in a dialog. If the letter is a status change, it will show “Status was changed.”
- Message sending date
- Link to Messenger
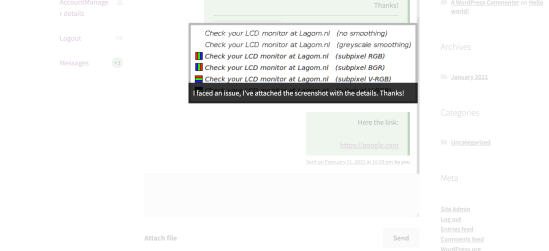
Messenger page
↑ Back to top If a sent file is image type, the users will be able to preview it in a lightbox:
Notifications
↑ Back to top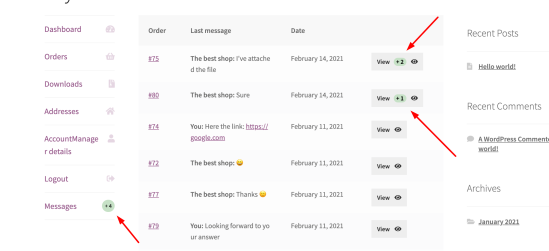
Backend
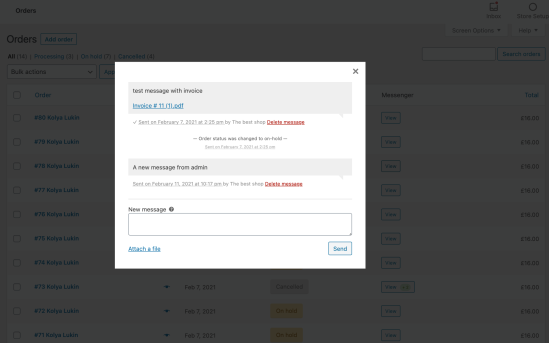
↑ Back to topOrders list
↑ Back to top Modal box:
Order page
↑ Back to top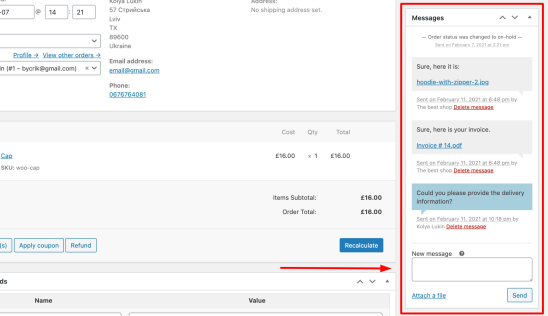
Product purchasing message
↑ Back to top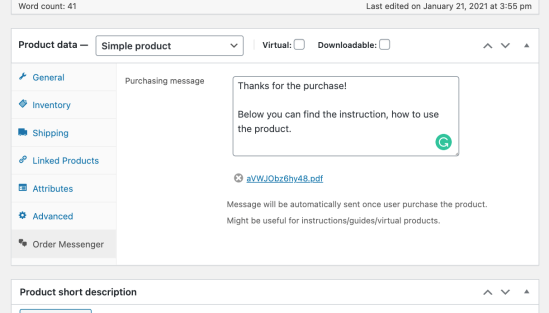 At the settings, you can choose the “purchase” trigger. Chose whether the message sends when payment is successful or when an order is placed.
Notifications
↑ Back to top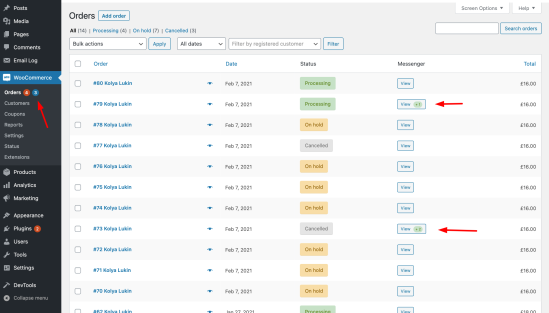
Messages types
↑ Back to top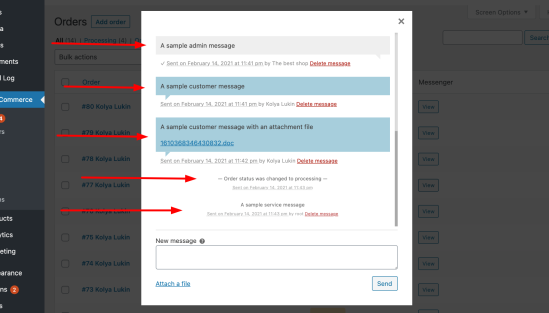 Customers:
 All messages are stored in the database. An admin can permanently delete them.
Regular messages
↑ Back to topOrder status changing messages
↑ Back to topService messages
↑ Back to topEmail notifications
↑ Back to top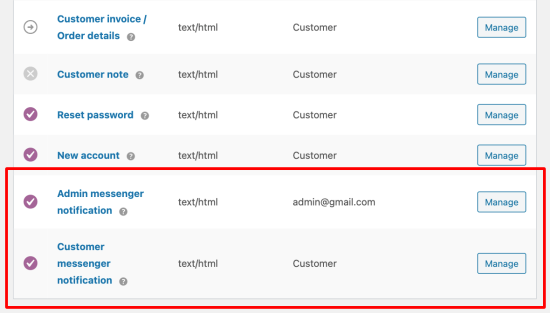 They help to don’t miss important messages. Email notifications are sent with 10 minutes delay and group on all unread messages related to an order. It helps to reduce emails amount.
Below you can find how they look:
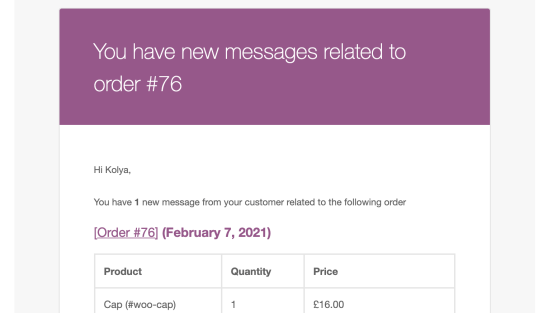
Admin:
They help to don’t miss important messages. Email notifications are sent with 10 minutes delay and group on all unread messages related to an order. It helps to reduce emails amount.
Below you can find how they look:
Admin:
 Customer:
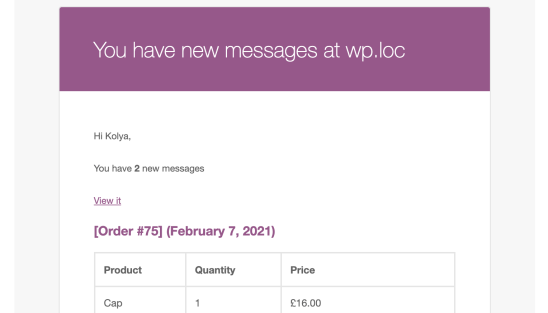 Within each email, you can:
- Change the subject
- Change the heading
- Add additional content to the bottom
- Enable/Disable sending
Settings
↑ Back to top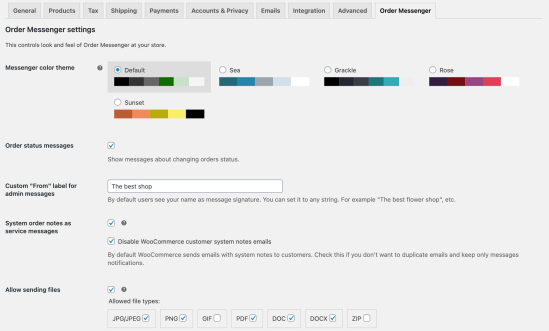
Order messenger theme
↑ Back to top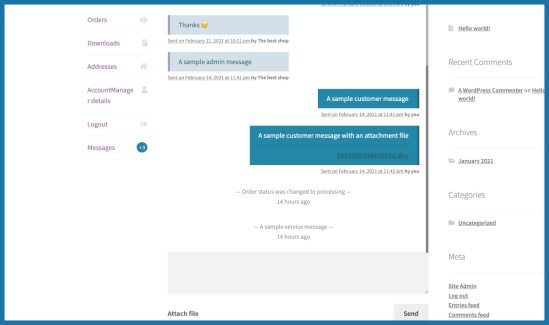
Custom signature
↑ Back to top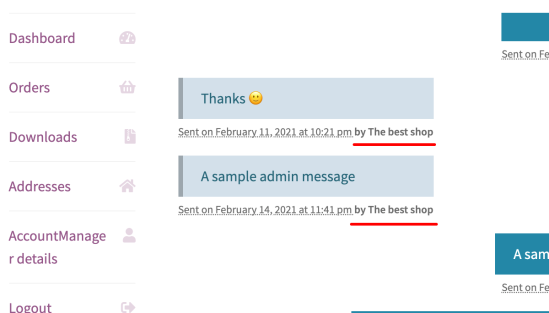
Order status messages
↑ Back to topSystem order notes
↑ Back to topSending files
↑ Back to topPurchase message trigger
↑ Back to top- Order placed
Preloaded messages
↑ Back to topOrder messenger link
↑ Back to top
Message read checkmark
↑ Back to top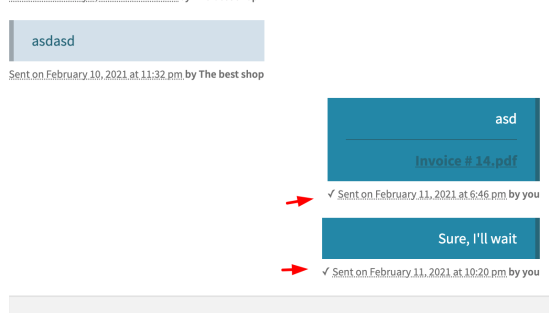
Developers
↑ Back to topHow to override templates
↑ Back to top- Each template order-messenger-for-woocommerce/views/frontend/{template_name} can be overridden at your theme by the following path: {your_theme}/order-messenger-for-woocommerce/{template_name}
- Every plugin template goes through the “order_messenger/template/location” filter, so you can easily substitute the template path.