INFO
In production. Will be available in one of the next releases.
INFO
This is a pro feature. Get the pro version here
Setup instruction
↑ Back to topBasic setup
↑ Back to top- Open your Outbrain account page: https://my.outbrain.com/
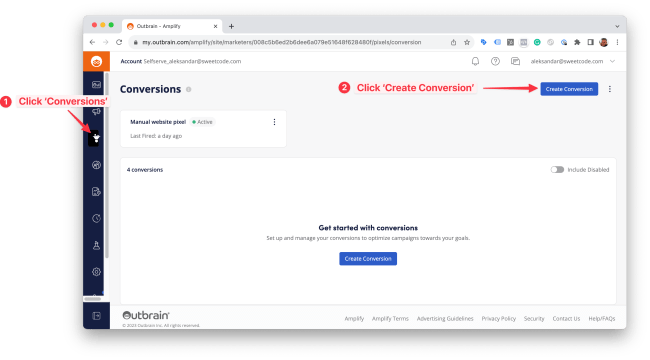
- In the left side menu, click on Conversions, then on the three dots in the Manual website pixel and then on View the Outbrain Pixel.

- Select and copy the
OBV_ADV_IDvalue.
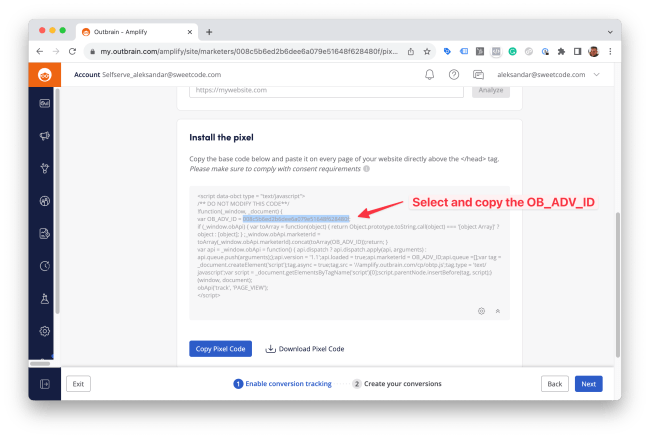
- Save the
OBV_ADV_IDvalue in Outbrain advertiser ID field in the Pixel Manager.
Event setup
↑ Back to topEach event needs to be set up in Outbrain individually. The following events are supported:
searchcontent_viewadd_to_cartcheckoutpurchase
The events need only to be set up within Outbrain. No additional configuration is required in the Pixel Manager plugin.
If you need to ajust the event names that the Pixel Manager sends to Outbrain, you can do so by using the following filter: Outbrain event name filter
- Open your Outbrain account page: https://my.outbrain.com/
- In the left side menu, click on Conversions, then on the three dots in the Manual website pixel and then on View the Outbrain Pixel.
- Set the following fields:
- Type:
Event-Based Conversion - Category:
Purchase - Name:
purchase(All lowerase) - Window:
30(Most common value, but can be changed to any other value)
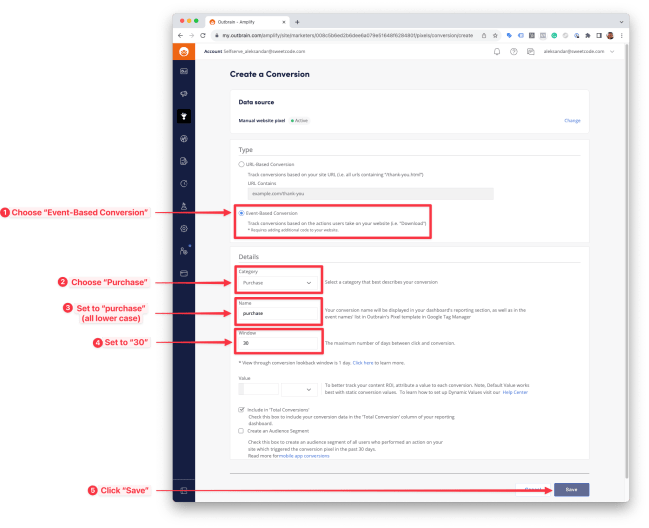
- Click on Save.
- Repeat the steps 2-4 for each event you want to track.