The WooCommerce Product Enquiry Form plugin lets customers submit product questions and quote requests via enquiry forms, email, SMS, or WhatsApp. Add enquiry buttons across your store, customize forms, and manage enquiries from your WooCommerce dashboard.
Installation
↑ Back to top- Download the Product Enquiry Form .zip file from your WooCommerce account.
- Go to WordPress Admin > Plugins > Add New and Upload Plugin.
- Click on Choose File to upload the file you downloaded.
- “Install” and “Activate” the extension
Configuration
↑ Back to topAfter you have installed and activated the Product Enquiry Form extension, you can configure the following settings.
General Settings
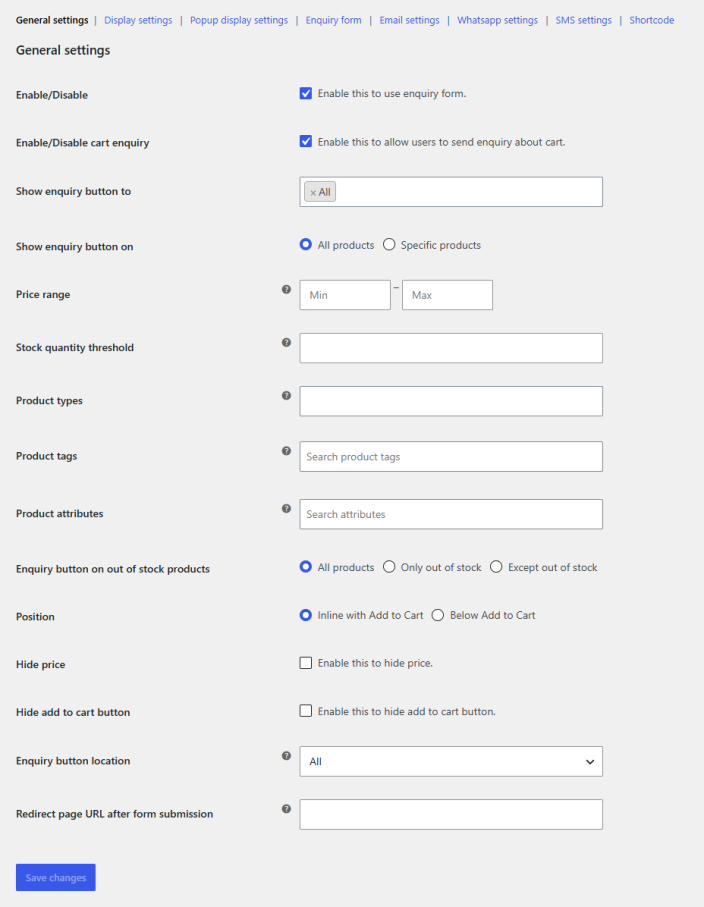
↑ Back to topConfigure the general settings for the product enquiry form plugin. Go to WooCommerce > Settings > Product Enquiry Form > General Settings and set up the following:
- Enable/Disable: Click the checkbox to enable or disable the Product Enquiry Form plugin.
- Enable/Disable Cart Enquiry: Enable to allow customers to send enquiries about the cart.
- Show Enquiry Button To: Choose the specific user role(s) for which you want to display the product enquiry button.
- Show Enquiry Button On: Select whether you want to display the enquiry button for all or specific products.
- Select Option: Choose whether you want to “Include” or “Exclude” the specific products.
- Include/Exclude By: Select how you want to include or exclude the product enquiry form. You can choose between the following options:
- Products
- Categories
- Shipping Classes
- Include/Exclude: Choose the specific products, categories, or shipping classes that you want to include or exclude.
- Price Range: Set a price range to show the enquiry form button only when the shop-display price falls within this minimum and maximum range.
- Stock Quantity Threshold: Show the product enquiry button when the stock is less than or equal to the threshold limit.
- Product Types: Choose the specific product types such as simple, variable, grouped, or external, or leave empty to display the product enquiry button for all product types.
- Product Tags: Further filter products based on tags. Display the product enquiry form for specific product types and tags.
- Product Attributes: Display the product enquiry button based on product attributes.
- Enquiry Button On Out-of-Stock Products: Set how you want to display the product enquiry form for out-of-stock products:
- All Products
- Only Out of Stock
- Except Out of Stock
- Position: Select the position for the product enquiry button:
- Inline with Add to Cart
- Below Add to Cart
- Hide Price: Check the box to hide the product price.
- Hide Add to Cart Button: Enable the box to hide the Add to Cart button.
- Enquiry Button Location: Choose the preferred location for the product enquiry button:
- All
- Product Page
- Shop Page
- Cart Page
- Redirect Page URL After Form Submission: Add a custom URL to redirect customers after the product enquiry form is submitted.
Display Settings
↑ Back to topPersonalize the display settings, including colors, texts, or padding. Go to WooCommerce > Settings > Product Enquiry Form > Display Settings and configure the following:
Enquiry Button Settings
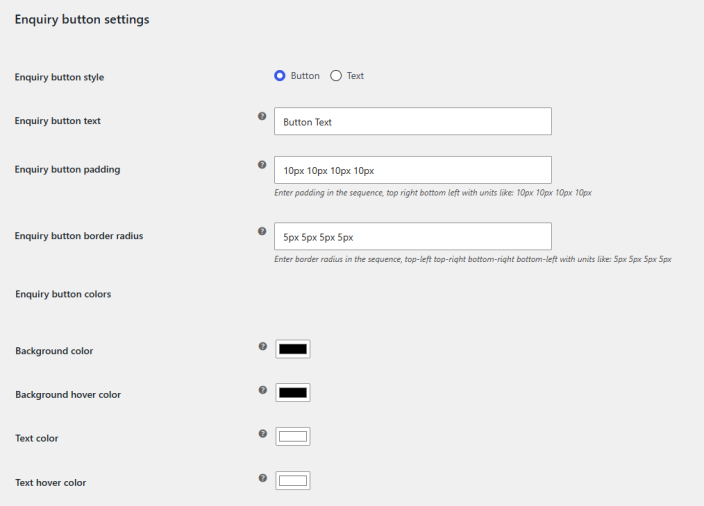
↑ Back to top- Enquiry Button Style: Choose the preferred style for the product enquiry button:
- Button
- Text
- Enquiry Button Text: Add text for the enquiry button.
- Enquiry Button Padding: Set the padding for the product enquiry button.
- Enquiry Button Border Radius: Set the border radius for the product enquiry button.
- Background Color: Select the background color for the product enquiry button.
- Background Hover Color: Choose the background colour on hover.
- Text Color: Select the color for the text.
- Text Hover Color: Select the color for the text on hover.
WhatsApp Button Settings
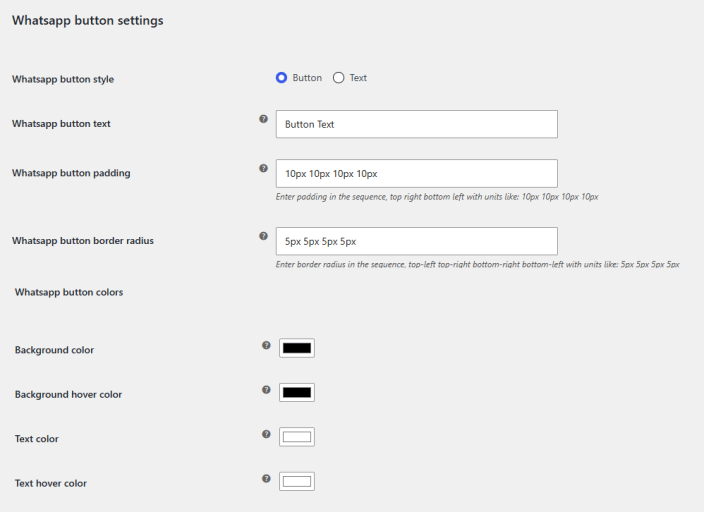
↑ Back to top- WhatsApp Button Style: Choose the style for the WhatsApp enquiry button:
- Button
- Text
- WhatsApp Button Text: Add text for the WhatsApp enquiry button.
- WhatsApp Button Padding: Adjust padding for the WhatsApp enquiry button.
- WhatsApp Button Border Radius: Set the border radius for the WhatsApp enquiry button.
- Background Color: Set the background color for the WhatsApp enquiry button.
- Background Hover Color: Choose the background hover color for the WhatsApp enquiry button.
- Text Color: Set the text color for the button.
- Text Hover Color: Set the text color on hover.
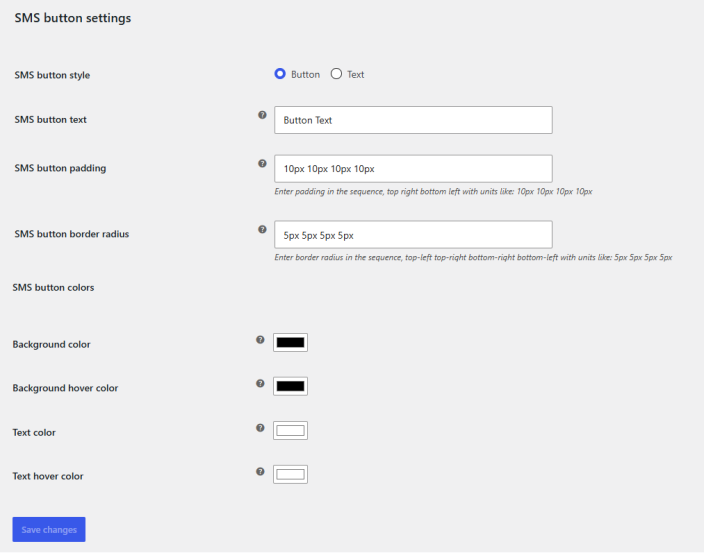
SMS Button Settings
↑ Back to top- SMS Button Style: Choose the style for the SMS enquiry button:
- Button
- Text
- SMS Button Text: Add text for the SMS enquiry button.
- SMS Button Padding: Adjust padding for the SMS enquiry button.
- SMS Button Border Radius: Set the border radius for the SMS enquiry button.
- Background Color: Set the background color for the SMS enquiry button.
- Background Hover Color: Choose the background hover color for the SMS enquiry button.
- Text Color: Set the text color for the button.
- Text Hover Color: Set the text color on hover.
Popup Display Settings
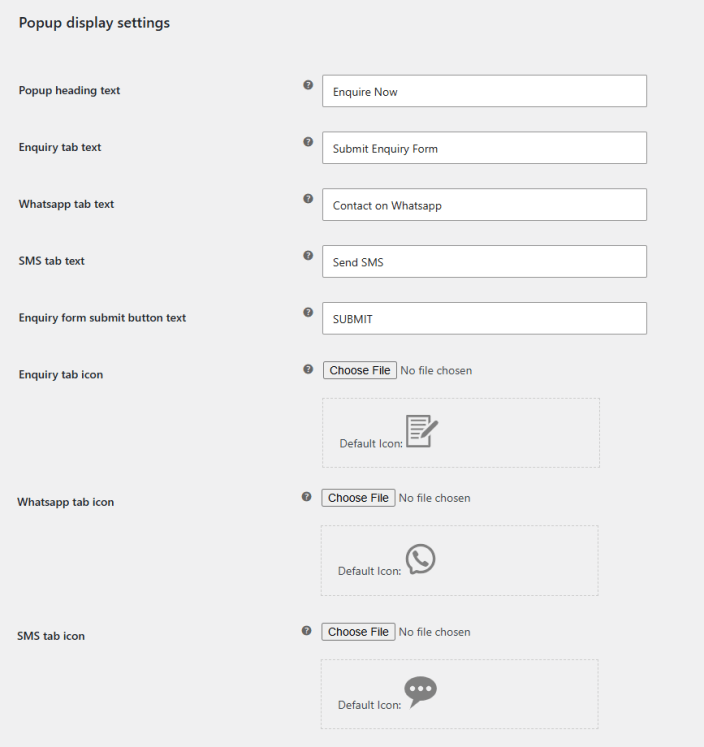
↑ Back to topCustomize the enquiry form popup. Go to WooCommerce > Settings > Product Enquiry Form > Popup Display Settings and configure the settings:
- Popup Heading Text: Add the heading text displayed at the top of the enquiry popup.
- Enquiry Tab Text: Add the text for the enquiry form tab.
- WhatsApp Tab Text: Add the text for the WhatsApp enquiry tab.
- SMS Tab Text: Add the text for the SMS enquiry tab.
- Enquiry Form Submit Button Text: Add the text displayed on the enquiry form submit button.
- Enquiry Tab Icon: Upload a custom icon for the enquiry tab. If no icon is uploaded, the default icon will be used.
- WhatsApp Tab Icon: Upload a custom icon for the WhatsApp tab. If no icon is uploaded, the default icon will be used.
- SMS Tab Icon: Upload a custom icon for the SMS tab. If no icon is uploaded, the default icon will be used.
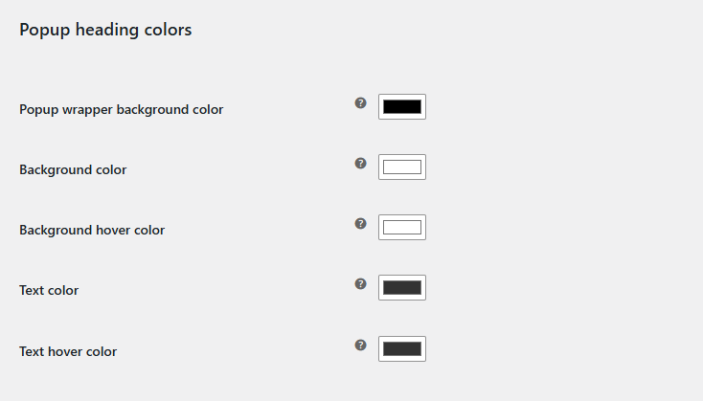
Popup Heading Colors
↑ Back to top- Popup Wrapper Background Color: Set the background color of the popup wrapper.
- Background Color: Set the background color of the popup heading.
- Background Hover Color: Set the background hover color of the popup heading.
- Text Color: Set the text color of the popup heading.
- Text Hover Color: Set the text hover color of the popup heading.
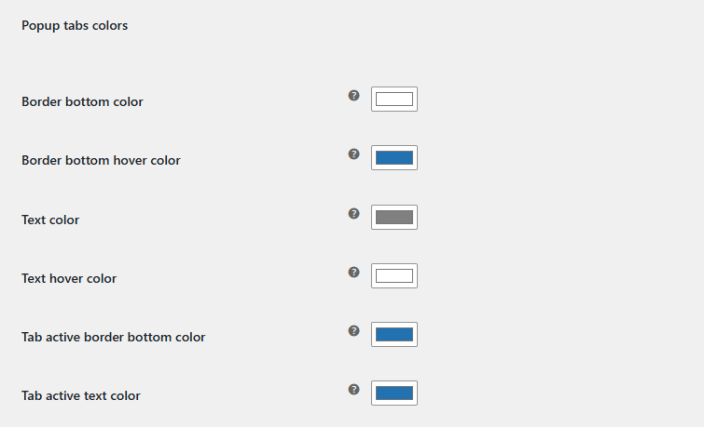
Popup Tabs Colors
↑ Back to top- Border Bottom Color: Set the bottom border color of the popup tabs.
- Border Bottom Hover Color: Set the bottom border hover color of the popup tabs.
- Text Color: Set the text color of the popup tabs.
- Text Hover Color: Set the text hover color of the popup tabs.
- Tab Active Border Bottom Color: Set the bottom border color for the active tab.
- Tab Active Text Color: Set the text color for the active tab.
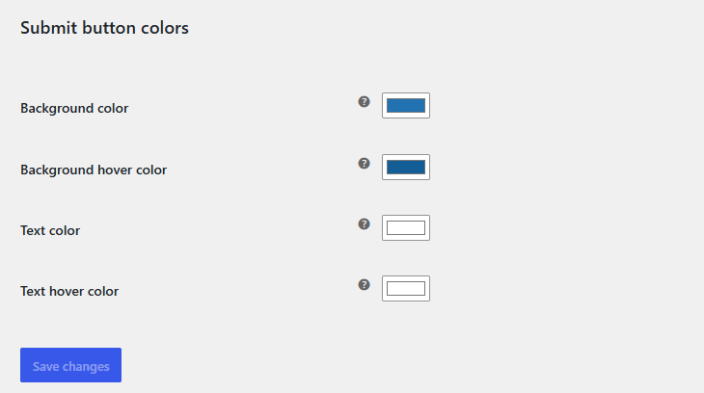
Submit Button Colors
↑ Back to top- Background Color: Set the background color of the enquiry form submit button.
- Background Hover Color: Set the background hover color of the enquiry form submit button.
- Text Color: Set the text color of the submit button.
- Text Hover Color: Set the text hover color of the submit button.
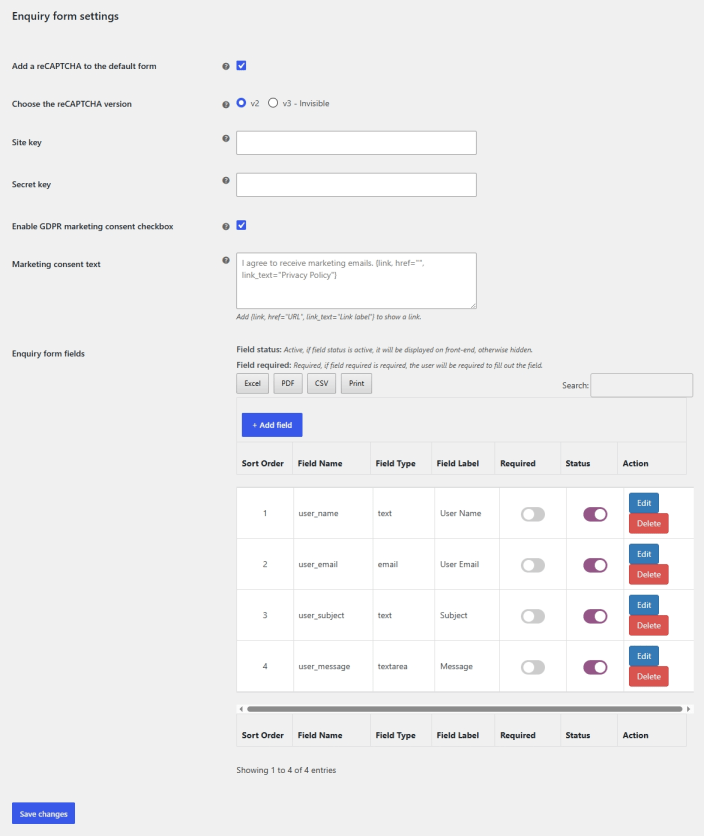
Enquiry Form Settings
↑ Back to top- Add a reCAPTCHA to the Default Form: Click the checkbox to add a reCAPTCHA to the default form.
- Choose the reCAPTCHA Version: Select the reCAPTCHA version you want. You can select from:
- v2
- v3 – Invisible
- Site Key: Enter the site key in the field.
- Secret Key: Add the secret key in the text field.
- Enquiry Form Fields: The table shows you all the enquiry fields. You can edit the following settings of the form:
- Add a new field to the form by clicking the “Add Field” button.
- Edit or delete the previously created fields.
- Search using the search bar.
- Export the form to Excel, CSV, PDF, or Print.
- Change the status of any field.
- Make fields required.
- The table includes the following columns:
- Sort Order
- Field Name
- Field Type
- Field Label
- Required
- Status
- Action
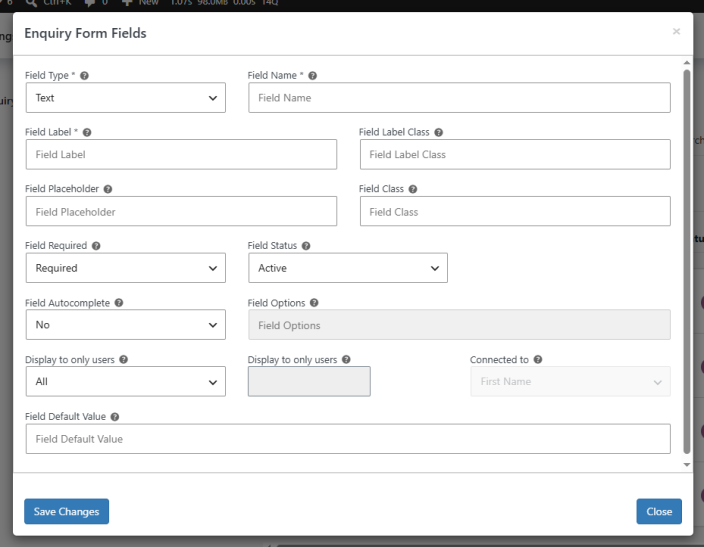
When clicked on “Add Field,” you can configure the following settings for the field:
- Field Type: Select the type of field you want to add, such as Text, Email, Number, Textarea, Dropdown, Checkbox, Radio, or File Upload.
- Field Name: Enter a unique name for the field. This is used internally to identify the field and should not contain spaces or special characters.
- Field Label: Add the label text that will be displayed for the field on the enquiry form.
- Field Label Class: Add a custom CSS class for the field label to apply custom styling.
- Field Placeholder: Add placeholder text that will be displayed inside the field before the customer enters a value.
- Field Class: Add a custom CSS class for the field to apply custom styling.
- Field Required: Choose whether the field should be Required or Optional for customers to fill in.
- Field Status: Set the field status to Active or Inactive to control whether it is displayed on the form.
- Field Autocomplete: Choose whether to enable or disable the browser’s autocomplete suggestions for the field.
- Field Options: Add the available choices for fields such as Dropdown, Checkbox, or Radio. This option stays disabled for field types that do not require choices.
- Display to only users: Select the user role(s) that should see this field on the form, or leave it set to All to display it to every customer.
- Connected to: Map the field to an existing customer detail, such as First Name, so the submitted value is linked automatically to that detail.
- Field Default Value: Add a default value that will be pre-filled in the field when the form loads.
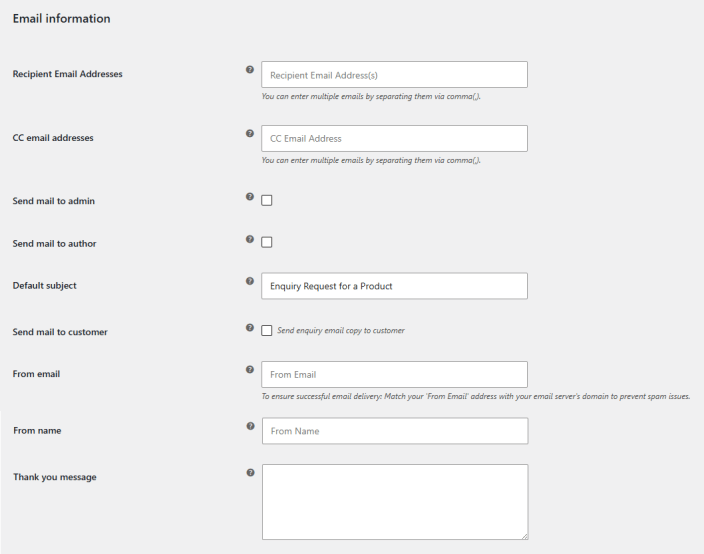
Email Settings
↑ Back to topGo to WooCommerce > Settings > Product Enquiry Form > Email Settings to configure the following:
Email Information
↑ Back to top- Recipient Email Addresses: Add the email address(es) that should receive enquiry notifications. You can enter multiple emails by separating them with a comma.
- CC Email Addresses: Add email address(es) to CC on enquiry notifications. You can enter multiple emails by separating them with a comma.
- Send Mail to Admin: Check the box to send enquiry notification emails to the site admin.
- Send Mail to Author: Check the box to send enquiry notification emails to the product author.
- Default Subject: Set the default subject line for the enquiry notification email.
- Send Mail to Customer: Check the box to send a copy of the enquiry email to the customer.
- From Email: Add the email address the notification will be sent from. To ensure successful delivery, match this address with your email server’s domain to prevent spam issues.
- From Name: Add the name that will appear as the sender of the email.
- Thank You Message: Add the message that will be shown to customers after they submit an enquiry.
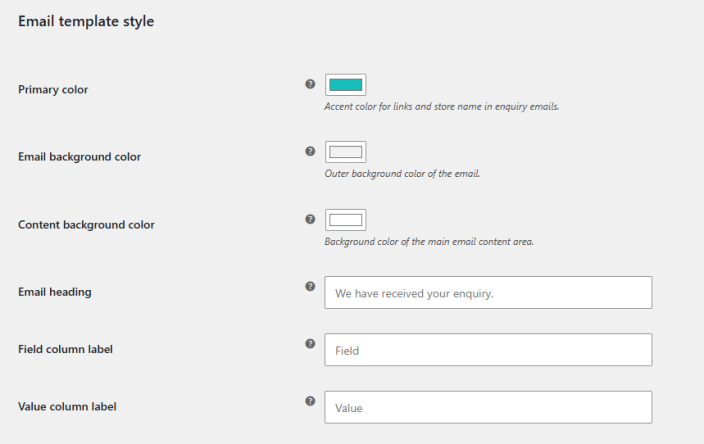
Email Template Style
↑ Back to top- Primary Color: Set the accent color used for links and the store name in enquiry emails.
- Email Background Color: Set the outer background color of the email.
- Content Background Color: Set the background color of the main email content area.
- Email Heading: Add the heading text displayed at the top of the email.
- Field Column Label: Add the label for the field column in the enquiry details table.
- Value Column Label: Add the label for the value column in the enquiry details table.
Email Template Content
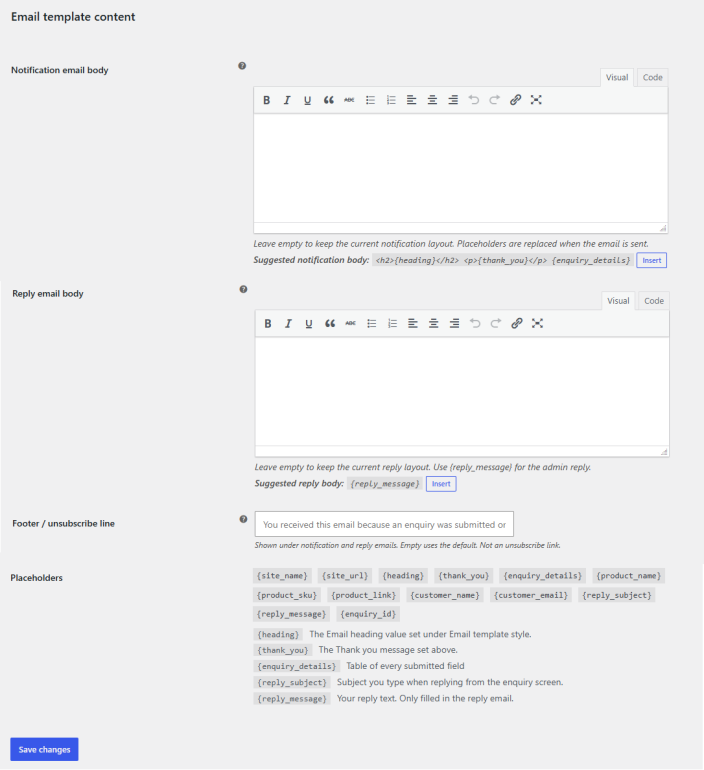
- Notification Email Body: Customize the layout of the notification email using the visual or code editor. Leave empty to keep the current notification layout. Placeholders are replaced when the email is sent. Click Insert to add the suggested notification body: <h2>{heading}</h2> <p>{thank_you}</p> {enquiry_details}.
- Reply Email Body: Customize the layout of the reply email using the visual or code editor. Leave empty to keep the current reply layout. Use {reply_message} for the admin reply. Click Insert to add the suggested reply body: {reply_message}.
- Footer / Unsubscribe Line: Add a custom footer line shown under the notification and reply emails. Leave empty to use the default. This is not an unsubscribe link.
- Placeholders: Use the following placeholders in the notification and reply email bodies: {site_name}, {site_url}, {heading}, {thank_you}, {enquiry_details}, {product_name}, {product_sku}, {product_link}, {customer_name}, {customer_email}, {reply_subject}, {reply_message}, {enquiry_id}.
- {heading}: The email heading value set under Email Template Style.
- {thank_you}: The Thank You Message set above.
- {enquiry_details}: Table of every submitted field.
- {reply_subject}: Subject you type when replying from the enquiry screen.
- {reply_message}: Your reply text. Only filled in the reply email.
WhatsApp Settings
↑ Back to topGo to WooCommerce > Settings > Product Enquiry Form > WhatsApp Settings to configure the following:
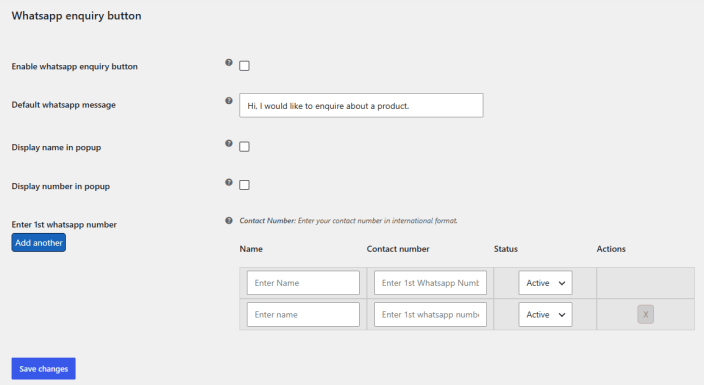
- Enable WhatsApp Enquiry Button: Check the box to enable the WhatsApp enquiry button on your store.
- Default WhatsApp Message: Add the default message that will be pre-filled when a customer starts a WhatsApp enquiry.
- Display Name in Popup: Check the box to display the contact name in the WhatsApp enquiry popup.
- Display Number in Popup: Check the box to display the contact number in the WhatsApp enquiry popup.
- Enter 1st WhatsApp Number: Add your WhatsApp contact number in international format. Click Add Another to add multiple WhatsApp contacts. Each entry includes:
- Name: Add a name to identify the contact.
- Contact Number: Add the WhatsApp contact number in international format.
- Status: Set the contact status to Active or Inactive.
- Actions: Remove a contact by clicking the “X” icon.
If you want to add more than one number, click the “Add Another” button and fill in the required details.
SMS Settings
↑ Back to topGo to WooCommerce > Settings > Product Enquiry Form > SMS Settings to configure the following:
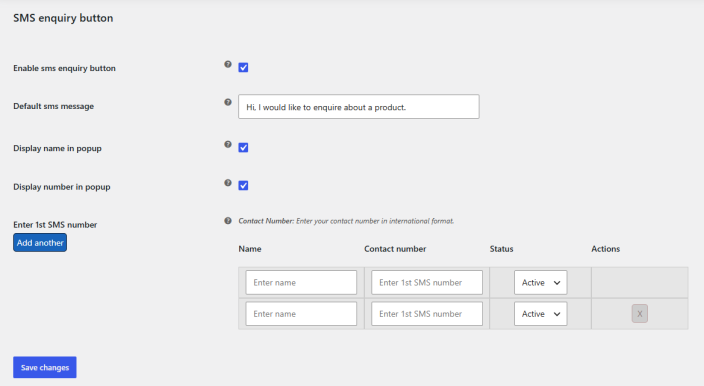
- Enable SMS Enquiry Button: Check the box to enable the SMS enquiry button on your store.
- Default SMS Message: Add the default message that will be pre-filled when a customer starts an SMS enquiry.
- Display Name in Popup: Check the box to display the contact name in the SMS enquiry popup.
- Display Number in Popup: Check the box to display the contact number in the SMS enquiry popup.
- Enter 1st SMS Number: Add your SMS contact number in international format. Click Add Another to add multiple SMS contacts. Each entry includes:
- Name: Add a name to identify the contact.
- Contact Number: Add the SMS contact number in international format.
- Status: Set the contact status to Active or Inactive.
- Actions: Remove a contact by clicking the “X” icon.
Shortcode
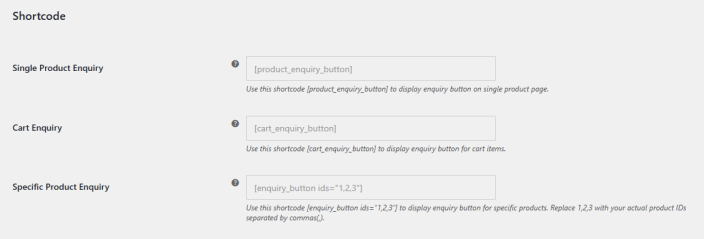
↑ Back to topGo to WooCommerce > Settings > Product Enquiry Form > Shortcode to find the following shortcodes:
- Single Product Enquiry: Use the shortcode [product_enquiry_button] to display the enquiry button on a single product page.
- Cart Enquiry: Use the shortcode [cart_enquiry_button] to display the enquiry button for cart items.
- Specific Product Enquiry: Use the shortcode [enquiry_button ids=”1,2,3″] to display the enquiry button for specific products. Replace “1,2,3” with your actual product IDs, separated by commas.
Managing Enquiries
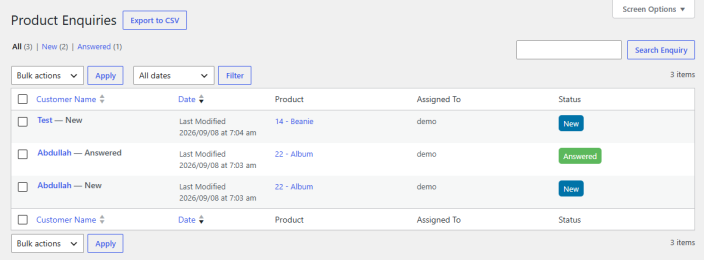
↑ Back to topGo to WooCommerce > Product Enquiries in your WordPress admin dashboard to view and manage all customer enquiries.
- Product Enquiries List: View all submitted enquiries in a table, showing the Customer Name, Date, Product, Assigned To, and Status for each enquiry.
- All / New Tabs: Filter enquiries by All or New to quickly see unread or unhandled enquiries.
- Export to CSV: Click to export the enquiry list as a CSV file.
- Search Enquiry: Use the search bar to find a specific enquiry.
- Filter by Date: Use the “All dates” dropdown and click Filter to narrow down enquiries by date.
- Bulk Actions: Select one or more enquiries using the checkboxes, choose an action from the Bulk Actions dropdown, and click Apply to perform it on the selected enquiries.
- Customer Name: Click a customer’s name to view the full enquiry details.
- Product: Click the product name/ID to go to the corresponding product.
- Assigned To: Shows which store admin or staff member the enquiry is assigned to.
- Status: Shows the current status of the enquiry, such as New.
Reply to Enquiry
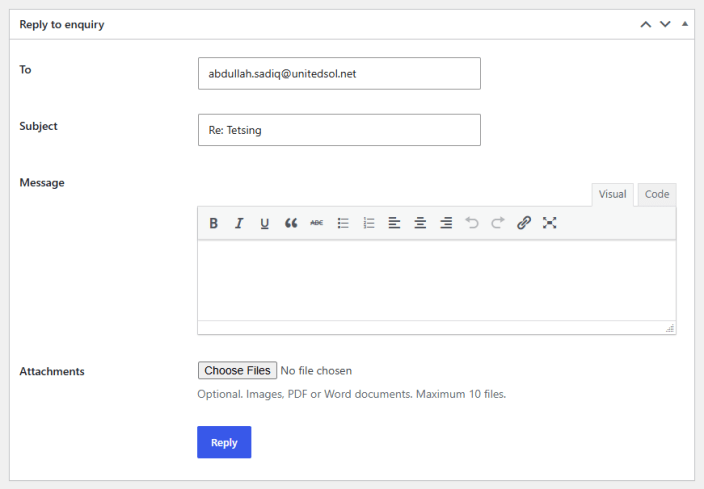
↑ Back to topOpen an individual enquiry to reply to the customer directly from the Reply to Enquiry panel:
- To: Shows the customer’s email address the reply will be sent to.
- Subject: Add or edit the subject line for your reply.
- Message: Write your reply using the visual or code editor.
- Attachments: Optionally attach images, PDFs, or Word documents to your reply.
Click Reply to send your response to the customer.
Convert to Order
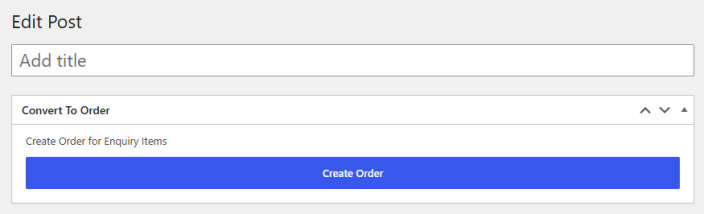
↑ Back to topThe enquiry edit screen also includes a Convert to Order panel:
- Create Order: Click the “Create Order” button to convert the enquiry items into a WooCommerce order for the customer.
Enquiry Analytics
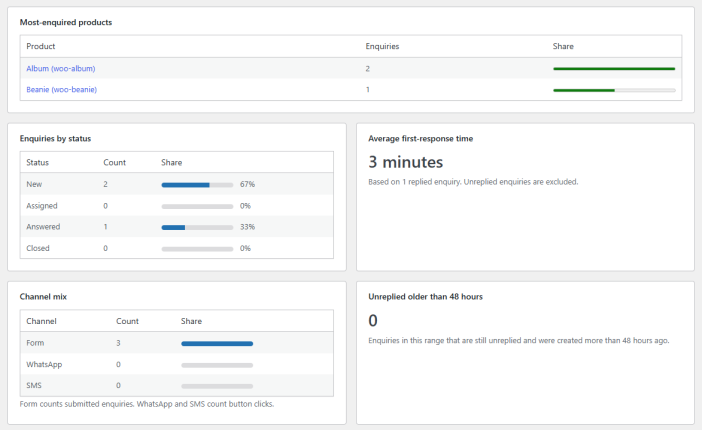
↑ Back to topGo to WooCommerce > Enquiry Analytics to view performance data for your product enquiries.
- Date Range: Choose a date range and click Apply to view analytics for that period.
- Most-Enquired Products: View a table of products with the highest number of enquiries, showing the enquiry count and share for each product.
- Enquiries by Status: View a breakdown of enquiries by status, New, Assigned, Answered, and Closed, with the count and share for each.
- Average First-Response Time: The average time taken to reply to enquiries, based only on replies to enquiries. Unreplied enquiries are excluded.
- Channel Mix: View a breakdown of enquiries by channel, Form, WhatsApp, and SMS, with the count and share for each. Form counts submitted enquiries, while WhatsApp and SMS count button clicks.
- Unreplied Older Than 48 Hours: Shows the number of enquiries in the selected date range that are still unreplied and were created more than 48 hours ago.