Product Specification Table for WooCommerce allows you to easily create and display product details in a table on the product page.
Installation
↑ Nach oben- Download the .zip file from your WooCommerce account.
- Go to WordPress Admin > Plugins > Add New and Upload Plugin > Choose File (for the file that was downloaded).
- Install Now and Activate the extension.
Setup and Configuration
↑ Nach obenSettings
↑ Nach obenGeneral Settings

- To configure and display the product specification table, enable the “Enable Product Specification Table” checkbox.
- Customize the single product page specification table section name using the “Single Product Page Product Specification Tab Label” option.
- To hide the WooCommerce Specification Table when the plugin’s specification table is configured for the product, enable the “Hide the WooCommerce Specification Table display when the plugin’s Specification Table available in the Product” checkbox.
- To hide the Product Specification Table which is displayed using shortcodes, enable the “Hide the Product Specification Tab when Shortcode is used” checkbox.
- To display the Product Specification Table only when clicking the link, enable the “Show the Product Specification Link Message” checkbox.
- Customize the look and feel of the Product Specification table using the “Custom CSS” option.
Bulk Update Settings
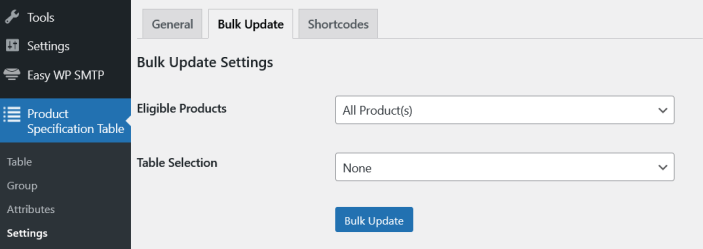
- If you wish to assign a product specification table for multiple products at once, you can use the Bulk Update option.
- In the Eligible Products Filter, select the products/categories for which the Specification Table must be assigned.
- Select the respective Specification Table in the Table Selection field.
- Customize the values as per your need for the attributes which is associated with the selected table.
- Click the Bulk Update once everything is configured as per your needs.
Shortcode
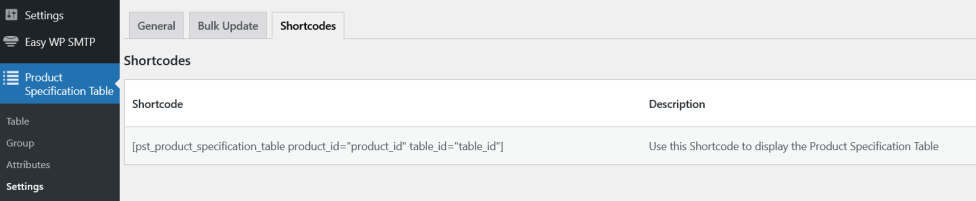
In this section, the available shortcodes will be listed along with the respective details.
Groups
↑ Nach obenThe first step in creating a Product Specification Table is Groups. With Groups, you can bundle multiple table elements(attributes) to a Group. Later, this Group can be used to create any number of tables.
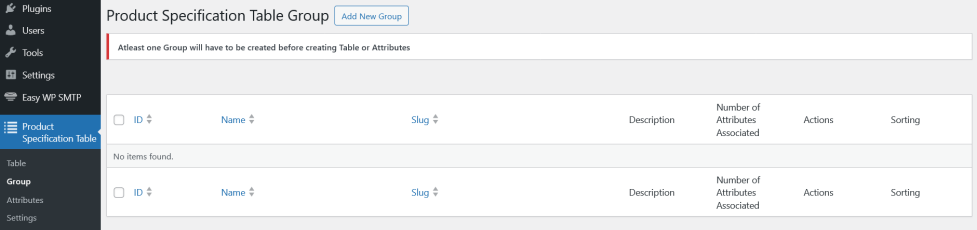
- Product Specification Table > Groups and click on “Add New Group”.
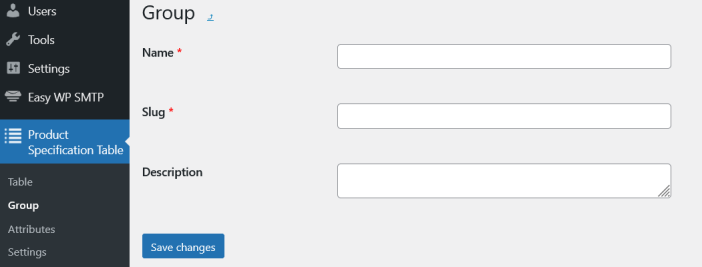
- Enter the Name for the Group. The slug will be automatically prefilled.
- Optionally, you can provide a description for the Group.
Note: Without Creating Groups, you cannot create Attributes or Tables.
Attribute
↑ Nach obenAttributes are elements displayed in the Table. One or more attributes can be linked to a Group.

- To create a new Attribute, go to Product Specification Table > Attribute and click on “Add New Attribute.”
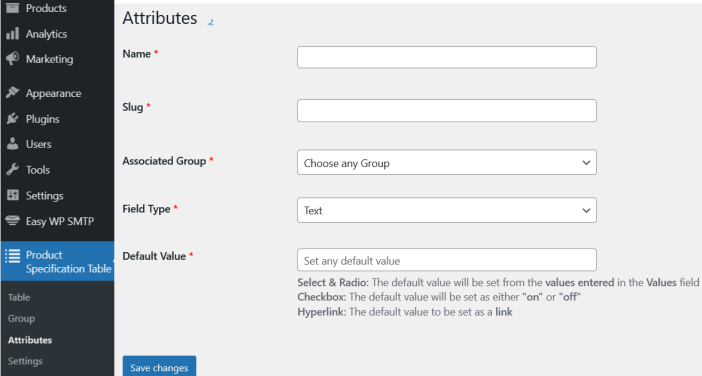
- Enter the Name for the Attribute. The slug will be automatically prefilled.
- In the “Associated Group” option, select the Group for which you want to link this attribute.
- In the Field Type, select the Field Type for this attribute. The attribute name will be used as the Label and the Value is fetched from the Field Type. As of now, the following input types are supported:
- Text – Displays the text displayed as the value.
- Select – The admin will have to select a value from the list of available options.
- Radio – The admin will have to select a value from the list of available options.
- Text Area – Displays the text displayed as the value.
- Checkbox – Displays a Yes/No image as the value.
- Hyperlink – Displays the Hyperlink as the value.
- Image – Displays the Uploaded Image as the value.
Note: The Attribute value can be modified on the product page during table selection.
Table
↑ Nach obenWithin this section, you can create Tables using Groups and attributes.

- To create a new Table, go to Product Specification Table > Table and click on “Add New Table”.
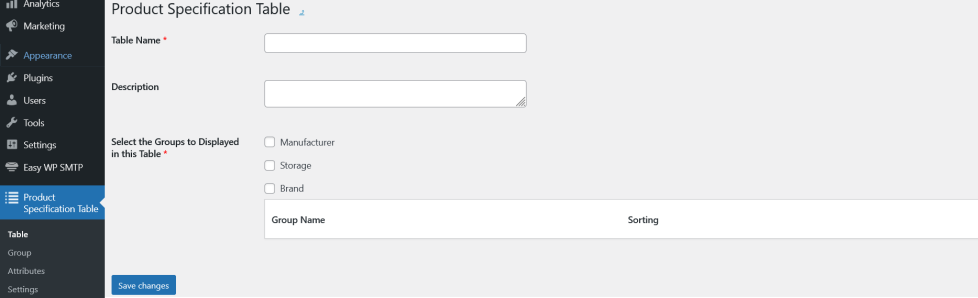
- Enter the Table Name. The slug will be automatically prefilled.
- Optionally, you can provide a description for the Table.
- The previously created Groups will be listed. You will have to select the Groups to be displayed in the table.
- You can also rearrange the groups as per your preference.
- Once you have completed the configuration, save the changes.
Usage
↑ Nach obenOnce you have created the Groups, Attributes, and Tables, you will have to assign the Table to the Product.
- Create a new product or edit an existing product.
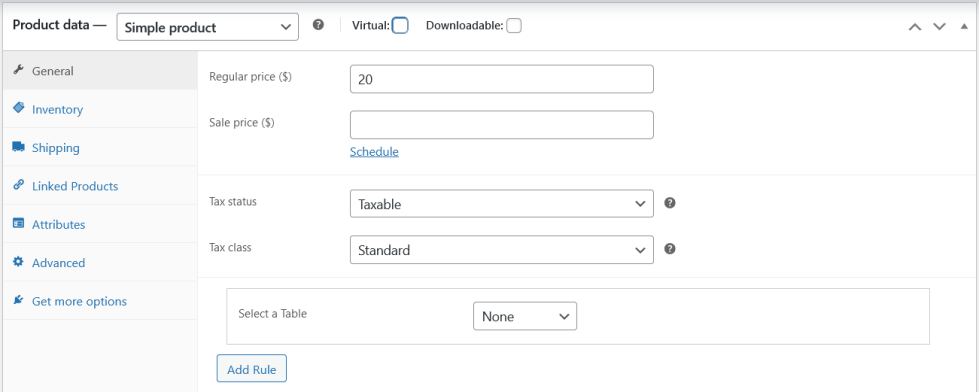
- Within Products > General, under Select a Table, choose the Table you want to display for this product.

- Once the Table is selected, all the attributes linked to the Table will be displayed in the same order you have configured.
- You can change the Attribute Values for this product and Publish it.
- To create a second table, click on the “Add Rule” button and repeat the process.
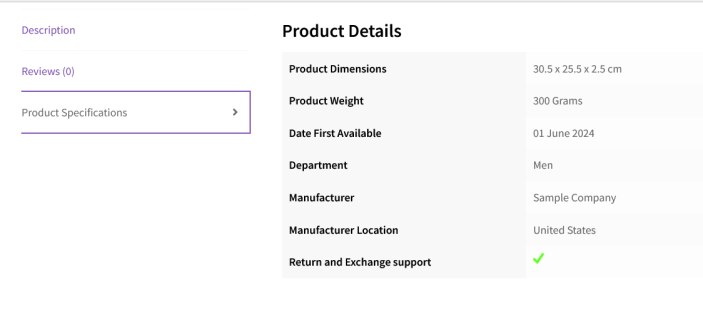
- Once the changes have been saved, the Product Specification Table will be displayed on the single product page under the “Product Specifications” section.
Translation
↑ Nach obenProduct Specification Table for WooCommerce is translation ready meaning you can edit the po files and translate the text to any language.
The steps to do the translation are as follows. For example, if we were to translate to French:
- Download and install Poedit
- Open the file product-specification-table-for-woocommerce > languages > product-specification-table-for-woocommerce.pot using Poedit.
- Create a new translation file by clicking Create new translation button.
- Choose the Source text and set its corresponding French text in Translation Text Area.
- Save the changes.
- Save the file name as product-specification-table-for-woocommerce-fr_FR.po.
- If you are using WordPress Version 3.9.13 or below, then in wp-config.php define the WPLANG as French. Syntax is define(‘WPLANG’, ‘fr_FR’);
- If you are using WordPress Version 4.0 or above, then go to WordPress dashboard > Settings > General and select the Site Language as French.